 CHAPTER 5
OTHER MEDIA
Colored Pencil: Weimaraner Puppy
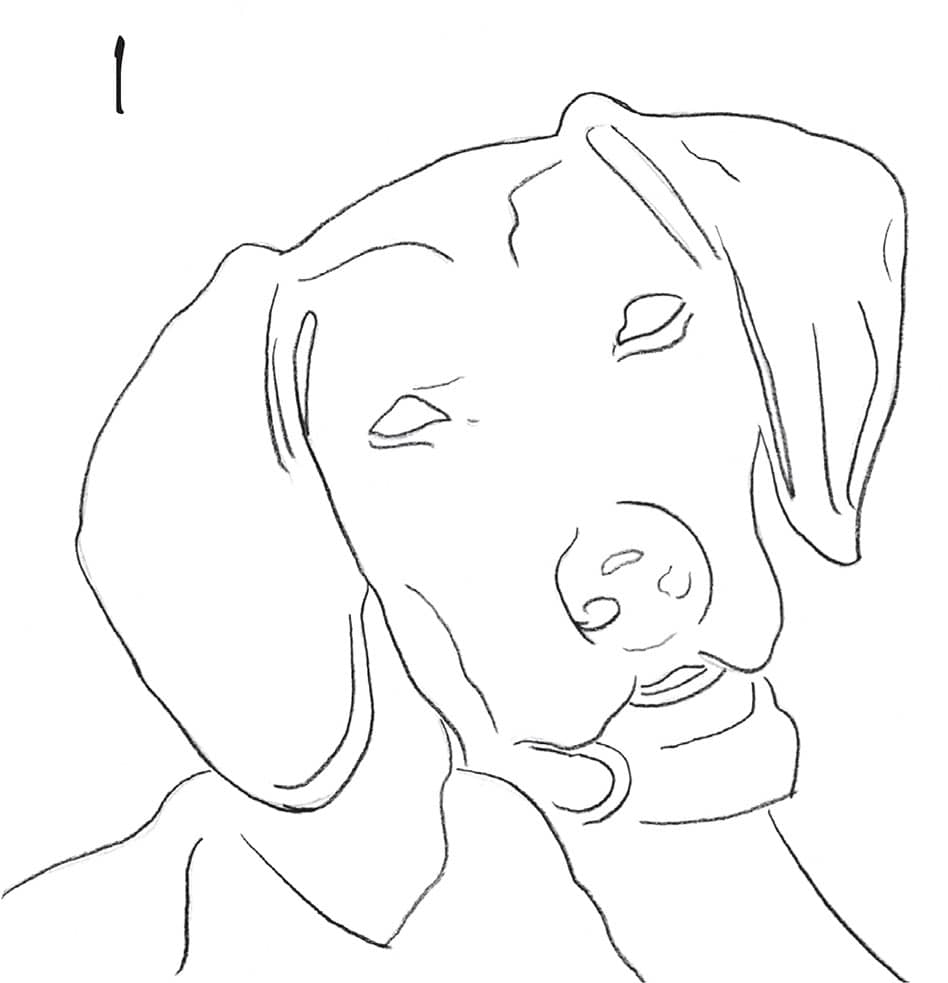
1. Sketch the portrait with cool gray 50%. Use a 2B graphite pencil to outline the eyes.
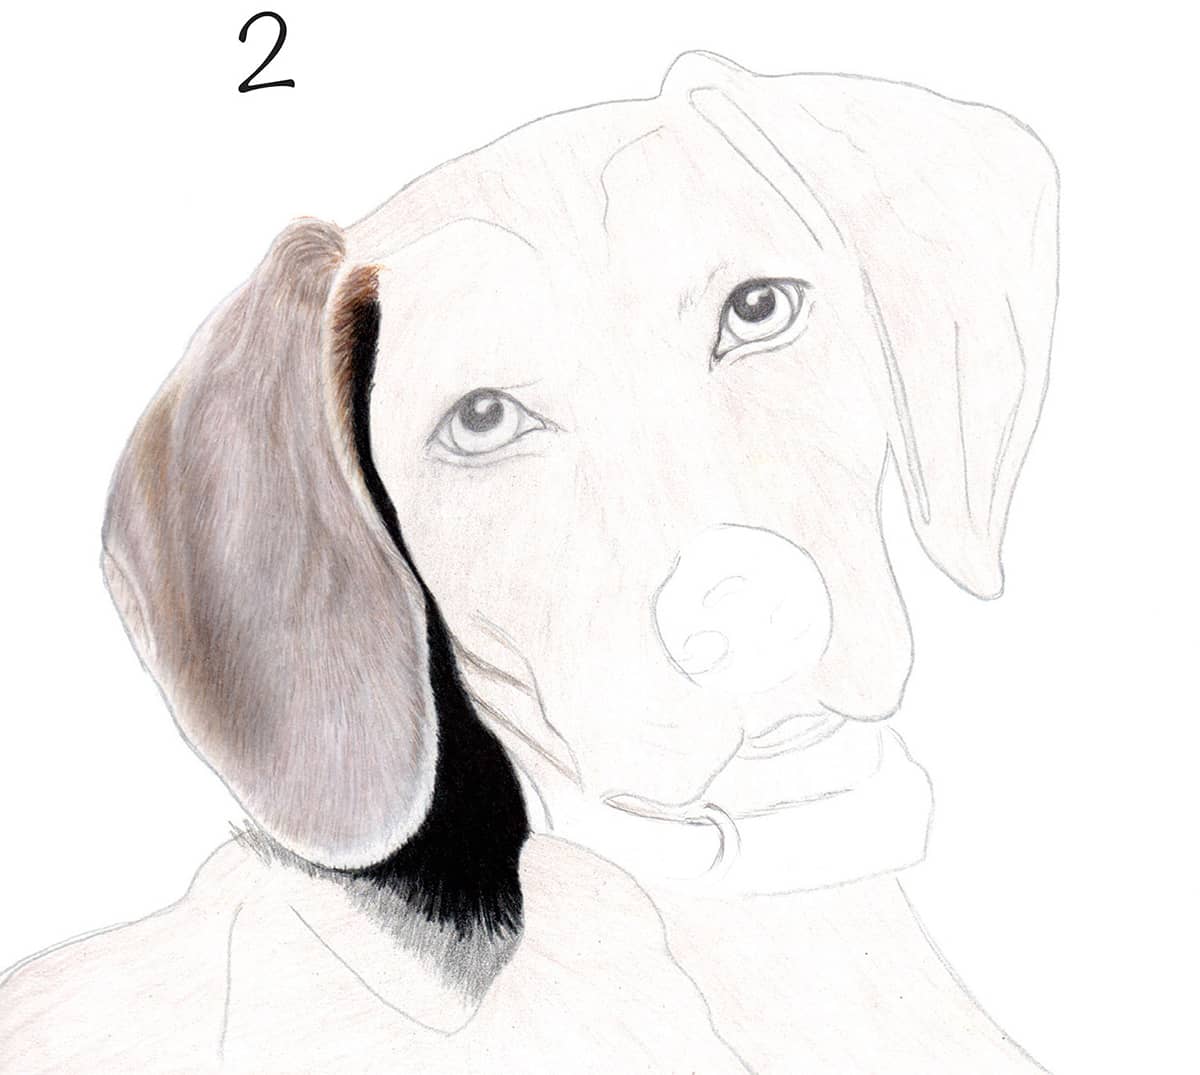
2. Fill in the head and body with a layer of putty beige for a foundation color. Beginning with the left ear, apply short strokes of warm gray 30% in the direction of hair growth. Add another layer of putty beige using short strokes. Block in the shadowed areas with warm gray 50% and then burnish everything with white for a smooth surface. To build up the darks, apply short strokes of French gray 70% and warm gray 50%, using white to create the vertical light streaks on the ear. Add chocolate down the left side followed by short strokes of warm gray 50% over the ear and burnish with white. For the cast shadow, layer dark umber and black, feathering chocolate and dark umber along the top edge.
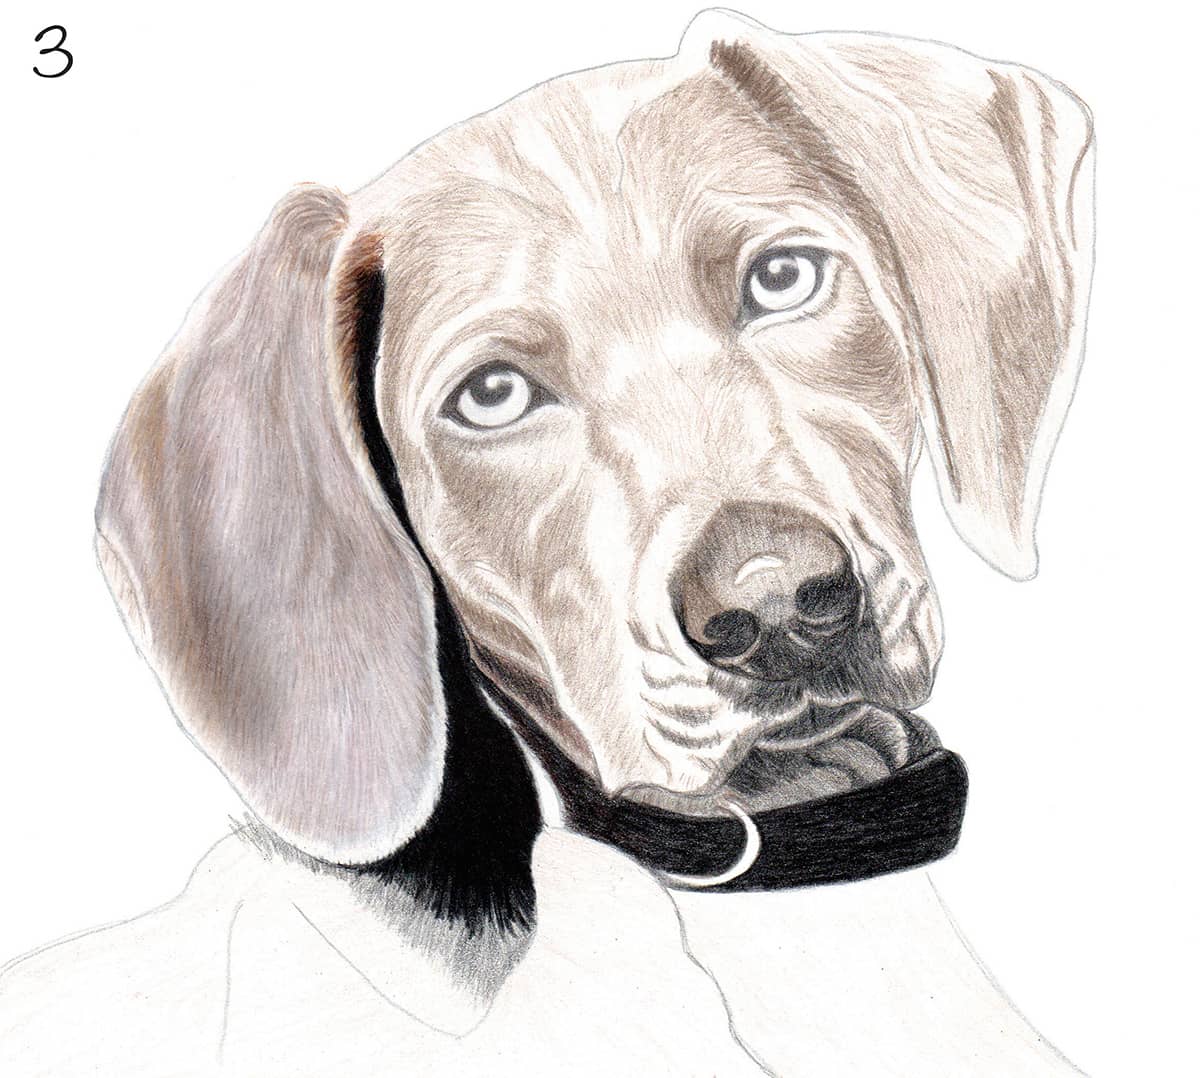
3. Block in the main value pattern of the face and the right ear with French gray 70%. Begin the nose and mouth with a layer of French gray 70%, followed by black. Use black to block in the collar.
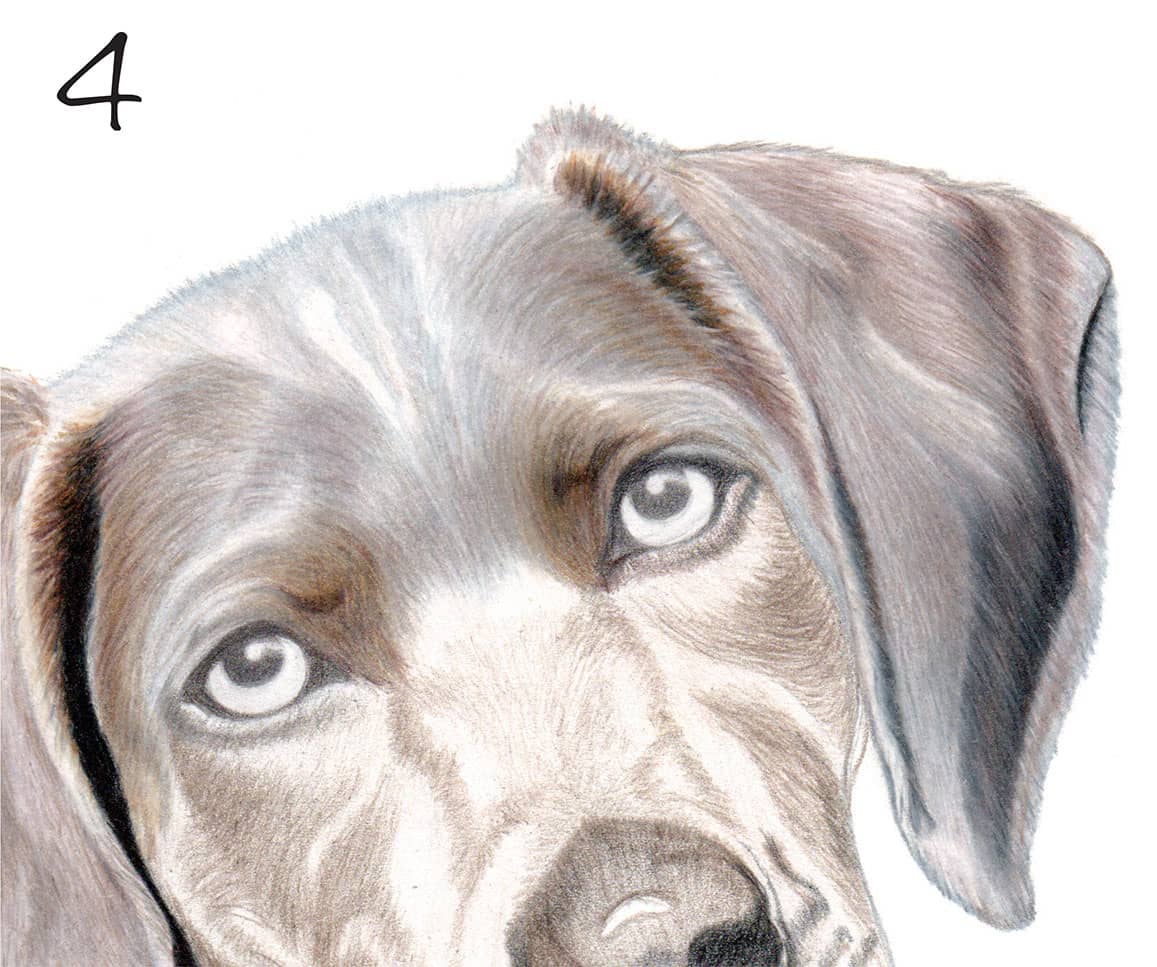
4. Complete the right ear in sections, moving from left to right. Layer the tuft of hair with French gray 70% and chocolate, applying black in the darkest areas. Create the light edge of the ear with white outlined by black. Use French gray 70% and cool gray 70%, layering them in short strokes and blending with white for the rest of the ear. Use dark umber and black to darken areas, adding rosy beige for warmth.
5. Work cool gray 70% and French gray 70% over the head. For the dark gray areas, apply cool gray 70% lightened with white and cool gray 50%. For the dark brown areas, use French gray 70%, chocolate, and dark umber. Use white to blend frequently and to define highlights.
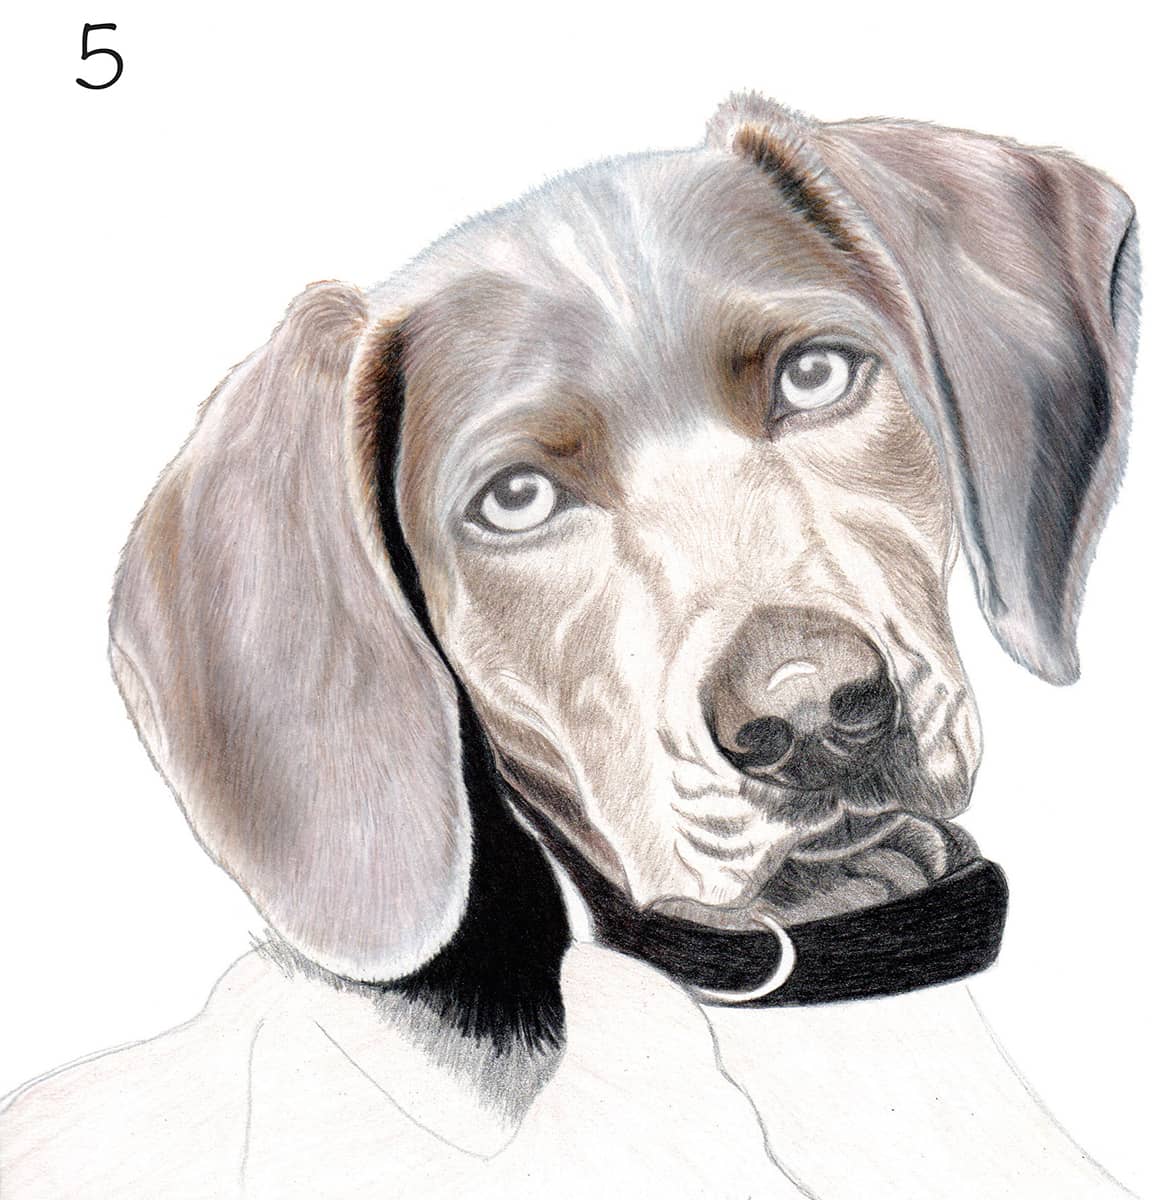
6. To complete the face, layer from the eyes to the nose with warm gray 50% and cool gray 50% using short, downward strokes. Blend warm gray 50% and French gray 70% into both cheeks, blending with white. Repeat the process several times to achieve a smooth texture. For the darkest areas of the cheeks, layer dark umber, chocolate, and black. For the neck area above the collar, apply a layer of dark umber; then coat the shadows with black. For the small curved area of gray hair on the right, apply cool gray 70% and lightly blend it down with white. Using a sharp black point, softly cover the entire area below the mouth and above the collar.
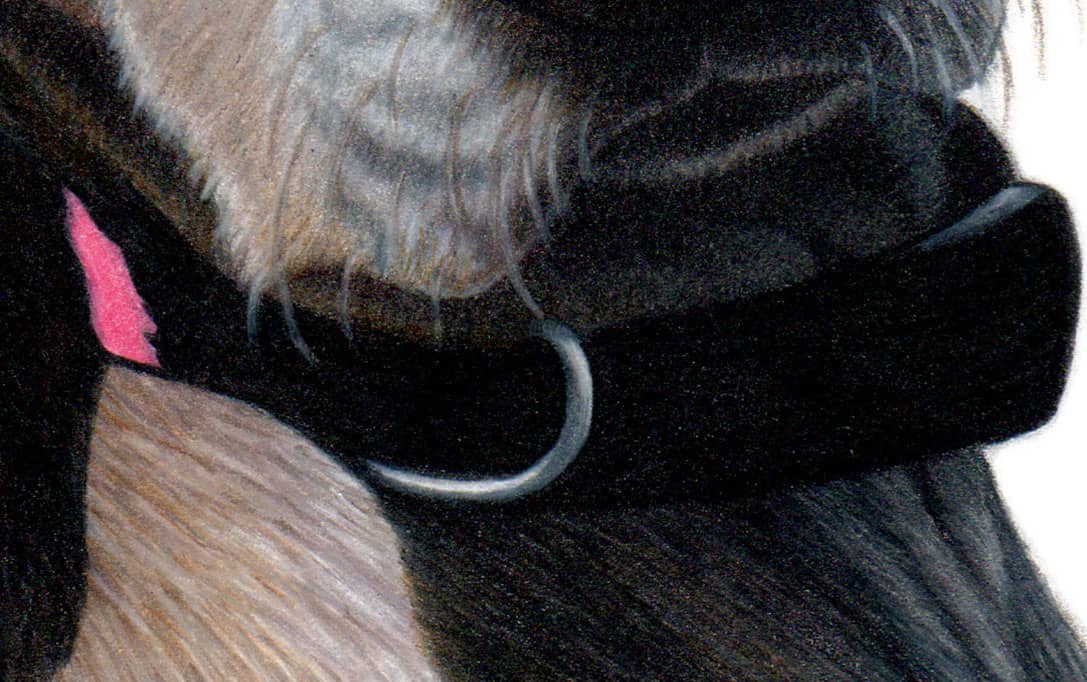
COLLAR DETAIL Apply a heavy coat of pink over the highlight and a heavy coat of black over the strap. Blend white along the top of the strap and create the silver buckle with cool gray 70% and white.
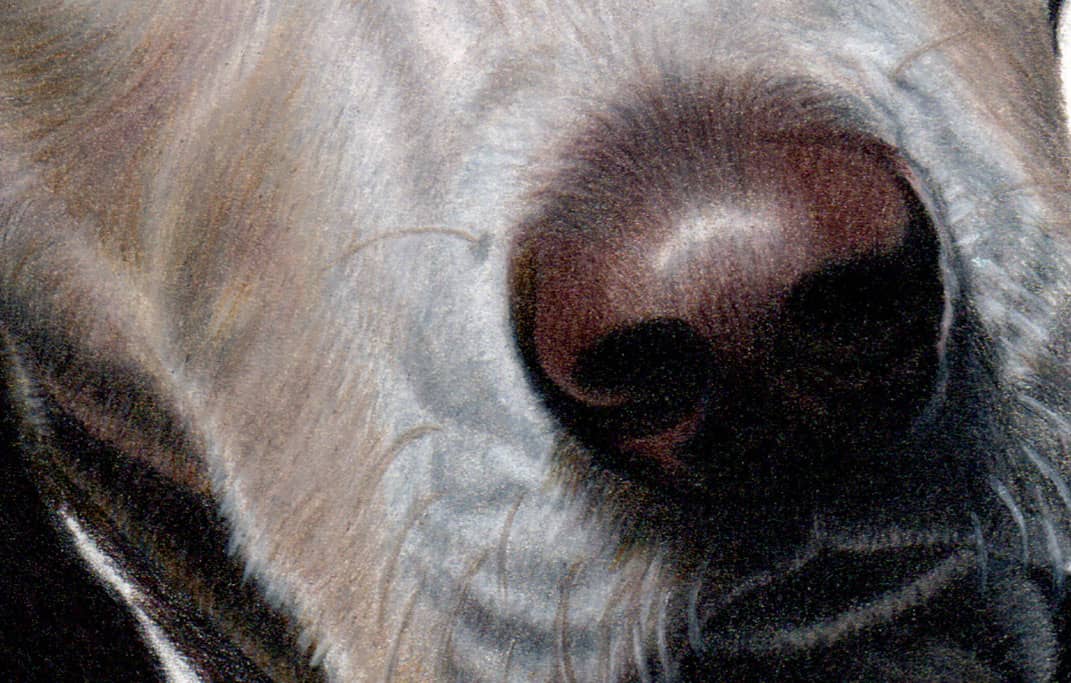
NOSE DETAIL Cover with dark umber and burnish the darkest areas with black. Use white to blend along the curve of the nose and preserve the white highlight. Layer the mouth with warm gray 50% followed by black. Lightly blend with white.
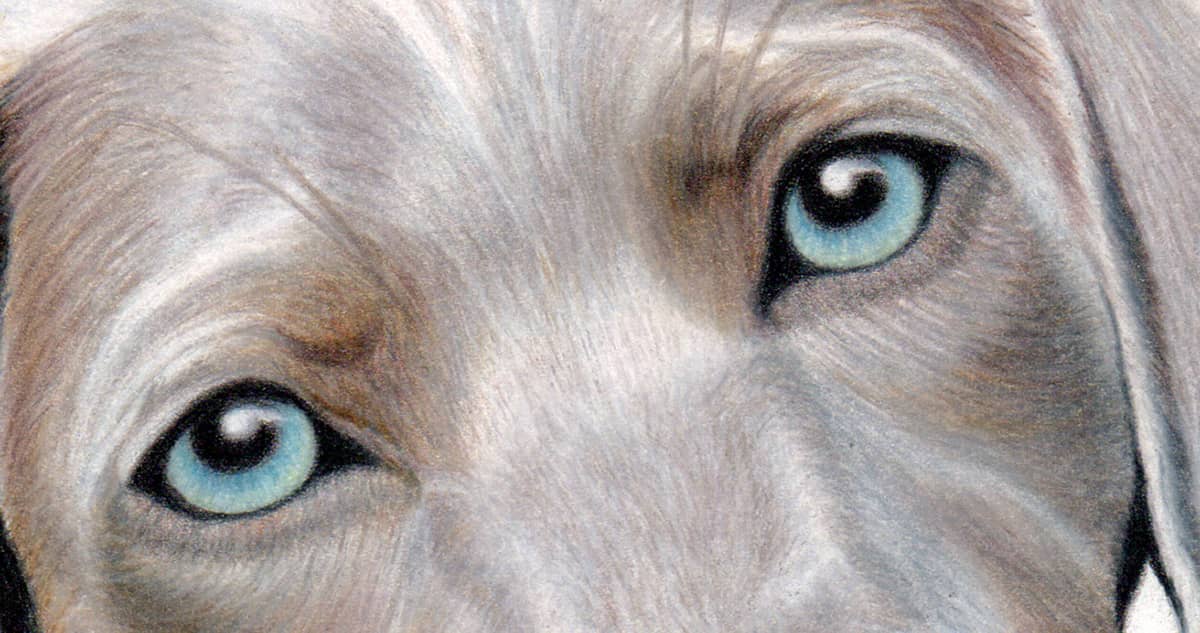
EYE DETAIL For the eyebrows and whiskers, apply thin, curved lines with French gray 70% and use a sharp white pencil for the whiskers. To create the eyes, blacken the pupils and the skin surrounding the eyes. Color the irises with jade green and pale sage, blend with white. Add muted turquoise around the pupils and blend outward into the irises. To complete the lower eyelids, apply dark umber blended with French gray 70% and white.
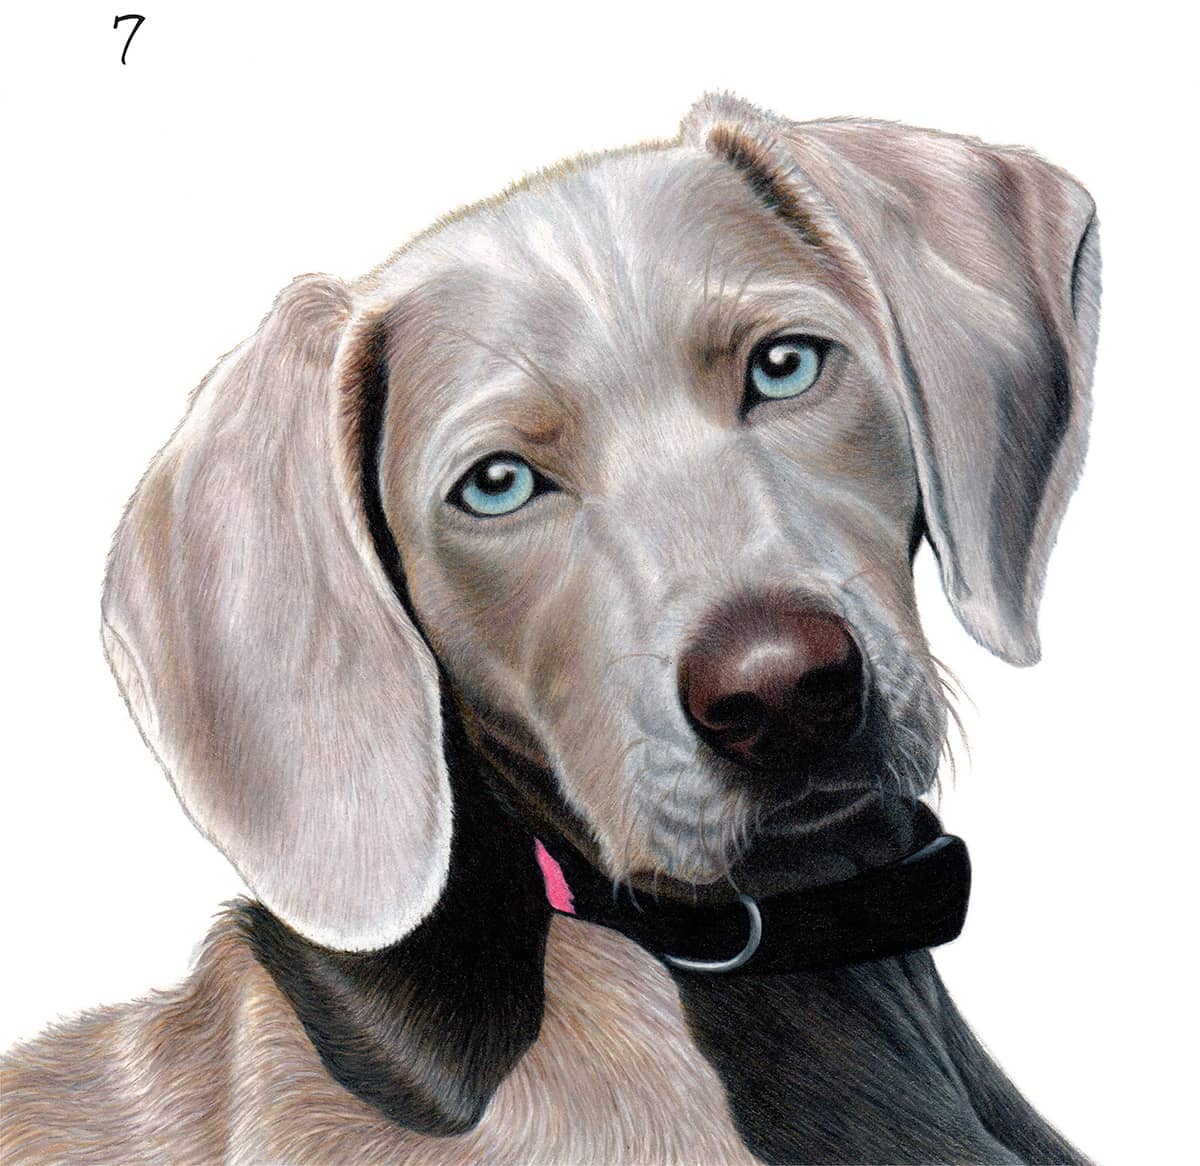
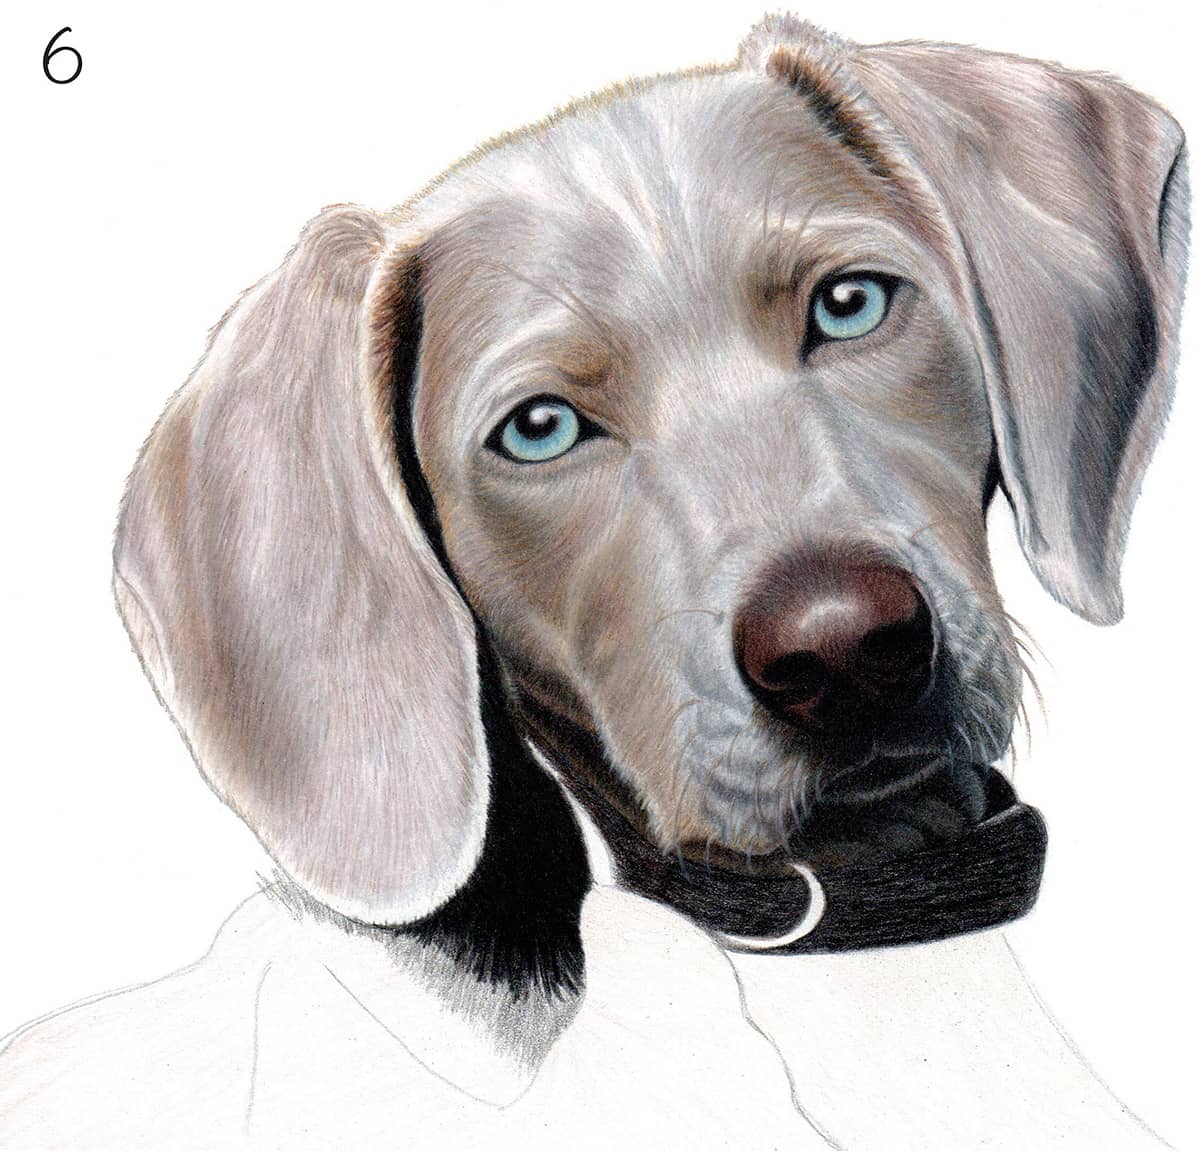
7. To complete the coat, layer short strokes in the direction of hair growth using French gray 70% over the body, followed by chocolate, dark umber, cool gray 70%, and cool gray 50%. Use black and warm gray 50% to build the dark shadows. Add a layer of black over the shadows, varying the pressure.
Pastel: Portrait with Dog
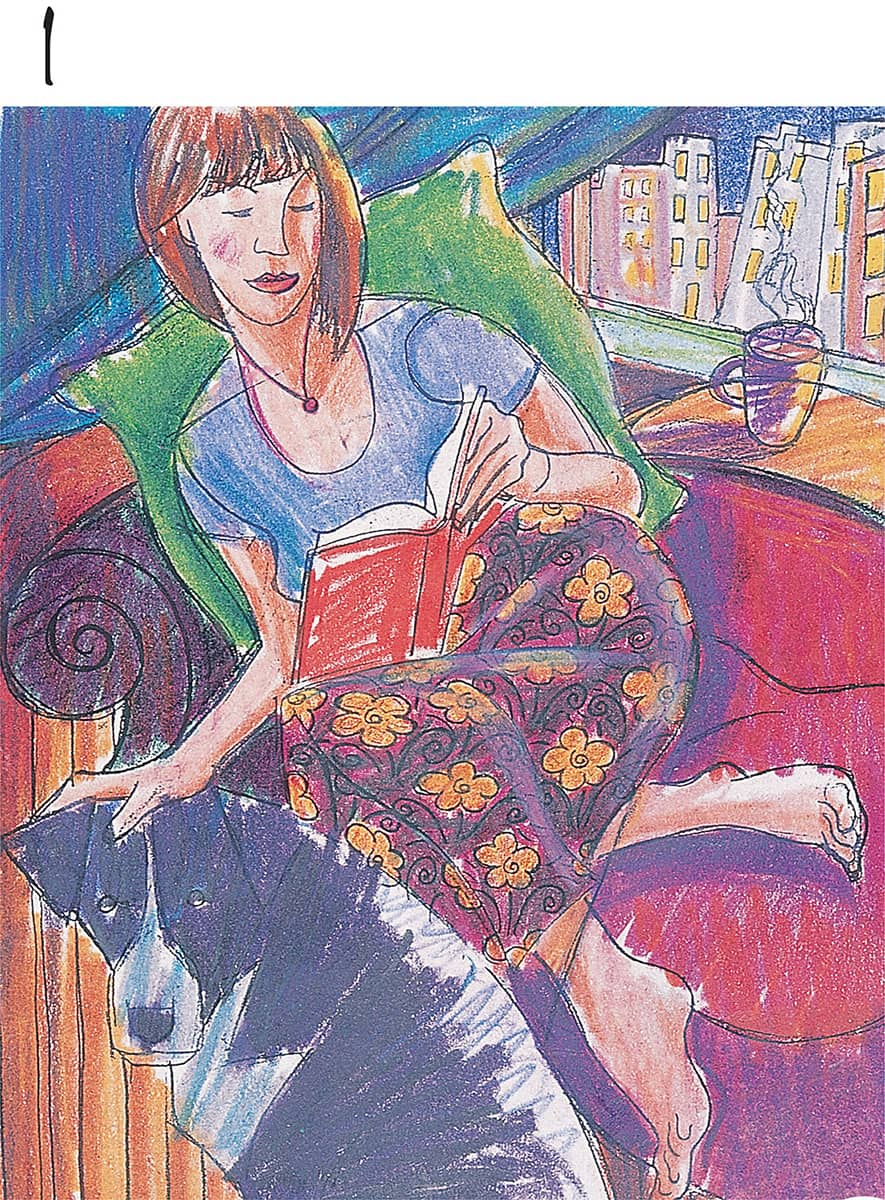
1 Sketch this portrait, or come up with your own idea. Add color to determine your scheme. Make a photocopy.
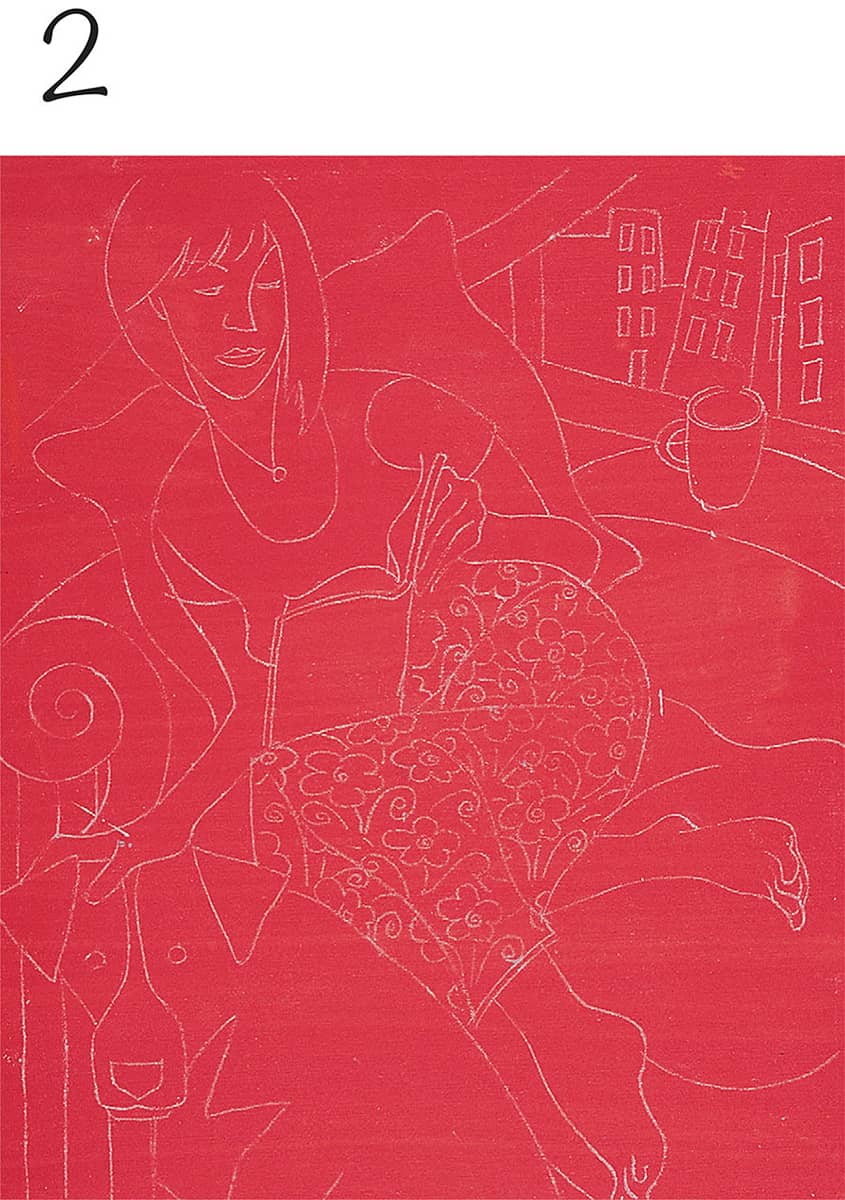
2 Tone a piece of sanded paper with cadmium red light acrylic paint. While that dries, rub the back of the photocopy with light gray hard pastel, covering the entire sheet to create a carbon. When the red paper is dry, tape the copy to it, carbon-side down. Use a sharp graphite pencil to trace over the lines to transfer the sketch to your surface.
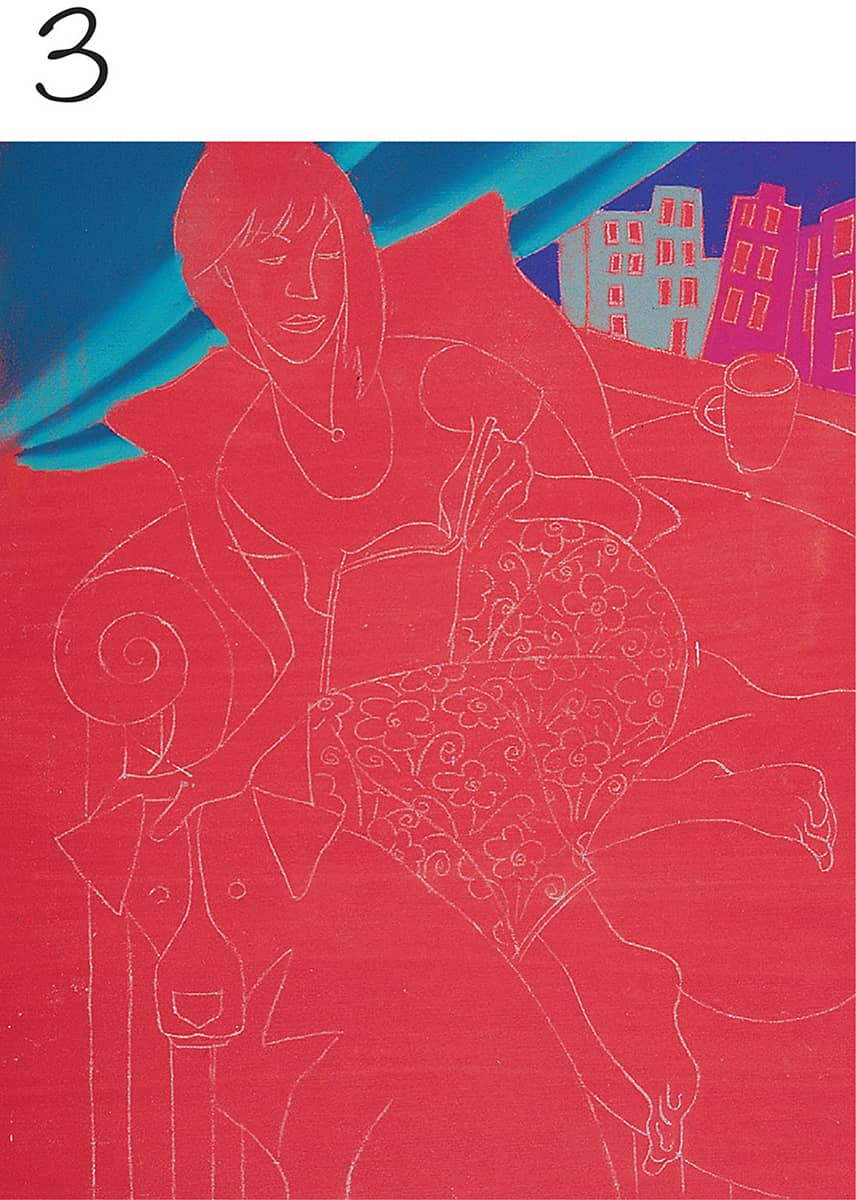
3 Starting in the upper left with the curtain, using turquoise blue for the darks and light turquoise green for the lights. Press firmly, using the tip of the pastel pencil and blending the two colors together where the edges meet. Use manganese violet for the night sky, earth green and pink carmine for the buildings, leaving the paper showing in the windows.

4 Color the pillow with permanent green olive and medium green. Use Van Dyke brown for the hair. Color the shadowed shapes of the face, arms, and legs with caput mortuum, leaving a bit of the red paper showing around the shapes.
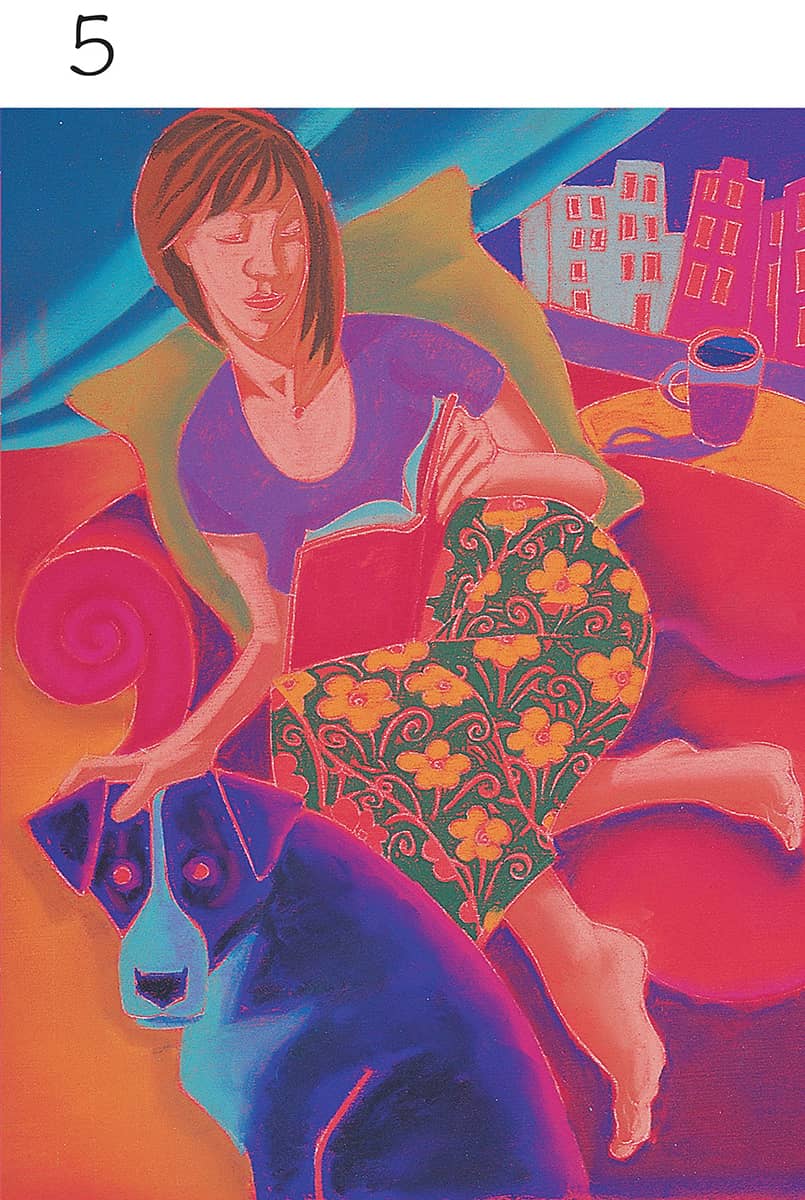
5 Next, use violet and manganese violet for the shirt, ledge, and coffee cup. Fill in the table with terra cotta and use a mix of burnt carmine and pink carmine for the couch. Fill in the dark areas on the dog with deep purple and black, blending the two slightly in some areas. Create the dog’s lighter areas with light turquoise green and light ultramarine blue. Add medium flesh for the lights on the skin and the hair with burnt umber. Fill in the pattern on the skirt with pine green and terra cotta, letting the color of the paper serve as the red lines in the pattern.
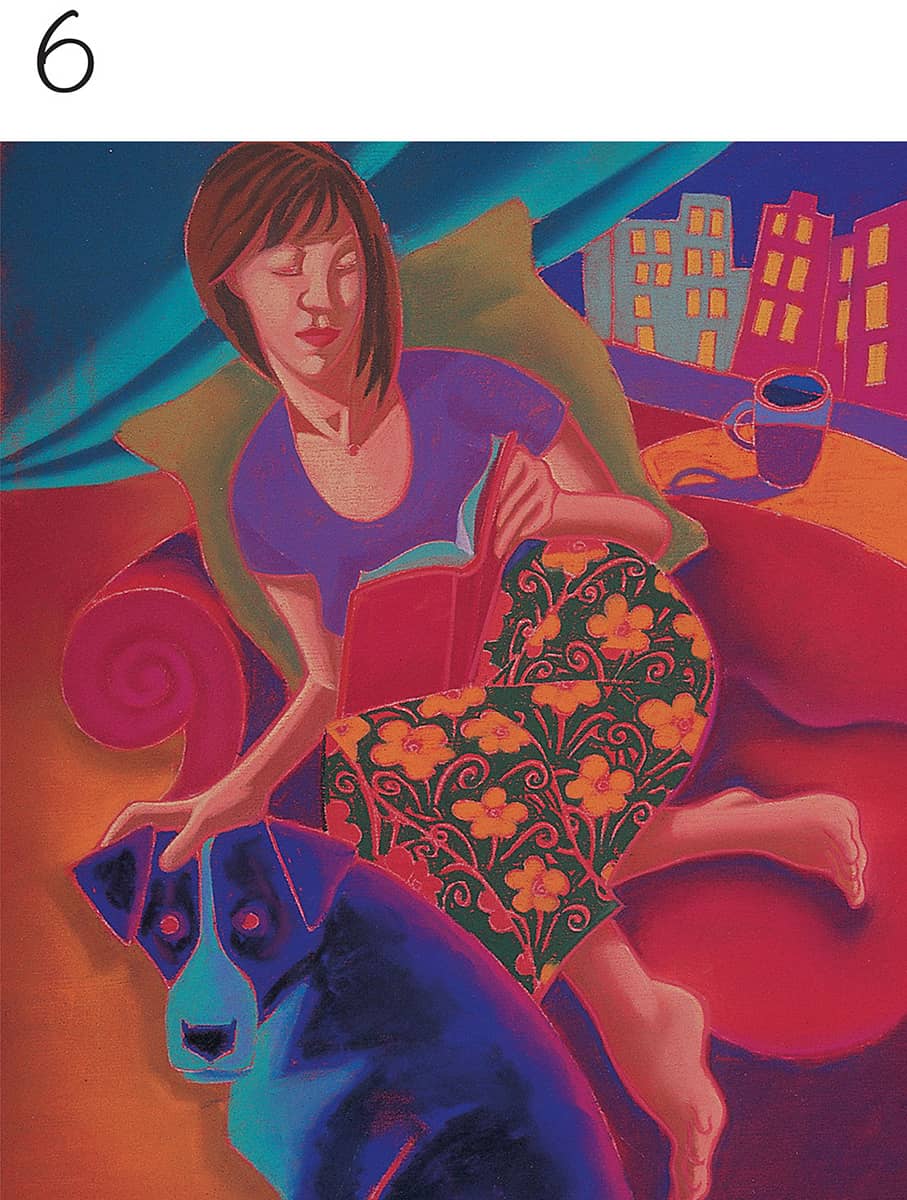
6 Add some highlights on the skin with light flesh, pressing firmly to cover the previous layers of color. Create the red mouth using pink carmine for the lower lip and burnt carmine for the upper lip. Add the lights in the windows of the background buildings with light chrome yellow.
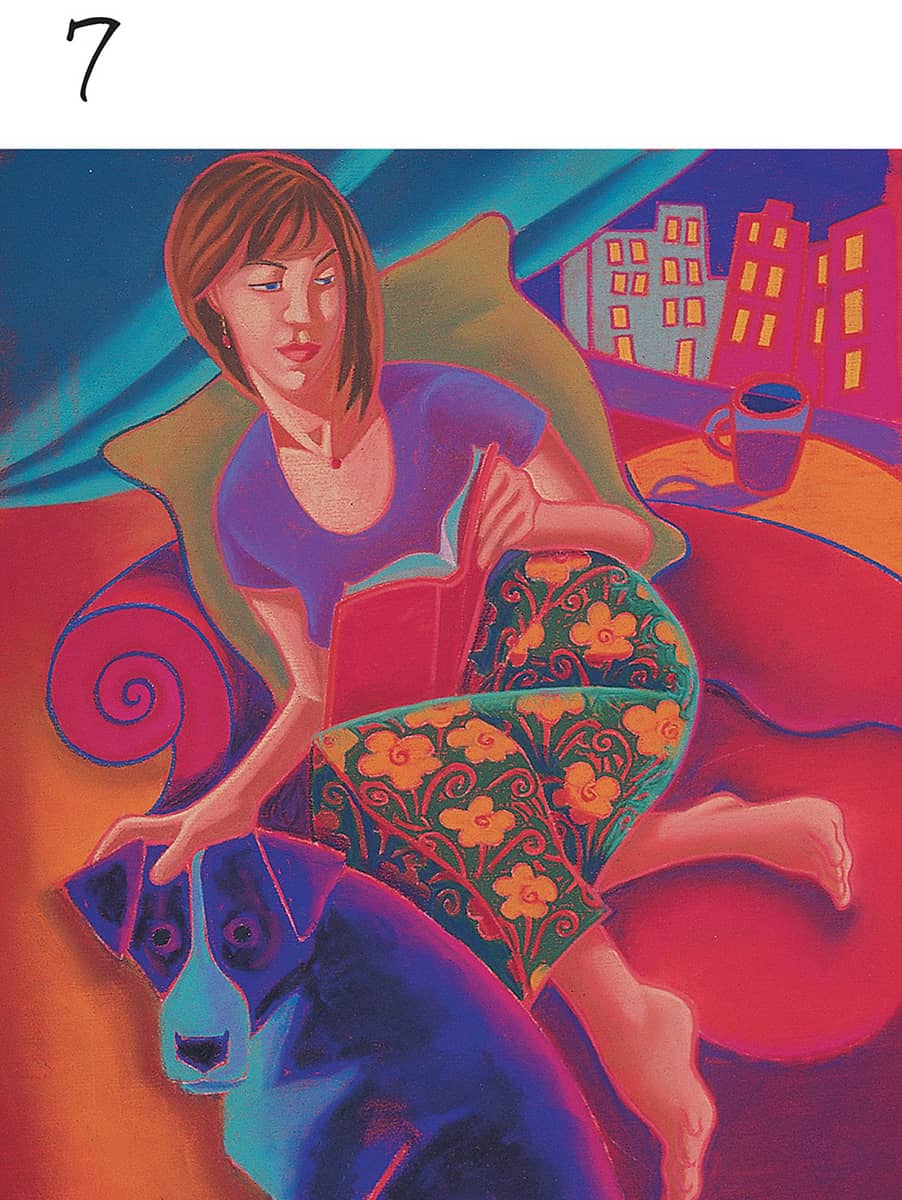
7 Once the shapes are filled in, outline the forms with a variety of colors, choosing contrasting colors for variety and interest, such as indigo blue around the left side of the pillow and Indian red around the right side. Add sanguine to the skin, and draw the eyes using cobalt blue for the iris and light ultramarine for the whites. Add the eyebrows with burnt umber. Add small strokes of light turquoise green for a highlight on the edge of the skirt.

8 For more interest, add a swirling texture to the big shapes except the skin areas. Apply the texture on the curtain with cobalt blue, pink carmine, and light turquoise green. For the pillow, use light turquoise green and pine green. Add texture to the dog with cobalt blue and olive green. For the light areas of the couch, use lemon yellow and pink carmine. Add steam from the coffee cup with light ultramarine and white, pressing firmly to cover the layers underneath.
Mixed Media: Dog Print
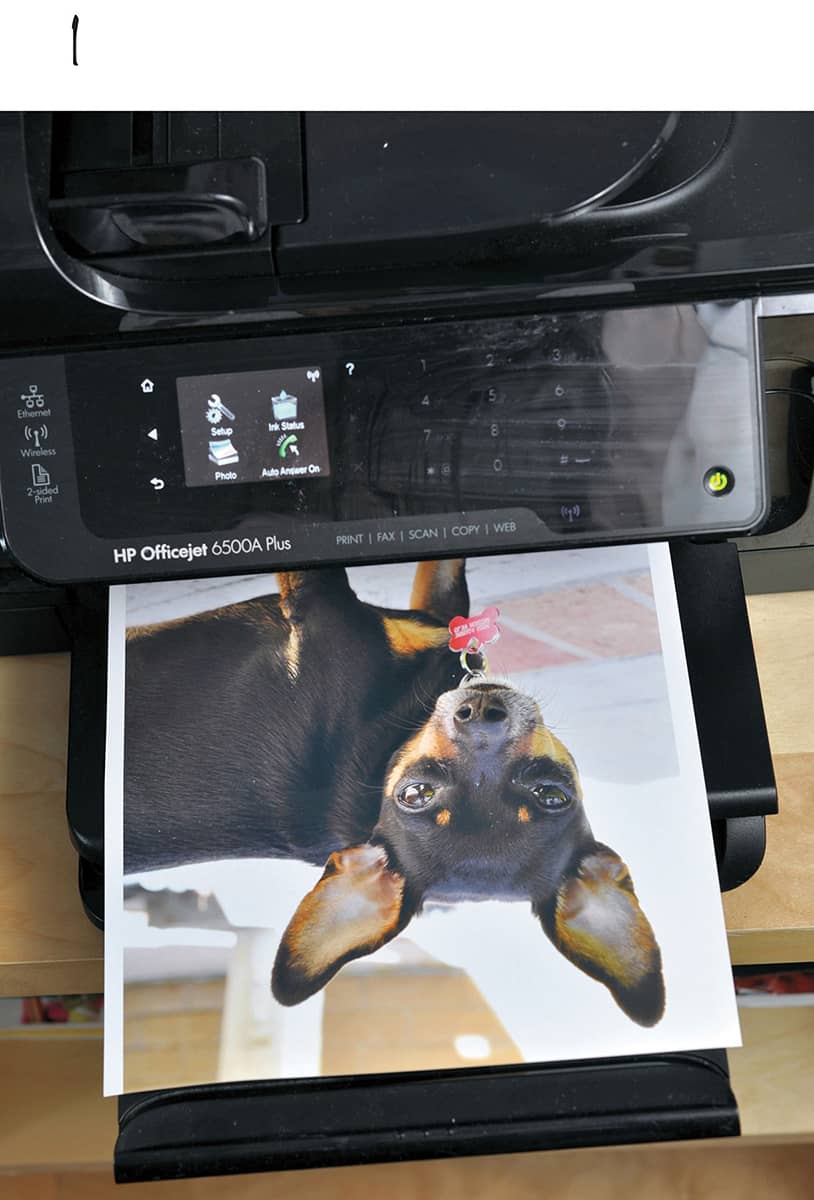
1 First decide how big you want your dog portrait to be based on the size of your canvas; then print out a copy of the photo.
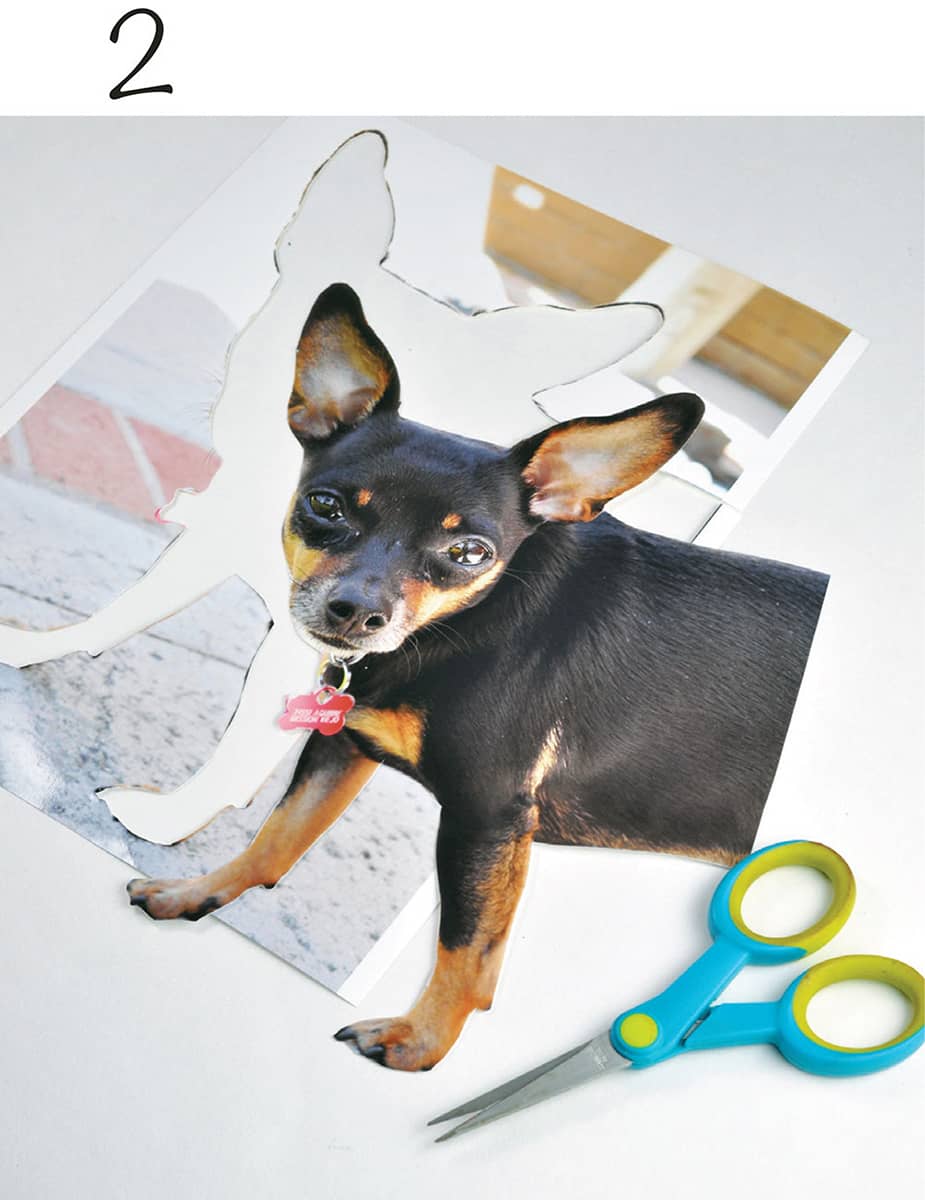
2 Use scissors to carefully cut away the background from the printed photo. You may want to cut slightly inside the outer edge of the dog to create clean lines.
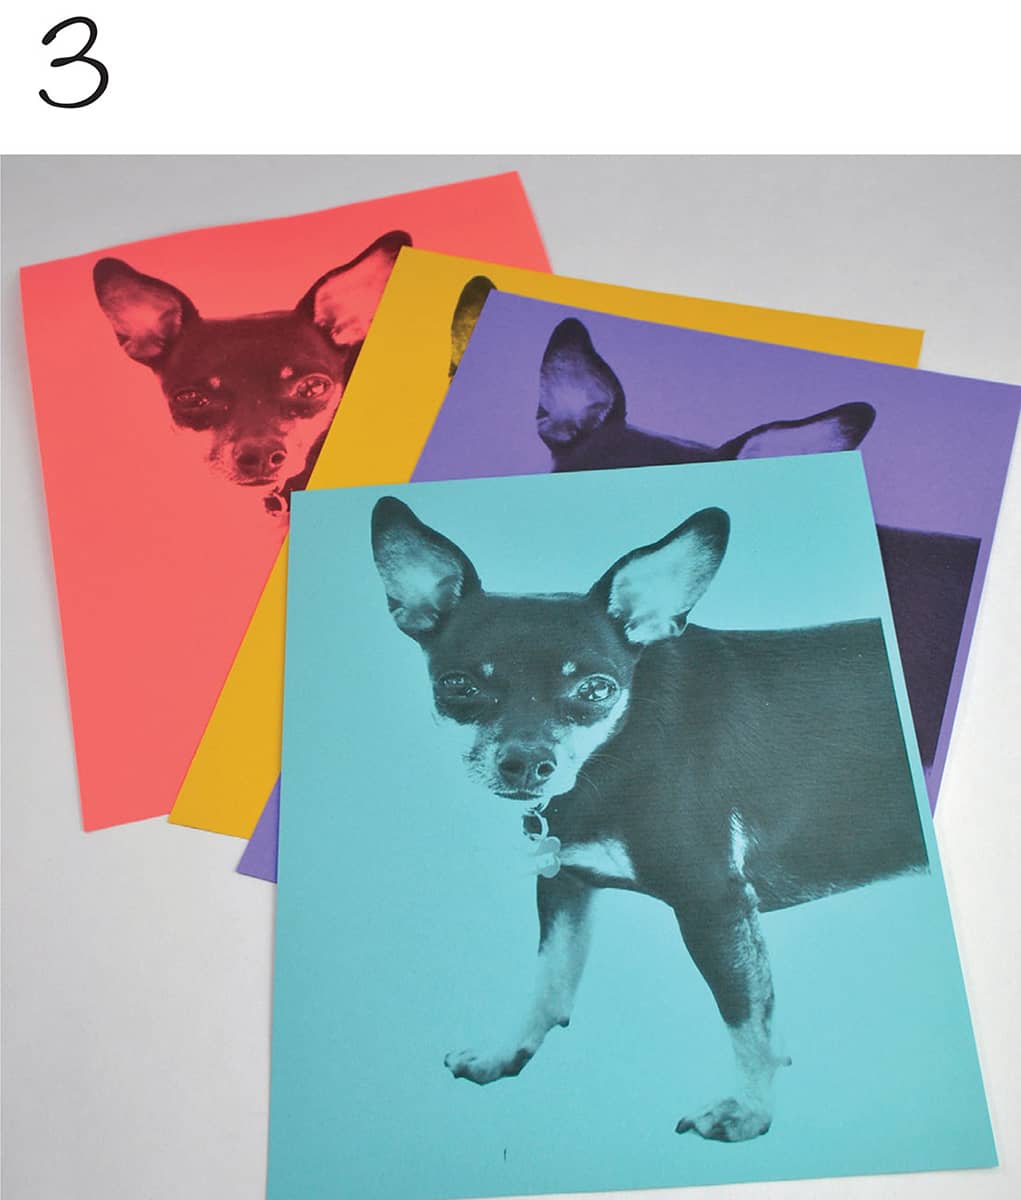
3 Place cut photo on the copier or scanner, and adjust the settings to copy the photo in black and white onto colored cardstock paper. You can play with the darkness and lightness of the copy using the settings on your copier. This project used four different brightly colored papers.
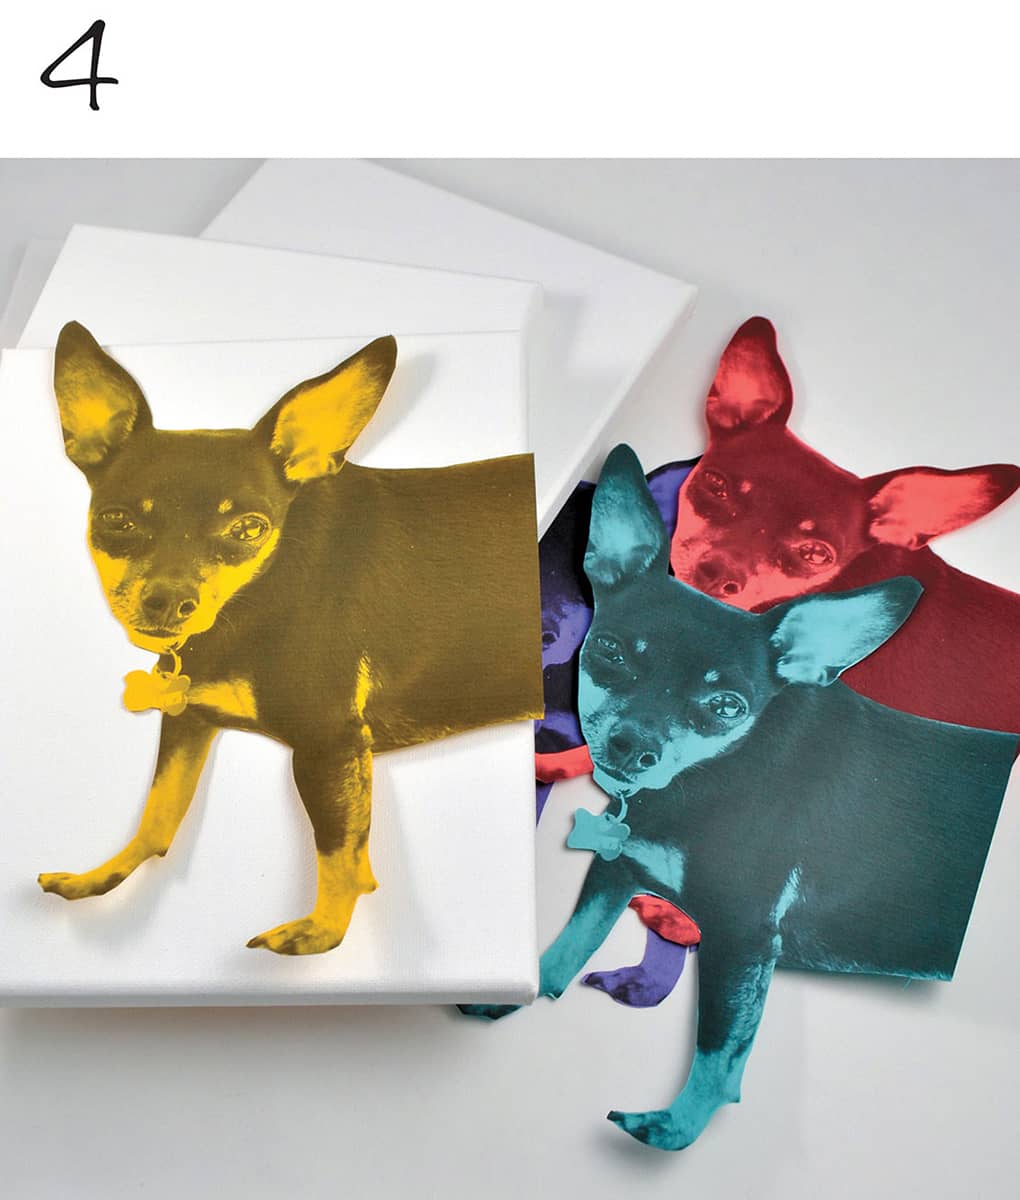
4 Now use scissors to cut away the colored paper backgrounds so that you are left with duotone photos of your puppy. Make sure your cut images fit well onto your canvases. Trim away any excess paper.
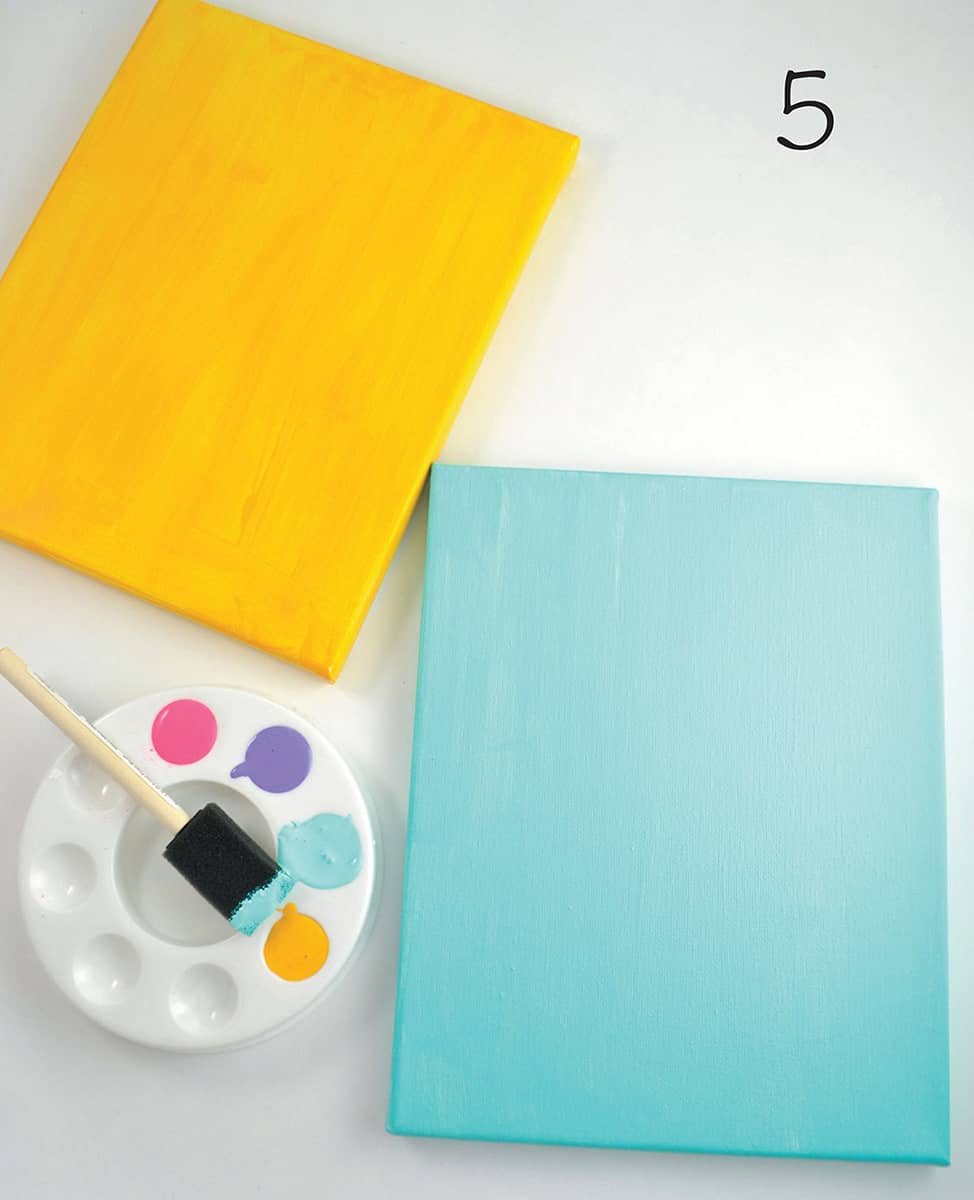
5 Now prep and color the canvases. This project uses four acrylic paint colors that match the colored paper choices, plus one more that adds an additional pop of color. Start by painting one solid layer of color on each canvas. You may need to apply two coats for full, even coverage. Allow the canvases to dry completely between coats and before moving to the next step.
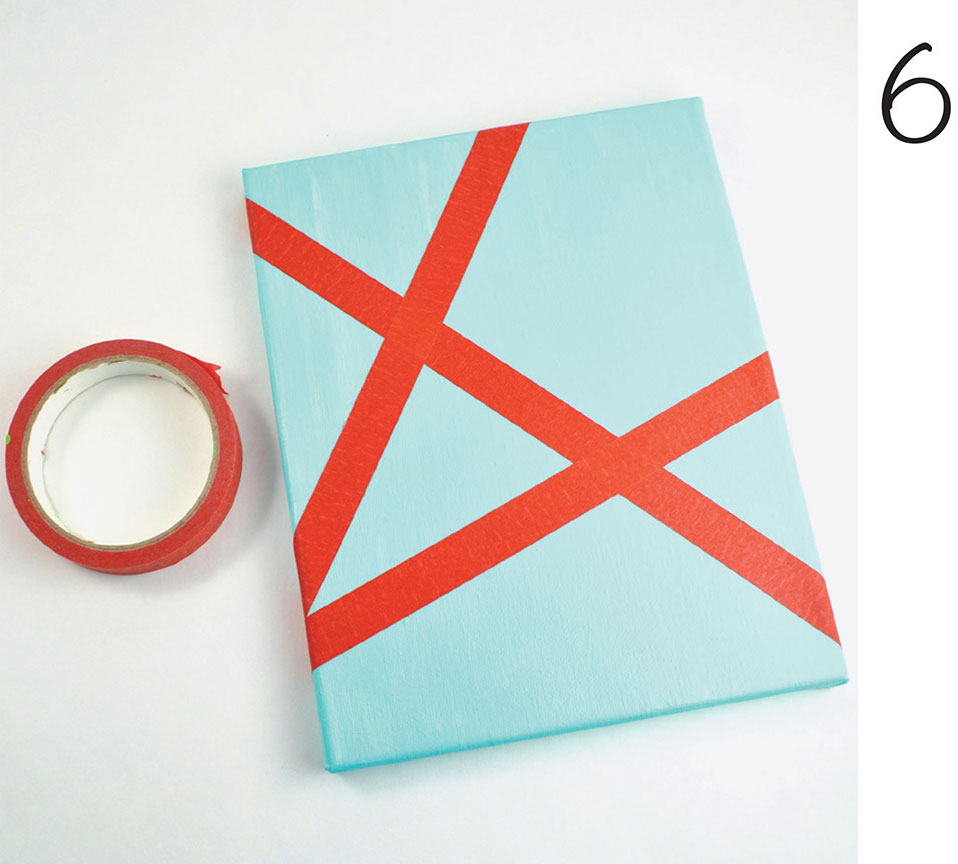
6 Use painter’s tape to apply random stripes from edge to edge to create six to eight smaller geometric shapes. Make sure to press down the edges of the tape to secure it firmly to the surface, and wrap the tape all the way around the edges of the canvas.

7 Now, using the remaining paint colors, randomly fill in each of the resulting shapes. Allow the canvas to dry before moving on to the next step.
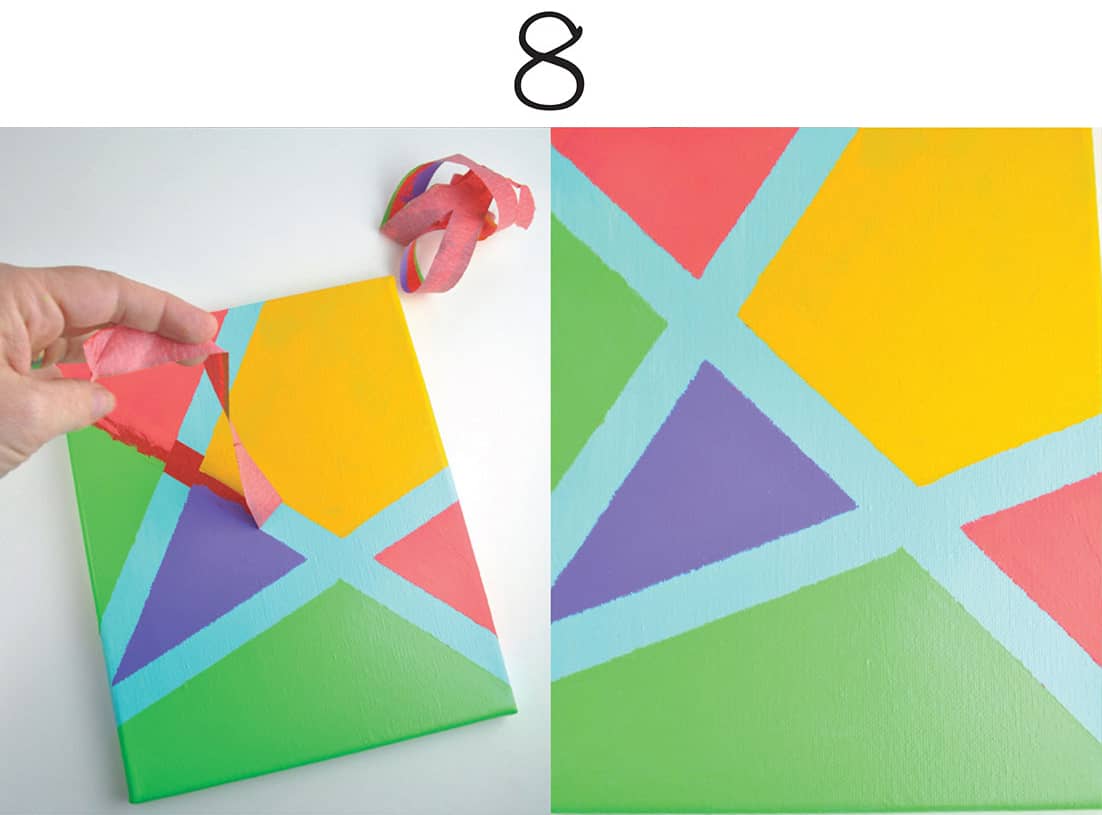
8 When the canvas paint is dry, gently peel away the tape to reveal the colorful background.
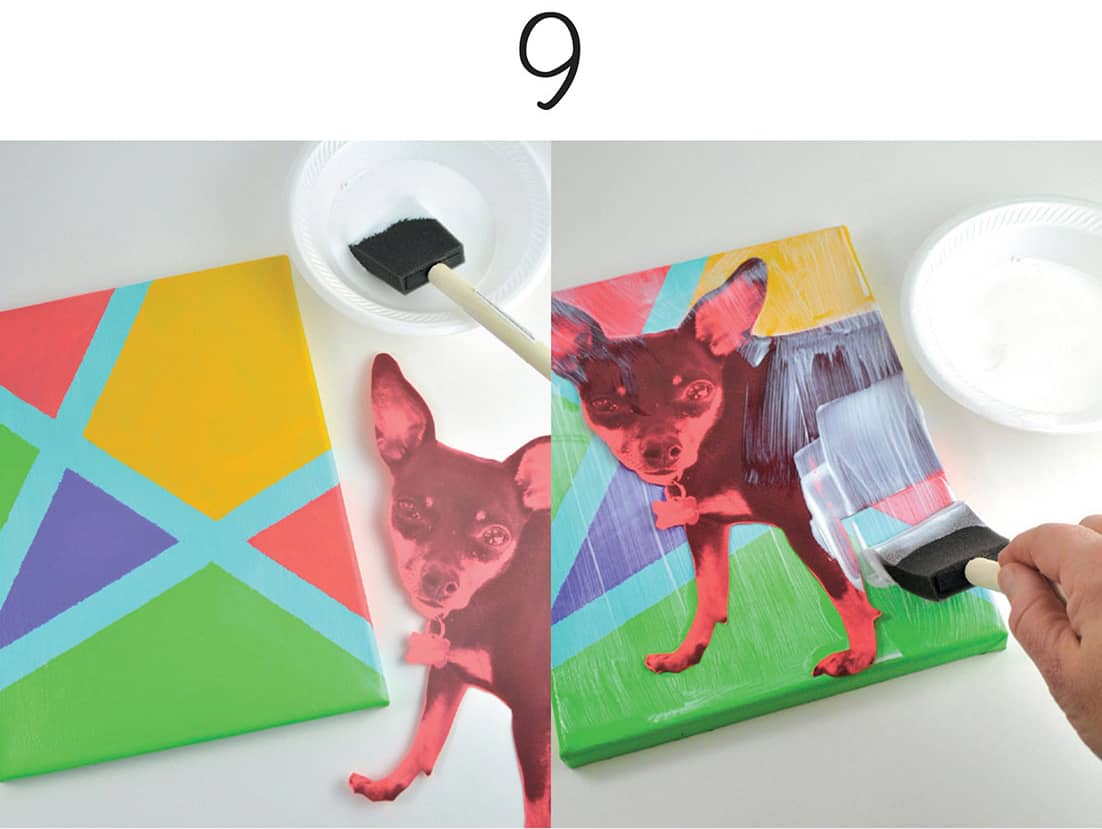
9 Apply a coat of Mod Podge on the painted canvas, place the paper dog portrait on top, and add a second coat to secure the dog. Let dry completely. Note: The Mod Podge will appear milky, but it will dry clear.
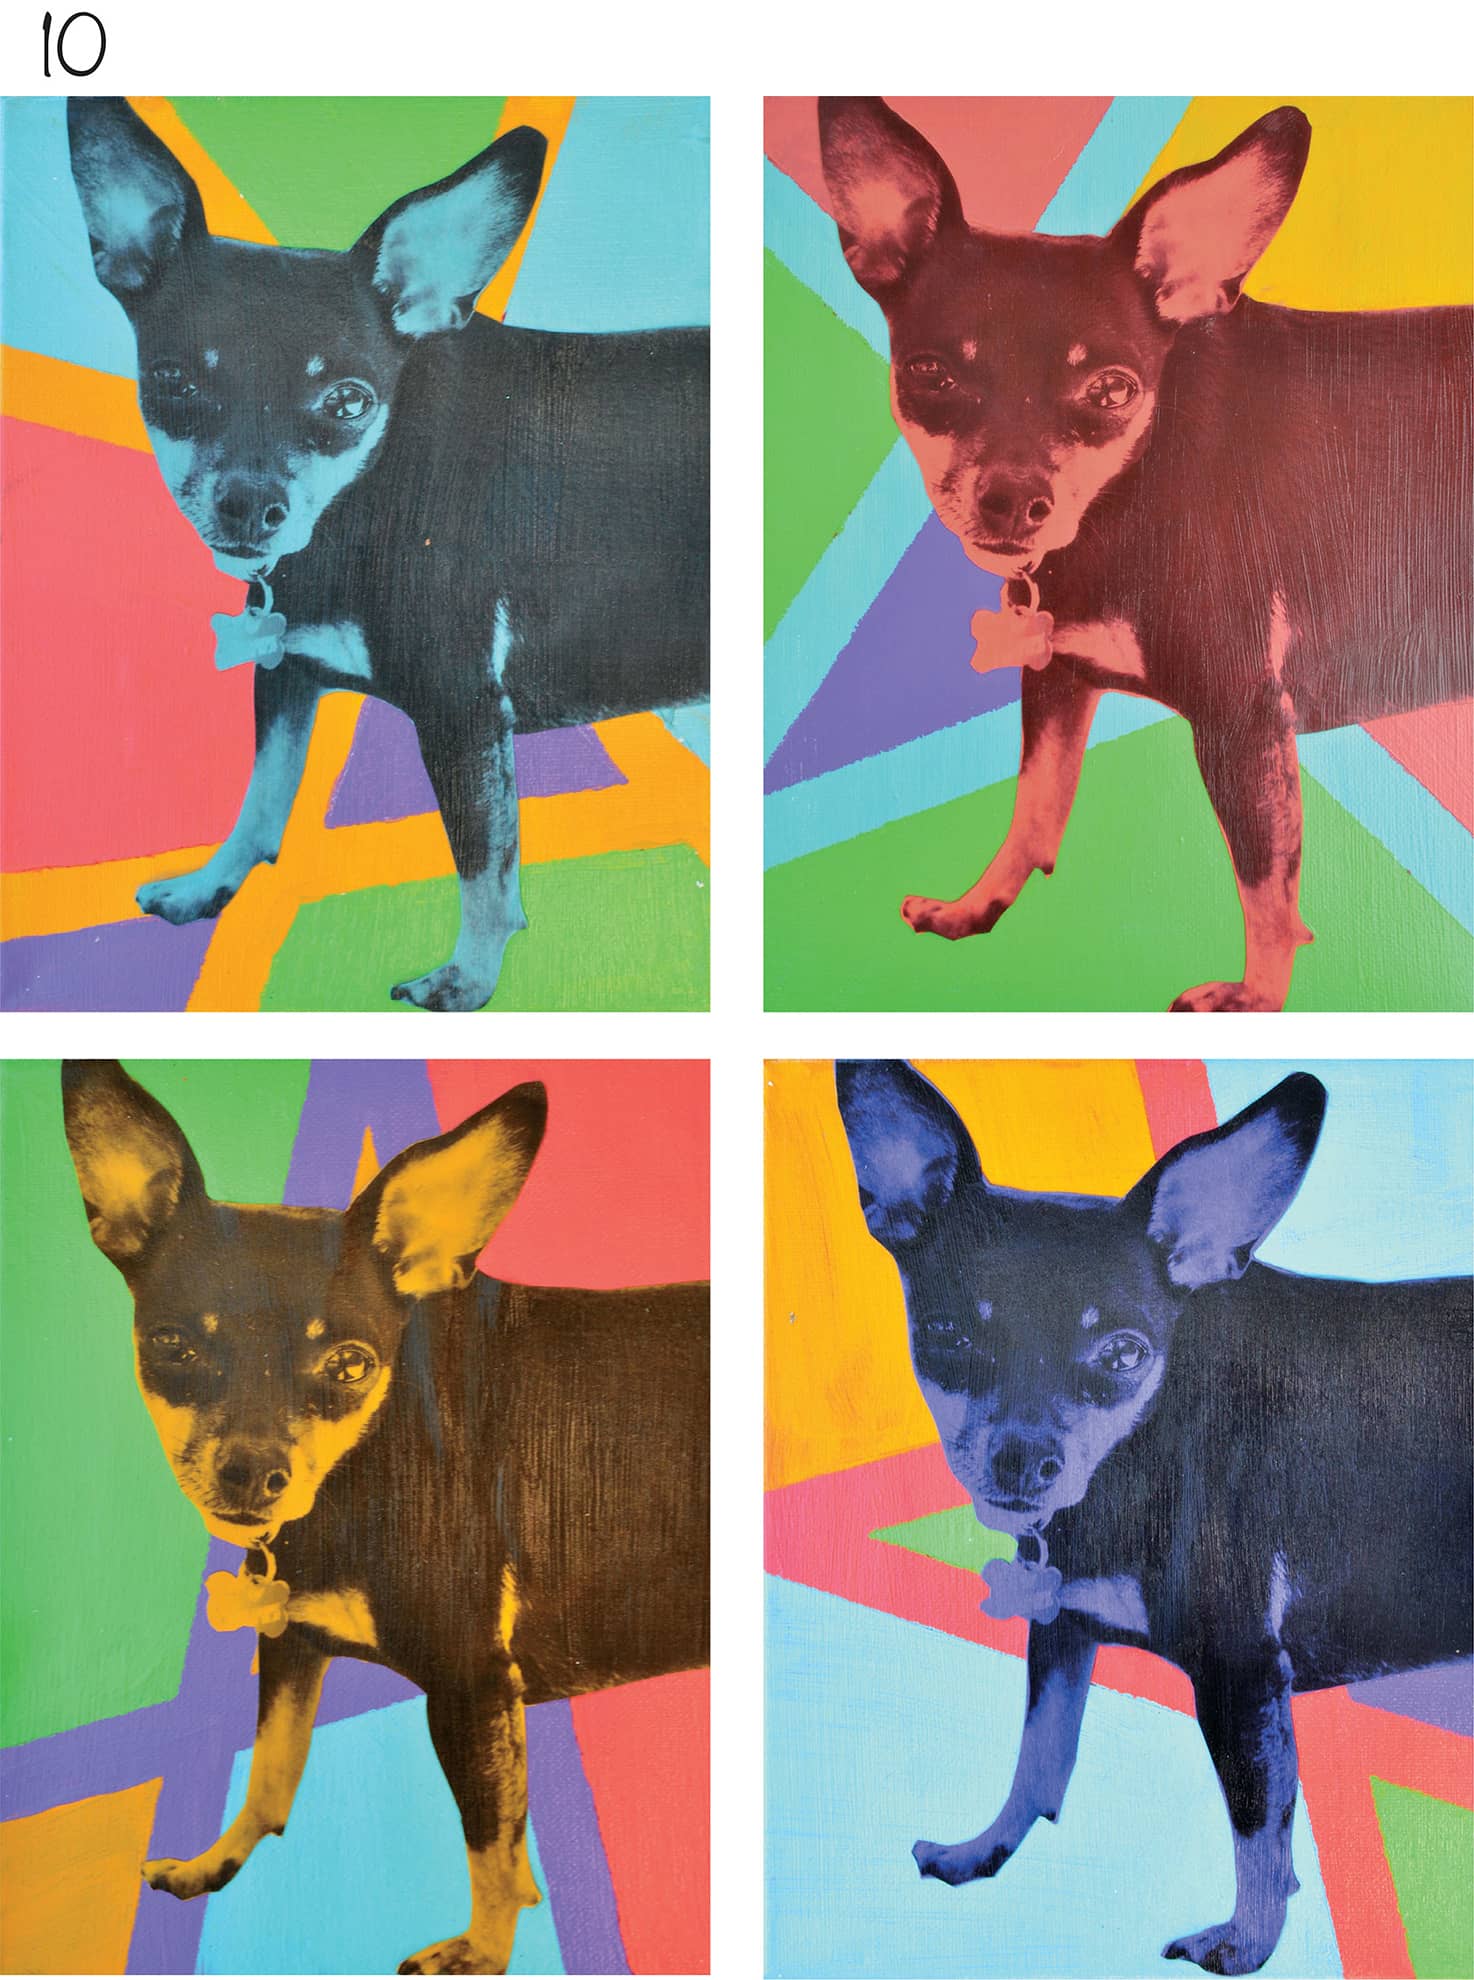
10 When all of the canvases are complete, you’ll have a modern masterpiece! Hang the collection together in a fun Andy Warhol style!
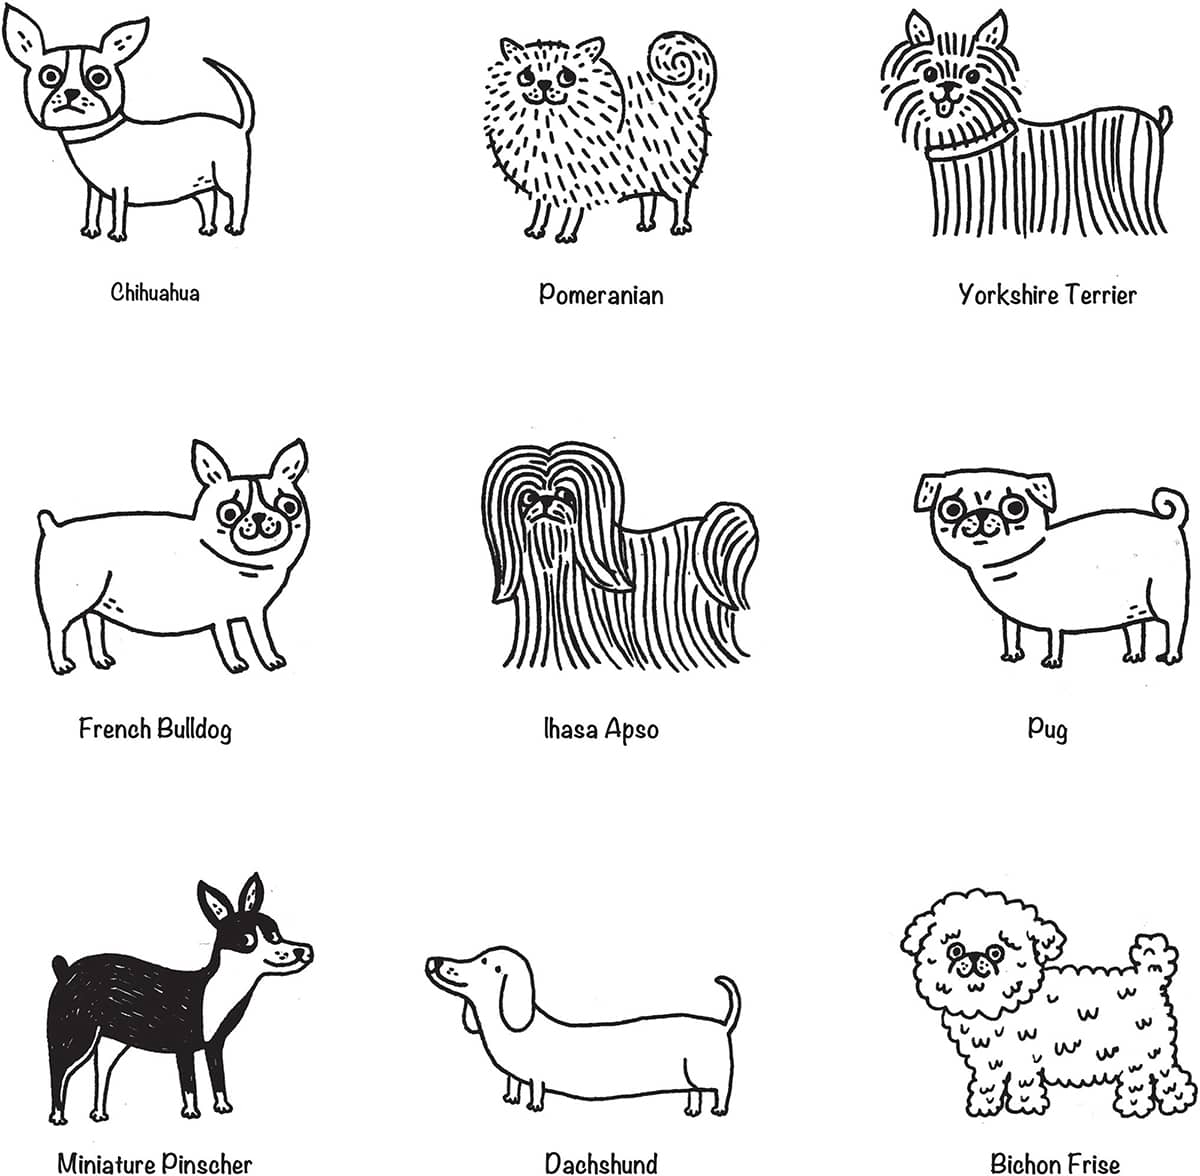
Pen & Ink: Doodled Dogs
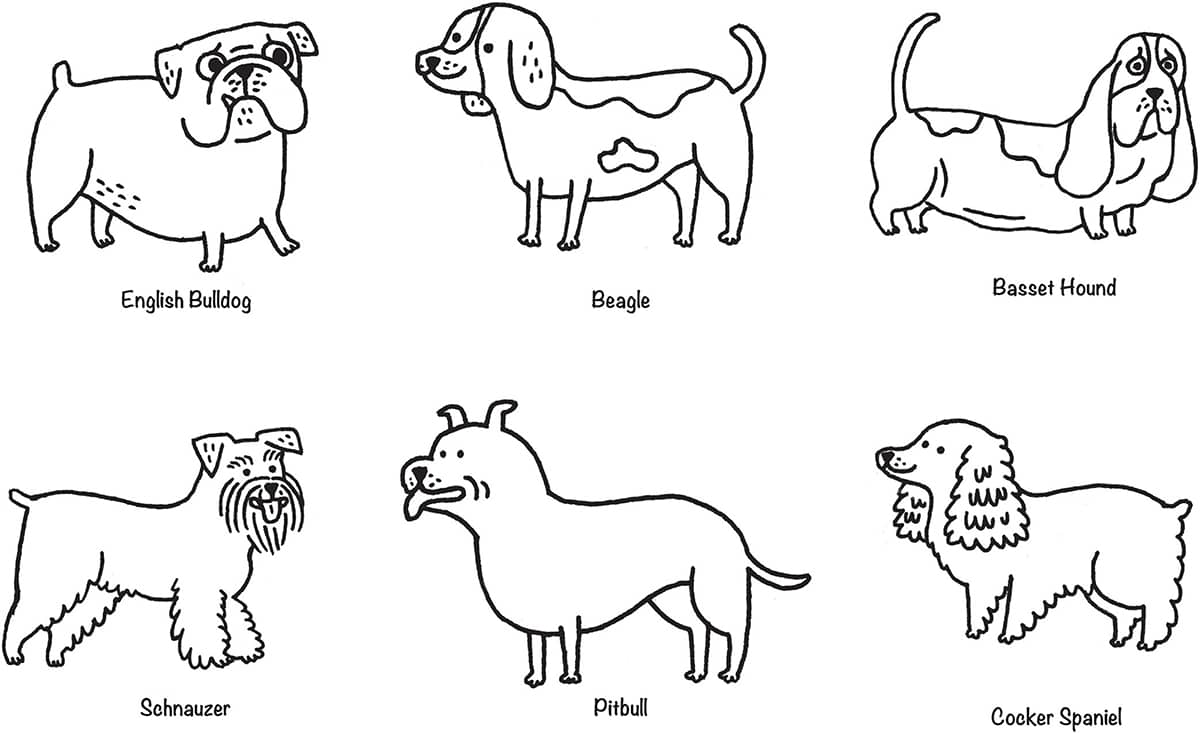
Small Dogs
Medium Dogs
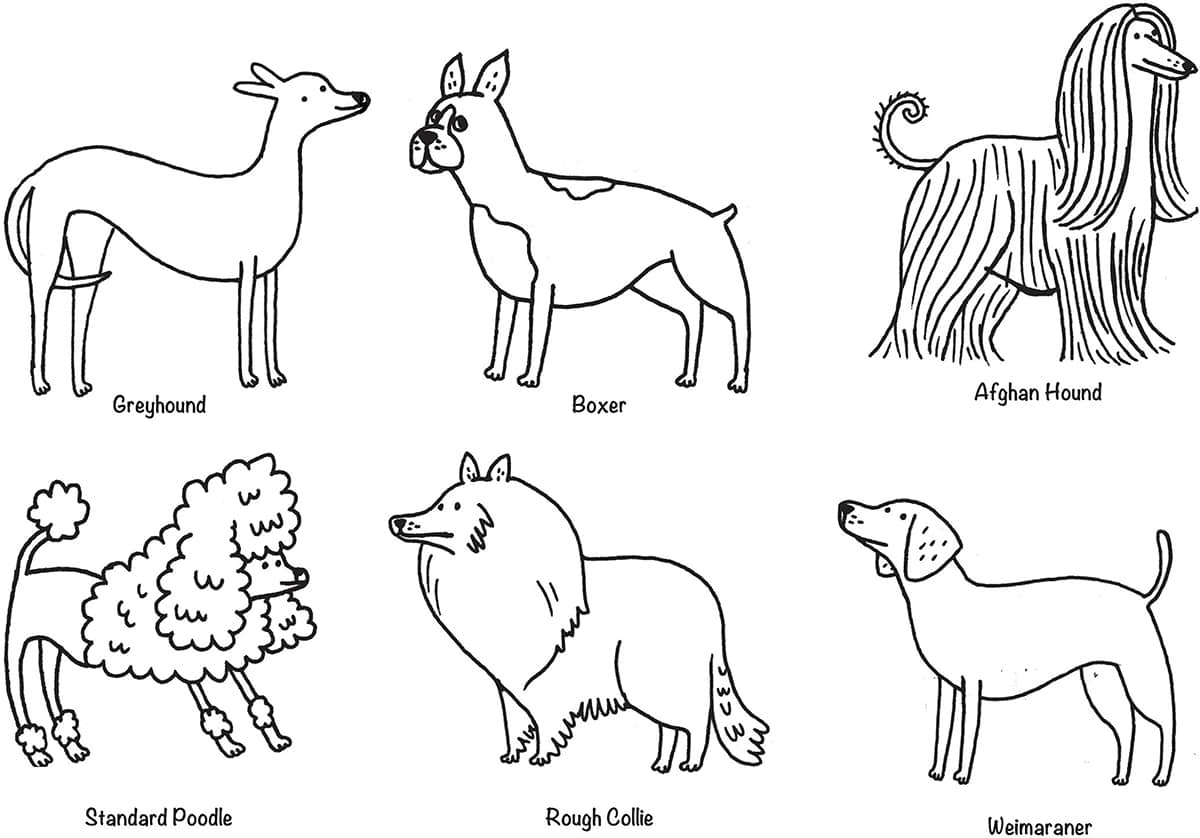
Large Dogs
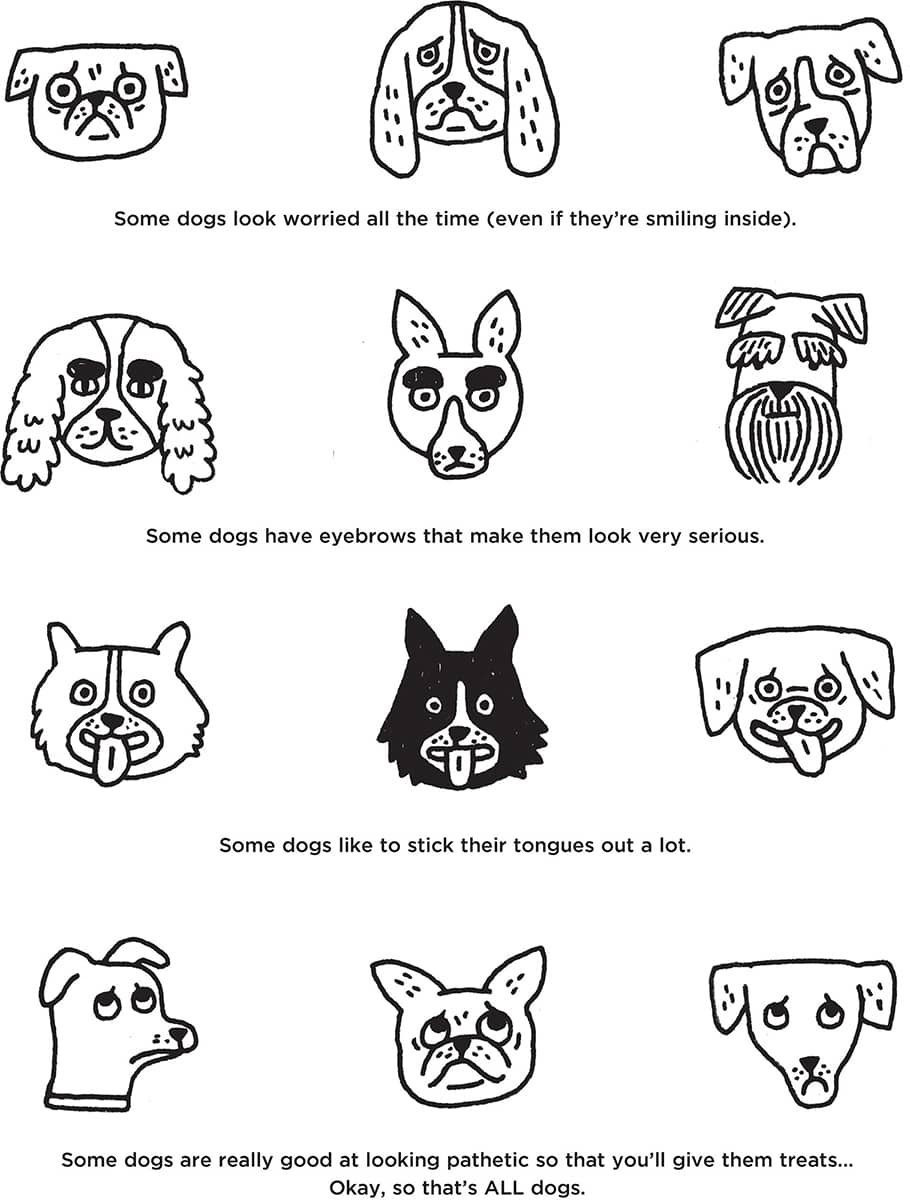
Doodled Dog Faces
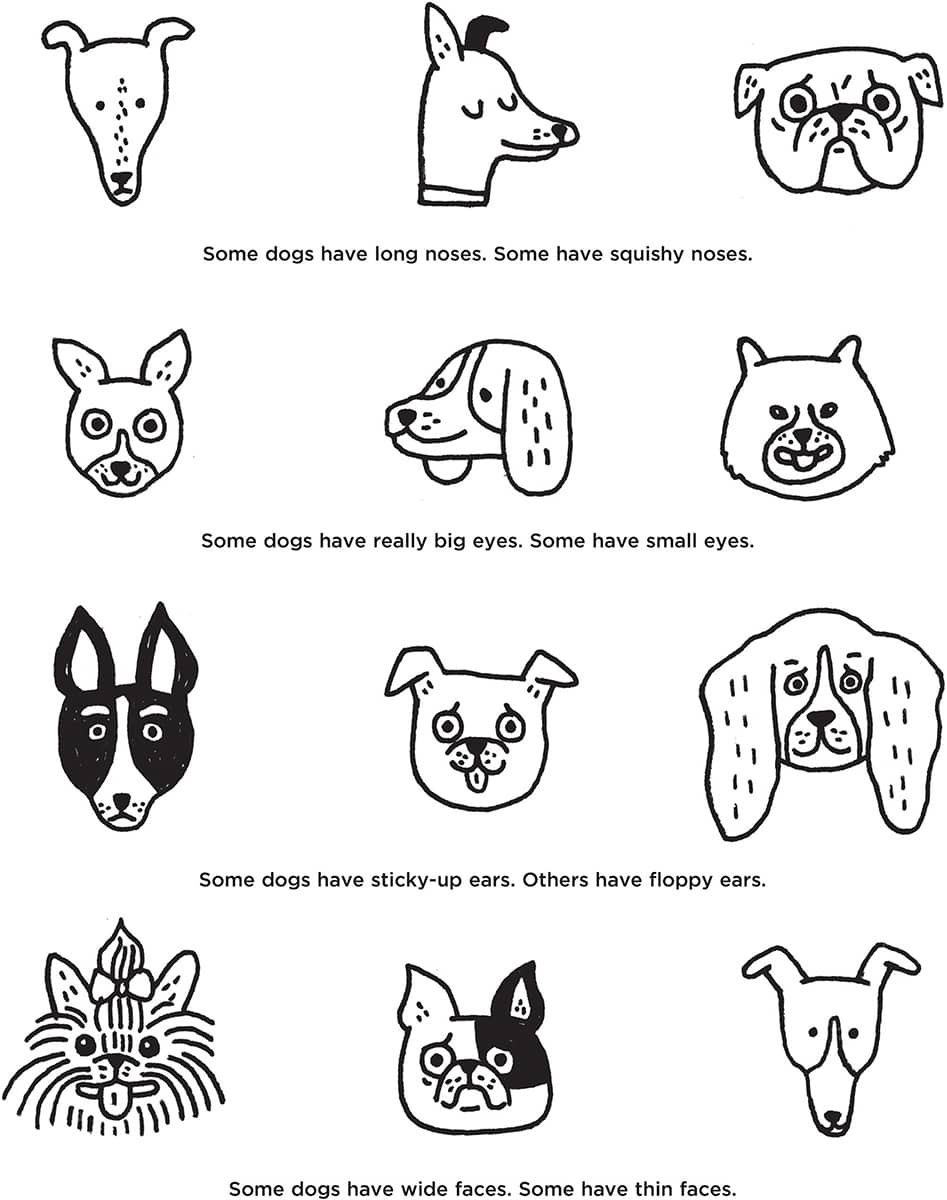
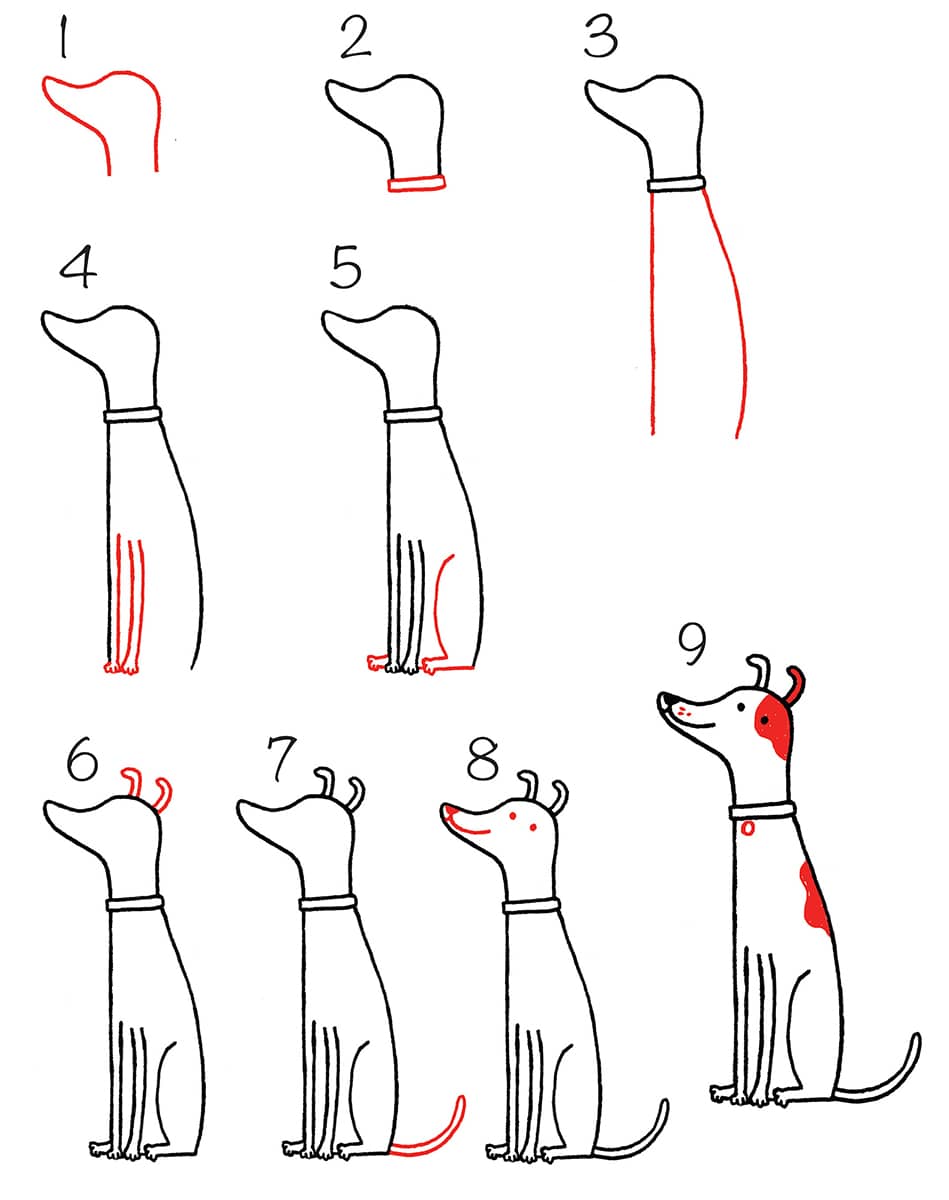
Greyhound
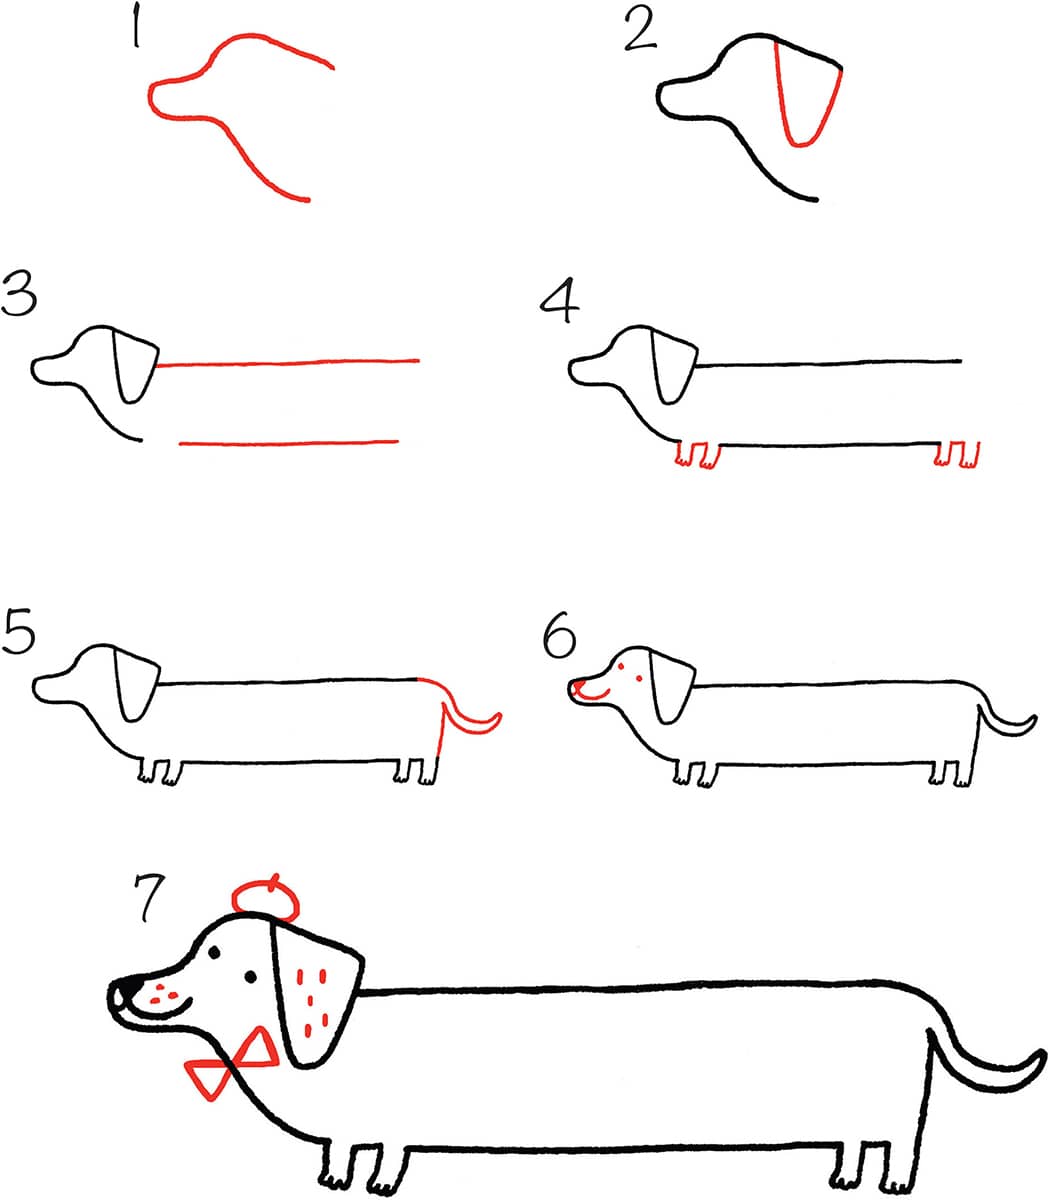
Dachshund
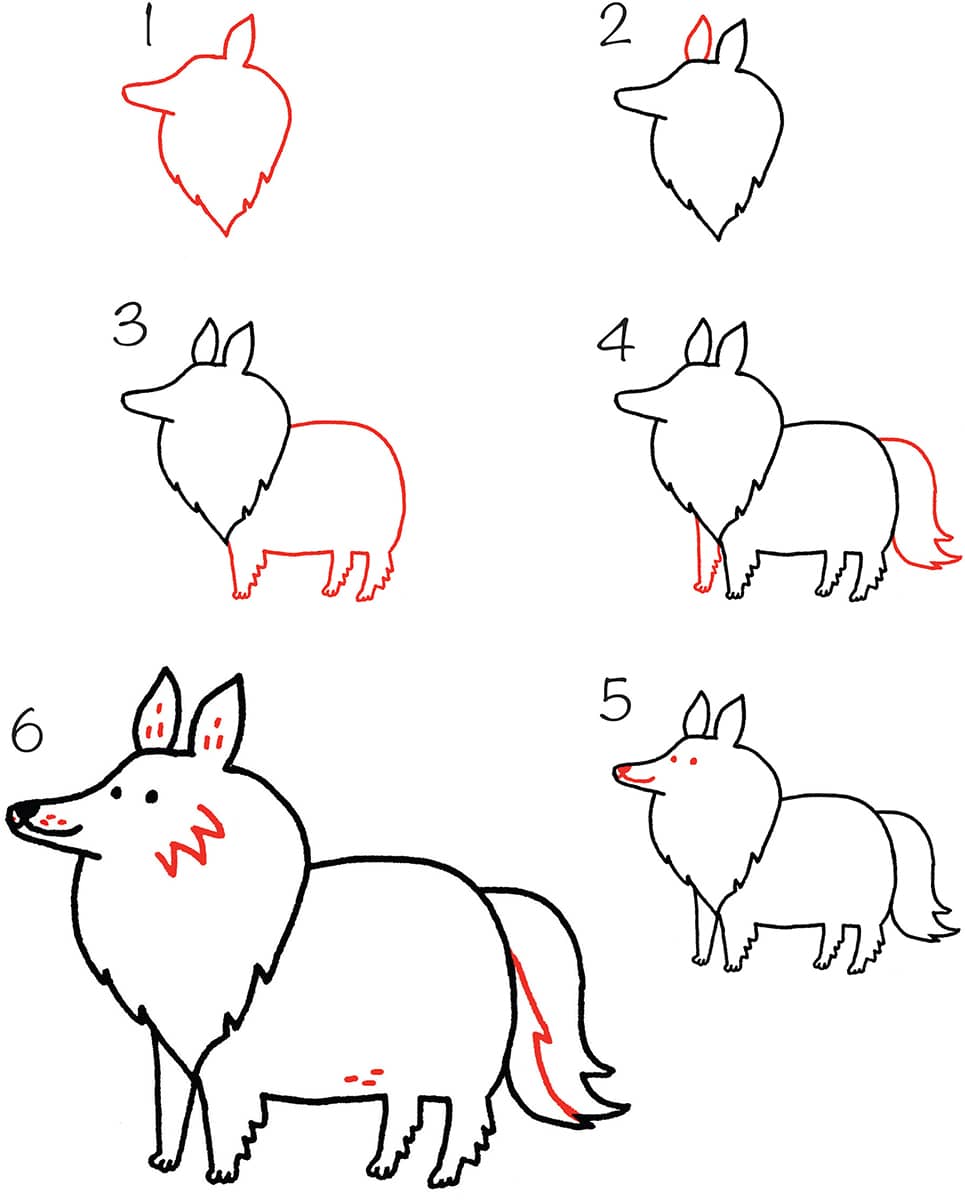
Collie
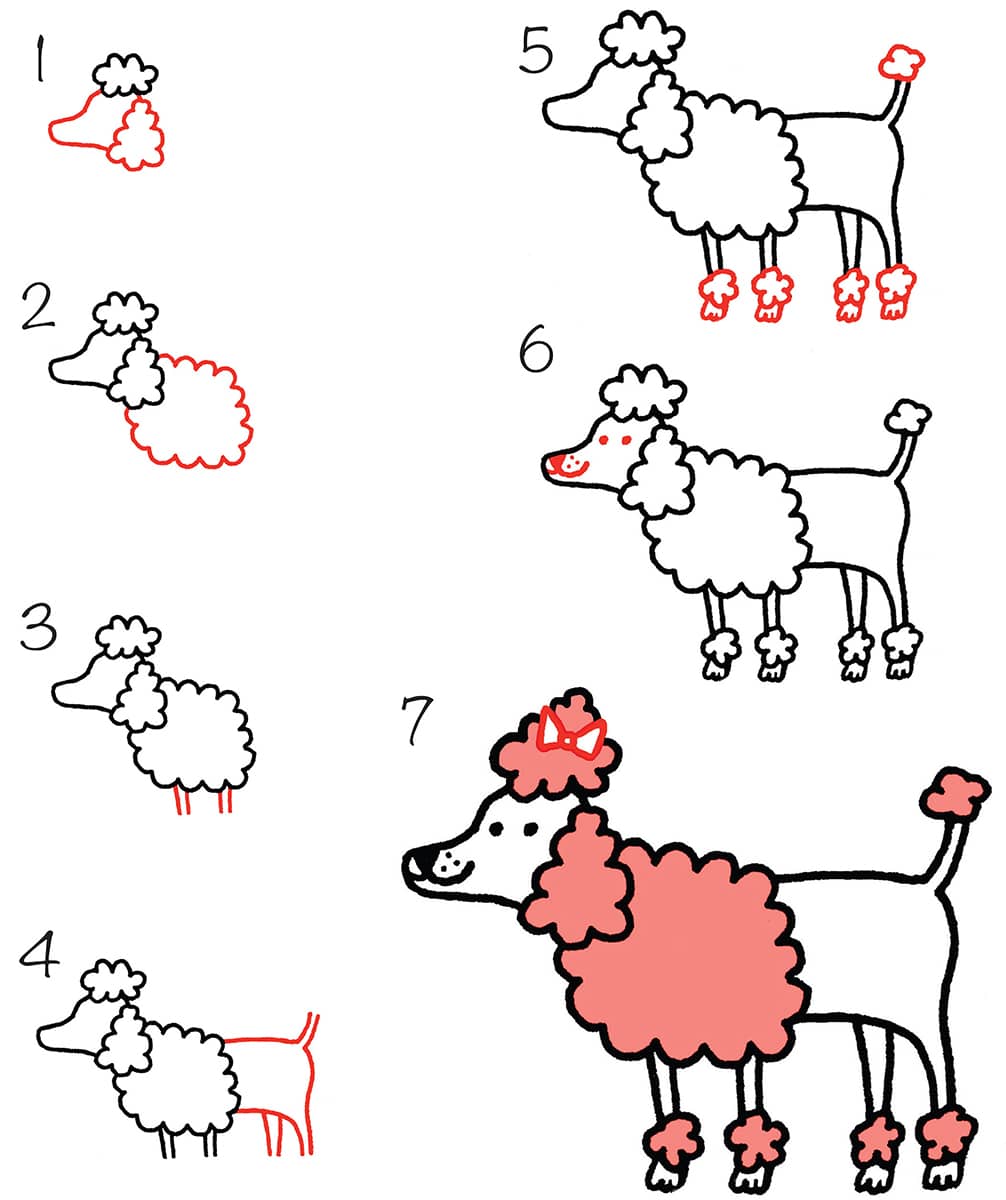
Poodle
Bonus Project: Doodled Doggy Mug
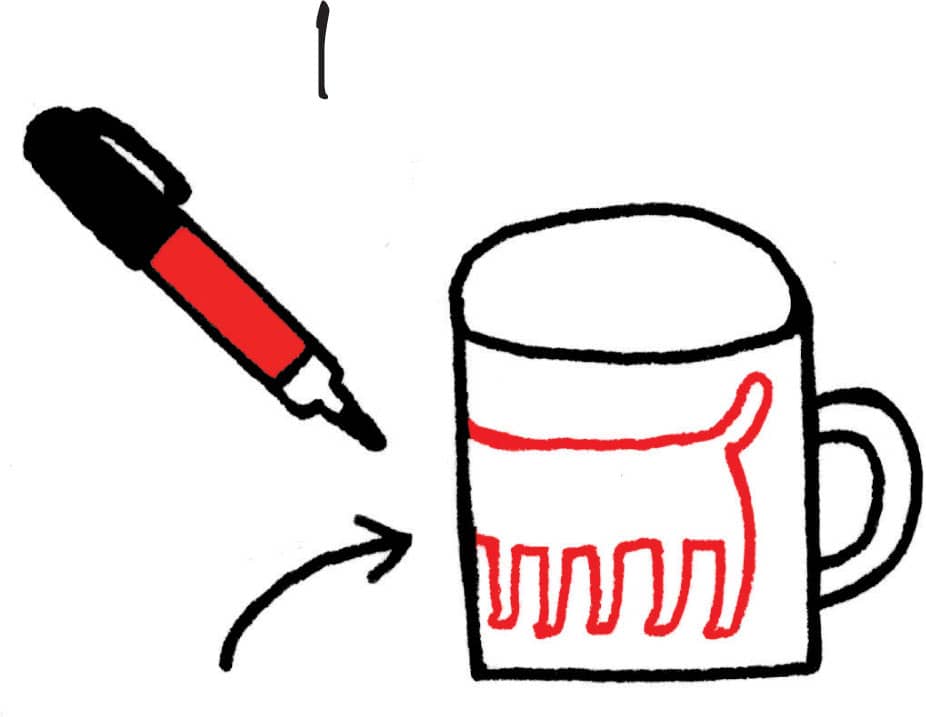
1. Decide what you’re going to draw on the mug.
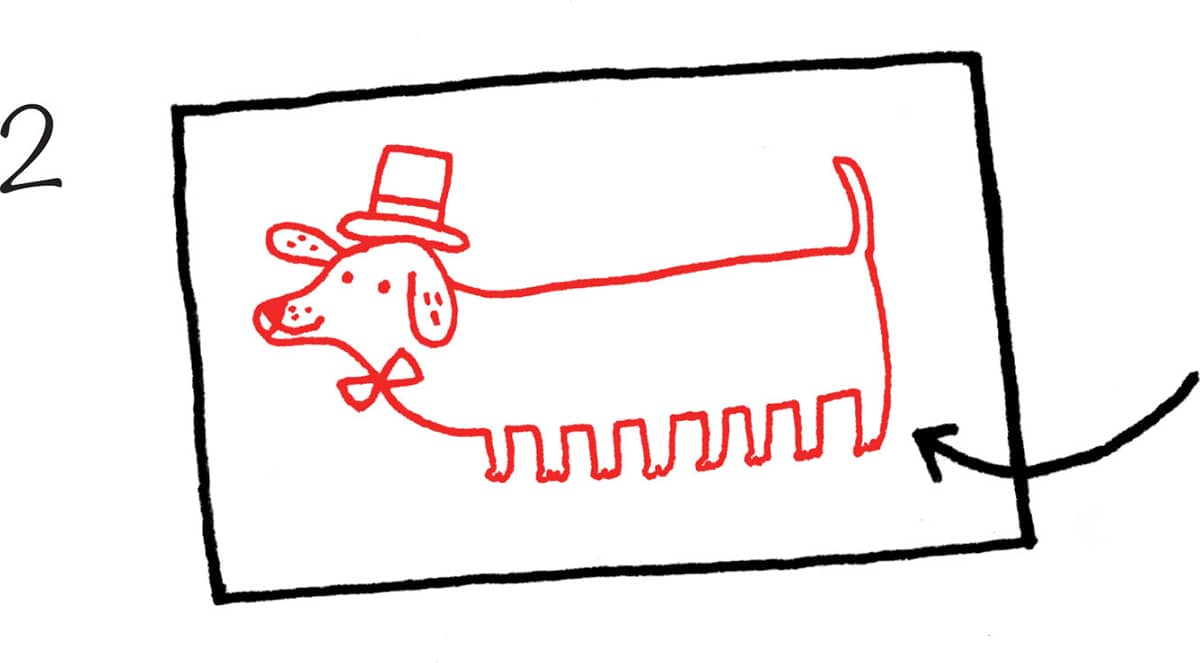
2. Draw your design out on paper first.
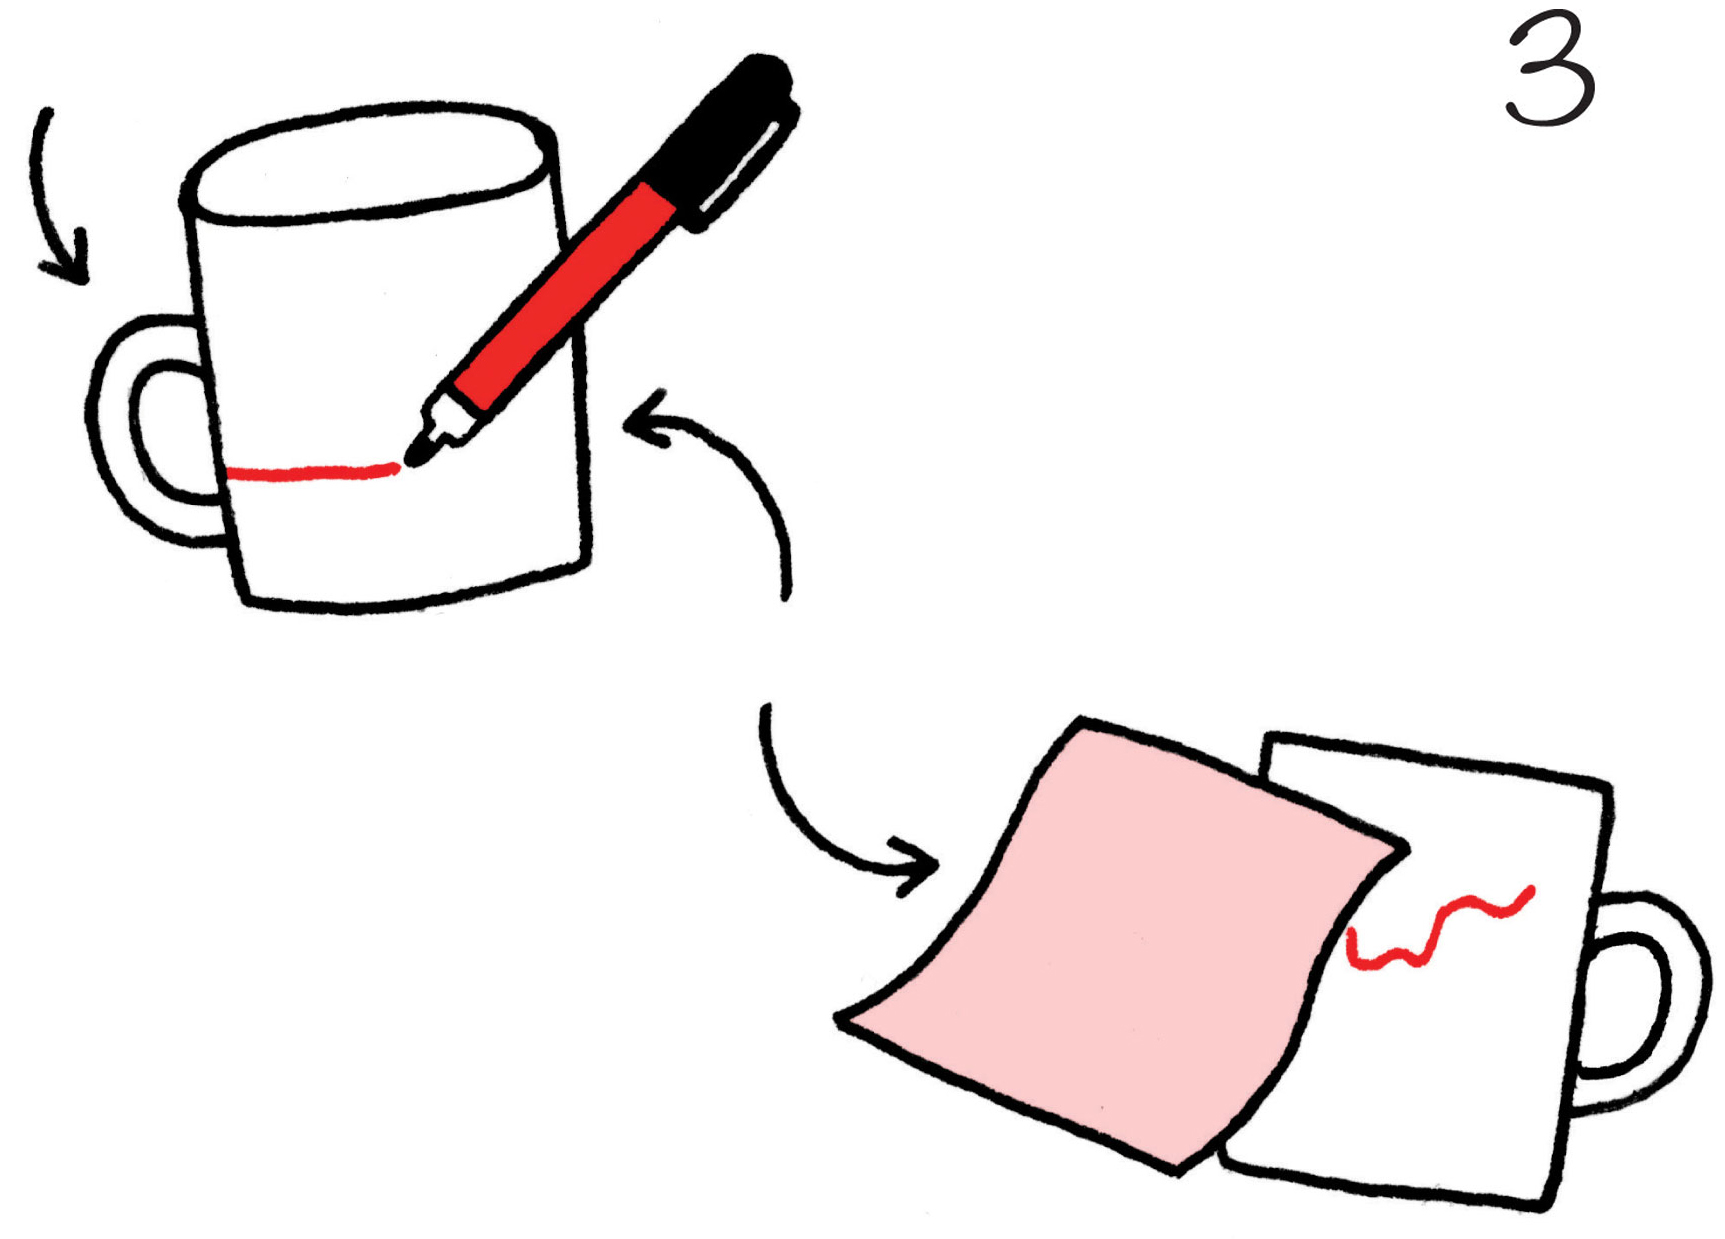
3. Start drawing your design on the mug.
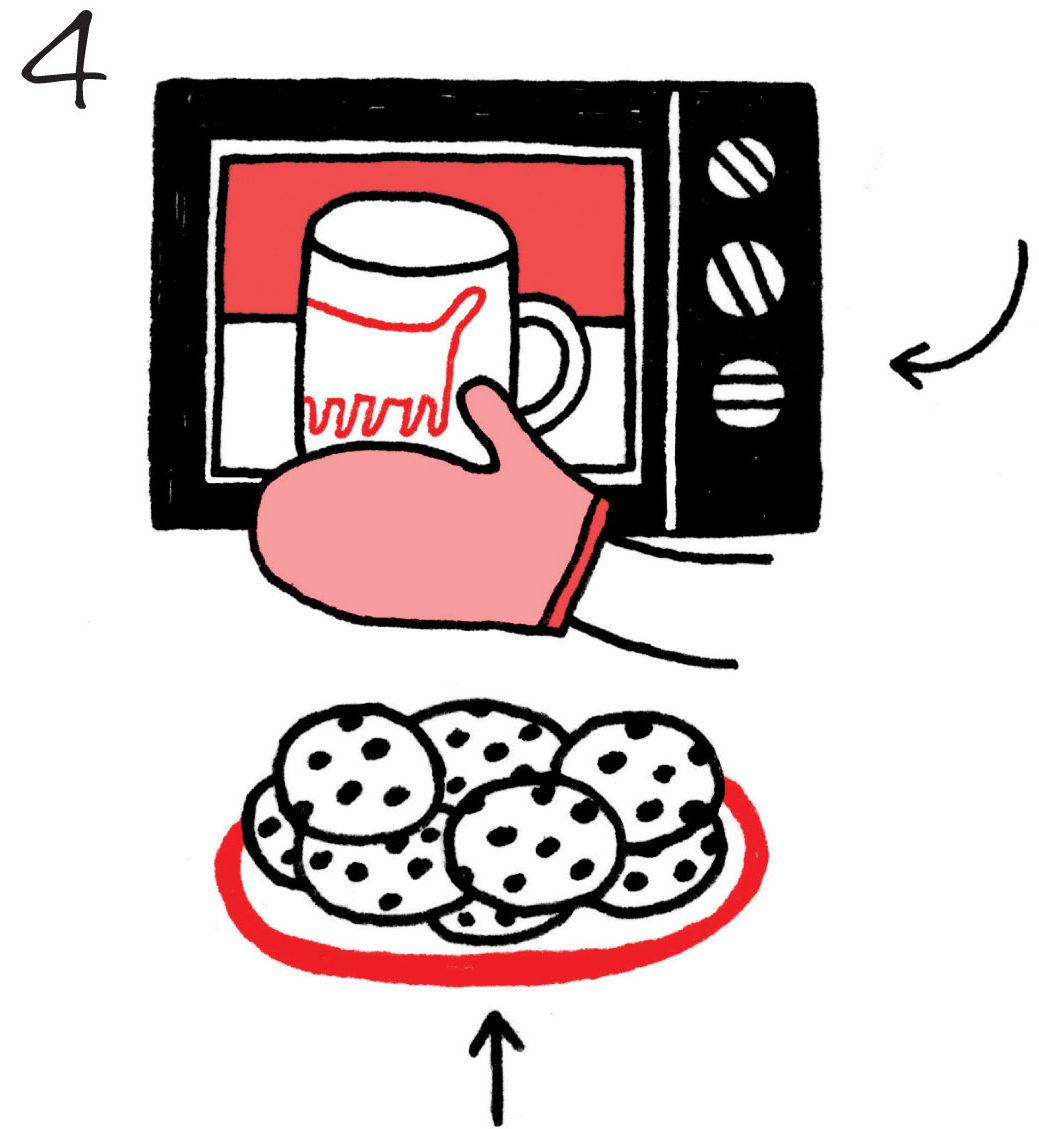
4. If you used paint pens, you can make your mug dishwasher safe by baking it in the oven for 45 minutes at 350*f / 180*c (or whatever your paint-pen packaging tells you to do).
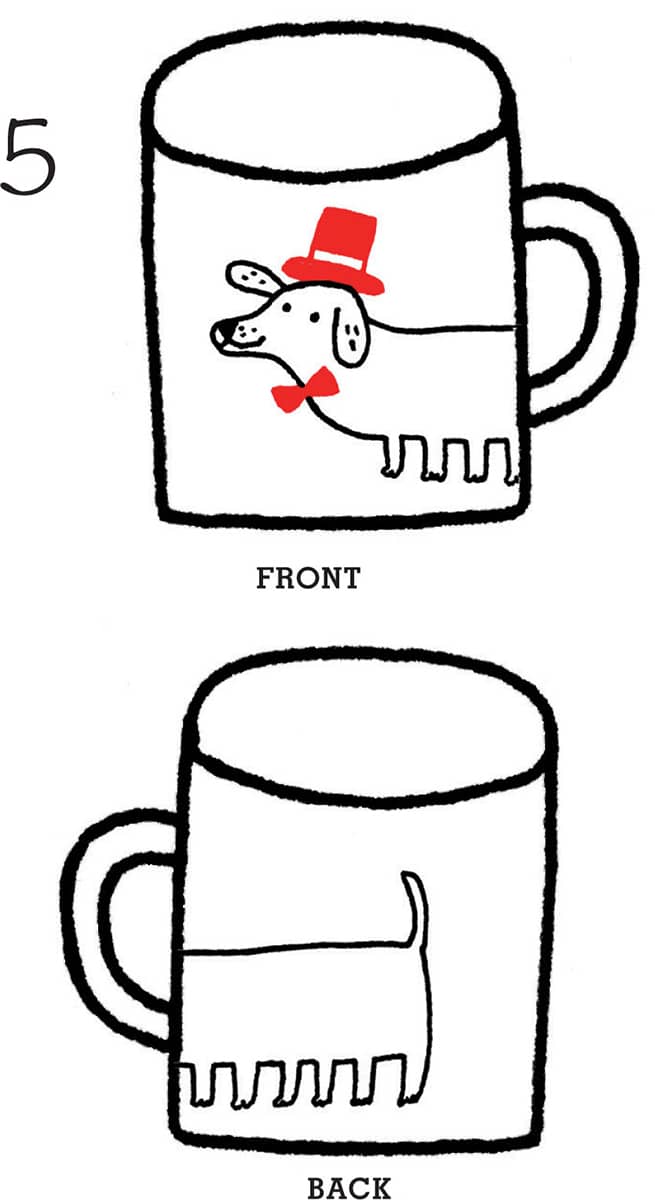
5. Ta da! Let your mug cool, and you’re ready to start sipping in style.