 CHAPTER 3
OIL & ACRYLIC
West Highland Terrier
This portrait employs heavy-body acrylic paint to allow the application of paint in thick, impasto strokes, as well as to dilute it to paint thin glazes.
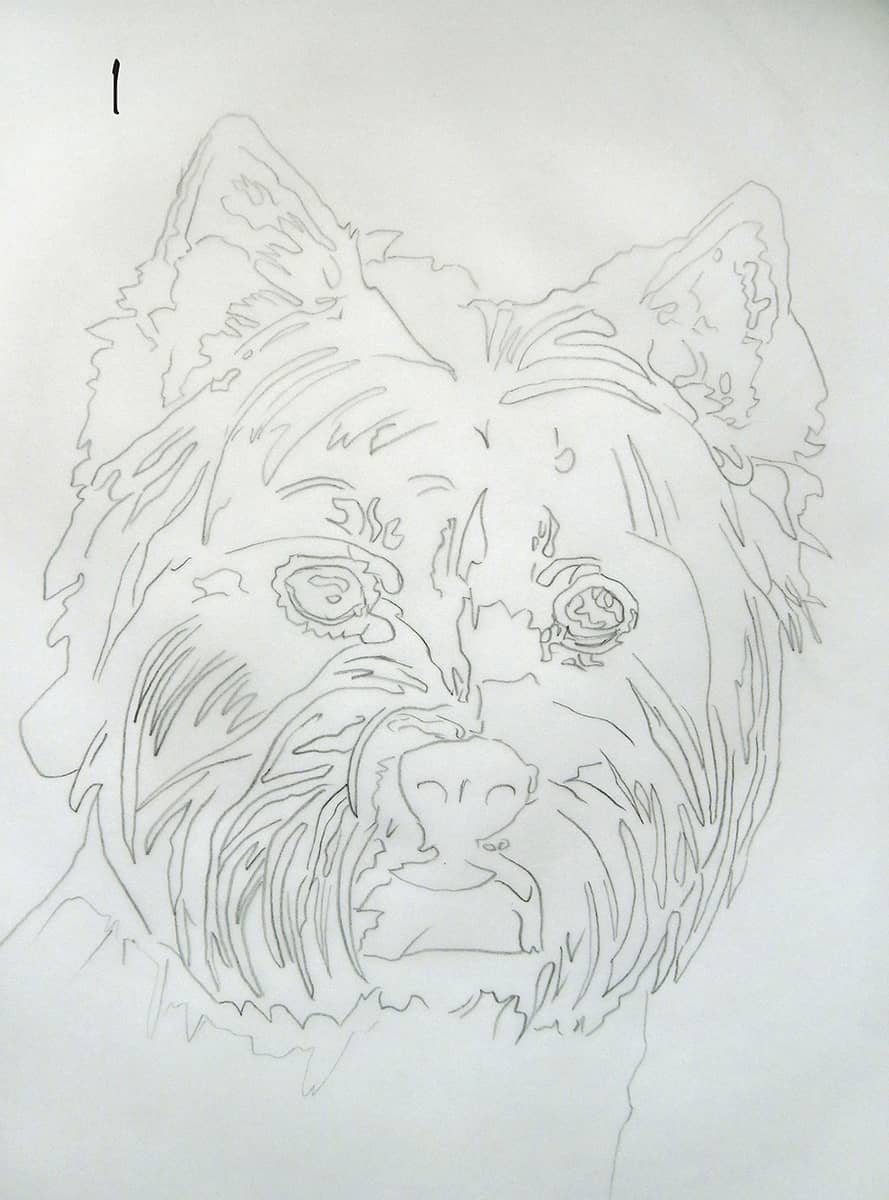
1 Sketch the portrait onto a canvas board using pencil or paint. Adjust your sketch to be as basic or as detailed as you’d like.

2 Create a rough tonal underpainting to block in areas of shadow using Mars black, burnt umber, and cadmium red.

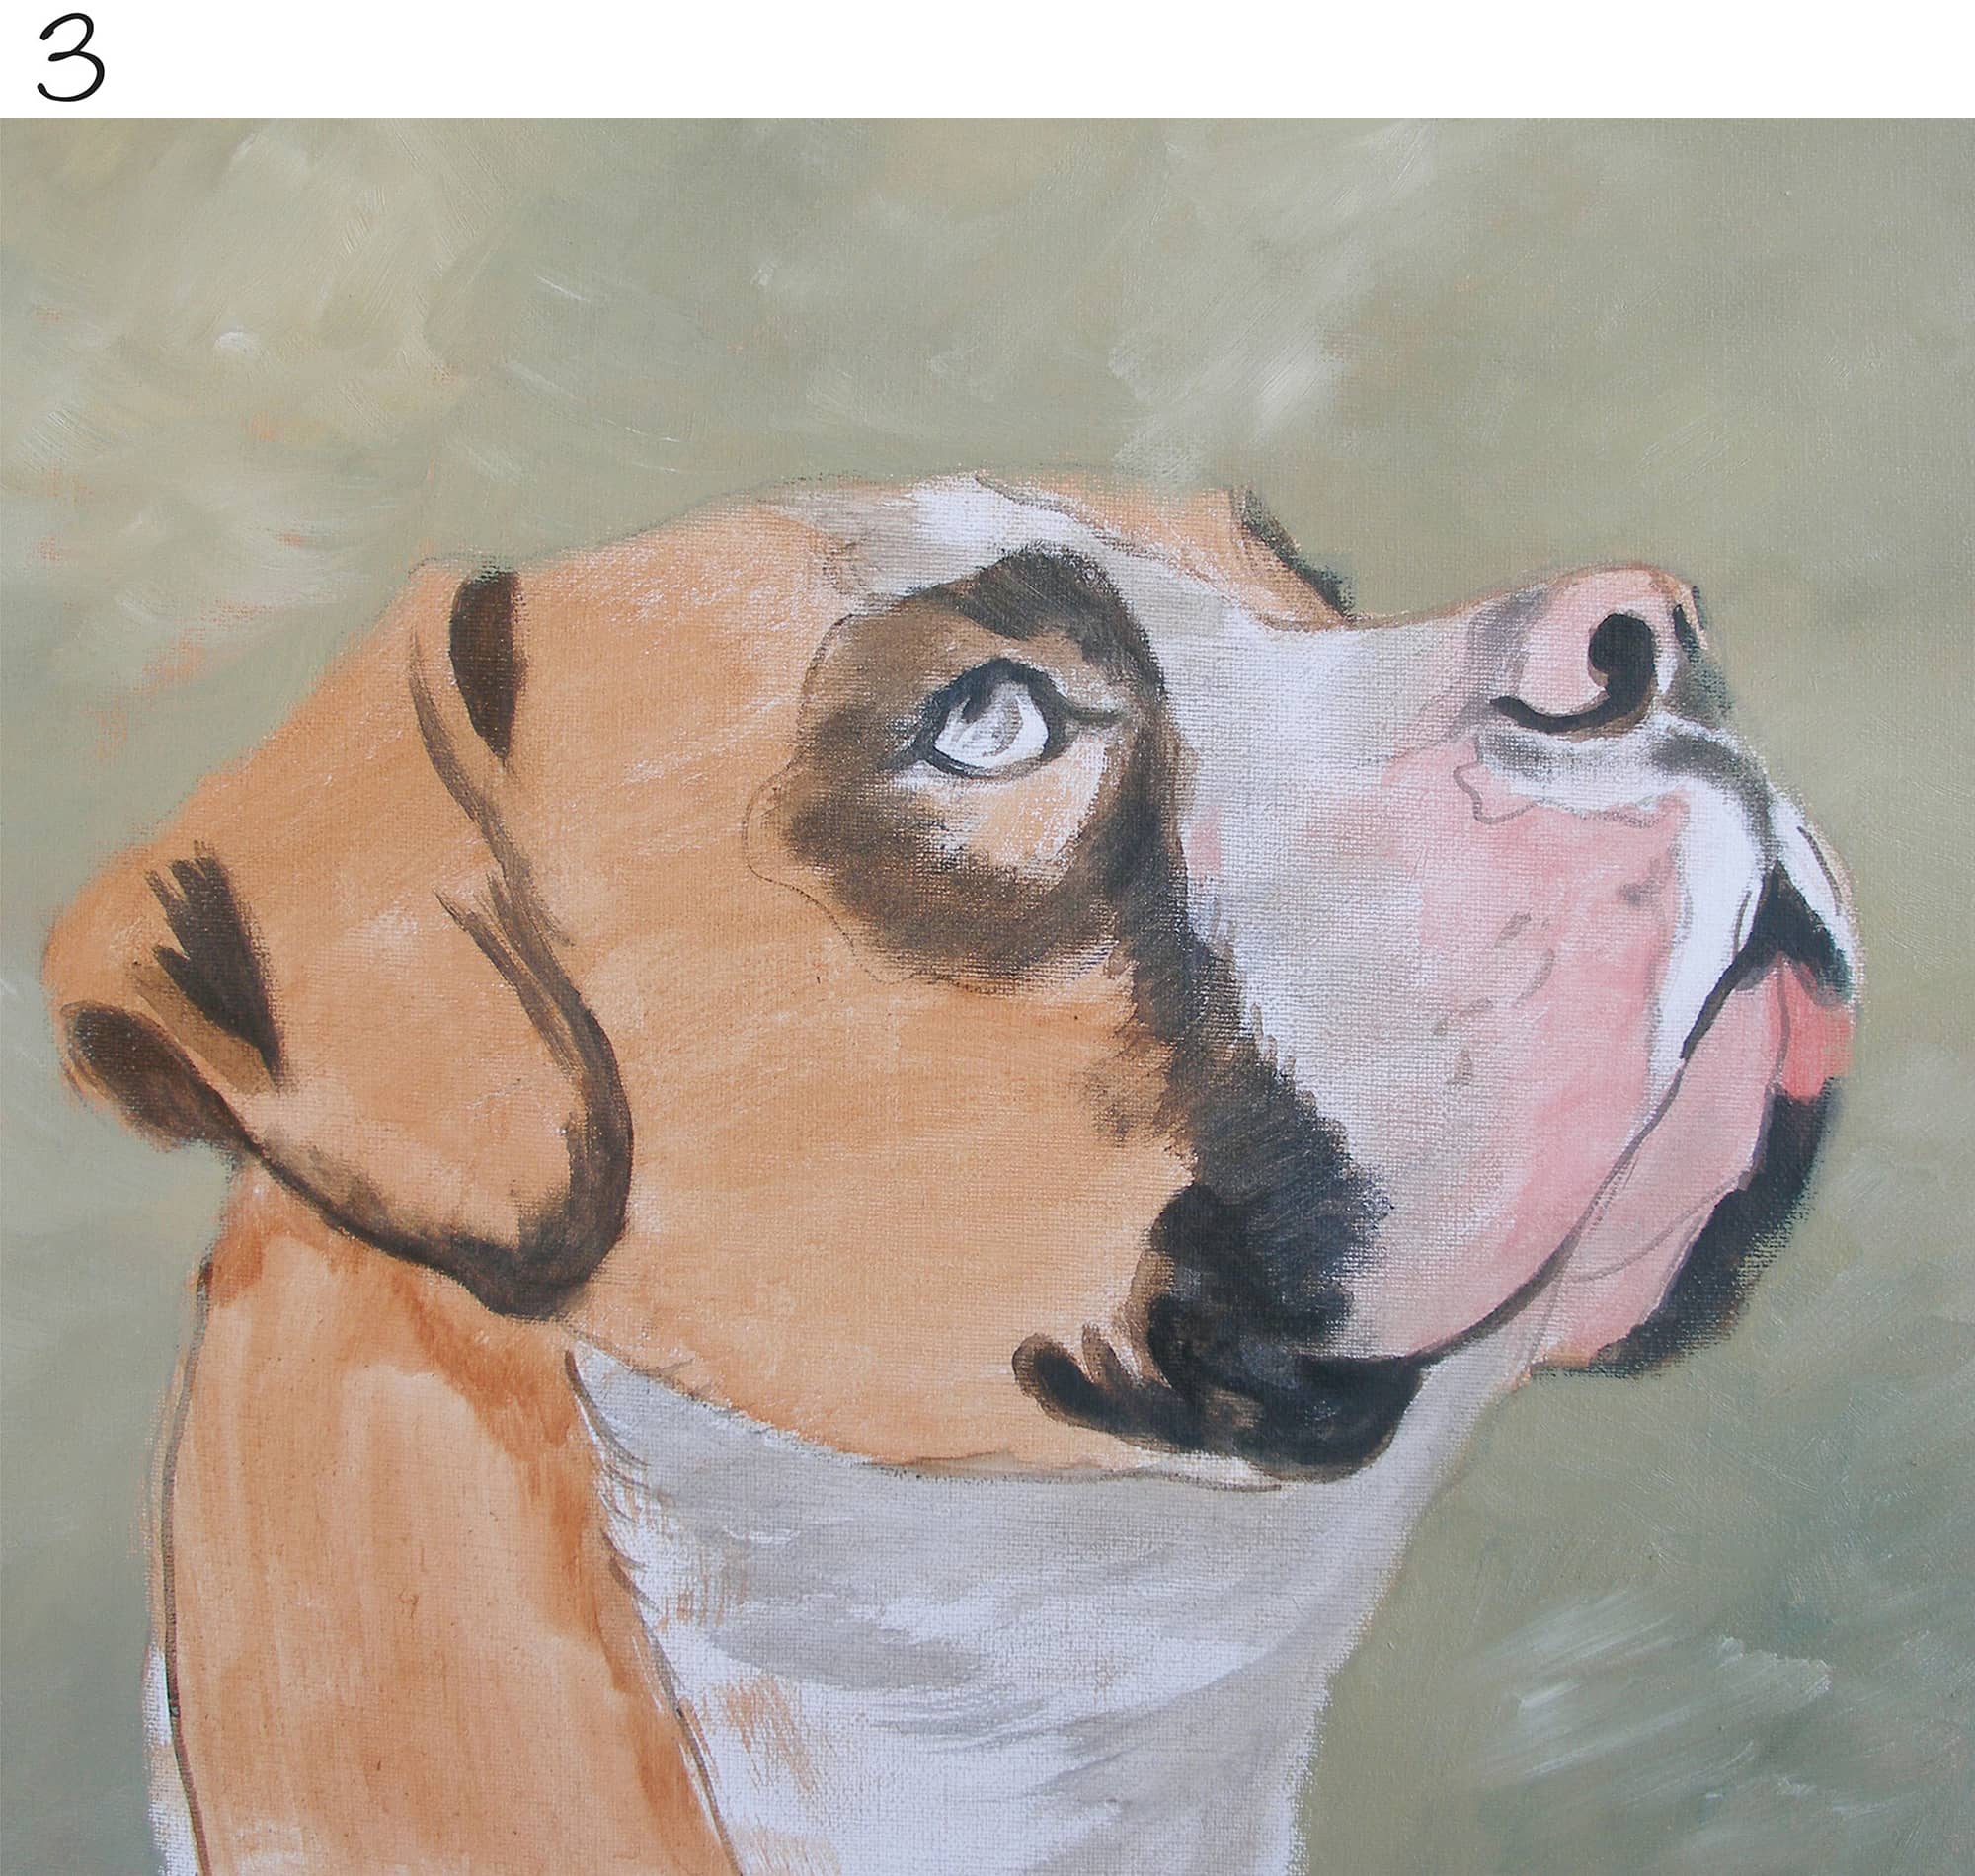
3 Next add texture paste to the fur to create highlights by raising the lighter areas.
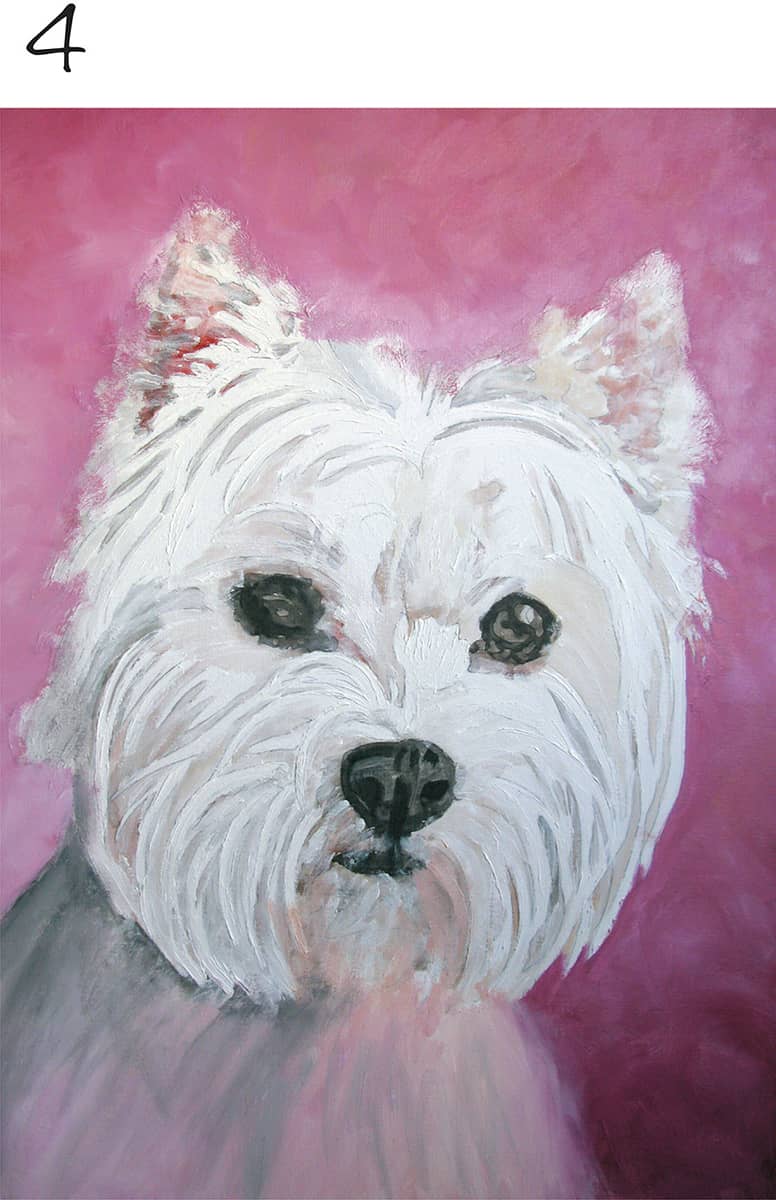
4 To enhance the shape of the dog’s head, apply a strong background color, such as alizarin crimson. Use a wide, hog-hair flat brush to cover the large background areas painting in a crisscross motion.
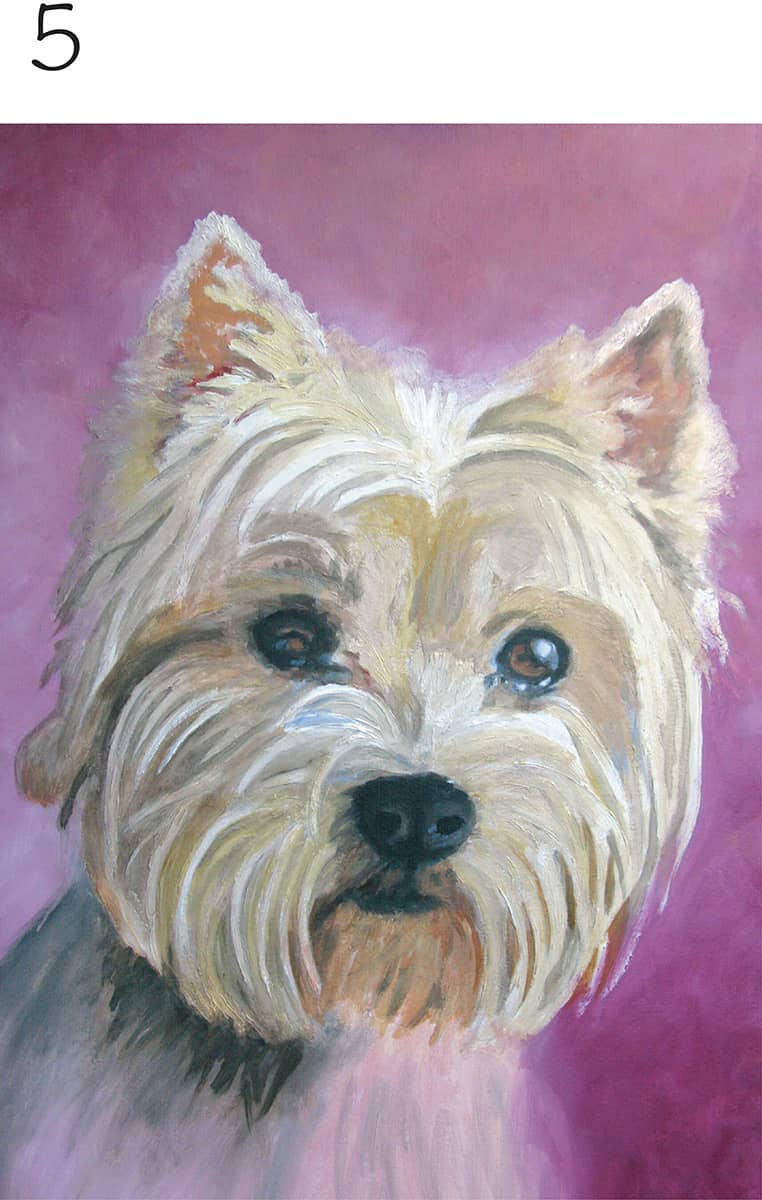
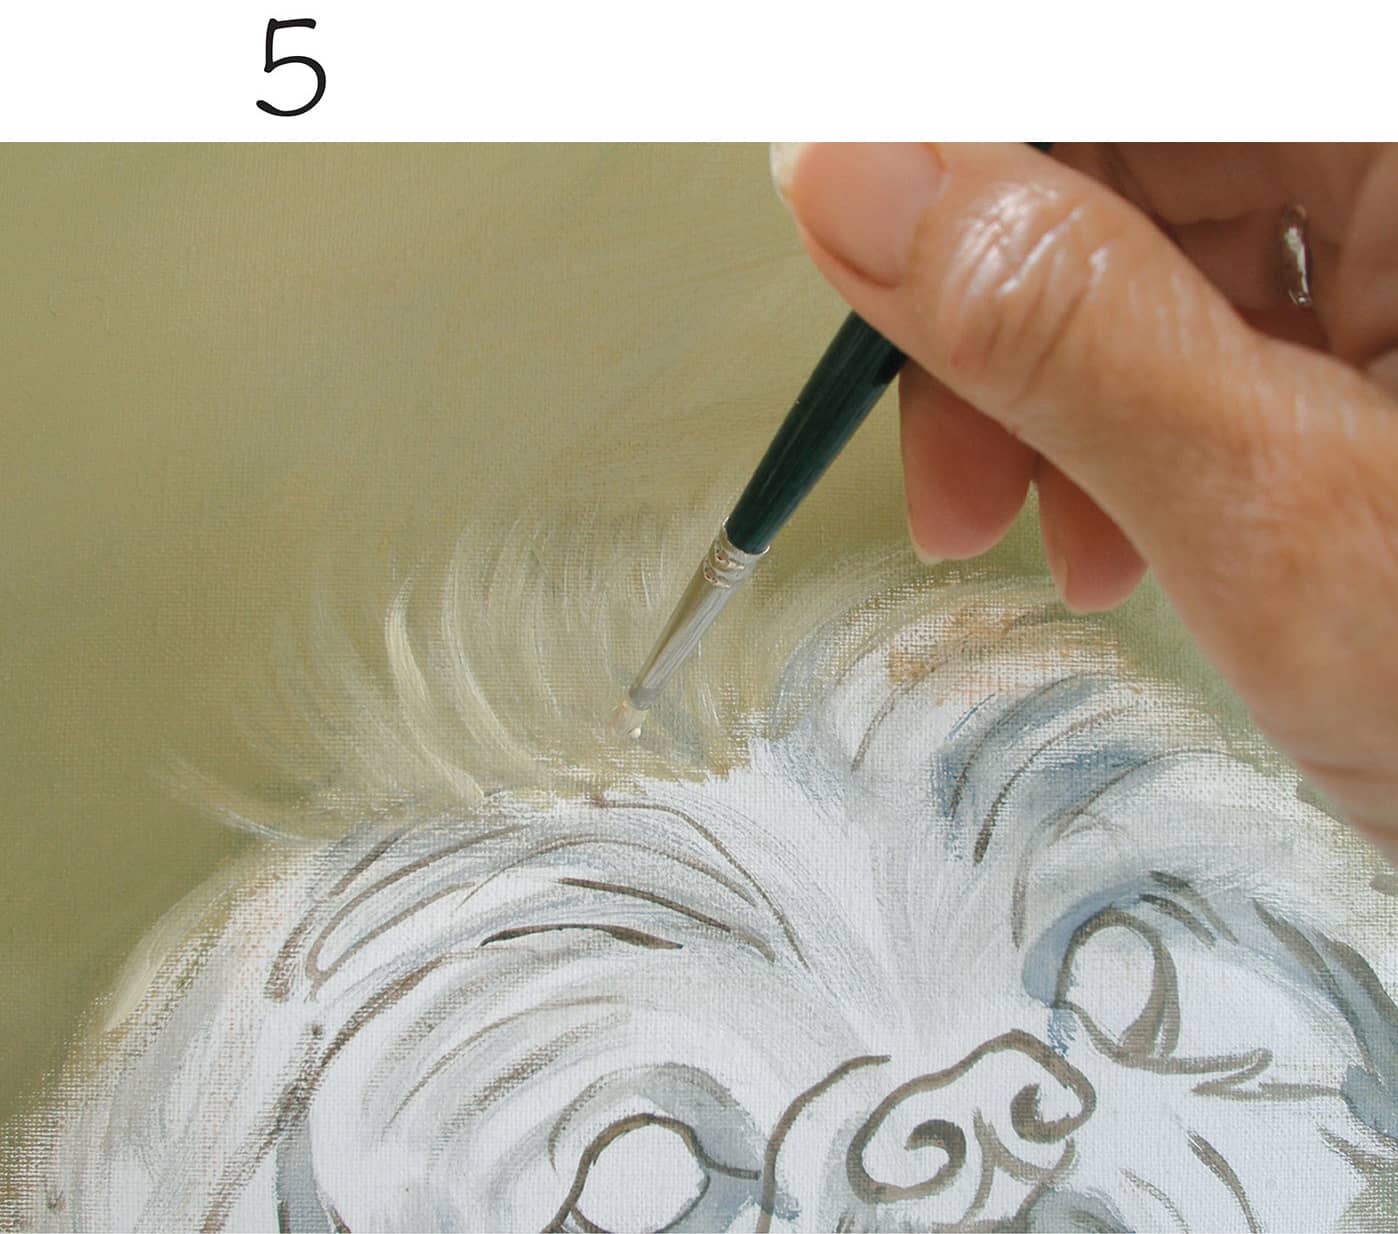
5 Begin adding shadows to create depth, using hues of yellow, orange, brown, purple, blue, and even green in the fur. Use a variety of round nylon brushes, and keep the paint thin to create glazes.
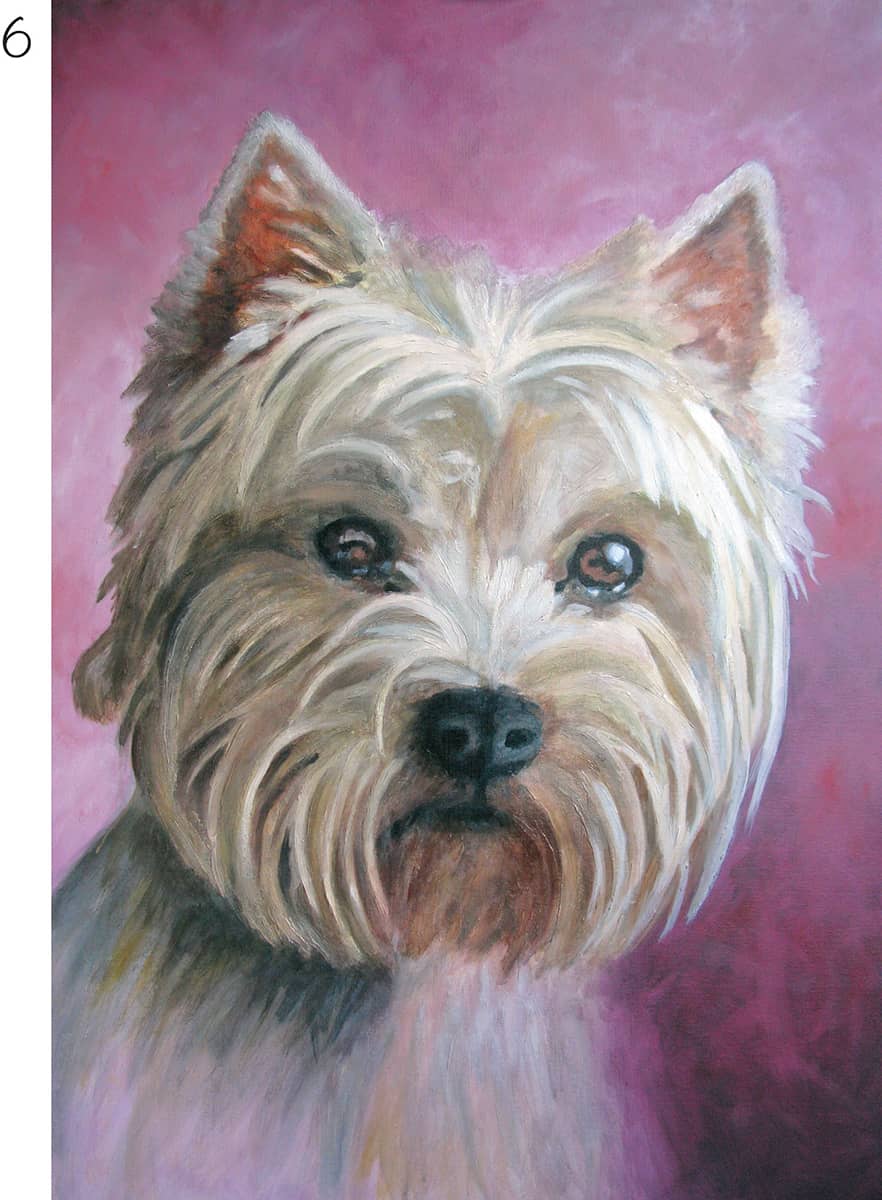
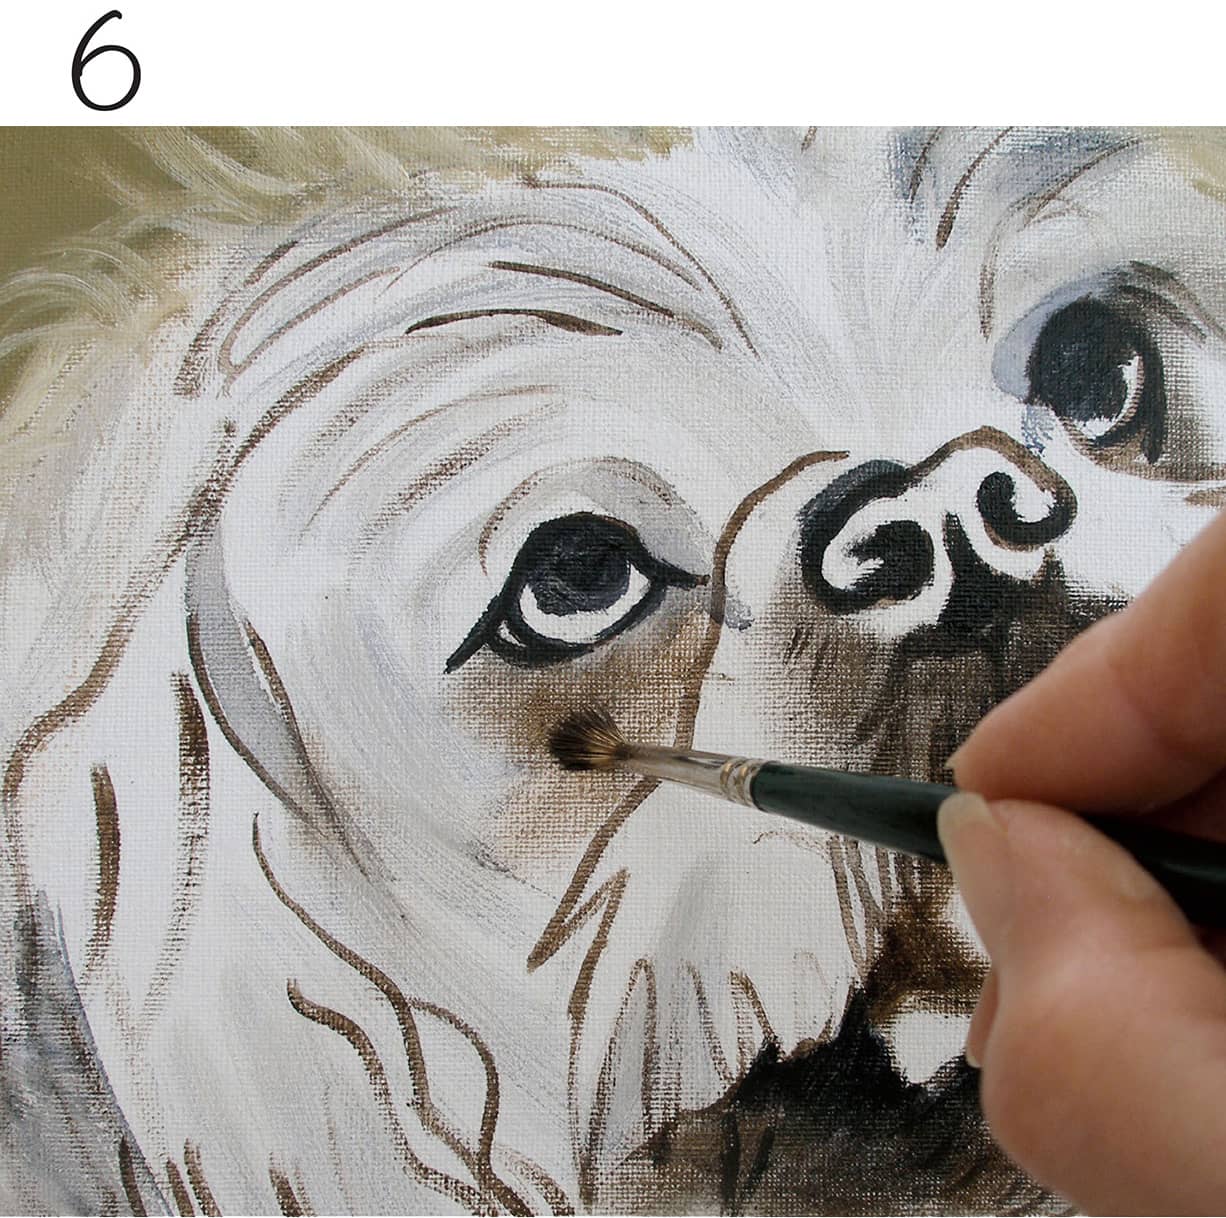
6 Add grays, reds, and browns on the shadow side of the face. The texture paste applied in step 3 helps show where to paint the shadows. Continue to work on the fine details and creating subtle shifts in the shadows. Continue building up glazes to achieve the desired depth.
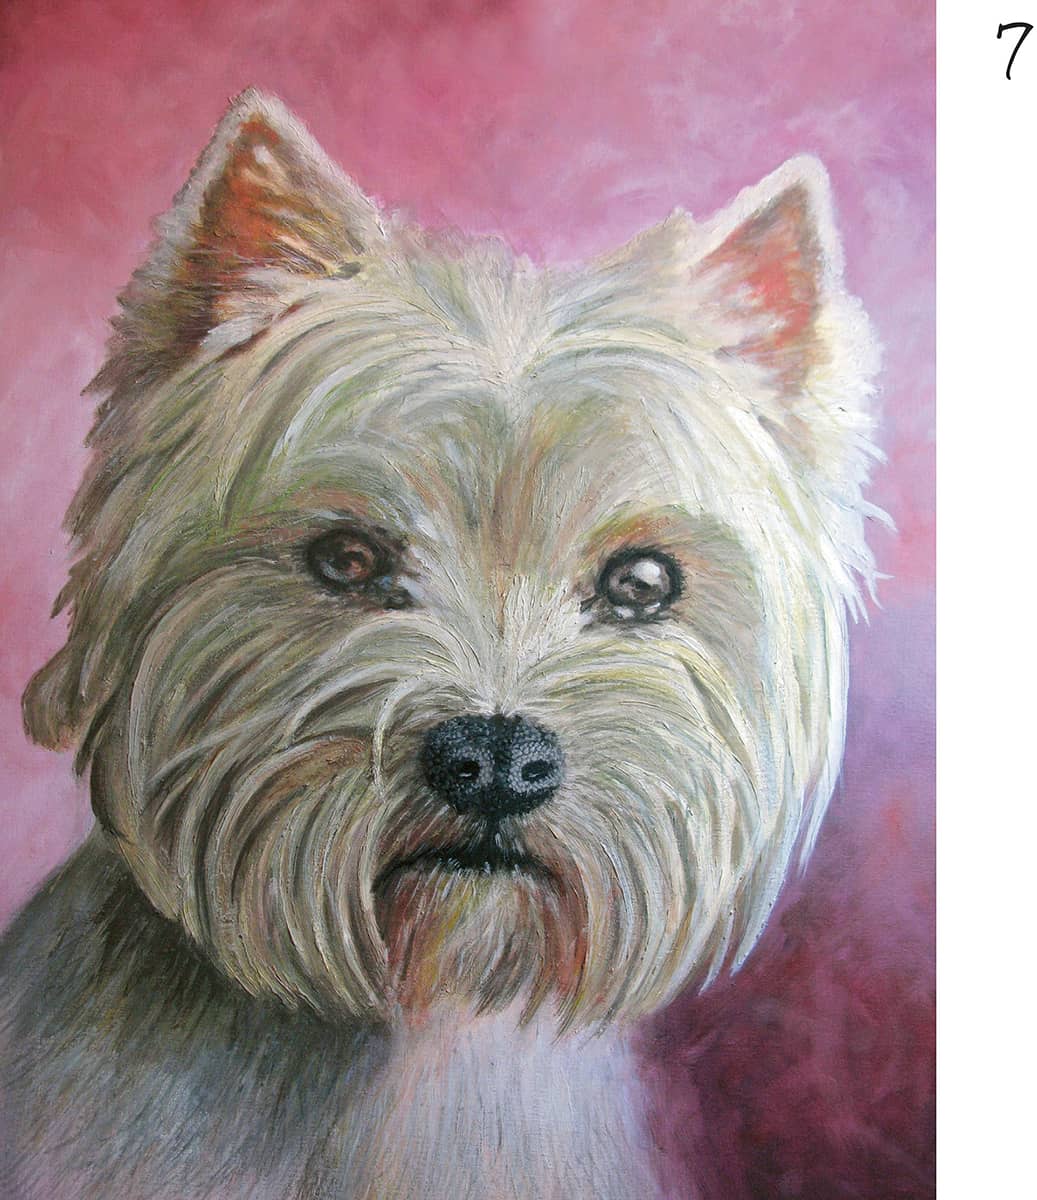
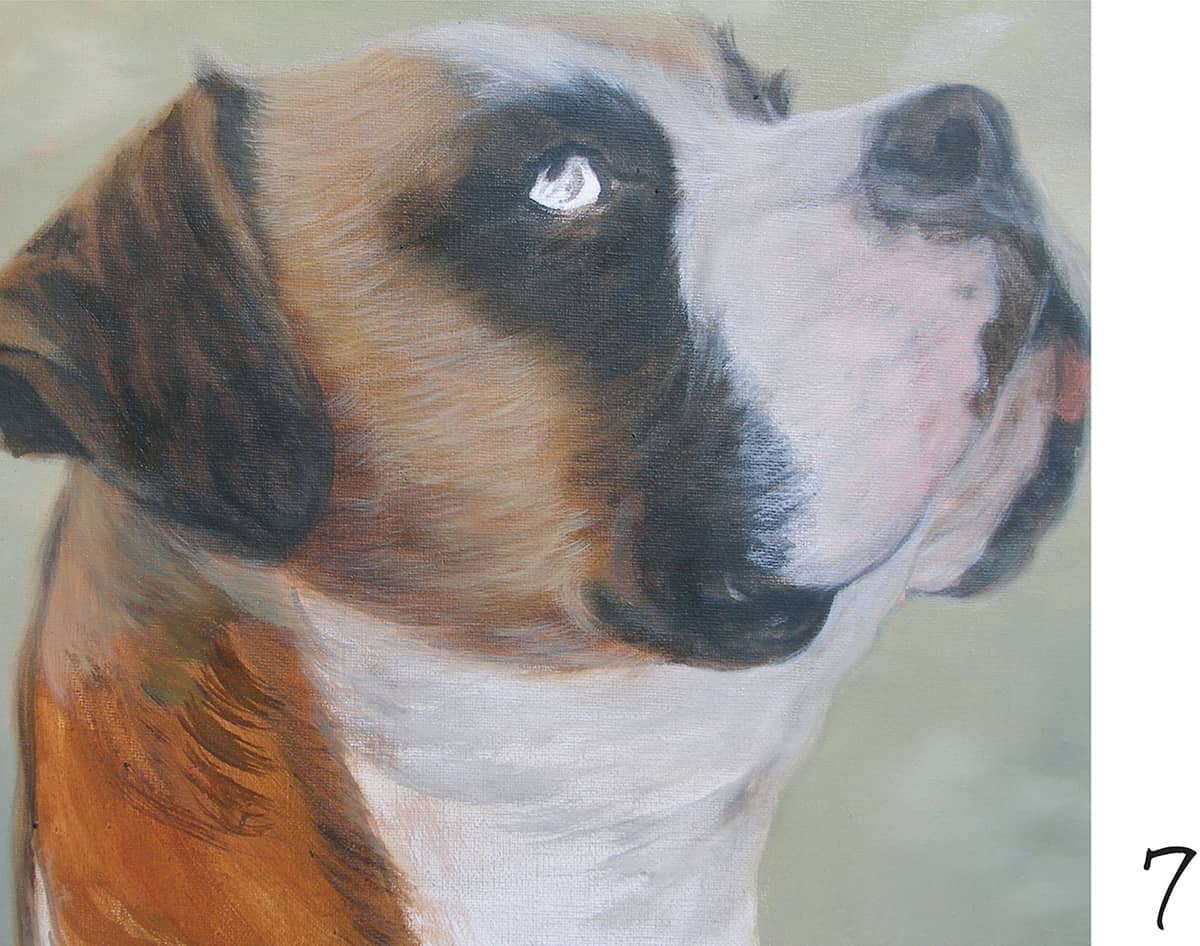
7 After applying layers of color and deepening the shadows, subtly add yellow ochres, burnt umbers, and muted cadmium reds to keep the fur warm.

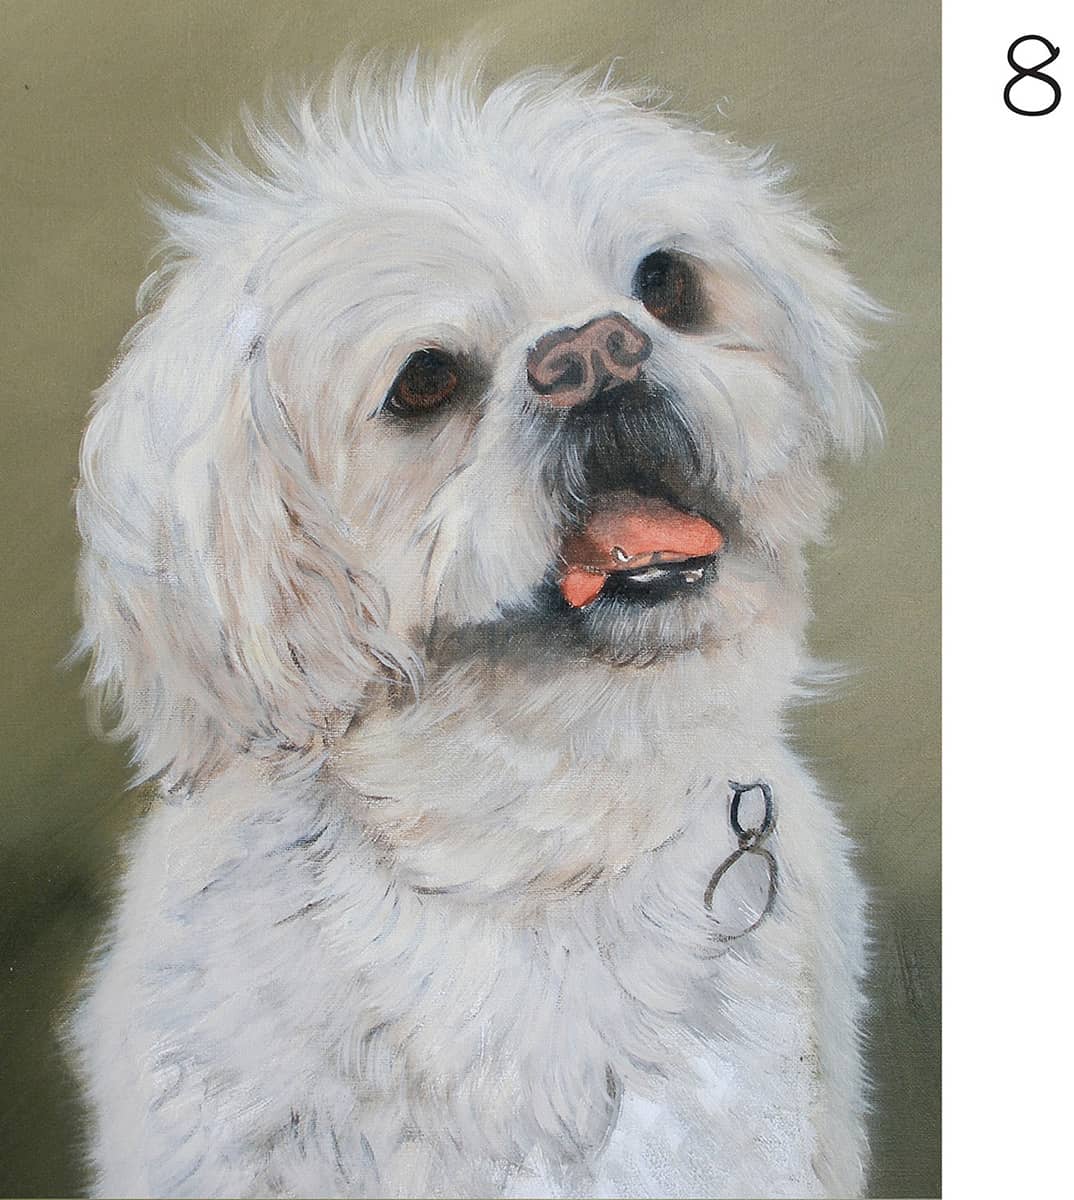
8 With the deep shadows complete, paint in the fur that catches the light using titanium white. Use a rigger brush to paint fine hairs and a fan brush on the chest to cover the area.
Collie
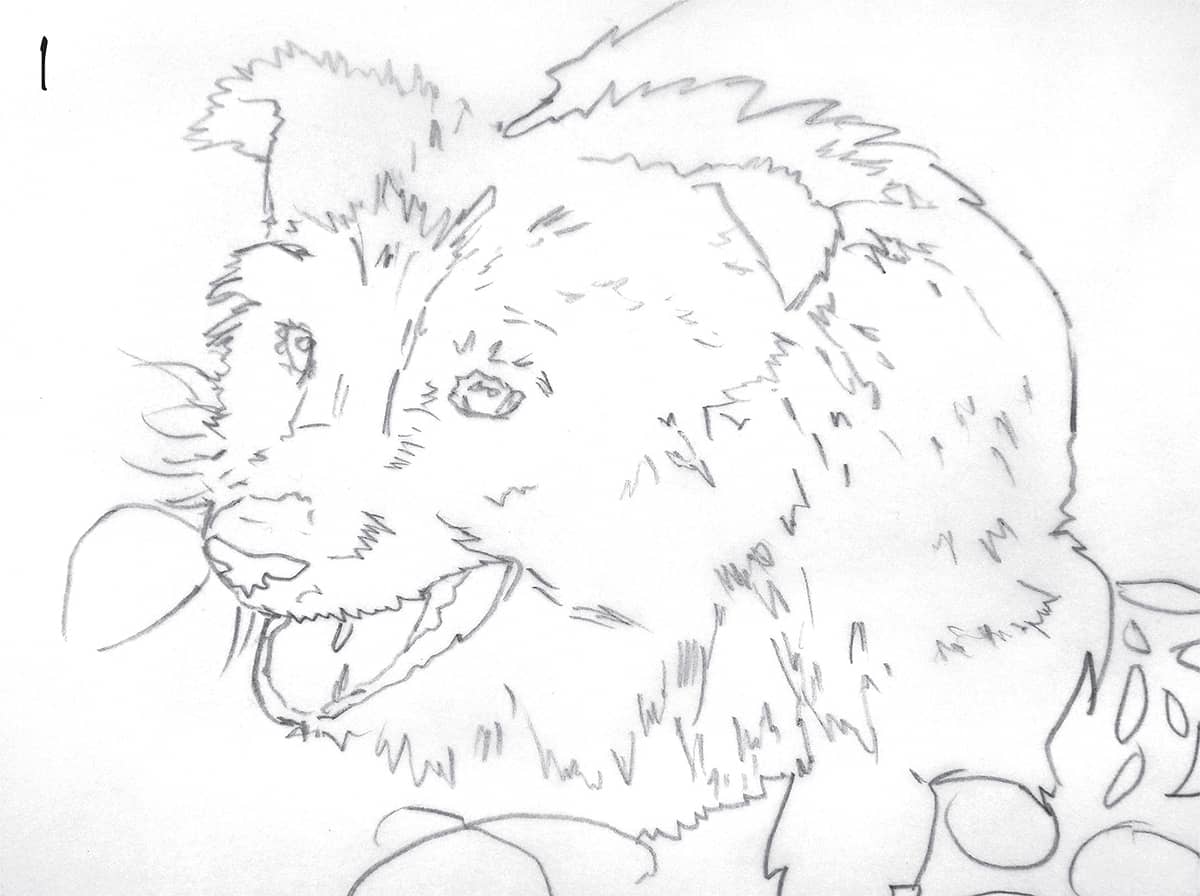
1 Sketch a composition working out the proportions.
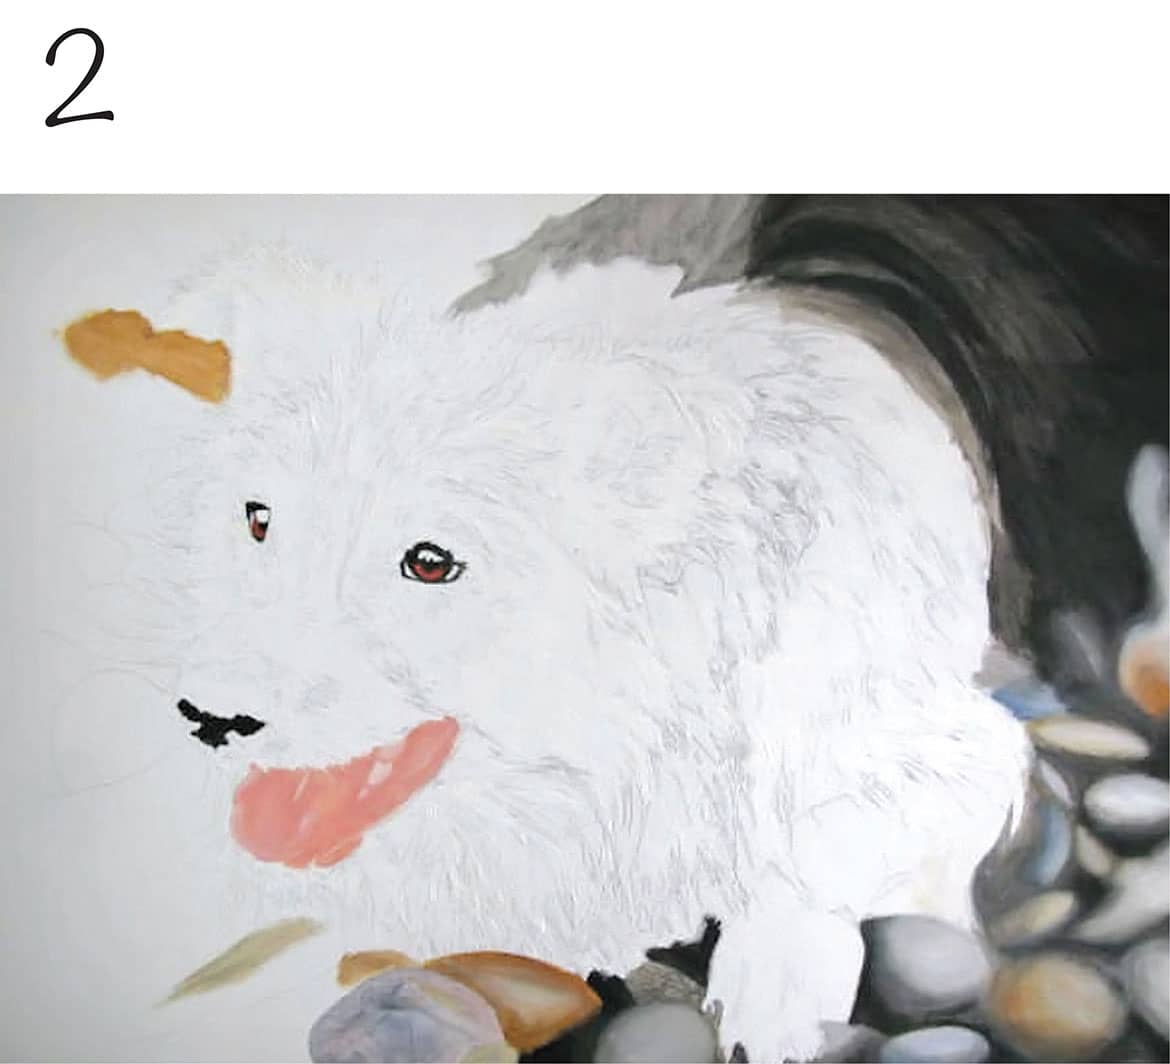
2 Establish the eyes, nose, and mouth first. Paint in Mars black at the back of the body. Then paint the pebbles, using earthy colors and immediately conveying their rounded forms.
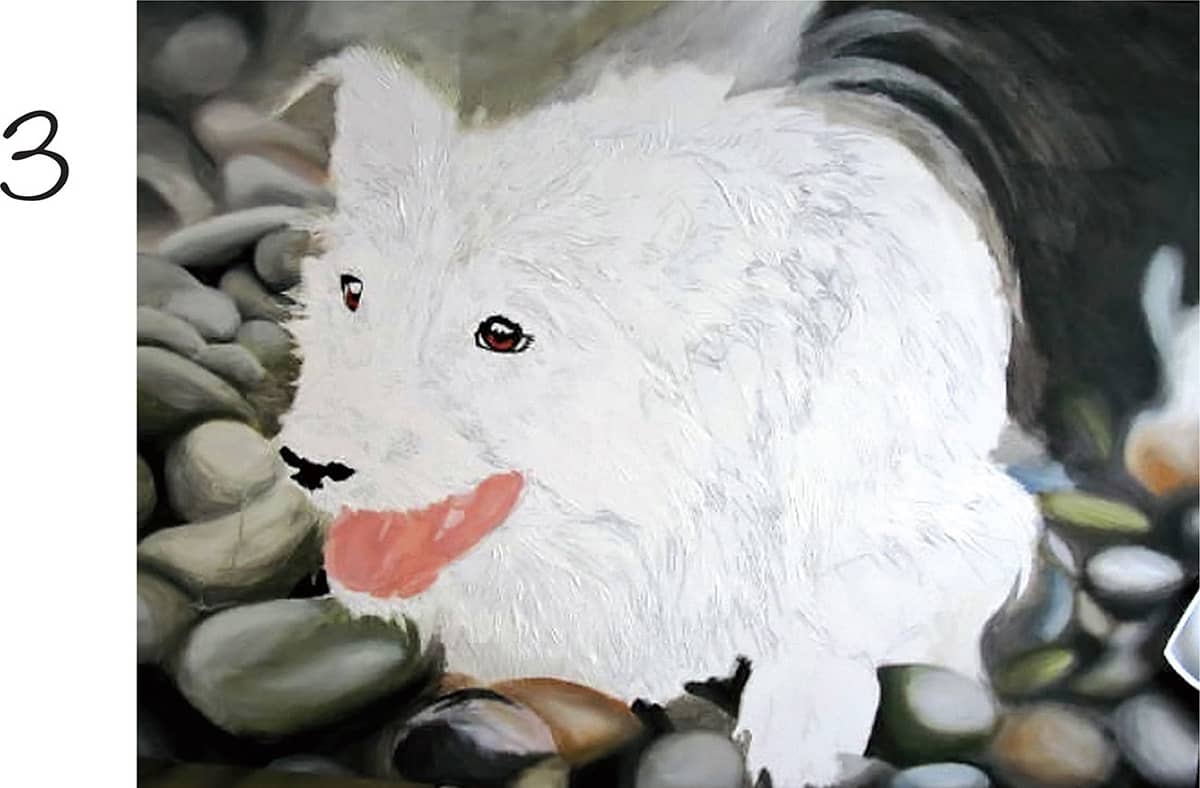
3 Continue blocking in the pebbles with earth tones. Then unify the pebbles by adding some greens, adjusting these colors and toning them down later on in the process if necessary.

4 To suggest clumped strands of wet hair, first stroke on texture paste and allow it to dry, which will give the coat coarseness and dimension. Then start painting the shadows in the fur and lay down base colors of pinks and browns in the ears, under the eyes, and along the mouth. Apply another layer of black on the back of the body and use flesh tint and a touch of black on the front paw.
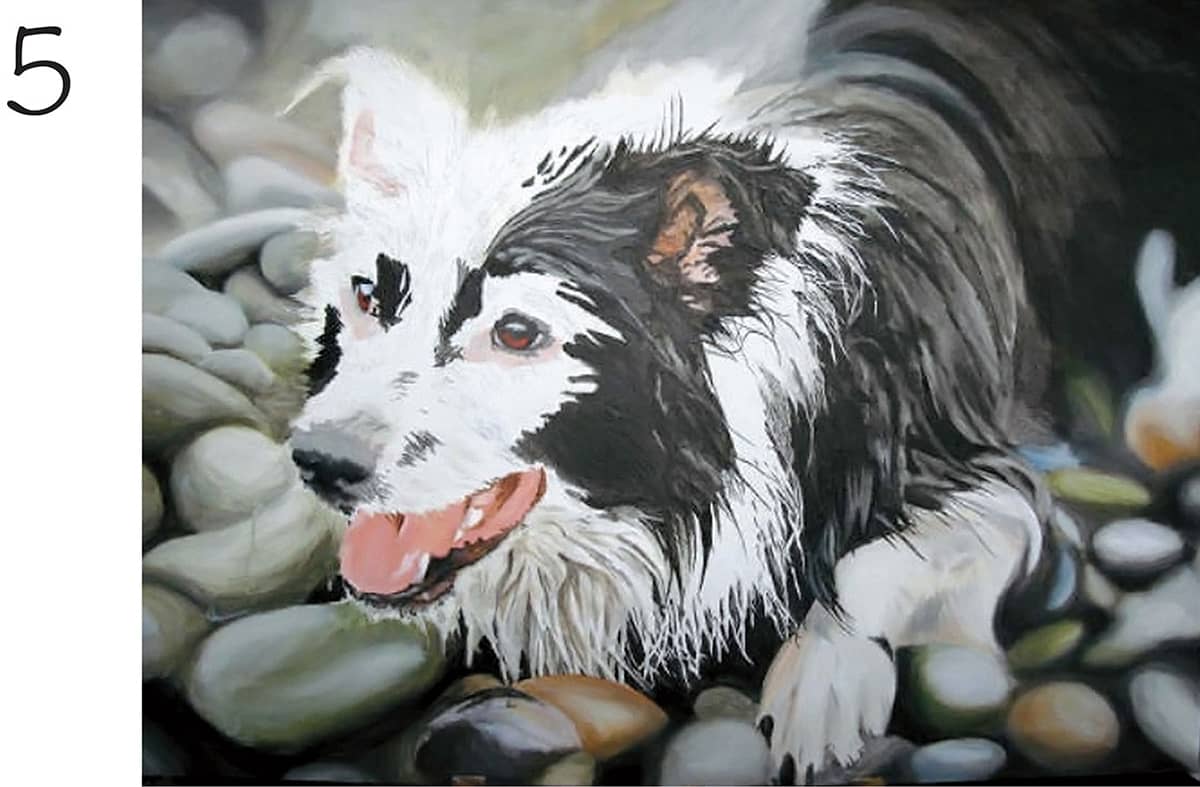
5 Begin painting the black fur, following the details of the sketch.
6 Paint the areas of black and gray with a fine brush. Paint the blackest shadow areas first and use diluted Mars black and Payne’s gray for the shine on the black areas, gradually working around the face.
7 Begin to embellish the details, add more colors in the coat, and correct the tonal values. Add some glazes of cool blues and warm browns over the black areas to create interesting values. Adjust the tonal values on the pebbles to make them cooler in color and less bright, if desired. Then paint finer detail on the head, using warmer tones to bring the dog forward.
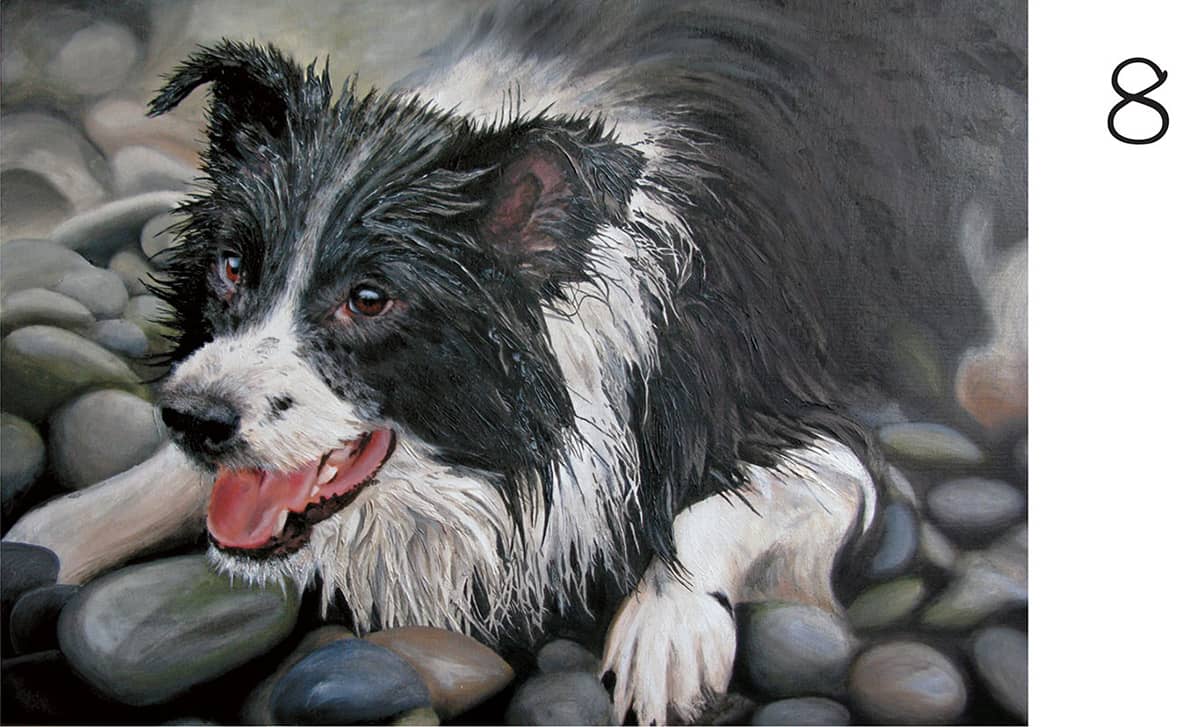
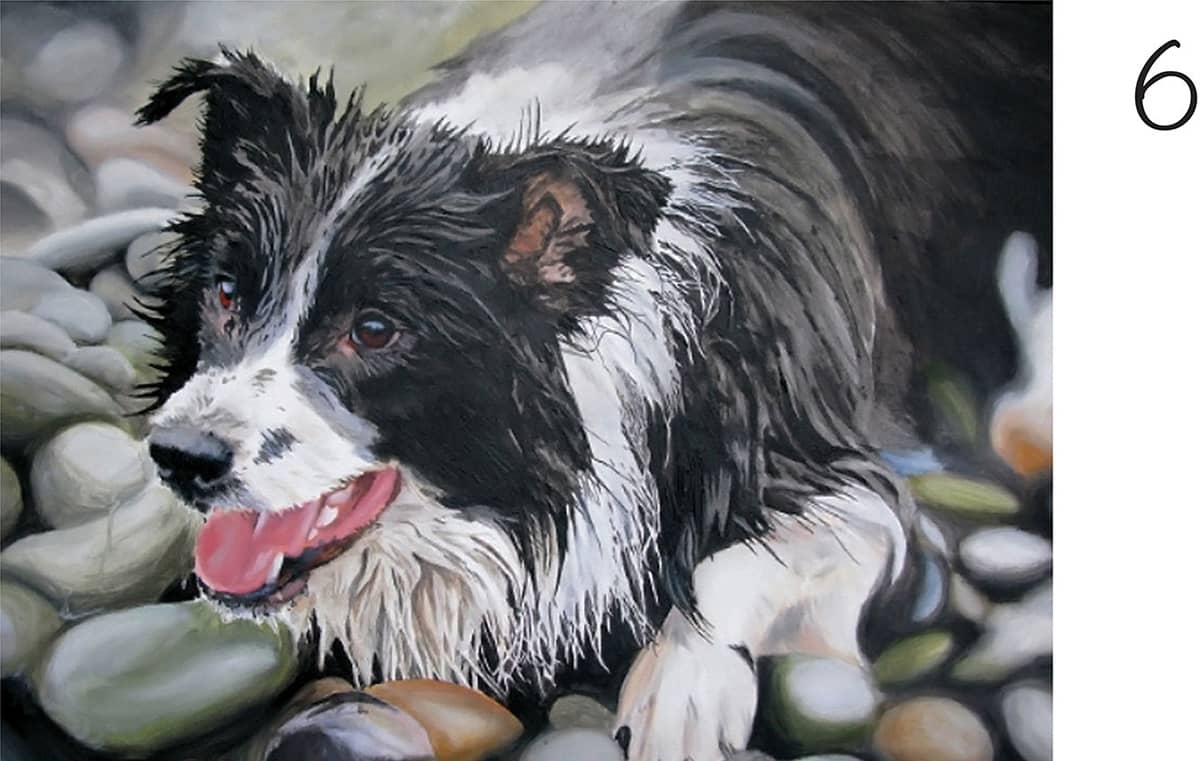
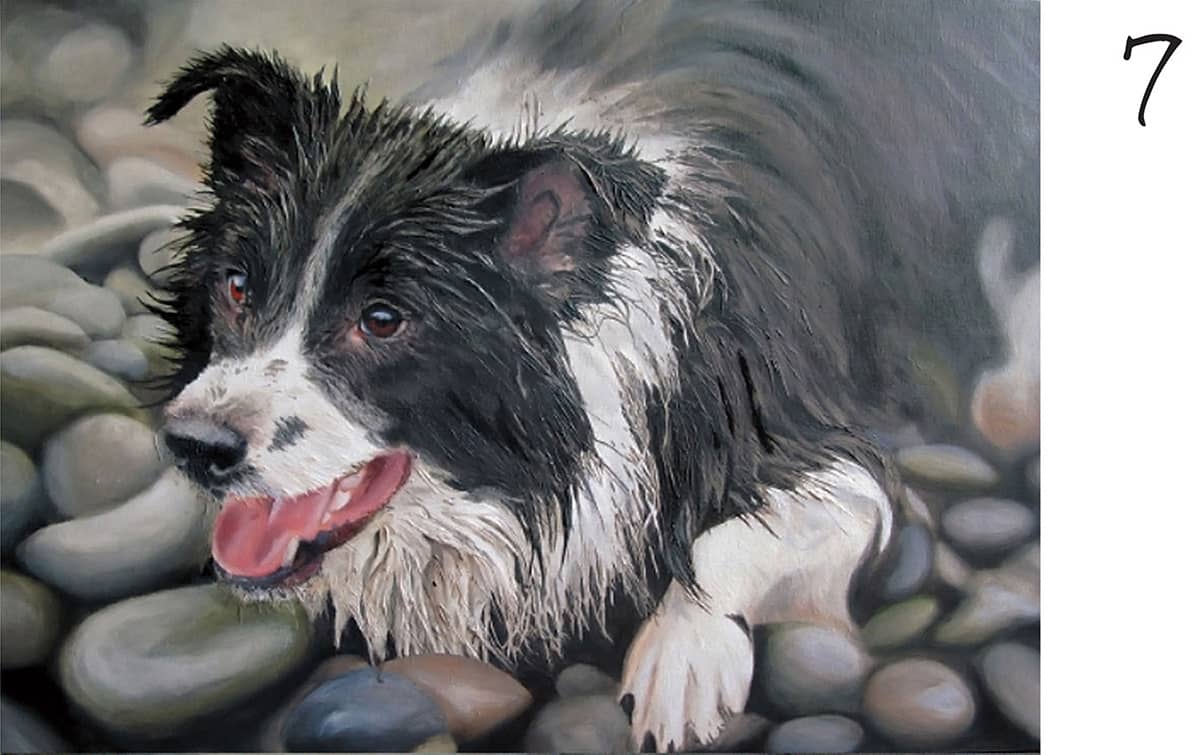
8 Lightly indicate the right paw, scuffing white and blue paint over texture paste to enhance the highlights.
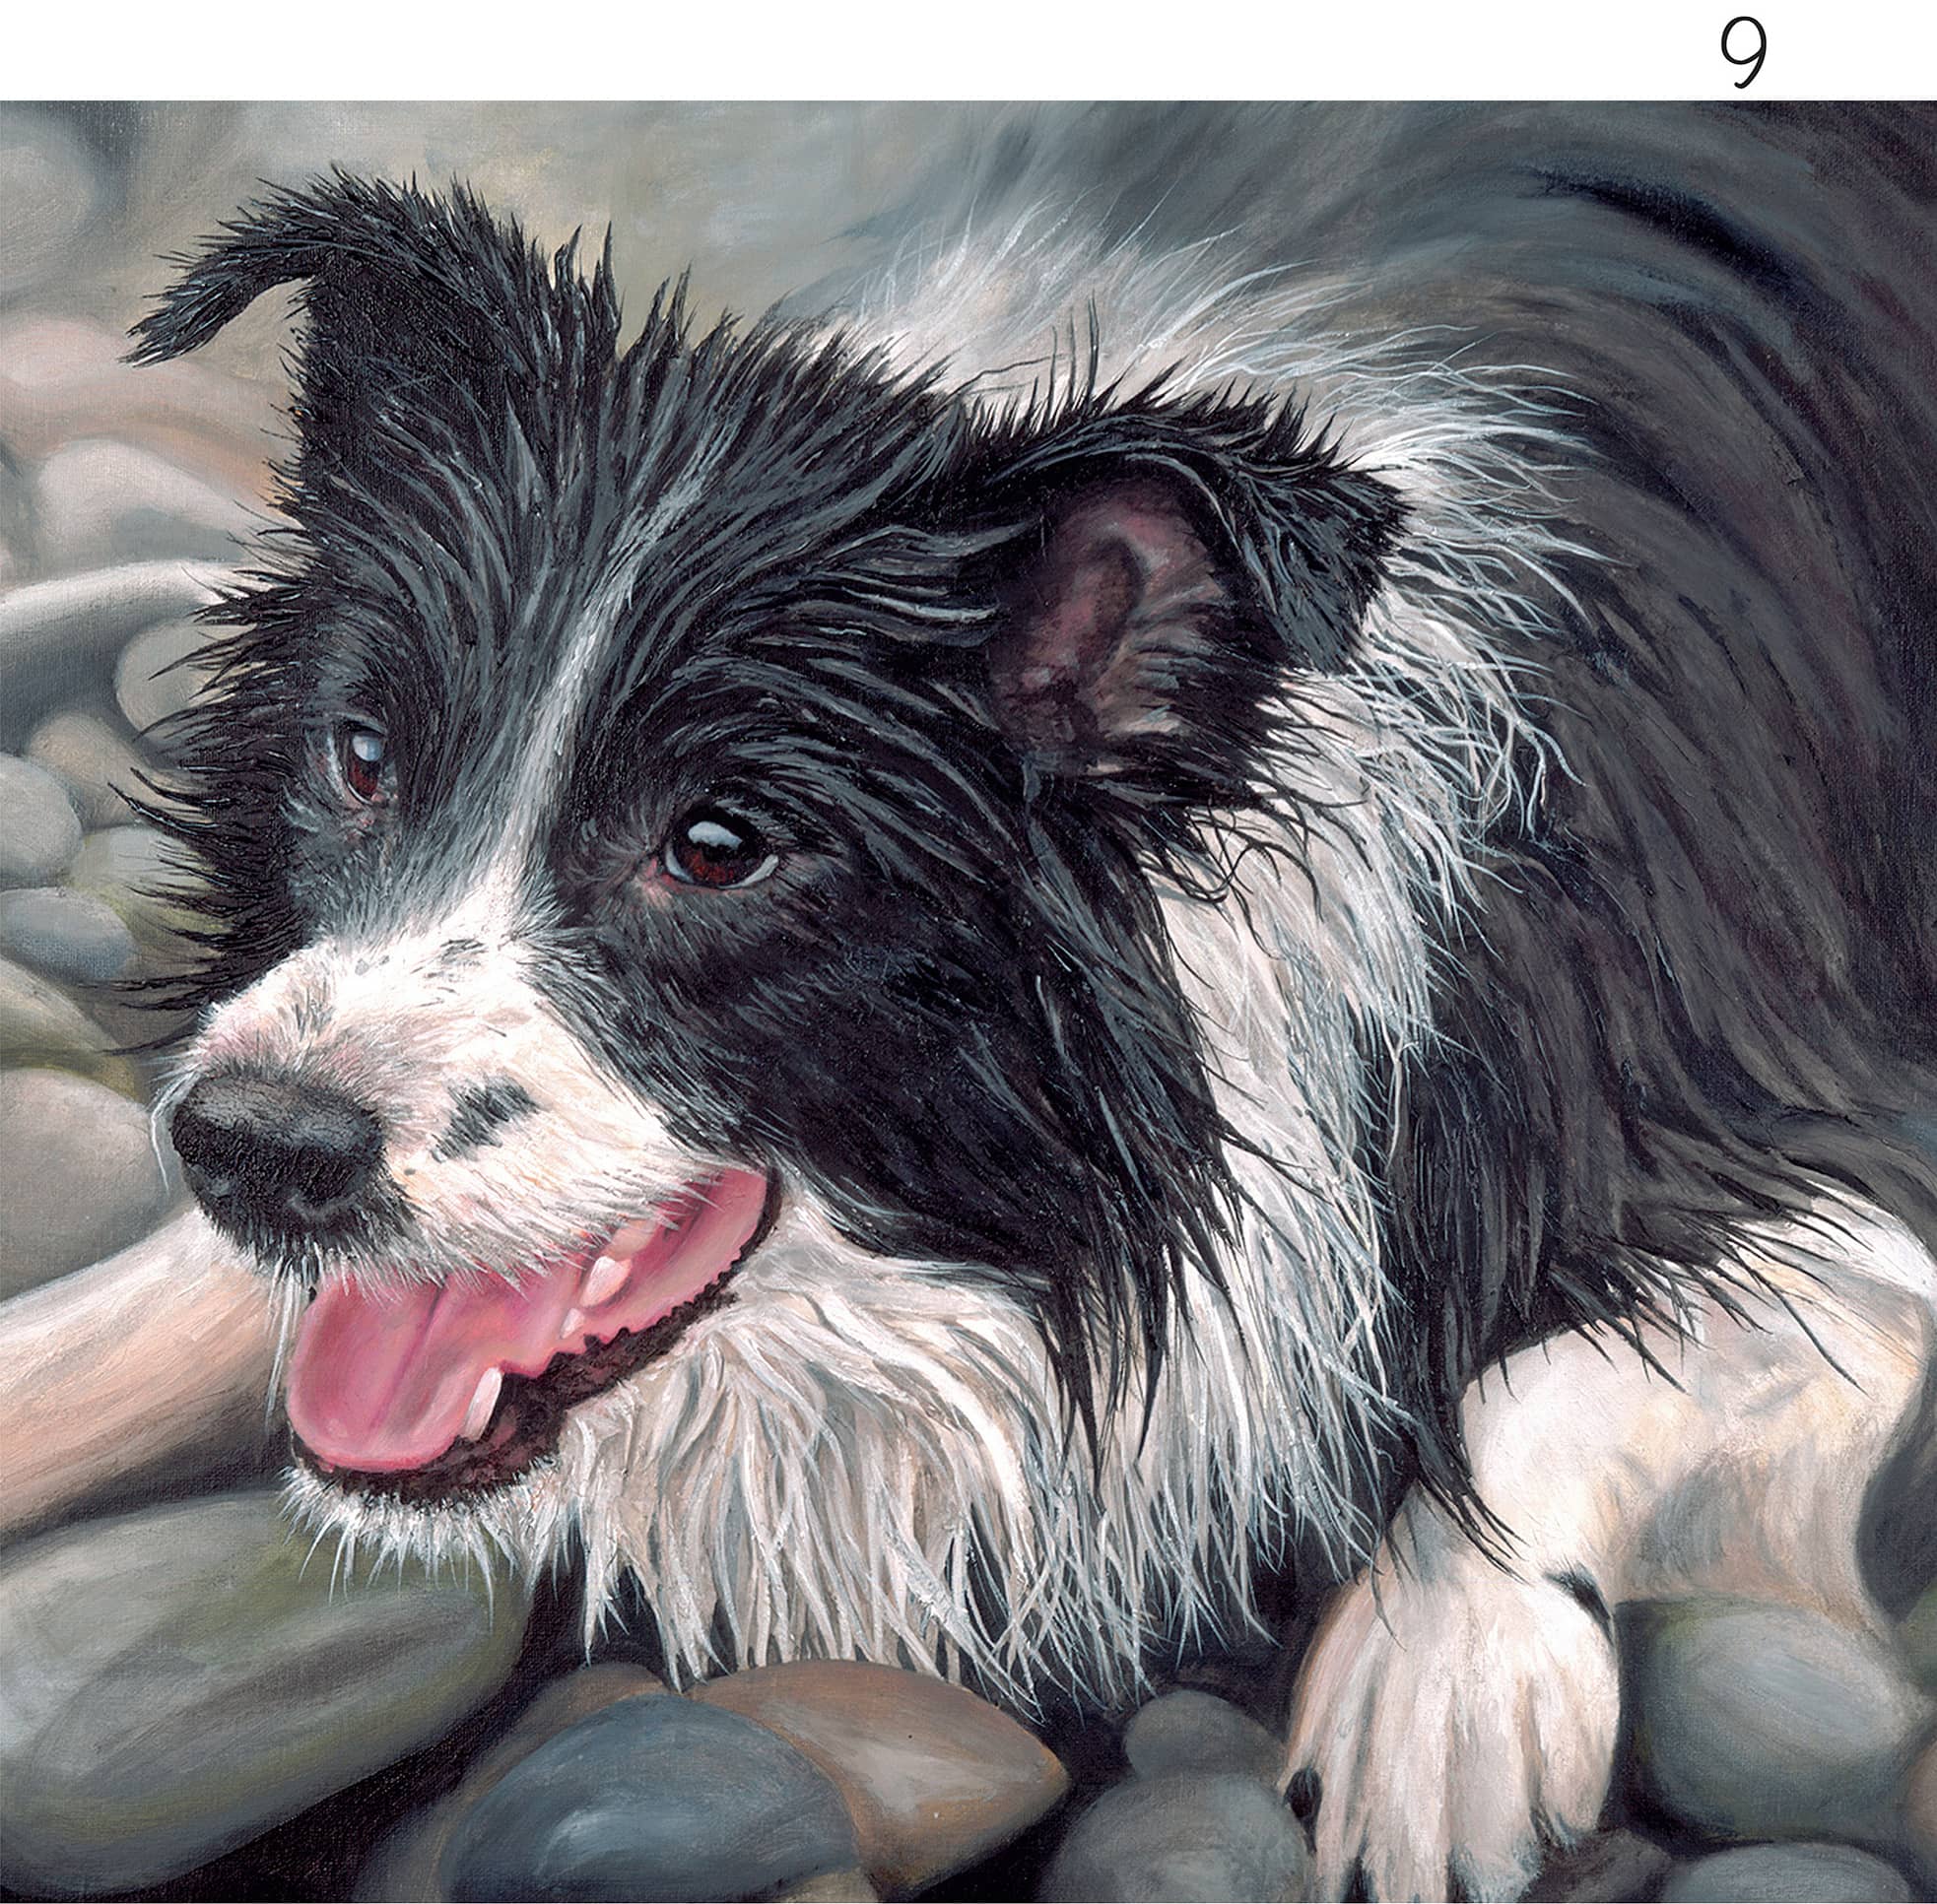
9 Finish detailing the fur with various shades of black, gray, white, blue, and brown. Use a watercolor sable brush and rigger brush to achieve the long, fine, wavy look of the fur. Continue to use texture paste to give the fur a shiny, wet appearance. Lastly, scumble more pinks, reds, purples, and browns onto the mouth for depth, paint the white fur on the muzzle, and add definition to the eyes.
Boxer
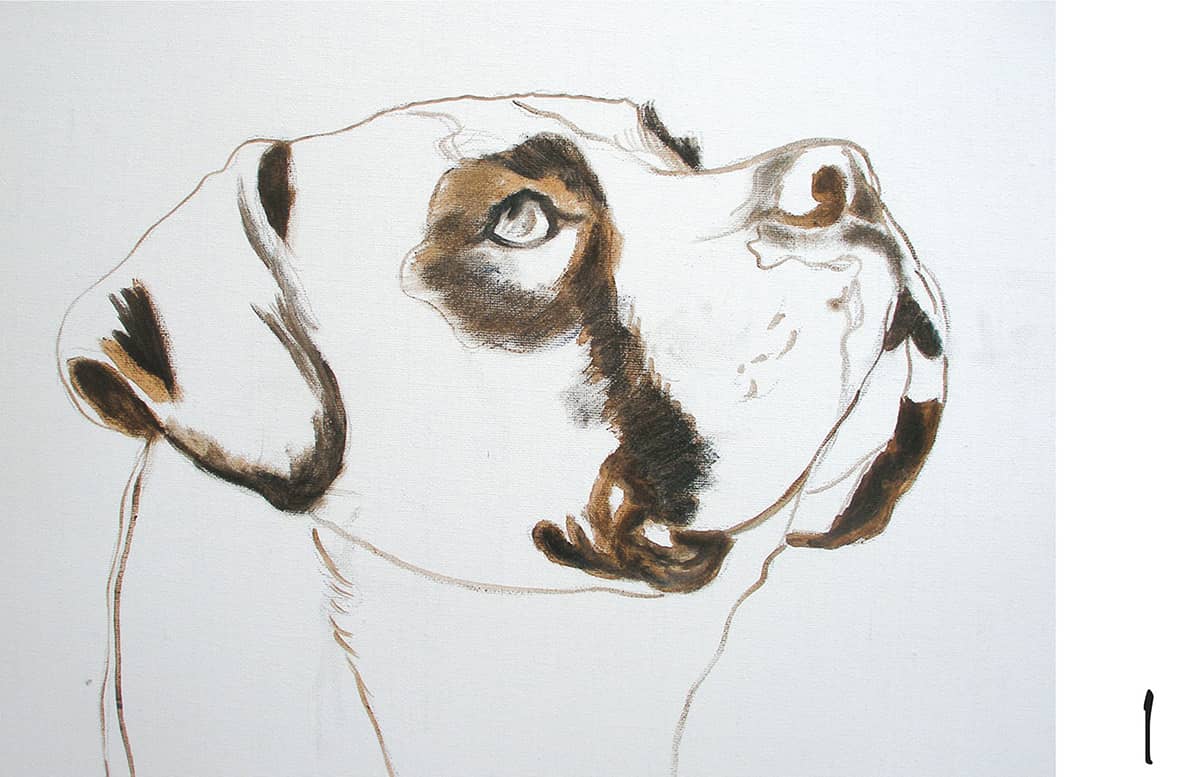
1 Use an HB pencil to sketch the dog. Then, using a small round brush and a thin mix of raw umber and ultramarine blue, roughly paint in the outline and darker areas.
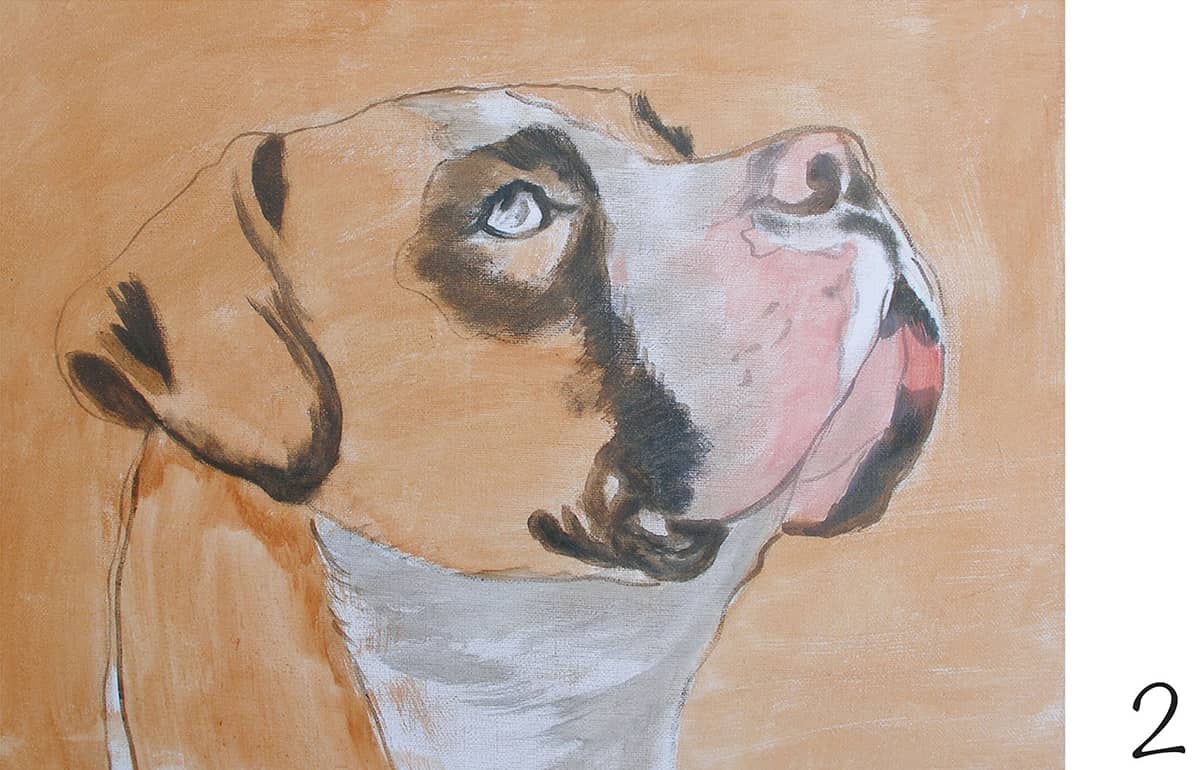
2 Using a large flat brush and a very thin mix of burnt sienna, cover the background and part of the dog’s face to form to the underpainting. Mix cadmium red and white to make a thin, pale pink for the undercolor of the mouth and muzzle area. The pink will show through when other layers are applied. Use a smaller round brush o apply. Next, paint in a thin mix of raw umber and ultramarine blue for the undercolor of the neck shadows.
3 Using a medium brush and a mix of sap green and Naples yellow, apply rough crisscross brushstrokes over the background; however, do not mix the two colors together completely in order to produce a mottled look.
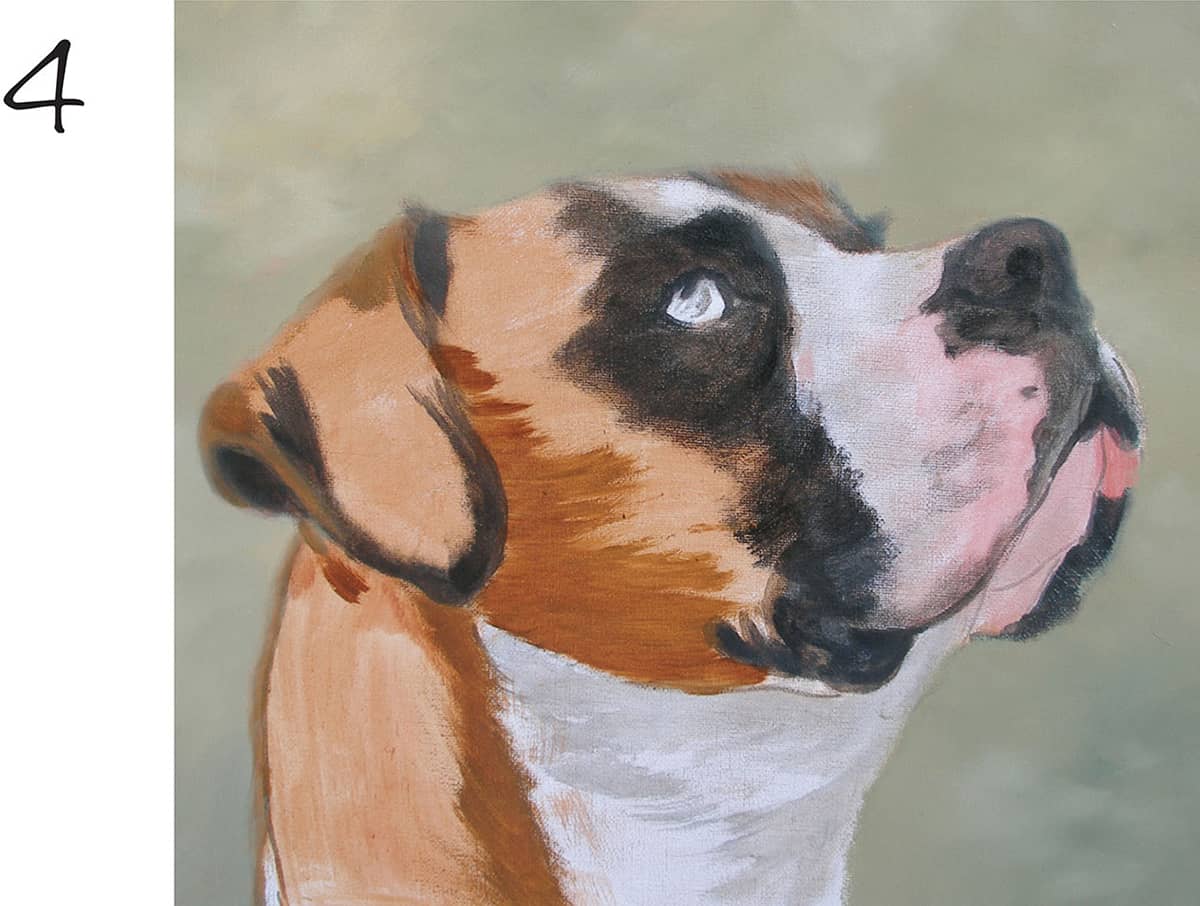
4 Use a large, dry, soft varnish brush to gently brush over the background, softening the edges of the outline. While the background is still wet, mix raw umber and ultramarine blue and paint another layer on the dark areas around the eyes, nose, and ear.
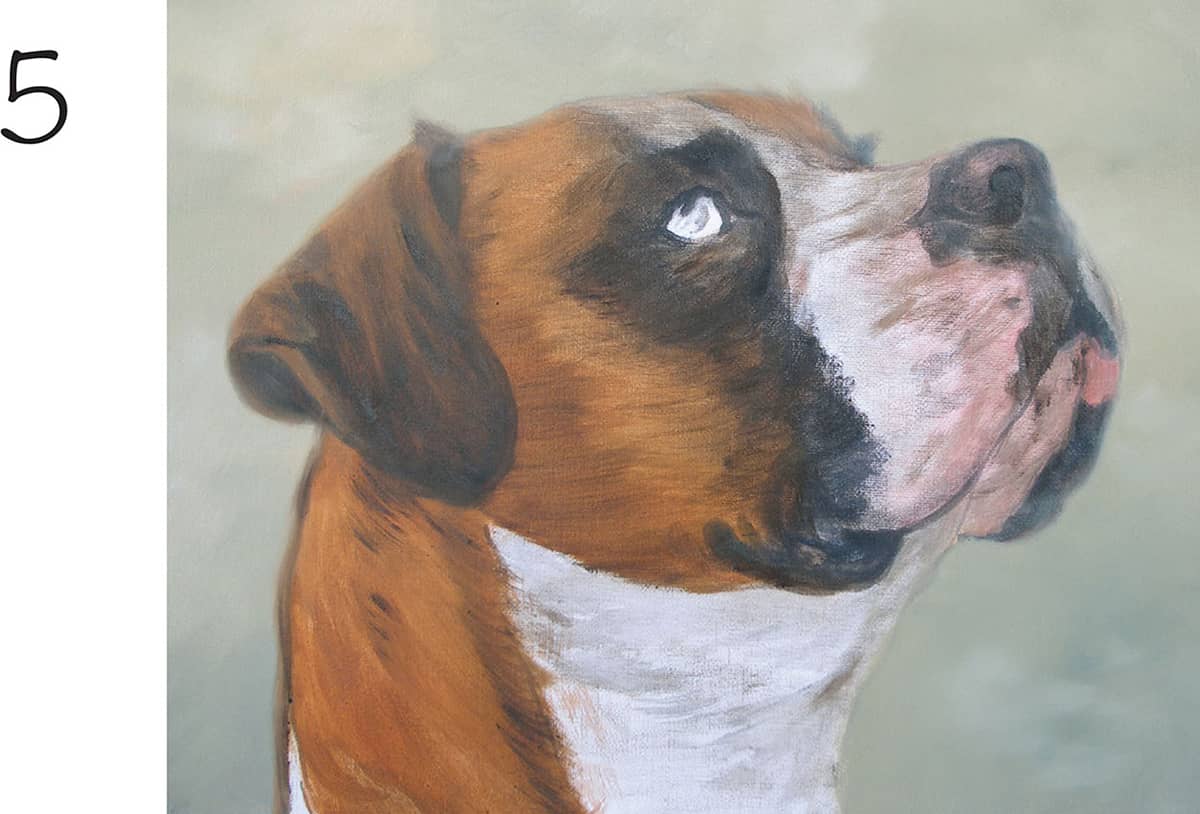
5 With a mix of burnt sienna, raw umber, and raw sienna, use a medium brush to paint in the darker brown areas next to the ear and down the neck. While this layer is still wet, paint a thin mix of raw sienna and a bit of burnt sienna on the lighter parts of the neck and head.
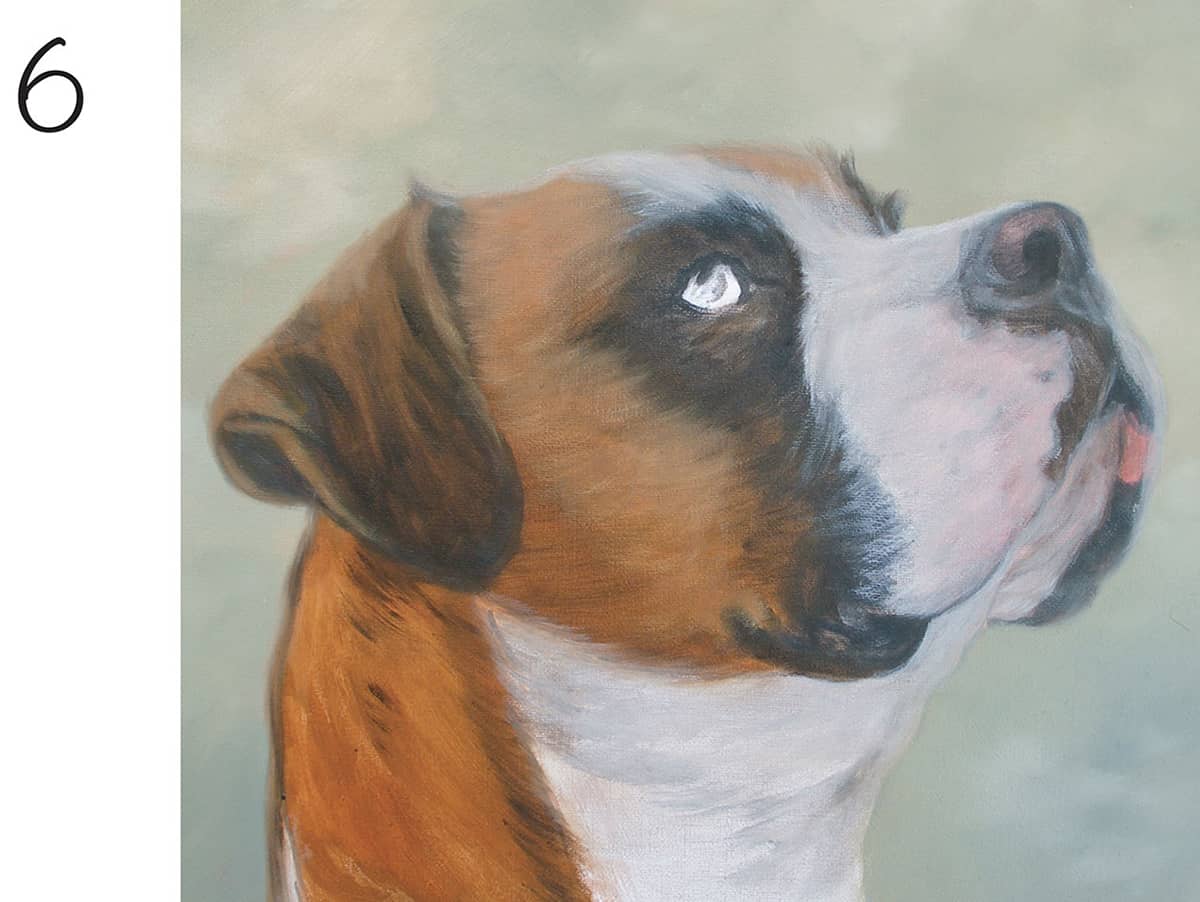
6 Using a small dry brush and a dry mix of raw umber and ultramarine blue, rub over the muzzle area. Start building up the white layers on the face. Using a medium brush, mix a medium consistency of white with touches of raw umber and yellow ochre to create a yellowish cream. Brush rough fur strokes over the forehead, face, and neck, allowing the pink on the muzzle to show through.
7 Allow the painting to dry. Combine another mix of yellow ochre, white, and a touch of raw umber; use a medium round brush to paint in the lighter fur strokes. At the same time, use another medium round brush and a thin mix of raw umber to blend the cream edges. Using the same brush with the raw umber mix, paint in some dark fur texture wet-into-wet over the cream color on the neck.
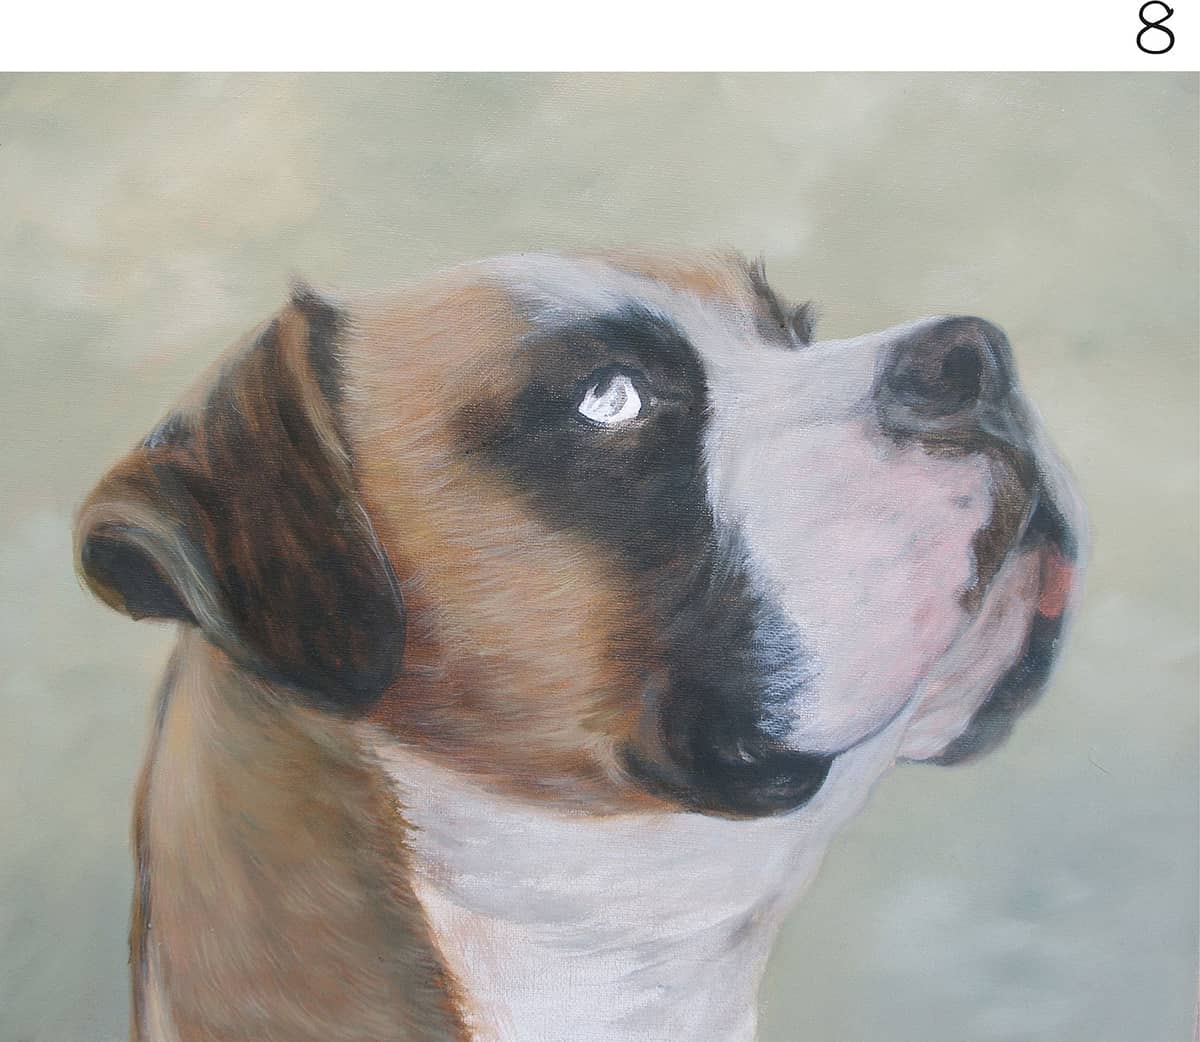
8 Build up the fur texture on the neck using two brushes and colors (one for the brown and one for the cream). Notice how the neck colors blend together nicely applyied at the same time. Paint the lighter colors on the ears.
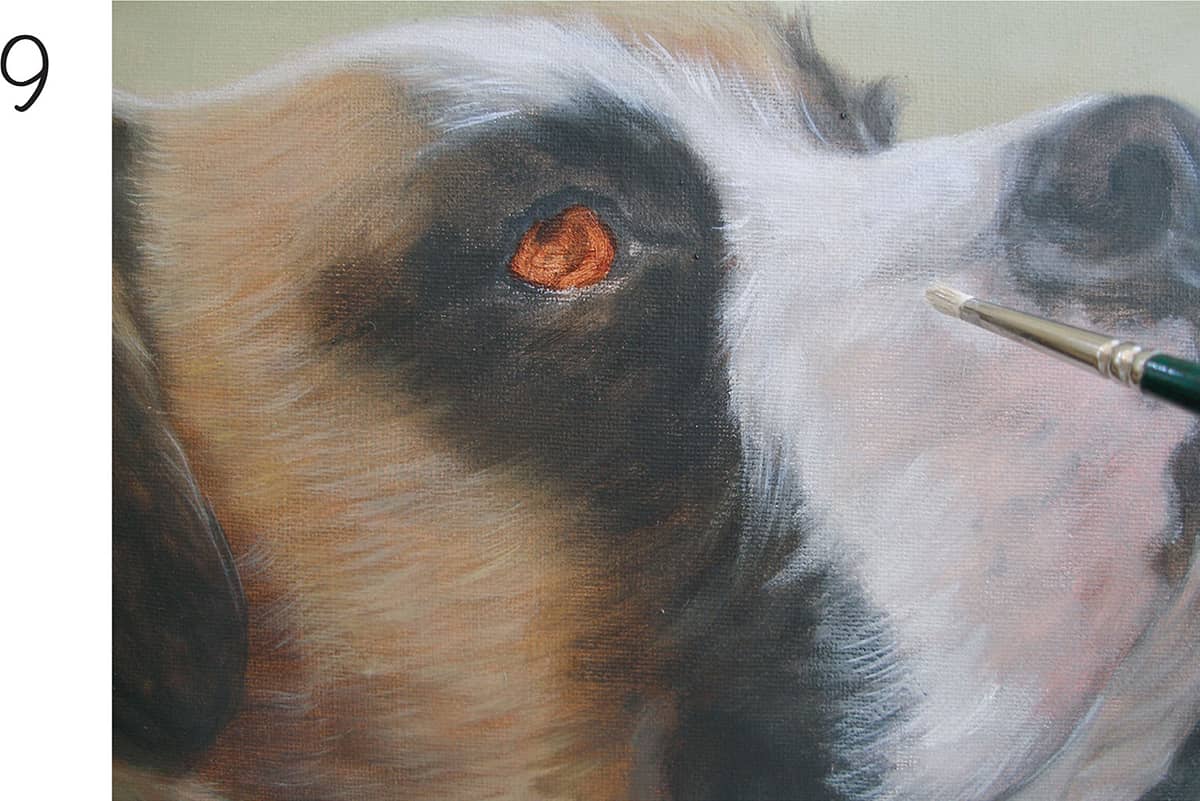
9 Using a small round brush and a thin mix of white and yellow ochre, brush the thin strands of white fur on the face. Then, using a larger round brush, paint a topcoat on the face using white toned down with a small touch of yellow ochre. Add a thin mix of burnt sienna in the eye as the base color.
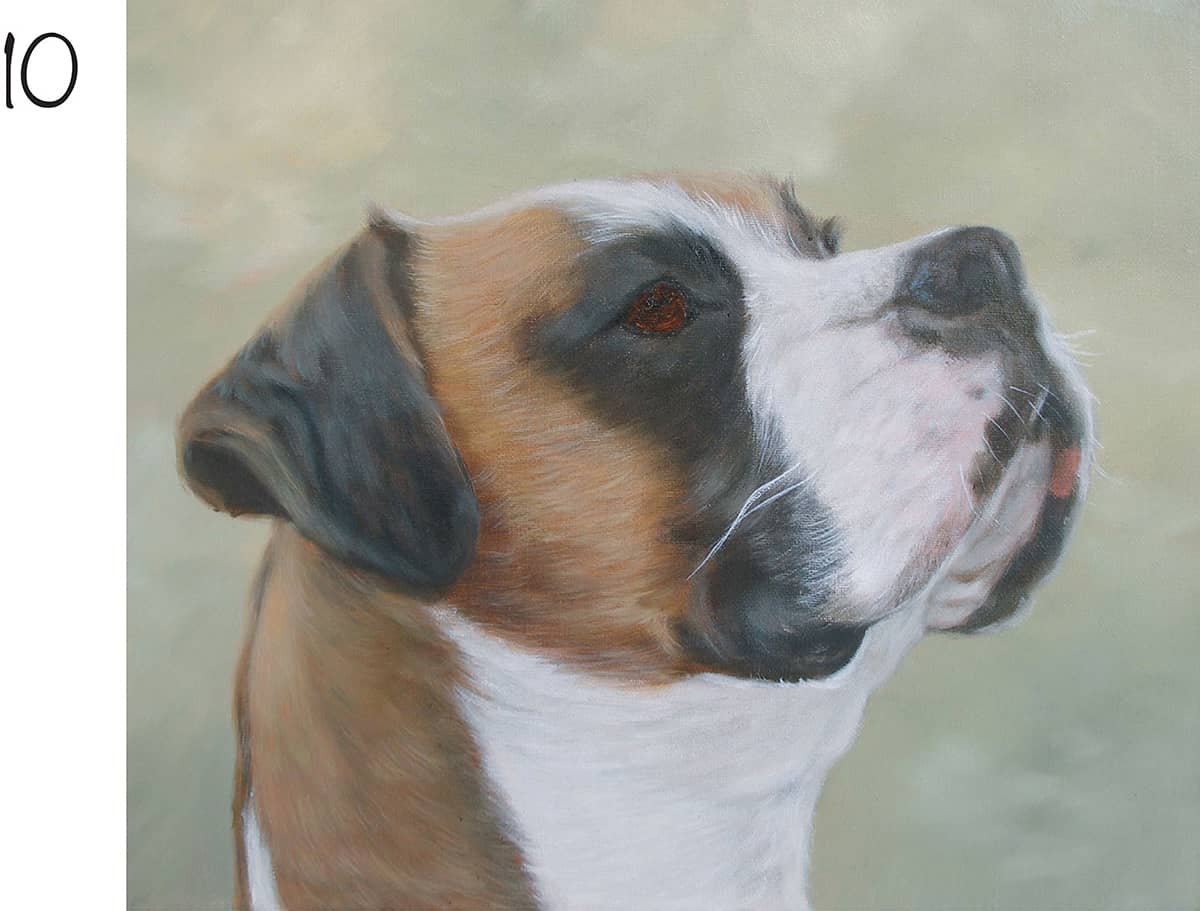
10 Using the same brush, apply the white mix from step 9 onto the neck. Using a rigger brush and a thin mix of white, flick in the whiskers. With a medium round brush and white mixed with a bit of yellow ochre, paint an extra layer on the middle and lower neck to lighten it. Finally, paint a layer of raw umber to tone down the eye color.
11 Add in more of the dark color on the ear and nose, using a small round brush and a mix of raw umber and ultramarine blue. While still wet, add some white to the mix and place highlights on the ears and nose; blend with a soft, dry brush. Add a highlight to the eye using a very small round brush and a thicker mix of ultramarine blue with a bit of white. While still wet, paint a tiny bit of white for the lightest highlight.
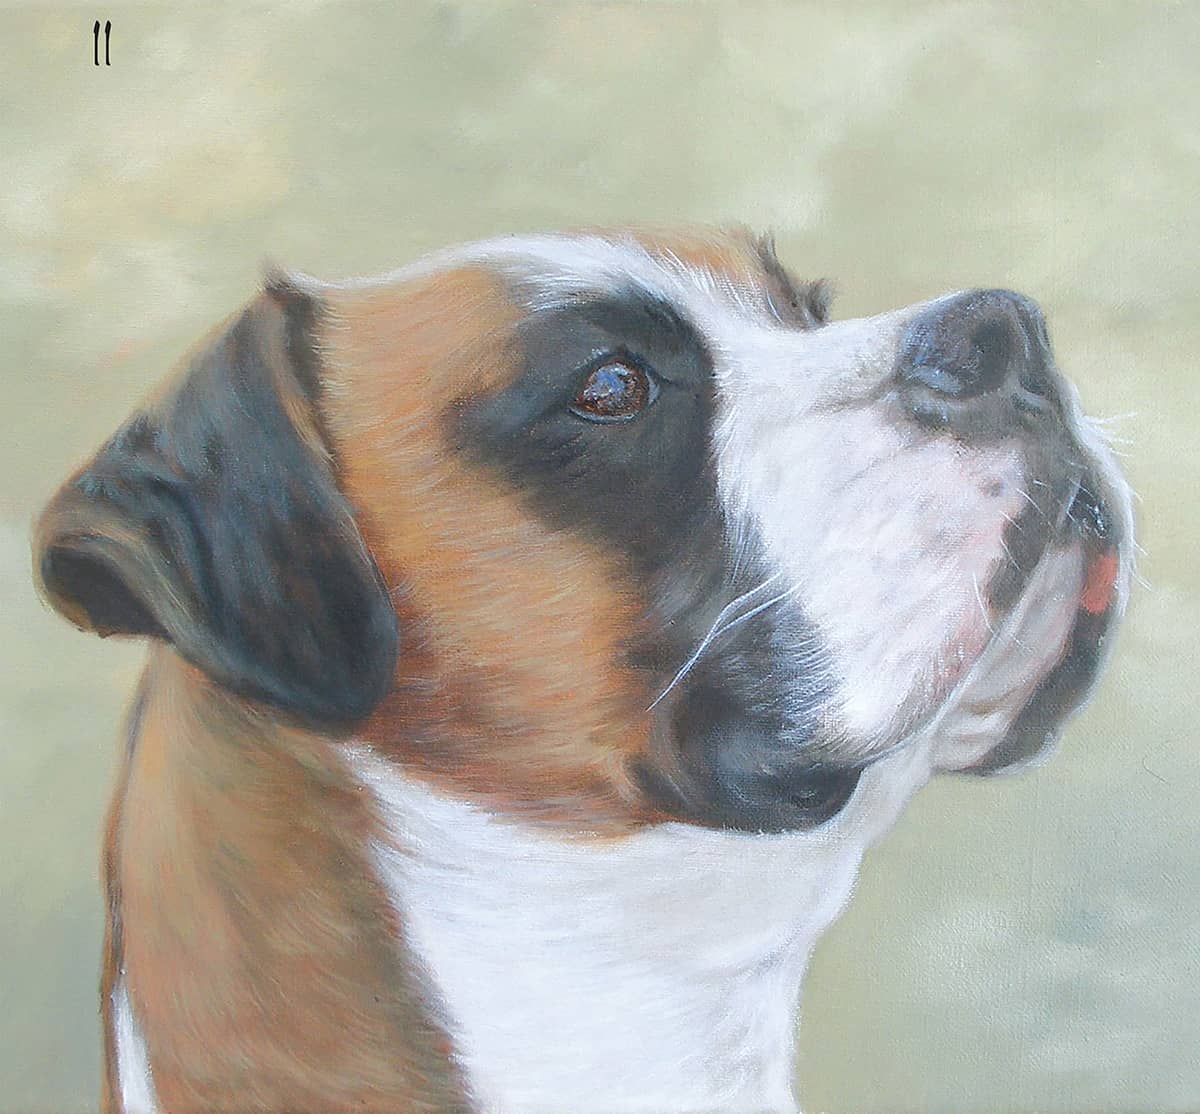
Dalmatian

1 Lightly sketch the dog on a canvas using an HB pencil. Paint over the outline with thinned burnt umber and a round brush.
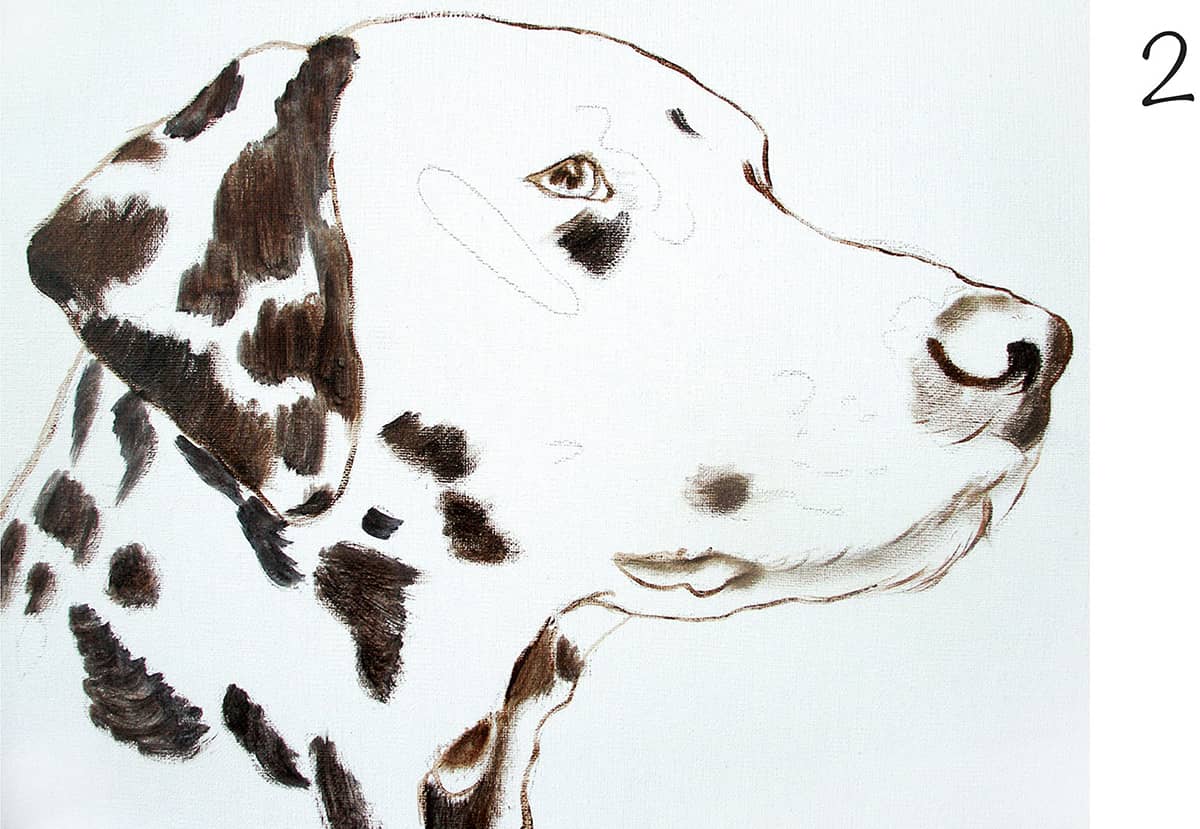
2 Using a mix of burnt umber and ultramarine blue, paint the dark spot with a small filbert. This is the undercolor.
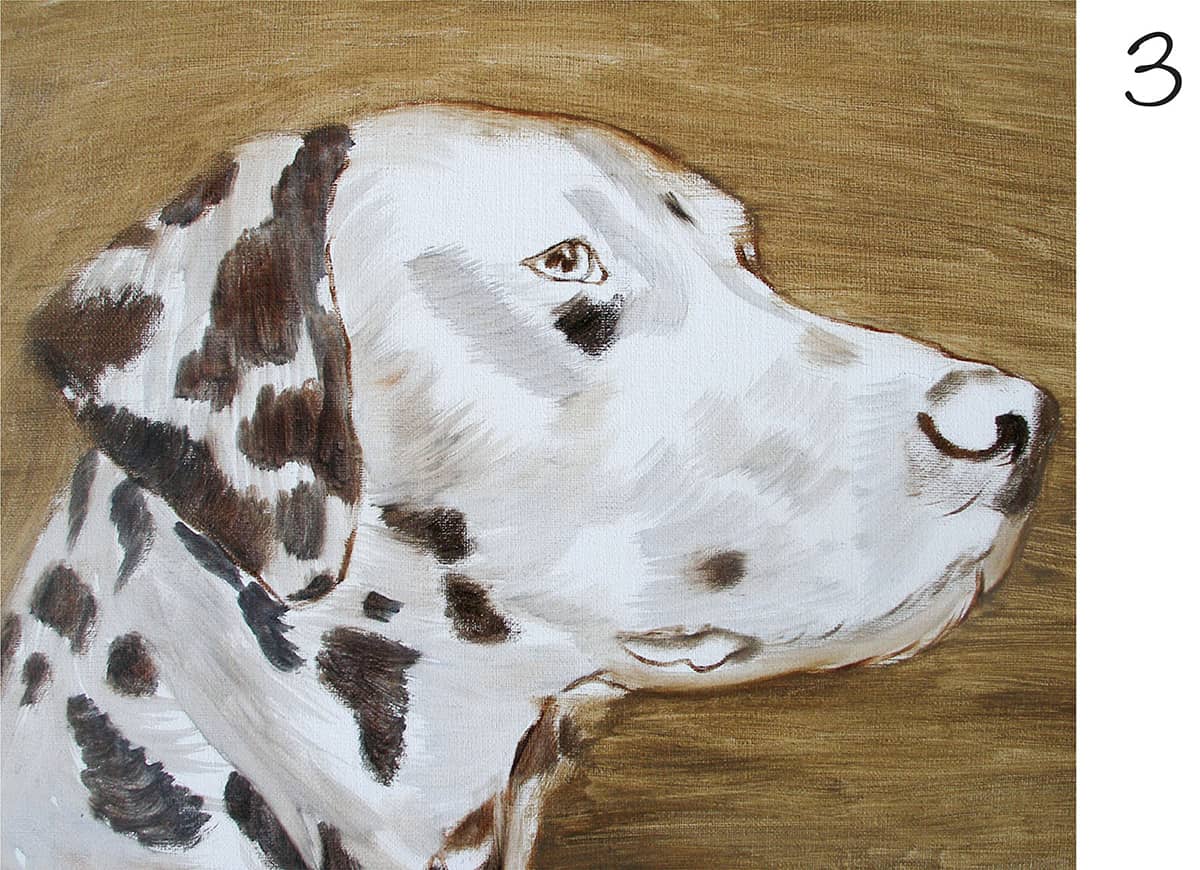
3. Mix a thin wash of burnt umber and paint the first background layer with a flat brush. While this dries, mix thinned ultramarine with a bit of burnt umber; paint the shadows in the white fur with a filbert, keeping the application thin. Let your painting dry for a day if using oils. If you are using acrylics, the painting will dry quickly and you can continue.
4 For the second background layer, apply a slightly thicker wash of raw umber and white. While the paint is wet, I blend in some white and yellow ochre; then paint another layer on the dog’s dark spots, using a mix of burnt umber and ultramarine blue. While the paint is wet, create a thin mix of white and burnt umber and paint a rough undercolor in the shadow areas of the white fur and the white part of the ear, blending into the dark spots to create a softer look.
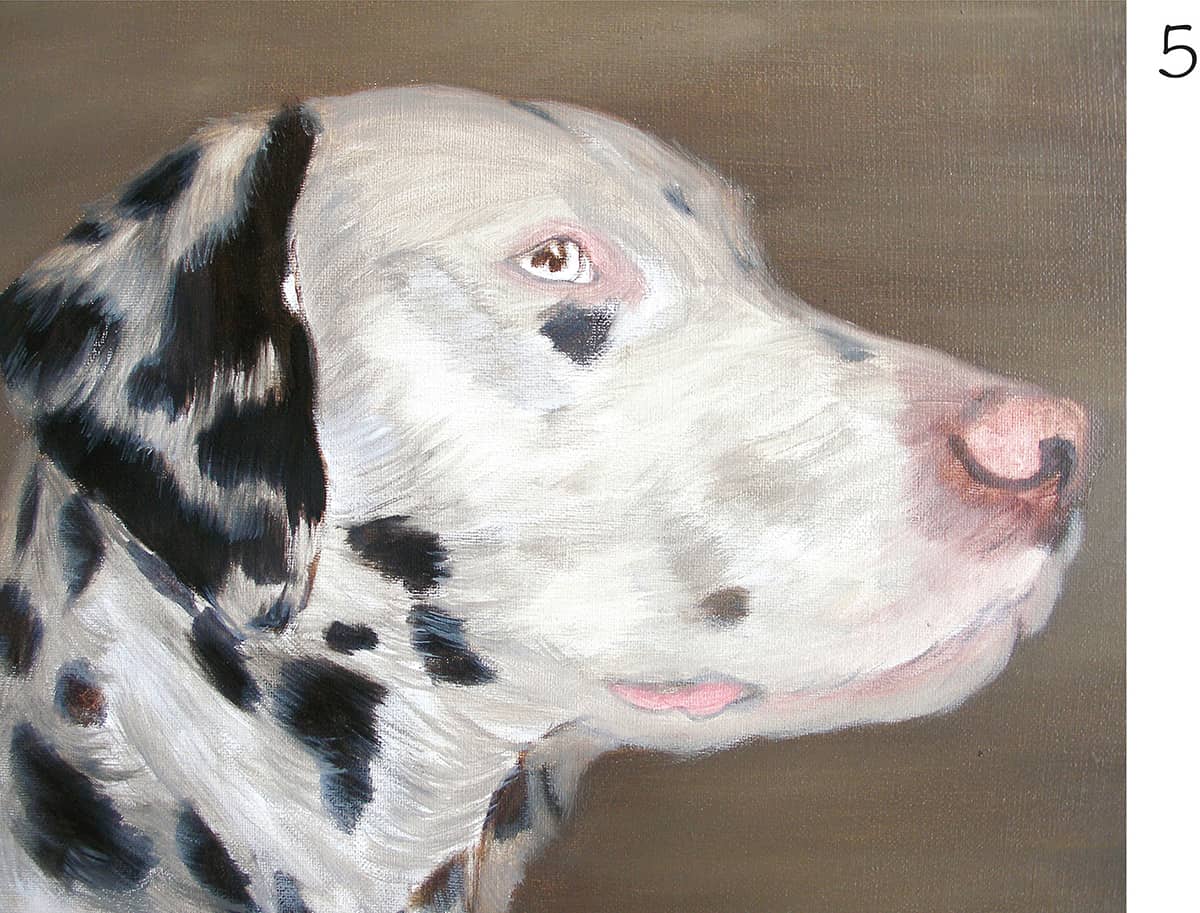
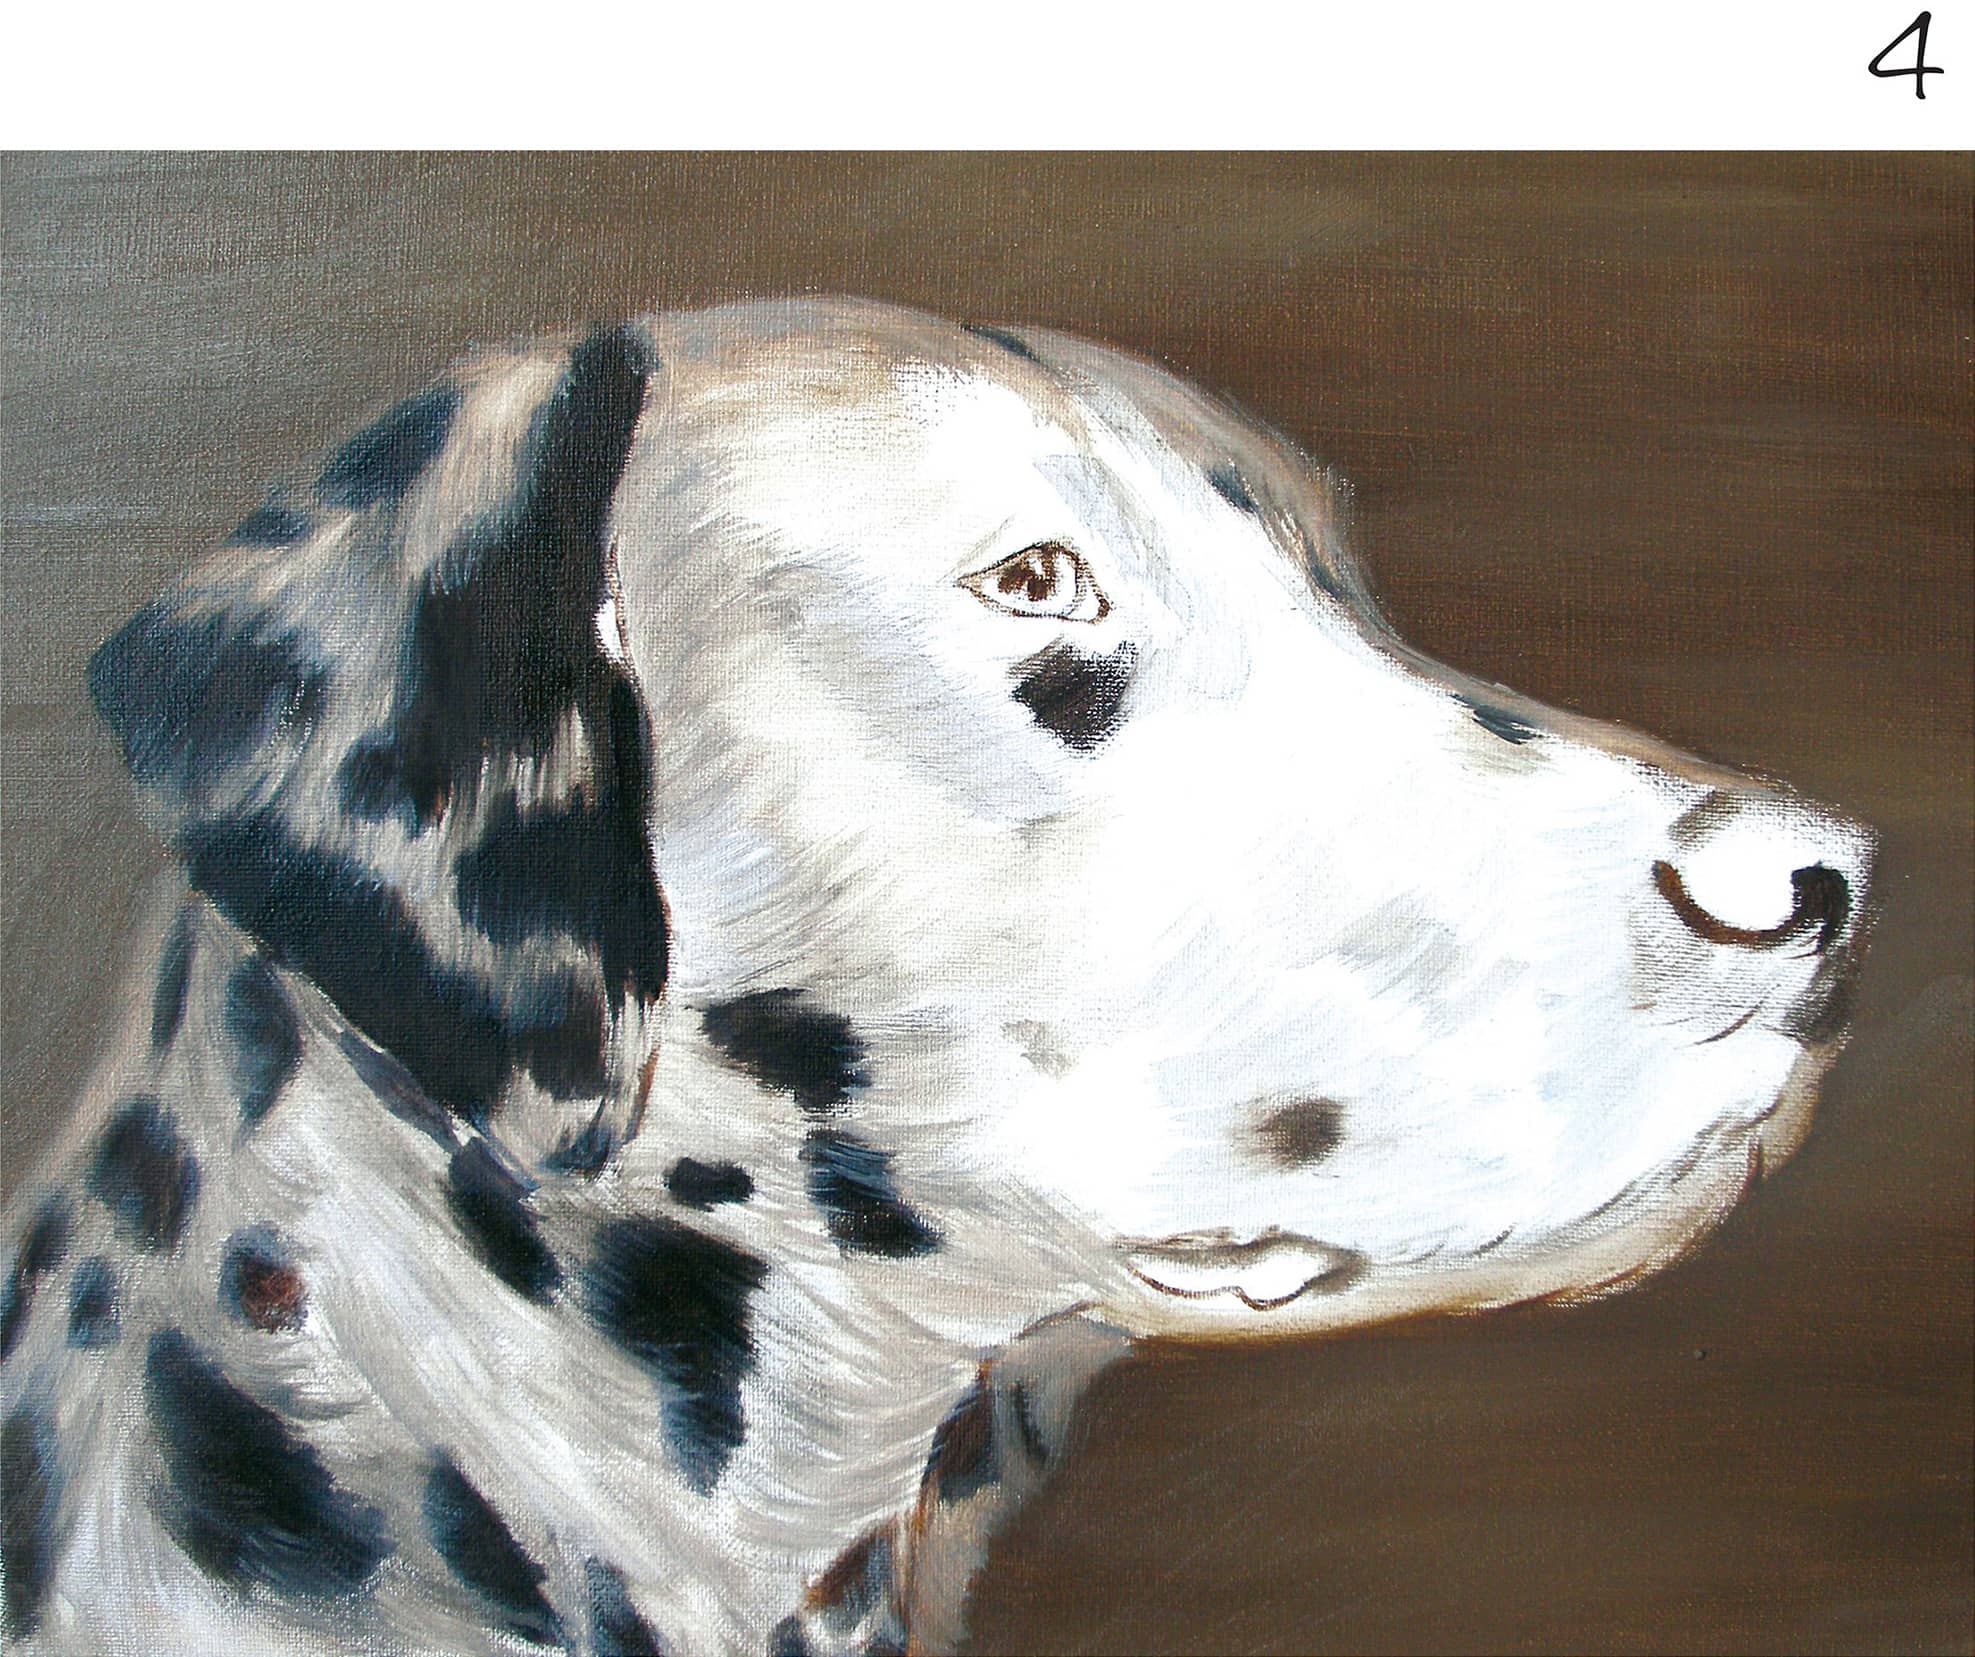
5 With a mix of cadmium red, alizarin crimson, and white and paint a very thin layer on the dog’s nose, mouth, and around the eye. Mix some burnt umber and alizarin crimson for the darker area around the nose., and mix some cream for the undercolor of the muzzle.
6 Using slightly thicker paint and a small acrylic round brush, apply more dark color to the spots on the ear. If you are using acrylics, add slow-drying medium to this mix. Mix white with a tiny bit of burnt umber and yellow ochre to create a cream. With a small round brush, flick the cream into the edges of the wet black to create fur texture in the ear.
7 Paint the eye detail using burnt umber and a small round brush. With the same cream mixture from step 6, apply a thin layer of paint to the face and neck. Don’t paint too light at this step; the next layer of fur texture will be the lightest layer. Use a thin mixture of burnt umber and ultramarine blue to darken the nose and surrounding area.
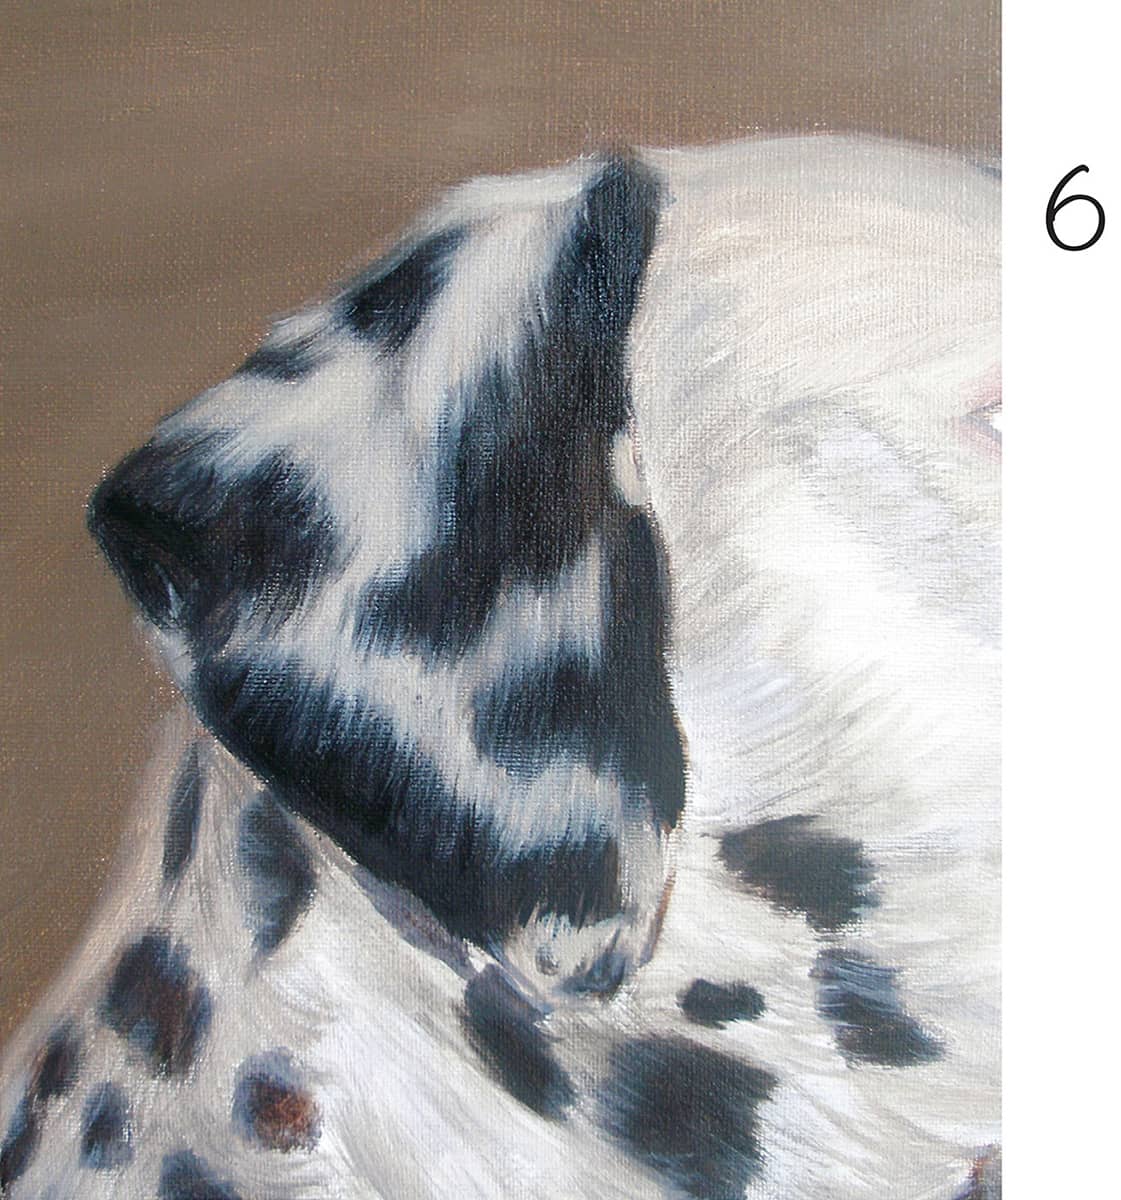
8 Apply another layer to the dark spots. Using a smaller brush with just a little paint, add cream to the ears, blending into the black spots.
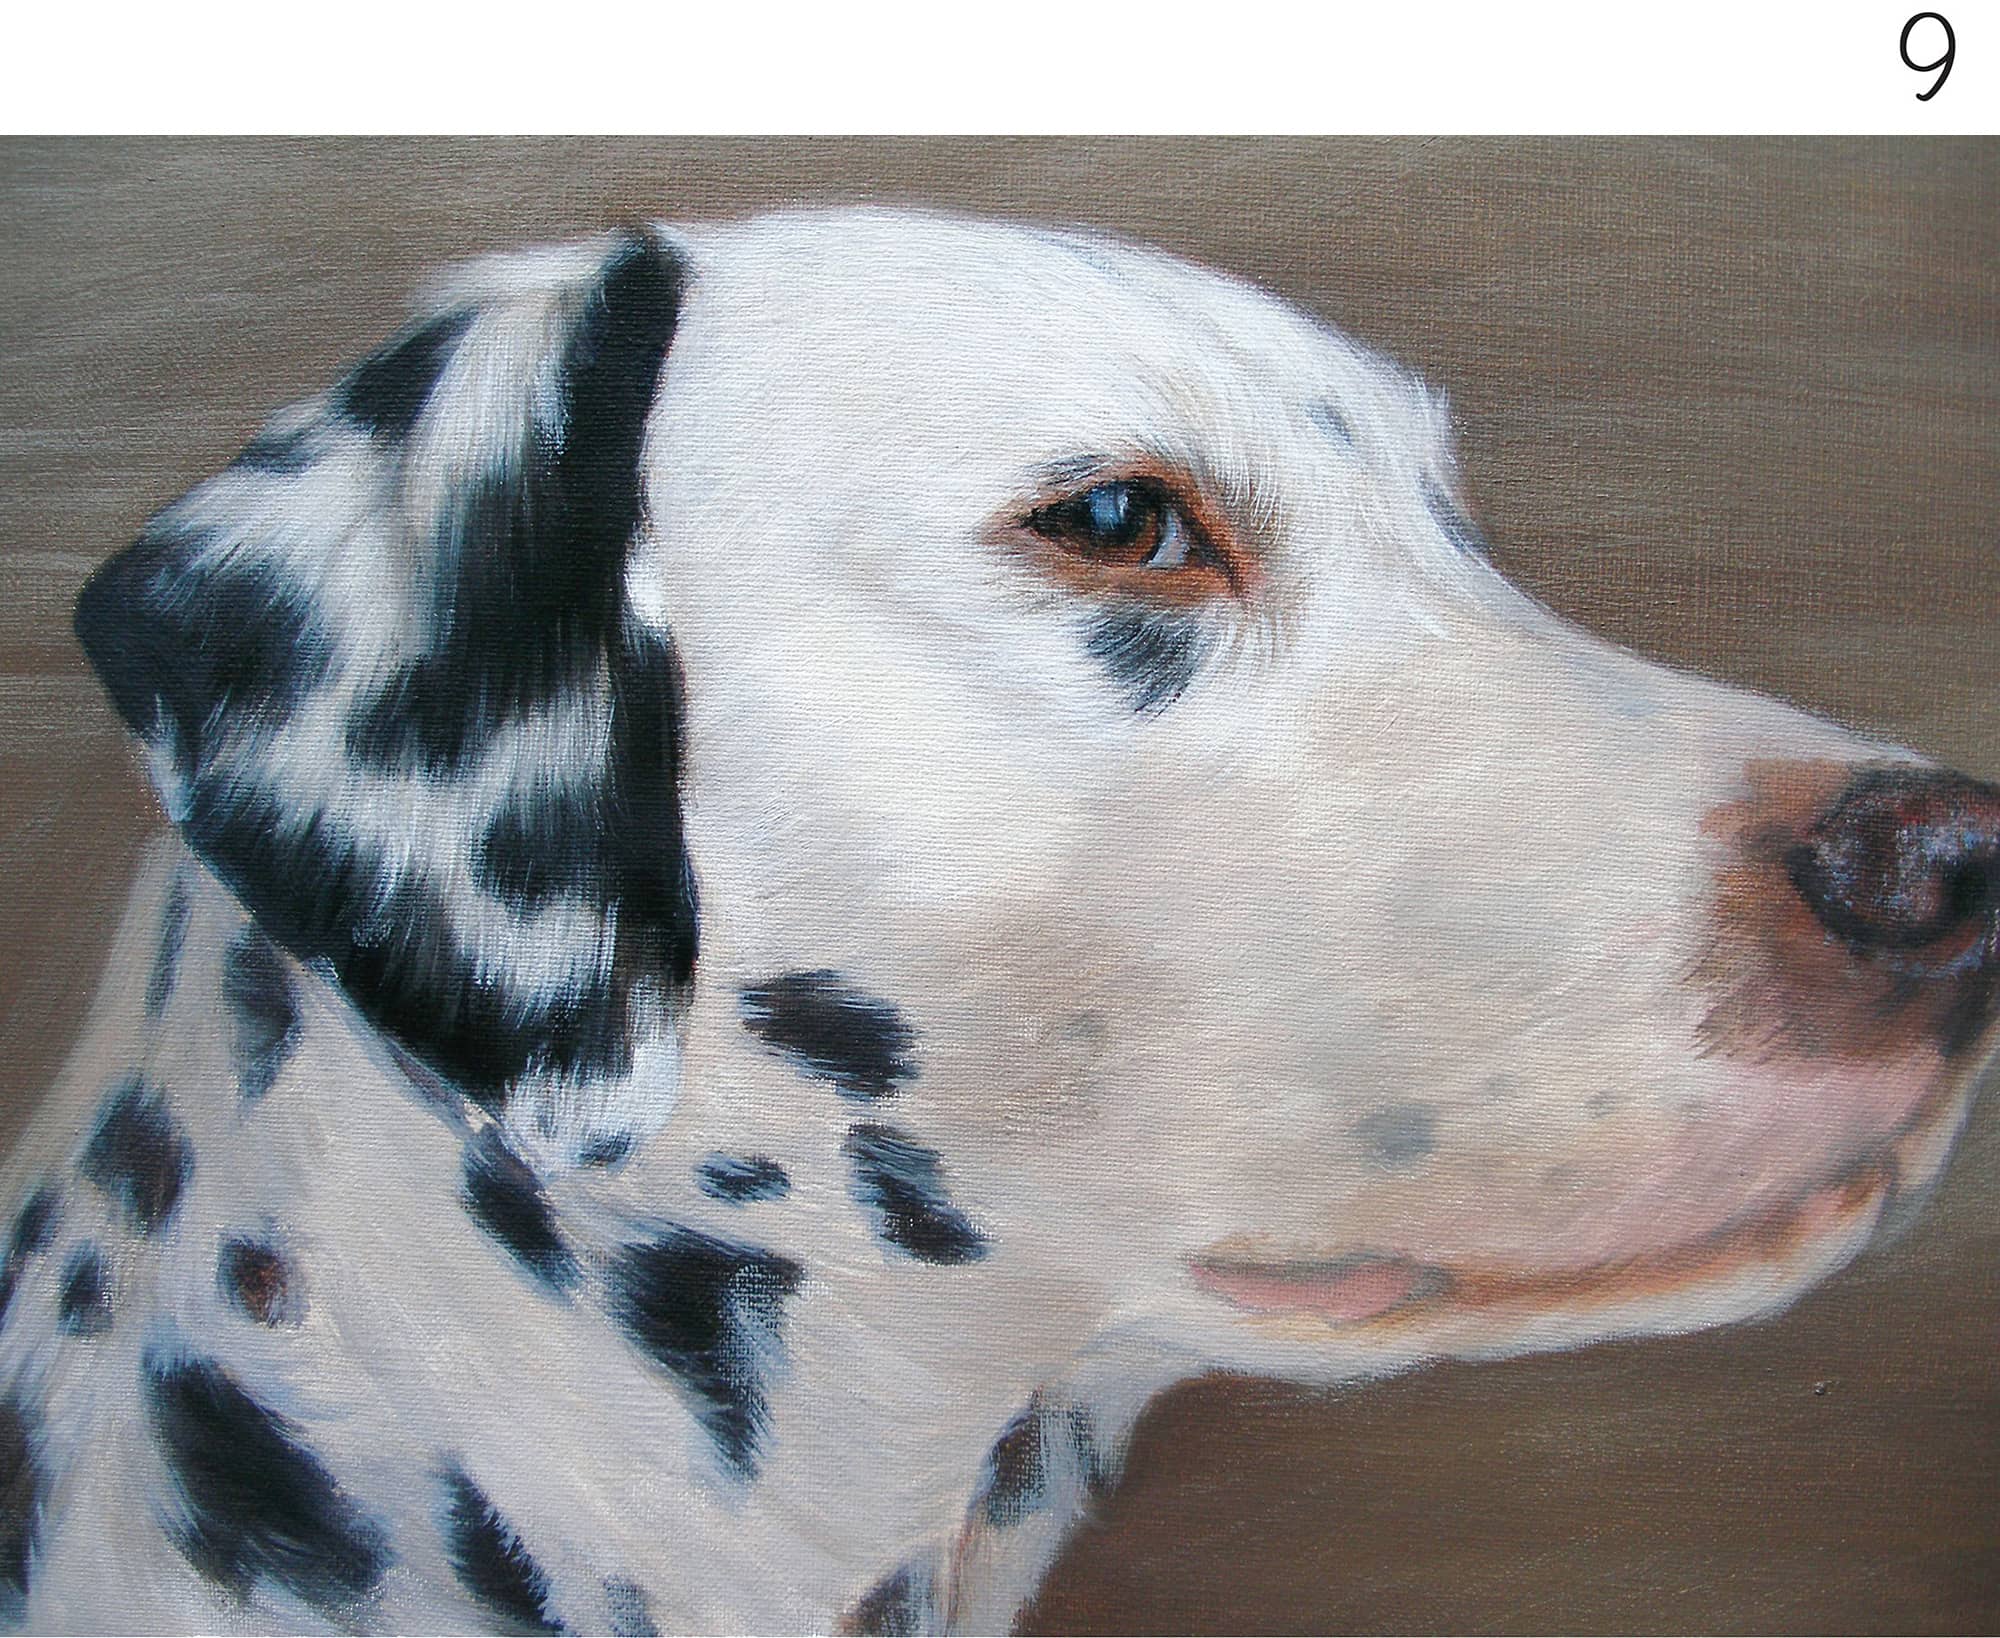
9 Let the painting dry overnight. Mix a light cream using white and a little yellow ochre, keeping the paint thin. Then load a round brush and apply short fur strokes to the forehead. While the paint is wet, add some white fur strokes on top, blending into the cream below.
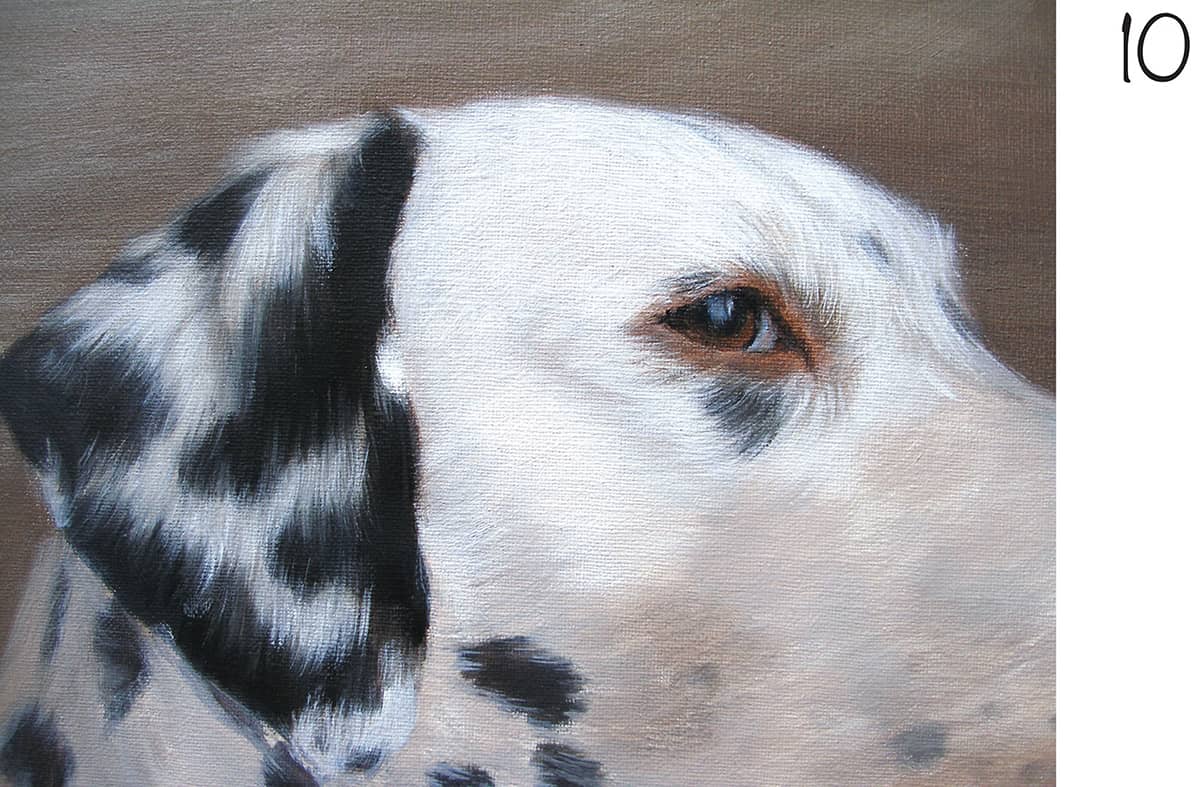
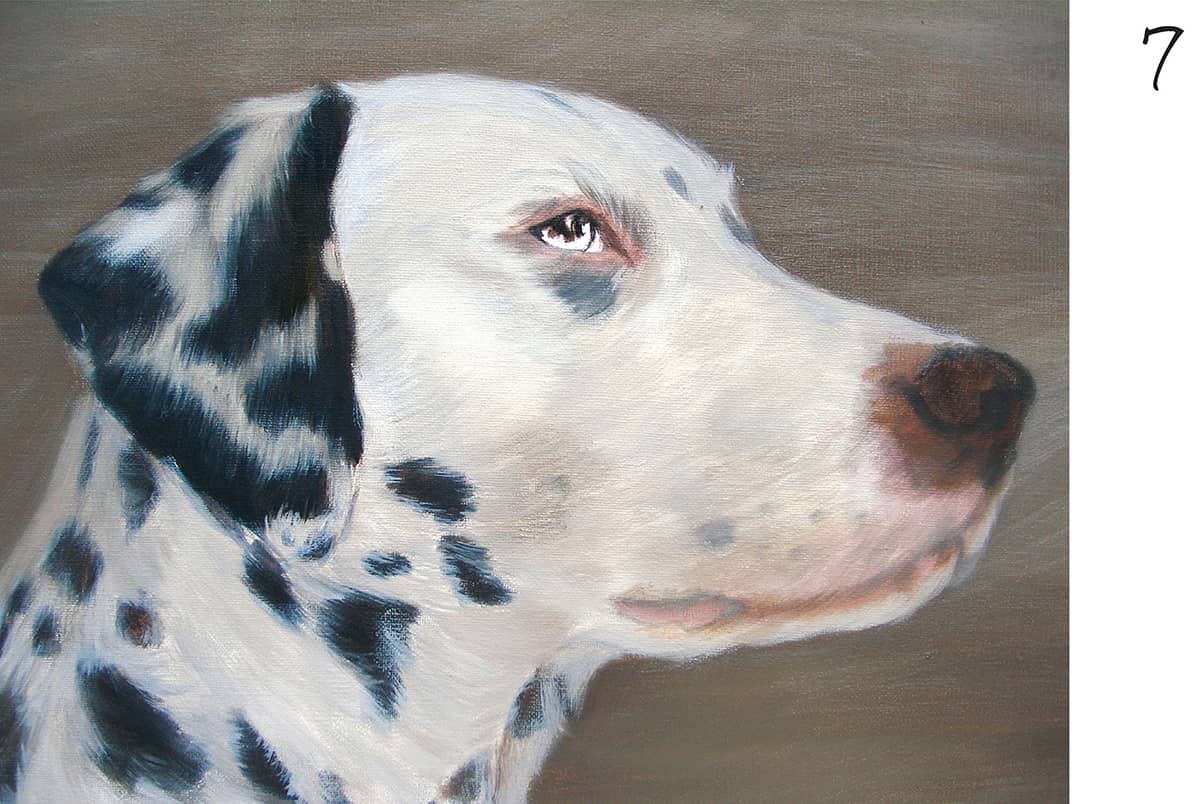
10 Next use burnt sienna for the iris; then mix burnt umber and ultramarine blue for the pupil. While the eye is wet, blend a layer of burnt umber over the burnt sienna to tone it down. For the highlight mix some white with a tiny bit of ultramarine blue and use a very small round brush. To tone down the pink area around the eye, add a thin layer of burnt umber, letting the pink shows through.
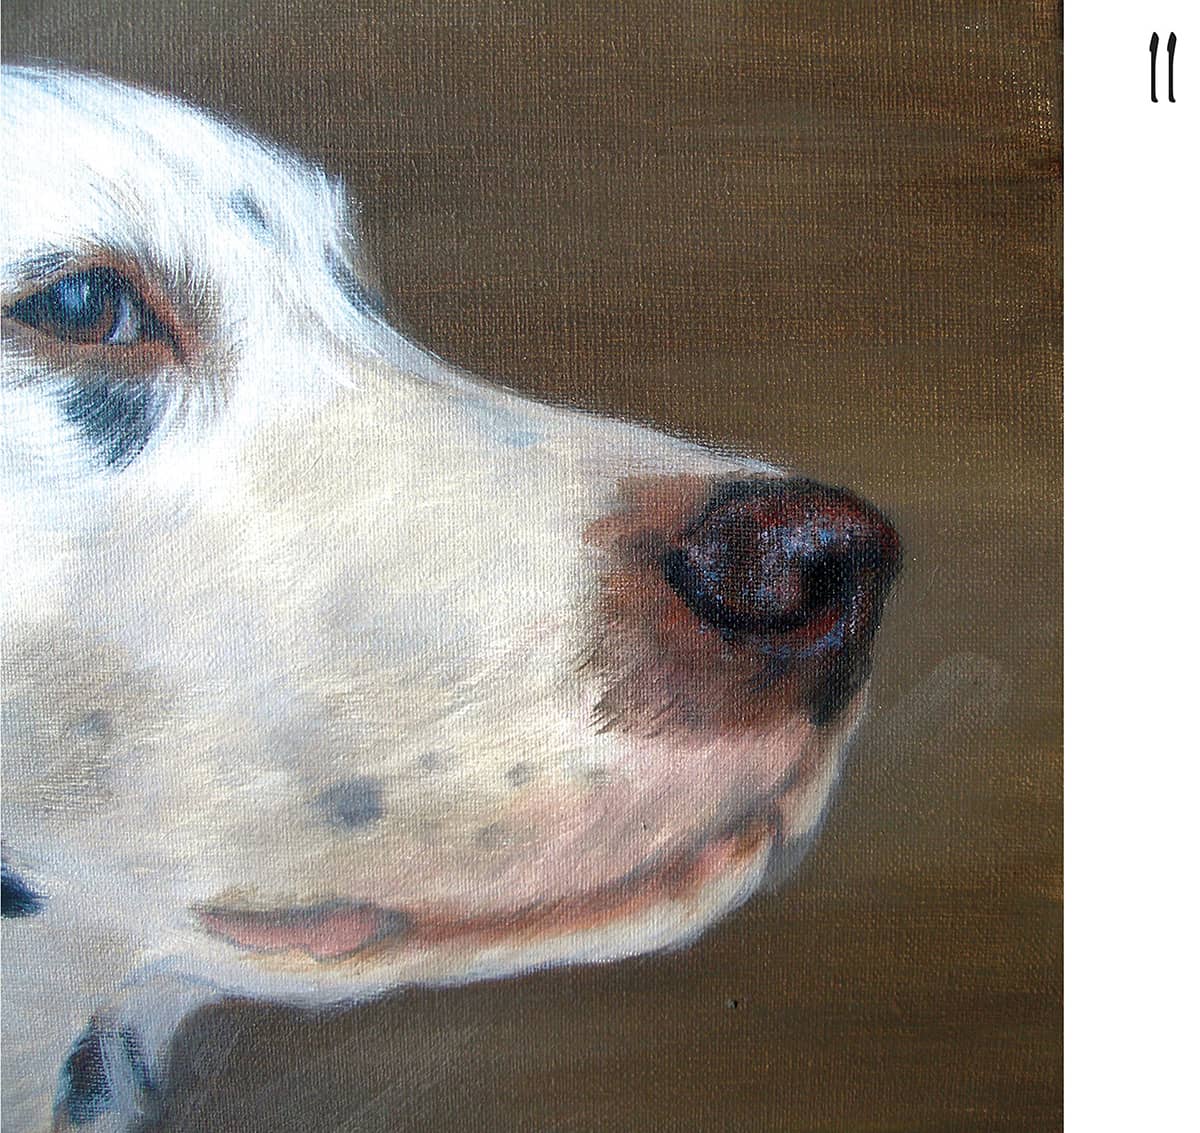
11 To tone down the color on the nose, add a thin layer of burnt umber. Using a small brush with just a little paint, add some pale blue highlights. While the paint is wet, press a finger onto the highlights to smudge them; use the same technique to dab on some pale pink.
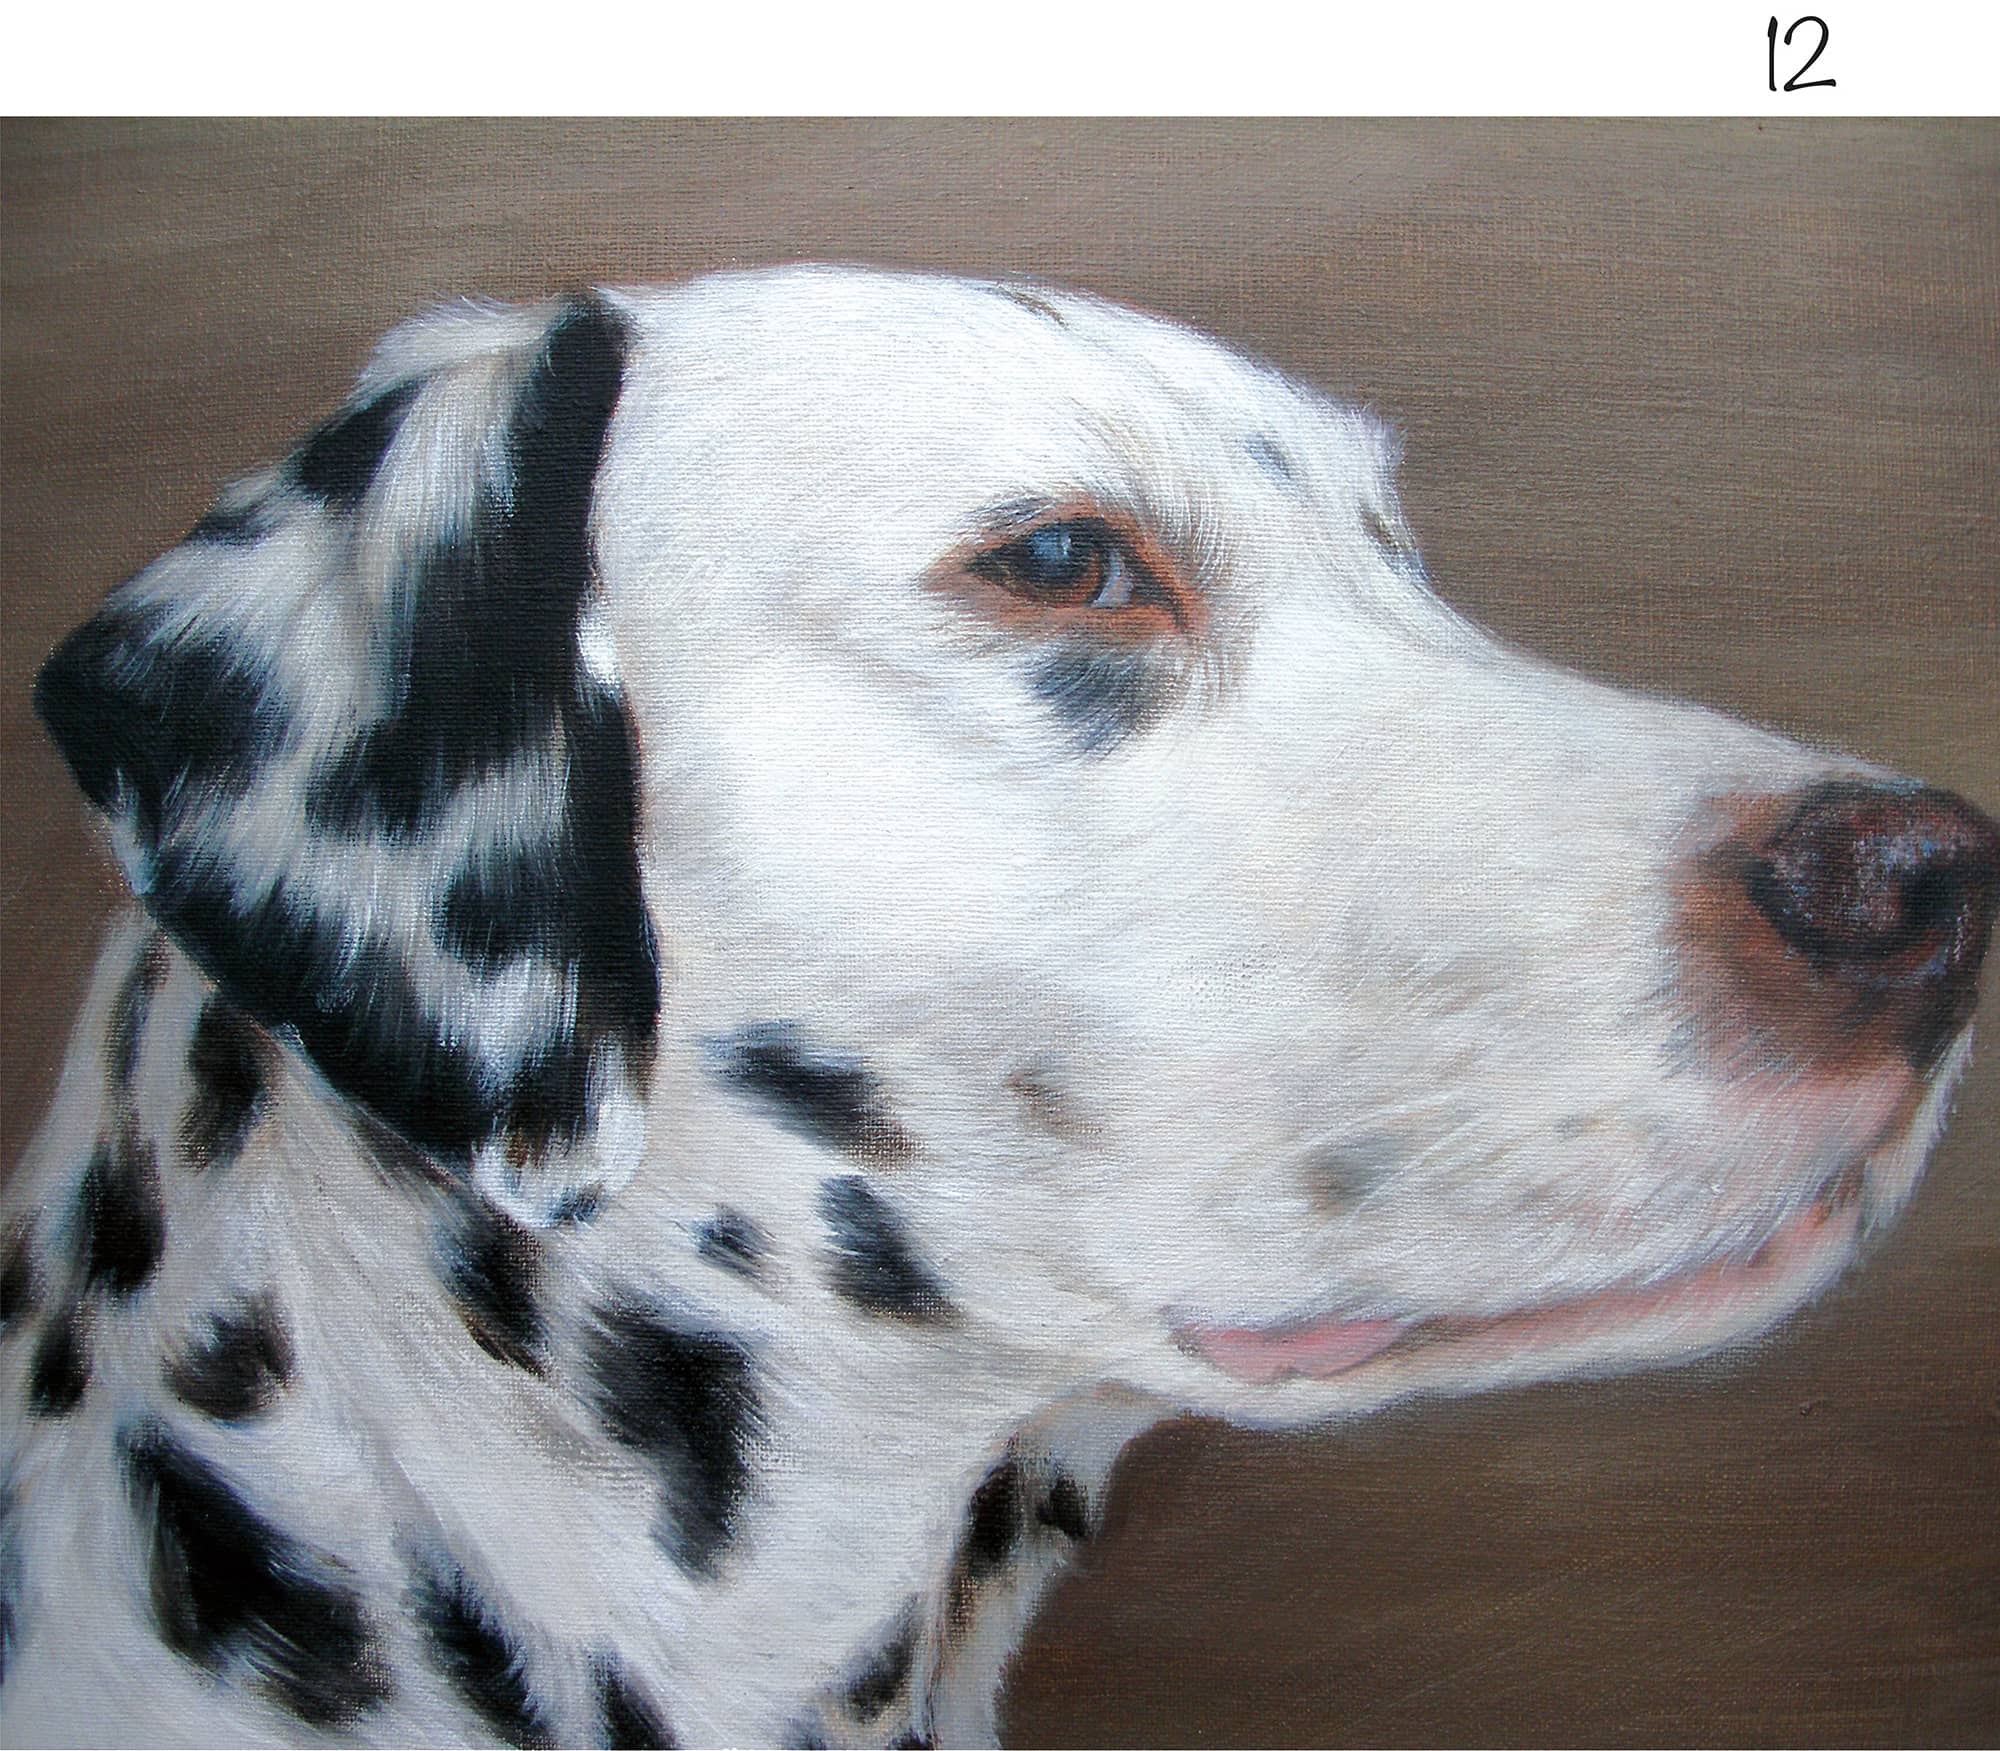
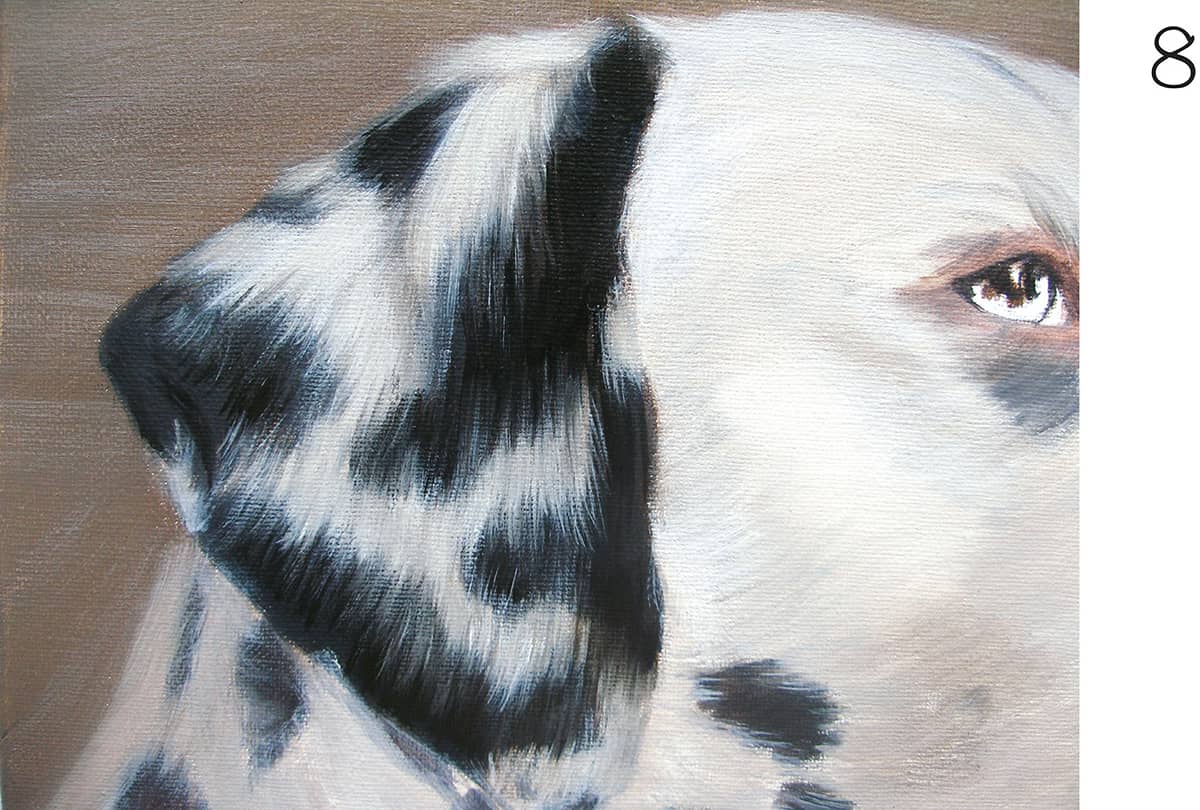
12 For the final step, add another layer to the dark spots on the neck. Using the cream mix from step 6, apply fur strokes on the neck, blending into the wet edges of the dark spot. Flick some cream mixture into the edges to create fur texture.
Shih Tzu
1 Sketch this cute dog using an HB graphite pencil. Using a small round brush and raw umber, paint over the sketch.
2 Use a large flat brush to paint a thin layer of burnt sienna around it.
3 Next paint the shadowed areas of the body and face. Using a medium flat brush and a thin mix of ultramarine blue mixed with raw umber, roughly brush in the values for the shadows. Make sure to keep the paint very thin—just to stain the canvas.
4 Using a large flat brush, paint on a slightly thicker consistency of olive green mixed with Naples yellow on the background in a crisscross motion. While the background is still wet, apply a second thicker layer of the same mix. Make the lower background darker by using more olive green. In the top area, brush in some Naples yellow.
5 While the background is still wet, mix white and a tiny bit of raw umber and yellow ochre to make a pale cream. With a small round brush, flick in the fur all around the edge of the dog so that it blends into the background.; this softens the edges.
6 Using a small round brush and a mix of ultramarine blue and raw umber (to make black), paint the dark area around the eyes, nose, and nostrils. Using a dry, small round brush and a little raw umber, scrub in the brown area around the eyes and under the chin. Allow to dry.

7 Using cadmium red and a little raw umber, apply a thin layer of paint over the tongue and mouth. This is the base color for the tongue. Paint a thin layer of burnt sienna in the eyes. Then start filling in the fur texture on the head, using a medium round brush and some white mixed with a little yellow ochre. Be careful not to apply the paint too thickly.
8 Continue detailing the fur over the face and body using the cream color. Mix a thin layer of ultramarine blue and raw umber to darken the area around the eyes; then apply dry brushstrokes in the shadow of the tongue. Paint a mix of ultramarine blue and raw umber in the darker, shaded areas of the body; then apply rough fur strokes.
9 Using a small round brush, paint a thin layer of raw umber over the nose. For the nostrils, thicken the paint with ultramarine blue. With the same brush and a thicker mix of white and ultramarine blue, dab some highlights on the nose. Using a small round brush, paint in more detailed fur strokes on the face and ears using white mixed with yellow ochre. Darken the eyes with a layer of raw umber. While the paint is wet, dab a small amount of yellow ochre at the lower edge of the pupil to suggest highlights. For the light in the eyes, use ultramarine blue mixed with white.
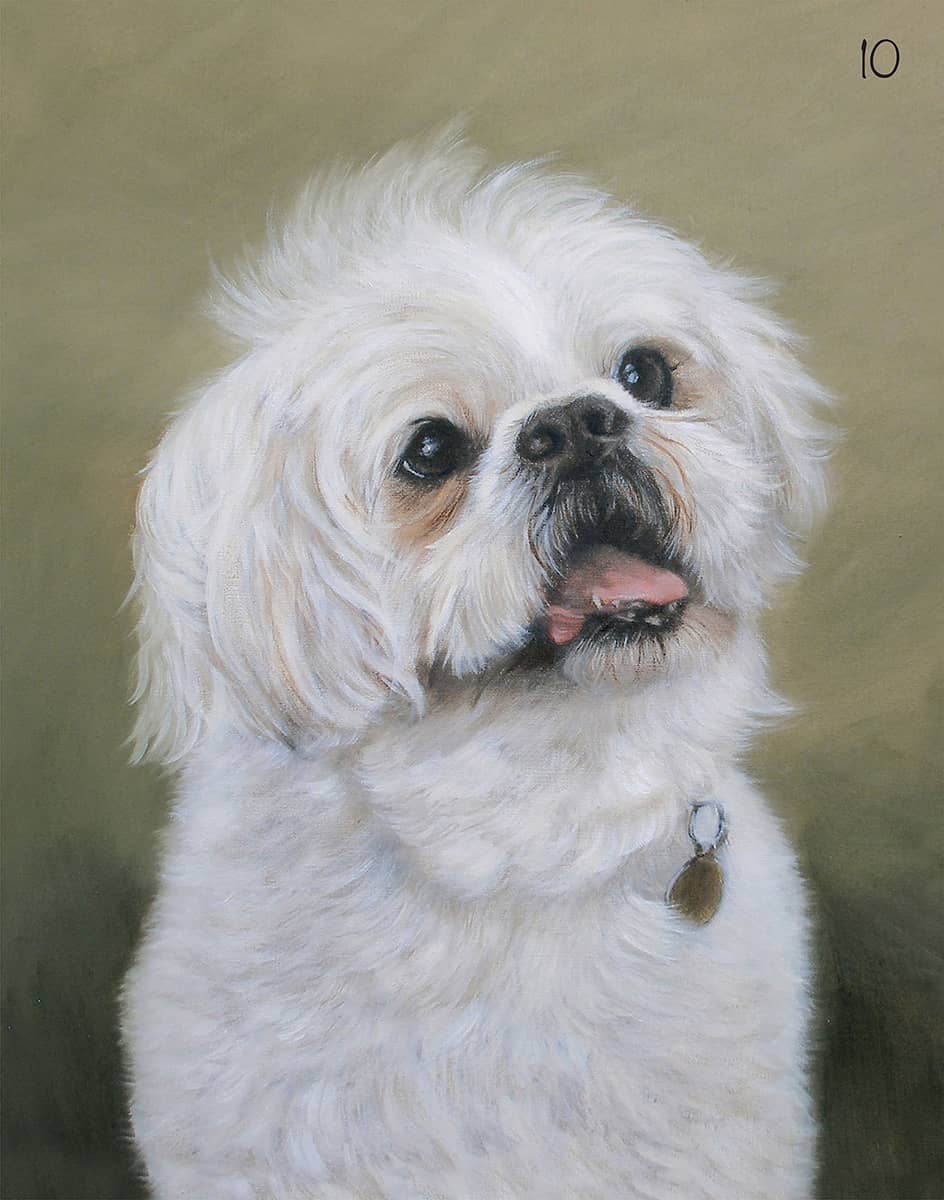
10 Using a large round brush and the cream color, cover the body with the fur texture. Continue adding fur detail using several different-sized round brushes, which gives variety to the fur strokes; then add more background color and blend the fur edges into the background while it is still wet. Add highlights on the tongue, using a small round brush and cadmium red mixed with white. Finally, dab a bit of cream for the tooth, and tone down the gold tag with a thin layer of raw umber mixed with ultramarine blue.
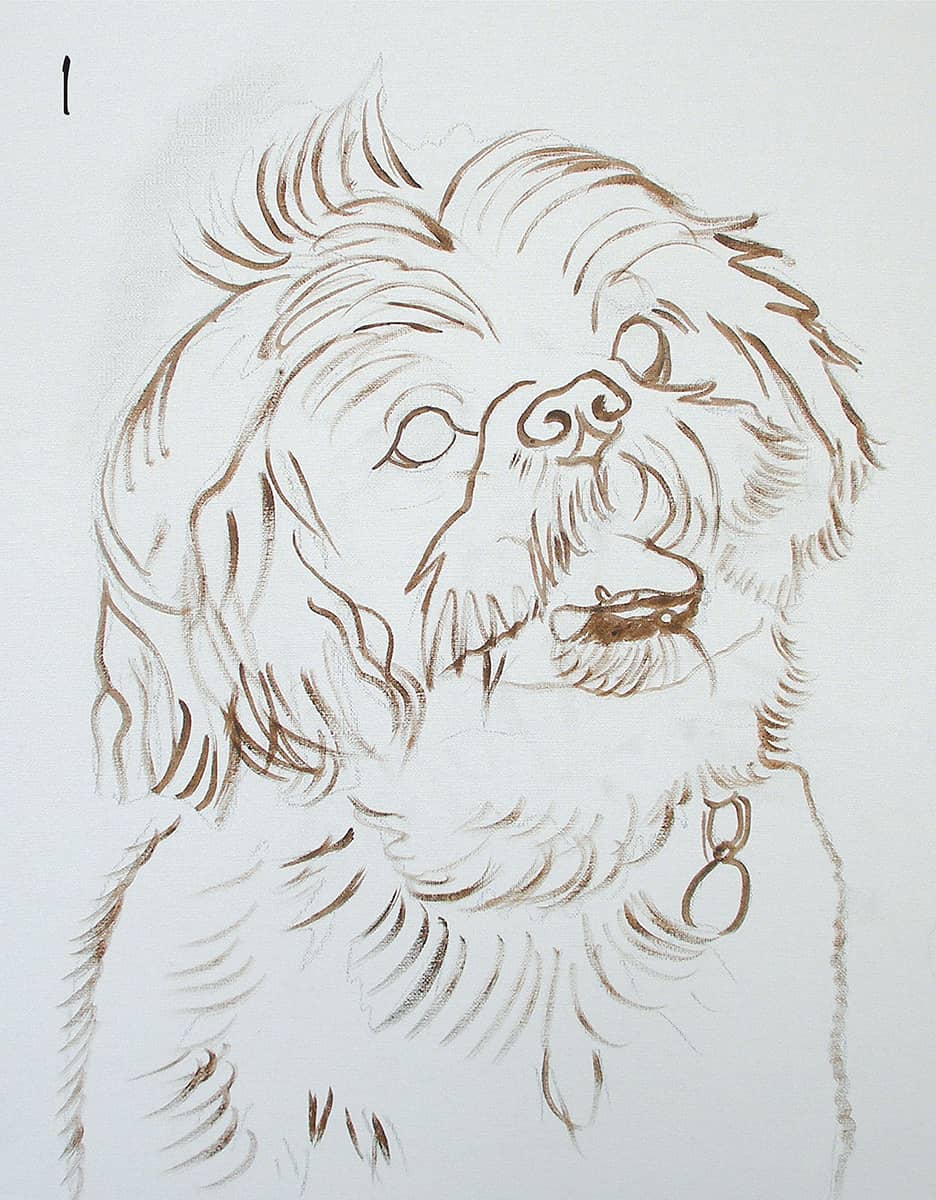
Lhasa Poo Mix
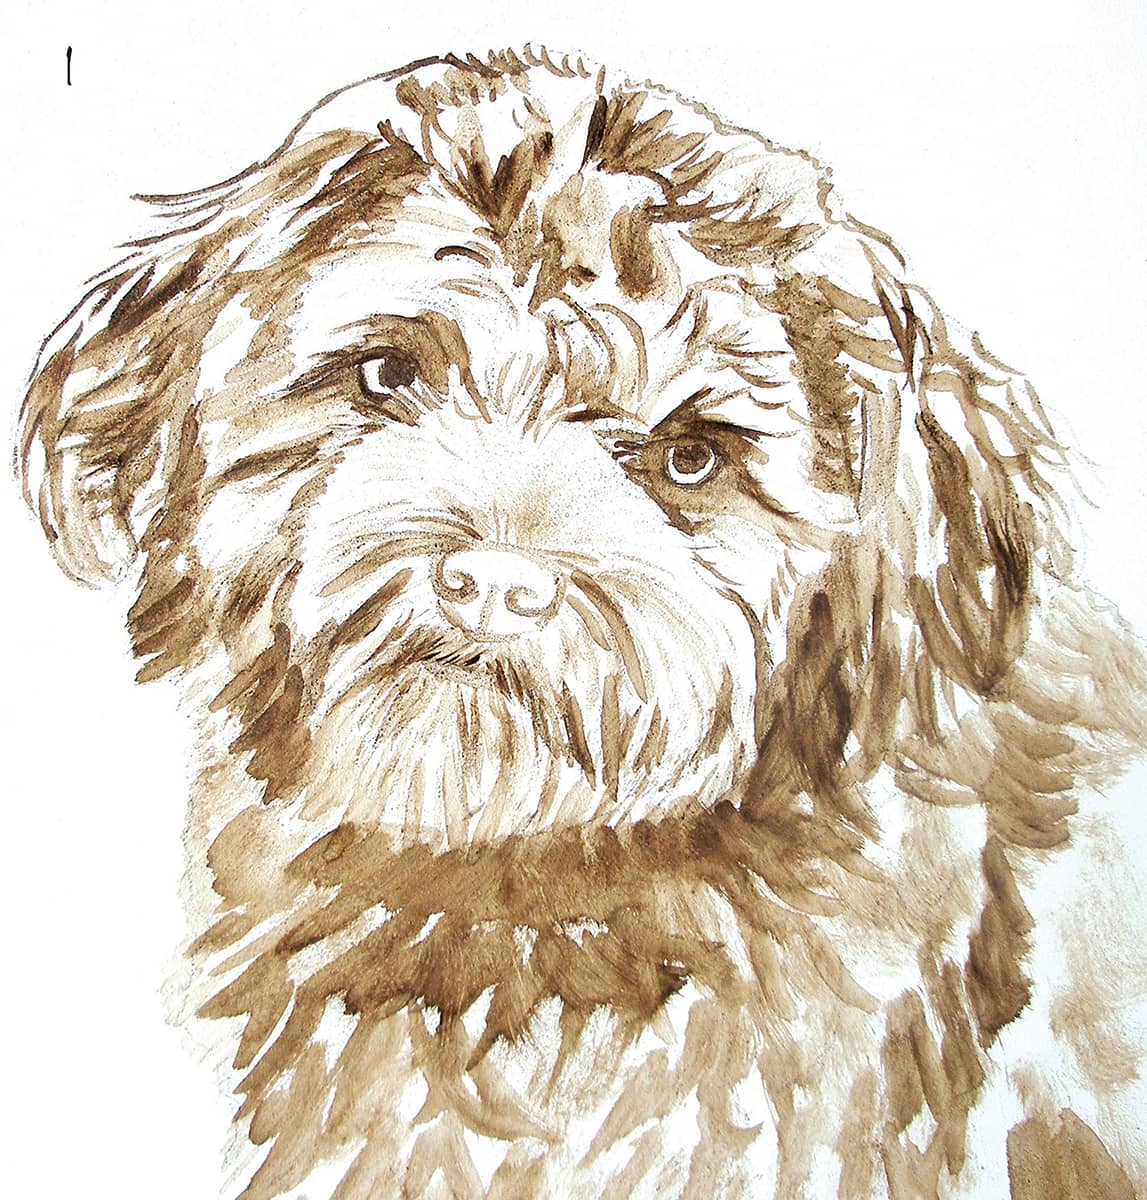
1 Sketch the dog with an HB pencil. Mix a thin wash of burnt umber and paint the outline with a small round brush.
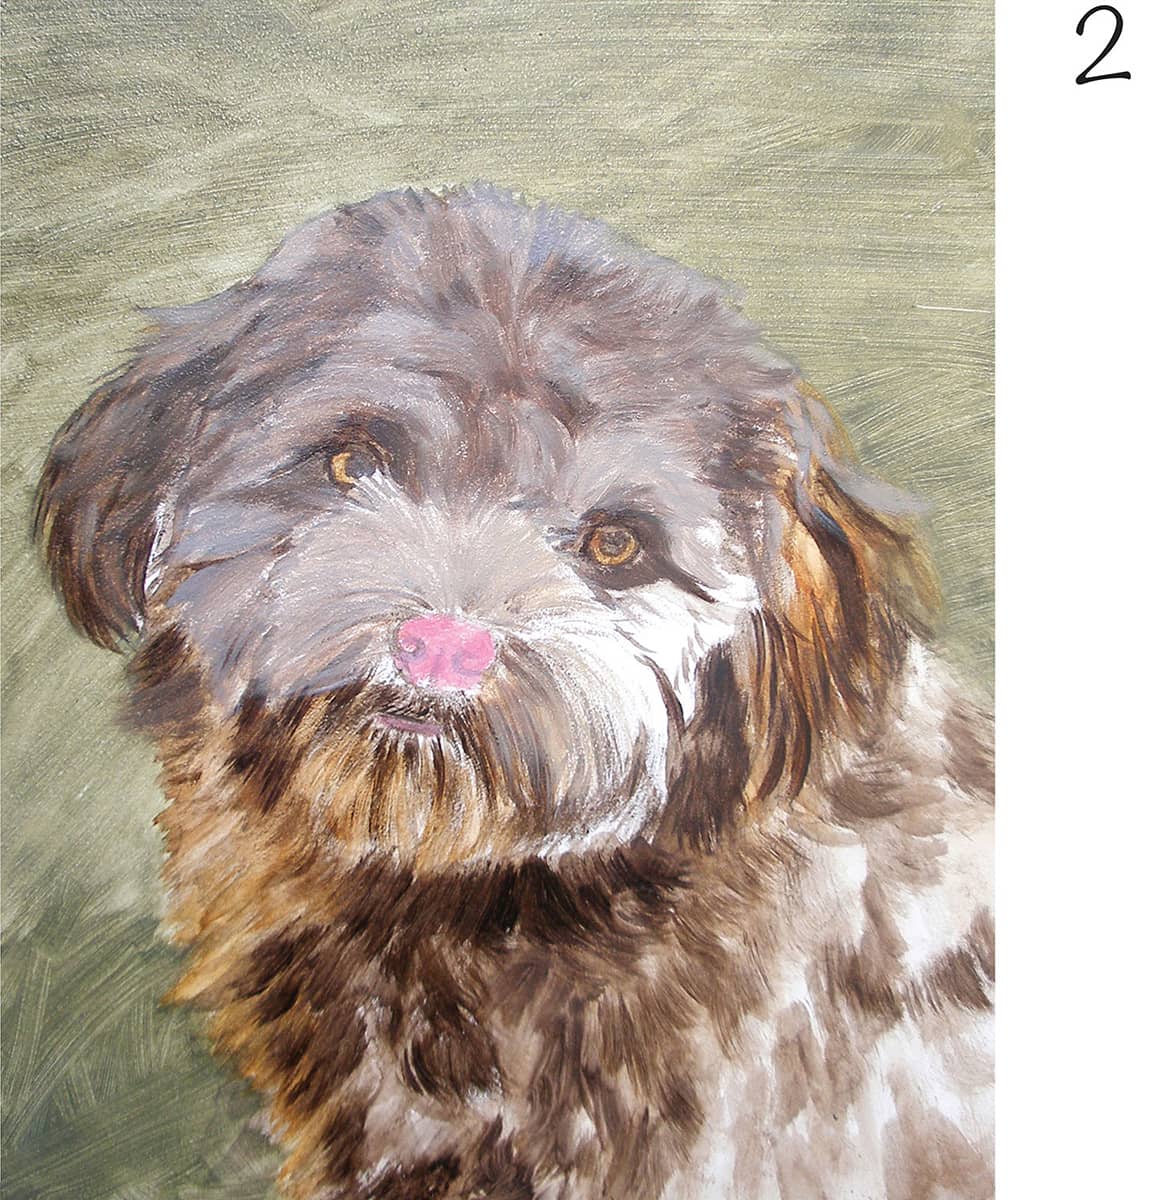
2 Mix a thin wash of olive green and paint the first background layer. Mix white with burnt umber and ultramarine blue for a gray undercolor on the face. Paint a thin wash of burnt sienna in the ears and eyes. For the pink nose, mix some cadmium red with a little alizarin crimson and white.
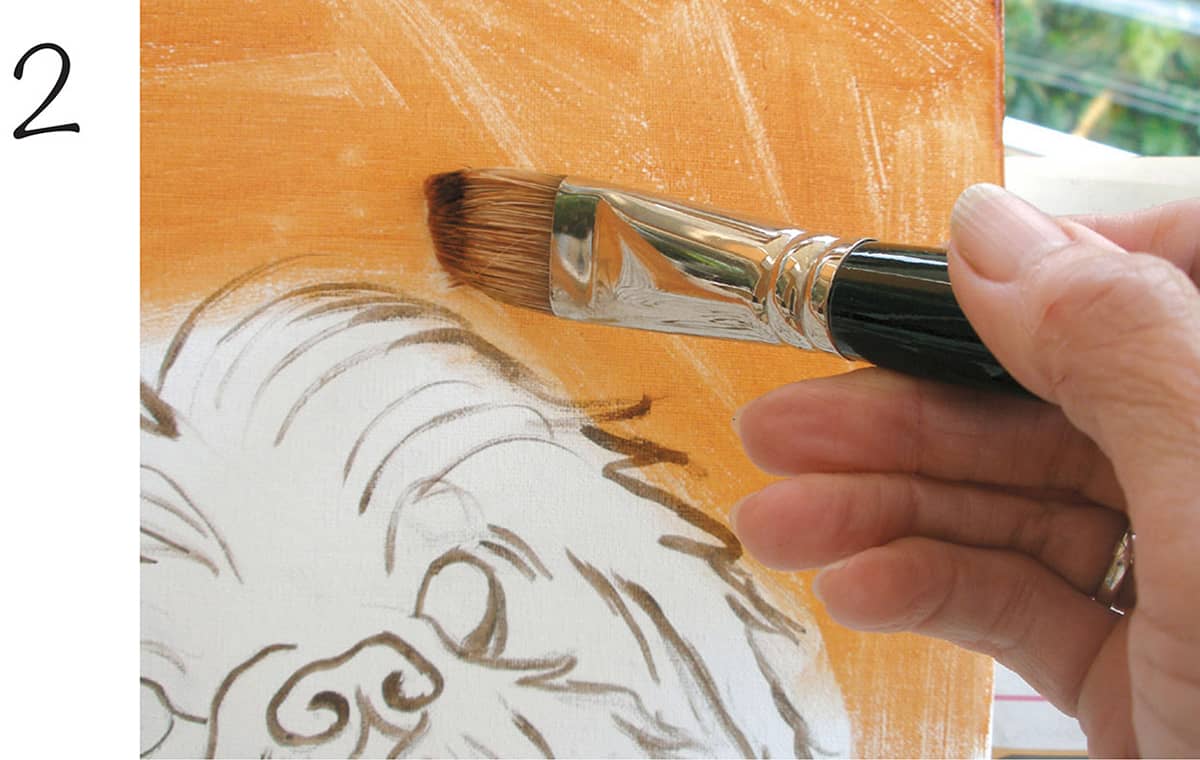
3 Mix olive green and Naples yellow, and use a flat brush to paint the background using thicker paint so it will be wet and allow you to blend the fur into it. Use slow-drying medium if working in acrylic.
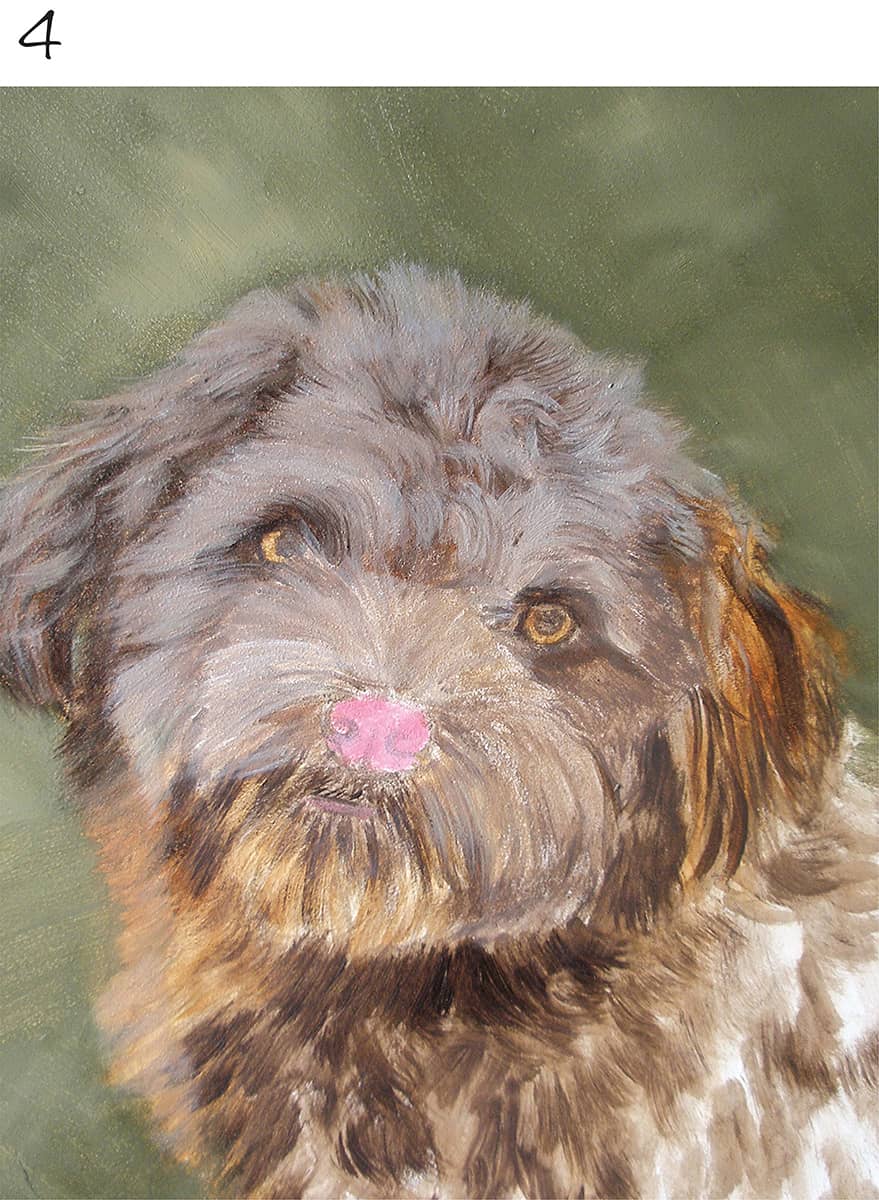
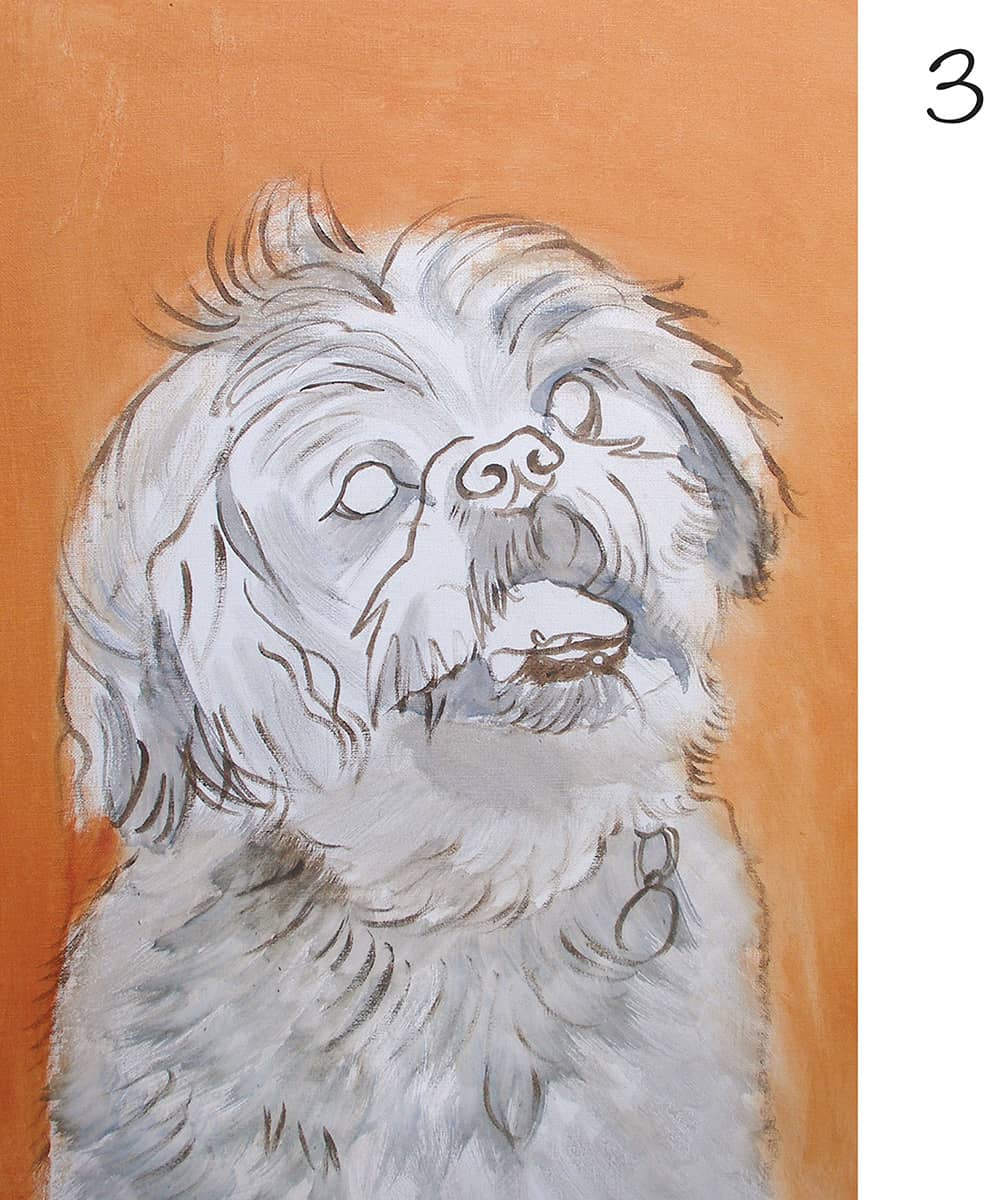
4 Mix white, burnt umber, and ultramarine blue for more gray. While the background is wet, use #3 and #2 round brushes to start brushing in fur texture. Add more darks where needed.
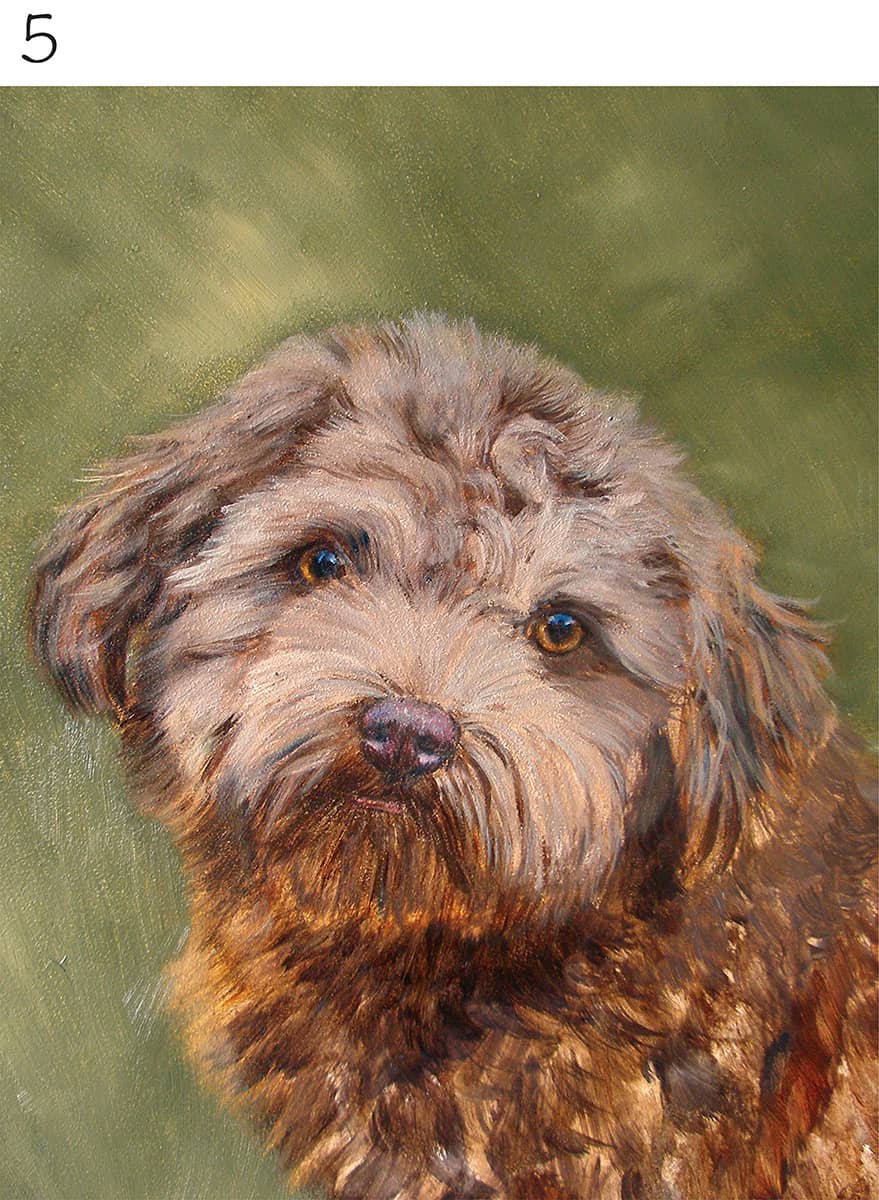
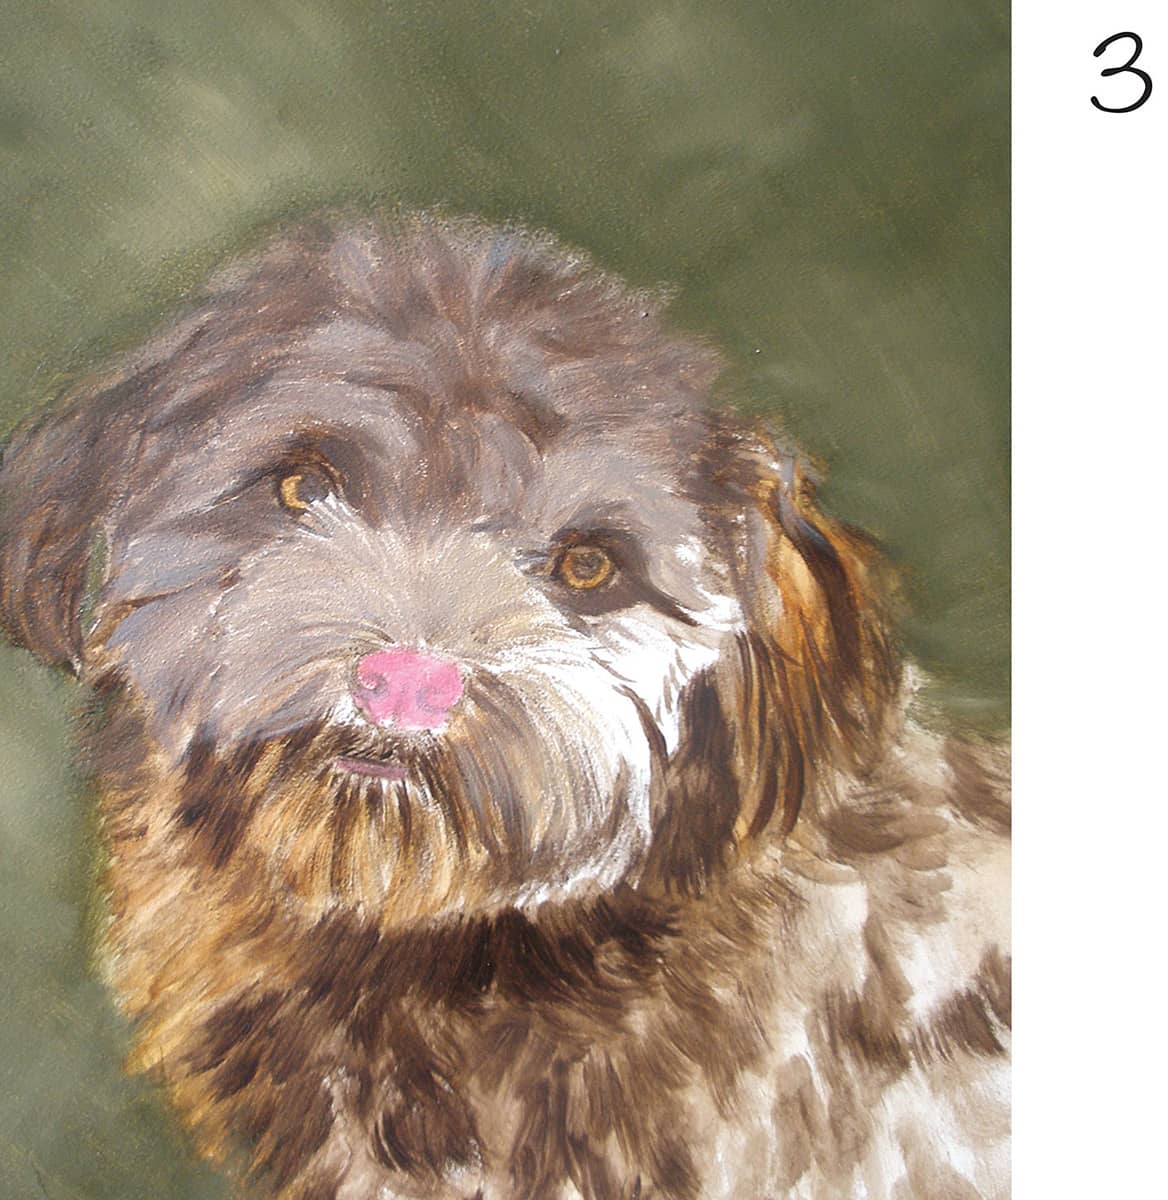
5 With a round brush, paint more dark areas of the fur with a burnt umber and ultramarine blue. Use slow-drying medium if you are working with acrylics so that you can blend the colors. Mix a light gray of burnt umber, ultramarine blue, and white and flick it into the dark fur. While the paint is wet, mix yellow ochre and burnt sienna into the color to add variety to the fur.
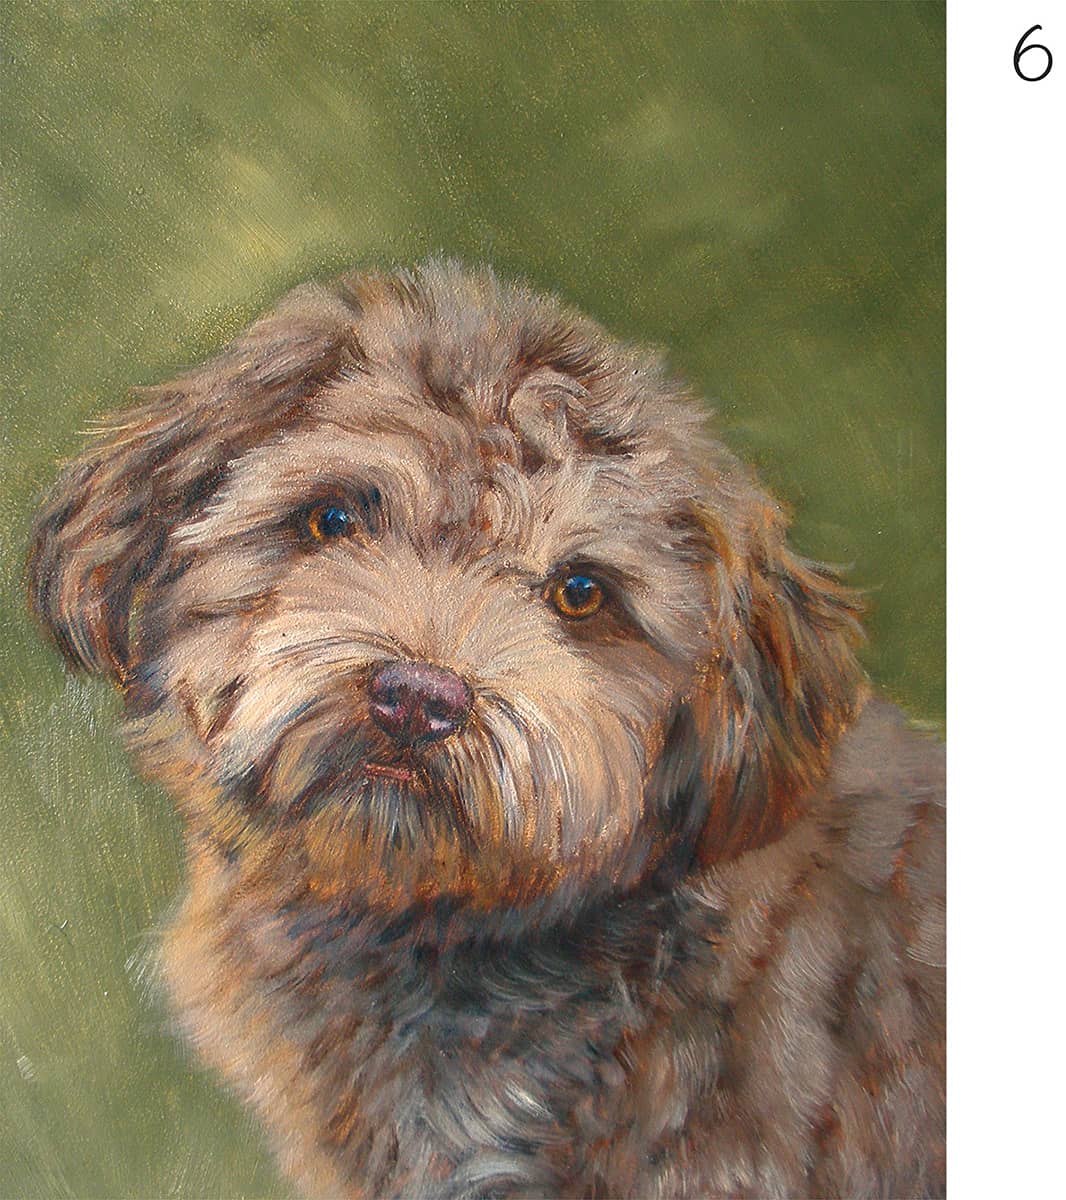
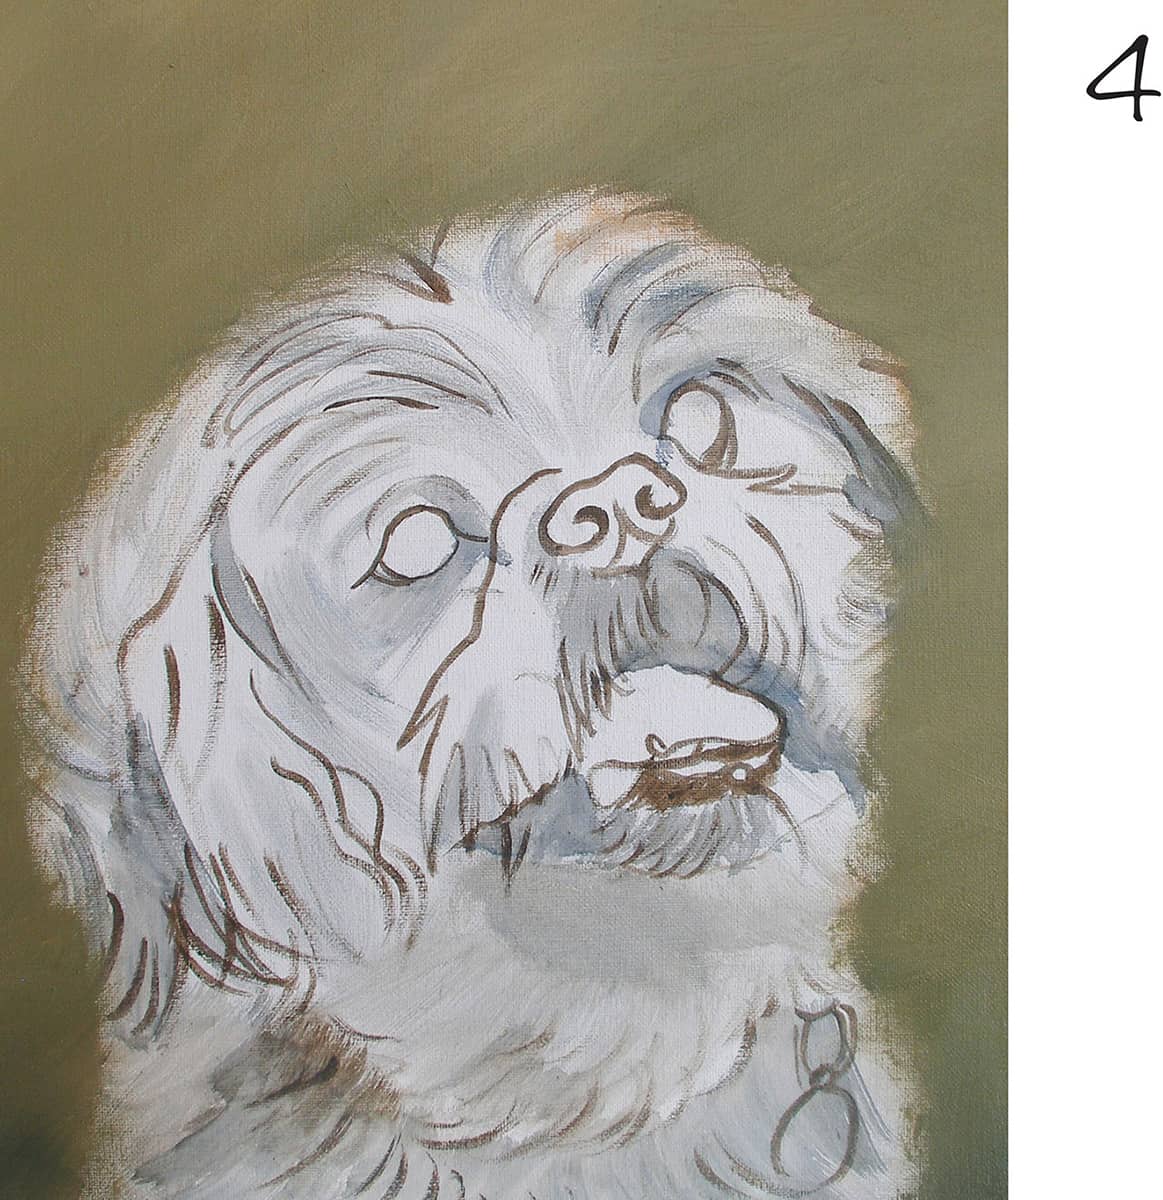
6 For the eyes, use burnt sienna for the undercolor and darken the pupils with a mix of burnt umber and ultramarine blue. Add highlights with a mix of ultramarine blue and white; add a small speck of pure white. Paint a bit of yellow ochre around the edge of the pupil. Add more fur texture on the face and ears with the gray mix from step 4. Add a thin layer of burnt umber to the nose to tone it down. Mix some black and use a small round brush to define the nostrils. Dab some light blue highlights on the nose with a mix of ultramarine blue and white; repeat with a light pink mix of cadmium red and white. Blend the paint for a soft, fluffy finish.
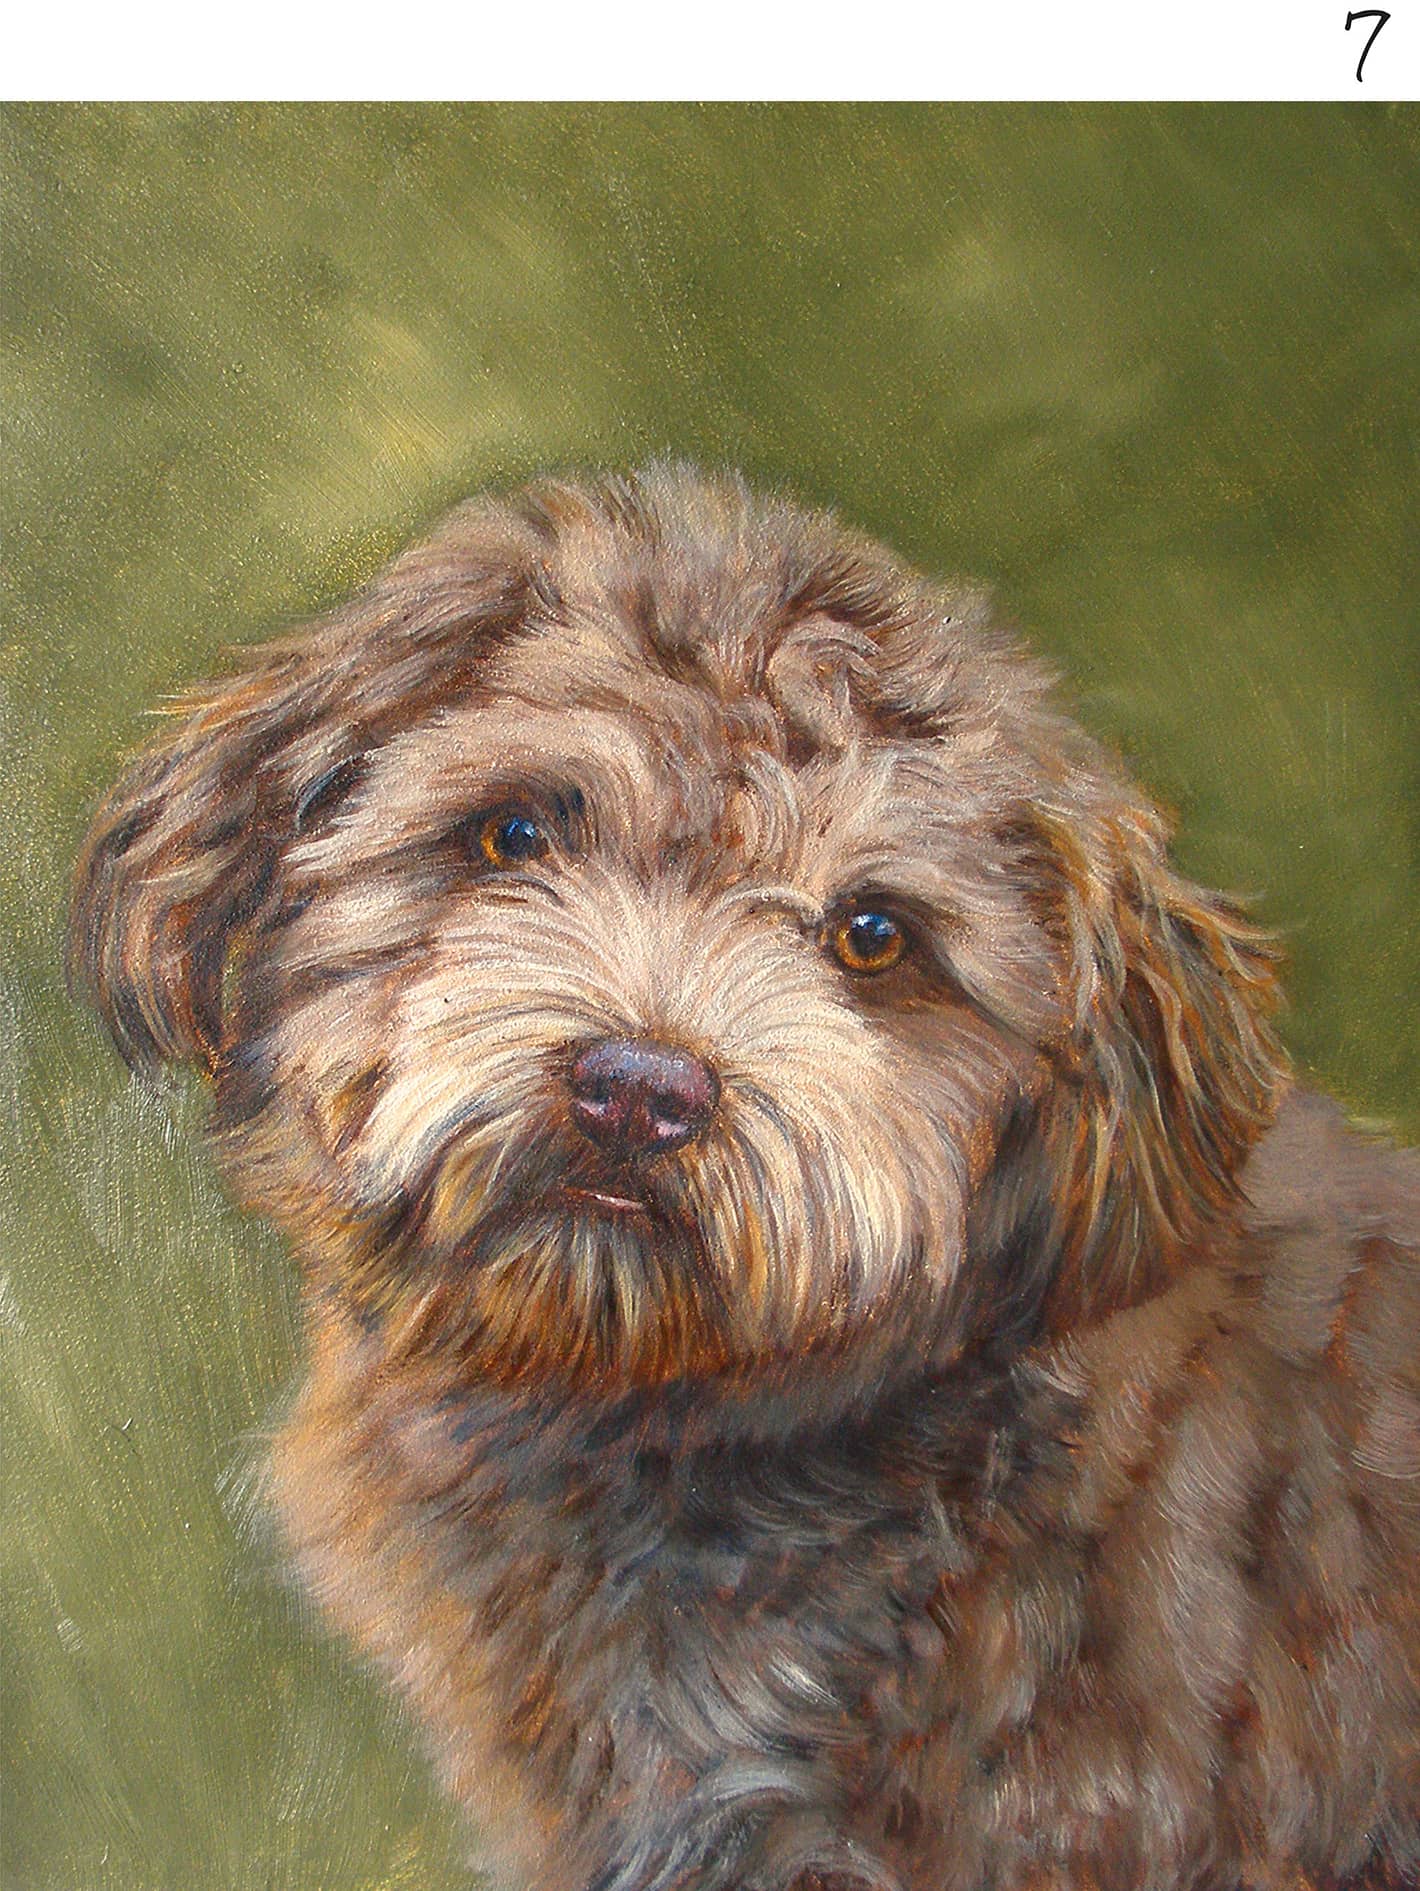
7 Mix a warm cream with burnt sienna, yellow ochre, and white, keeping the paint thin. With a small round brush add smooth fine lines in the fur on the ears and around the nose. Mix a lighter cream of yellow ochre and white for the highlights. Paint a thin wash of burnt umber over the pink mouth.