
Chapter 12. Publishing Your Application
For the most part, the Google Play Store is one of the easiest-to-use application stores I’ve ever encountered. But although you can update an application almost instantly without any of the hassles of other app stores, there are still a few things you should be aware of before you publish. We’ll cover packaging, versioning, and creating a release build.
Packaging and Versioning
There are a few key points in your manifest that you need to pay attention to before you consider producing a release build to go to market. You’ll need to make sure your application isn’t debuggable (not so much an issue with newer versions of the Android client). You’ll also want to make sure your package name is unique and consistent in each subsequent version. Last, there are two values to pay attention to when upgrading an existing application.
Preventing Debugging
Shipping your application out the door with debugging enabled will allow anyone who can connect their phone to their computer to enable debugging and step through lines of code in your app, look at the contents of variables, and do other things that no security-aware engineer would like to have happen. The debugging flag is turned off by default, but if you’ve turned it on, it will appear in the application portion of the manifest:
<application
android:icon="@drawable/ic_launcher"
android:label="@string/app_name"
android:debuggable="true">
When the application ships, make sure that you either remove the line entirely or set the following:
android:debuggable="false"
Naming the Package
The package you declare in your manifest can, for the most part, contain almost any string you fancy. I’ve highlighted one from a previous example here:
<?xml version="1.0" encoding="utf-8"?>
<manifest xmlns:android="http://schemas.android.com/apk/res/android"
package="com.peachpit.layouts"
android:versionCode="1"
android:versionName="1.0">
Although I named this package to correspond to my layouts example, you could just as easily declare a package like
package="com.sparkle.pants.fairy.dust.unicorn"
I wouldn’t recommend using the unicorn example (it’s somewhat outrageous), but the fact remains that you can. However, the package name you choose must be different from all other existing packages in the entire Google Play Store. Be sure it’s unique and that it’s something you can live with for as long as you upgrade the application. When you upgrade your app, it absolutely must have the same package name as the build that came before it. Typically, the naming convention goes something like com.company_name.product_name. But again, the package name for your application is entirely up to you.
Versioning
There are two values to pay attention to when updating an existing application. First, you should (but are not required to) increase the value inside the versionName field of the manifest declaration. Standard rules for the version number apply: Major releases get a new primary number (1.0 to 2.0), while small patches should get a secondary bump (1.0 to 1.1). The version name is what shows to the user in the Play Store and in your application’s details screen. The version name is “1.0” in the previous example’s manifest file.
The field you must pay careful attention to is versionCode. This is the value that must change every time you do an update for the Play Store. Sending an update to the Play Store will be rejected unless you change the versionCode. Typically, Android developers will make the version code by taking the periods out of the version name and padding each portion of the name to create a two-digit number for each section. The number must be unique, but it does not necessarily have to be sequential. So version 1.0.1 would become 010001, and 2.3.12 would become 020312. This is a basic way to make sure your version names stay tied to the version code without much complexity. It’s a good idea to make this number constantly grow even though, according to the documentation, it isn’t technically required to. However, adopting a convention of incrementing the numbers ensures it will be unique.
Setting a Minimum SDK Value
Google Play requires that you specify a minimum SDK value for your application. You can do this in the manifest by including the uses-sdk field, like so:
<?xml version="1.0" encoding="utf-8"?>
<manifest xmlns:android="http://schemas.android.com/apk/res/android"
package="com.haseman.location"
android:versionCode="1"
android:versionName="1.0">
<uses-sdk android:minSdkVersion="10"/>
<!-- The rest of your application goes here-->
</manifest>
The number in minSdkVersion corresponds to the integer value for the SDK. In this case, by declaring version 10, I’m not allowing phones earlier than Android 2.3.3 (which is SDK version 10) to install my application. Be sure to test your application on the versions you support, even if you just test it briefly with an emulator.
Packaging and Signing
So your version number is sorted, your code is tested, and all your resources are in place—it’s time to make a release build before submitting.
There are a few ways you can go about producing your final APK, depending on the IDE you’re using: Apache’s Ant (which will build your application from the command line in conjunction with the build.xml file), Eclipse’s Android Build tools, Android Studio’s Build tools, or the Gradle command line. If you want to build your Eclipse project with the command line, head on over to http://developer.android.com/tools/building/building-cmdline.html; it’s a wonderfully comprehensive guide to building with Ant. If you built your project in Android Studio and want to build from the command line, see Chapter 13, where I’ll go into how to modify your Gradle file and run through the Gradle commands. In this chapter, however, I’ll be focusing on creating your release build through your IDE.
Exporting a Signed Build
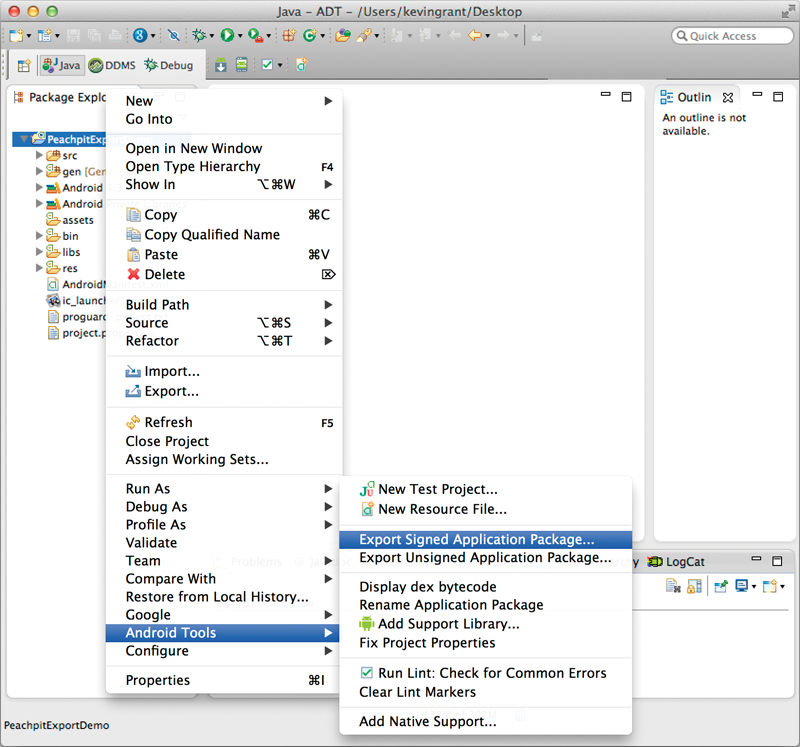
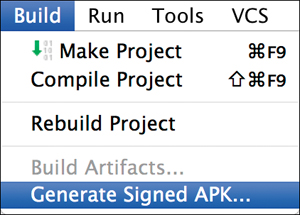
The IDE tools make it very easy to produce an effective release build. If you’re using Eclipse, simply right-click your project in the Package Explorer and choose Android Tools > Export Signed Application Package (Figure 12.1). If you’re using Android Studio, choose Build > Generate Signed APK (Figure 12.2).
You’ll be asked if you want to use an existing keystore file or create a new one. Because this is your first time releasing your product, you’ll need to create a new one.
In Eclipse, enter a location for the file, or click the Browse button to find one. Enter a password, and re-enter it to confirm that it is correctly typed (Figure 12.3).

In Android Studio, click the Create New button in the dialog (Figure 12.4).

The keystore is a file that can contain any number of keys. For your purposes, you’ll really need only one key. All your applications can be signed with the same one, or you can use different keys—it’s up to you (but I recommend using only one, because it’s less to keep track of).
Once you’ve created your keystore, your IDE will ask you to create a key. You aren’t required to fill in all the lower fields. For guidance, check out Figure 12.5 for Eclipse, or Figure 12.6 for Android Studio.
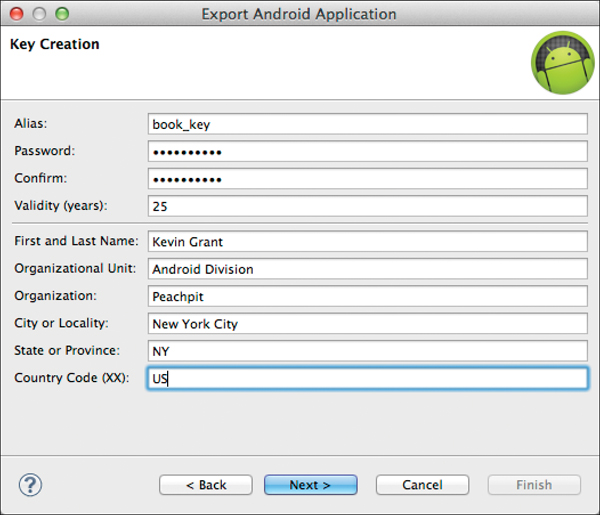

You’ll be creating a key (to place in your new keystore file) that requires an alias and its own password.
Be sure that you make the number you use for the Validity field large enough to be valid for a very, very long time. You never know, Android could still be around a thousand years from now. It pays to be prepared. Last, you’ll need to fill out at least one of the several remaining fields, but I recommend you fill in as many as apply.
Click Next (or OK, in Android Studio) to create your key. You’ll just need to tell your IDE where to put your APK, and you’re finished!
Submitting Your Build
At this point, it’s time to sign up for a developer account and submit your build. Android’s application submission page is fairly self-explanatory, but I should point out that it’s important to provide the Play Store with as many screenshots, videos, and graphical assets as you have time to generate. Making the decision to purchase an application can be a difficult one. Users need to be able to trust that your application actually works as advertised, so giving them a sneak peek is essential.
Watch Your Crash Reports and Fix Them
The marketplace provides a very helpful capability: Users, when they experience a crash, have the option of reporting that crash to you (Figure 12.7). Take advantage of it as much as possible. Get in touch with users, and fix absolutely everything you can. When you get stuck, go online and use every resource available (your favorite search engine, Google Groups, or Stack Overflow, to name a few). If you’re seeing a crash you don’t understand, chances are high that other developers have battled the same thing; we’re a very helpful bunch.
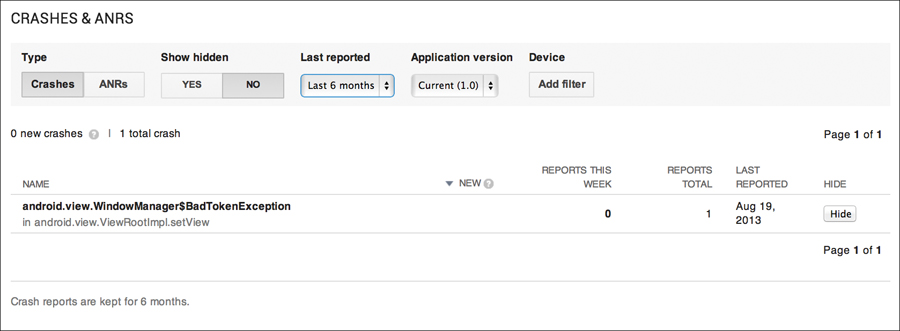
Figure 12.7 The user-submitted crash report console. I wish all my applications had a crash report console that looked like this.
Update Frequently
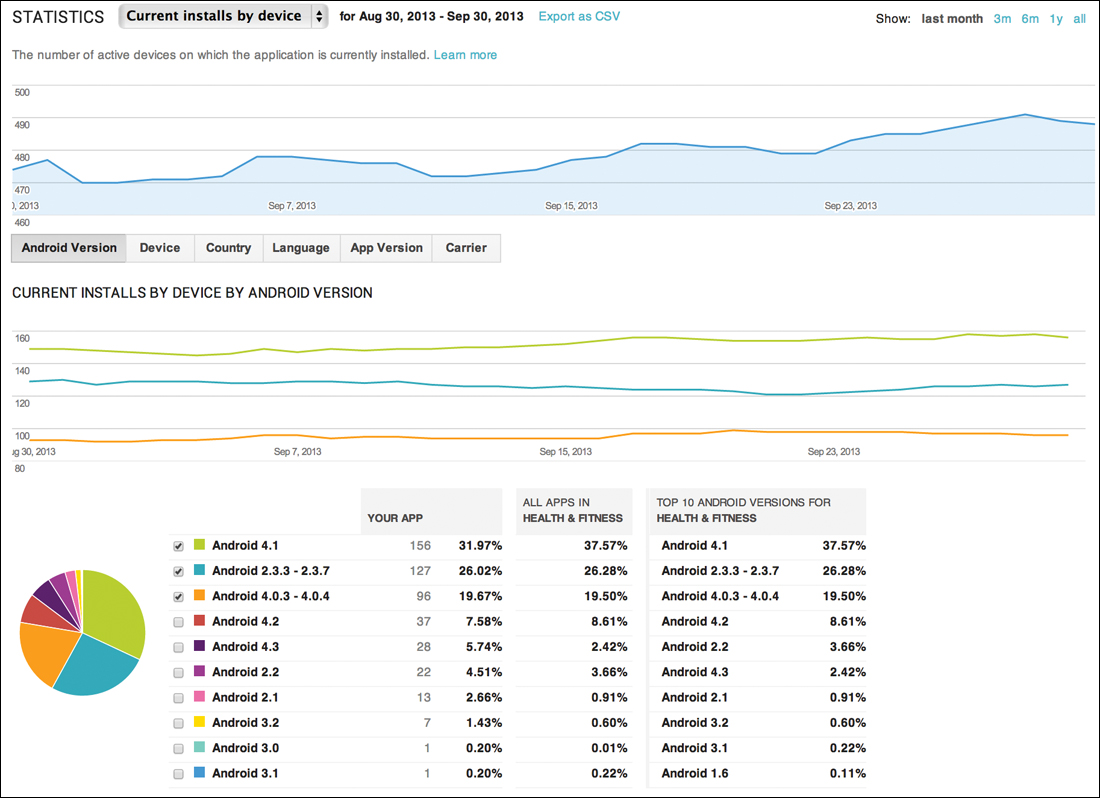
Your application, after you submit it, will show up in the Play Store within a few hours, and within a day you will start seeing installation statistics (Figure 12.8). This allows you to frequently update in order to add small features, fix bugs, and make small tweaks. No other platform allows you this kind of speed from submission to availability. Use it. You’ll be amazed by how grateful your users will be if you respond to their problems quickly.
Wrapping Up
Before we move on to the last chapter, which covers Gradle, I want to give you one more piece of advice: Make a meaningful contribution to the Android landscape. While you’ll undoubtedly have questions that this book cannot answer, you now have the vocabulary and knowledge that will allow you to find answers. This means you have no excuse but to make something amazing. Please—the Play Store is, for lack of a better phrase, full of crap. The world doesn’t need another flatulence app; we need things that make data more accessible, meaningful, fun, useful, and interesting. Do not build apps, build applications.
Good luck, and happy hacking.