
![]()
Extending Backbone with Marionette and Thorax
For small projects, the approach that we’ve taken to building Backbone applications works fine. However, as the scale of your Backbone.js application increases, it might be time to consider using either Marionette or Thorax to make the code base more manageable and to reduce the amount of boilerplate code. This chapter will introduce both of these add-ons and show the difference that they can make to how you write your applications.
Marionette (http://marionettejs.com, Figure 10-1) was created by Derick Bailey to simplify the construction of large-scale Backbone applications. It is a collection of the patterns he has found while building Backbone applications.
Figure 10-1. Marionette web site at http://marionettejs.com
The framework deals with the fact that Backbone is an unopinionated framework, which provides the developer with all the parts they need without strictly prescribing how they should be put together. Two of the key problem areas that developers find themselves in with Backbone are view management and memory management. Marionette aims to alleviate these concerns in your applications.
Even though Marionette has a rich set of features, you can still choose which ones to use in your Backbone application. This gives you the freedom to gradually migrate an app to using Marionette, rather than having to face a big application overhaul.
Getting Started with Marionette
When you visit http://marionettejs.com, you will be presented with a couple of different download options, including a prepackaged zip that contains Marionette, Backbone, jQuery, and all other dependencies. There is also a bundled version that leaves out the main third-party libraries but still includes some other Marionette dependencies. Finally, there is a simple core, which just includes the standard backbone.marionette.js file.
The prepackaged zip is perfect for those starting off with a new application, but as we’ll be extending our application with Marionette, it’s best to take the bundled version. Download this version of backbone.marionette.js and add it to the external directory of your application. Provided you are building on the example from Chapter 6, your source directory should look like Figure 10-2.

Figure 10-2. Application structure with backbone.marionette.js included
Marionette Feature Set
A few key pieces form the basis of Marionette.
Application Infrastructure
Marionette applications are built around modules and submodules that allow greater reuse and composability. At the center of all of this is the Marionette.Application object, which organizes your entire app. There is also a dedicated Controller object, which controls the workflow and process of modules and therefore the entire application.
Marionette introduces some specific view objects to cater for the differing requirements in applications. An ItemView is provided for rendering single items, and a CollectionView iterates over a collection and renders individual ItemView instances. The Layout object allows complex user interfaces to be laid out into a set of Region objects.
View Management
A number of mechanisms are available to manage regions and subviews within the framework. There is also a renderer, which allows templates to be rendered in a consistent manner. Your views can also be sped up by utilizing the TemplateCache.
Messaging
Marionette provides a request-response framework and a command execution framework to allow better decoupling of application code. Both of these components allow one part of the application to request work to be done without needing to be tied to the component that performs the work.
Put together, the features that Marionette provides brings Backbone into a new league. Developers with a background in more traditional languages and web application frameworks will find these features more familiar, and it makes the JavaScript code more manageable.
A Simple Marionette Application
This section will take you through the creation of a Marionette-based application step-by-step.
To create the app, you can make a copy of index.html and name it m.html. We’ll include a different app.js to manage the application using Marionette rather than plain Backbone. This will be stored in a directory named Marionette under the js directory.
The main m.html page will need to include your Marionette download, as well as this new app.js.
<!-- General Includes -->
<script src="js/external/jquery-1.10.2.js"></script>
<script src="js/external/underscore.js"></script>
<script src="js/external/backbone.js"></script>
<script src="js/external/handlebars.js"></script>
<script src="js/external/moment.js"></script>
<script src="js/external/dialog.js"></script>
<script src="js/external/backbone.marionette.js"></script>

<!-- The 'main' for this app -->
<script src="js/marionette/app.js"></script>
Create an Application
The Backbone.Marionette.Application object is at the center of any Marionette app. This application is the first thing that is created and can be extended with many options if you want. The simplest invocation of this object is as follows:
$(function() {

    //create a new Marionette Application
    MApp = new Backbone.Marionette.Application();
});
From here, you will be able to add regions, set up initializers to prepare the application in a particular way, or set up application-level event listeners.
Adding Regions
The Marionette.Region object provides functions to manage your views within your application. Regions can be added in any one of three forms: by using a jQuery selector, by creating your own custom Region object, or by using a combination of both methods.
An application can contain multiple Region objects, and later we’ll see how Layout objects can be added to encapsulate a number of regions.
To add the main content area of the page as a region to this application, simply add the following lines:
MApp.addRegions({
     mainRegion: '#app'
});
An equivalent way to achieve this would be to create your own Region object and set the root element for that Region.
AppRegion = Marionette.Region.extend({
el: '#app'
});
MApp.addRegions({
     mainRegion: AppRegion
});
Both of the following code snippets will create a Region as part of the application, using a div with an ID of content as the area to render within.
The region can be accessed through the Backbone.Marionette.Application reference, by using the region name (in this case mainRegion). You can access the region directly as an attribute.
var region = MApp.mainRegion;
Alternatively, you can use the getRegion function.
var region = MApp.getRegion('mainRegion'),
Adding Views to a Region
Marionette has a number of different view types defined, including ItemView, which is ideally used to render a single item, and CollectionView, which should be used to render a number of ItemViews when dealing with collections.
For a simple example, the TimelineView that was previously defined as a Backbone.View could be refactored to extend Backbone.Marionette.ItemView. A copy of the original Timeline.js can be renamed to MarionetteTimeline and adjusted as follows:
var com = com || {};
com.apress = com.apress || {};
com.apress.view = com.apress.view || {};

com.apress.view.MarionetteTimelineView = Backbone.Marionette.ItemView.extend({
This new view needs to be included in the list of scripts on the main HTML page.
<script src="js/app/view/MarionetteTimelineView.js"></script>
Finally, the view can be added to the Region. There are two ways to do this; one is to include the view when creating the region by using the currentView attribute.
var timelineView = new com.apress.view.MarionetteTimelineView();
AppRegion = Marionette.Region.extend({
     el: '#app',
    currentView: timelineView

    });
This causes the view to be rendered as soon as the Region is displayed. You can also attach a view after the Region has been created using the attachView function.
var timelineView = new com.apress.view.MarionetteTimelineView();
MApp.mainRegion.attachView(timelineView);
As Region objects manage views, it follows that there are methods available to show or hide a particular view. A Region also has the benefit of including a reset function that will completely clear all views that have been displayed within.
MApp.getRegion('mainRegion').reset();
You can also close individual views within a Region using the close function.
MApp.mainRegion.close(timelineView);
Region Events
When calling show() or close() on Marionette views, events are fired that the Region can listen to and react if necessary. The listeners can be added to the Region as follows:
MApp.mainRegion.on("show", function(view){
    console.log( ' View has been displayed '),
});
MApp.mainRegion.on("close", function(view){
    console.log( ' View has been closed '),
});
Executing code to show or close the view will now trigger the appropriate function.
MApp.mainRegion.show(timelineView);
MApp.mainRegion.close(timelineView);
Additionally, both Region and View classes can have onShow and onClose functions defined to handle these events.
AppRegion = Marionette.Region.extend({
 el: '#app',
 onShow: function(view){
     console.log('View is shown'),
 },

 onClose: function(view){
     console.log('View is closed'),
 }
});
Strictly speaking, it would be better to utilize the CollectionView as the type of Marionette view because the Twitter timeline is really a series of Tweet objects. In the previous section when we used ItemView, the same render function from Chapter 6 was still in use, so Marionette’s rendering was not used.
Marionette actually provides a default rendering for ItemViews, based on their templates, and the Model object that can be provided from its collection. Figure 10-3 illustrates how the CollectionView and ItemView can be used together.
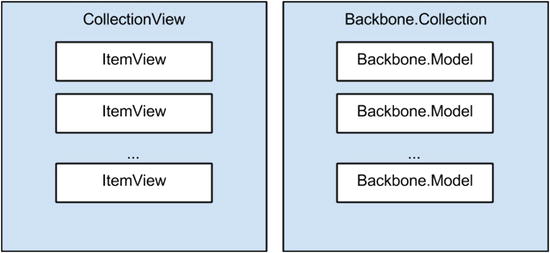
Figure 10-3. An illustration of the relationship between CollectionView, ItemView, Backbone.Collection, and Backbone.Model
As you can see from Figure 10-3, a CollectionView represents a single Backbone.Collection. For each of the Backbone.Model objects present in that collection, an ItemView is created to render that model.
Creating an ItemView is usually a simple task, where the template required is passed, with no rendering function required. The showProfile event listener and handler from Chapter 6 are also added to the ItemView because it is an event that relates to each of these subviews.
To represent the model objects correctly, you can create a new JavaScript file in the view directory named TimelineItemView.
Note that the template parameter, which is required in all ItemViews, references the compiled version of our Handlebars template. If your Marionette application is utilizing Underscore templates, this would not be necessary. Instead, you could pass the ID of that Underscore template.
var com = com || {};
com.apress = com.apress || {};
com.apress.view = com.apress.view || {};

com.apress.view.TimelineItemView = Backbone.Marionette.ItemView.extend({

    template: Handlebars.compile($("#timeline-item-template").html()),

    events: {
        'click .profile': 'showDialog'
    },

    showDialog: function(options) {
        var self = this,
            $target = $(options.currentTarget),
            username = $target.data('user'),

        var profileView = new com.apress.view.ProfilePopupView({
            user: username
        });
    }
});
Previously the template that was being used to render timeline information iterated over an entire collection. We are now dealing with individual items, so the template will need to reflect this in the main HTML page, m.html.
<!-- Template for timeline items -->
<script type="text/x-handlebars-template" id="timeline-item-template">
       <li>
         <div class='icon'>
                 <img src='{{user.profile_image_url}}'></img>
           </div>
           <div class='data'>
               <h4>{{user.name}}</h4>
               <p>{{format text}}</p>
               <p class="timestamp"><i>{{friendlyDate}}</i></p>
           </div>
       </li>
</script>
While in the HTML page, we should update the root element of the timeline to be a ul tag by adding this under the div with the timeline identifier.
<div id='timeline' class='timeline-view'>
   <h2>My Tweets</h2>
    <ul id='timeline-list' class='listview fluid'>
    </ul>
</div>
The next step is to build a CollectionView that will use the newly created TimelineItemView. Once again, the amount of refactoring required from the previous TimelineView, which utilized the Backbone.View class, will be minimal. To remove any ambiguity, this JavaScript object should be named MarionetteTimelineView. It can also be placed in the view directory of the application.
Rather than extending Backbone.View, it will need to extend Backbone.Marionette.CollectionView.
var com = com || {};
com.apress = com.apress || {};
com.apress.view = com.apress.view || {};

    com.apress.view.MarionetteTimelineView = Backbone.Marionette.CollectionView.extend({
});
The most important attribute in a CollectionView is the ItemView that is used to render the Model objects.
com.apress.view.MarionetteTimelineView = Backbone.Marionette.CollectionView.extend({

    itemView : com.apress.view.TimelineItemView,
});
Note that the itemView refers to the class that is used rather than an instance of the view that would be created using the new operator. It is essential that you refer to the ItemView in this manner to avoid confusing errors in your application.
The other important attribute in the CollectionView is the collection attribute, which refers to the Backbone.Collection to use. The initalize function that previously existed can be kept because all it was responsible for was fetching the collection and calling render when the collection reset. If you wanted, you could build the Backbone.Collection outside of this view and pass it as a parameter.
The event handlers for clicking a user’s profile link have been moved to the TimelineItemView, and the root element has been updated to the ul identified with timeline-list, rather than using the higher-level div element.
var com = com || {};
com.apress = com.apress || {};
com.apress.view = com.apress.view || {};

com.apress.view.MarionetteTimelineView = Backbone.Marionette.CollectionView.extend({

    el: '#timeline-list',
    itemView : com.apress.view.TimelineItemView,

    initialize: function(options) {
        var self = this;
        //create a collection for this view to render
        self.collection = new com.apress.collection.Timeline();

        //force the fetch to fire a reset event
        self.collection.fetch({
            reset: true
        });
        self.listenTo(self.collection, 'reset', self.render);
    }

});
To get everything running, ensure that the new view is included correctly in the main HTML page.
<script src="js/app/view/TimelineItemView.js"></script>
<script src="js/app/view/MarionetteTimelineView.js"></script>
Now, in app.js, the region can use the MarionetteTimelineView in place of the old view.
var timelineView = new com.apress.view.MarionetteTimelineView();
MApp.mainRegion.show(timelineView);
When the application is run, you should see the Twitter timeline rendered once again, as in Figure 10-4.

Figure 10-4. Using a CollectionView to render the Twitter timeline
Later in this chapter when we look at the Marionette Layout object, we will see how to incorporate the profile view that appeared on the right side in the Chapter 6 example.
Marionette has one other type of view, in addition to ItemView and CollectionView, named CompositeView. This view extends the functionality that is provided by CollectionView. For more complex user interfaces that require collections, this can be a good choice because it allows you to provide a template to be used for the overall collection as well as using a template for the individual model objects in the collection.
To illustrate this, let’s take a look at the previous example where CollectionView was used to render the collection contents. The HTML had to be altered to include the ul container tags for the list of TimelineItemView objects to be rendered. The following code snippet shows how this looks in our main HTML page:
<div id='timeline' class='timeline-view'>
            <h2>My Tweets</h2>
                <ul id='timeline-list' class='listview fluid'>
                    </ul>
</div>
Using the CompositeView, we can get rid of this additional ul declaration and move it into a template, to be used only when the collection is being rendered.
<script type="text/x-handlebars-template" id="timeline-template">
 <ul id='timeline-list' class='listview fluid'>
 </ul>
</script>
This results in the timeline div returning to a simpler form.
<div id='timeline' class='timeline-view'>
         <h2>My Tweets</h2>
 </div>
To utilize this change, a new CompositeView version of the previous MarionetteTimelineView will need to be created. In this example, we’ll call this MarionetteCompositeTimelineView. Start by making a copy of MarionetteTimelineView, and change the declaration to use the correct view.
var com = com || {};
com.apress = com.apress || {};
com.apress.view = com.apress.view || {};

com.apress.view.MarionetteCompositeTimelineView = Backbone.Marionette.CompositeView.extend({
    });
You can also add a template attribute that will use the new timeline-template created previously. The root element attribute, el, will need to change to the higher-level timeline div, but the itemView can stay the same.
com.apress.view.MarionetteCompositeTimelineView = Backbone.Marionette.CompositeView.extend({
    el: '#timeline',
    template: Handlebars.compile($("#timeline-template").html()),
    itemView : com.apress.view.TimelineItemView,
}
Finally, the appendHtml function should be overridden so that each item that is added to the view is placed under the ul tag. The default implementation would have added it to the root el instead, which would have resulted in incorrect rendering in our case.
appendHtml: function(compositeView, itemView){
        compositeView.$('#timeline-list').append(itemView.el);
}
The complete code listing for MarionetteCompositeView would look as follows:
var com = com || {};
com.apress = com.apress || {};
com.apress.view = com.apress.view || {};

com.apress.view.MarionetteCompositeTimelineView = Backbone.Marionette.CompositeView.extend({
    el: '#timeline',
    template: Handlebars.compile($("#timeline-template").html()),

    itemView : com.apress.view.TimelineItemView,

    initialize: function(options) {
        var self = this;

        self.itemView =  com.apress.view.TimelineItemView;

        //create a collection for this view to render
        self.collection = new com.apress.collection.Timeline();
        //initial render
        //self.render();

        //force the fetch to fire a reset event
        self.collection.fetch({
            reset: true
        });

        self.listenTo(self.collection, 'reset', self.render);
    },

    appendHtml: function(compositeView, itemView){
        compositeView.$('#timeline-list').append(itemView.el);
    }
});
There are two minor changes required to have this work with the TimelineItemView object. First, add a tagName attribute to TimelineItemView with the value li. This instructs Backbone to wrap the HTML for this view in an li tag. Without this, the default would have been to wrap the HTML in a div.
com.apress.view.TimelineItemView = Backbone.Marionette.ItemView.extend({

    //el: '#timeline',
    template: Handlebars.compile($("#timeline-item-template").html()),
    tagName: 'li',

    //other TimelineItemView source
});
This will require the timeline-item-template to be changed so that it no longer contains the li tag.
<!-- Template for timeline -->
<script type="text/x-handlebars-template" id="timeline-item-template">
        <div class='icon'>
                 <img src='{{user.profile_image_url}}'></img>
           </div>
           <div class='data'>
               <h4>{{user.name}}</h4>
               <p>{{format text}}</p>
               <p class="timestamp"><i>{{friendlyDate}}</i></p>
           </div>
</script>
Finally, to use this new view in the application, simply change the declaration of timelineView in app.js to use the new MarionetteCompositeView.
var timelineView = new com.apress.view.MarionetteCompositeTimelineView();
MApp.mainRegion.attachView(timelineView);
Depending on your preference, either the simpler CollectionView or the CompositeView can be used in the application. In our application example, to switch between both, you just need to remember to set up that initial ul within the timeline div.
Marionette Views in More Detail
All views in Marionette extend a base Marionette.View class, although you will never use this view directly. Instead, it provides common functionality to be used across all three view types.
General View Events
A few events are common across all views. When any Marionette view is closed, the following sequence of events occur on the view being closed:
- The onBeforeClose callback is executed, if it exists.
- The onClose callback is executed, if it exists.
- Unbind all custom view events.
- Unbind all DOM events.
- Remove the view’s el from the DOM.
- Unbind all listenTo events.
Table 10-1 lists these callbacks and describes how they can be used.
Table 10-1. Callbacks That Can Be Used Across All Marionette View Types
Callback |
Description |
|---|---|
onBeforeClose |
This allows additional checks to be performed before a view is actually closed. By returning false, the view will be kept open, and the sequence of closing events will be terminated. |
onClose |
Once the view is closed and cleaned up, this allows the execution of additional custom cleanup code, without the need to override the close function. |
onDomRefresh |
When a view has been rendered and shown on the DOM, the onDomRefresh function allows you to manipulate the HTML for the view. |
ItemView
As illustrated already in this chapter, ItemView is one of the simpler views in Marionette. During the life cycle of an ItemView, a number of events are fired, in addition to the common events for all views. Table 10-2 lists the callbacks that you can add to your ItemView to handle these events.
Table 10-2. ItemView Life-Cycle Event Callbacks
Callback |
Description |
|---|---|
onBeforeRender |
Triggered before the view is rendered. This allows preparation code to be executed before rendering commences, if necessary. |
onRender |
Triggered once the rendering of the view is complete. This allows custom code to be added to manipulate the view’s el further. |
CollectionView
We’ve already seen how the CollectionView utilizes the combination of Backbone.Collection and Marionette ItemViews to provide a clean way of representing the model objects in the collection on the screen.
Just as with ItemView, CollectionView has a number of callback events that can be added to deal with the various events that get triggered during the view’s life cycle. Table 10-3 lists these callbacks.
Table 10-3. CollectionView Life-Cycle Event Callbacks
Callback |
Description |
|---|---|
onBeforeRender |
Triggered before the CollectionView is rendered, allowing additional preparation of the root element before rendering the view. |
onRender |
Triggered once the rendering of the CollectionView is complete. This allows custom code to be added to manipulate the view’s el further. |
onBeforeItemAdded |
Triggered before an ItemView is added to the CollectionView. The ItemView that is about to be added is passed to this callback as a parameter. This can be used to decide whether to add the ItemView, for example, when a filter is in effect for the CollectionView. |
onAfterItemAdded |
Triggered when the ItemView has been added to the CollectionView. The instance of the ItemView that has been added is included as a parameter in this callback. |
onItemRemoved |
Triggered when an a model object has been removed from the original collection and, as such, removed from the CollectionView. |
Note that the CollectionView will render automatically when its collection has been altered through add, remove, or reset events. This saves the developer from having to listen for such occurrences and rerender the view manually.
Passing Parameters to ItemView
As well as providing a value for the itemView attribute, which must be an object definition rather than an instance, additional itemViewOptions can be passed for cases where the initialize function in the ItemView requires some parameters.
For example, if TimelineItemView had an initialize function defined as follows:
initialize: function(options){
    console.log('Initialized with ' + JSON.stringify(options));
   },
then simply passing any parameters you need via the CollectionView can be achieved by stating these itemViewOptions in the constructor:
var timelineView = new com.apress.view.MarionetteTimelineView({itemViewOptions: {parameter: 'hello itemview'}});
Providing Views for Empty Datasets
There may be cases that the collection is empty and there is nothing to render. Considering that there is no template available at the level of the CollectionView, this needs to be handled somewhere else. Luckily, the creators of Marionette included an emptyView attribute that allows a backup view to be used when there are no items to be rendered.
Typically, the value of the emptyView attribute will be another ItemView definition that uses a dedicated template.
Accessing Child Views
In cases that you need to access a particular ItemView within the CollectionView, you can use the children attribute, which provides a list of pointers to each ItemView. You can also access a specific ItemView by model using children.findByModel( model ) in cases that you have a reference to the model that relates to the ItemView.
Nested Regions
Marionette provides a Layout object that allows you to create multiple regions in an application and control the overall app layout. A Layout object consists of a number of Region objects and extends from ItemView. This means you can provide a template for the overall application layout structure and then use the regions attribute to specify the areas within the application that will be filled out with other views, or even other nested layouts.
The definition of a layout has two key attributes: the template that will be used and the regions marked inside that template. An example of a Layout definition follows:
MyLayout = Backbone.Marionette.Layout.extend({
 template: '#layout-template',
 regions: {
   main: '#main',
   nav: '#nav'
 }
});
Just as with the main Backbone.Marionette.Application object, regions can be added and removed using the appropriate functions (addRegion, removeRegion). Deferring the management of regions to the Layout object rather than the overall Application object leads to a cleaner code base.
As Layout extends ItemView, it also inherits the close functionality. This means you can switch layouts by closing one and replacing it with a new one.
Using Layout in Our Example
We can extend our current example to use the Layout object, creating separate regions for the timeline view and the profile. First, we’ll need to change the existing ProfileView to be a Marionette ItemView. As we’ve done before, a simple copy of ProfileView will suffice, renaming it to MarionetteProfileView. To make this an ItemView, we’ll just change the type from Backbone.View to Backbone.Marionette.ItemView.
com.apress.view.MarionetteProfileView = Backbone.Marionette.ItemView.extend({
//existing source
});
Next, the template for the overall application needs to be created. This is simply a matter of moving everything that was within the body tag, bar the other templates, into a new template with an ID of app-layout-template.
<!-- Template for entire app-->
<script type="text/template" id="app-layout-template">
<div id="app" class="grid">
       <div class="row">
           <div class="span8">
               <div id='timeline' class='timeline-view'>
                <h2>My Tweets</h2>
                <div id="timeline-area">
                   <ul id='timeline-list' class='listview fluid'>
                   </ul>
                 </div>
             </div>
           </div>

           <div class="span4" id="side">
               <div id="profile" class="profile-view">
               </div>

                 <div id="search" class="search-view">
                   <form>
                         <div class="input-control text">
                              <input type="text" id="searchbox" autofocus="" placeholder="I'm looking for..">
                           </div>
                             <button class="bg-color-blue" id="searchbutton">Search</button>
                   </form>
                 </div>
             </div>
       </div>
   </div>
</script>
Previously, the Application object used the div with an ID of app as its main region. We’ll change this now to be the body tag.
AppRegion = Marionette.Region.extend({
 el: 'body',
});
The creation of the layout now is simply a matter of defining the template to use and the regions that are marked for the views to be added. This code can be placed directly in app.js.
AppLayout = Backbone.Marionette.Layout.extend({
    //template: Handlebars.compile($("#app-layout-template").html()),
    template: "#app-layout-template",
    regions: {
        timeline: '#timeline-area',
        profile: '#side'
    }
});
The Layout must be instantiated and added into the mainRegion of the application.
var layout = new AppLayout();
MApp.mainRegion.show(layout);
Finally, each of the views can be created and added to the appropriate region.
layout.timeline.show(new com.apress.view.MarionetteTimelineView({itemViewOptions: {parameter: 'hello itemview'}}));
layout.profile.show(new com.apress.view.MarionetteProfileView({user: 'sugrue'}));
Layout affords a little extra control over the application user interface, without the need to create a number of levels of complicated subviews throughout the application. While it may seem that Application and Layout are similar, you should consider that a Layout has a visual representation, while the Application should be used as a lightweight object for managing the life cycle of your app.
Having looked at Marionette in detail, it’s worth investigating another alternative framework that helps manage your Backbone applications. Thorax (http://thoraxjs.org, Figure 10-5) was written by Ryan Eastridge and Kevin Decker for the Walmart mobile application. While similar to Marionette in some aspects, the framework is more opinionated, forcing Handlebars as the template mechanism.

Figure 10-5. Thorax web site at http://thoraxjs.com
Thorax Feature Set
Thorax provides a similar feature set to Marionette, covered in the following sections.
Views
Thorax includes extensions to the standard Backbone.View, which utilizes Handlebars templates. Just as with Marionette, there is a CollectionView that helps deal with displaying complete lists of items.
Getting Started with Thorax
The easiest way to get going is to download the library from the CDN, at http://cdnjs.cloudflare.com/ajax/libs/thorax/2.0.0rc6/thorax.js. Details of the latest version will be available at https://github.com/walmartlabs/thorax. This should be downloaded and added to the external directory, like we have done with all external dependencies. Your directory structure should look similar to Figure 10-6.
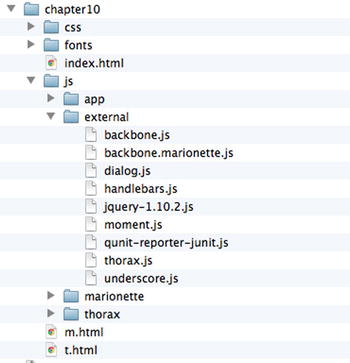
Figure 10-6. Directory structure of application including Thorax
For a really quick start, you can clone the Thorax Seed project from https://github.com/walmartlabs/thorax-seed and follow the instructions to build a basic app, utilizing grunt tasks to generate a stub.
We’ll be building a Thorax version of the Twitter, so make a copy of index.html from Chapter 6 and rename it to t.html. For now, the only script you’ll need to include apart from the standard combination of dependencies (Backbone, jQuery, and Handlebars) is the new Thorax library.
<!-- General Includes -->
<script src="js/external/jquery-1.10.2.js"></script>
<script src="js/external/underscore.js"></script>
<script src="js/external/backbone.js"></script>
<script src="js/external/handlebars.js"></script>
<script src="js/external/moment.js"></script>
<script src="js/external/dialog.js"></script>
<script src="js/external/thorax.js"></script>
As in the previous section, when illustrating the features of Marionette, it is useful to create a separate app.js under a thorax directory, which should also be included in the HTML page.
<!-- The 'main' for this app -->
<script src="js/thorax/app.js"></script>
In the following sections, we’ll run through some Thorax basics before moving onto a reimplementation of the Twitter application using Thorax.
An Introduction to Thorax Types
Thorax includes a number of specialized versions of Backbone objects, such as Thorax.Model, Thorax.Collection, and Thorax.View, which all interact seamlessly together. This section will first focus on the data types available. Thorax views will not work with plain Backbone.Model or Backbone.Collection objects, so it is essential to understand test types. With an understanding of the model and collection types, we’ll take a look at some examples of Thorax views.
Thorax.Model
Thorax.Model extends Backbone’s default model with two functions, one to check whether the model is empty (isEmpty()) and another to check whether the model has been populated (isPopulated()). When a model is passed to a view, the isPopulated() function is used to check whether it is necessary to fetch the model data.
To create a Thorax model, simply use Thorax.Model.extend to define the model rather than Backbone.Model.extend.
MyModel = Thorax.Model.extend({
    //otherwise the model is the same
});
Thorax.Collection
Just as with Thorax.Model, Thorax.Collection adds two functions to the default Backbone implementation. The functions are also the same; isEmpty() returns true if the collection has a zero length, and isPopulated() is used to determine whether the collection should be fetched when it is passed to a view.
Creating a Thorax.Collection is a matter of replacing the usual Backbone.Collection.extend with Thorax.Collection.extend.
MyCollection = Thorax.Collection.extend({
    //otherwise the collection is the same
});
Thorax’s collection is the same as a standard Backbone collection in every other way.
Thorax.View
The centerpiece of the Thorax library is the View object, which adds an element of simplicity and data binding to the default Backbone.View object.
Each view needs to have a Handlebars template available for rendering, which is referenced through the template attribute. Views will also include either a model or collection attribute, but note this can be passed at a later stage.
Most views will have at least a template and model attribute defined as follows:
var view = new Thorax.View({
 template: //a compiled template
 model: //your model
});
This template has access to any of the attributes listed in the view, as well as all properties within the model object. The following example illustrates how properties are made available to the view’s template:
var view = new Thorax.View({
 label: "Title",
 template: Handlebars.compile( "{{label}} : {{bookname}}"),
 model: new Thorax.Model({
   bookname: 'Beginning Backbone'
 }),
});
The view must be added to a section of the page before it will be visible. This is done through the appendTo function, which accepts a CSS selector to decide where to attach the HTML that the view has generated.
view.appendTo('body'),
By running the previous code in app.js, you will have a simple view displayed, as in Figure 10-7.
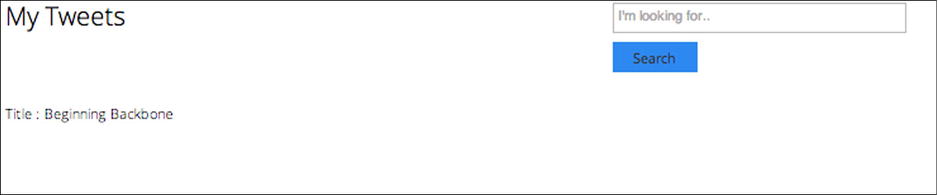
Figure 10-7. A simple Thorax view
Using View Context
Thorax.View includes a context property that allows you to expose only parts of the model to the template. This can be useful if you want to control which model attributes the template uses or if you want to alter the attributes in some way before displaying them in the view.
The following code snippet illustrates how the context property can be used to change the bookname value to uppercase. Because the author is not made available in the context, it is not displayed in the resulting HTML output.
var view = new Thorax.View({
 model: new Thorax.Model({
   bookname: 'Beginning Backbone',
   author: 'James Sugrue'
 }),
 label: 'Title',
 context: function() {
   return {
     bookname: this.model.get('bookname').toUpperCase()
   };
 },
 template: Handlebars.compile( "{{label}} : {{bookname}} by {{author}}"),
});

view.appendTo('body'),
![]() Note context applies only to model attributes; any attributes defined in the view will always be visible to the template.
Note context applies only to model attributes; any attributes defined in the view will always be visible to the template.
Embedded Views
One of the main reasons to use Thorax is to make the management of subviews simpler and to alleviate any concerns of memory leaks. Using one of the many built-in Handlebars helpers, view, you can easily embed views inside the view template.
First, create a view that you want to use as a child view.
var subview = new Thorax.View({
 model: new Thorax.Model({
   description: 'A book to help you get started with Backbone.js',
  }),
 template: Handlebars.compile( "{{description}}"),
});
Then, the subview can be passed as another property within the main view. In the following example, this is tagged with the name subview, but it can be any name you want.
The template included here expects a view named subview to be available. By simply using the {{view subview}} statement within your template, the subview is successfully rendered.
var view = new Thorax.View({
 model: new Thorax.Model({
   bookname: 'Beginning Backbone',
   author: 'James Sugrue'
 }),
 label: 'Title',
 context: function() {
   return {
     bookname: this.model.get('bookname').toUpperCase()
   };
 },
 subview: subview,
 template: Handlebars.compile( "{{label}} : {{bookname}} by {{author}} <br/> {{view subview}}"),
});

view.appendTo('body'),
Layouts
Thorax.LayoutView is a simple way to include a placeholder for other views in your document. It can be useful when you need to replace a view within another.
var layout = new Thorax.LayoutView();
layout.appendTo('body'),
The LayoutView has two functions: setView and getView. When these functions are used, certain life-cycle events will be triggered within the views themselves. Consider the following view:
var view = new Thorax.View({
 events: {
   ready: function() { console.log('View is ready'),},
   destroyed: function() { console.log('View is destroyed'),},
   rendered: function() {console.log('View is rendered'),}
 },
 model: new Thorax.Model({
   bookname: 'Beginning Backbone',
   author: 'James Sugrue'
 }),
 template: Handlebars.compile( "{{bookname}} by {{author}}"),
});
When this is added to the view, through the setView function, the rendered event will be triggered.
layout.setView(view);
If the view is replaced with another, the destroyed event will be fired.
//replacing with this view. Original view is destroyed
var replacementView = new Thorax.View({
 events: {
   ready: function() { console.log('Replacement View is ready'),},
   destroyed: function() { console.log('Replacement View is destroyed'),},
   rendered: function() {console.log('Replacement View is rendered'),}
 },
 model: new Thorax.Model({
   bookname: 'Beginning Backbone',
   author: 'James Sugrue'
 }),
 template: Handlebars.compile( "{{bookname}}"),
});

layout.setView(replacementView);
The result of the previous code is the destruction of the original view and the rendering of the new view.
![]() Note There is a useful Chrome extension available, named Thorax Inspector, that allows you to inspect Thorax views within your application and see the associated models and collections.
Note There is a useful Chrome extension available, named Thorax Inspector, that allows you to inspect Thorax views within your application and see the associated models and collections.
Using Thorax for the Twitter Example
To illustrate how to migrate an existing application to Thorax, we’ll migrate both the timeline view, which uses a collection, and the profile view, which uses a model.
Migrating the Profile View
Before we deal with the view, the Profile model will need to be changed to a Thorax.Model object. To do this, simply make a copy of the original Profile.js model and change the extends declaration. For clarity, you may want to place all Thorax models under a separate namespace, as in this example. As you can see, the amount of change required is quite limited.
var com = com || {};
com.apress = com.apress || {};
com.apress.model = com.apress.model || {};
com.apress.model.thorax = com.apress.model.thorax || {};

com.apress.model.thorax.Profile = Thorax.Model.extend({

    urlRoot: 'http://localhost:8080/profile',

    parse: function(model) {
        return model;
    }

});
With the model in place, we can make a copy of the original ProfileView.js and create a ThoraxProfileView.js file. Thorax will deal with rendering, so the resulting code is much simpler. Additionally, because the model will be created before the view is used, there is no requirexment for an initialize function.
var com = com || {};
com.apress = com.apress || {};
com.apress.view = com.apress.view || {};

com.apress.view.ThoraxProfileView = Thorax.View.extend({

    el: '#profile',

    template: Handlebars.compile($("#profile-template").html()),

});
Ensure that the model and view are available in the HTML page.
<!-- Model -->
<script src="js/app/model/thorax/Profile.js"></script>
<!-- View -->
<script src="js/app/view/ThoraxProfileView.js"></script>
The profile template in the HTML page is also slightly updated because the model is no longer referenced under the username.
<!-- Template for profile -->
<script type="text/x-handlebars-template" id="profile-template">
<div class='tiles clearfix'>
   <div class="tile double bg-color-orangeDark">
     <div class="tile-content">
         <img src="{{profile_image_url}}" class="place-left">
         <h3 style="margin-bottom: 5px;">{{name}}</h3>
         <p>{{description}}</p>
         <div class="brand">
             <div class="badge">{{followers_count}} Followers</div>
         </div>
     </div>
   </div>
 </div>
</script>
Finally, update app.js to retrieve the profile model and on success display the profile view.
var profileModel = new com.apress.model.thorax.Profile({id: 'sugrue'});
//ensure we have the model before rendering
profileModel.fetch({success: function(){
                //get the profile model first
                var profileView = new com.apress.view.ThoraxProfileView({model: profileModel});

                profileView.appendTo('#profile'),

            }
        });
Running the application will result in the profile being displayed on the HTML page.
Migrating the Timeline View
Although the migration of the timeline view is similar to the previous, you will also need to deal with a collection rather than a simple model. This is dealt with using the special collection Handlebars helper that Thorax provides.
Before dealing with the collection, the Tweet model will need to be updated, as in the Profile model example, to extend Thorax.Model. Once again, the Thorax version of Tweet.js is placed under a different namespace.
var com = com || {};
com.apress = com.apress || {};
com.apress.model = com.apress.model || {};
com.apress.model.thorax = com.apress.model.thorax || {};

com.apress.model.thorax.Tweet = Thorax.Model.extend({

    parse: function(model) {

        //USE moment here
        //mode.created_at "Wed Aug 28 06:32:07 +0000 2013"
        var created = model.created_at;
        var friendly = moment(model.created_at, "ddd MMM DD HH:mm:ss ZZ YYYY").fromNow();

        model.friendlyDate = friendly;

        return model;
    }

});
In the same manner, Timeline.js will need to extend Thorax.Collection. No other changes are necessary, other than on the namespace.
var com = com || {};
com.apress = com.apress || {};
com.apress.collection = com.apress.collection || {};
com.apress.collection.thorax = com.apress.collection.thorax || {};

com.apress.collection.thorax.Timeline = Thorax.Collection.extend({

    //the model that this collection uses
    model: com.apress.model.thorax.Tweet,
    //the server side url to connect to for the collection
    url: 'http://localhost:8080/timeline',

    initialize: function(options) {
        //anything to be defined on construction goes here
    },


    organiseCollection: function() {
        console.log('organising'),
    }
});
The previous TimelineView.js is greatly simplified; because Thorax will deal with all rendering, TimelineView.js doesn’t need a render function. The initialize function is also unnecessary because the collection will be made available before the view is created.
var com = com || {};
com.apress = com.apress || {};
com.apress.view = com.apress.view || {};

com.apress.view.ThoraxTimelineView = Thorax.View.extend({
    template: Handlebars.compile($("#timeline-template").html()),
});
The previous template assumed that a collection would be provided and iterated through using the each that Handlebars provides. However, Thorax provides a collection helper. This helper allows you to define the tag and class to use at either end of the list, while iterating through the collection.
<!-- Template for timeline -->
<script type="text/x-handlebars-template" id="timeline-template">
{{#collection tag="ul" class="listview fluid"}}
       <li>
         <div class='icon'>
                 <img src='{{user.profile_image_url}}'></img>
           </div>
           <div class='data'>
               <h4>{{user.name}}</h4>
               <p>{{format text}}</p>
               <p class="timestamp"><i>{{friendlyDate}}</i></p>
           </div>
       </li>
       {{/collection}}
</script>
While updating the HTML, ensure that there is a dedicated section to append the view to. In this case, it is the div with the timeline-section identifier.
<div id='timeline' class='timeline-view'>
      <h2>My Tweets</h2>
      <div id="timeline-section"></div>
   </div>
 </div>
You will also need to ensure that all the necessary scripts are included in the HTML, in addition to the scripts already included for the Profile view.
<!-- Model -->
<script src="js/app/model/thorax/Tweet.js"></script>
<!-- Collections -->
<script src="js/app/collection/thorax/Timeline.js"></script>
<!-- View -->
<script src="js/app/view/ThoraxTimelineView.js"></script>
<!-- Util -->
<script src="js/app/util/Helpers.js"></script>
Finally, to render the view, retrieve the collection and build the timeline view once it has been fetched successfully.
var timeline = new com.apress.collection.thorax.Timeline();
//force the fetch to fire a reset event
timeline.fetch({reset:true, success: function(){
    var timelineView = new com.apress.view.ThoraxTimelineView({collection: timeline});
    timelineView.appendTo('#timeline-section'),
}});
After running the previous code, the resulting HTML should look like Figure 10-8.
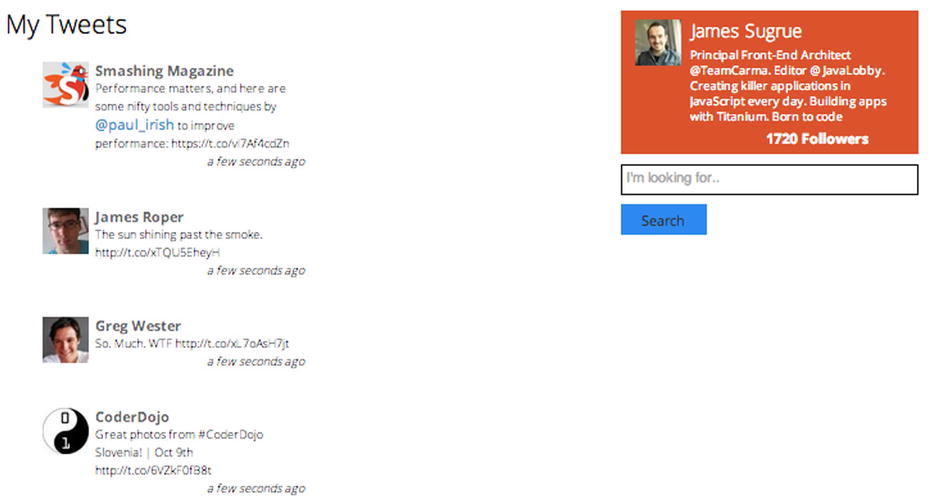
Figure 10-8. Final view of Thorax Twitter application example
Summary
In this chapter, we saw the benefits of the two leading Backbone add-ons, Marionette and Thorax. With Marionette, it’s clear that your application is much more scalable, with applications built through modules and an event-driven architecture that removes unnecessary coupling between objects. The code behind the application is much simpler than with standard Backbone and is less error-prone because of the reduction in boilerplate code. The memory management features mean that you won’t fall victim to the typical zombie view issues that many Backbone developers hit. Best of all, Marionette allows you to pick and choose which features of the framework suit your project.
Even though Thorax is opinionated, with the requirement that Handlebars templates are utilized, it provides a really simple way of binding models and collections to views. And as with Marionette, nested views and rendering are dealt with by the framework and allow developers to focus on the core business logic.
This chapter should be enough to get you started with either Marionette or Thorax. If you choose to base your Backbone application on either framework, you’ll see that there is a lot to discover. No matter which one you choose, your applications will be more structured and scalable as a result.