Before diving deep into Jenkins Blue Ocean, an introductory overview about it would be of great use. Blue Ocean is not just a renovation of the classic Jenkins UI—it's also a change in the way you compose, describe, and visualize pipelines.
What is Jenkins Blue Ocean?
What does it have to offer?
Things to consider
Along with the introduction, it is equally important to set the expectations right. Therefore, I have included a section about the essential things to consider before you decide to move to Jenkins Blue Ocean.
At the end of this chapter, you’ll get a clear picture of Jenkins Blue Ocean’s capabilities. Remember the current chapter is an introduction to Jenkins Blue Ocean. The upcoming chapters expound on the topics discussed here. So, let us begin.
What Is Jenkins Blue Ocean?
Jenkins Blue Ocean, or Blue Ocean, is more than just a face-lift to the Classic Jenkins .1 The following section answers why there is a Jenkins Blue Ocean in the first place and its purpose.
A Response to Stimuli
The need for an improved software delivery process has introduced various continuous practices, such as Continuous Integration and Continuous Delivery, to name a few.
These continuous practices are creating a wave of DevOps tools. As a result, a typical developer deals with at least two to five DevOps tools in everything he does.
As a consequence, demand for improved usability and user experience is inevitable. Jenkins, being a widely used CD tool, is no exception to these demands.
Jenkins is extensible and robust yet criticized for its poor user experience. An attempt to improve Jenkins’s usability is visible in Jenkins version 2.0 and afterward, such as the Jenkins Setup Wizard, the well-ordered configurations inside a Jenkins Job using tabs, and more recently the new login page, to name a few. However, these few enhancements do not fill the much more significant void in Jenkins concerning the user experience.
That is why we have Jenkins Blue Ocean. Blue Ocean is altogether a more generous attempt to address the user experience issue. Beauty with brains, I must say.
Competition from the other CI/CD tools is also responsible for the conception of Jenkins Blue Ocean. Tools such as Circle CI, GitLab CI—to name a few—already had the feature to visualize pipelines.
However, Jenkins Blue Ocean, although late in the competition, has the edge over the others for introducing the Visual Pipeline Editor —a UI tool to simultaneously visualize and create pipelines. You’ll see more of it in the upcoming sections and chapters.
A Continuous Delivery Tool for Everyone
Jenkins Blue Ocean comes with an embedded tool called the Visual Pipeline Editor. This tool allows users to create and edit their pipeline visually using a UI interface that’s accessible directly from the pipeline dashboard. Also, the Visual Pipeline Editor saves your pipeline in code inside a file (Jenkinsfile), following the Declarative Pipeline Syntax, directly to your source code repository.
The pipeline visualization allows users to diagnose pipeline failures with ease and speed. When a pipeline fails, Blue Ocean tells you exactly where it has failed by pointing out the failed step. Also, the pipeline logs are displayed individually for every stage and step of a pipeline, so that users do not end up scrolling through a single huge log.
Blue Ocean also creates separate pages to view your testing results and built artifacts for every pipeline run.
The pipeline creation process in Jenkins Blue Ocean is more like a wizard. It also comes with a UI tool to create and edit pipelines. Above all, it has an interactive pipeline visualization, which makes your pipeline easy to understand.
Those who would like to create a more complex Jenkins pipeline while staying within Jenkins Blue Ocean's framework can seek help from script and Jenkins Shared Libraries .
Your source code is on Git/GitHub/GitLab/BitBucket.
Your build/test agents are set up and connected to the Jenkins Master. If you plan to spawn them on Docker, the required Docker images2 and Dockerfiles3 are ready.
Your Continuous Delivery Pipeline is straightforward and free from legacy technologies.4
Your Jenkins Administrator has set up the supporting DevOps tools and Jenkins Plugins required by your CD pipeline.
A Jenkins Plugin
As a suite of plugins on an existing Jenkins installation
As part of Jenkins in Docker
Installing Jenkins Blue Ocean is easy for both new and existing Jenkins users. The Blue Ocean plugin works with Jenkins 2.7.x or later. Besides, there are important things to consider before using Blue Ocean if you run Jenkins behind a reverse proxy server such as Apache or Nginx.
In the upcoming chapter, you will learn to set up Blue Ocean in ways described earlier.
What Blue Ocean Offers?
The classic Jenkins is infamous for not being user-friendly. Jenkins Blue Ocean, on the other hand, is designed to provide the best possible user experience. Let’s see what Jenkins Blue Ocean has to offer.
Pipeline Creation Wizard
Creating a pipeline using Blue Ocean is much more relaxed in many ways. Thanks to the Blue Ocean engineers, the pipeline creation process is now a simple wizard.
If you search for the term Pipeline Creation Wizard, you are going to find nothing. It’s a name that I find appropriate for an improvement in Jenkins Blue Ocean—related to the way you create pipelines in Jenkins. Let’s look at what I mean.
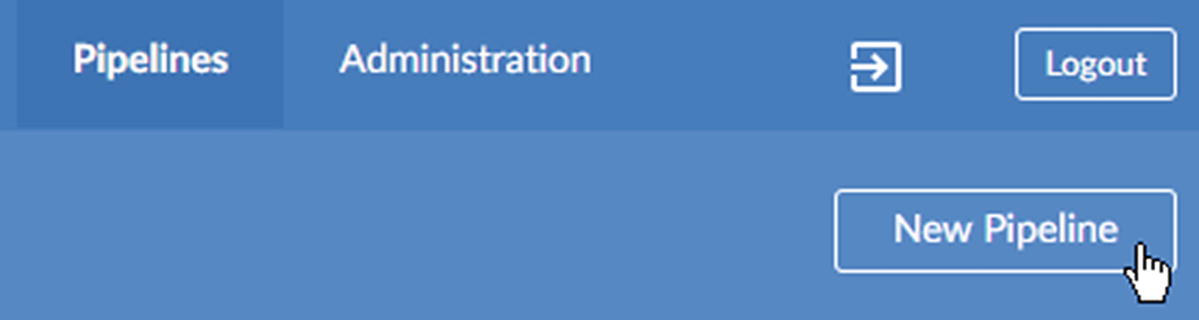
The Pipeline creation link to initiates the Pipeline Creation Wizard

Git-based repository managers that integrate with Blue Ocean

Connecting to GitHub using an access token
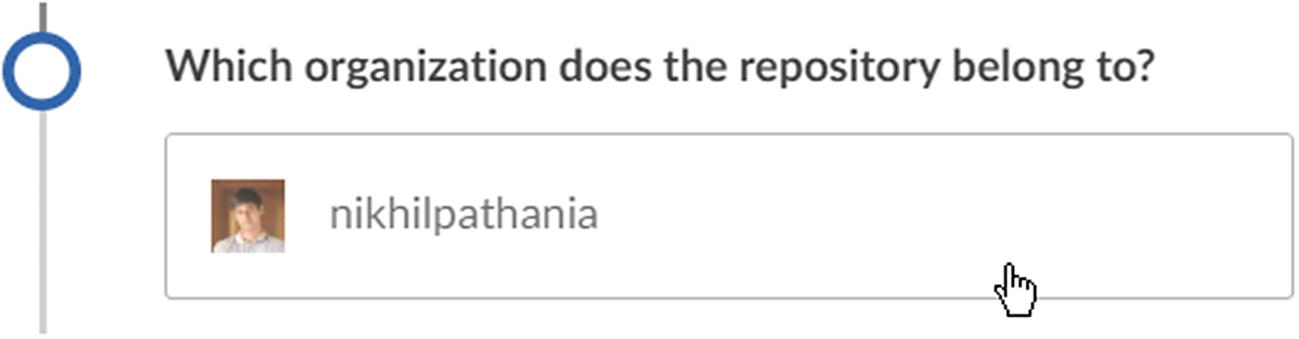
Choosing a GitHub organization
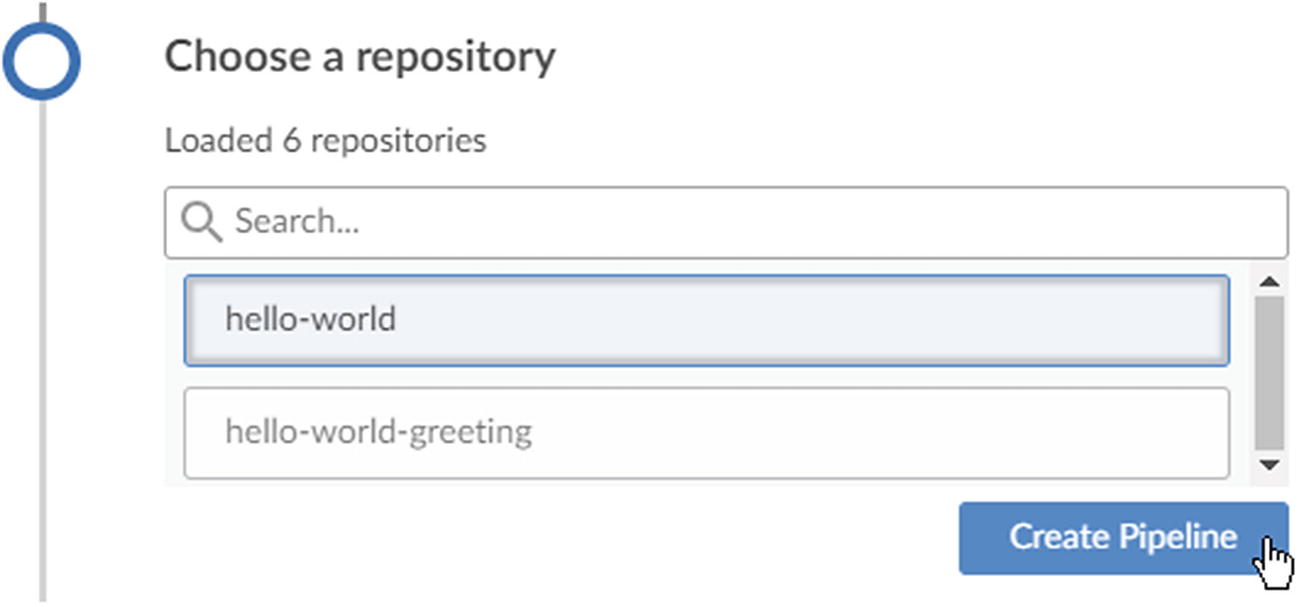
Choosing a repository

The Visual Pipeline Editor
When you try to create a pipeline in Jenkins Blue Ocean, you are bound to follow the aforementioned Pipeline Creation Wizard. It’s restrictive in many ways, but the good part is that it does not baffle new users by flashing all possible pipeline configurations on a single page, like in the Classic Jenkins.
This new way of creating a pipeline in Jenkins Blue Ocean is quick, easy, and intuitive. Next, let’s look at the Visual Pipeline Editor.
Visual Pipeline Editor
The Visual Pipeline Editor or Pipeline Editor is the most helpful feature in Jenkins Blue Ocean. It allows you to create a pipeline using a UI.

Working with the Visual Pipeline Editor
When you save your work, the Pipeline Editor converts it to a Jenkinsfile. You’ll get a brief introduction to Jenkinsfile in the next section.
Pipeline Editor can do everything that is possible using the Declarative Pipeline Syntax. You’ll learn about Declarative Pipeline Syntax in the coming section. There is also a chapter explaining Declarative Pipeline Syntax in detail.
When you install a Jenkins plugin, it makes itself available as a step inside the Pipeline Editor. Only Blue Ocean-compatible plugins are available. With every day that passes, more and more Jenkins plugins are getting Blue Ocean-ready.
In the upcoming chapters, you’ll learn to create a pipeline using the Pipeline Editor.
Jenkinsfile
Jenkinsfile is a text file that contains your pipeline code. Jenkinsfile resides inside your source control repository alongside the source code. When you create a pipeline in Blue Ocean, it automatically saves your pipeline design as pipeline code, which is saved as a Jenkinsfile inside your source control repository.
Each branch of your source code repository can have its pipeline.
It is possible to review the pipeline.
Multiple project members can view/edit the pipeline.
Pipeline Visualization

Pipeline visualization
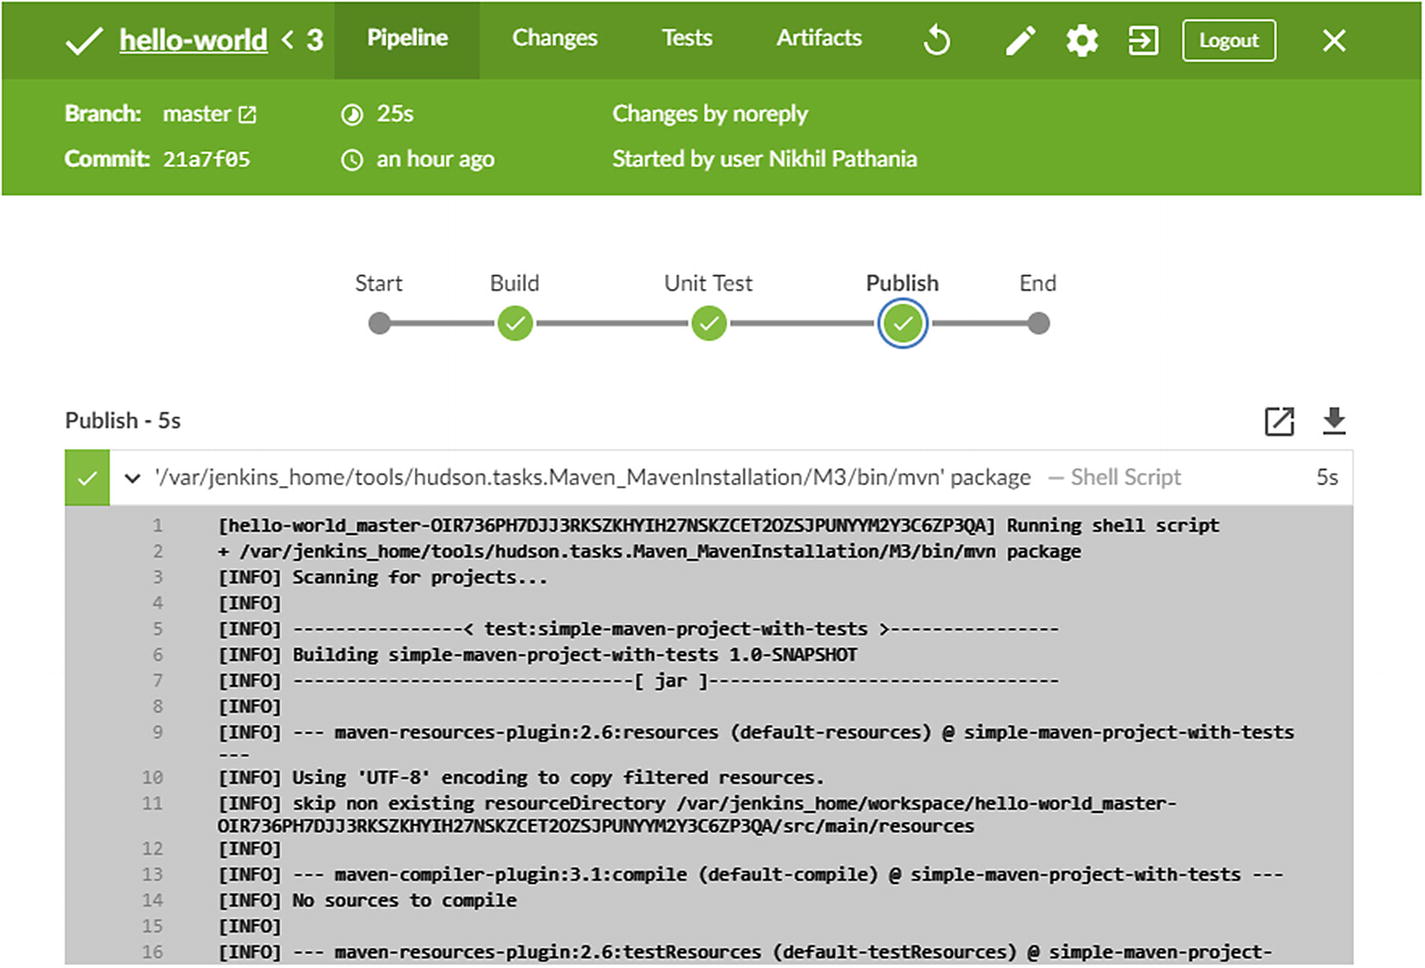
Individual log about a step belonging to a stage of the pipeline
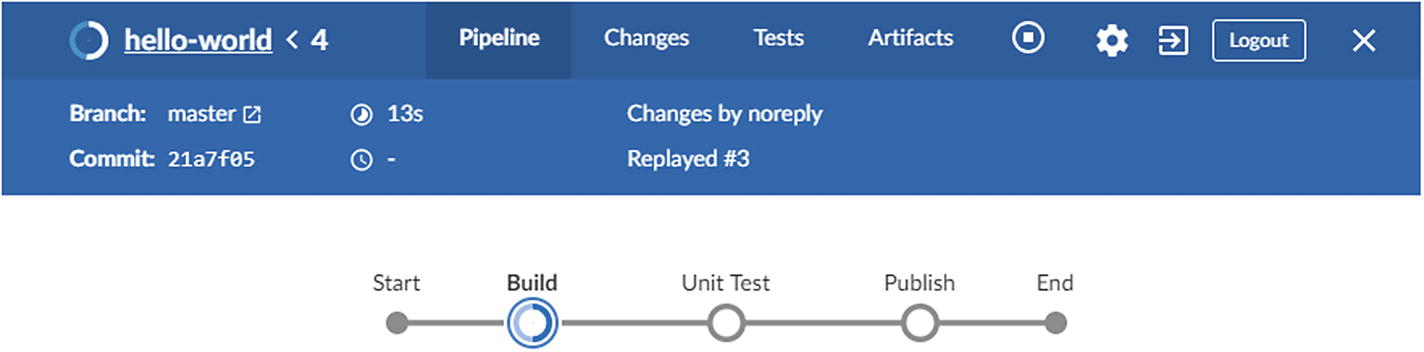
A pipeline stage in progress
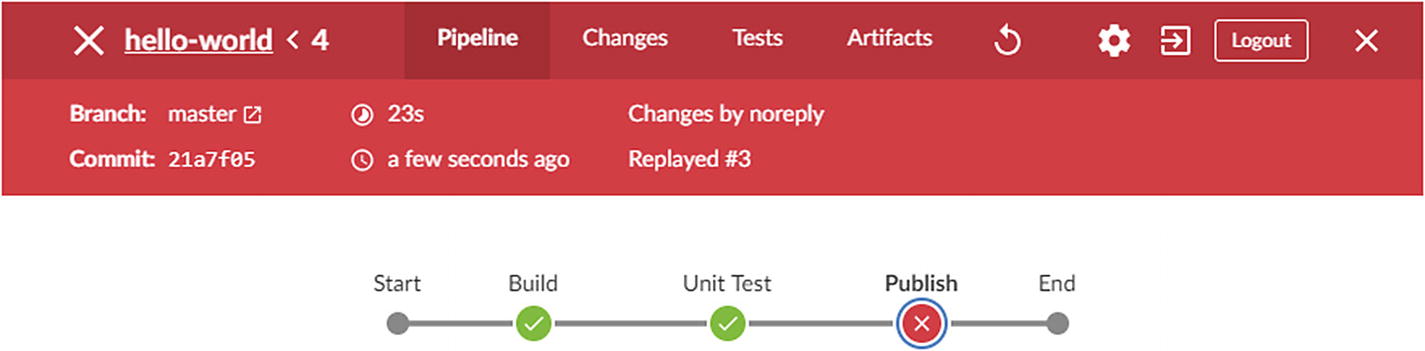
A failed stage of a pipeline
What you saw is a very simple pipeline flow. Blue Ocean, however, allows you to visualize complex pipeline flows that have nested parallel and sequential stages. You’ll see them in the upcoming chapters.
View Changes, Tests, and Artifacts
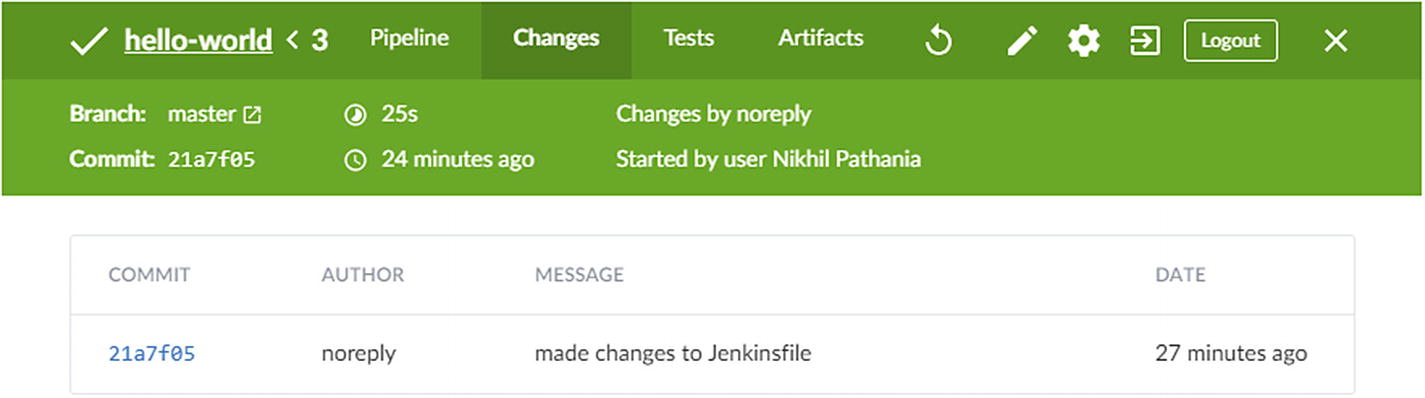
The Changes tab from a pipeline run
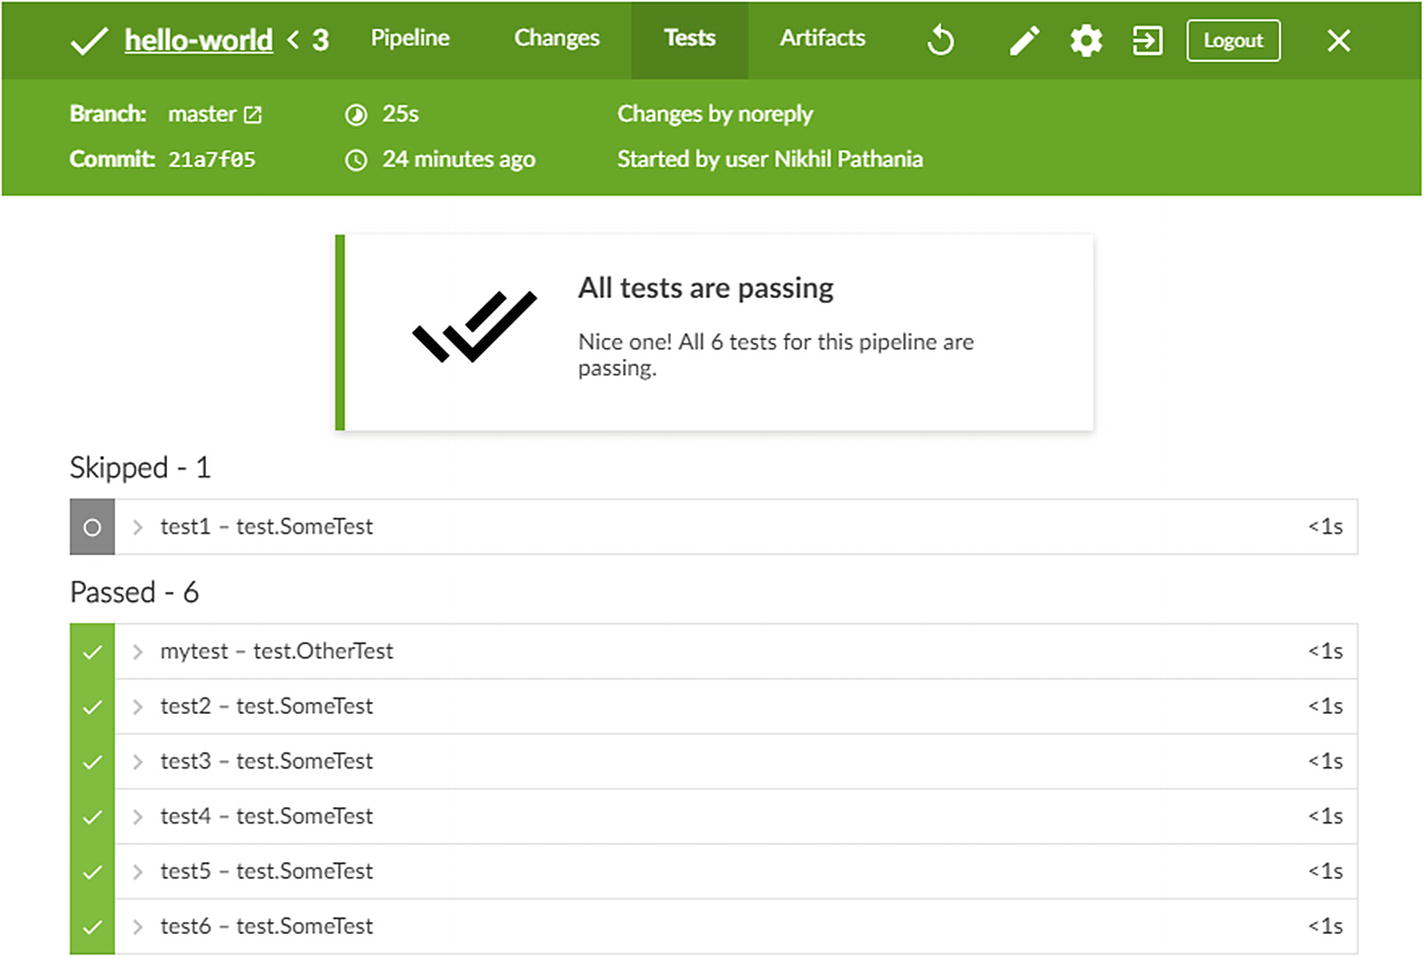
The Tests tab from a pipeline run
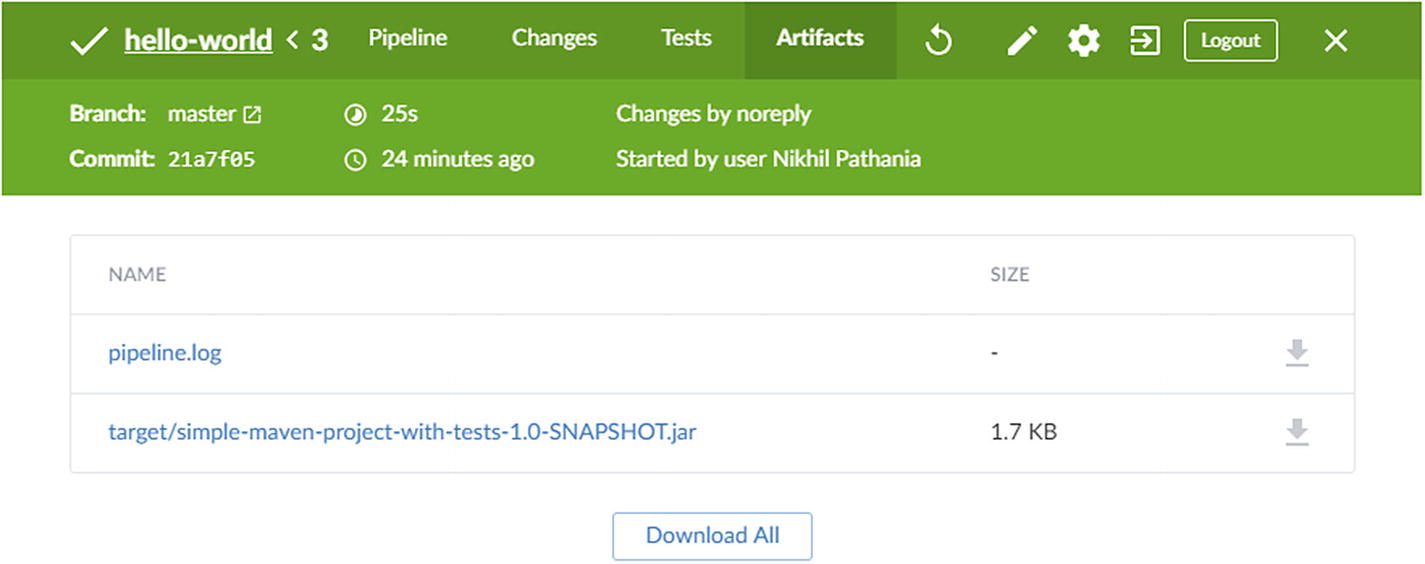
The Artifacts tab from the pipeline run
Pipeline Activity/Branches

The Activity view of the pipeline project dashboard

The Branches view of the pipeline project dashboard
Blue Ocean Dashboard
Figure 1-17 show you an example of the Jenkins Blue Ocean dashboard. The Blue Ocean dashboard lists all the projects. It is also the first page that you see when you open Jenkins Blue Ocean.
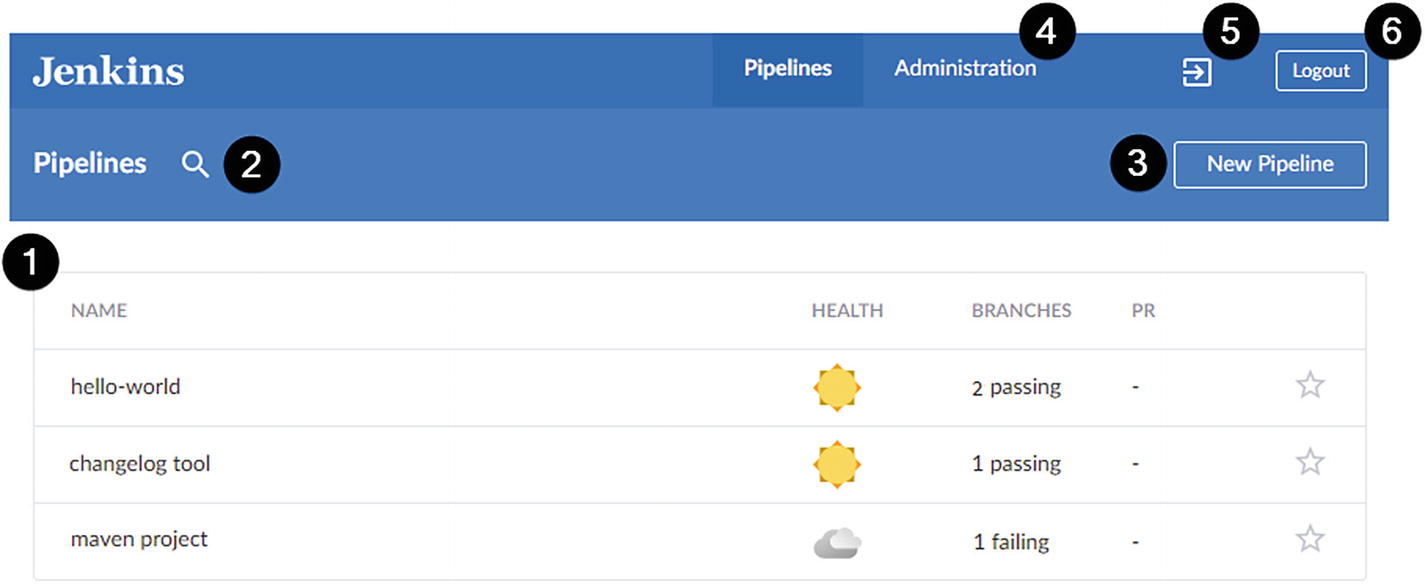
The Jenkins Blue Ocean dashboard
You’ll see more about the visual elements of Jenkins Blue Ocean in the upcoming chapters.
Things to Consider
The following section deals with topics that are significant for you to consider before making Jenkins Blue Ocean your one-stop shop for creating pipelines.
Running Existing Jenkins Projects in Blue Ocean
A Pipeline Project that’s created using Jenkins Blue Ocean
A Pipeline Project that’s created using Classic Jenkins, is a multibranch pipeline, and is written in Declarative Pipeline Syntax.
A Pipeline Project created using Classic Jenkins; it could be a multibranch pipeline, GitHub Organization Project, or a Pipeline Project. Furthermore, it follows an Imperative Pipeline Syntax (basically a Scripted Pipeline).
Do Freestyle/Multi-Configuration Projects Work in Blue Ocean?

Viewing a Freestyle project dashboard in Blue Ocean
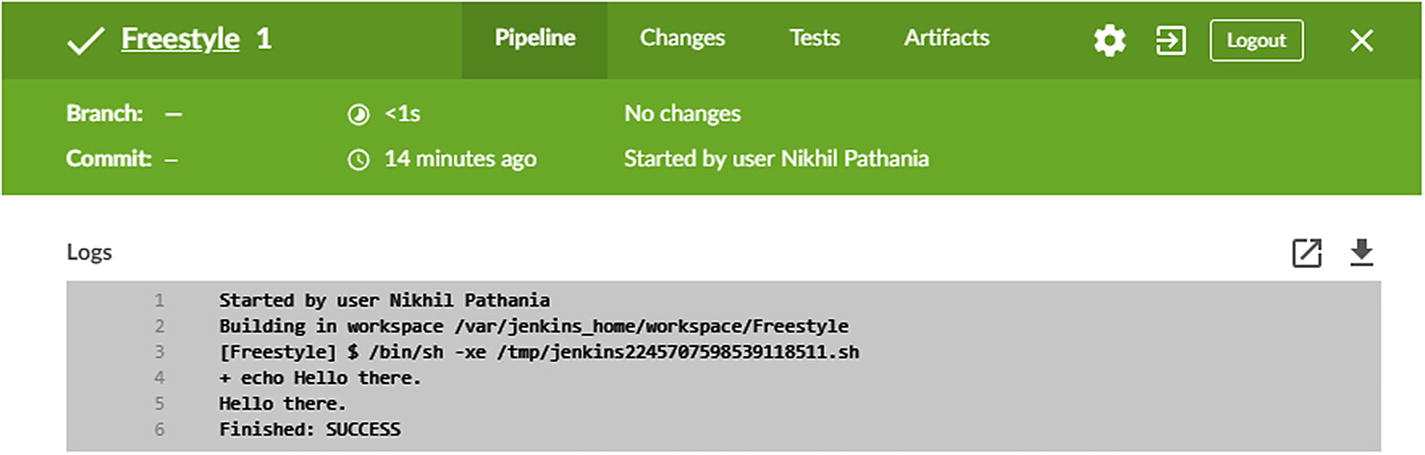
Viewing a Freestyle project pipeline in Blue Ocean
In addition to this, you won’t be able to use the Blue Ocean features build around the pipelines. For example, you can’t edit the Freestyle Project using the Pipeline Editor, and you can’t use the Pipeline Visualization.
However, it may be possible for Blue Ocean to support the Freestyle Project and the other types of Jenkins jobs in the future.
Declarative Pipeline Syntax
The foundation of Jenkins pipeline is Groovy. Jenkins even has an embedded Groovy Engine. There is no limit to what an admin or a user can write using Groovy.
With Groovy as a foundation, the Jenkins engineers came up with Scripted Pipeline, also known as Pipeline Script. The Scripted Pipeline is flexible and extensible but has a steep learning curve.
In addition to that, Scripted Pipeline happens to be less structured. It comes with a higher technical debt, higher maintenance, and lower code readability.
To make things simpler, Jenkins has come up with the Declarative Pipeline Syntax. It’s structured and comes with a smooth learning curve. If you have tried the Scripted Pipeline, you may find Declarative a bit restrictive.
The Declarative Pipeline Syntax is suitable for writing simple Continuous Delivery Pipelines. However, it’s also possible to make it extensible using Jenkins Shared Libraries.
Pipelines created using Jenkins Blue Ocean follow the Declarative Pipeline Syntax. The Pipeline Editor in Jenkins Blue Ocean reads/writes pipeline code to Jenkinsfile in the Declarative Pipeline Syntax. It’s designed to make it easy to write pipeline using a text editor. You’ll learn more about the elements of Declarative Pipeline Syntax in the upcoming chapter.
Sailing Through Complex Pipelines
Script step
Jenkins Shared Libraries
Script step allows you to write a portion of Scripted Pipeline inside your Declarative Pipeline. You should use this feature only when necessary.
However, more prominent and complex script step should move into a Shared Library. A Jenkins Shared Library is an external source control repository containing your complex Groovy code. It acts like a function that could be used on-demand inside your Declarative Pipeline.
You’ll learn more about using Script steps and Jenkins Shared Libraries in the upcoming chapters.
Do I Still Need to Visit the Standard Jenkins Interface?
The answer is yes. To work with the Classic Jenkins Projects—such as Freestyle Project, Multi-configuration Project, Pipeline Project, to name a few—you must visit the Classic Jenkins UI.
The Classic Jenkins dashboard would also continue to remain as an entry page after you install Jenkins or when you log in to Jenkins. Even with the Jenkins Blue Ocean installed, the Classic Jenkins UI remains the default entry point when you log in to Jenkins.
The Classic Jenkins UI including the dashboard is not going to fade out any time soon. However, as more and more users move toward Jenkins Blue Ocean for creating and editing pipelines, there will be less reason to visit the Classic Jenkins UI, and managing Jenkins pipelines through the Classic Jenkins UI may become unpopular.
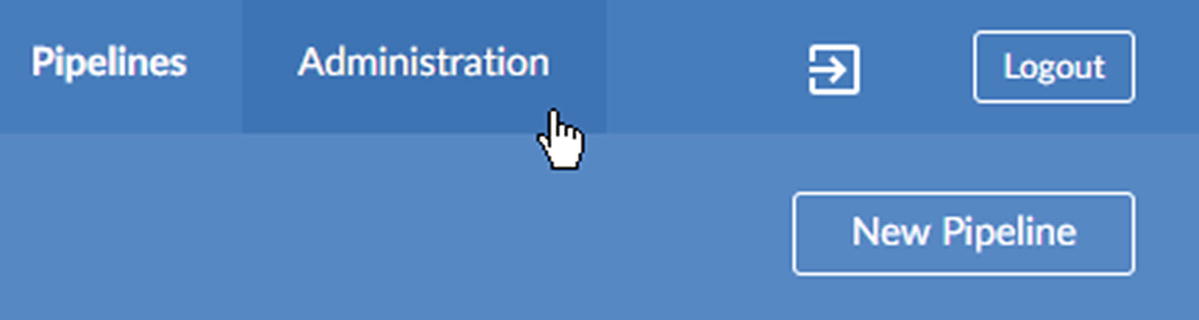
Link to the Jenkins administration page from Blue Ocean
Is It Wise to Move Now?
Both Jenkins Blue Ocean and Classic Jenkins co-exist happily together. Pipelines created in Jenkins Blue Ocean are fully compatible in Classic Jenkins. Installing Jenkins Blue Ocean is made easy by shipping it as a Jenkins Plugin. Having said so, new users should for sure try Blue Ocean.
Creating pipelines in Jenkins Blue Ocean is easy. The Declarative Pipeline Syntax is designed to be structured and straightforward. As a result, it is suitable for the users who prefer writing pipelines using a text editor. For the rest, there is the easy-to-use Visual Pipeline Editor.
Jenkins Blue Ocean promotes Declarative Syntax. Pipelines written in Declarative Pipeline Syntax are easy to maintain, and from experience, maintainability is a precious thing.
Creating a pipeline using Jenkins Blue Ocean is made easy through all its brilliant features. This eases doing business, making it the best tool for teams who expect all their developers to be well-versed in creating pipelines.
The Stage View feature available in Classic Jenkins is incapable of rendering parallel pipeline stages correctly. Furthermore, there is no attempt to fix it, since Jenkins Blue Ocean already comes with a feature to visualize pipelines.
Onboarding new users to Blue Ocean is easier than Classic Jenkins, as it’s more intuitive.
Debugging failures in Jenkins Blue Ocean is easier than Classic Jenkins. It is made possible by displaying the build log for each step separately. Also, the status of the pipeline is visible at the stage and step level. All these features allow developers to pinpoint failures with accuracy.
Apart from the above points, the Jenkins community is actively listening to its users (Jenkins as well as Blue Ocean users). Furthermore, all the feedback received goes into Blue Ocean’s roadmap. Nevertheless, it’s a challenge to make Jenkins Blue Ocean compatible with the full range of configurations out there.
Who Should Use Blue Ocean?
Jenkins Blue Ocean puts creating pipelines in the hands of developers who are a novice to Continuous Integration and Continuous Delivery practices. The easy-to-use Pipeline Creation Wizard in addition to the Pipeline Editor do all that is needed.
Development teams who use Git/GitHub/GitLab/Bitbucket as their source control tool
Development teams who encourage using feature branches, or shall I say GitFlow Workflow5
Development teams who create and manage pipelines themselves, and where the Jenkins admin’s involvement is minimal or limited to administrative tasks
Development teams with a requirement of simple pipelines that stay under the framework of Declarative Pipeline Syntax and Jenkins Shared Libraries
Development teams who would like to build & test their changes before and after a code review
Development teams who do not possess legacy elements6 anywhere in their environment
In the coming chapters, you’ll learn to write simple as well as complex pipelines using Jenkins Blue Ocean.
What to Expect in the Future?
With the advent of the pipeline as a code (Scripted Pipelines in general), Freestyle Jenkins Jobs are on the brink of extinction. Similarly, with the arrival of Declarative Pipeline Syntax, fewer developers are expected to go for the Scripted Pipelines. The reason is that Declarative Pipeline Syntax is easy to understand, use, and maintain.
Scripted Pipelines, however, are not going to vanish from the scene, as there will always be a need for writing complex pipelines. Nevertheless, for a majority of people, Blue Ocean is going to turn out to be their favorite.
I do not claim to have seen the future, but I can say for sure Blue Ocean is the way to go. It is going to be the Continuous Delivery tool for the masses, and there would undoubtedly be a need for a second version of this book.
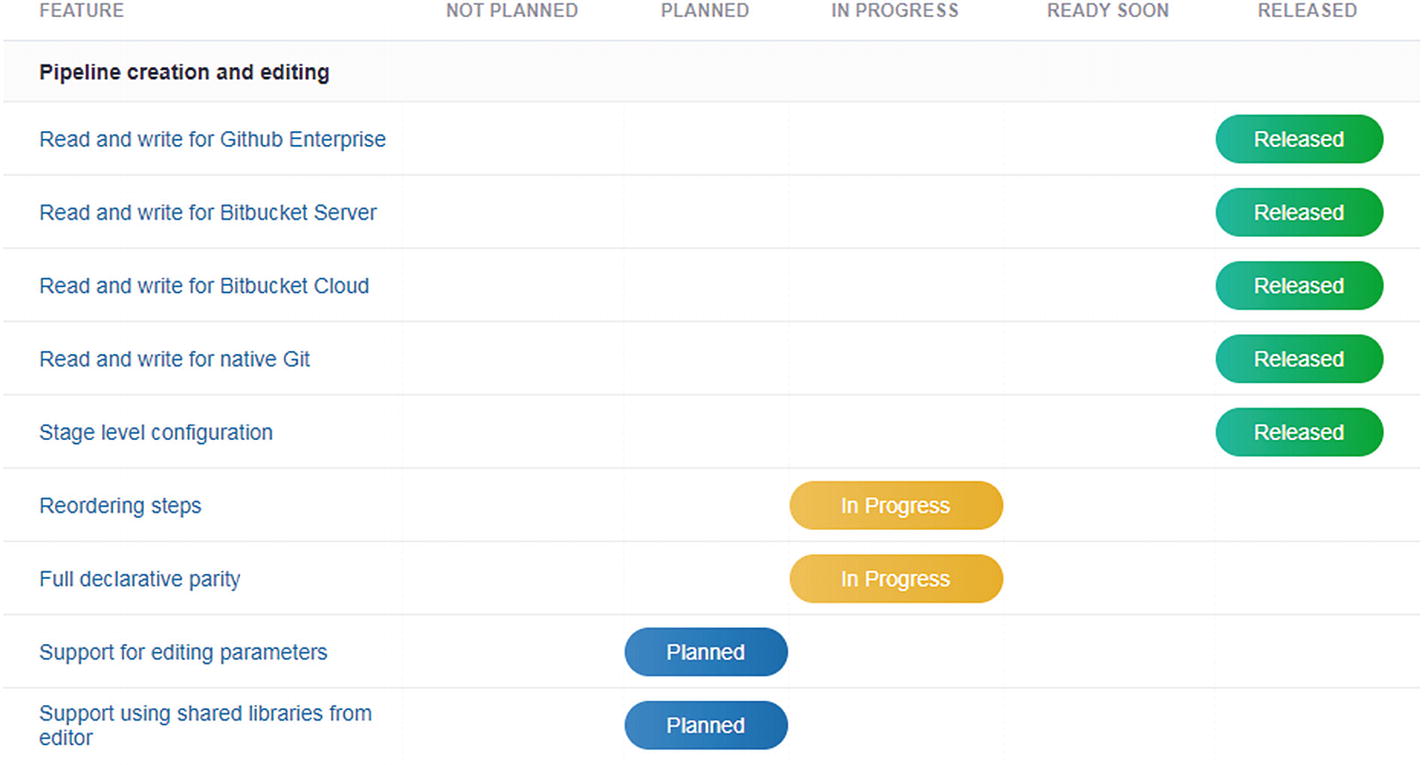
The Jenkins Blue Ocean roadmap page
Since Jenkins is a community-driven tool, it is possible that someday the Classic Jenkins jobs, such as the Jenkins Freestyle Project and the Jenkins Pipeline (Scripted Pipeline) , would be editable in Jenkins Blue Ocean.
On the Jenkins Plugin front, more and more plugins are expected to be available inside Jenkins Blue Ocean as steps.
The Declarative Pipeline Syntax and the Pipeline Editor, along with the other cool features of Jenkins Blue Ocean, are already making it easy for teams to adopt Continuous Delivery practices.
Summary
In this chapter, you learned why Jenkins Blue Ocean exists. It’s a step toward providing a better user experience, with an aim to bring CI/CD to the masses. You took a slice of what Blue Ocean has to offer. The Pipeline Creation Wizard and the Pipeline Editor look promising. The Pipeline visualization is intuitive and interactive. In the upcoming chapters, you’ll learn more about them.
A Pipeline created using Jenkins Blue Ocean follows the Declarative syntax. The Declarative syntax allows you to write structured and maintainable pipelines. You’ll learn more about the Declarative Pipeline Syntax in the upcoming chapter.
With Jenkins Blue Ocean, you can create a simple CD pipeline with ease. However, it’s also possible to write complex pipelines using Shared Libraries. You’ll see both of these in the coming chapters.
You also saw the types of Classic Jenkins pipelines compatible with Blue Ocean and the ones that are not.
With this, I conclude the first chapter. I hope that your expectations are set right, so let us move forward. In the next chapter, you’ll learn the various ways to set up Blue Ocean.