In this chapter, you will learn about Firebase, which is a set of tools provided by Google. You will also learn how to deploy a simple React app through Firebase hosting.
Introduction to Firebase
Firebase is not just a database but a set of tools; it is often called a back-end-as-a-service(BaaS). Firebase contains a variety of services, as listed here:
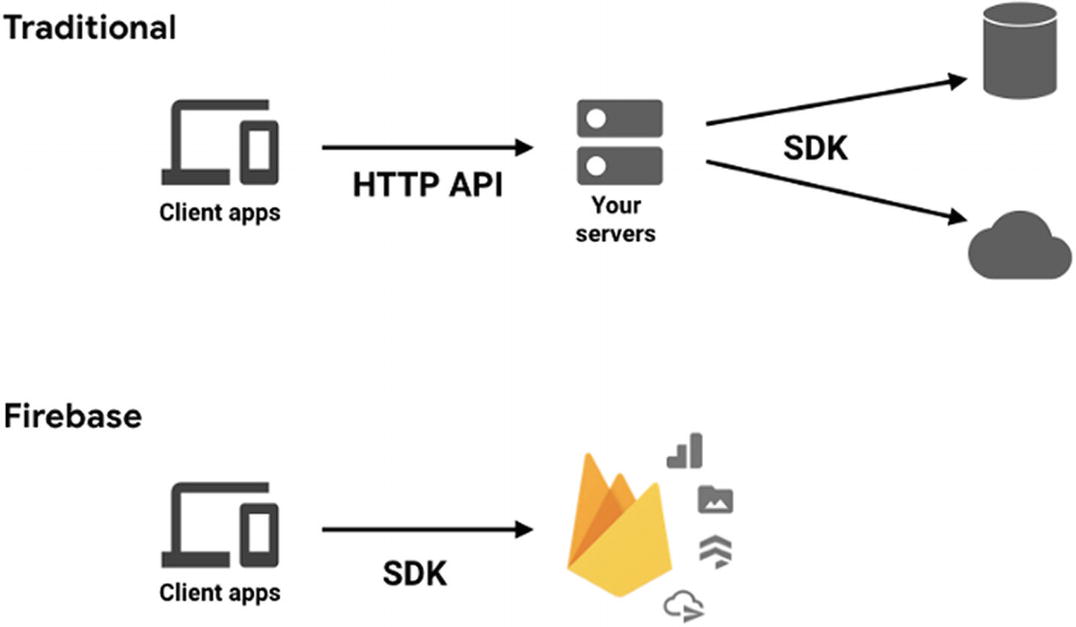
Firebase makes it easy for front-end developers to integrate a back end into their application, without creating any API routes and other back-end code. Figure 1-1 shows an example of a traditional web app, which does API requests to the server from the client apps. The rest of the code is handled by the server. As you can see in Figure 1-1, Firebase eliminates the back-end work, and you communicate directly with Firebase, hosted on the Google platform with an SDK.
Figure 1-1
Firebase
It’s extremely easy to build a project in the Firebase back end with ReactJS as the front end. If you made the same project in MERN (meaning MongoDB, Express, ReactJS, NodeJS), it would take more time and would be far more complicated as you would need to make the back-end APIs in NodeJS.
The other thing I find easy to do in Firebase is the authentication part. Authentication used to be one of the most complicated parts of JWT authentication, but with Firebase you need only a few lines of code. Even better, you get all types of authentication.
Firebase hosting is also extremely easy to use for your ReactJS apps, and that is what we are going to look at in this book.
Creating a Firebase Account
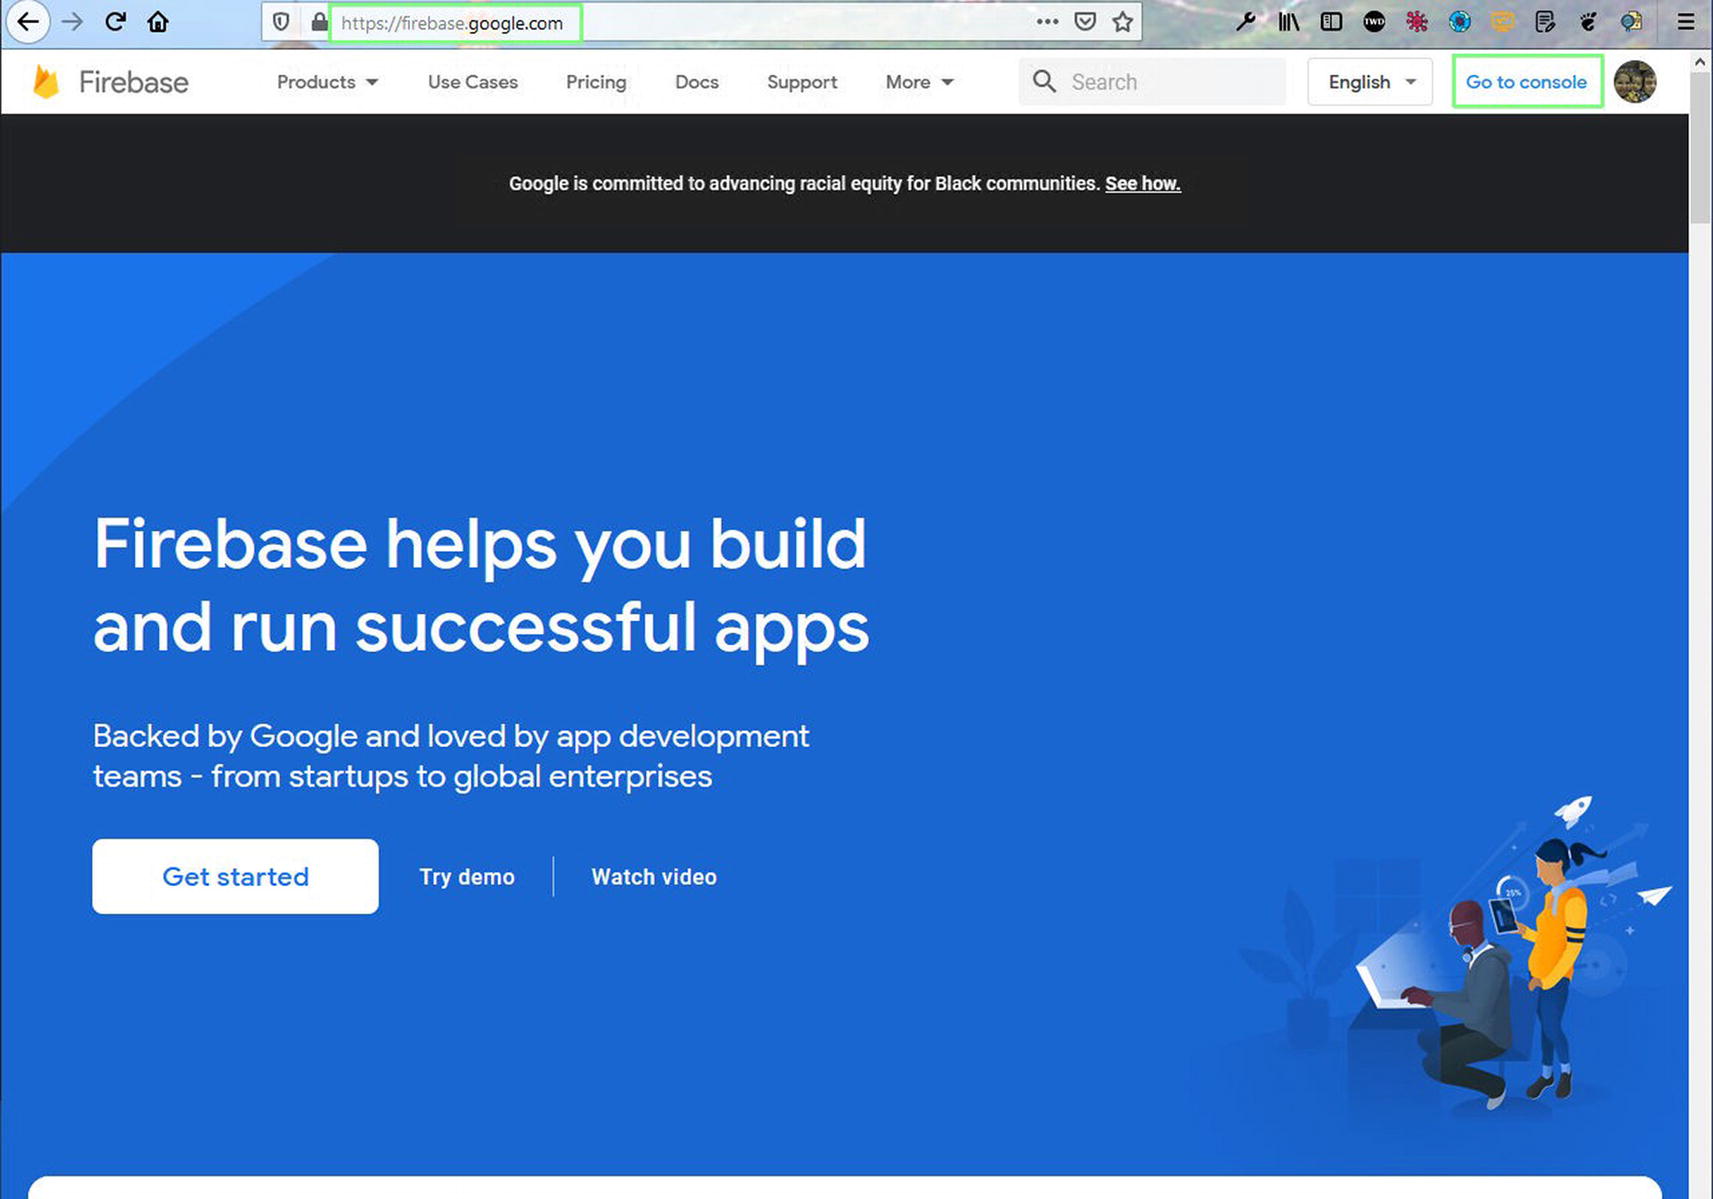
To work with Firebase, you just need a Google account. So, go to Firebase site at https://firebase.google.com/ and click Go to console in the top-right corner. You need to be logged in with your Google account to do so, as shown in Figure 1-2.
Figure 1-2
Firebase site
Setting Up Hosting
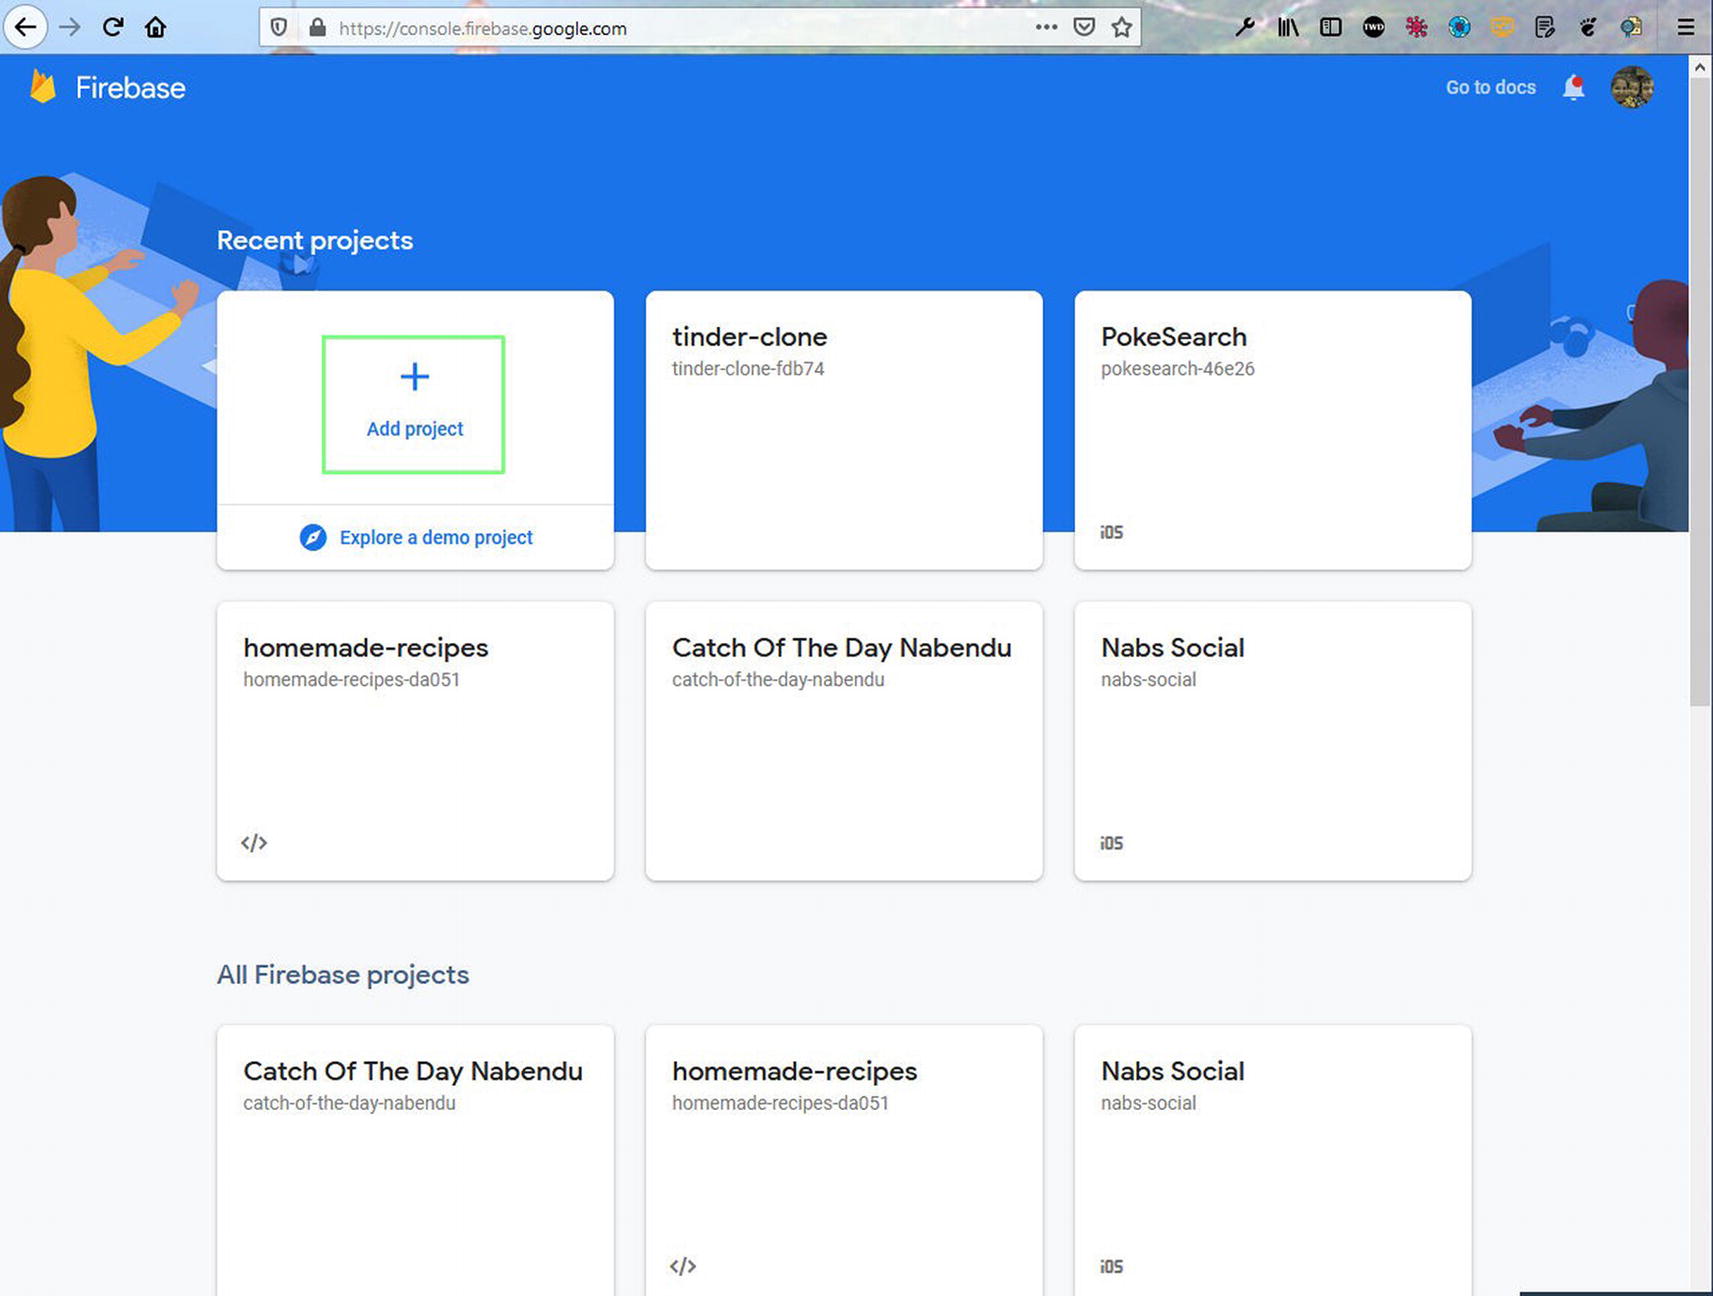
Click the Add project link on the page, as shown in Figure 1-3. Since I have a lot of projects, the figure shows them on this page. For your first time, you will see only the Add project link.
Figure 1-3
Adding a project
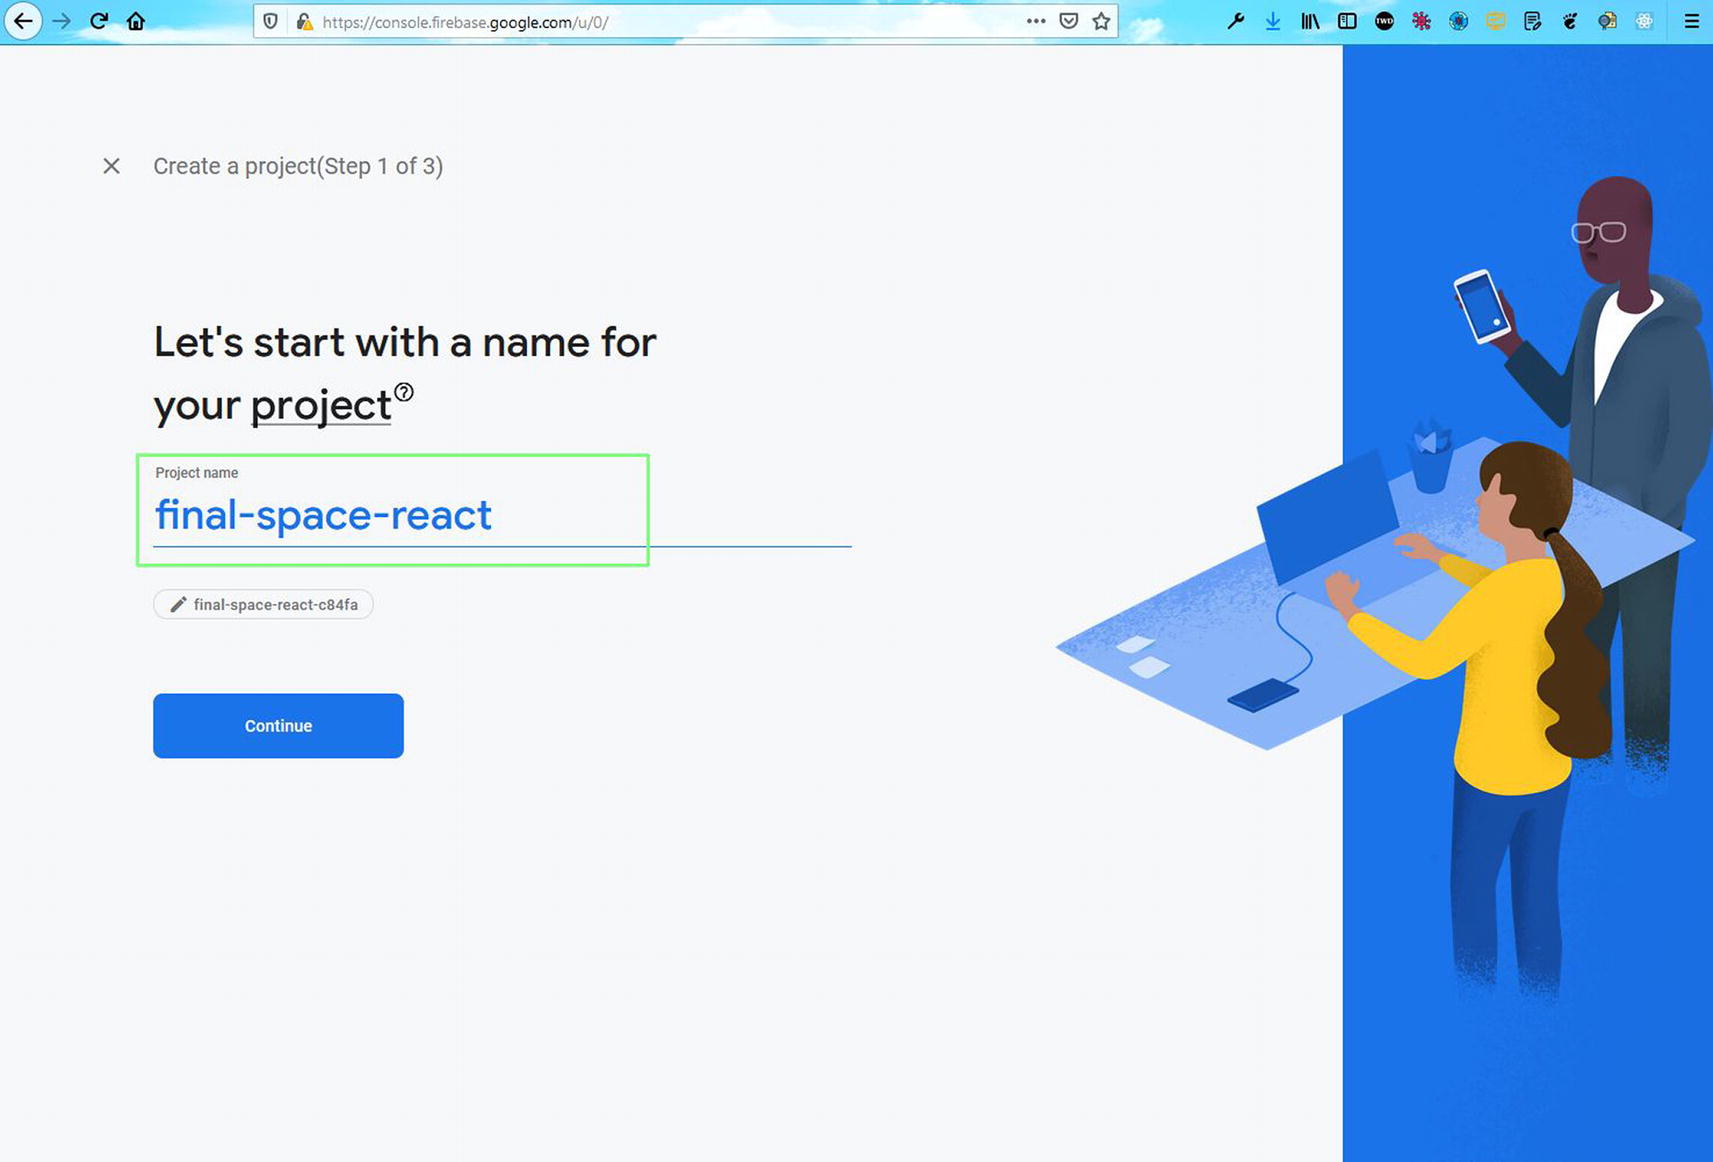
On the page that opens, give the project a name like final-space-react and click the Continuebutton, as shown in Figure 1-4.
Figure 1-4
Naming the project
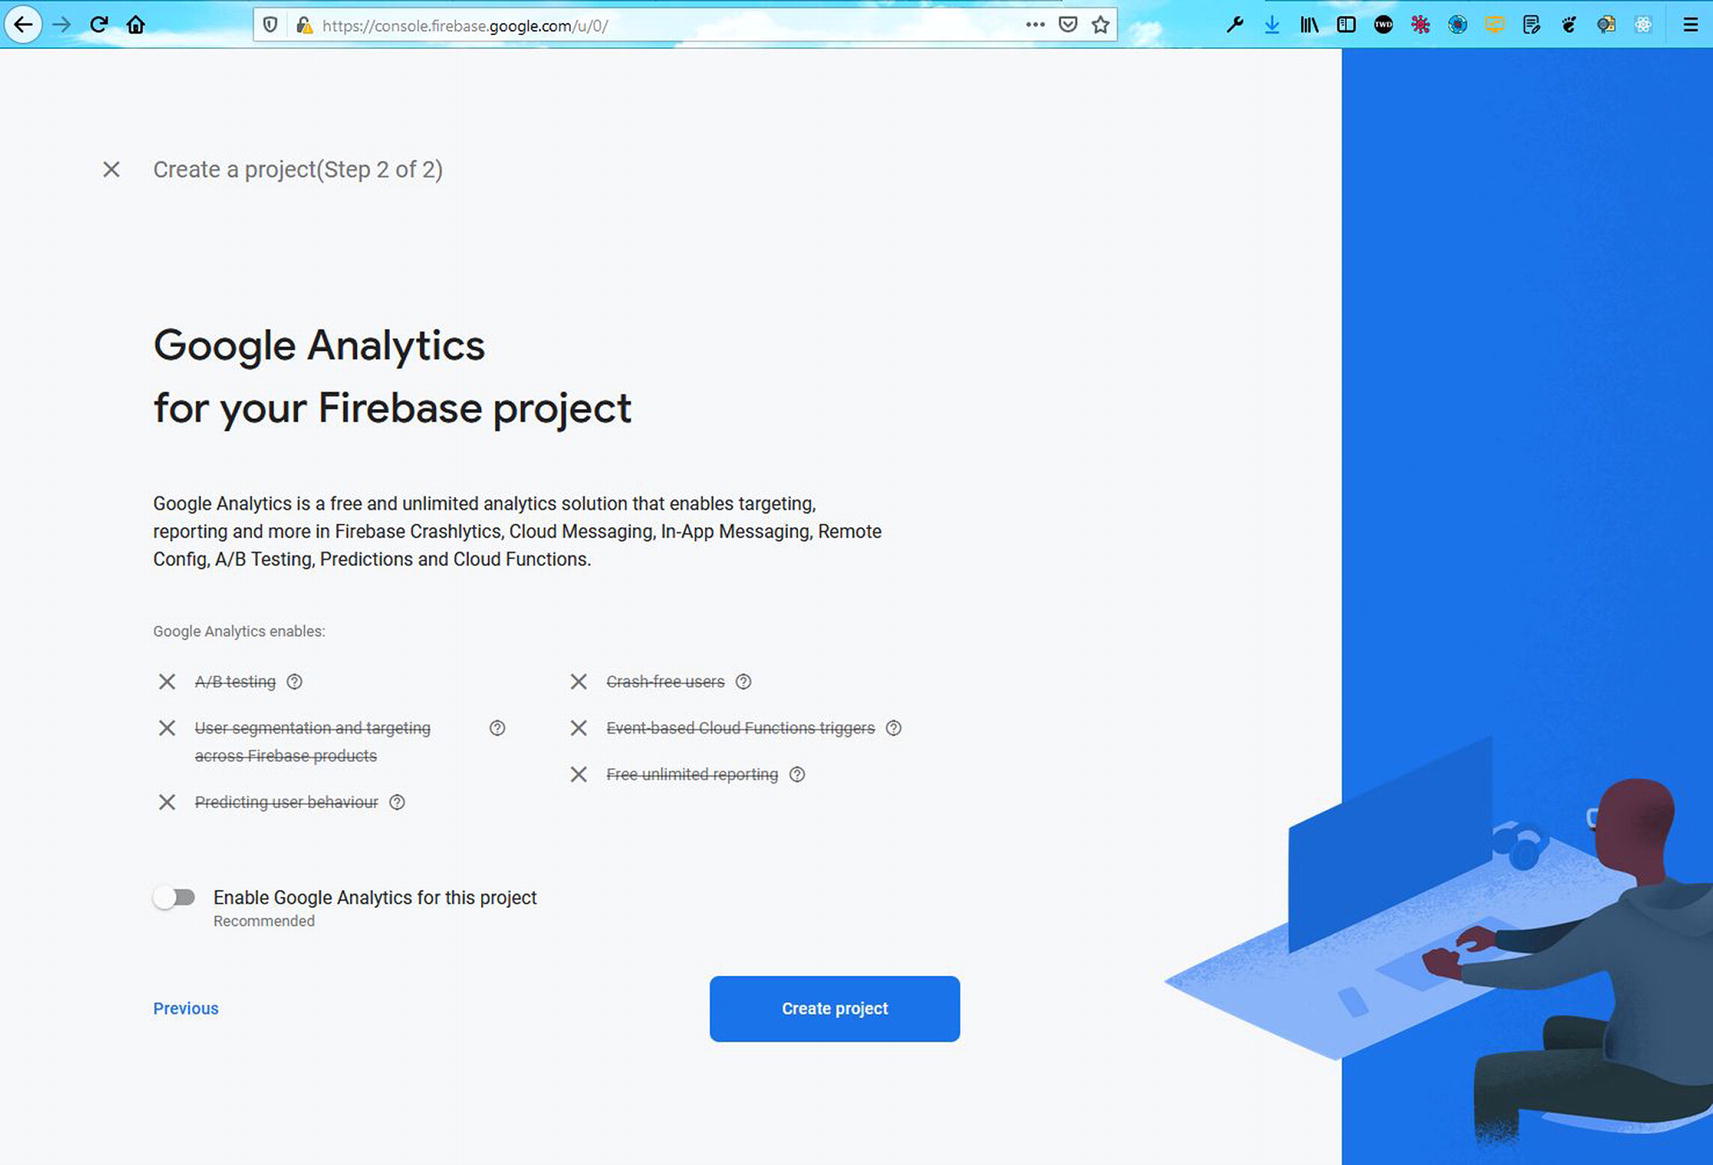
On the next page, click the Create project button after disabling Google Analytics, as shown in Figure 1-5. We are disabling Google Analytics as we’re creating a demo project here. If you intend to deploy your app in production, you should keep it enabled.
Figure 1-5
Creating a project
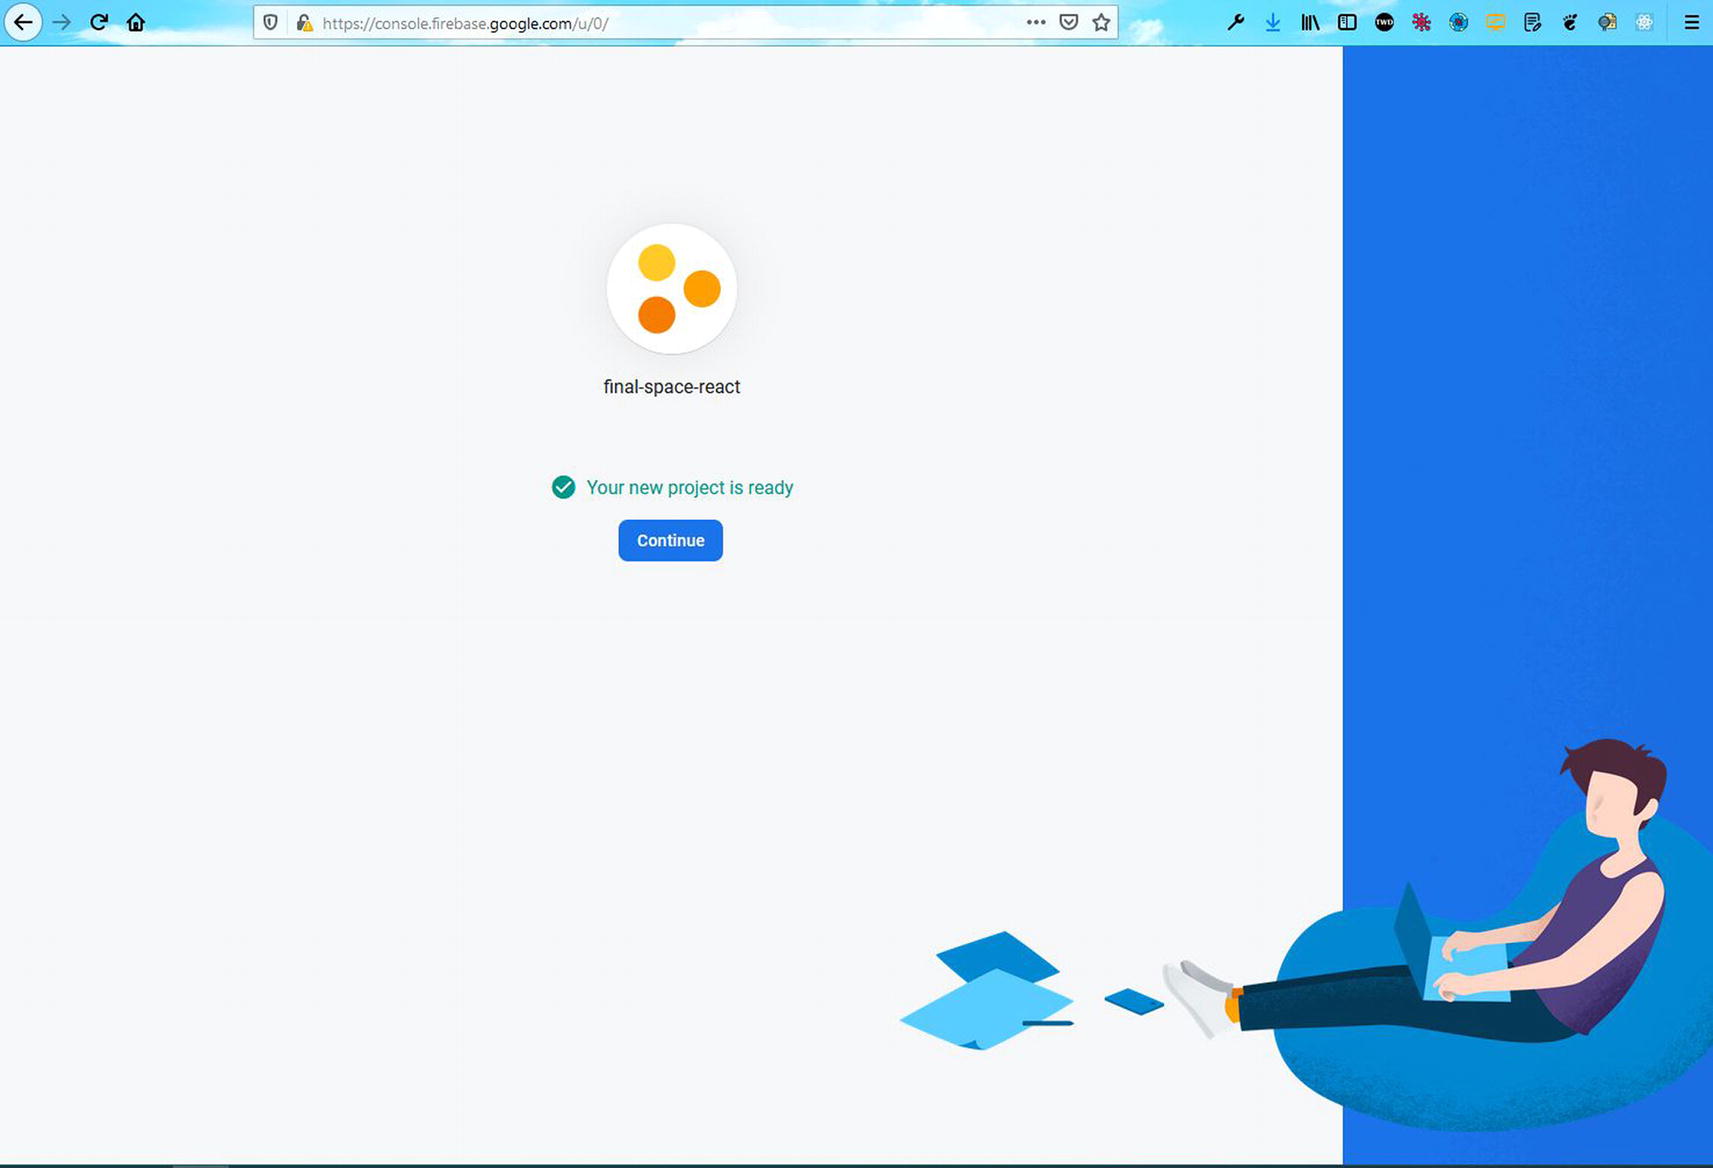
After some time, you will see the screen shown in Figure 1-6. Here, you need to click the Continuebutton.
Figure 1-6
Continuing
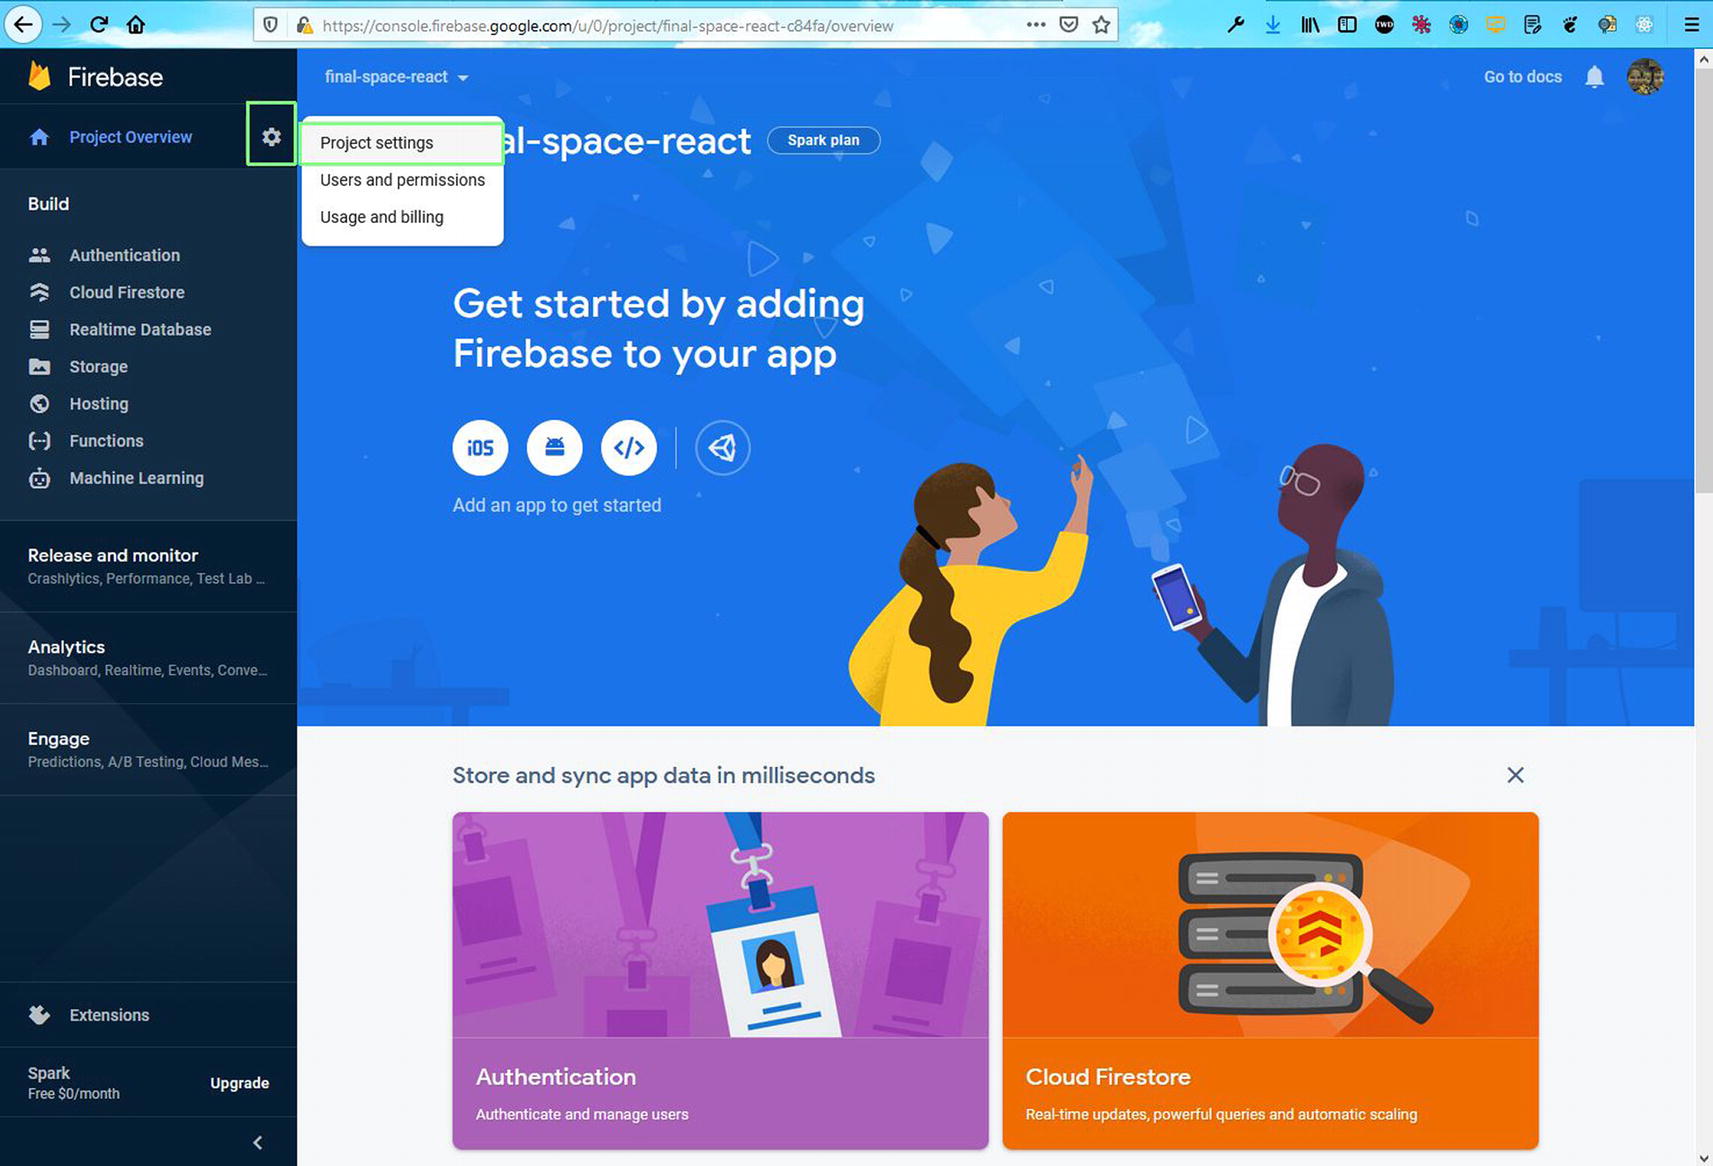
Now, click the Settings icon at the top-left corner of the screen, as shown in Figure 1-7. After that, click Project settings.
Figure 1-7
Project settings
On the next page, click the code icon at the bottom of the page, as shown in Figure 1-8.
Figure 1-8
Code icon
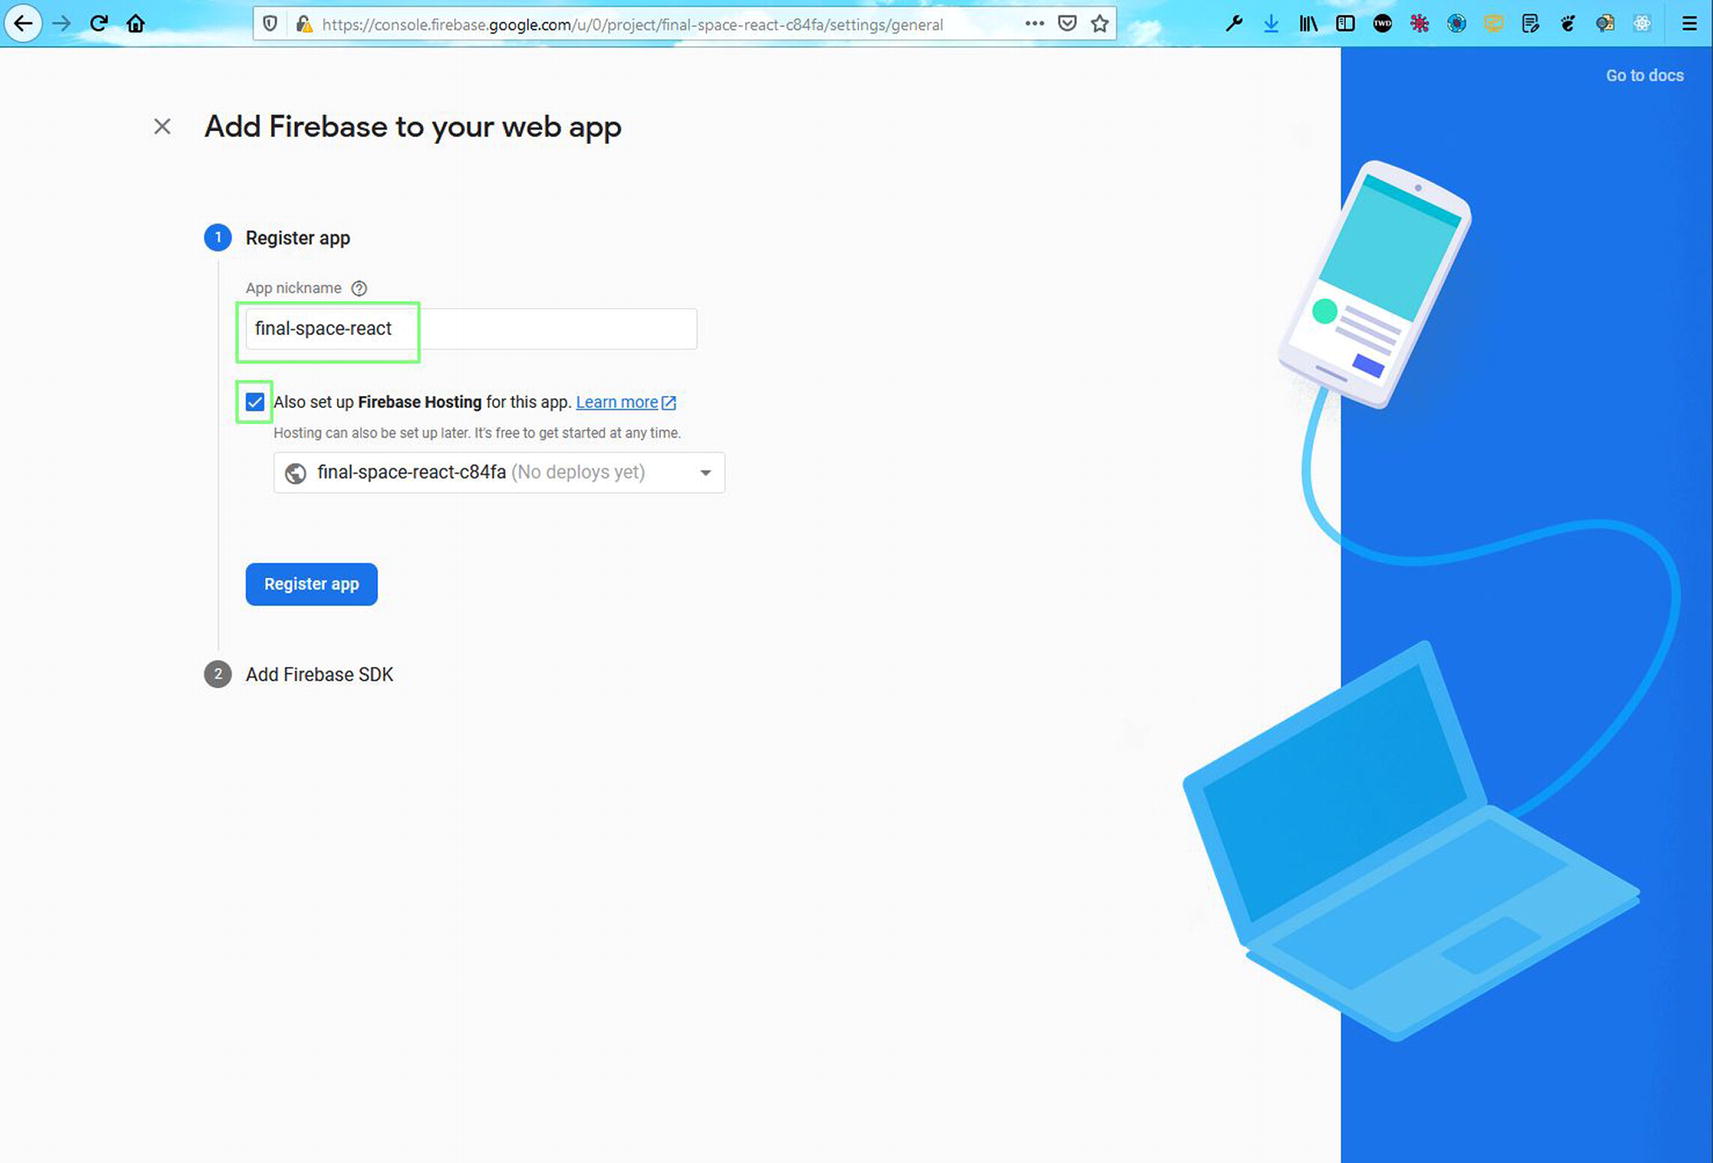
On the next page, enter the same name of the app that you entered earlier, which is final-space-react in my case. Also, click the checkbox for Firebase hosting. After that, click the Register appbutton, as shown in Figure 1-9.
Figure 1-9
Selecting Firebase hosting
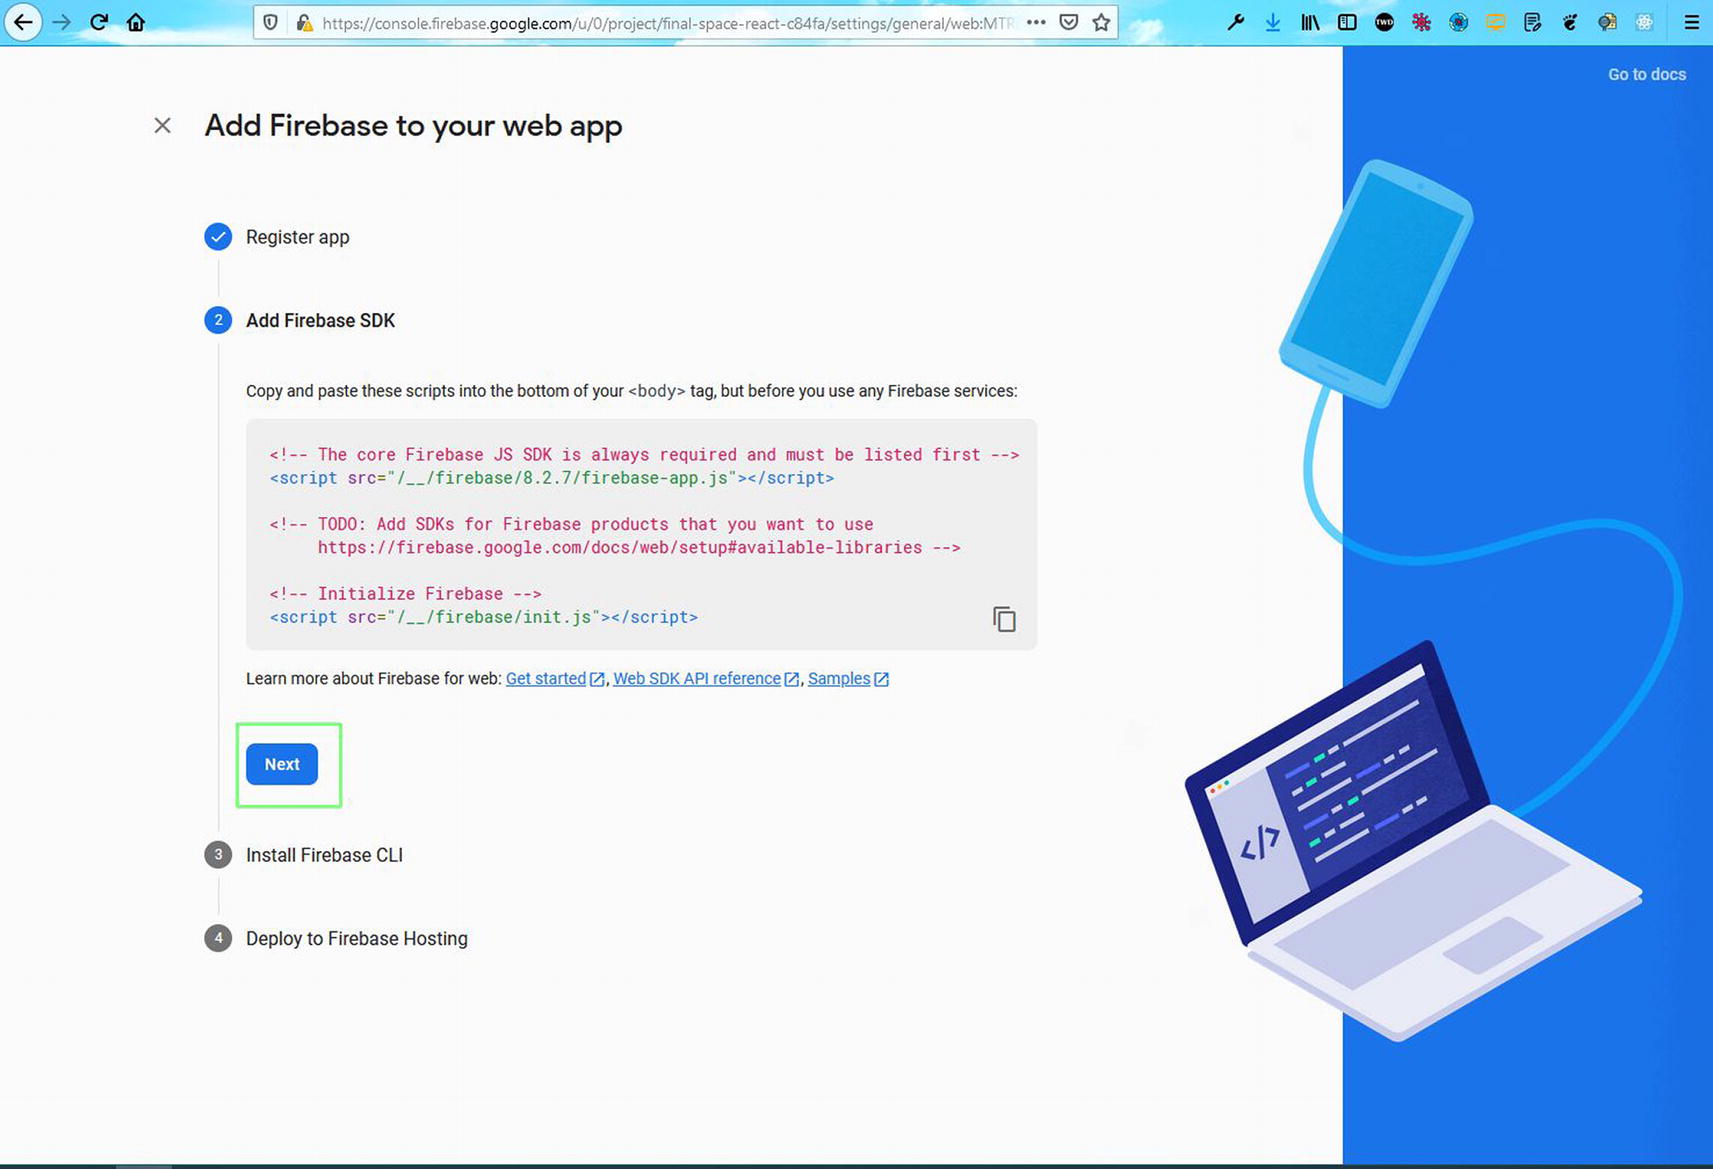
On the next page, just click the Nextbutton (Figure 1-10).
Figure 1-10
Next button
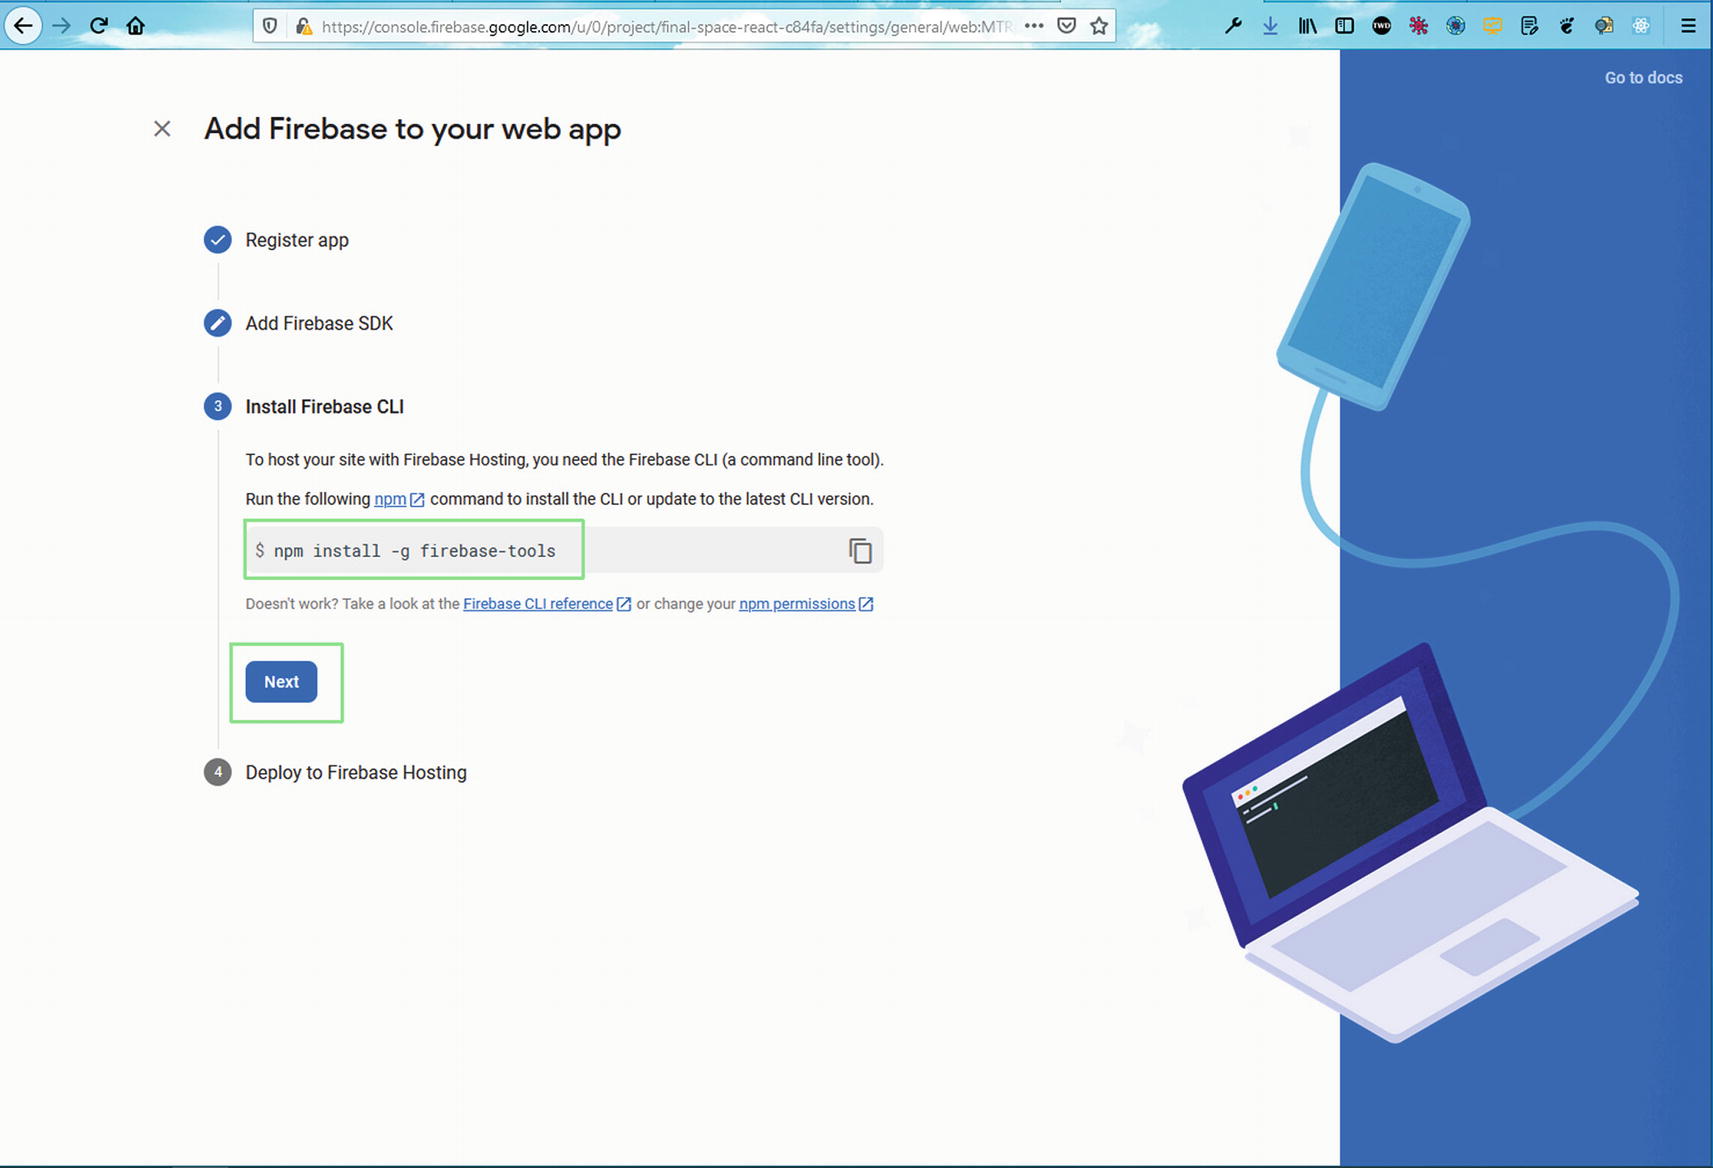
On the next page, you will see the command to installfirebase-tools globally from the terminal (Figure 1-11). So, open any terminal and run the command from anywhere. Notice that this is a one-time setup on a machine, since we are using it with the -g option. The -g option specifies that it needs to be installed globally.
Figure 1-11
Installing Firebase globally
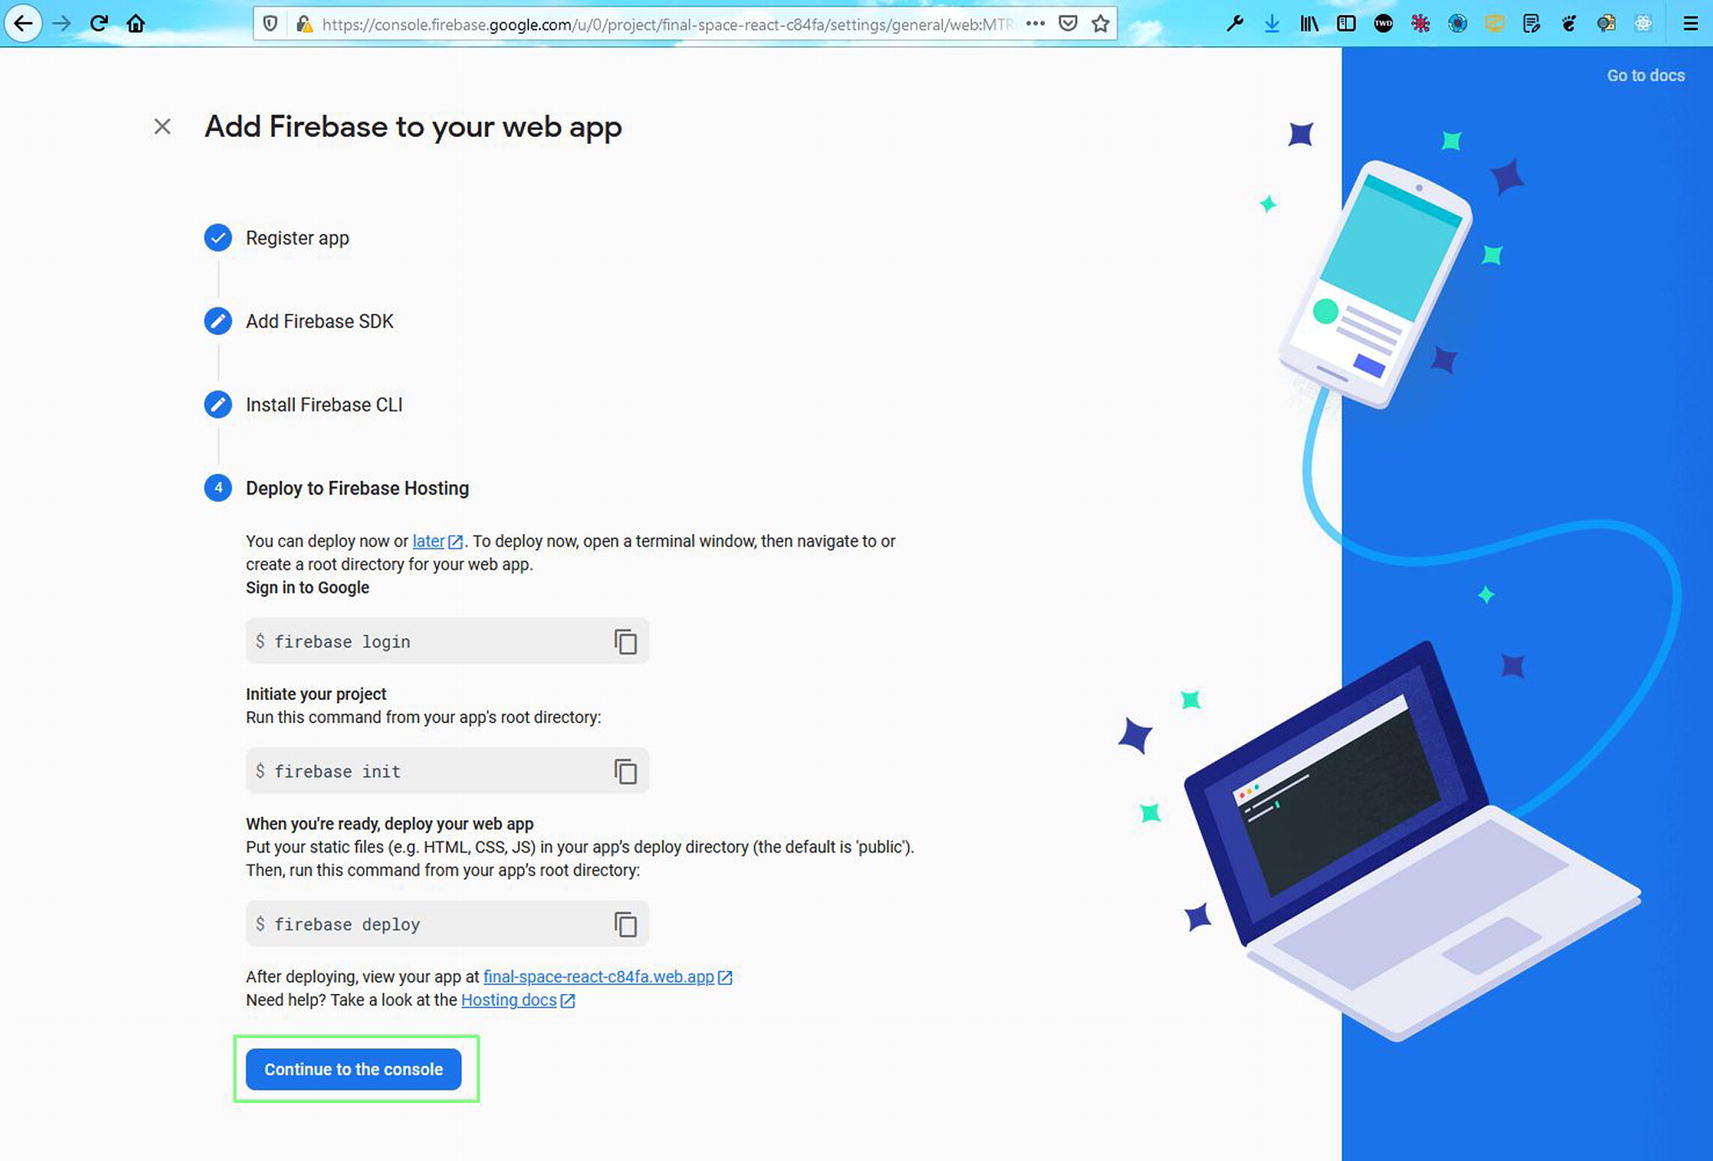
Ignore the next set of commands for now and click the Continue to the console button (Figure 1-12).
Figure 1-12
Continuing to the console
Deploying a Simple ReactJS Project from the Terminal
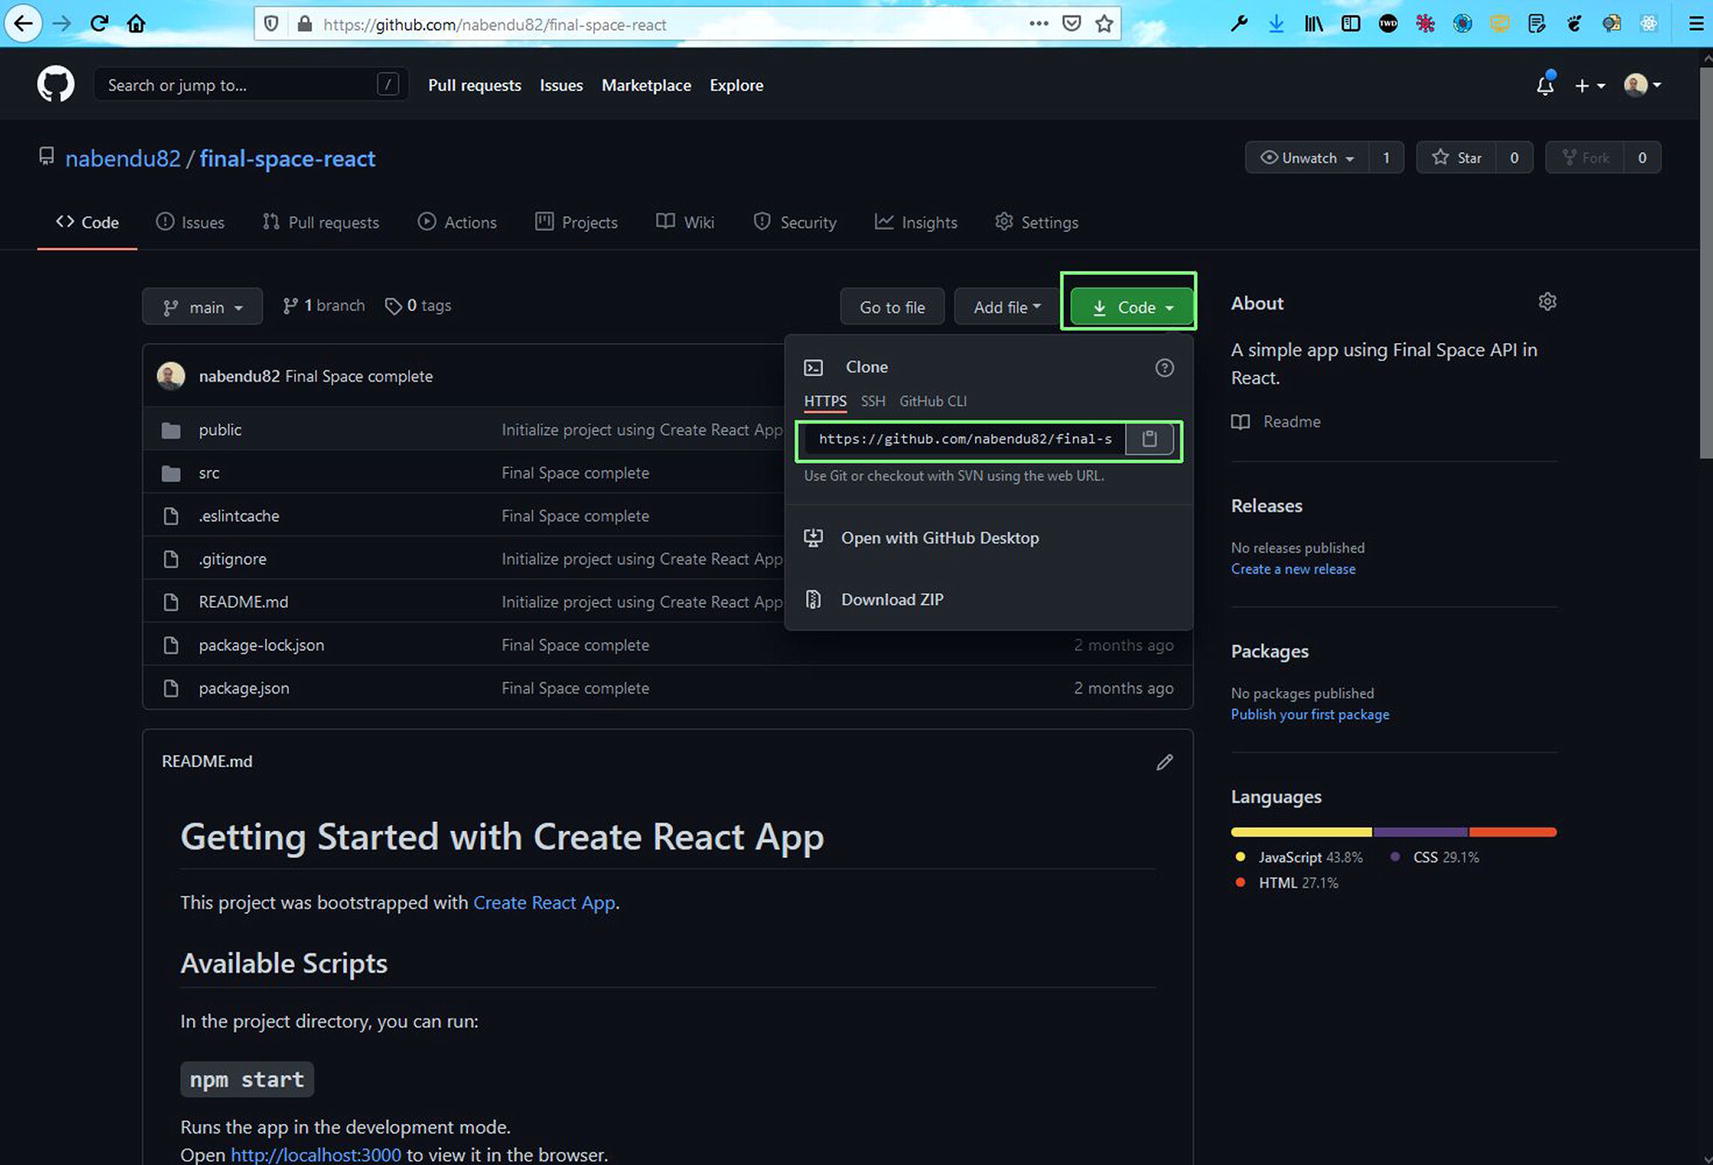
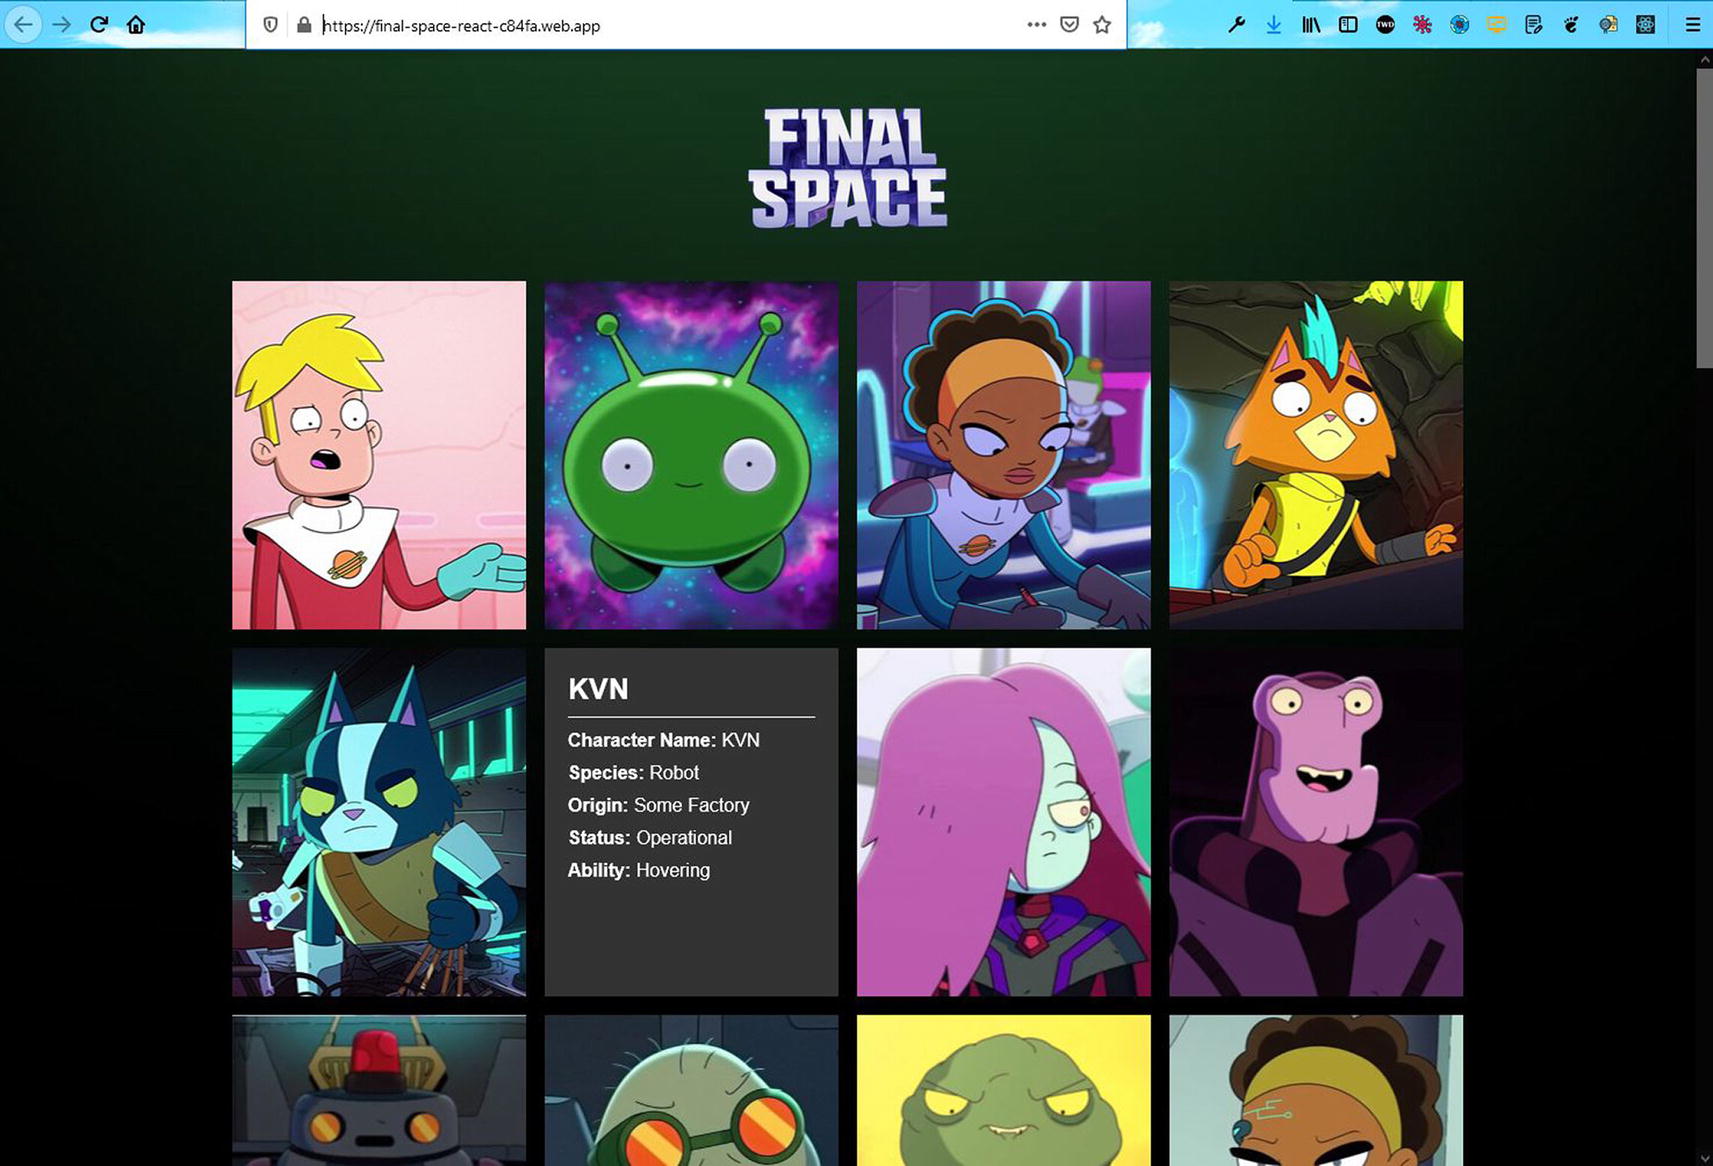
In this section, you will learn how to deploy a simple ReactJS app that gets data from a simple API. Open https://github.com/nabendu82/final-space-react and then click Code and the clipboard copy icon (Figure 1-13).
Figure 1-13
GitHub
Now, go to any terminal and clone the project using the following command:
After that, change to the project’s directory and run npm i to install all the dependencies, as shown here:
cd final-space-react
npm i
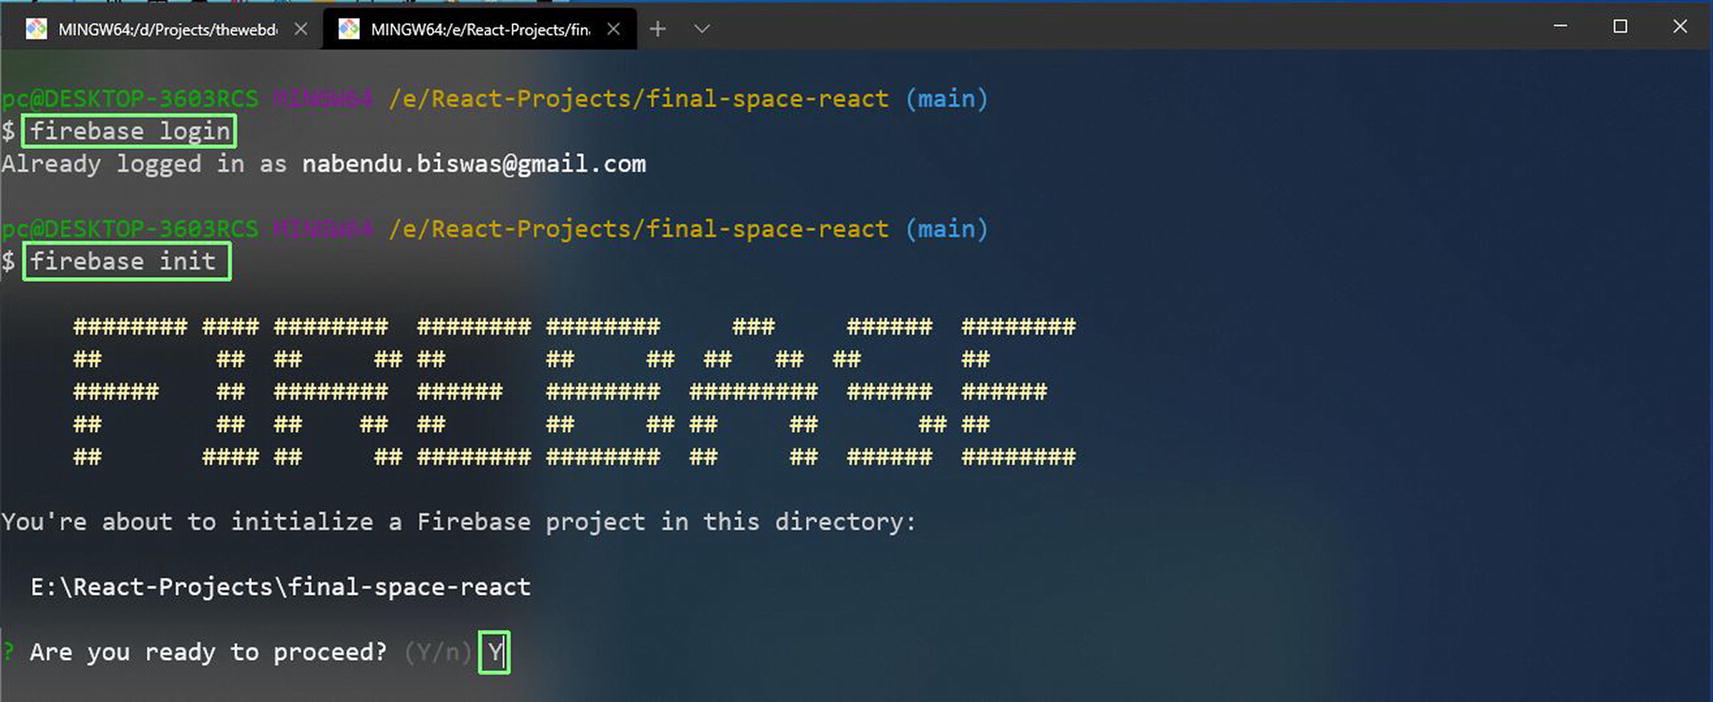
Now run firebase login from the terminal. If you are running it for the first time, it will give you a pop-up message. After that, run the firebase init command. Type Y to proceed (Figure 1-14).
Figure 1-14
Firebase login
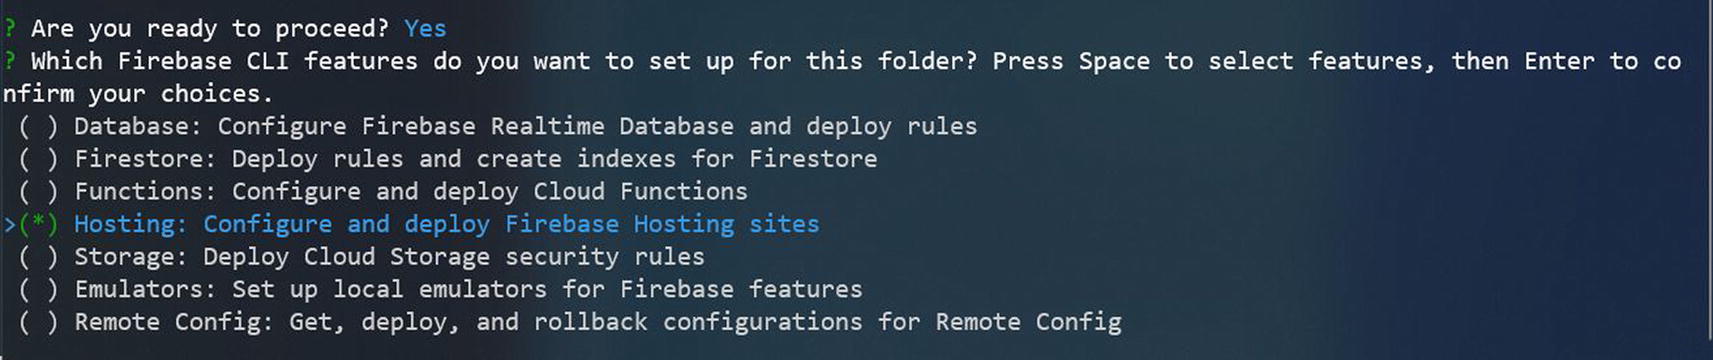
Next, go down to Hosting using the arrow keys, press the spacebar to select Hosting, and then press Enter, as shown in Figure 1-15.
Figure 1-15
Hosting
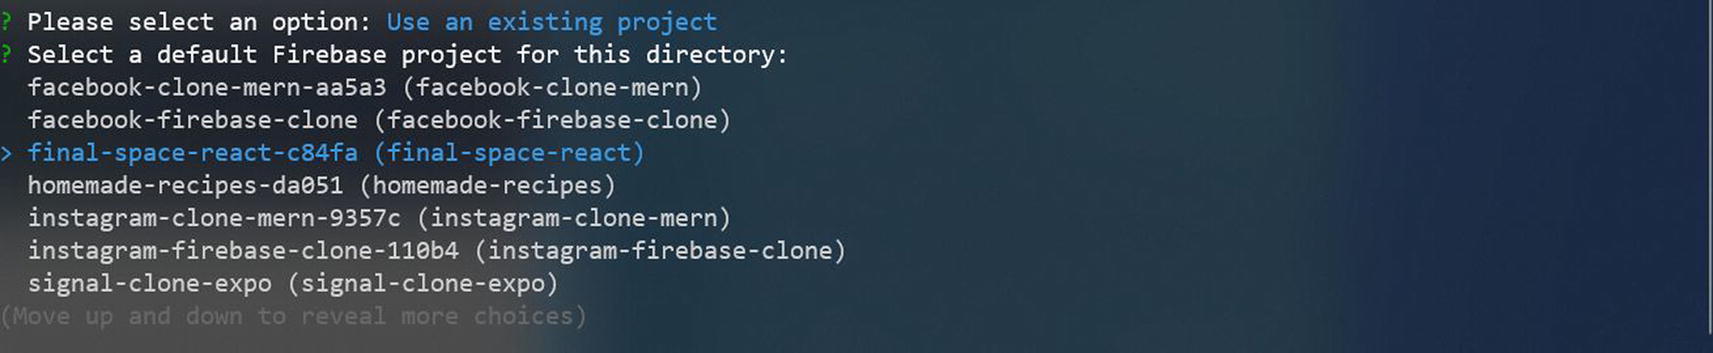
Then select Use anexisting project and press Enter, as shown in Figure 1-16.
Figure 1-16
Existing project
Here, you need to select the correct project, which is final-space-react-c84fa in my case (Figure 1-17).
Figure 1-17
Selecting the final-space-react project
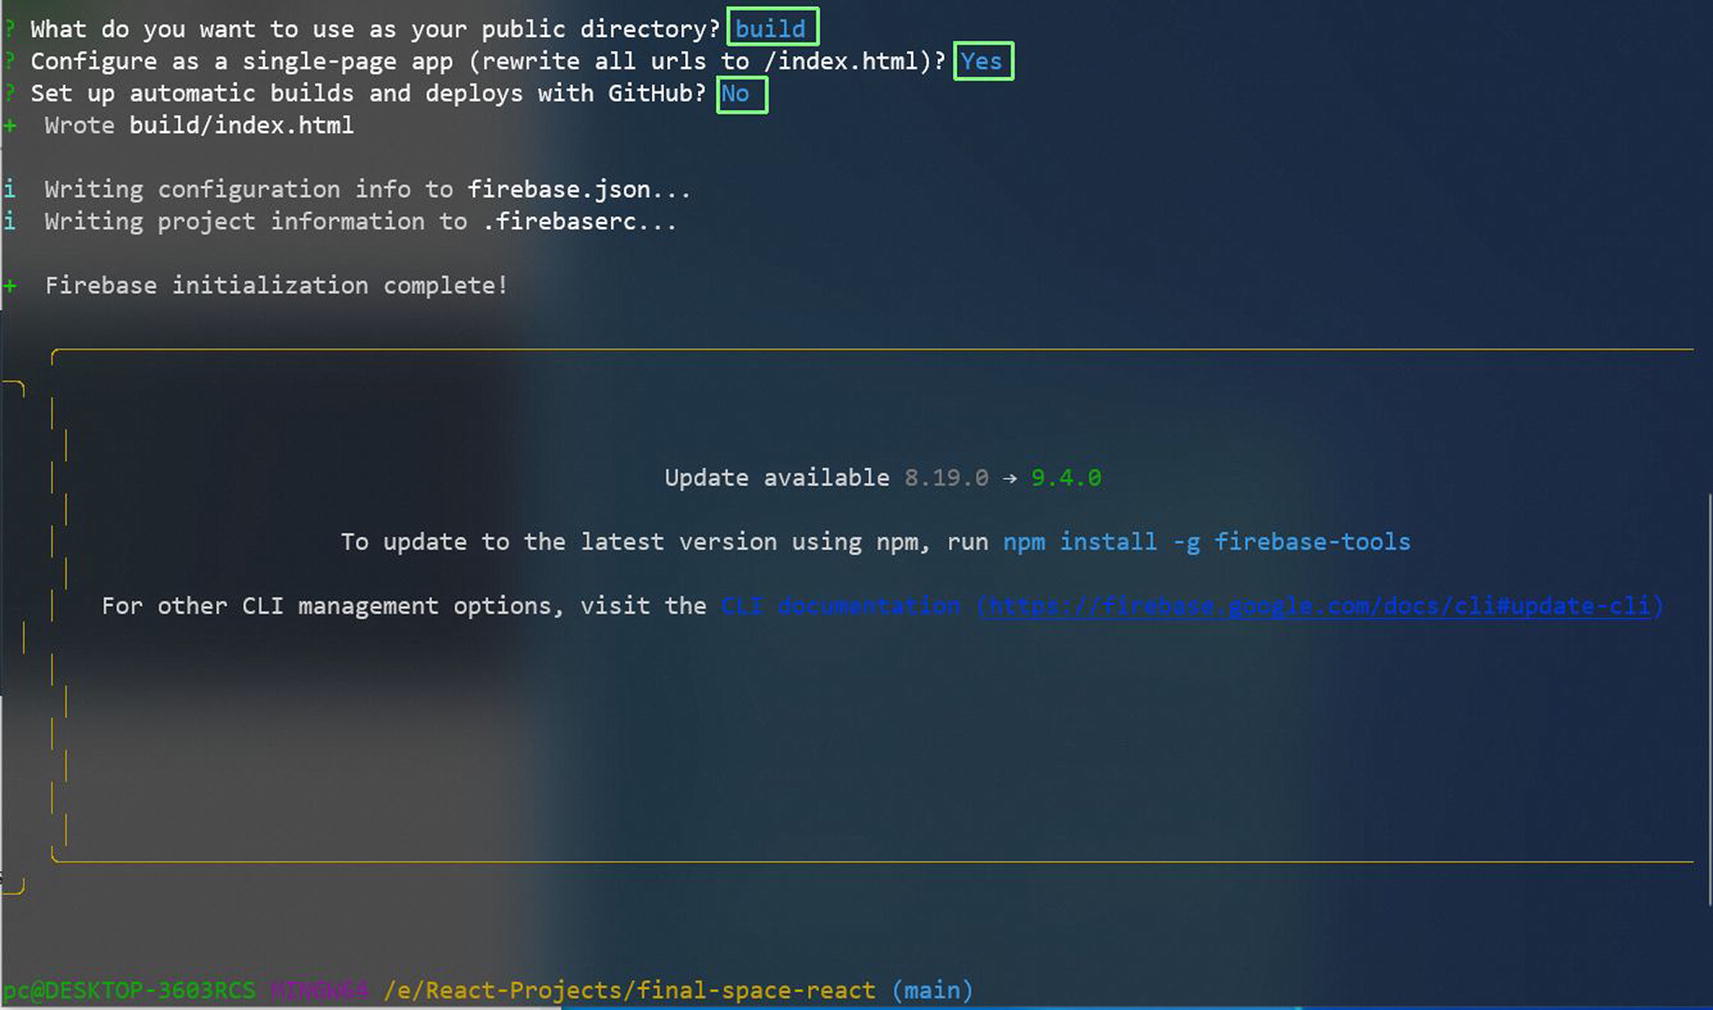
Next, choose the public directory, which is build. The next option is Yes for a single-page app and GitHub deploys, where you select No (Figure 1-18).
Figure 1-18
Building the project
Now, you need to run npm run build in the terminal for a production-optimal build, with this command:
npm run build
n
The final command is firebase deploy to deploy the project to Firebase, as shown here: