In the previous chapter, you learned to deploy a React app through Firebase. In this chapter, you will learn how to build an awesome to-do list app in ReactJS, with the data stored in the back end, specifically in a Firebase Firestore database. The hosting will also be in Firebase.
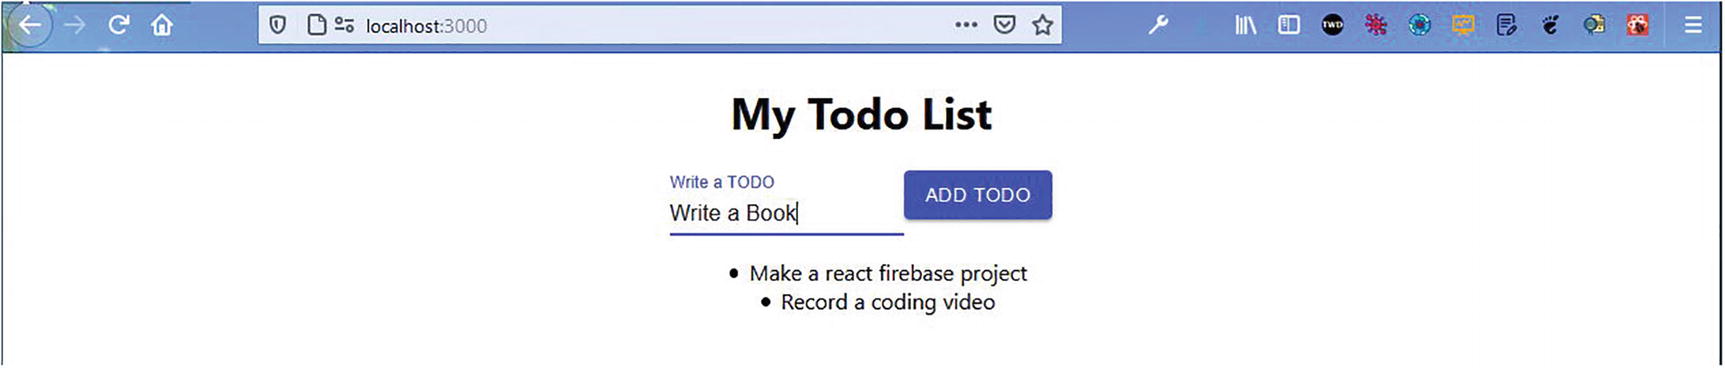
We will show how to use Material UI for the icons in the project, and we will be using a useRef hook in this project. Figure 2-1 shows what the app will look like. The user will be able to enter a to-do item and store it in a lovely list in the firebase database. So, this list is permanent and won’t be changed after a refresh of browser.
Figure 2-1
Completed app
Getting Started
To get started, use the create-react-app command to create a new app called todo-react-firebase. Specifically, the command for this is as follows:
npx create-react-app todo-react-firebase
Initial Firebase Setup
Since our front-end site will also be hosted through Firebase, we will create the basic settings while the create-react-app command creates our React app. Follow the same steps as in Chapter 1 to set up Firebase.
One additional setup step is required after you click the Continue to the console button in the setup procedure. You need to scroll down and click the Config radio button and then copy all the data for the firebaseConfig section. This is required because we are going to use the Firebase database in our project (Figure 2-2).
Figure 2-2
Firebase config
Now, open the code in VS Code and create a file called firebase.js inside the src folder. Paste the following code into the file:
Now, we will do the basic setup for ReactJS. Inside the todo-react-firebase directory, start the React app with npm start. Next, we will delete some of the files because we don’t need them. They are actually part of the logo and the other test, which we will not be using in this project. Figure 2-3 shows the files to delete.
Figure 2-3
Delete option
We will remove all the unnecessary boilerplate code, so our index.js file will look like this:
import React from 'react';
import ReactDOM from 'react-dom';
import './index.css';
import App from './App';
ReactDOM.render(
<React.StrictMode>
<App />
</React.StrictMode>,
document.getElementById('root')
);
The App.js file contains only the “TODO React Firebase” text, as shown here:
import './App.css';
function App() {
return (
<div className="App">
<h1>TODO React Firebase</h1>
</div>
);
}
export default App;
Now, our app will look like Figure 2-4 in localhost.
Figure 2-4
Localhost app
Local To-Do List
After doing the setup in the previous section, we will work on our to-do app. We will update our App.js file to contain the logic for a basic to-do list. Here, we are using two state variables: todos and input. We are using the useState hook to declare both of them. todos contains an array containing two strings, and input contains an empty string.
Next, inside the return statement, we use the controlled input of React to update the input of an input box. Next, we have a button and a click event assigned to the button. When we click it, we run a function called addTodo() that changes the state of todos, with setTodos. Here, it appends the already existing content with the user-typed content.
We are using a form to wrap our input and button, and the button type is submit. Therefore, if we type anything in the input box and press Enter on the keyboard, it will work. For that reason, we need to use e.preventDefault() inside the addTodo() function.
Now, in localhost, we will get two items by default, as they are in our initial state of todos. But when we type, we will get new items, as shown in Figure 2-5.
Figure 2-5
List in localhost
We will be using Material UI for the icons. So, we need to run two npm install commands as per the documentation. We will install core and icons through the integrated terminal, as shown here:
npm install @material-ui/core @material-ui/icons
Now, we will use the icons from material-ui on our project. We have replaced our Button and Input fields with the Button and Input from material-ui, and we imported them at the top. The updated code is marked in bold here:
import { Button, FormControl, Input, InputLabel } from '@material-ui/core';
Next, we will move the to-do list to a separate component. So, create a new file called Todo.js inside a components folder. We will send the separate to-do to it as a props. The updated code is shown in bold here:
import { Button, FormControl, Input, InputLabel } from '@material-ui/core';
import Todo from './components/Todo';
function App() {
...
...
return (
<div className="App">
<h1>TODO React Firebase</h1>
<form>
...
...
</form>
<ul>
{todos.map(todo => <Todo todo={todo} />)}
</ul>
</div>
);
}
export default App;
Now add the following code into the Todo.js file. We are just using a bunch of material-ui icons and showing the props called todo. These icons help us to make the list item prettier.
import { List, ListItem, ListItemAvatar, ListItemText } from '@material-ui/core'
import React from 'react'
const Todo = ({ todo }) => {
return (
<List className="todo__list">
<ListItem>
<ListItemAvatar />
<ListItemText primary={todo} secondary={todo} />
</ListItem>
</List>
)
}
export default Todo
Now, in localhost, we will be able to see these changes, and our list will be looking good (Figure 2-7).
Figure 2-7
Todo list
Now, it’s time to hook up Firebase to the project.
Using Firebase
Now, we will start setting up Firebase for the back end. For that we will first install all dependencies for Firebase in the terminal by running the following command:
npm i firebase
Next, we will update our firebase.js file to use the config to initialize the app. After that, we use Firestore as the database. The updated code is highlighted in bold here:
Now, we will go back to Firebase and click Cloud Firestore and then click the Create databasebutton, as shown in Figure 2-8.
Figure 2-8
Creating the database
On the next screen, select Start intest mode and then click the Next button, as shown in Figure 2-9.
Figure 2-9
Test mode
On the next screen, click the Enablebutton (Figure 2-10).
Figure 2-10
Enable button
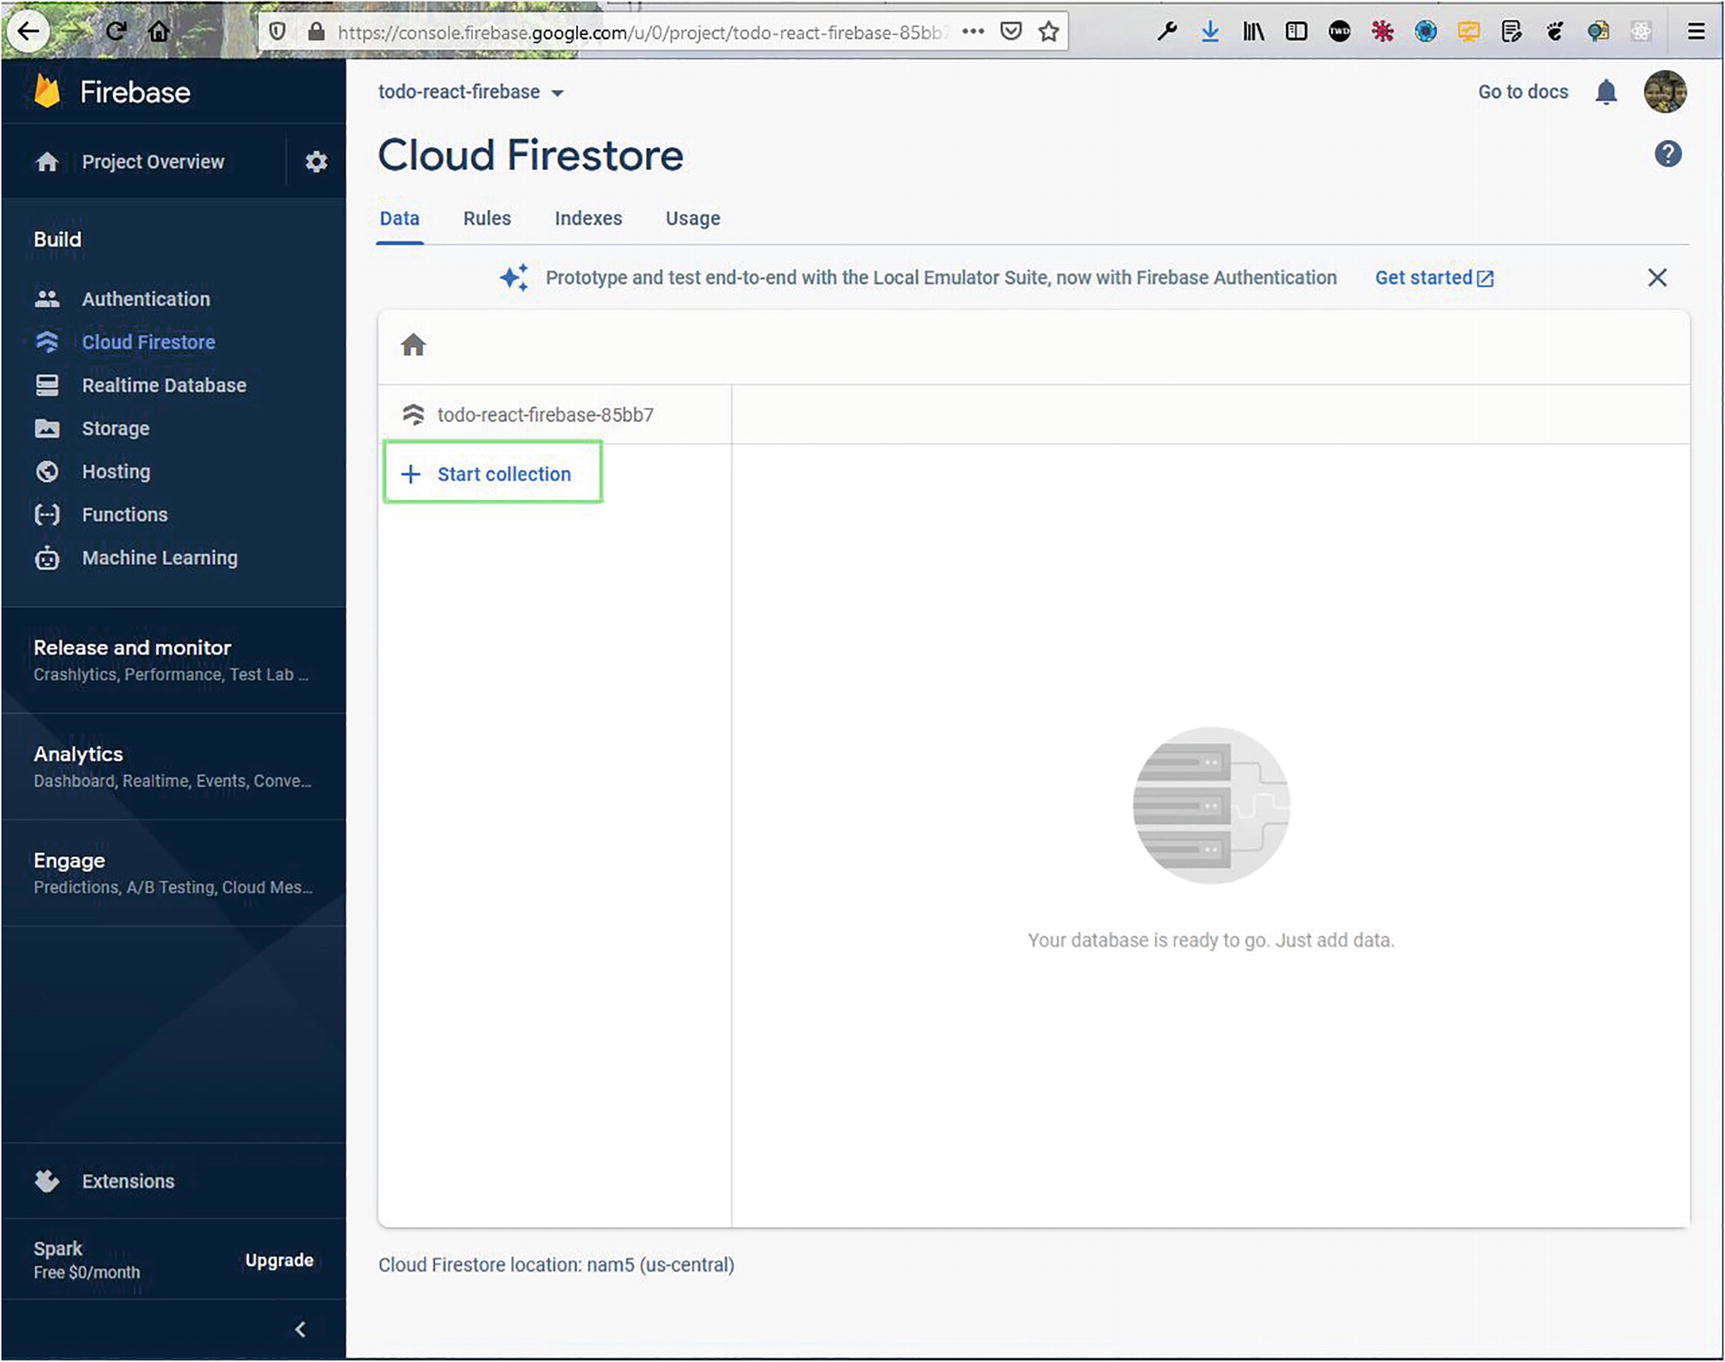
On the next screen, click Start collection, as shown in Figure 2-11.
Figure 2-11
Starting the collection
It will open the pop-up shown in Figure 2-12. We need to enter todos in the Collection ID field and click the Next button.
Figure 2-12
The to-dos
On the next screen, fill the Document ID field by clicking Auto ID. Also enter todo in the Field field. After that, click the Save button (Figure 2-13).
Figure 2-13
Fields
That will take us back to the main screen. Now click the Add document link. This will again open the same pop-up, where we will add the details of another to-do item. Now, we have two to-dos in our database (Figure 2-14).
Figure 2-14
Two to-dos
Adding Firebase to the App
Now we are going to remove the hard-coded to-dos in App.js and use the data from the Firebase database. So, go back to App.js and remove the hard-coded stuff in the useState code for todos. We have also created the required imports.
After that, within useEffect, we are calling the collection todos, and then we take the snapshot. In Firebase terms, it is the live data, which we will get instantly. We will then set this data in the todos array, via setTodos().
Also, notice that useEffect has input inside the array. So, any time a todo is added by the user, it will instantly display in our app.
Also, notice that we have changed the way we loop through data, using todos. This is done because we receive the data as an array of objects. The updated code is shown in bold here:
import { useState, useEffect } from 'react';
import Todo from './components/Todo';
import { db } from './firebase';
function App() {
const [todos, setTodos] = useState([])
const [input, setInput] = useState('')
useEffect(() => {
db.collection('todos').onSnapshot(snapshot => {
setTodos(snapshot.docs.map(doc => doc.data()))
})
}, [input])
...
...
return (
<div className="App">
<h1>TODO React Firebase</h1>
...
...
<ul>
{todos.map(({ todo }) => <Todo todo={todo} />)}
</ul>
</div>
);
}
export default App;
Now, we will add the functionality so the user can add the to-do item. For this we just need to add the input to the collection, using add(). Also, notice that we are adding the server timestamp, while adding a to-do. We are doing this because we need to order the to-dos in descending order. The updated code is marked in bold here:
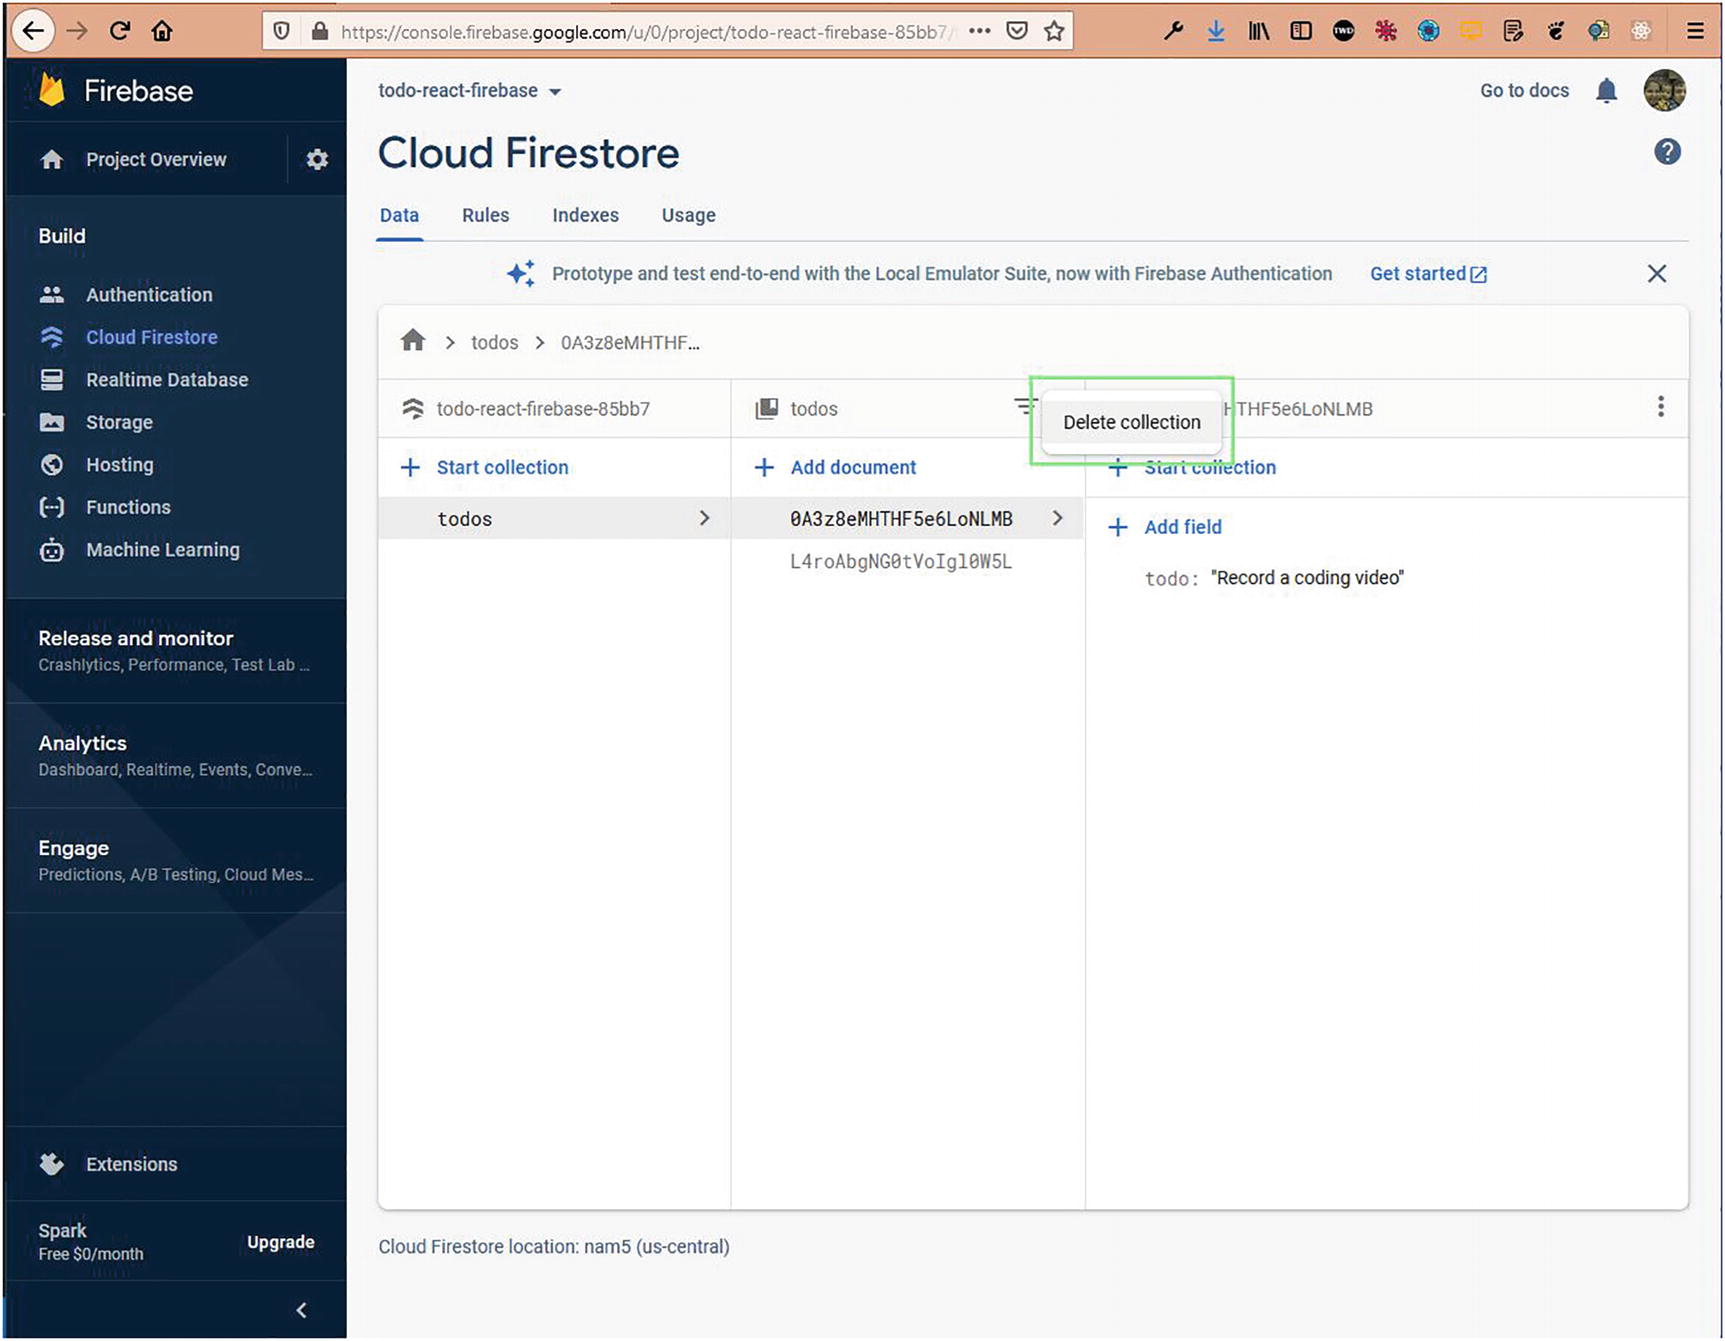
Now, we need to delete the old collection in Firebase, because none of the records has a timestamp (Figure 2-15).
Figure 2-15
Deleting the collection
It will also display a pop-up to confirm this (Figure 2-16).
Figure 2-16
Confirmation before deleting
Now, we also want to get the ID of each item that we require for the key and also for deleting, which we are going to implement. The key is essential in React for optimization, and we also get a warning in the console. So, we need to change the structure in which we set the data in setTodos().
Now, we are mapping through it in a different way, specifically when we are passing the single item to a Todo component. Here’s the updated code:
Now, in the Todo.js file, we are getting a different structure, and we are updating our file for that.
We have also added the delete functionality, in which we have to get the ID of the item and call the delete(). The updated code is marked in bold here:
import { db } from '../firebase'
import DeleteForeverIcon from '@material-ui/icons/DeleteForever'
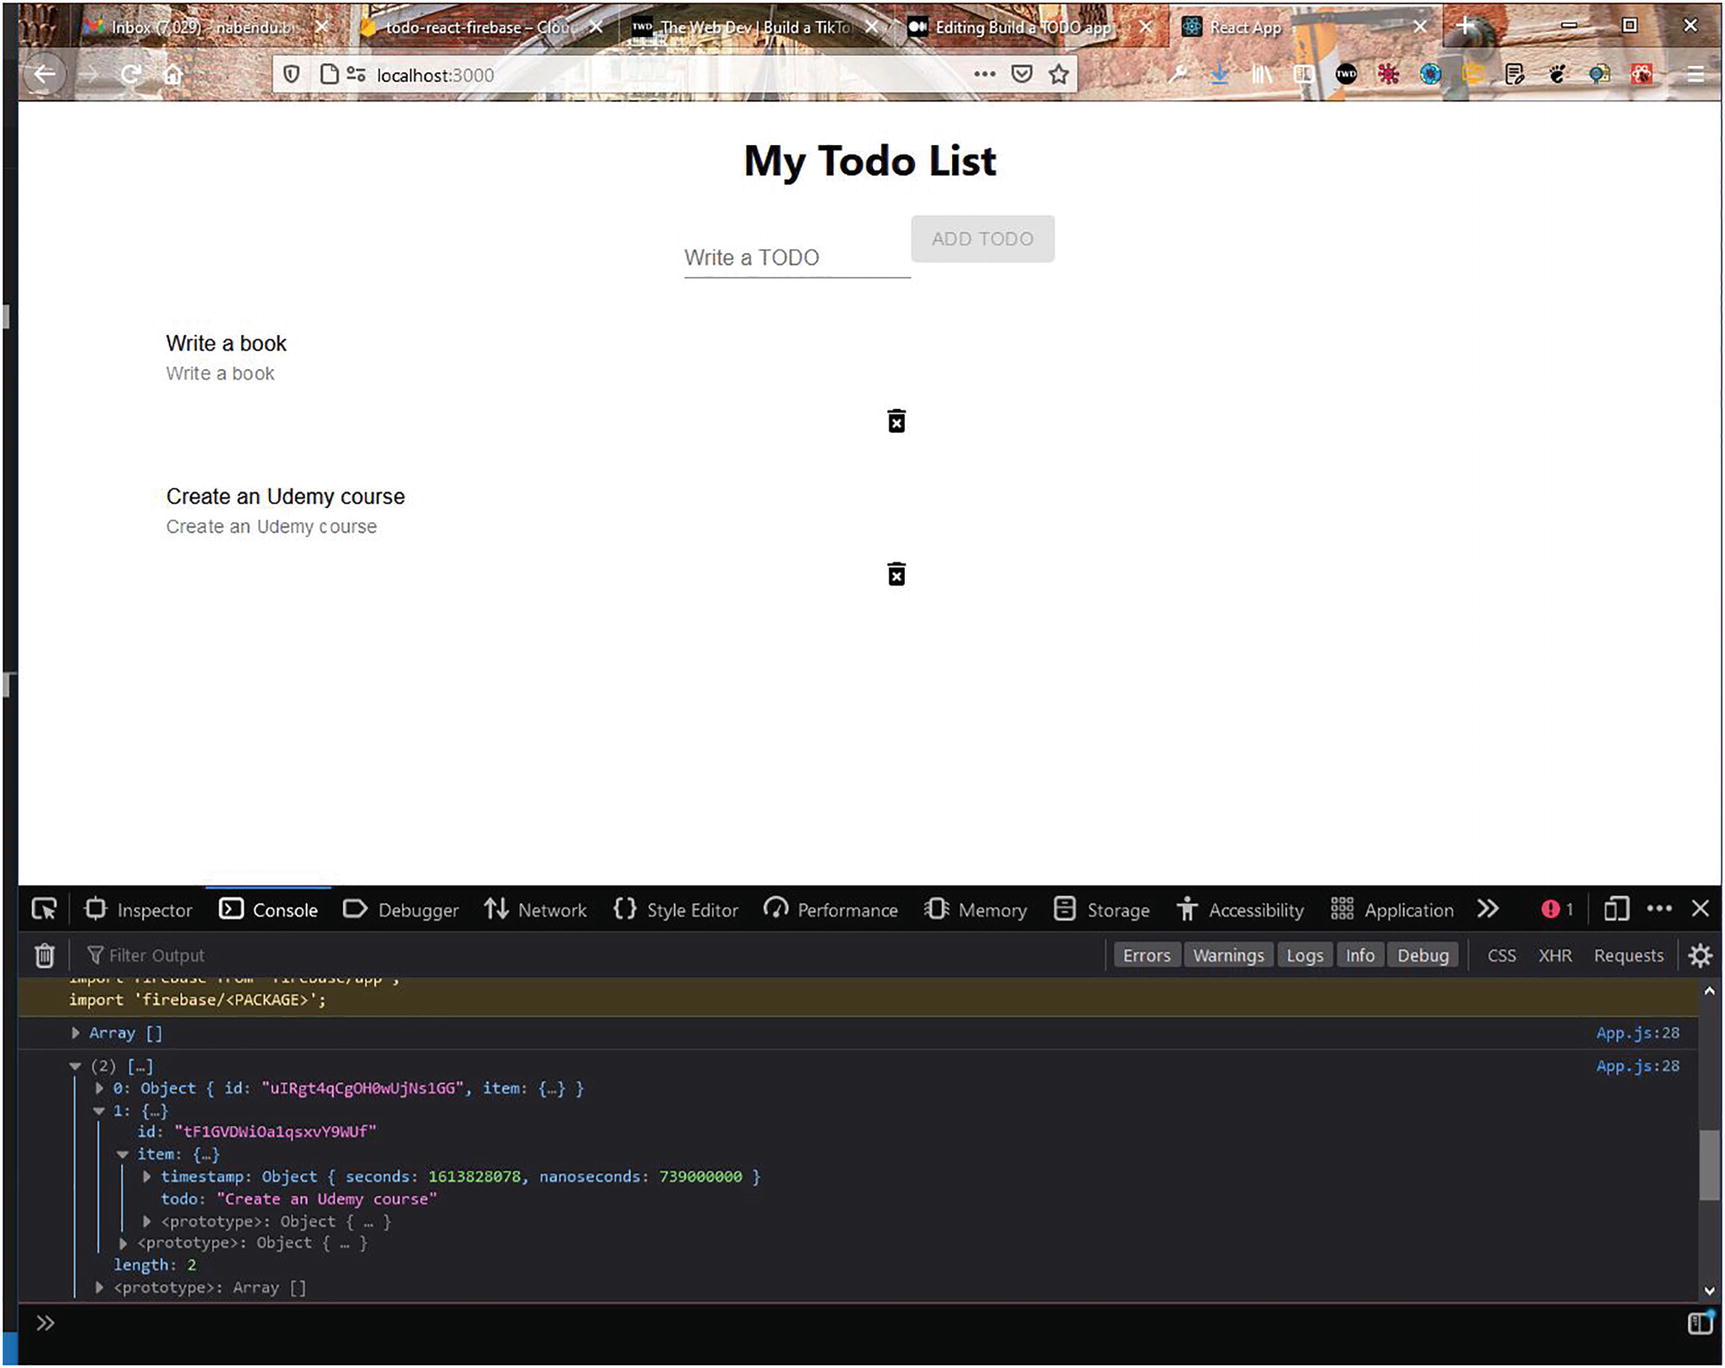
Now, in localhost, we can add and delete any item. Also, notice the structure in the console log (Figure 2-17).
Figure 2-17
Console log
We are done with the app, and only the styling remains. Let’s make it prettier now. In the App.js file, change className to app. The updated code is marked in bold here:
return (
<div className="app">
...
</div>
);
}
export default App;
Next, in the App.css file, remove everything and insert the content shown here:
.app {
display:grid;
place-items: center;
}
Now, in the Todo.js file, add the import for the Todo.css file. Also, set fontSize to large for the Delete icon. The updated code is marked in bold here:
Next, in the Todo.css file, add the following content:
.todo__list{
display:flex;
justify-content: center;
align-items: center;
width: 800px;
border: 1px solid lightgray;
margin-bottom: 10px !important;
}
Now, in localhost, the app is looking perfect (Figure 2-18).
Figure 2-18
Our app after adding the styling
Deploying Firebase
To deploy the app, we will follow the same steps as in Chapter 1. After doing that, we can see that the app was successfully deployed from the terminal (Figure 2-19).
Figure 2-19
The completed app
Summary
In this chapter, you created a beautiful to-do app. The data for the app was stored in a Firebase Firestore database, and it even has delete functionality.