
Before diving deep into any topic, you must learn the fundamentals. In this chapter, you will learn about three basic concepts in Unreal Engine – Projects, Levels, and Actors.
Projects
In the context of the Unreal Engine, a project is the unit that stores all the information for an individual game. Meaning each game you create will be stored in its own project.
For example, for a first-person shooter game, you might have a project called “ShooterProject.” If you wanted to work on another game, a puzzle game, you would create a new project and perhaps call it “PuzzleProject.” So if you are working on five different games, you should have five different projects, one for each game.
Unreal Project Browser
To launch the Unreal Project Browser
- 1.Go to your desktop and double-click the Epic Games Launcher shortcut that you created during installation.
- 2.Make sure you are on the Unreal Engine tab.
- 3.Click the yellow “Launch” button in the upper-right corner.
The Unreal Project Browser is where you can open your existing projects or create new ones. It is divided into two tabs.
Projects Tab
The first tab is simply called Projects and will be selected by default whenever the Project Browser first opens (Figure 2-1). This tab is for existing projects. It contains thumbnail images of all existing projects that the Project Browser was able to find, which would include any projects within the installation directory, and any projects you previously created or opened using this installation of Unreal.
Figure 2-1
The Projects tab of the Unreal Project Browser
To open a project, simply double-click it, or select it and click the “Open” button in the bottom-right corner, and it will open the Unreal Editor and load that project into it.
If you have lots of projects and need help finding one, you can enter all or part of the name of the project in the search bar at the top and it will narrow down the results based on what you entered.
As previously mentioned, the Projects tab will only list the projects that the Project Browser could find. For example, if you were to download an existing project from the Internet onto your desktop, then the Project Browser won’t know about it until you open that project. This is what the “Browse” button in the bottom-right corner is for. In this situation, you would need to click the Browse button and browse to that project file on your desktop and open it from there. Once you open it, from then on, the Project Browser will know about it and it will appear in the list.
In the upper-right corner of the Project Browser, there are two buttons – Refresh and Marketplace. The Refresh button is used to refresh the list of project thumbnails. Again, let’s say that you download a project from the Internet, but instead of saving it to the desktop, you saved it in the installation directory instead. In that scenario, the Project Browser will be able to find it. However, it won’t appear in the list until you click the Refresh button.
If you click the Marketplace button, this will take you to the Marketplace tab of the Epic Games Launcher where you can download existing environments, objects, characters, and so on either for free or for a price.
In the bottom-left corner is a checkbox labeled “Always load last project on startup.” If you check this, the next time you hit the Launch button in the Games Launcher, it will skip the Project Browser altogether and automatically open the last project you worked on. This is useful if you plan to be working on only one project for several days, weeks, or months at a time. It will allow you to skip this step every time.
If you do this and then want to open a new or different project, you can still do that through the File menu of the Unreal Editor. If you later decide you do want the Project Browser to open on launch, you can change this setting in the Editor Preferences.
New Project Tab
The second tab is the New Project tab (Figure 2-2). This tab has two tabs itself – a Blueprint tab and a C++ tab. On the Blueprint tab, there are several options to choose from – a blank project and several template projects.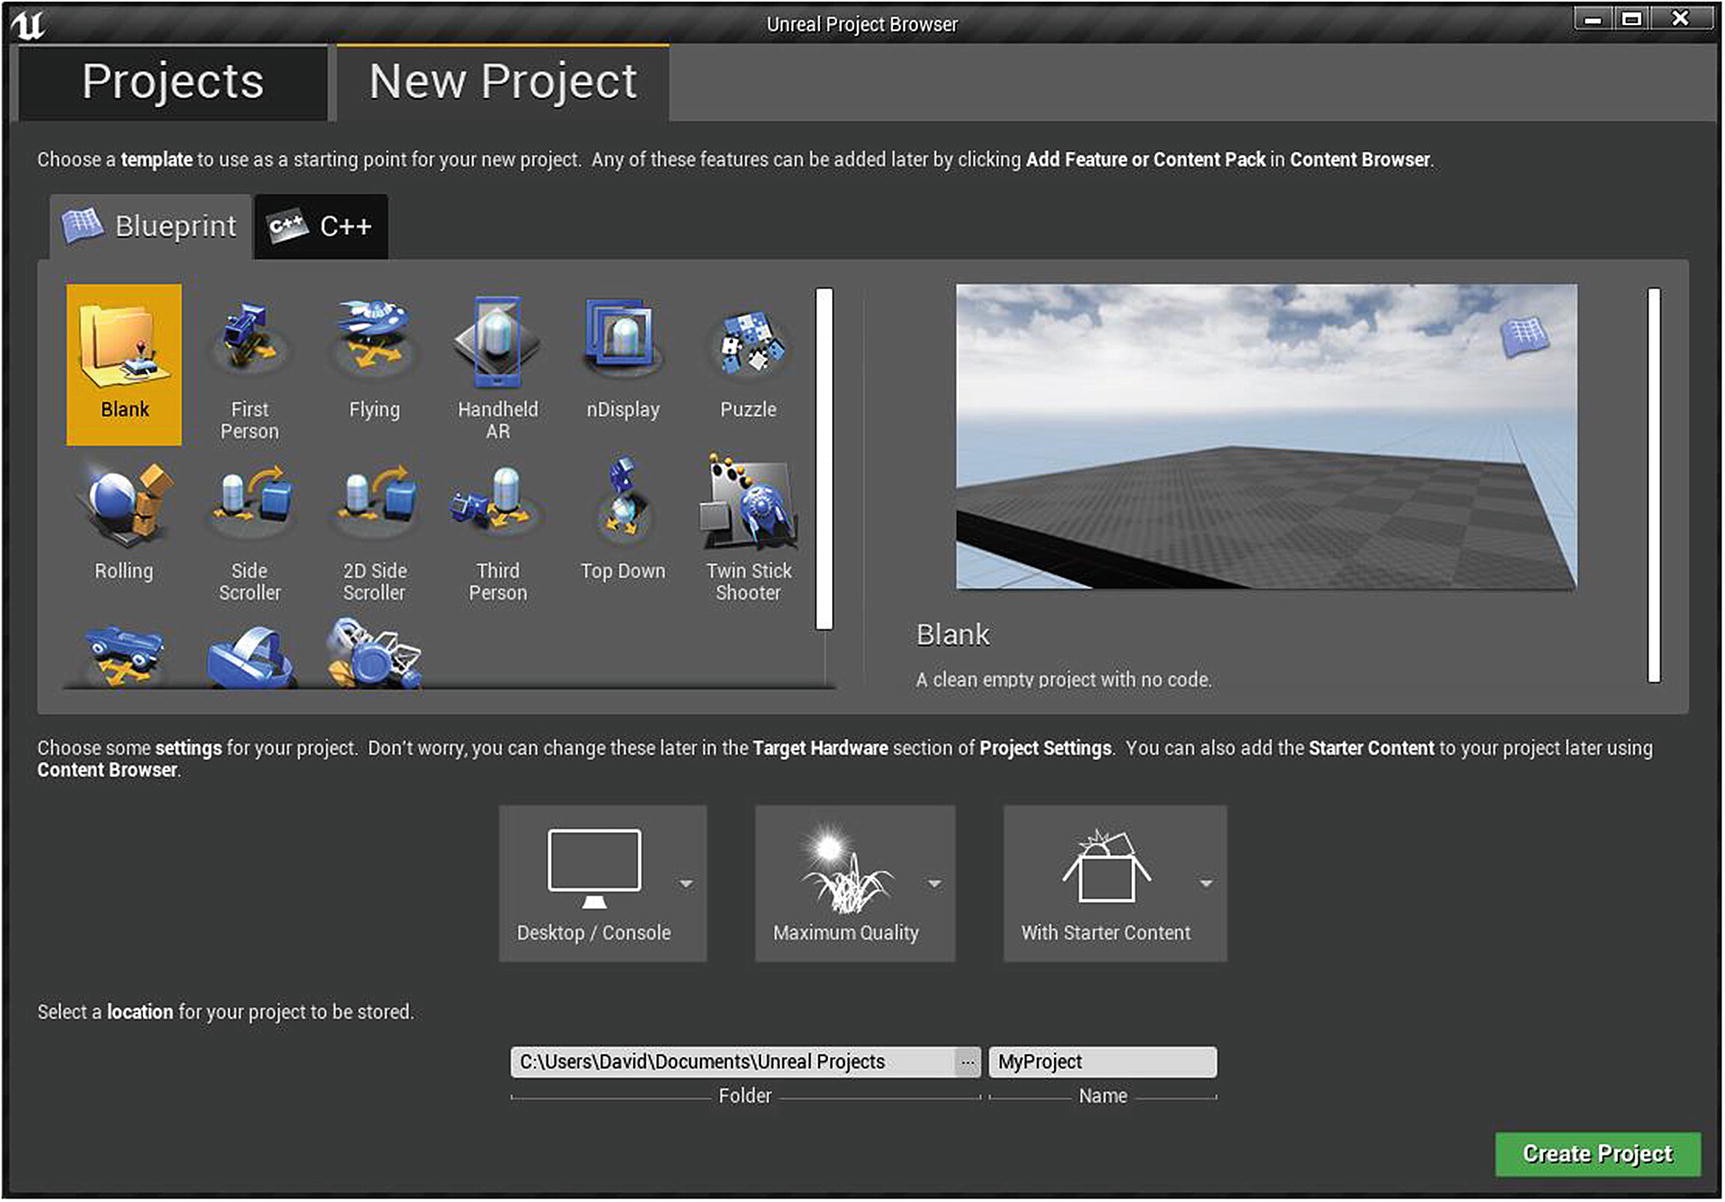
Figure 2-2
The New Project tab of the Unreal Project Browser
The templates are all based around common game types. For example, the First Person template will load with several features common to first-person games already hooked up and ready to go. For a racing game, the Vehicle template would make a good choice. If you don’t choose these features here, you still have the option to add them in later if you want. You could choose a blank project to start with and then add in “First Person” features later, within the Editor.
Toward the bottom of the tab, there are three different settings available to configure (Figure 2-3). You also have the option to change any of these settings later within the Editor.
Figure 2-3
Settings available on the New Project tab
First, you can choose the overall class of hardware that you are planning to develop your game for. You can choose between Desktop/Console
for developing computer and console games and Mobile/Tablet for developing phone and tablet games.
Next, you have the option of choosing between Maximum Quality and Scalable 3D or 2D. In general, you would pair the Desktop/Console setting with Maximum Quality, and Mobile/Tablet with Scalable 3D or 2D, which makes this setting somewhat redundant. However, if you wanted to, for example, create a desktop game that could operate using minimal resources, you could pair the “Desktop” and “Scalable” settings together.
Lastly, you have the option of choosing between With Starter Content and No Starter Content. Choosing the blank template will start you off with no code, but if you wanted to start with a truly empty project, you would choose the blank template along with the No Starter Content setting. However, the With Starter Content setting is useful as it will load into your project, from the start, a lot of basic content you can use to get you going such as materials, basic shapes, and so on.
Finally, when you have selected the template you want to use and have chosen your settings, you just need to go to the bottom of the window and choose where you want the project to be saved, give it a name, and click the Create Project button in the bottom-right. This will open the Unreal Editor and load a new project into it based on the settings you chose.
Levels
A Level
, in the context of the Unreal Engine, can be defined as a collection of objects and their properties that together define an area of gameplay.
That’s the technical definition, but an easy way to visualize this is, if you’ve ever played a fighting game such as Super Smash Bros, or SoulCalibur, or Mortal Kombat, you know that each match takes place in a different location. The first match might take place in a palace and the next one in a forest, and so on. Each of these different locations would be its own Level within the Unreal Editor.
Also, think of first-person shooter (FPS) games such as Call of Duty or Battlefield. When you’re playing multiplayer, you might get asked to choose a map for the match to take place in. Each of those maps is it’s own Level.
Levels are loaded and unloaded into memory one at a time. So if you’re playing a game where you’re in a town, and you can walk around the town, and every time you enter or exit one of the buildings in the town, the game has to load, then that means that the outside of the town is a single Level, and each building interior is its own Level.
A single game may consist of only one Level, but often will consist of many Levels. Major releases often contain hundreds of Levels.
Creating, Opening, and Saving Levels
To create a new Level, go to File ➤ New Level (Figure 2-4), or use the shortcut Ctrl+N.
Figure 2-4
The File Menu
You have the option of choosing between “Default,” “VR-Basic,” and “Empty Level” (Figure 2-5). “Default” will start you off with some basic stuff already added, including a platform, an atmosphere, some lighting, and so on. “VR-Basic” will give you a basic level that can be viewed inside of a VR headset. The “Empty Level” option will start you off with a completely empty Level.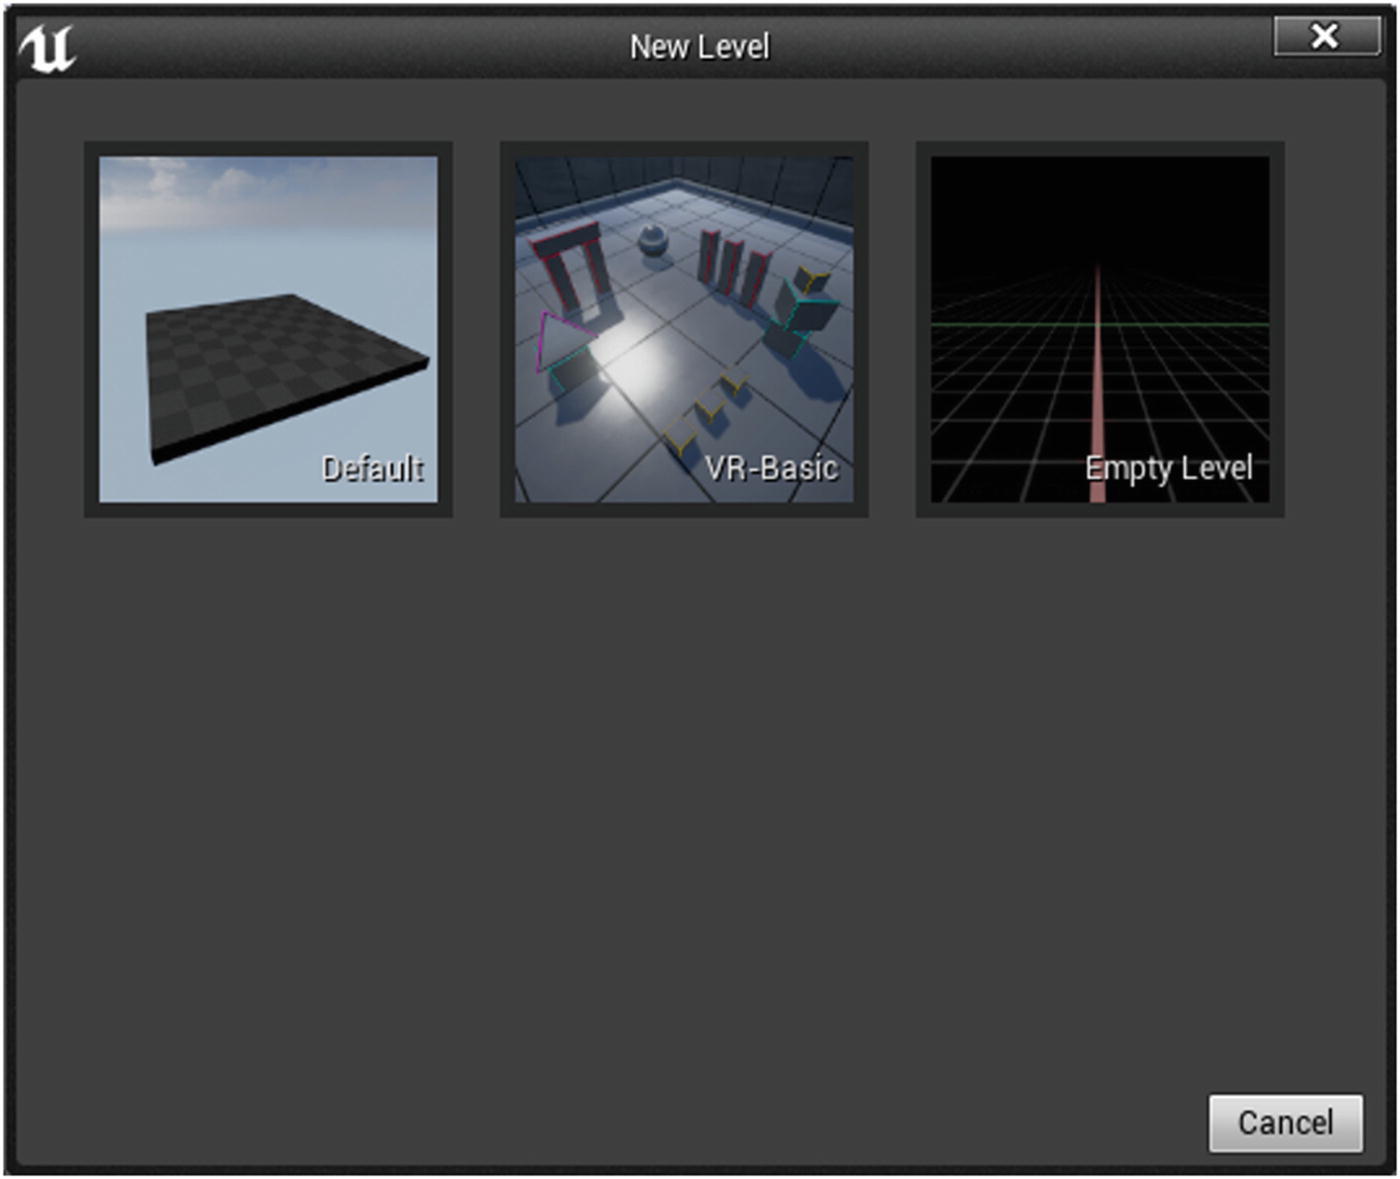
Figure 2-5
You can choose between Default, VR-Basic, and Empty Level when creating a new Level
To open an already existing Level, go to File ➤ Open Level, or use the shortcut Ctrl+O. From there, navigate through the Content folder to find the Level you want, then double-click to open it.
There are multiple options available for saving. You can go to File ➤ Save Current to save it with its current name. Or you can select “Save Current As” and save it under a different name. If you have multiple Levels that are unsaved, and want to save them all, you can select “Save All Levels.”
In addition to Levels, it is possible to open and save other assets as well. An asset is anything that can be used to help develop your game that can be saved and opened. For example, anything you can open or add to your game within the Content Browser is an asset.
If you want to open an existing asset for editing, you would select “Open Asset,” or use Ctrl+P, and then select the asset you want to open from the list.
To save everything you have open, including all Levels and other assets, select “Save All,” or simply press Ctrl+Shift+S. To save only some of the files you have open, select “Choose Files to Save…” and select which of the unsaved files you want to save.
Playing a Level
You can test your Levels directly in the Editor by clicking the Play button at the top of the screen (Figure 2-6). This will simulate the Level immediately, without having to do a full build of the game, so you can quickly test things as you develop them.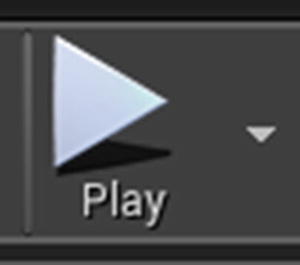
Figure 2-6
The Play button
To view the Level fullscreen, or to exit fullscreen, make sure the Viewport is in focus, then press the F11 key. To stop the simulation, press Esc on the keyboard or the Stop button at the top of the screen.
Actors
An Actor
is any object that can be added to a Level. Consider the objects on the left side of the Unreal Editor when you first start a project. If you click the cube, for example, and drag it into the Level, it will become an Actor within the Level (Figure 2-7).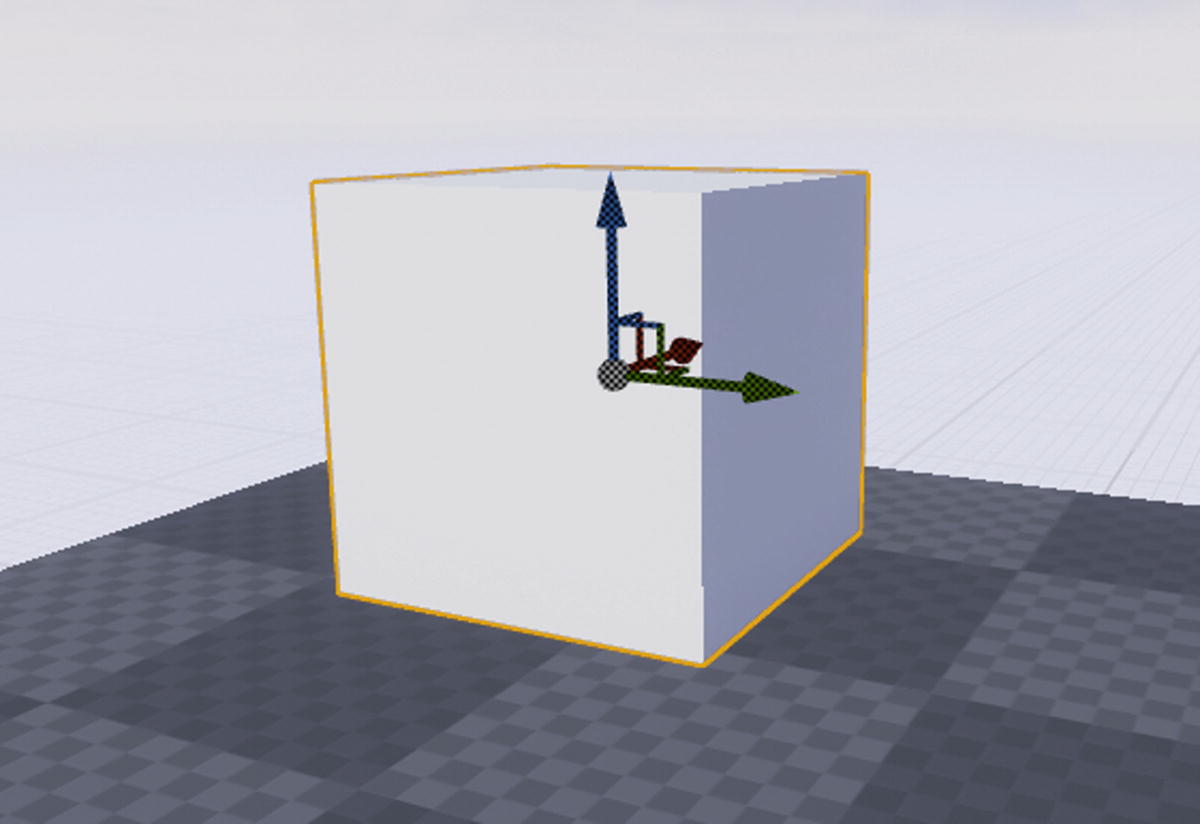
Figure 2-7
This cube is an Actor within the Level
Actors can be physical, visible objects within the Level, such as the cube, but they don’t have to be. For example, there is something called the Player Start Actor. Wherever this Actor is placed within the Level is where the player will start when the Level begins. Even though the Player Start Actor isn’t a physical object within the Level, it is still considered to be an Actor.
Static Meshes
The Static Mesh Actor
is one of the most common types of Actors used to construct Levels in the Unreal Editor. If you’re not familiar, “mesh” is a 3D modeling term and simply refers to a 3D object. When you’re playing a game, pretty much every object you see in the game will be a mesh. For example, you may see tree meshes, bird meshes, table meshes, chair meshes, and so on.
Static Meshes refer to meshes with no moving parts, for example, the cube and the other geometric shapes in that list.
There is another type of mesh, a Skeletal Mesh, which is simply a mesh that does have moving parts. Skeletal Meshes have polygons that are combined to form the appearance of the mesh, just like Static Meshes, but they also have a set of bones which are connected together and used to animate the vertices of the polygons. Skeletal Meshes are an intermediate to advanced topic and won’t be covered in detail.
In the Starter Content that comes with the Unreal Engine, you have some Static Meshes in the form of furniture and some basic architectural objects (Figure 2-8).
Figure 2-8
Some Static Meshes are included in the Starter Content
So you have some Meshes to start with, but the vast majority of meshes used in games are created in external 3D modeling applications, such as Maya, 3D Studio Max, Blender, and so on, and then imported into the Unreal Editor. If you’re not a 3D modeling artist, don’t despair; there are lots of great content available on the Internet for you to use, for free or for a price, and the final chapter of this book will show you where you can find some of that content.
Geometry Brushes
A Geometry Brush
, or simply “Brush” for short, is an Actor used to represent 3D space (Figure 2-9). There is a Box Brush, a Cone Brush, and so on. This is very similar to a Mesh, but there are a few key differences. These differences will be discussed in greater detail in Chapter 4, so, for now, just know the following:
- Brushes are only used for basic geometric shapes, while Meshes can be crafted into objects with a high level of detail.
- Brushes are useful for quick level design but are less memory efficient than Meshes. Therefore, Brushes are generally used to prototype Levels early on and are then replaced with better-looking and better-performing Meshes for the final project.
Figure 2-9
A Box Brush
Materials
Before moving on to the next Actor, you should know about a property that is common to both Meshes and Brushes – the Material of the Actor. A Material
in Unreal Engine is an asset you can apply to a surface to make that surface, and thus the geometry behind that surface, look like it’s made out of a certain substance. For example, if you apply a wood Material to a Cube Mesh, it will look like a wooden cube (Figure 2-10).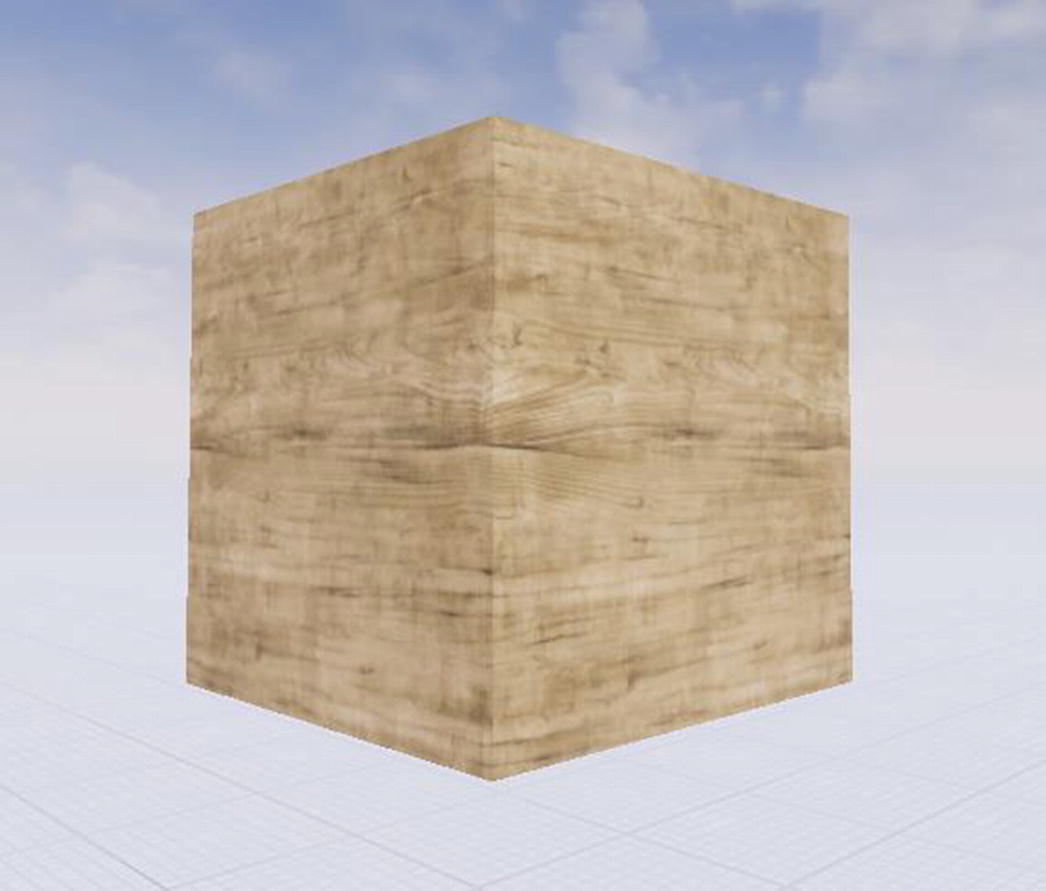
Figure 2-10
A wood Material has been applied to this Cube Mesh
Meshes
that are imported into the Unreal Editor may already have one or more Materials applied to them that get imported in alongside them. But you can replace these Materials if you wish.
Lights
A Light Actor
in the Unreal Engine is used to represent visible light in the real world. Thanks to a lot of complex, mathematical algorithms that the Unreal Engine uses, it will behave much like light does in the real world. It will make objects that it hits more visible, depending on the intensity of the Light and the Material of the object. It will reflect off the surface of objects and light up other objects indirectly. It will cast a shadow if a visible, opaque object is in its path, and so on.
Lights will be discussed in greater detail in Chapter 4, but for now, just know that Light Actors are used to represent only the light itself, and not any of the objects from which the light emanates from. For example, if you wanted a working flashlight in your Level, you would need to combine a Light Actor with a Static Mesh Actor that looked like a flashlight. You would place the Light Actor at one end of the flashlight to make it look like the light was coming out of the flashlight.
Particle Systems
A Particle System
is an Actor used to represent objects made of many tiny particles, such as smoke, fire, sparks, lasers, and so on. A Particle System is comprised of one or more Particle Emitters, which can be combined in a variety of ways to create different-looking particle effects.
The Starter Content contains a number of pre-made particle systems, but you also have the option of creating your own using Cascade, the particle effects editor within Unreal.
Components
Components are a type of object in Unreal that are attached to Actors. In fact, Actors can be thought of as simply containers that are used to hold Components. For example, a Static Mesh Actor is just an Actor that has a Static Mesh Component.
Components will be covered in detail in Chapter 4.
Summary
In this chapter, you learned the basics of the Unreal Engine. Specifically, you learned about Projects, Levels, and Actors. In the next chapter, you will learn about the Level Editor, the main editor of the Unreal Engine.