© Peter Himschoot 2019
Peter HimschootBlazor Revealedhttps://doi.org/10.1007/978-1-4842-4343-5_1

1. Your First Blazor Project

Peter Himschoot1 
(1)
Melle, Belgium
 

Getting a hands-on experience is the best way to learn. In this chapter, you’ll install the prerequisites to developing with Blazor, which includes Visual Studio along with some needed extensions. Then you’ll create your first Blazor project in Visual Studio, run the project to see it work, and inspect the different aspects of the project to get a “lay of the land” view for how Blazor applications are developed.

Installing Blazor Prerequisites

Working with Blazor requires you to install some prerequisites, so let’s get to it.

.NET Core

Blazor runs on top of .NET Core, providing the web server for your project, which will serve the client files that run in the browser and run any server-side APIs that your Blazor project needs. .NET Core is Microsoft’s cross-platform solution for working with .NET on Windows, Linux, and OSX.

You can find the installation files at www.microsoft.com/net/download . Look for the latest version of the .NET Core SDK. Download the installer, run it, and accept the defaults.

Verify the installation when the installer is done by opening a new command prompt and typing the following command:
dotnet –version

Look for the following output to indicate that you have the correct version installed. The version number should be at least 2.1.300.

Should the command’s output show an older version (for example 2.1.200), you must download and install a more recent version of .NET Core SDK.

Visual Studio 2017

Visual Studio 2017 (from now on I will refer to Visual Studio as VS) is one of the integrated development environments (IDEs) you will use throughout this book. The other IDE is Visual Studio Code. With either one you can edit your code, compile it, and run it all from the same application. The code samples are also the same. However, VS only runs on Windows, so if you’re using another OS, please continue to the section on Visual Studio Code.

Download the latest version of Visual Studio 2017 from www.visualstudio.com/downloads/ .

Run the installer and make sure that you install the ASP.NET and web development role, as shown in Figure 1-1.
../images/469993_1_En_1_Chapter/469993_1_En_1_Fig1_HTML.jpg
Figure 1-1

The Visual Studio Installer Workloads selection

After installation, run Visual Studio from the Start menu. Then open the Help menu and select About Microsoft Visual Studio. The About Microsoft Visual Studio dialog window should specify at least version 15.7.3, as illustrated in Figure 1-2.
../images/469993_1_En_1_Chapter/469993_1_En_1_Fig2_HTML.jpg
Figure 1-2

About Microsoft Visual Studio

ASP.NET Core Blazor Language Services

The Blazor Language Services plugin for Visual Studio will aid you when typing Blazor files and will install the Blazor VS project templates. Installation of the plugin is done directly from Visual Studio. Open Tools ➤ Extensions and Updates. Click the Online tab and enter Blazor in the search box. You should see the ASP.NET Core Blazor Language Services listed as shown in Figure 1-3. Select it and click the Download button to install.
../images/469993_1_En_1_Chapter/469993_1_En_1_Fig3_HTML.jpg
Figure 1-3

Installing Blazor Language Services from the Extensions and Updates menu

Visual Studio Code

Visual Studio Code is a free, modern, cross-platform development environment with integrated editor, git source control, and debugger. The environment has a huge range of extensions available, allowing you to use all kinds of languages and tools directly from Code. So, if you don’t have access to Visual Studio 2017 (because you’re running a non-Windows operating system or you don’t want to use it), use Code.

Download the installer from www.visualstudio.com/ . Run it and choose the defaults.

After installation I do advise you install a couple of extensions for Code, especially the C# extensions. Start Code, and on the left side, select the Extensions tab, as shown in Figure 1-4.
../images/469993_1_En_1_Chapter/469993_1_En_1_Fig4_HTML.jpg
Figure 1-4

Visual Studio Code Extensions tab

You can search for extensions, so start with C#, which is the first extension from Figure 1-4. This extension will give you IntelliSense for the C# programming language and .NET assemblies. You will probably get a newer version listed so take the latest.

Click Install.

Another extension you want to search for is Razor+, as shown in Figure 1-5. This extension will give you nice syntax coloring for the kind of Razor files you will use in Blazor.
../images/469993_1_En_1_Chapter/469993_1_En_1_Fig5_HTML.jpg
Figure 1-5

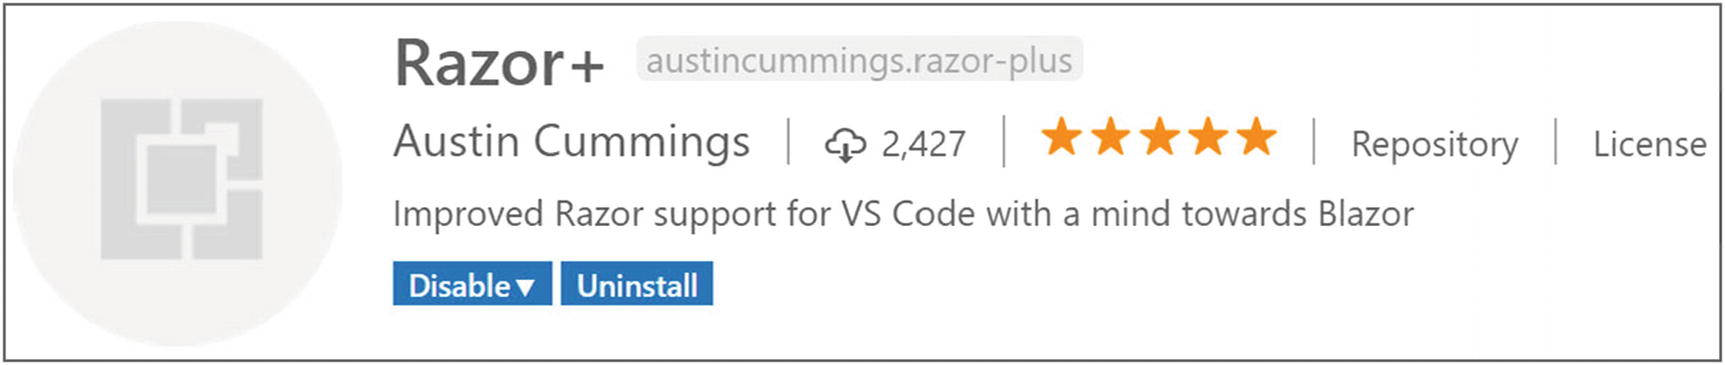
Razor+ for Visual Studio Code

Installing the Blazor Templates for VS/Code

Throughout this book you will create several different Blazor projects. Not all of them can be created from Visual Studio or Code, meaning you’ll need to install the templates for Blazor projects. This section’s example shows how to install those templates from the .NET Core command-line interface, also known as the .NET Core CLI. You should have this command-line interface as part of your .NET Core installation.

Open a command line on your OS, and type the following to install the templates from NuGet:
dotnet new -i Microsoft.AspNetCore.Blazor.Templates
These templates will allow you to quickly generate projects and items. Verify the installation by typing the following command:
dotnet new –-help
This command will list all the templates that have been installed by the command-line interface. You will see four columns. The first shows the template’s description, the second column displays the name, the third lists the languages for which the template is available, and the last shows the tags, a kind of group name for the template. Among those listed are the following:
Blazor (hosted in ASP.NET server)            blazorhosted
Blazor Library                               blazorlib
Blazor (Server-side in ASP.NET Core)         blazorserverside
Blazor (standalone)                          blazor

Generating Your Project with Visual Studio

With Blazor projects you have a couple of choices. You can create a stand-alone Blazor project (using the blazor template) that has no need for server-side code. This kind of project has the advantage that you can simply deploy it to any web server, which will function as a file server, allowing browsers to download your site just like any other site. Or you can create a hosted project (using the blazorhosted template) with client, server, and shared code. This kind of project will require you to host it where there is .NET core 2.1 support because you will execute code on the server as well. The third option is to run all Blazor code on the server (using the blazorserverside template). In this case, the browser will use a SignalR connection to receive UI updates from the server and to send user interaction back to the server for processing. In this book, you will use the second option, but the concepts you will learn in this book are the same for all three options.

Creating a Project with Visual Studio

For your first project, start Visual Studio and select File ➤ New ➤ Project. On the left side of the New Project dialog, select C# ➤ Web, and then select ASP.NET Core Web Application, as illustrated by Figure 1-6.
../images/469993_1_En_1_Chapter/469993_1_En_1_Fig6_HTML.jpg
Figure 1-6

Visual Studio New Project dialog

Name your project MyFirstBlazor, leave the rest to the preset defaults, and click OK. On the next screen, you can select what kind of ASP.NET Core project you want to generate. From the top drop-downs, select .NET Core and ASP.NET Core 2.1 (or higher), as shown in Figure 1-7. Then select Blazor (ASP.NET hosted) and click OK.
../images/469993_1_En_1_Chapter/469993_1_En_1_Fig7_HTML.jpg
Figure 1-7

New ASP.NET Core web application

Wait for Visual Studio to complete. Then build your solution.

At the time of writing this book, Blazor has very limited client-side debugging (and only in Chrome), so running a Blazor project with a debugger just will take more time to show the browser. From now on I will tell you to run without the debugger.

Generating the Project with dotnet cli

To generate the project with dotnet cli, open command line and change the current directory to wherever you want to create the project. Now execute this command to create a new project from the blazorhosted template in the MyFirstBlazor directory:
dotnet new blazorhosted -o MyFirstBlazor
This command will take a little while because it will download a bunch of NuGet packages from the Internet. When the command is ready, you can build your project using
cd MyFirstBlazor
dotnet build
Now open your project’s folder with Code. When Code has loaded everything, it will pop a little question, as shown in Figure 1-8.
../images/469993_1_En_1_Chapter/469993_1_En_1_Fig8_HTML.jpg
Figure 1-8

Code asking to add build and debug assets

Answer Yes. This will add a folder called .vscode with configuration files adding support for building and running the project from Code.

Running the Project

Press Ctrl-F5 to run (this should work for both Visual Studio and Code). Your (default) browser should open and display the home page, as shown in Figure 1-9.
../images/469993_1_En_1_Chapter/469993_1_En_1_Fig9_HTML.jpg
Figure 1-9

Your first application’s home page

This generated single-page application has on the left side a navigation menu allowing you to jump between different pages. On the right side you will see the selected screen shown in Figure 1-9: the home page. And in the top right corner there is an About link to https://blazor.net/ , which is the “official” Blazor documentation web site.

The Home Page

The home page shows the mandatory “Hello, world!” demo, and it also contains a survey component you can click to fill out a survey (please let Microsoft know you like Blazor!).

The Counter Page

In the navigation menu, click the Counter tab. Doing so opens a simple screen with a number and a button, as illustrated by Figure 1-10. Clicking the button will increment the counter. Try it!
../images/469993_1_En_1_Chapter/469993_1_En_1_Fig10_HTML.jpg
Figure 1-10

The Counter screen

The Fetch Data Page

In the navigation menu, click the Fetch data tab. Here you can watch a (random and fake) weather forecast, as shown in Figure 1-11. This forecast is generated on the server when asked by the client. This is very important because the client (which is running in the browser) cannot access data from a database directly, so you need a server that can access databases and other data storage.
../images/469993_1_En_1_Chapter/469993_1_En_1_Fig11_HTML.jpg
Figure 1-11

The Fetch data screen

Examining the Project’s Parts

Being able to play with these pages is nice but let’s have a look at how all this works. You will start with the server project, which hosts your Blazor web site. Then you will look at the shared project, which contains classes used by both server and client. Finally, you will examine the client project, which is the actual Blazor implementation.

The Solution

Visual Studio and Code use solution files to group projects that will form an application. So a typical Blazor project consists of a server, a client, and a shared project grouped into a single solution. This simplifies building everything since the solution allows tools to figure out in which order to compile everything. Hey, you could even switch between Visual Studio and Code because they both use the same project and solution files!

The Server

Web applications are really a bunch of files that get downloaded by the browser from a server. It is the server’s job to provide the files to the browser upon request. There is a whole range of existing servers to choose from, for example IIS on Windows or Apache on Linux. ASP.NET Core has its own built-in server which you generated with the blazorhosted template, which you can then run on Windows, Linux, or OSX.

The topic of this book is Blazor, so I’m not going to discuss all the details of the server project that got generated using the blazorhosted template, but I do want to show you an important thing. In the server project, look for Startup.cs. Open this file and scroll down to the Configure method shown in Listing 1-1.
// This method gets called by the runtime.
// Use this method to configure the HTTP request pipeline.
public void Configure(IApplicationBuilder app,
                      IHostingEnvironment env)
{
  app.UseResponseCompression();
  if (env.IsDevelopment())
  {
    app.UseDeveloperExceptionPage();
  }
  app.UseMvc(routes =>
  {
    routes.MapRoute(name: "default",
                    template: "{controller}/{action}/{id?}");
  });
  app.UseBlazor<Client.Program>();
}
Listing 1-1

The Server Project’s Configure Method

The Configure method is responsible for installing middleware. Middleware are little .NET components that each have a clear responsibility. When you type in a URI, the browser sends a request to the server, which then passes it on to the middleware components. Some of them will take the request and return a response; some of them take the response and do something with it. Look at the first line in the Configure method, shown in Listing 1-2.
app.UseResponseCompression();
Listing 1-2

The UseResponseCompression Middleware

Your Blazor client will download a lot of files from the server, including .NET assemblies, so compressing these files will result in a faster download. The UseResponseCompression middleware takes care of that.

Would you like to see a detailed error page when the server has an uncaught exception? The UseDeveloperExceptionPage takes care of that. Of course, you don’t need it in production (you should handle all exceptions correctly) so this middleware is only used when running in a development environment. How does the server know if you are running in development or release? The if statement you see here checks an environment variable called ASPNETCORE_ENVIRONMENT, and if the environment variable is set to Development it knows you are running in development mode.

The Fetch data screen downloads weather information from the server. These kinds of requests will be handled by the MVC middleware. I will discuss this in more detail in Chapter 5.

The Blazor bootstrap process requires a bunch of special files, especially mono.wasm. They are served by the Blazor middleware, which can be found at the end of the Configure method.

The Shared Project

When you click on the Fetch data tab, your Blazor project fetches some data from the server. The shape of this data needs to be described in detail (computers are picky things); in classic projects, you describe this model’s shape twice, once for the client and again for the server because they use different languages. Not with Blazor! In Blazor, both client and server use C#, so you can describe the model once and share it between client and server, as shown in Listing 1-3.
public class WeatherForecast
{
  public DateTime Date { get; set; }
  public int TemperatureC { get; set; }
  public string Summary { get; set; }
  public int TemperatureF
             => 32 + (int)(TemperatureC / 0.5556);
}
Listing 1-3

The Shared WeatherForecast Class

The Client Blazor Project

Open the client project’s wwwroot folder and look for index.html. The contents of that file should appear as shown in Listing 1-4. To be honest, this looks mostly like a normal HTML page. But on closer inspection you’ll see that there is a weird <app> html tag there:
<app>Loading...</app>
The <app> html element does not exist! It is an example of a Blazor component. You will also see a <script> element:
<script src="_framework/blazor.webassembly.js"></script>
This script will install Blazor by downloading mono.wasm and your assemblies.
<!DOCTYPE html>
<html>
<head>
  <meta charset="utf-8" />
  <meta name="viewport" content="width=device-width">
  <title>MyFirstBlazor</title>
  <base href="/" />
  <link href="css/bootstrap/bootstrap.min.css"
        rel="stylesheet" />
  <link href="css/site.css" rel="stylesheet" />
</head>
<body>
  <app>Loading...</app>
  <script src="_framework/blazor.webassembly.js"></script>
</body>
</html>
Listing 1-4

index.html

Routing

What is that <app> element? Open Startup.cs from the MyFirstBlazor.Client project and look for the Configure method, as shown in Listing 1-5. Here you can see the App component being associated with the app tag from index.html. A Blazor component uses a custom tag like <app>, and the Blazor runtime replaces the tag with the component’s markup, which is normal HTML recognized by the browser. I will discuss Blazor components in Chapter 3.
public void Configure(IBlazorApplicationBuilder app)
{
  app.AddComponent<App>("app");
}
Listing 1-5

The Configure Method Associating the app Element to the App Component

The main thing the App component does is install the router, as shown in Listing 1-6. The router is responsible for loading a Blazor component depending on the URI in the browser. For example, if you browse to the / URI, the router will look for a component with a matching @page directive.
<Router AppAssembly=typeof(Program).Assembly />
Listing 1-6

The App Component

In your current MyFirstBlazor project this will match the Index component, which you can find in the Index.cshtml file, which you can find in the Pages folder. The Index component displays a Hello World message and the survey link, as shown in Listing 1-7.
@page "/"
<h1>Hello, world!</h1>
Welcome to your new app.
<SurveyPrompt Title="How is Blazor working for you?" />
Listing 1-7

The Index Component

Layout Components

Look at Figure 1-9 and Figure 1-10. Both have the same menu. This menu is shared among all your Blazor components and is known as a layout component. I will discuss layout components in Chapter 7. But how does Blazor know which component is the layout component? Open the Pages folder from the MyFirstBlazor.Client project and look for the _ViewImports.cshtml file. In Razor you use a _ViewImports.cshtml file to define common markup among all razor files in the same folder. If you’re familiar with .NET Core, _ViewImports.cshtml from .NET Core is very similar. The Pages folder contains such a file and specifies that all files use the same MainLayout component, as shown in Listing 1-8.
@layout MainLayout
Listing 1-8

Specifying the Layout Component in _ViewImports.cshtml

In your project, the layout component can be found in MainLayout.cshtml from the Shared folder, which is shown in Listing 1-9.
@inherits BlazorLayoutComponent
<div class="sidebar">
  <NavMenu />
</div>
<div class="main">
  <div class="top-row px-4">
    <a href="http://blazor.net" target="_blank"
       class="ml-md-auto">About</a>
  </div>
  <div class="content px-4">
    @Body
  </div>
</div>
Listing 1-9

The MainLayout Component

The first div with class sidebar contains a single component: NavMenu. This is where your navigation menu gets defined. You will look in more detail at navigation and routing in Chapter 7.

The next div with class main has two parts. The first is the About link you see on every page. The second part contains the @Body; this is where the selected page will be shown. For example, when you click the Counter link in the navigation menu, this is where the Counter.cshtml Blazor component will go.

The Blazor Bootstrap Process

Examine Listing 1-4 again. At the bottom you will find the <script> element responsible for bootstrapping Blazor in the browser. Let’s look at this process.

Go back to your browser and open its developer tools. (Most browsers will open the developer tools when you press F12.) Let’s look at what happens at the network layer.

All screenshots in this book use the Chrome browser, mainly because it is available on all platforms (Windows, Linux, and OSX) and because it is very popular with a lot of web developers. If you like another browser better, go right ahead!

Refresh your browser to see what gets downloaded from the server, as shown in Figure 1-12. If Figure 1-12 does not match what you see, clear the browser’s cache. Browsers use a cache to avoid reloading files from the server, but when you are developing, you must clear the cache to ensure you are getting the latest changes from the server. First, you will see index.html being downloaded, which in turn downloads bootstrap.css and site.css, and then blazor.webassembly.js. A little lower you will see that mono.js gets downloaded, which in turn will download mono.wasm. This is the mono runtime compiled to run on WebAssembly!
../images/469993_1_En_1_Chapter/469993_1_En_1_Fig12_HTML.jpg
Figure 1-12

Examining the bootstrap process using the network log

Now that the .NET runtime is running, you will see that MyFirstBlazor.Client.dll gets downloaded, followed by all its dependencies, including mscorlib.dll and system.dll. These files contain the .NET libraries containing classes such as string, used to execute all kinds of things, and they are the same libraries you use on the server. This is very powerful because you can reuse existing .NET libraries in Blazor that you or others built before!

Summary

Is this chapter, you installed the prerequisites needed for developing and running Blazor applications. You then created your first Blazor project. This project will be used throughout this book to explain all the Blazor concepts you need to know about. Finally, you examined this solution, looking at the server-side project, the shared project, and the client-side Blazor project.

..................Content has been hidden....................

You can't read the all page of ebook, please click here login for view all page.
Reset
13.58.190.38