Chapter 7. Sharing your Photos with the World
![]()
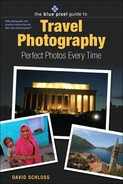
What good is it to have a beautiful photo like this if you can’t share it with anyone? (Photo by Reed Hoffmann)
After the hard work of preparing for your photo trip, the fun of photographing new things, and the exhilaration of experiencing new places, it’s time to show off your pictures. If you’ve gotten this far, you already have the tools you need to share your photographs. From physically giving people your photos to posting slide shows online, sharing your photos couldn’t be easier. And it’s one of the most satisfying parts of digital photography.
Digital photographs are strange because they don’t really exist. Every digital photo ever taken is simply a recording of zeros and ones arranged in the same language that all computers speak. Although a digital photo isn’t real, it starts off the same way as a film photograph—light passing through a lens, striking a surface. But the digital image is recorded as a stream of numbers representing the strength of the light and its color at each of the photosensitive pixels across the face of the imaging sensor.
In order to reproduce a film photograph, light is passed through the original negative and projected onto a sheet of light-sensitive photographic paper. The process results in a slight loss of quality due in part to the nature of light, but also to the limitations of the technology.
Digital photography doesn’t have as many limitations, so each copy of a digital photograph will be identical to the one before it, with no loss in quality. This makes sharing digital photographs much easier.
There are any number of ways to show off your travel photography that don’t involve huddling over the back of a camera peering at tiny images. And unlike the old days of sitting in a darkened room being bored to death by a relative’s slide show—featuring real slides—modern photo sharing is fun and easy.
Figure 7.1. Because it’s made up of pixels, a digital image file can be copied endlessly without degradation. To share it properly, though, learn the difference between what’s needed for a good print and a photo attachment you send via email. (Photo by Reed Hoffmann)
![]()
Digital photos can be shared physically or virtually. One approach requires a physical print, and the other way requires that you send your files in a format, usually on a CD or as an email attachment that can be viewed without having to make a reproduction. Both have their advantages. Which method you choose has a lot to do with the amount of control you like to have over your work, and how much time you want to spend.
Do-It-Yourself
The personal inkjet printer was the most important development in digital photography. You could argue that the digital camera itself was more important, but for most people a digital camera doesn’t change how they capture photographs; it just makes the process easier.
Affordable inkjet printers freed photographers from the chains of the one-hour photo lab, enabling them to save money by printing only the photos they wanted, at the size they wanted, when they wanted.
Figure 7.2. Today’s high-quality photo inkjet printers allow photographers to do their own printing. (Photo by Reed Hoffmann)
![]()
Every all-in-one photo software package on the market enables easy printing of photographs by clicking a button. All you have to do with most programs is click on the photograph you want to print, and click the print button. Many of the programs, including Apple’s iPhoto, will let you print your images at different sizes and will even print multiple images on the same page, or create the digital equivalent of contact sheets of your photos. (This can help you decide which pictures you want to print at larger sizes.)
Figure 7.3. Like most all-in-one programs, Apple’s iPhoto gives you the tools to print without leaving the application. (Photos by Reed Hoffmann)
![]()
All of the photo-editing programs (such as Photoshop and Photoshop Elements, Corel Paint Shop Pro, Microsoft Digital Image Pro, and so on) will allow you to print your own photos. Because you’ll likely have to resize the photograph first, the all-in-one packages are easier for the casual computer user, though even some pro photographers occasionally turn to the all-in-one programs for printing.
Regardless of the program you use to print, keep in mind that you’ll want to look for a printer that has the word “photo” somewhere in its name and has at least six inks. Many of the least expensive color inkjet printers are designed to do text and the occasional graphic, but they’re not designed to print beautiful photographs. That’s the reason for the photo printer’s extra inks—they give it the ability to make true photo-quality prints. High-end professional printers often cost upwards of $800, but a great consumer photo printer can be had for as little as $100. Epson, Hewlett-Packard, and Canon make the most widely sold printers, and they all have models in each price category. Since printer technology is constantly improving, you’ll want to look for printers advertised as being great for photography. Models that tout both the speed of their black output or the crispness of the text they produce are aimed at a more office-like environment.
And your choice of paper is just as important as your printer. Each of those little tiny dots sprayed out by your printer has to land somewhere, and the better the surface it lands on, the better your image will look. Cheap paper lets the little droplets of ink spread out and blur, while a “photo” paper is designed to keep that dot right where it is, without blurring or smudging. Most printer manufactures recommend sticking with the paper carrying their brand, and for good reason. Theses companies put a lot of effort into developing their printing technology, and they know how to formulate papers that will give you good results. That’s not to say that putting HP paper into an Epson printer will produce poor quality photos, but you’ll generally get better looking images sticking with the Epson stock when using an Epson printer.
When shopping for paper, keep your eyes out for the words “professional,” “pro,” or “premium.” A “premium gloss photo paper” is going to produce better results than a “glossy photo paper.” Another way to figure out the quality of the paper is to look at the price. Twenty-five sheets of higher quality paper will cost more than the same quantity of less expensive stuff.
But don’t limit yourself to high-end papers. Keep on hand packages of less expensive papers. While you’ll want to print out your truly best shots on a professional-level paper, there’s no reason to spend a fortune just to give someone a printout of a snapshot.
In any case, many photographers love the convenience of printing as many (or as few) copies of an image as they wish. Even if they also use other sharing tools, they’ll still print the occasional image on their trusty inkjet.
Bottom line? You’ll have more artistic control over the images that come off your own printer. The trade-off is that you may need to tweak or adjust the images for optimal output, and you’ll need to keep print supplies like ink and paper available. If you’re looking for a way to output a large order of prints, send lots of individual orders to many different people, or create a photo book, photographic service providers are the way to go.
Figure 7.4. Using good-quality inkjet photo paper designed by the manufacturer to work best with your printer and ink will make it easier to produce high-quality prints. (Photo by Reed Hoffmann)
![]()
Mailing It in
If you’re less inclined to do your own printing, or looking for an easy way to send prints to friends and family, the all-in-one packages (and some Web sites, see below) provide excellent tools for turning digital images into high-quality glossy prints.
Think of your all-in-one program or photo-sharing Web site as the interface to a giant professional photo lab. Click on your photograph and then hit the “order prints” button in most programs and you’re on your way to getting photos ordered, packaged, and mailed anywhere.
When you order prints, your files are transferred electronically (remember, sending a copy of a digital image doesn’t reduce its quality) to a big processing center where they are printed on expensive, high-end machines. (This doesn’t necessarily mean they’ll be better than the output you can get on an inkjet, but it does mean that you don’t have to print them.) They’re then packaged and shipped to the address you provide.
The best thing about these services is that they offer more than just prints. Many programs and Web sites can walk you through the steps needed to create photographic books, hard- or soft-cover compilations of your photos laid out as if you’d hired a talented graphic designer to help you make a custom book. These volumes make great gifts, and they’re much more interesting - than a pile of pictures.
OK, this one isn’t a travel tip per se, but if you want to really make someone happy, create a custom book with photos from a special event. I’ve brought my camera to many a christening or bar mitzvah, and then ordered a hardcover book for the person I photographed. It’s a much appreciated, thoughtful present. You can do this for travel subjects, too. Want to thank the tour guide who showed you around Guam for a week? Make a book.
Figure 7.5. BookMaker is a stand-alone application from MyPublisher.com that allows Windows users to create a book on their computer, then transmit the finished book to MyPublisher.com for printing. (Photo by Reed Hoffmann)
![]()
Figure 7.6. Self-publishing is easy. You can either print your own book and have it bound at a local office supply store, or use one of the many online services that will print a book for you using your photographs. (Photo by Michael Schwarz)
![]()
It’s a snap to create a book. Most of the time you just need to select some photos or an album, click on the button to make a book, and then choose a template, and hit the “buy” button. It’s really that simple. Most of the programs will also allow you to drag photos or pages around in the book, change the themes on certain pages, write captions, and more. It’s a fun way to share your pictures.
Slipped Disc
It’s often not necessary to print your photographs when you want to share them. If you’d like to hand someone your photographs, but don’t want to spend time printing them, make a CD or DVD filled with your images. Again, this is a snap if you turn to your all-in-one photo program, but you can also do it on a Mac or a PC without any other programs.
Collecting images for CD or DVD is something that the photo-editing programs do not do well, generally speaking, and it is easier to do with a consumer-level tool.
From your photo package, select a group of images or albums and look for a button that says “Share” or “Burn.” This will allow you to collect all of your images (usually giving you the ability to resize them or rename them during this step) and then burn an optical disc with a collection of your photos.
Making a disc with your images on your Mac or PC couldn’t be easier. On Mac OS X, insert a blank disc, give it a name when asked, and then drag your images onto its icon in the finder. Next to the icon of the disc in any Finder window you’ll see a little icon that indicates you can burn the disc. Click that, and your disc will be made for you.
Figure 7.7. Microsoft Digital Image Library 10, part of MS Digital Image Suite 10, has an “Archive” button that will start the process of burning the selected material to CD or DVD, depending on your computer. (Photo by Reed Hoffmann)
![]()
The process is similar on the PC. On Windows XP, the system will see when you insert a blank disc and an autoplay window will pop up asking what you’d like to do with that disc. The easiest way to make your CD or DVD is to have it open a window for the disc and then copy your images into that window. Once they’re all there, click the “Burn this CD” button on the left, and you’re done.
If the autoplay doesn’t pop up when you insert the disc, try right-clicking the folder of images you want to burn and choose the “Send to CD...” choice.
If you’d like to get fancier, you can take the same collection of images and create a slideshow, which you can burn onto a CD or a DVD for sharing with friends and family. Most programs will let you arrange your images, adjust the timing of the slideshows, add music, and even create special effects for the transitions between pictures. If your program doesn’t have a button labeled “slideshow,” the features are usually found under a Sharing menu.
Another nice way to share your photos with friends is to play your CD or DVD slideshow on your TV using your DVD player. It’s more interesting to see photos on a big screen (especially if you happen to have an HDTV set) than it is to huddle around a computer monitor. Big couches, popcorn, and fantastic travel photographs make for a great evening. Most of the all-in-one programs will walk you though the steps of creating a slideshow that’ll work in most DVD players.
Most consumer and prosumer digital cameras have a connector that allows you to hook them up to your television for camera-generated slideshows. These aren’t nearly as sophisticated as the ones you can make with your computer, but they’re a fun way to review your photos while you’re still traveling, especially if you didn’t bring your computer along.
Figure 7.8a. Some inkjet printers make it easy to create beautiful labels for your CDs and DVDs using inkjet-printable media. (Photo by Reed Hoffmann)
![]()
Figure 7.8b. Many applications now let you create a slideshow with music that can be burned to a DVD and shown on a television using a DVD player. The label was printed using an inkjet printer directly on the DVD. (Photo by Reed Hoffmann)
![]()
Virtual Insanity
A photographic print is great, but there are times when you don’t need to go through the effort of reproducing your photograph to share it with others. In many ways, the Internet has replaced the photographic print with the instantaneous transmission of photographs. This has opened up new opportunities for photographers to share their work in the blink of an eye, not only with friends and family, but also with people they’ve never met before.
Community Service
If you’d like to share your photographs with people around the world, one of the easiest ways is with an online photo service or a photo community. Think of a photo service (such as snapfish.com, shutterfly.com, and others) as an online photo-processing store. Such sites allow photographers to upload photos and then have other people log into the service and order prints of the images. This works great for things like weddings and special events where someone might want their own copy of your pictures, but you don’t want to have to print and send them.
A photo community (like flickr.com, buzznet.com, smugmug.com, and friendster.com), on the other hand, is focused on the sharing of photos, more for artistic appreciation than for commercial output. On photo community Web sites there are all sorts of topic-based groups (travel, food, sports, and so on). People post their photographs as if they were journal entries or submissions in a contest, and other members comment on them.
These sites offer a variety of uploading tools for transferring images from your computer to the Web sites. Many of them even allow you to email your photos to post them, or send them from a camera phone. Registering for either photo service Web sites or photo community Web sites is easy, and most provide free hosting space for your photos.
The URL of Browser
You don’t need to use a photo service or photo community site to post your photographs if you’re familiar with creating and hosting a web page. (If you are familiar with making your own pages, you’re probably not reading these instructions on how to do so.)
All-in-one programs, many browsers, and most photo-editing packages allow for the quick creation of web pages based on templates. Often called web galleries or just galleries, the tools for creating quick galleries are usually found under Export, Share, or Automate menus on your computer, and they can create complex web pages in a few fast clicks.
You’ll need to be able to FTP the pages and folders to your web-hosting provider, who will need to give you information on the programs you can use and the steps you’ll need to take. It’s this added complexity that makes the photo Web sites so popular.
No Postage Required
Directly emailing your pictures is one of the easiest ways to share them. You can send photos as attachments just as easily as you can send a Word document or spreadsheet. You can also use most photo packages, browsers, and many editing programs to send copies of your images by using a Share or Export option.
Remember that a photo can be quite large, much larger than most email servers can handle. A five-megapixel camera might make a file that’s larger than five megabytes, and that’s a lot more than your recipient will need in order to view it on a monitor. Always resize your image to something less cumbersome, such as 640x480, before sending. And be sure to save it as a JPEG (.jpg) format file. That way it will be compressed to make the file size smaller, and, as long as you stay around medium compression, it will look great on the recipient’s screen.
Figure 7.9. A five-megapixel digital camera will create an image file that opens to about 11 megabytes, much more than you would want to send via email. Be sure to downsize the image and compress it into a JPEG file before emailing it. (Photo by Reed Hoffmann)
![]()
You’ll also want to be sure you don’t send your email to too many people for fear of having your Internet account suspended. Fifty pieces of mail, each with a five-megabyte attachment, is a surefire way to have your account questioned or terminated. That’s another reason the photo-sharing sites are so popular; they shift the burden of sending the images to the Web site, instead of the photographer’s email.
Figure 7.10. Downsized to 640 pixels tall, this 11-megabyte photo is now just 900 kilobytes, and after being compressed will be less than 100K, making it easy to email. (Photo by Reed Hoffmann)
![]()
There’s no need to choose a single way to share your images. After a trip it’s entirely acceptable for a photographer to mix all the sharing techniques: Print several of the best shots to hang on the wall or put in a scrapbook; order a book or create a CD or DVD as a souvenir for a traveling companion; turn a great shot into a holiday card; upload some photos for friends to order; and post a few others to a photo community. Mix and match as you wish. There are more tools available for sharing your digital photographs than ever before, so it’s easy and fun to show them off to the world.
Figure 7.11. With today’s tools it’s easy to make sure that all your friends and family see the beautiful photos you’ve created. (Photo by Reed Hoffmann)
![]()