Chapter 14: Zoho Creator
Zoho Creator is another excellent application developed by Zoho that can further contribute toward the digital transformation of your business.
In this chapter, we will provide an introduction to how you can create custom applications on your own with minimal coding experience or IT expertise using Zoho Creator's low-code platform.
The concept of low-code/no-code automation is rapidly gaining traction across just about every industry. In fact, Gartner (a leading global research and advisory firm) forecasts that 75% of large enterprises will be using not just one but at least four low-code development tools by as early as 2024.
So now is the time to discover this growing trend and see what it could possibly do to help your future business.
Topics covered within this chapter include the following:
- Creating your first application
- Customizing the web form to capture the right information
- Pushing data into CRM
- Publishing your application
- Further reading and training courses
By the end of this chapter, you will understand the basic concepts of Zoho Creator. You will have practiced creating your first application and customized the web form to capture information. You will have also learned how to push this data into your CRM. Finally, you will gain knowledge of the types and locations of additional training and further reading.
So, let's get started with how to create your first application.
Creating your first application
The best way to understand the basic functions and capabilities of Creator is to create a simple example. In this working example, we will create a web form that can be shared with your referral partners for them to submit referrals to your business. We shall also push this data automatically into your CRM Leads module so that your team may follow up and engage with the prospective client from there.
Let's start at the beginning, accessing Creator at creator.zoho.com:
- Complete the sign-up form to create your account. You will be able to build this app within the Free Trial version and either link to your Zoho One account (if you have one) or sign up to one of three available plans at a later date if required.
- Click on the New Application button toward the top right of the page.
- Click on the Create from scratch icon as shown next:
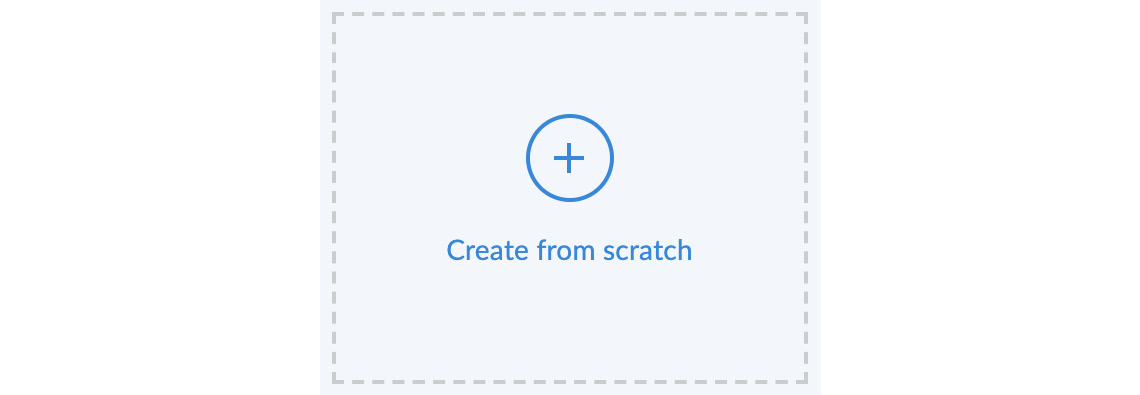
Figure 14.1 – The Create from scratch icon to start building your application
- Now enter your application name in the pop-up box that appears, as shown; for example, Partner Referral App:

Figure 14.2 – Naming your application
- Click on the blue Create New Form button.
- Next, you'll be presented with a screen as shown in the following figure. Click on the Blank option on the left of the screen:

Figure 14.3 – Creating a new form
- Now give your form a name, for example, Referral, then click on the Create Form button:

Figure 14.4 – Naming your form
So now that the application creation has been started, next, we need to customize the fields and appearance of our web form.
Customizing the web form
Customizing your web form is important to make sure that we are collecting the data we need, in the correct format. In this section, you will learn how to add fields and set their properties.
Upon creating your new form in step 7 in the previous section, you will be presented with the following screen:

Figure 14.5 – A simple drag-and-drop user interface for creating your new form
Bearing in mind that we will be pushing this data into CRM later, we need to ensure that we only use the field types that are also present in CRM.
Now, let's go on to create our web form as follows:
- Drag a Single Line field from the Basic Fields pane on the left to the blank section on the right.
- Next, create the First Name field by completing Field Properties as follows:

Figure 14.6 – Setting the field properties for our First Name field
- Now add the remaining fields to your form with the field name/types as follows:
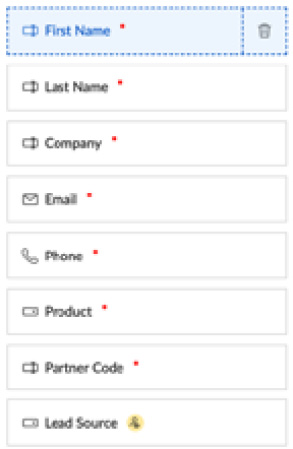
Figure 14.7 – A form with the basic form fields added
- Once we have added all the basic fields that we need the user to complete, we need to also add a hidden and pre-populated field to capture that the Lead Source is Referral - Partner.
- You can achieve this by selecting the Referral - Partner field from the Choices dropdown. (This will be the only option in the dropdown.) Next, set the Show field to option to Admin Only. Refer to the following screenshot for an illustration of this step:

Figure 14.8 – Adding a hidden field with a value pre-selected
- Upon adding the Lead Source field, click on the Done button in the top-right corner.
Congratulations, you have achieved the first milestone by completing the web form! At this stage, while only basic, you have taken the first step toward understanding how Creator works. Next, let's explore how we can make changes to the appearance of the form.
Designing your web form
In this section, you will learn how to change the appearance of your web form. You will see how your form will appear across multiple devices and understand where to change themes and sections as follows:
- From within the app, click on the Design tab on the menu at the top of the screen, as shown next:

Figure 14.9 – Amend the appearance of your form using the Design menu
- Use the following icons to make changes to the appearance of the form on desktop, mobile, and tablet devices:
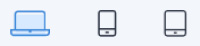
Figure 14.10 – Desktop, mobile, and tablet icons
Click from left to right to use these icons to amend the web form's appearance.
- Upon selecting a device, use the following icons to make changes to the theme and sections of your web form:
Figure 14.11 –Theme and sections icons (from left to right)
These icons allow you to change the theme and personalize the sections.
Once you have experimented with these settings and personalized the appearance, it is time to set up the integration with Zoho CRM.
Pushing data to Zoho CRM
One of the main benefits of using Zoho Creator is the ease with which we can push a submitted web form to Zoho CRM.
While there is native integration with Zoho CRM that allows us to push data into any module using a simple mapping function, unfortunately, it does not support custom fields (at the time of writing). Until such time that this becomes available, you may use a function with a script as provided. Here's how you push the data to Zoho CRM:
- From within the app, click on the Workflow tab on the menu at the top of the screen:

Figure 14.12 – Click Workflow to enter the Workflow menu
- Click on the Create Workflow button in the center of the screen.
- Now complete the form that appears subsequently, as illustrated in the following screenshot. Next, click on the Create Workflow button:
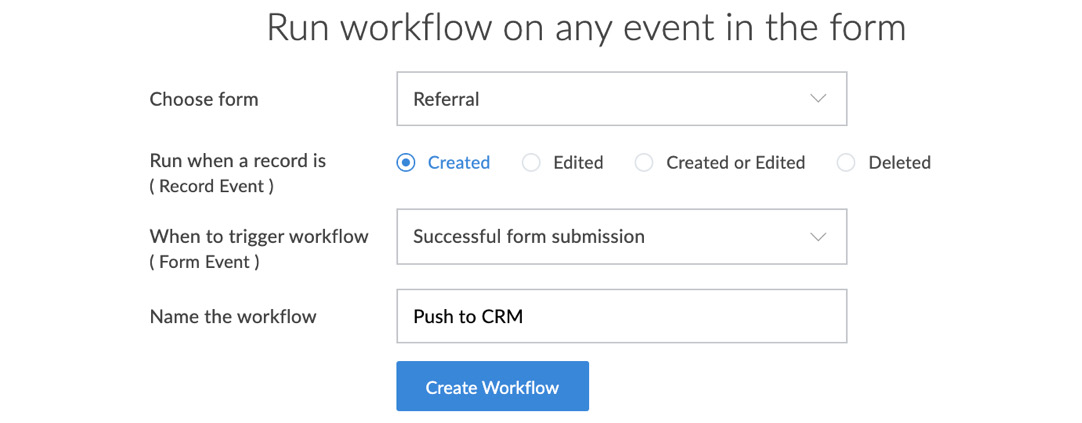
Figure 14.13 – Selecting the triggers for the workflow
- Click on the Add New Action button on the next screen that appears.
- Click on the Deluge Script button, then add the following code into the Deluge script screen that appears:
leadinfo = {"Company":input.Company,"Last_Name":input.Last_Name,"First_Name":input.First_Name,"Phone":input.Phone_Number,"Email":input.Email,"Product":input.Product,"Partner_Code":input.Partner_Code,"Lead_Source":input.Lead_Source};
response = zoho.crm.createRecord("Leads",leadinfo);
To understand this code, let's consider the first part of it as follows:
"Company":input.Company
In the preceding code, "Company" is the API Field Name within the CRM Leads module and .Company is the field name within our Creator application.
If you need to check your API field names in Zoho CRM, navigate to the following page:
Setup | Developer Space | APIs | API Names | Leads
- Once you have copied in the code and checked/updated all the CRM API names, click on the Update button at the bottom of the screen and then on X in the top-right corner, which can be seen in the following screenshot:
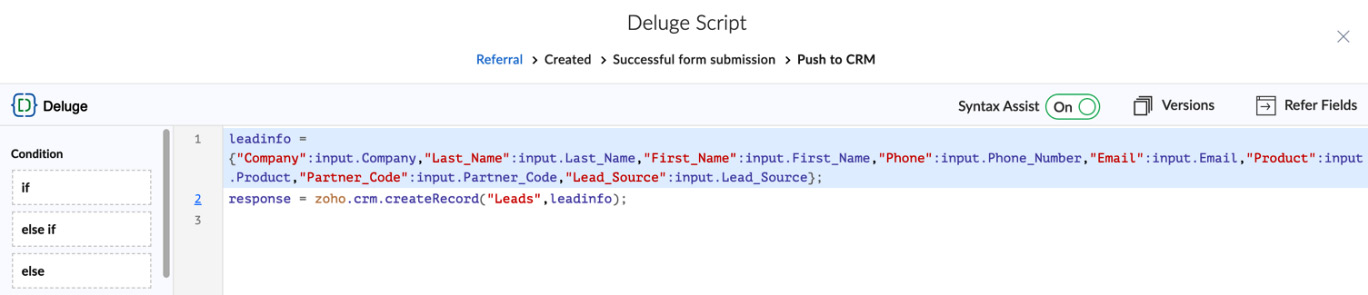
Figure 14.14 – Adding/editing your Deluge script
- Next, you should test your form and integration by first clicking Done, followed by the Share this Application button, both located in the top-right corner of the screen.
- You will now see your web form as a referral partner would see it, so complete the form with some sample data and click Submit:

Figure 14.15 – Complete the referral web page
- Finally, log in to your CRM and view the Leads module – where you should see a new record, created by your script, which was triggered when the form was submitted.
Tip
If some fields have not pulled through into CRM correctly, recheck your Creator field names and CRM API names as per step 6.
Congratulations, you have now built, customized, and integrated your first application! This is a significant milestone toward understanding the scope and flexibility that Creator integrated with CRM has to offer.
Let's take a look at how we complete the final step and publish our application.
Publishing your application
Once you've built and tested the application, it is time to publish it, which can be achieved by completing the following steps:
- From within the Edit Application screen, click on the Settings tab from the main menu:

Figure 14.16 – Accessing Settings from the main menu
- Click on Publish within the sub-menu named Users and Control.
- On the next screen, click Publish again to display the following options:

Figure 14.17 – Publishing options for your application
- Use the required options described in the following list and displayed in Figure 14.17:
- Change appearance: Use this option to further customize the appearance of the web form.
- Perma Link: Copy this link to share it by email or as a button-click URL.
- Embed Code: Provide this code to a web developer for them to insert the code (form) into a web page.
- Finally, click on X to the right of the text Published URL and click on the Publish Component button in the top-right corner of the screen.
So now you have published your first application using Zoho Creator, you may possibly be considering possibilities for extending the functionality of this one. Perhaps you have other ideas you wish to try out. Either way, there are many resources available.
Let's now consider additional reading and training that is available on the internet to help you with the next steps using Creator.
Further reading and training courses
While you should appreciate that you have achieved an important first milestone by completing the steps in this chapter, you should also realize there is a lot more to learn and achieve with Creator.
As such, it is highly recommended that to further develop your basic skills in this application, you should consider exploring the following resources:
- Zoho Creator User Guide: This is the official user guide provided by Zoho, which will cement what you have learned so far and allow you to build upon this example. Visit https://www.zoho.com/creator/newhelp/user-guides.html.
- Zoho Creator Training and Certifications: These are a range of online training courses provided by Zoho. Visit https://www.zoho.com/creator/training/online.html for further details.
- Zoho Creator Application Gallery: This is a range of pre-built applications, providing some ready-to-use solutions for certain industries. See https://www.zoho.com/creator/apps/?src=hdd for further details.
- Zoho Creator Community: This is an online community managed by Zoho that enables Zoho enthusiasts to connect, engage, and learn from each other, accessible at https://help.zoho.com/portal/en/community/zoho-creator.
Every one of these resources will help you to learn and gain more value from Zoho Creator and, most importantly, make you realize that Zoho is so much more than a CRM solution – it is a platform with which you can grow, evolve, and scale your business.
Finally, let's have a brief recap of what we have learned from this chapter.
Summary
In this chapter, you have gained an understanding of the basic concepts of Zoho Creator. You have created your first application and customized the web form to capture information. You have also learned how to push this data into CRM. You now know the best sources of further reading and additional training so that you can build upon these skills and improve your knowledge of this app-building software. The skills gained will help you extend the capability of your Zoho solution, providing you with more control and flexibility. Your digital transformation potential now has fewer bounds.
This chapter concludes Section 3 of this book. We'll now move on to Section 4, Measure, Learn, Evolve, with the next chapter. In the next chapter, you will learn how to create powerful and insightful reports and dashboards within Zoho CRM.