
12. Building a Quadcopter V: Accessories
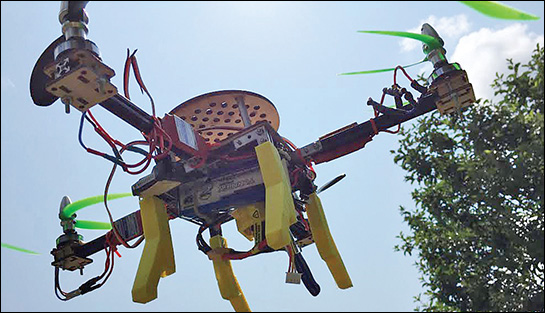
So far in the quadcopter project, I’ve covered such important topics as flight control, motors, and batteries. Now for the fun category: everything else! It turns out there is a bunch of extras you can purchase or build for your bird. In this chapter, you’ll learn about some of the options available for accessorizing your drone. Then, you’ll add a protective plate and a camera mount to the quadcopter—you can see the completed drone in Figure 12.1.

Add Accessories to Your Quadcopter
You’ve got a quadcopter—now what? Many quad pilots seek to add accessories such as cameras, first-person video rigs, and protective plates. Let’s go over just a handful of the numerous options out there.
Camera
The most flashy accessory you’re likely to encounter, the camera, has an obvious appeal: You can take pictures from a vantage point impossible for humans to attain. In fact, it’s probably the most popular accessory, and some people even make money by selling drone footage, though recent laws have clouded this matter somewhat.
One subcategory of mount is the motorized, controllable turret called a gimbal. A gimbal enables you to control the shooting angle of the camera, in addition to triggering the camera’s shutter. Most of the time gimbals are used with quadcopters, but not always! Fixed-wing planes and rovers also benefit from having these devices installed.
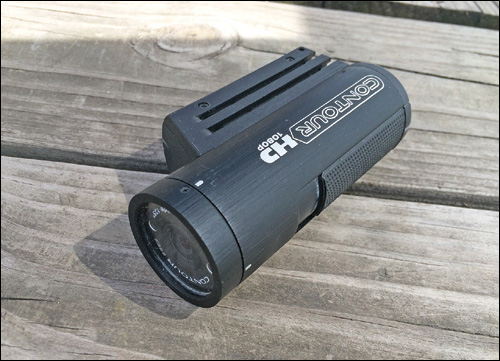
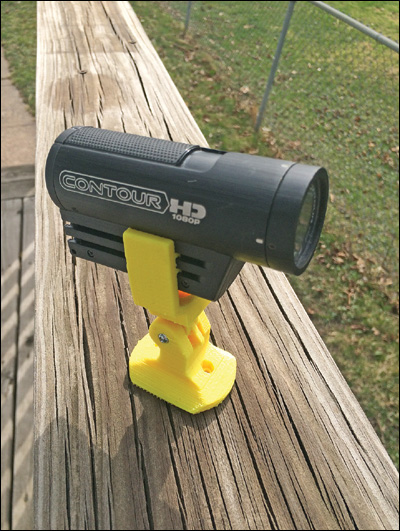
Many aerial photographers choose the GoPro Hero (GoPro.com), which sets the bar for durable, waterproof (to 40m), high-speed photography. You’ll find a large GoPro fan base with countless techniques, 3D-printed mounts, and third-party add-ons to share. Another popular model is the Contour ROAM, shown in Figure 12.2. It’s cheaper than a GoPro but has fewer features. Later in this chapter, I demonstrate adding a similar camera to the quadcopter.
First-Person Video (FPV)
A hypothetical onboard GoPro might shoot some great video, but it suffers if there is no one to look through the viewfinder! Sometimes you want to see what the camera will be shooting, and that’s where FPV comes in. An FPV setup consists of a small, low-resolution camera, with a transmitter and antenna. The video feed is viewed on a matching receiver, which includes a small monitor. Intriguingly, some FPV suites include video goggles, thus allowing you to see through the quadcopter’s eyes!
One of the intriguing aspects of FPV usage is the nascent phenomenon of drone sports. I’m talking racing, with pilots guiding their craft through courses while peering through their drones’ eyes. One company, Game of Drones (gameofdrones.com), organizes “aerial combat” events where the last quadcopter left flying wins the day. They even sell tough “Hiro” airframe kits for participants or anyone else to build.
Figure 12.3 shows a close-up of drone-builder Steve Lodefink’s quadcopter, showing off its FPV camera in front. You can also get a good look at the protective dome covering the electronics.
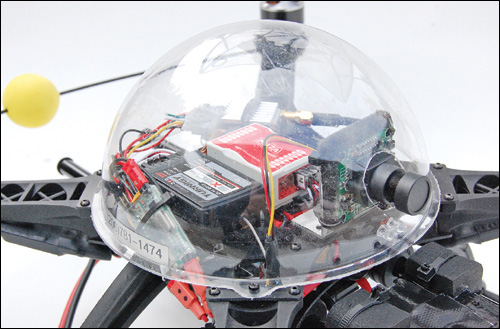
FIGURE 12.3 This quadcopter’s FPV lens sticks out through the protective plastic dome (credit: Steve Lodefink).
Landing Gear
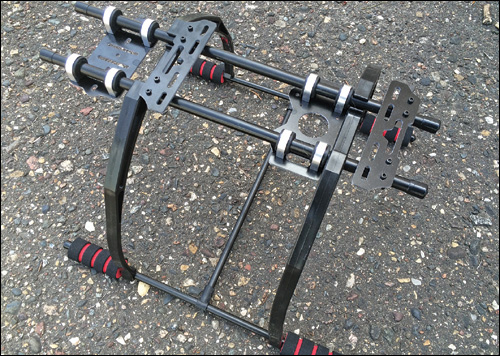
Landing gear legs not only keep the drone off the ground, but also make room for a camera mounted on the bottom, thus protecting it from impacts. You can buy a kit such as the robust (and big!) combo package pictured in Figure 12.4. It includes mounting pads so you can attach a camera underneath the copter that’s protected by the landing gear legs. There are many kits out there, usually specialized for a particular model of quadcopter. However, in many instances they can be adapted to another type of drone. The kit in the figure is a no-name clone designed for the DJI F450 quadcopter, but it can be used in a similarly sized quadcopter with a center-plate connection system.
Of course, I always suggest drone builders check out Thingiverse and similar 3D-printer design sites. They offer tons of different printable legs, including many (as with the commercial kits) intended for specific models of drones. In fact, the parts I designed for this book’s quadcopter project are available on my Thingiverse page, http://www.thingiverse.com/jwb.
Parachute
The dread of every quadcopter pilot is to face the sight of the bird falling out of the sky and smashing into pieces on the ground. Gravity can be so unreasonable! One solution is to add a parachute that deploys automatically if power is lost.
Parachute systems definitely cannot be described as being mainstream in the quadcopter world, but a few commercial systems do exist. Skycat Recovery Launchers (Skycat.pro) cost $600, which sounds like a lot, but considering you might have an expensive drone with an even more expensive camera on it, $600 seems reasonable. The Skycat recovery system is shown in Figure 12.5.
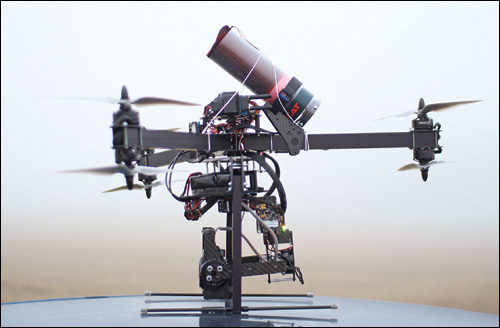
FIGURE 12.5 The Skycat recovery system deploys a parachute when the quadcopter loses power (credit: Skycat).
The use of onboard parachutes may also be the law someday, as increased use of quadcopters can lead to more folks bonked on the head by falling drones.
Protective Plate or Dome
You sometimes see quadcopters with a protective plate or dome guarding the electronics. Copters crash, and you wouldn’t want to see your lovely microcontroller smashed to pieces. It’s one thing to crack your propeller, but quite another to see your $200 flight control package kicking up a divot.
Obviously, if your drone hits a rock or concrete slab, no plate in the world is going to save it. However, the many casual and relatively gentle mini-crashes can also do damage to your quadcopter.
When building your own drone, you might simply want to create your own plate, but commercial options are also available. Many of these ship with the airframe you buy, but you can also find standalone products that can be adapted to fit any quadcopter.
One intriguing angle involves repurposing an old camera dome. I’m talking about those half-sphere globes that keep moisture and inquisitive fingers off of the lens. The one shown in Figure 12.6 is too small for our uses, but would be great for protecting an FPV camera, for instance.

Prop Guards
Prop guards protect the propellers from casual damage, although they’re likely to remain the most vulnerable component on a drone no matter what. Most of the time they consist of a simple plastic ring positioned along the prop edge, though some have a more complicated structure, looking like little cages around the props. Still others incorporate chassis elements to protect the propellers, in effect embedding the props inside the chassis.
Because propellers are apt to break, prop guards are available in countless configurations and styles. They can be found in hobby stores and on websites, and even more can be downloaded from Thingiverse, which enables you to print them out. The guard pictured in Figure 12.7 (http://www.thingiverse.com/thing:652455) is designed for the DJI Phantom 2 Vision.
Project: Adding Accessories to the Quadcopter
In the final step of the quadcopter’s physical build, you’ll add a protective plate, landing gear, and a camera mount to the quadcopter. It’s the finishing touches that will make your drone work even better. Figure 12.8 shows the drone with these parts installed.
Install the Camera Mount
Two Thingiverse files are used to install the camera mount: renelm’s ContourHD mount with GoPro adapter (Thing #423077) and ark19’s GoPro Arca Mount V2 (Thing #234654). The beauty of Thingiverse and other collaborative platforms is that these two makers can contribute to your project and not even realize it! You just print their completely compatible designs and connect them. You can see the two parts in Figure 12.9.
If you don’t have access to a 3D printer, you can buy any number of commercial mount options. I consistently recommend going with HitCase (hitcase.com), which specializes in waterproof and impact-resistant phone cases and robust mounting solutions.
1. Print off the aforementioned two Thingiverse pieces, the ContourHD mount and GoPro adapter (http://www.thingiverse.com/thing:423077_) and the GoPro Arca Mount (http://www.thingiverse.com/thing:234654). You can see one of the prints in Figure 12.10.

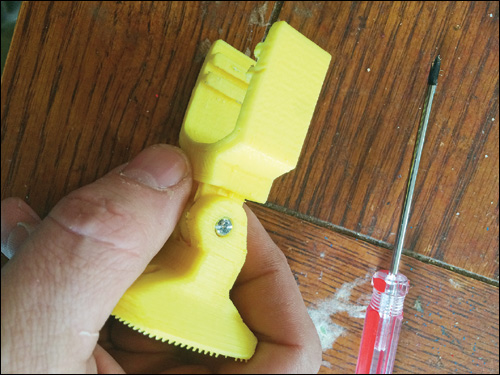
2. Attach the parts together and secure them with a #4×1” screw. Figure 12.11 shows how it should look.
3. Flip the quadcopter over and attach the camera mount to the underside of the wooden platform, drilling holes as needed (see Figure 12.12). Use #4×3/4” screws.

Install the Landing Gear
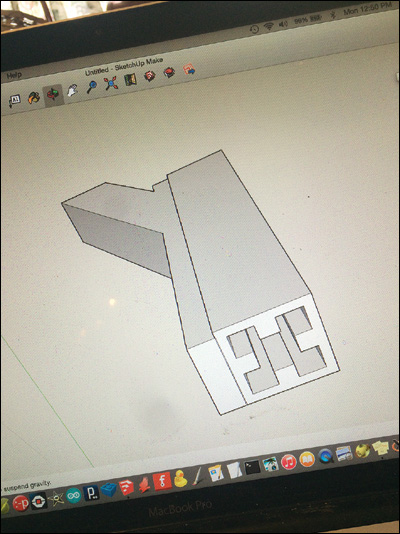
Next, you need to add onto the quadcopter’s existing legs to give it proper landing gear. I designed the landing gear in SketchUp, and it isn’t pretty, it is functional. The legs have a hollow interior matching the cross-section of the MakerBeam beams. You can see the rendering in Figure 12.13.
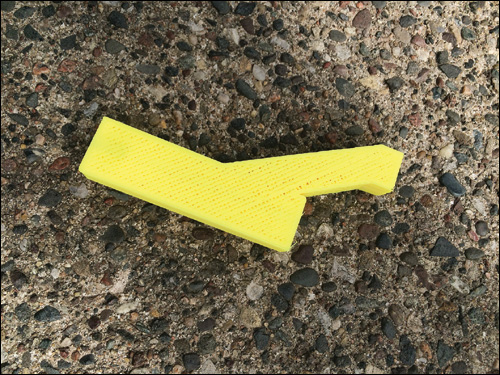
1. Print off the landing gear. The file is available on http://www.thingiverse.com/jwb. Figure 12.14 shows one of the legs printed off.
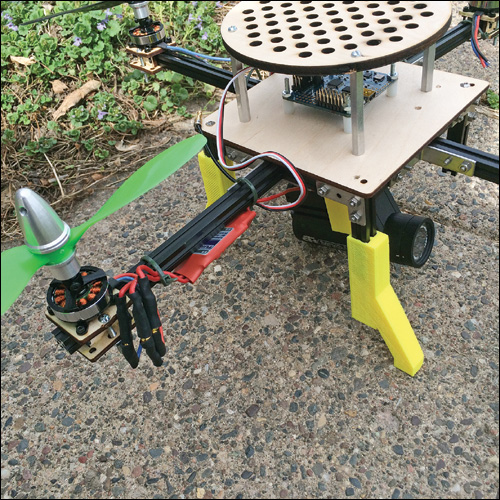
2. Once the legs are cleaned up (the inside might require a skinny file!), you’ll be able to slide the 3D-printed part onto the MakerBeam legs, as shown in Figure 12.15. For me, the tolerances were so tight I could barely get them on, but if you find yours a little loose, use a hot glue gun to keep them from falling off. If all goes well, you should have a modest amount of clearance for the camera.

Install the Top Plate
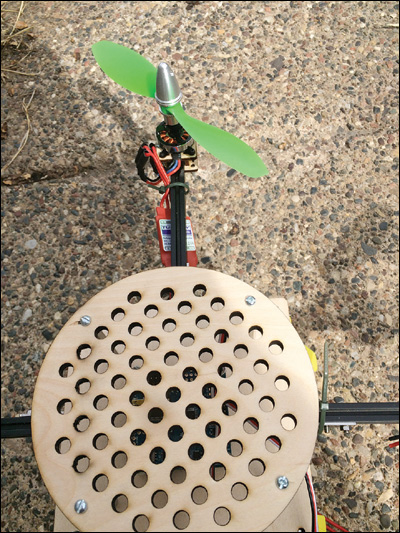
The top plate consists of a laser-cut wooden plate with four aluminum standoffs giving it a little clearance for the electronics. Figure 12.16 shows a top view of the quadcopter, showing off the plate.
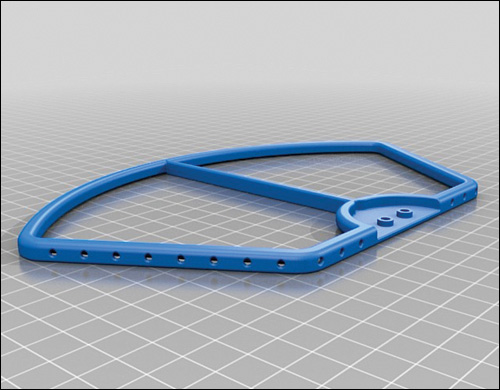
1. Laser out the design, which can be downloaded from my Thingiverse page. I used 1/4” birch plywood, my favored laser-cutter fodder. Figure 12.17 shows the plate.

2. Install the plate using four 2” #4 M-M aluminum standoffs or something similar. You can find standoffs in any respectable fastener store, and many hardware stores as well. Figure 12.18 shows the finished quadcopter with the accessories in place.
Summary
In this chapter we completed the hardware portion of the quadcopter project by adding a 3D-printed camera mount, and you learned about a number of quadcopter accessories along the way. All we have left is the software! First, however, let’s make another drone. In Chapter 13, “Making a Rover,” you’ll learn how to modify a commercially available car drone to carry an RFID sensor.