8. Class Inheritance
Now that you know how to create simple classes, you’re ready to learn one of the most important features of C++: inheritance. Inheritance is a core concept in object-oriented programming, revolutionizing the way software is modeled. Inheritance lets you build hierarchies of classes, each class inheriting methods and attributes from its base class. Because classes inherit members from the base class, those members can be used as if you had an object of that base class available. In short, inheritance allows you to expand upon existing, solid code so that it can be adopted for new applications. But don’t worry, it’s easier than it sounds, and we’ll take you through it gently.
In this chapter, we’ll introduce you to the basics of class inheritance. You’ll write code that extensively uses inheritance to model real-world problems, and—more important—you’ll learn how to describe such problems in order to create an object-oriented design. Besides that, we’ll talk about the different relationships that you’ll encounter with OOP, another important part of every design. Last but not least, you’ll get to know how to secure your code by using the protection designations in C++.
Basic Inheritance
Let’s assume that you have two pets, a cat and a dog. Your two pets have some things in common: They both have a name, they both eat, and they both sleep. In addition to this, your dog can bark, and your cat can climb trees.
So, how do we translate this into classes? A good starting point is to describe the problem in normal words, as we did in the preceding paragraph. If you find yourself saying “a dog is a pet” or “they both can...”, then it’s already clear that you can write a class Pet that will be the superclass for Dog and Cat (a superclass is a class from which other classes are derived, also called the parent or base class; a subclass is a derived class, like Dog or Cat). All things that are common to dogs and cats will be implemented in Pet, and everything that makes a dog or a cat special will be placed in that pet’s own respective class.
We noted that our pets perform activities: they eat, sleep, bark, and climb. This directly translates into methods: eat() and sleep() will be methods of the class Pet, because every pet does these things. Only a dog can bark, so bark() will be implemented in the class Dog. Only a cat can climb, so this method goes to the class Cat.
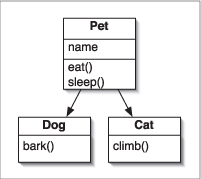
Our pets also have names. There is no activity involved with having a name, so we will translate this to a member variable (or attribute). Because both dogs and cats have names, this member variable belongs to the class Pet (Figure 8.1).
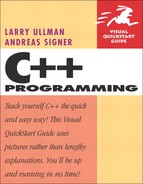
Figure 8.1. Inheritance places common class members in a base class (Pet) and unique members in inherited classes like Dog and Cat.
Now you’re done. You just designed your first class hierarchy! You see, object-oriented programming is no magic at all. The key is really just describing the problem in plain English. Everything that is an activity (like eating) will result in a method, and everything that is a property (like a name) will result in a member variable. To turn a description of inheritance into actual C++ code, use this syntax:
class SubClass : public SuperClass { ...
With the pets example, this means you would have
class Cat : public Pet {...
as the beginning of the Cat class declaration. Later in the chapter the use of the word public will be explained, but for now, just roll with it. It’s time to test our design with some real and complete code.
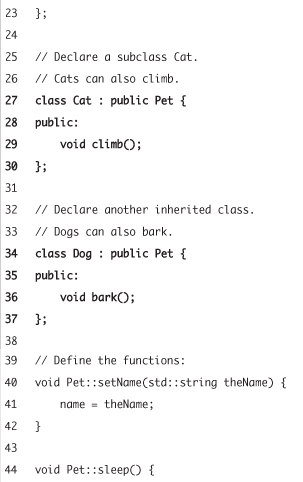
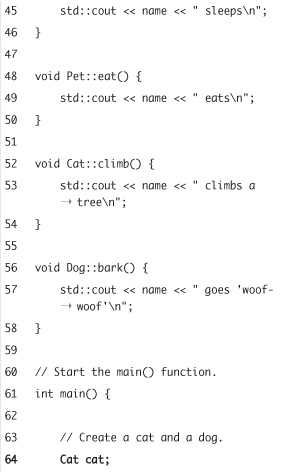
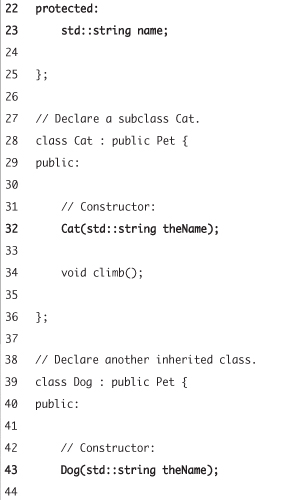
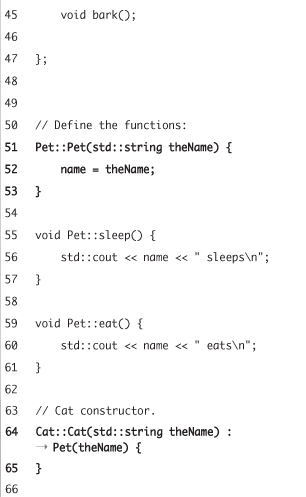
Script 8.1. Two classes derived from one superclass are created in this application.

To use basic inheritance
- Create a new, blank text document in your text editor or IDE (Script 8.1).
// pets.cpp - Script 8.1
#include <iostream>
#include <string>The
stringfile is also necessary, as the pet’s name will be a string. - Define the class
Pet.class Pet {
public:
void eat();
void sleep();
void setName(std::string theName);
std::string name;
};The class has three methods and one attribute. Only one method,
setName(), takes an argument, which will be the pet’s name. This method will be used likesetSize()in theRectangleclass (see Chapter 7). The members of this class will be available to all derived classes, likeCatandDog. - Define the class
Catthat inherits fromPet.class Cat : public Pet {
public:
void climb();
};Note that we didn’t repeat the methods
eat(),sleep(), andsetName(), or the attributename. These are inherited fromPetand are thus readily available inCat. We only added the new methodclimb(). - Define the class
Dogthat inherits fromPet, too.class Dog : public Pet {
public:
void bark();
};Again, we didn’t repeat any of the common members from
Pet. Only a new method,bark(), has been added. - Define the methods, starting with the class
Pet.void Pet::setName(std::string theName) {
name = theName;
}
void Pet::sleep() {
std::cout << name << " sleeps ";
}
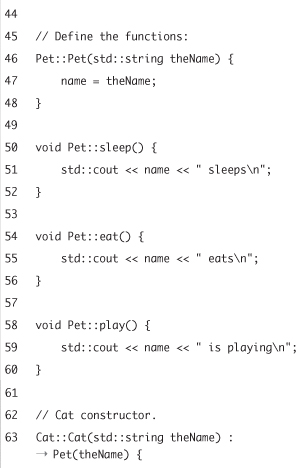
void Pet::eat() {
std::cout << name << " eats ";
}The implementation is quite straightforward. In the
setName()function, we’re storing the passed string inname, so that we can later use it. The methodseat()andsleep()just print out what is happening and who is doing it. - Define the extra method for
Cat.void Cat::climb() {
std::cout << name << " climbs a tree ";
} - Define the extra
Dogmethod.void Dog::bark() {
std::cout << name << " goes 'woof-woof' ";
} - Begin the
main()function.int main() {
- Create one object of each subclass.
Cat cat;
Dog dog;This code creates two objects representing your new pets. You do not need to create an object of type
Pet. - Name your pets.
cat.setName("Garfield");
dog.setName("Odie");The
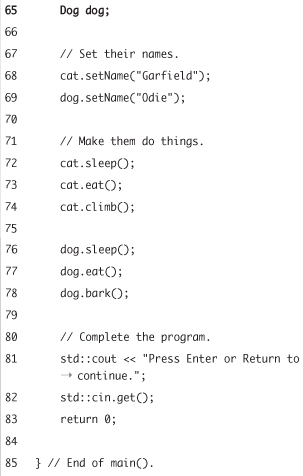
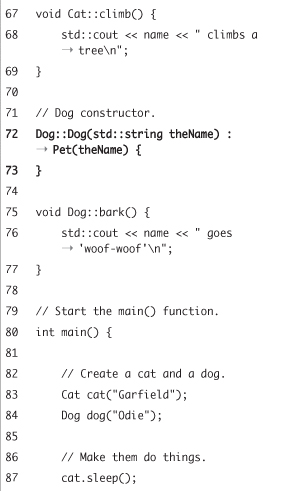
setName()function assigns a value to thenameattribute. You can call the method as you would any method in a class, using theobjectName.methodName()syntax, which you learned in Chapter 7. Even thoughsetName()is not formally declared within eitherCatorDog, they can both use this and other members defined withinPetbecause both classes are derived from that superclass. - Make the pets do stuff.
cat.sleep();
cat.eat();
cat.climb();
dog.sleep();
dog.eat();
dog.bark();The
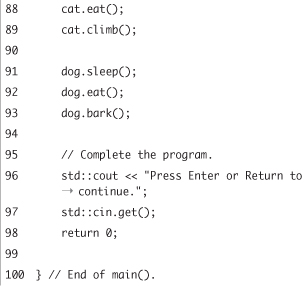
eat()andsleep()methods are defined inPetand can be used by bothcatanddog. Ourcatcan alsoclimb(), and ourdogcan alsobark(). - Complete the application.
std::cout << "Press Enter or Return to continue. ";
std::cin.get();
return 0;
} - Save the file as
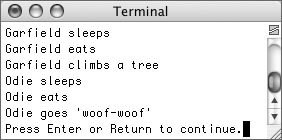
pets.cpp, compile, and then run the application (Figure 8.2).Figure 8.2. Your first class hierarchy in action: pets that eat, sleep, and bark or climb trees.
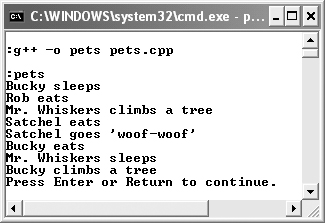
- If you want, create more cats and dogs, save the file, recompile, and rerun the application (Figure 8.3).
Figure 8.3. The program is now overrun with cats and dogs!
 Tips
Tips
• If you really understood the basics of OOP as presented in the last chapter, then you might recognize that a constructor would be better here than using the setName() function. This is true, but because use of constructors with inheritance is a bit tricky, we’ve omitted that concept from these classes. You’ll learn about this in the next section of the chapter.
• It is a common mistake for beginning programmers to create a new class by inheriting an unrelated class when a new problem comes up. For example, class Human has a swim() method that you also need for a fish, so you inherit Fish from Human. Clearly that doesn’t make any sense. The relationship between a base class and its derived classes should be obvious and immediate.
• As with families, inheritance can go on for many generations. You may need a Transportation class with Plane, Train, and Automobile as derived classes. You might then derive Car and Truck from Automobile. These classes would have access to everything defined within Automobile and Transportation.
• An alternative to inheritance is composition (also called aggregation). With composition you create a new class and define an attribute in it that is an object of a different class. This way, the new class can make use of the other class’s members without using inheritance. Some C++ programmers give preference to composition over inheritance, if at all possible.
Inheriting Constructors and Destructors
As you already know, C++ gives you the potential to write methods that are run whenever an object is created or destroyed. These methods are referred to as constructors and destructors, respectively. When you’re not using inheritance, it’s easy to understand when these methods are called (when an object is created or destroyed). As soon as inheritance gets involved, constructors and destructors become more complex.
Let’s start with the Pet class, where there could be a constructor called Pet() that sets the pet’s name. Then Cat would also have a constructor Cat() (and Dog a constructor Dog(), but let’s focus on the cats for now). When you create an object of type Pet, you know that Pet() gets called first, which is how constructors work. The same goes for Cat (calling the Cat() method first). But when Cat is a subclass of Pet, what happens? The answer is that both constructors are called.
If a base class has a constructor, like Pet(), it will be called as soon as an object of type Cat is created. This happens before anything else. If Cat also has a constructor, it will be called next. This order is necessary, as the base class must be initialized before the subclass.
If the constructors take arguments, as they would in the Pet example, there’s more to it. Assuming you have as your declarations
class Pet {
public:
Pet(std::string theName);
std::string name;
};
class Cat : public Pet {
public:
Cat(std::string theName);
};
then your function definitions would be
Pet::Pet(std::string theName) {
name = theName;
}
Cat::Cat(std::string theName) :
Pet(theName) {
}
Notice that the subclass constructor has :Pet(theName) in its definition. In layman’s terms, this states that when Cat() is called, taking theName as its argument, Pet() should be called, passing along theName to it. Thus
Cat cat("Garfield");
passes the string Garfield to both Cat() and Pet(). Then in Pet() the name assignment happens.
When destroying an object, you may also have base class destructors to call, but the compiler will take care of this for you. Since destructors don’t accept parameters, you don’t have to worry about the : SuperClassMethod(arguments) blurb.
Unlike constructors, base class destructors are called after the last statement of the subclass is executed. In other words, invoking the superclass destructor is the last thing that happens.
To make the order of execution clearer, we’ll write a small program that prints out when constructors or destructors are run.
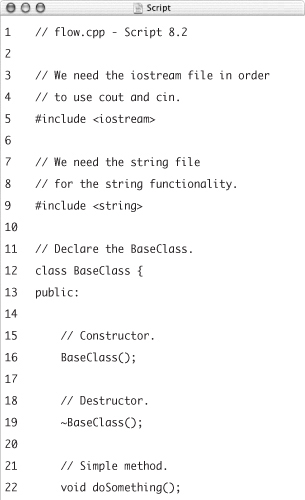
Script 8.2. Because the usage of constructors and destructors in inherited classes can be confusing, this program uses std::cout to help visualize what statements are executed when.


To use inherited constructors and destructors
- Create a new, blank text document in your text editor or IDE (Script 8.2).
// flow.cpp - Script 8.2
#include <iostream>
#include <string> - Declare a class
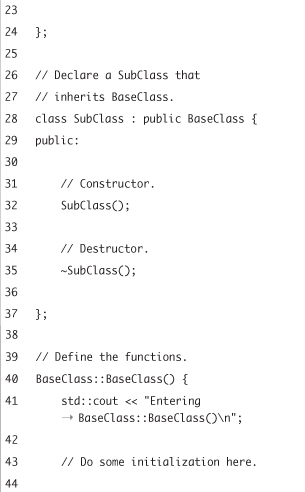
BaseClassthat has a constructor, a destructor, and a method calleddoSomething().class BaseClass {
public:
BaseClass();
~BaseClass();
void doSomething();
};If you’ve forgotten the syntax for creating constructors and destructors, revisit the preceding chapter.
- Now declare a class
SubClassthat inherits fromBaseClass.class SubClass : public BaseClass {
public:
SubClass();
~SubClass();
}; - Define the methods of
BaseClass.BaseClass::BaseClass() {
std::cout << "Entering BaseClass::BaseClass() ";
std::cout << "Leaving BaseClass::BaseClass() ";
}
BaseClass::~BaseClass() {
std::cout << "Entering BaseClass::~BaseClass() ";
std::cout << "Leaving BaseClass::~BaseClass() ";
}
void BaseClass::doSomething() {
std::cout << "Entering BaseClass::doSomething() ";
std::cout << "Leaving BaseClass::doSomething() ";
}Obviously these are pretty useless functions. The functionality is not important, but make sure that you add plenty of
std::coutstatements to be able to trace the flow of operations. - Implement the methods of
SubClass.SubClass::SubClass() {
std::cout << "Entering SubClass::SubClass() ";
std::cout << "Leaving SubClass::SubClass() ";
}
SubClass::~SubClass() {
std::cout << "Entering SubClass::~SubClass() ";
std::cout << "Leaving SubClass::~SubClass() ";
}Again, don’t forget to use
std::coutin order to show the user what is happening. - Write a
main()function that creates an object of classSubClass.int main () {
std::cout << "Creating an instance of class SubClass... ";
SubClass subclass;When the subclass object is created, the
BaseClassconstructor will be called, followed by theSubClassconstructor. You’ll see this order thanks to all thestd::coutstatements. - Call the
doSomething()method.std::cout << "Calling subclass.doSomething()... ";
subclass.doSomething(); - Complete the program.
std::cout << "This is the second-to-last statement in main(). ";
std::cout << "Press Enter or Return to continue.";
std::cin.get();
return 0;
} - Save the file as
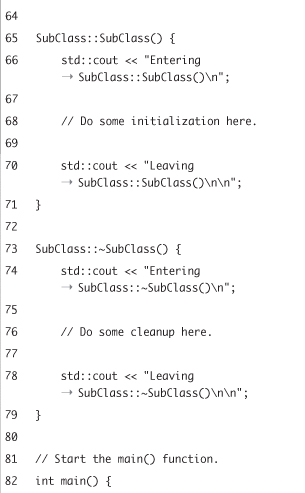
flow.cpp, compile, and then run the application (Figure 8.4).Figure 8.4. Printed statements help to visualize the control flow involved with using inherited constructors and destructors.
As you can see, the constructor of
BaseClasswas executed first, even if there’s no explicit call in the program. The same goes for calling theBaseClassdestructor, although it is executed last.
Tips
• As a reminder, keep your constructors lean! You should use them only to initialize attributes. This is all part of the general “keep it simple” policy you should have toward classes in general.
• Remember that destructors are normally used to tidy up things done earlier in a program. They are critical for releasing blocks of memory, which you’ll learn about in Chapter 11, “Dynamic Memory Management.”
Access Control
In the previous pets example, all members of the Pet, Cat and Dog classes were declared public using the public: statement. We’ve been doing this with every example in the book, and it’s about time you understand its meaning.
C++ provides a way to protect a class’s methods and attributes. By protection, we mean that a restriction is placed as to who can call methods and access attributes (see the sidebar). If an object tries to call a function it doesn’t have access to, the compiler will report those violations. To control access to your methods and attributes, you can use the access levels described in Table 8.1.
Table 8.1. These are the access levels available for use with object members in C++.

Using these access levels to protect methods and attributes in your classes is very simple. Just put the access level followed by a colon in your class, and every method or attribute declared between it and the next access level (or end of the class) is protected accordingly.
Let’s review our Pet class (modified to have a constructor):
class Pet {
public:
Pet(std::string theName);
void eat();
void sleep();
std::string name;
};
The attribute name is public, which means that anything can change its value. In fact, we could write code like
Dog dog("Odie");
dog.sleep();
dog.name = "Snoopy";
dog.eat();
Our dog would have changed its name! This might not be a problem in such a simple example, but it can get quite nasty when you start writing larger programs. Just as you don’t change your dog’s name every other day, the attribute name in our Pet class should be protected. Let’s fix this now (and, at the same time, formally implement all of the constructors).
To protect a member
- Open the
pets.cppexample in your text editor or IDE (Script 8.1). - Remove the declaration and definition of the
setName()method (Script 8.3).Thanks to the constructor, this won’t be needed any more.
- Change the
Petclass declaration to include the constructor and a protected attribute.class Pet {
public:
Pet(std::string theName);
void eat();
void sleep();
protected:
std::string name;
};The constructor takes the same name as the class and indicates no return type. To mark the attribute as protected, insert a
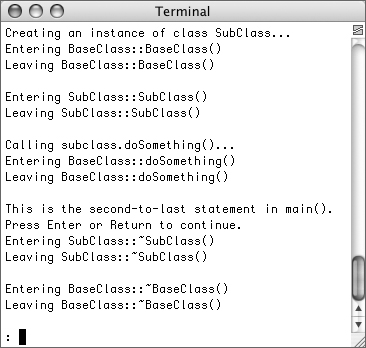
protected:beforestd::string name;.Script 8.3. This refined version of Script 8.1 appropriately limits access to the
nameattribute.
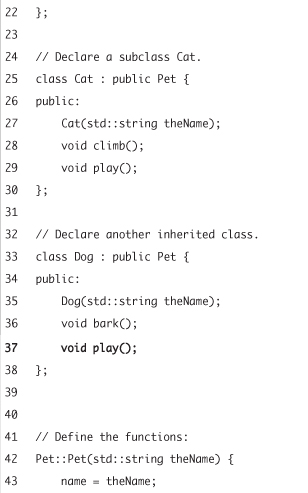
- Add constructors to the
CatandDogclasses.class Cat : public Pet {
public:
Cat(std::string theName);
void climb();
};
class Dog : public Pet {
public:
Dog(std::string theName);
void bark();
};Each constructor has the same name is its class. Each also takes one string argument.
- After the class definitions, define the constructors.
Pet::Pet(std::string theName) {
name = theName;
}
Cat::Cat(std::string theName) : Pet(theName) {
}
Dog::Dog(std::string theName) : Pet(theName) {
}The
Petconstructor does whatsetName()used to do. The other two constructors invoke the superclass constructor, using the syntax outlined in the preceding section of this chapter. - Save the file as
pets2.cpp, compile, and run the application (Figure 8.5).Figure 8.5. The program has the same behavior as the first pets application, but the class design is much improved by incorporating access control.
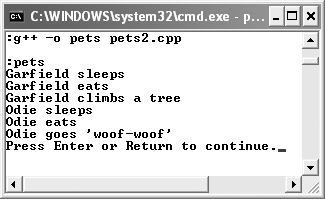
As you can see in the figure, the output won’t change at all.
Tips
• Use these access levels! Even if you’re the only one that is working on a project, it’s very hard to remember which methods you can safely use outside a class. When you make them protected or private, the compiler tells you when you’re trying to do something forbidden. Access levels exist only to protect the programmer from herself, and even the best programmers out there need such protection.
• One of the benefits of using private methods is that you can later change the internals of a class—how that method works—without having to rewrite the whole code. Because other code can access only public elements, your classes will work flawlessly as long as those public members don’t change.
• You can use multiple public:, private:, and protected: statements in a class definition, but you should group your elements together. The code will be way more readable if you have only one section for each level.
• When laying out your class declaration, start with the public elements. Then list all protected elements, and finish with the private ones. Although the order makes no difference to the compiler, it will save you time when you need to check which methods/attributes a class provides.
• In C++, the access to inherited classes defaults to private if not otherwise specified.
Overriding Methods
To this point you have learned how to reuse code functionality by creating new classes that inherit common features from a base class. Although this technique already enables you to easily address real-world problems, sometimes it’s just not enough. Occasionally you’ll want to provide a common method in a base class, but you’ll also want to change that method’s implementation in classes that inherit from the base class. In C++, this is called overriding.
Let’s stick with our pet example, but we’ll enhance it a little. Pets have more in common than just sleeping and eating. They will also play sometimes (some pets more than others). While playing is a common feature of pets, not every pet has the same idea of having fun. Your cat is probably perfectly happing playing with a ball of wool, but a dog might prefer chasing cats. We need a method to allow each pet to play in its own unique way.
C++ makes it easy for you to model such common behavior where the actual implementation changes with every class. All you have to do is to redeclare the method in the subclass, and provide the changed functionality in its definition, exactly as if it were a new method. You’ll see this in action in this next program.
Script 8.4. By adding a play() method to Pet and providing overridden play() methods to Dog and Cat, the same function call can provide different functionality in inherited subclasses.

To override a method
- Open the
pets2.cppexample (Script 8.3) example in your text editor or IDE. - Add a method
play()to the declaration of the classPet(Script 8.4). The class should now look like:class Pet {
public:
Pet(std::string theName);
void eat();
void sleep();
void play();
protected:
std::string name;
};Like
eat()andsleep(),play()takes no arguments and returns no values. - Now also add
play()to the class declarations ofCatandDog.class Cat : public Pet {
public:
Cat(std::string theName);
void climb();
void play();
};
class Dog : public Pet {
public:
Dog(std::string theName);
void bark();
void play();
};The
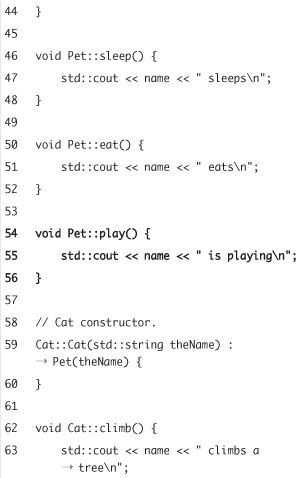
play()method within the two subclasses uses the exact same syntax as the one inPet. In the definition of each method is where you will distinguish among them. - Implement the
play()method forPet.void Pet::play() {
std::cout << name << " is playing ";
}Within the
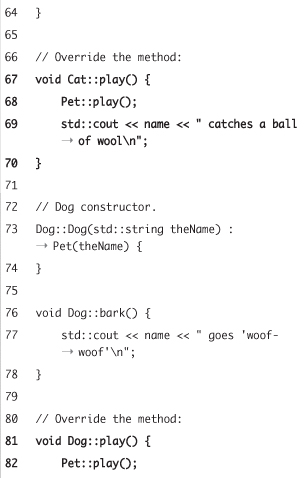
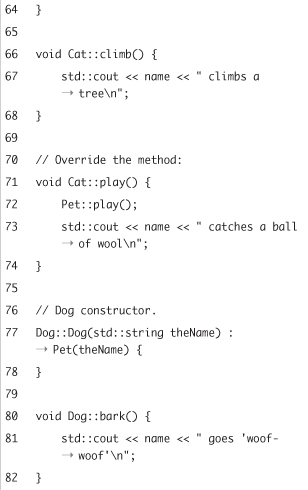
Petclass, we don’t know how the pet plays, so we just print out some text that tells the user that the pet is playing. - Implement the
play()method forCat.void Cat::play() {
Pet::play();
std::cout << name << " catches a ball of wool ";
}The
Catversion ofplay()does two things. We’re not only going to state that the cat plays with a ball of wool, but we’re also going to call theplay()method of the superclass. This is not a requirement of an overridden method, for the record. - Now implement the
play()method for the classDog.void Dog::play() {
Pet::play();
std::cout << name << " chases cats ";
}Again, we’re going to call the
play()method ofPet. - Add the
play()calls to themain()function:cat.play();
dog.play(); - Save the file as
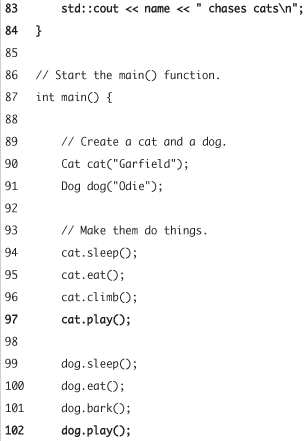
pets3.cpp, compile, and then run the application (Figure 8.6).Figure 8.6. Using method overriding, the cat and the dog can play in different ways.
Tips
• A little trick was also introduced in these steps. In order to call a method of a class without using an object, use the ClassName::methodName() syntax. Both the Dog and Cat versions of play() do this when they call the Pet play() method without using an object of type Pet.
• By this time you should be able to see how you could easily inherit other classes from Pet, like gerbil() or horse(). Using the examples begun in Chapter 7, another commonly used model involves geometric shapes. All shapes have an area and a perimeter. Triangles have three sides and three interior angles. Rectangles have four sides and four ninety-degree angles. And circles have no sides and no angles. Thus you create a base class called Shape and Rectangle, Triangle, and Circle all inherit from it. Then the area() and perimeter() methods would have to be overridden, as those calculations change from one shape to the next.
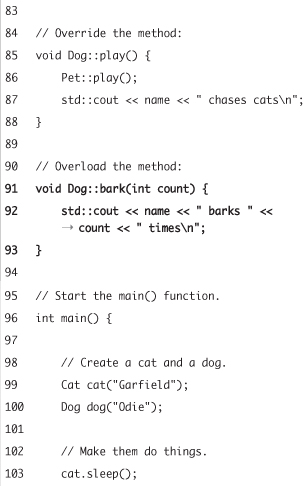
Overloading Methods
Another way to make your life easier and your code more readable is overloading. Overloading allows you to have multiple methods or functions with the same name, only the parameters must be different. (The different parameters allow the compiler to distinguish the different methods.)
For example, it is perfectly valid to add a method void bark(int count) to Dog, even if there is a method void bark() already. The compiler can distinguish the two methods because one of them takes an int as a parameter. In fact, method overloading works exactly as function overloading, which you learned about in Chapter 5, “Defining Your Own Functions,” does.
Overloading is not really an object-oriented feature. It’s just some syntactic sugar that makes your life easier, and making your programming life easier is what C++ is all about. Let’s quickly implement the bark() example to test this out.
To overload a method
- Open the
pets3.cppexample (Script 8.4) example in your text editor or IDE. - Overload the
bark()method inDog. Your class should look like this (Script 8.5):class Dog : public Pet {
public:
Dog(std::string theName);
void play();
void bark();
void bark(int count);
};Remember that an overloaded function is just the same name with different arguments.
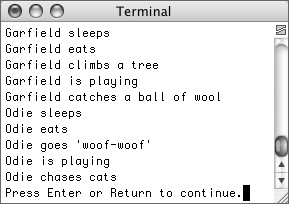
Script 8.5. Using overloaded methods, the dog can now bark for a given number of times.

- After the class declaration, implement the new
bark(int count)method.void Dog::bark(int count) {
std::cout << name << " barks " << count << " times ";
}Instead of just printing text that tells the user that the dog is barking, this method indicates how many times the dog barks. Alternatively, you could create a loop that prints
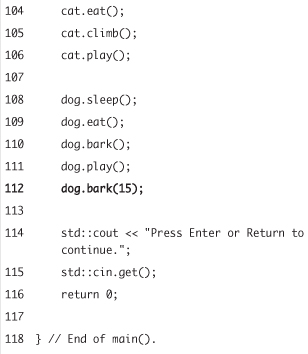
name << " goes 'woof-woof'"forcountnumber of times. - Call the new method in the main function.
dog.bark(15);
When
bark()is called with no arguments, the original definition is invoked. When it is called as it is here, the new, overloaded definition is used. - Save the file as
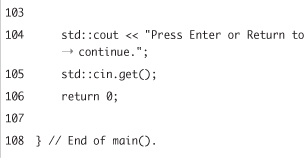
pets4.cpp, compile, and then run the application (Figure 8.7).Figure 8.7. Overloading methods works the same way as it does with functions. In this program, two different calls using the same method name have different results.

Tips
• Use overloading with care. It’s very easy to render your code hard to read with excessive use of overloads.
• Pay attention when overriding methods. If you don’t use the exactly same parameters and return values, you’ll end up with an overloaded method, and not an overridden one. Such mistakes are very hard to debug!
• Overloading inherited methods does not work the way you would expect. For example, you can add a method sleep(int hours) to Dog, but then you’re not able to call the sleep() method declared in Pet. The new method sleep(int hours) will hide Pet::sleep(). The compiler does not complain about this as long as you’re not trying to call sleep() without parameters.
Making Friends
Using the access levels public, protected, and private enables you to control who is allowed to use the methods and attributes in your classes. It is a powerful tool that ensures implementation details are hidden from everyone that doesn’t need to know about such details. But sometimes, totally unrelated classes need access to members that are protected or even private. So, what to do then? You could declare everything public, but then everyone could use the public methods and attributes, not just the few classes that really need to. Or you could use protected, but then, everyone that needs access must inherit from this class, even if this breaks your design. Fortunately, the inventors of C++ saw the problem and introduced friends.
Friends are classes (or functions) that have a special relationship to the class in question. They are allowed to access not only public methods and attributes, but also protected and private ones. As in the real world, a class chooses its friends itself.
To declare a friend, just add—friend class MyFriend;—somewhere in the class declaration. It doesn’t matter whether this statement is in a public, protected or private section. Don’t worry if this sounds confusing to you—the next example will make it clearer. We’ll explain what we’re trying to accomplish first.
In our previous pets example, we declared the name of a Pet as protected. This way, subclasses from Pet (i.e., Dog and Cat) have access to the name, but nobody else does. Now let’s assume that you’d like to be able to change the names of your pets (maybe because your cat doesn’t look like a “Garfield” at all). If you made the name public, then anyone could change it. You don’t want to do that, because only a few selected family members should be allowed to change the names of your pets. If you made another class that inherited from Pet, it could change name, but that doesn’t make sense either, as you’re not going to have one pet renaming another. The solution is to make a friend (like a family member) that has a connection to Pet.
To declare a friend
- Open
pets2.cppin your text editor or IDE (Script 8.3).We’ll go back and work with this earlier, easier version of the program for these modifications.
- Add a new class declaration
PetRenamerafterPet(Script 8.6).class PetRenamer {
public:
PetRenamer(std::string theName);
void rename(Pet *pet, std::string newName);
private:
std::string name;
};The
PetRenamerclass has its ownnameattribute (so that we can print out who’s renaming our pets), and it has a method that will actually do the pet renaming. This method is defined asvoid rename(Pet *pet, std::string newName)
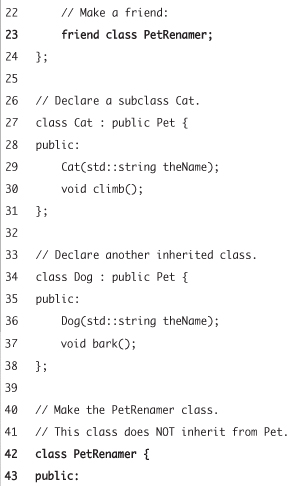
Script 8.6. This application adds a class that is able to rename your pets. Because
PetRenameris a friend ofPet, it is allowed to change thenameattribute, without having to make thename public.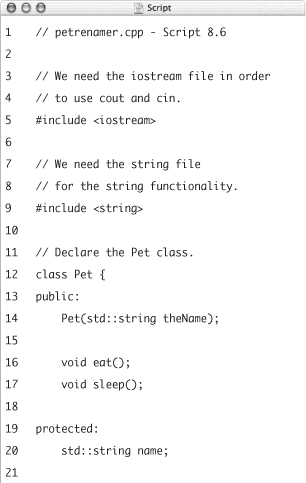

Note that the
rename()method expects its first argument to be a pointer to aPetinstead of an actualPetobject. This is necessary because parameters are passed by value. If we passed an object of thePettype to this function (instead of a pointer), the name would be changed in the copy that is passed, not in the original object. If you’re confused by any of this, refer to the end of Chapter 6, “Complex Data Types,” where we talk about pointers, functions, and arguments. - Make the newly created class
PetRenamera friend ofPet. To do so, go to the declaration ofPetand addfriend class PetRenamer;
After this, your class
Petshould look like this:class Pet {
public:
Pet(std::string theName);
void eat();
void sleep();
protected:
std::string name;
friend class PetRenamer;
};This line states that objects of type
PetRenamerare friends ofPetand can therefore call the methods defined inPet. - Add the implementation of
PetRenamerafter the class declarations.PetRenamer::PetRenamer(std::string theName) {
name = theName;
}
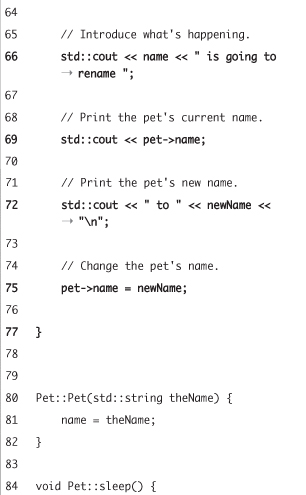
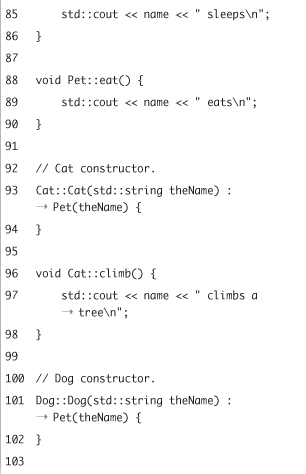
void PetRenamer::rename(Pet *pet, std::string newName) {
std::cout << name << " is going to rename ";
std::cout << pet->name;
std::cout << " to " << newName << " ";
pet->name = newName;
}The class’s constructor initializes the class’s
nameattribute. As for therename()method, it takes a pointer and a string. The pointer stores the address in memory where the original pet object is stored. By using thepointerName->attributesyntax, we can access thenameattribute of the object associated with the pointer. This is also used in this function to rename the original pet.To be more explicit, say the
main()function has a petCatnamed Bucky. The address of that object is sent to this function when called, sopetwithin this function is a pointer to theCatobject.pet->namecurrently has the value of Bucky, but that can be changed with the assignment operator. - In the
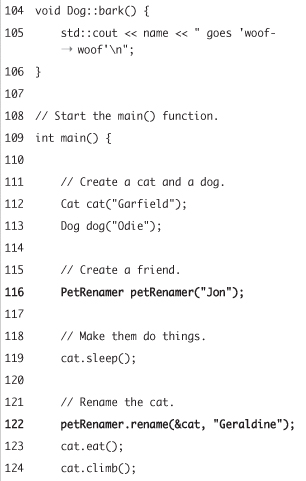
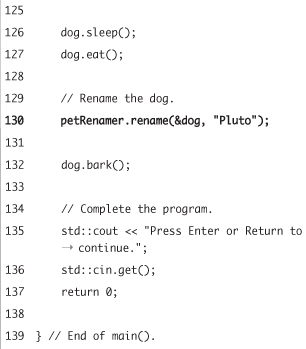
main()function, add code to create aPetRenamerand then rename your pets.PetRenamer petRenamer("Jon");
petRenamer.rename(&cat, "Geraldine");
petRenamer.rename(&dog, "Pluto");
dog.bark();The only tricky part here is that the first argument when calling the
rename()function must be the address of the object whose name is being changed, not the actual object itself. So&catand&dogare used instead ofcatanddog. - Save the file as
petrenamer.cppand build it. - Run the program and watch how your pets change their names (Figure 8.8).
Figure 8.8. Using a friend allows us to change the name of a pet, although the
nameattribute is still protected.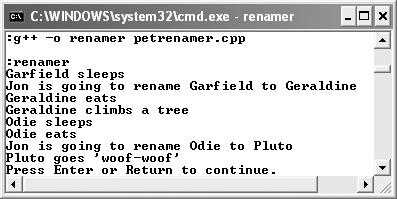
Tips
• Only use friends if there is no other way around a problem.
• As in real life, choose your friends carefully. Every time you need to declare a friend, explain to yourself why this is necessary.
• If you find yourself declaring a lot of friends, rethink your design. Having too many friends is often a sign of poor design.