
Lavalier microphones, or “lavs,” are small, close-proximity microphones designed to record the voice. They can be exposed or hidden on talent, usually on the head or chest area. Lavs are ideal for recording dialogue because they’re designed to pick up sounds that are extremely close—which means they also do a great job of quelling the ambience of a location.
Personally, I prefer to record all dialogue with my boom pole and a shotgun microphone—it just sounds better. But, for the one-person camera crew, that’s not really an option. So, a lavalier mic is often your only choice.
The lavalier/wireless combination is the go-to for many camera ops for recording dialogue!
The benefits of using a lavalier are that they are small, don’t require any handling after they’re applied correctly, good in loud locations, and can be totally hidden in many cases. When used with a wireless system, you’ve got a voice-capturing mic that can go just about anywhere.
The downside is that they are a close-proximity microphone and tend to sound that way. When you listen to dialogue recorded with a lavalier, it feels like you’re right in the person’s face. Also, there’s not much ambience or feel of the environment the subject is in, making the recording sound sterile. In my opinion, it’s a tight and isolated sound.
However, a tight and isolated sound is better than crappy sound—or no sound at all! If you use lavs properly, you’ll get usable sound you can work with. Just keep in mind that you’ll likely need to add a little environmental ambience to your sound mix when you’re editing. That will help breathe some life into lavalier recordings.
|
Techniques used by professionals to apply these mics are as varied as the operators applying them. Sometimes it’s a bit more art than science. But there are a few key considerations all camera operators should be aware of. |
WIND
As I mentioned, lavaliers do a good job of quelling background noise. Wind is another matter. It’s the one thing that will render a lav mic pretty much useless. It doesn’t take much wind to distort these small capsule microphones. There are windsocks available that help, but I think they look ridiculous (is that a gerbil on your lapel?) and they’re not really that effective—especially in gusty wind.
But sometimes you can use lavs when it’s windy. If the subject wearing the lavalier isn’t moving around much and you can position their body to block the wind. But be aware that if they move slightly or the wind changes direction, you’re hooped.
If you have to work in a windy location, be prepared to accept the fact that your lavalier microphone could be unusable. You may have to reconsider how to shoot the scene so you can get close enough with your camera-mounted mic—which with a proper wind jammer or softie will perform much better.

Foam windsock and crazy furry windsock for a lavalier
Your only saving grace is that depending on the type of shoot, dialogue distorted by wind may be somewhat acceptable. A reality type show, for example, can get away with this type of audio—viewers are used to it. But for drama or documentaries, the dialogue needs to be high quality and intelligible.
So, if you think that lavaliers are going to be the best way to record dialogue on every shoot, think again.
Ok, I lied. There are two things that can render a lav mic pretty much useless. It’s wind’s distant cousin, clothing noise!
Because lavaliers do such a good job of picking up any sound within close proximity, noise generated by clothing can sound like someone filing their nails inside your eardrum.
The first thing you have to determine is whether or not the clothing is generating noise by rubbing on the microphone itself. If that’s the case, the problem might be easily solved by repositioning the mic—possibly moving it from being hidden under a layer of clothing to being exposed. This isn’t as visually pleasing, but sometimes it’s the best option.
The other possible cause is the actual fabric of the subject’s clothing. Fabrics such as silk, nylon, or Gortex are just naturally noisy and there’s nothing you can do about it. It won’t matter where you move the mic on your subject’s body. This scenario will cause you nothing but grief.
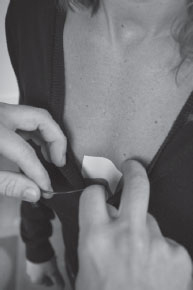
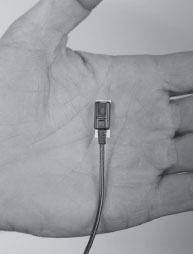
If you feel there could be a potential problem when you first look at someone’s clothing, quickly clip on an exposed lav and ask them to move around. Have a listen with your headphones and you’ll soon know if the clothing is going to give you trouble.
Lavalier clipped to the outside of potentially noisy clothing
I wish I could offer a solution to fix this problem but there just isn’t one. Your only real options in this case are to ask your subject to change their clothing, or put away the lavalier and figure out how to record what you need with your camera-mounted mic.
HARDWIRED LAVALIER
It wasn’t that long ago that lavaliers only came hardwired. They came with an XLR connector that you’d connect to a cable and then directly into your camera’s XLR input. But then wireless systems showed up and most hardwired lavaliers ended up on the shelf or converted to a non-XLR type connector that worked with a wireless system.
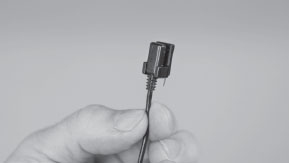
Tram TR50 hardwired lavalier with many of the clips needed for applying a lavalier
Lavaliers are definitely more flexible when used with a wireless system, but there’s still a place for the hardwired version. One example is the lengthy sit-down interview. No one’s going anywhere so there’s no real advantage to being wireless in this situation. So why expose yourself to possible dropouts and RF hits that may occur with a wireless system? These nasty pops and snaps can come out of nowhere. During a long interview, the last thing you want to be worrying about is your sound being compromised. If you’ve ever shot in NY or LA, you know how RF is a real problem. When you’re hardwired, however, your tracks will be clean and stable.
There’s always a risk vs. benefit equation to measure when considering whether to go wireless or hardwired. If you’re shooting hand-held and following talent as they walk-and-talk through a busy farmer’s market, then the benefits of going wireless for mobility outweigh the risk of a possible RF hit here and there. If you’re planted in one place and nothing is moving, go hardwired when you can.
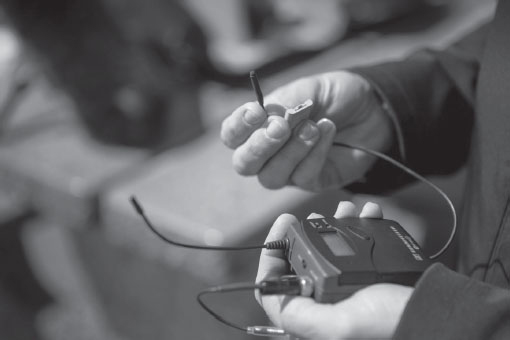
Manufacturers are realizing that we need this hardwire option and are now offering adaptors that allow you to easily change the connector on a lavalier to either an XLR for hardwired applications or one of a variety of other connector types that are currently used by wireless systems. RØDE has a lavalier system that does this beautifully.
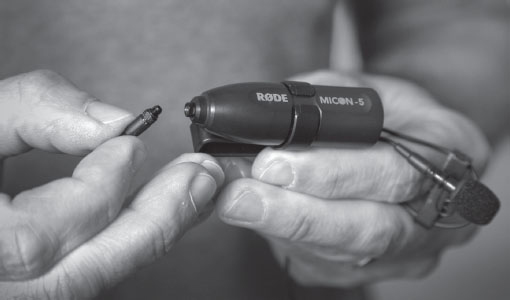
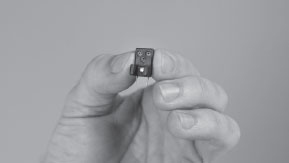
RØDE lavalier mic with interchangeable connector—XLR connector
// Watch Class 9—Lavalier microphones, the basics //
ENTERING SOMEONE’S PERSONAL SPACE
“Hi, my name is Dean, I’m the sound guy, and I’m going to be putting a small mic on you so I can record your voice.” It’s how I start the whole uncomfortable lavalier miking process.
When I started teaching location sound ops and camera ops how to apply lavaliers, it became very clear that the hardest part of the job was the uncomfortable weirdness of encroaching on someone’s personal space!
Placing a lavalier on someone can be a nerve-wracking experience. I’ve watched seasoned location sound operators fumble through a simple wire job because the talent was intimidating. I’ve had my share of uncomfortable wire sessions that had me sweating buckets, and you’ll have yours! They do come to an end, and the sun will rise again.
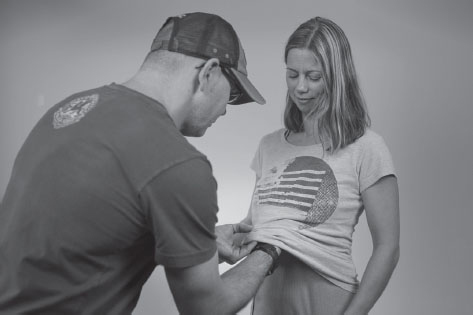
For many, the thought of touching a complete stranger is just weird. You may be touching their shirt, pants, possibly their skin and hair. You’re going to be looking right at a woman’s chest from one foot away and adjusting her blouse and possibly her bra. For you female operators, this is no big deal. But for the men, the studly facade quickly turns into red-faced embarrassment. It’s a real invasion of someone’s personal space.
So how do you do it without embarrassing either party? How do you make it comfortable for the talent and for you?
Oh how I wish someone had taught me what I’m going to teach you.
See, in video, working with seasoned professional talent is more the exception then the rule. Most “talent” in the world of documentary, corporate and lower budget drama are not familiar with the whole lavalier miking process. I’ve wired hundreds of men, women, and children and have learned a few tricks that really take the uncomfortable weirdness out of the experience. This is what I do.

• Check your breath! There is nothing worse than stinky breath. I carry Listerine packets in my wiring kit to assure I don’t melt the talent
• Introduce yourself with a friendly smile and gentle tone in your voice. Don’t scare the hell out of them with a commanding lieutenant bark! Be friendly and calm
• Be sure to make eye contact while you’re talking. Even though you’ll be touching the person’s shirt or blouse, don’t approach them staring at their chest. Man or woman, it’s rude!
• Don’t bring the lavalier or wireless system on your first introduction. There’s a reason for this—I’ll get to it later
• Explain what you’re going to do before you start checking the clothing for mic placement. “I’m going to be placing a small mic and transmitter on you so I can record what you’re saying”
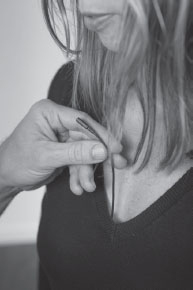
• As you examine the talent for mic placement, explain where and how you’re going to be attaching the mic. Make contact with the areas of the body you will be contacting during the actual miking. This gives the talent warning regarding the area(s) you’ll be working
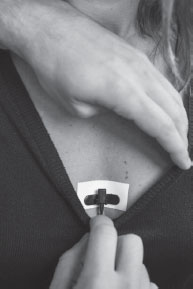
• Use your thumb when making contact during the explanation, never your fingers. The thumb is a very harmless digit compared to your pointer finger, and always look them in the eyes during the explanation
• Placing your hand on the shoulder of younger talent is a disarming, comforting contact. Children and young teens are the most uncomfortable with body miking. As well as the teenage girl’s mother who is hovering the whole time you’re working
• When you’ve finished the explanation, inform talent that you’re going to get and prep the equipment. It’s important to give them a chance to head off to the bathroom, or wherever, to adjust, check and be comfortable with the areas you’re going to be working in. With unprofessional talent who may not be expecting some stranger to be getting as close as you’ll be getting, this is their opportunity to remedy any concerns they may have
• When you start miking the talent, relax, be efficient, and be professional. There’ll be time for joking but it’s not when you have your hand in someone’s shirt!
• After the mic is on, take a few seconds to look at the their wardrobe and straighten out anything you have possibly messed up
|
If you’re miking professional talent, most of the steps for making them comfortable with the process become irrelevant. Professional actors and actresses are used to it. The best thing you can do is to be efficient and professional. |
// Watch Class 10—Lavalier microphones, entering someone’s personal space //
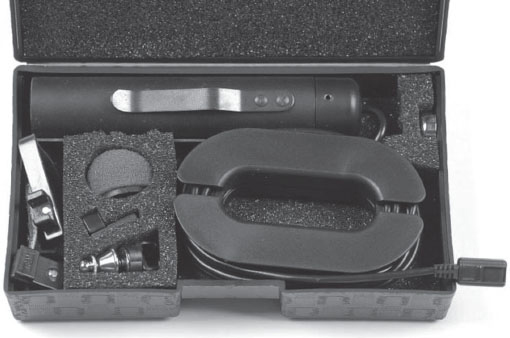
For applying lavaliers, you need an assortment of tapes and adhesives, a sharp pair of scissors, bobby pins, cotton swabs, rubbing alcohol, and some breath freshener. For all location sound ops, a wiring kit is a must. Each operator will usually have a few more items they’ve found here and there that help when hiding a lavalier.
You should have one as well. I use a small Tupperware container to keep everything together. It fits in my backpack and goes on every shoot.
Here’s my kit. The techniques you’re going to learn in this chapter will use many of these items.

My wiring kit
APPLYING LAVALIERS: BODY MIKING
The most common place to apply a lavalier mic is the chest area. Lavaliers can be exposed, like what you see on a news cast, or hidden like…well, you can’t see them…but they’re there!
The optimal place on the body to apply the mic is the centre of the chest, at approximately sternum height. Keeping the mic in the centre of the body ensures consistent tone and volume when the talent moves their head from left to right. By placing the mic at sternum level, it gives the recording a looser feel—which is more natural sounding. When the mic is exposed, it also provides the added bonus of being low enough that it won’t be seen in the frame on a close-up shot.
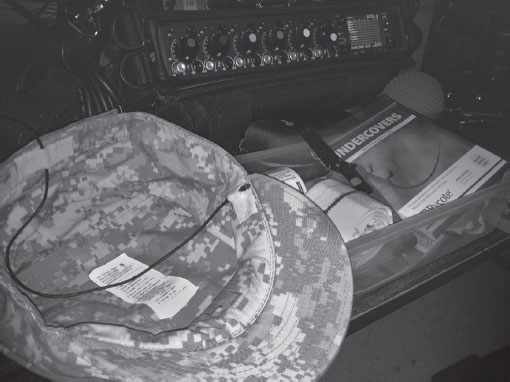
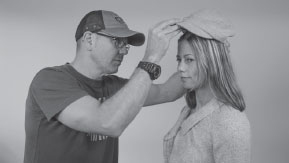
Wiring kit and a wired up hat ready to be put on talent
The exposed lavalier technique is most commonly found in newscasts, talk shows, panel-of-guests-type shows—anything where you’d expect to see a microphone clipped to the tie or lapel.
Exposing the lav will produce the highest quality sound these little mics offer. If the sound entering the mic is not muffled in any way, lavaliers can actually sound quite good. The downside to exposed lavs is you can see them, so for drama, exposed techniques are rarely used.
When you expose a lavalier, you must use the windsock! I know it can be a little unsightly, but lavaliers have no wind protection at all, and it only takes a small puff of air to distort the diaphragm of these little mics. If you think you can go without a windsock because you’re indoors, think again. The first time you experience a heavy nose breather you’ll be scrambling for the windsock.
When exposing a lavalier on the talent’s wardrobe, it should be nicely placed and look good. Take a look at what talent is wearing. Placing the mic on a darker part of the fabric, a buttonhole, even following the cut or lines in the fabric can make the lav less distracting.
The windsock should be clean, not dented or crushed. Clips should be in perfect condition and the cable clean and not full of kinks. Remember, the mic is going to be seen on camera—don’t embarrass yourself with a nasty, worn-out lav.
Pet peeve! It makes me crazy when I’m watching a show and during the close-up shots, there it is, bouncing along the bottom of my TV screen, the windsock of the lavalier. Keep the lav at sternum level so it stays out of the close-up!
I use the news style miking technique just about every time I expose a mic on the chest area of talent. It can be used on ties, button shirts, and zipper or button jackets. I’m using a Sanken COS-11D for this application.
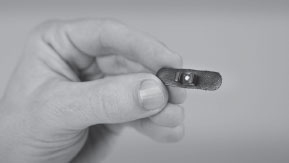
• Choose the tie clip from the case
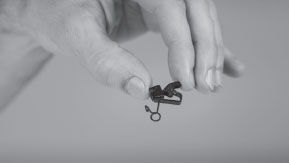
• Place the mic in the clip. If you’re using a front-loaded lav, place it in the clip with the capsule facing out. If you’re using a top-loaded mic like the Sanken COS-11D, point the mic upwards
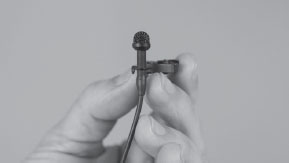
• Put the windsock on
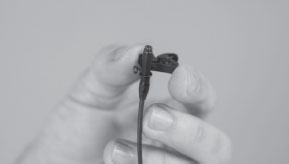
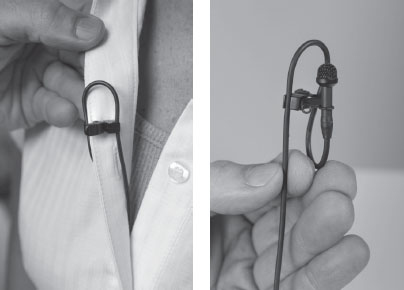
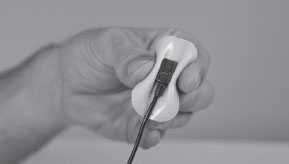
• Feed the cable through the clip. You’ll have to squeeze the clip to open the jaws. Make a 1-inch loop
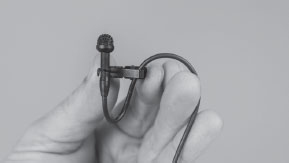
• With the section of the lavalier’s cable that is exposed on the front of the talent’s clothing it’s important for you to create a nice symmetrical loop. Not too big and not too small
• Unzip or unbutton the talent’s shirt in the area you’re attaching the tie clip so you can work more efficiently. This doesn’t mean you unbutton the whole shirt or blouse. One or two buttons will suffice. With a coat or jacket, open it up all the way if it’s appropriate. It’s a lot easier to apply the tie clip properly when you can manipulate the clothing a bit
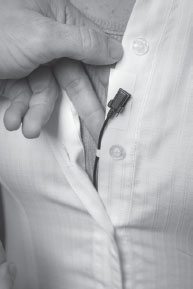
• Feed the cable, connector first, down through the talent’s clothing and out the bottom of the jacket or shirt. Never leave the cable exposed down the front of the clothing. If talent is uneasy with you doing this, let them feed it through

• Attach the clip with the cable still in the jaws at approximately bottom sternum height and as close to the centre of the body as possible
• Snug the clip to the edge of the shirt, tie, jacket, whatever the clothing you are applying the mic clip to with the cable running between the edge of the fabric and the tie clip

• Flip the tie or clothing flap back and make a second loop by running the cable back through the jaws of the clip. Have the jaws grip the cable. Some clips like the one in this photo have an added clip to secure the loop. This loop and extra clip act as a strain relief to prevent damaging the mic from a sudden tug
• Button up the shirt or blouse and make adjustments to the visual appearance of the mic and clothing. The mic should be straight with a symmetrical loop and the clothing should look like you were never there. This final clothing and mic adjustment is important. Take time to step back and make sure it looks good

• Connect the lavalier to your system
If you’re using a hardwired lavalier, run the cable to the side or back of talent’s body (still under the clothes) and either clip the XLR power supply connector to the talent’s belt, top edge of pants or skirt, or back pocket. I like to run the cable to the back of talent and then all the way to floor if talent is sitting down and connect the XLR cable there, it’s less stuff attached to the talent. Connect a 25-foot XLR cable to the lavalier’s power supply and connect it to your camera.
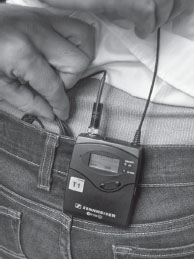
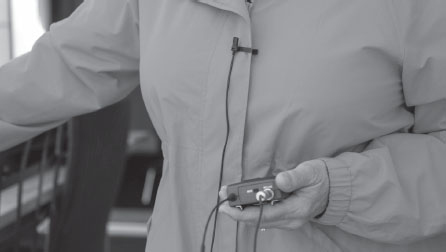
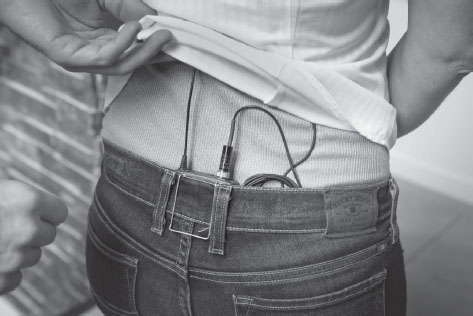
If you’re using a wireless system, the most common place to attach the transmitter is the top edge of the talent’s pants or skirt at the small of their back. The transmitter will have a clip to make it easy. Run the cable (still under the clothes) around the talent’s body. Coil up the excess cable (make sure to leave slack for movement) and tuck it into the top of the talent’s pants or skirt. Do not cross the transmitter’s antenna with the cable from the lavalier
• To help hide the wireless transmitter and prevent it from bouncing around if the talent is walking or running. It’s good practice to spin the transmitter around and place the entire pack in the talent’s pants or skirt
// Watch Class 11—Lavalier microphones, exposed news style technique //
If you’ve ever tried to hide a lavalier microphone on talent, you’ve probably realized it’s a lot harder then you thought. Making it sound clear, getting rid of the clothing noise, and hiding it so you won’t see it in the shot—there’s a lot to get right.
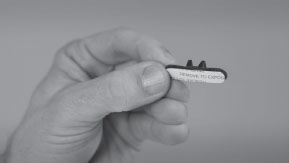
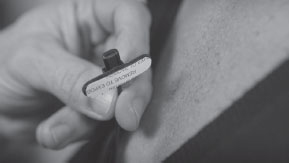
Placing mics in beards, hollowed out pens, even behind mirrored sunglasses—you’d be surprised at where the mic is sometimes hidden.
Even though I’ve experimented and learned many miking techniques, I find that I use the following three techniques most often when hiding mics on the body.
BUTTON SHIRTS: VAMPIRE CLIP
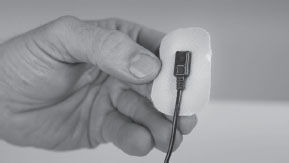
Between the buttons on a dress shirt or blouse is a perfect place to hide a lavalier. The mic is centred on the body and the layered fabric hides and isolates the mic. I’m using a Tram TR50 front-loaded lavalier for this application.
• Choose the vampire clip from the case
• Place the lavalier in the vampire clip. Since I’m using a front loaded lavalier (the mic has a front and back) place it in the clip with the capsule (front) facing towards the clip. This will prevent clothing from touching the screen of the mic when it’s hidden
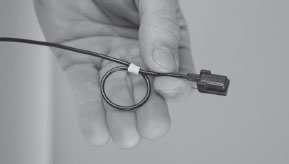
• Make a loop in the cable and secure it with a small piece of tape. The first 1 inch to 2 inches of the lavalier’s cable closest to the head of the mic is very sensitive and will transmit noise to the microphone easily. This loop will dull the cable down, as well as act as a strain relief
• Unzip or unbutton the talent’s shirt in the area you’re attaching the vampire clip so you can work more efficiently
• Feed the excess cable through the talent’s clothing and out the bottom of the jacket or shirt. Again, if talent is weirded out by this, let them do it

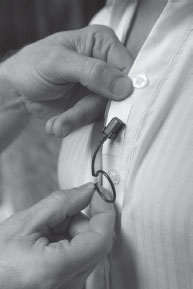
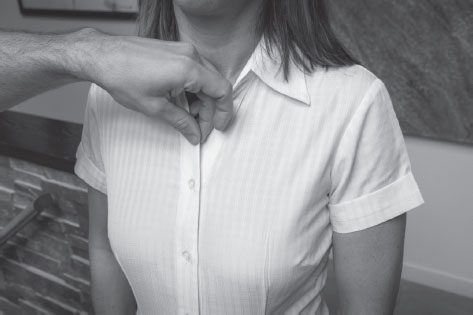
• The optimal place on a button shirt to apply the vampire clip is halfway between two buttons. If you place the lavalier too close to a button, the friction between the button and the fabric can create noise.
• Fold a 1-inch/5-centimeter piece of white camera tape around the edge of the section of shirt to which you are going to be attaching the vampire clip. This will give rigidity to flimsy material, as well as prevent damaging the clothing

• Place the clip half way between two buttons. Hold the fabric away from the talent’s skin to prevent stabbing them when pinning
• Tuck the loop behind the shirt. If the loop is going the wrong way and not sitting nicely behind the flap of fabric, don’t be afraid to twist the cable and tape to make it sit where you want it to
• Button up the shirt or blouse and make one last adjustment to the visual appearance of the clothing. This final adjustment is very important. Take time to step back and make sure it looks good
• Connect the lavalier to your system. See News Style Lavalier, page 88, for connecting
One of the ugliest miking techniques I see is the tie clip or vampire clip on the neckline of a t-shirt, sweater, or hoodie—very amateur! I understand why this occurs: the mic is slapped on for a quick interview and the operator either doesn’t know how to hide a lav, there’s no time, talent thinks they know what they’re doing and does it themselves, or the talent doesn’t want to be body miked. Well, it’s your career! If you allow this to happen, it’s your visuals that will suffer. Every eye that has the misfortune of looking at their screen when your shot comes up will be drawn to the ugly cable running down the front of the person’s shirt. Even if you do tuck the cable inside their top, the crappy sound this mic placement produces added to the stupid looking mic.… Like I said, it’s your career.
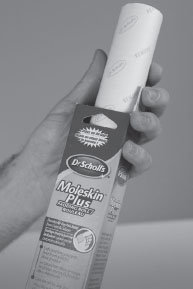
Here’s a really easy fix for those problem t-shirts and hoodies that produces good quality sound—moleskin.
• Purchase a box of Dr. Scholl’s Moleskin at the pharmacy. Buy the large box that has a 5”x 7” solid full sheet. You’ll go through it like milk
• With a pair of very sharp scissors, and I mean very sharp or you’ll be hacking at it for a while, cut a 2-inch x 1½-inch rectangle piece. Round off the corners, this prevents the edges of the moleskin showing through the fabric when the lav is applied. I carry about 10 pre-cut pieces for simplicity sake during production.
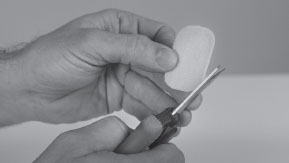
• Remove the paper backing from the moleskin to expose the gluey surface. Lay the head of a front-loaded lavalier (I use a Tram TR50 for this technique) into the gluey surface, capsule out. Don’t stick the capsule into the glue or you’ll mess up your mic!
• With your fingers, pinch the moleskin to the sides of the mic head, creating a pocket for the lavalier to sit in. Then gently grab the edges of the moleskin with your thumb and second finger and squeeze together so the front of the mic is level with the edges of the moleskin. This prevents the mic from creating a bump in the fabric, as well as making it easier to apply

• Now, here’s where it can get a little unnerving. Untuck the talent’s clothing you are attaching the mic to for easy excess. Remember how I explained how to ease the talent’s concerns with miking? This is when it’s really important to have explained what you’re going to be doing before you start
Look at the talent’s top and figure out exactly where you’re going to be placing the mic; you want to try and place it as close to the centre of the body as possible about sternum height. Since you won’t see your hand placing the mic onto the fabric, keep an eye on the area of the top you want to place it
Be careful with iron-on logos and decals. Heavy vinyl or plastic ironons won’t let sound pass through
With the mic in one hand, holding it the way I explained earlier, pull the clothing forward with your other hand and slide the moleskin and mic up under the shirt to your predetermined spot. Fasten the moleskin to the shirt by pushing your index finger forward on the capsule of the mic and gently releasing the edges of the moleskin from your thumb and second finger. This technique is important because it fastens the mic capsule flush with the edges of the moleskin. Don’t push too hard, or you’ll create an unsightly mic outline on the shirt
• This technique takes a little getting used to to prevent unsightly kinks in the fabric, so experiment on a partner wearing a variety of tops. You’ll quickly learn which fabrics it works great on and which fabrics require too much futzing to make look good
A word of warning! With nonprofessional talent, they’re not going to be letting you in their top repeatedly if you’re having troubles with this type of miking. Learn this technique on a friend who has a lot of patience and then try it on talent
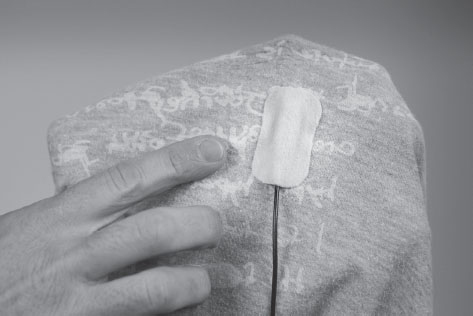
• This photo shows how the mic looks inside the t-shirt. Notice how the mic is completely surrounded by the moleskin and the capsule is recessed into the moleskin and not pushing out onto the fabric
• Connect the lavalier to your system. See News Style Lavalier, page 88, for connecting
Miking on the skin is most successful on people with no chest hair. So all “monkey men” are right out, unless they’re prepared to tango with a razor. Men with little or no chest hair and women are the best candidates.
Men with muscular chests (with no chest hair) and all women have the perfect place for body miking. With the mic placed at the sternum there is no chance of the clothing coming in contact with the mic, making the cleavage area the best place for body miking on the skin.
If I have to hide a lavalier on a woman wearing a blouse, t-shirt, or sweater (as long as the clothing is not too dense), the leather clip is always my first choice. It sounds great and clothing noise is nonexistent.
• Choose the leather clip from the case
• Cut a piece of double-sided tape and stick it to the rough side of the leather clip, big enough to completely cover the leather. Do not remove the wax paper from the second side of the tape just yet
• It’s time to get personal again. A gentle reminder to have informed talent what you are about to do.
• If you are miking a man, expose the sternum area by unbuttoning his shirt or lifting his sweater or t-shirt. I find it a whole lot easier to get this right the first time when I can see where I’m sticking the mic because a little off and the mic can come in contact with the clothing. You want the mic right in the pit of the cleavage. From there, run the cable down to the talent’s belt line and around to their back
• If you’re miking a woman wearing a button shirt or blouse, there’s a bit more to it. Unbutton their top to expose the cleavage area. This does not mean you unbutton the whole shirt or blouse, one or two buttons will suffice. With the plunging necklines of fashion, I have yet to have any issues applying this technique. If the woman is absolutely against you applying the mic, for whatever reason, you’re going to have to explain the following steps and hope they get it right
• First, drop the connector end down talent’s shirt between their breasts, under their bra and pull excess cable out the bottom of the shirt or blouse. You MUST have the cable under the bra! If you don’t, when the talent takes a deep breath, the bra will pop the mic out of the clip. If talent is nervous about you being in their clothes, have them thread the mic through themselves
• With the area exposed, you first need to stick a 1-inch piece of hypoallergenic skin tape on the talent at the centre of their sternum. This is where you’re going to secure the leather clip. Hypoallergenic skin tape will prevent any possible skin irritation that double-sided tape can cause, and it stays put if talent sweats
• Place the lavalier in the leather clip with the capsule facing towards the leather clip. You want the capsule of the mic to be facing the body. This will prevent clothing from touching the screen of the mic when it is hidden
• Remove the wax paper from the double-sided tape on the leather clip and secure the mic to the skin tape
• Button up the shirt or blouse and make one last adjustment to the visual appearance of the clothing
• Connect the lavalier to your system. See News Style Lavalier, p. 88, for connecting
// Watch Class 12—Lavalier microphones, hidden miking techniques //
LAVALIER TECHNIQUES—MIKING ON THE HEAD
Placing the lavalier mic on the talent’s head is a great option if their clothing is too noisy or there’s a considerable amount of physical action. I’ve had great success miking skiers, actors with elaborate costumes, fight scenes, and bikini clad girls (we didn’t see their backs) by moving the miking technique up to the head. Personally, I think lavaliers sound better up on the head than they do on the body. Miking on the head negates volume surges from the talent talking down, as well as tone and volume changes when they turn their head left or right.
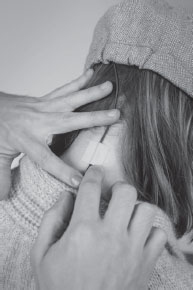
When placing a mic on the talent’s head, hiding the cable can sometimes become the biggest problem. If talent is moving around and the camera is going to see the back of their head, the cable running down the talent’s neck could be seen. Long hair, a high collar shirt and make-up will all help conceal the cable. If you can’t be absolutely certain the mic and cable can be hidden, I suggest you move down to the body. If it’s a straight-on shot, a small piece of skin tape will do to keep the cable from accidentally moving out from behind the neck.
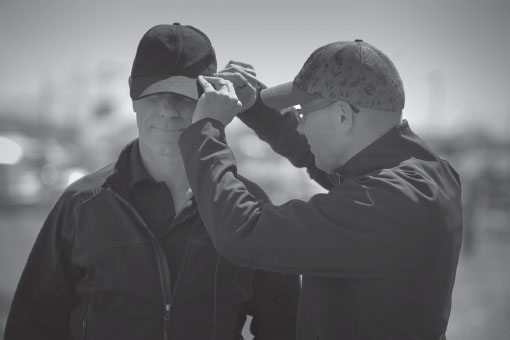
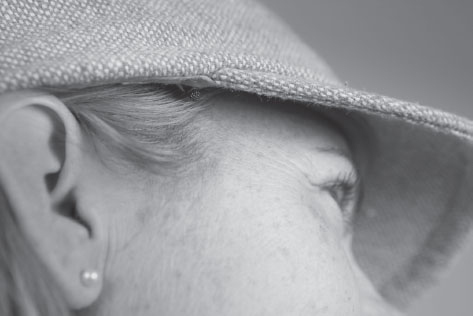
HATS AND BASEBALL CAPS: CAMERA TAPE OR MOLESKIN
When hiding a lavalier in a hat, you can use either a front-loaded or top-loaded type lav.
For years, I used a Tram TR50 front-loaded lav when miking a baseball cap. I started using a Sanken COS-11D top-loaded lav for this application and prefer the results.
HIDING A TOP-LOADED TYPE LAVALIER
• Cut two small strips of moleskin about 1-inch x ¼-inch
• Tape the lav to the inside edge of the hat with the capsule facing down just barely sticking out. I like to position the mic just in front of the temple. For a little experiment, place your finger just above your temple and then open and close your mouth. The skin and skull move. This will create noise when talent speaks. So move the mic a little further forward on the head where you feel no movement.
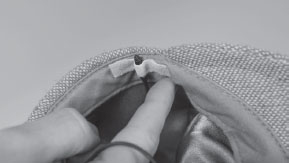
• Put a little extra cable inside the hat to prevent any binding and tape it to the back of the cap. This will prevent the cable from accidentally moving to the side of the head
• Place the hat back on the talent with the cable hanging down their back
• Run the cable inside the talent’s clothing down their back
• Have talent tip their head slightly forward and secure the cable to their neck with a small piece of skin tape. This part kinda sucks because you’ll eventually have to remove it, and those little hairs on the back of the talent’s neck are going to get you a few dirty looks. I guess you can let them do it?
• Unless the camera is on an extreme close up and shooting up the talent’s nose, this mic will never be seen
• Connect the lavalier to your system. See News Style Lavalier, page 88, for connecting.
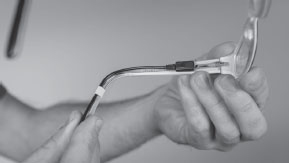
With miking a cap like this, you’ll be surprised at how little wind hits the mic. If you were to tuck it in a little more than what I’m showing in my photo, you can really knock down the wind. Experiment with this miking technique, I use it a lot and I’m always surprised at how good it sounds in the wind.
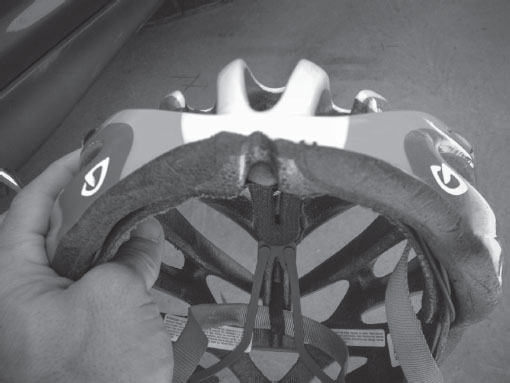
Lavalier hidden in a road bike helmet
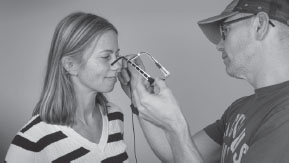
Hiding a lavalier in a pair of glasses is quite simple and if they’re sunglasses, the camera will never see it. It’s good if the glasses have fairly wide arms for attaching and concealing, but even if the mic is a little wider than the arm, nobody will notice. Like with all head miking techniques, if you can’t conceal the mic cable as it travels down the talent’s neck, this technique won’t work.
• Clean the arm of the glasses with rubbing alcohol about a half-inch from the lens. This is where you’ll be concealing the lav
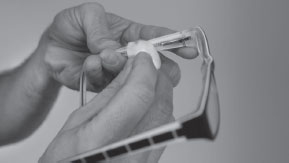
• Cut a small piece of two-sided tape (clear is best), and stick it to the back of the lavalier microphone. I prefer the Tram TR50 for this technique, but when the arms of the glasses are really thin, I’ll use a Sanken
• Remove the paper from the second side to expose the tape, and attach the mic to the arm of the glasses
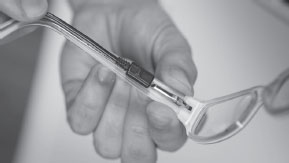
• With a small piece of tape (not double sided), secure the cable to the arm of the glasses where the arm bends around the ear
• Place the glasses on the talent
• Have the talent tip their head forward and secure the cable to the back of their neck with skin tape. Make sure there is slack for them to move their head
• Run the cable down the talent’s back on the inside of their clothing and connect the lavalier to your system. See News Style Lavalier, page 88, for connecting.

// Watch Class 13—Lavalier microphones, head miking techniques //