Chapter 12. T3i Video: Beyond the Basics

Getting Professional-Looking Video from Your Rebel T3i
Back in Chapter 2 I took you through some of the basics for setting up and using the video recording functions of the T3i. In this bonus chapter, we will take a look at some of the creative things you can do with your video. First, though, let’s take a look at why the video capture feature is such a big deal in a DSLR.
It’s All about the Lenses
Video cameras have been around for a long time, so why is it such a big deal that you can now use your DSLR camera to record video? The answer is simple: it’s all about the lenses. If you have any experience using a video camcorder you know that it always seems like everything is in focus. While this isn’t always a bad thing, it can also be pretty boring. Using DSLR video allows you to use faster lenses (larger apertures), which can give you more shallow depth of field in your videos. This shal low depth of field can add a sense of dimension and depth that is normally lacking in most of your standard video cameras. The truth is that many videographers are turning their attention from video cameras costing many thousands of dollars to the much more affordable DSLR video camera to produce similar high-definition results.
Using the T3i will not only allow you to capture video with a more shallow depth of field; you also have the flexibility of using different lenses for different effects. While you may only own one lens right now, you have the ability to buy specialty lenses to enhance your video as well as your still capture. Any lens that you can use for still photography on your T3i can also be used for video, including ultra-wide lenses such as the EF 15mm Fisheye f/2.8 ED lens, the EF-S 18-200mm f/3.5-5.6 IS, or even the EF-S 60mm Micro f/2.8D for getting extreme close-up videos (Figure 112.1).
Figure 12.1. Using specialty lenses such as this 15mm fish-eye will add a different perspective to your video.

Speaking of Filters...
Close-Up
While we are on the subject of video, if you read the other bonus chapter you might recall the section on close-up accessories, such as the Canon close-up filter and the extension tube. Well, guess what? You can use those same accessories for getting great close-up video of those tiny little subjects such as insects or flowers.
Polarizing
The polarizing filter is going to offer the same benefits to your videos that it does for your photographs. By utilizing this filter you can eliminate the bluish colorcast that can happen on those blue-sky days, bring accurate color and contrast to vegetation, reduce annoying reflections from water and glass, and darken your blue skies, giving them more depth and character. (See the other bonus chapter, Chapter 11, for more detail on the polarizing filter.)
Neutral Density
Shooting in bright daylight conditions can sometimes overwhelm any attempts at using a larger aperture, and thus a shallow depth of field (see the section below). To help combat this problem, you might want to employ the use of a neutral density filter to darken the scene. The filters come in varying densities or darkness values, so you will need to determine how much light you need to cut down to get the effect you desire. A great filter for this is the Sing-Ray Vari-ND filter, which lets you vary the amount of density by up to eight stops. The problem with this filter is that it only comes in 77mm and 82mm sizes and it is pretty darned expensive. You can create your own variable ND filter by purchasing a linear polarizing filter and a circular polarizer, which cost much less. Place the linear polarizer on your lens and then the circular on top of that. Then just rotate the circular polarizer and watch the scene get darker and darker. Just dial in the amount of density you want and then start filming.
Tripods
Another topic that was covered in the other bonus chapter was the use of tripods to stabilize the camera for the purpose of achieving sharper images. The use of a tripod for video is not quite the same as for still image applications. When you are shooting video, you want to present a nice, smooth video scene that is fairly free of camera shake. One particular case for this is the pan shot. When you are following a subject from side to side, you will want the viewer’s attention to be focused on the subject, not the shaky look of the video. To help in this cause, your preferred tool of choice should be a tripod with a fluid head (Figure 12.2). A fluid head looks a little different than a standard tripod head, usually with one long handle for controlled panning. To really make things smooth, the head uses a system of small fluid cartridges within the panning mechanisms so that your panning movements are nice and smooth. You can get a nice fluid pan head like the Slik 504 QF-II for around $65, which will mount on your existing tripod legs (if your existing tripod has a removable head).
Figure 12.2. The ModoSteady will allow you to capture more fluid movement if you are going to be moving your camera around while recording.
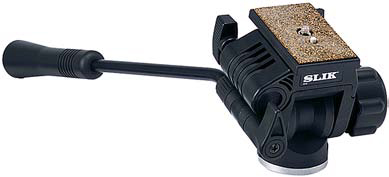
For more information on the Slik tripod head, go to http://www.thkphoto.com/products/slik/.
Camera Stabilizer
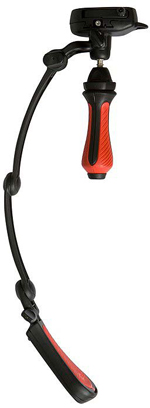
Aside from using a boom arm, there’s really only one way to get jitter-free video on your camera while moving around and that is to use a steady device. You have probably heard of SteadyCam rigs but they can be very cumbersome, expensive, and frankly a little bit of overkill for the normal video experience. There are, however, smaller handheld rigs that provide the same benefit without the cost and bulk, like the ModoSteady from Manfrotto (Figure 12.3). One of the big advantages of this rig is that it has three different setups to choose from. The steady mode hangs a counterbalance under the camera to allow you to capture fluid looking video movement. You can also move the balance arm to a different position and then use it as a shoulder rig, much like the stock of a rifle, and finally, you can open the handle and turn it into a small tabletop tripod. That’s a lot of functionality for under $100.
Figure 12.3. The ModoSteady will allow you to capture more fluid movement if you are going to be moving your camera around while recording.
Easier LCD Vision
I have one problem with shooting video on the T3i or any DSLR camera and that is that I can’t use the viewfinder as I record. Instead I am forced to use the rear LCD screen and, while it is very large and sharp, my old eyes tend to make me hold the camera fairly far away from my body to see the screen. But there is a another way, and it is perfect for old eyes like mine, or anyone who wants a better look at their rear LCD while recording.
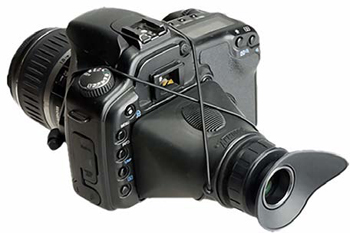
In the first bonus chapter I introduced you to the Hoodman HoodLoupe for viewing your rear LCD screen. This small device allows you to get a great, crisp view of your LCD screen due to the built-in dioptor. The only problem is that you have to handhold the loupe against the screen while viewing, which ties up one of your hands. That’s why Hoodman came out with this great little device called the Cinema Strap (Figure 12.4), which allows you to attach your Hoodman Loupe to the camera for hands-free operation. If you are going to be doing any sizeable amount of video recording, you will most certainly want to look into a device like this. Not only is it great for getting a great look at the LCD screen while recording, it also helps avoid glare on the screen while working outdoors.
Figure 12.4. The Cinema Strap offers an easy way to mount your Hoodman HoodLoupe to your camera for hands-free use.
Getting a Shallow Depth of Field
As I said earlier, getting the look of a production cinema camera means working with shallow depth of fields. The problem that you might encounter when trying to get a large aperture in your video will be that the camera wants to use an auto-exposure mode to establish the correct camera settings for recording video. To get the benefit of a large aperture, you are going to need to do one of two things, either fool the camera for just a bit or shoot in manual mode. To get a large aperture, you need to point your camera at a dark part of the scene and then engage the AE Lock feature. Since the normal button used for AE Lock is used for autofocus in the video mode, you will need to use the ISO button to lock in the auto exposure setting.
Locking the Exposure
- Turn your camera mode dial to the Movie setting. This will turn on the Live View screen.
- Focus on your subject and then point your camera at a dark area and press the * button to lock in the exposure (a dark scene will force the camera to use a large aperture, a bright scene will use a small aperture with greater depth of field).
- Press the Record button to begin recording your movie.
- Press the ISO button once again to cancel the AE Lock feature.
Giving a Different Look to Your Videos
Using Picture Styles
Something that a lot of people don’t realize is that you can use the picture styles to give your video a completely different look. Sure, you can use the Standard style for everyday video, but why not add some punch by using a different picture style setting? You can set up your own user-defined style to add some color saturation and sharpness, or you can use one of the pre-defined styles. Maybe you want to shoot a landscape scene. Go ahead and set the picture style to the Landscape setting to improve the look of skies and vegetation. If you really want to get creative, try using the Monochrome setting to shoot in black and white. The great thing about using the picture styles is that you will see the effect right on your LCD screen as you record, so you will know exactly what your video is going to look like. Want to take things up a notch? Try customizing the picture styles and do things like shoot sepiacolored video. Check out the “Classic Black and White Portraits” section of Chapter 6 to see how to customize the look of your Monochrome picture style.
White Balance
Another great way to change the look of your video is to select a white balance that either matches your scene for accurate color rendition or better yet, choose one that doesn’t match to give a different feel to your video. You can completely change the mood of the video by selecting a white balance setting that is different from the actual light source that you are working in. Don’t be afraid to be creative and try out different looks for your video.
Tips for Better Video
Shoot Short Clips
Even though your camera can record fairly long video sequences, you should probably limit your shooting time to short clips and then edit them together. Here’s the deal: most professional video shot today is actually made up of very short video sequences that are edited together. If you don’t believe me, watch any TV show and see how long you actually see a continuous sequence. I am guessing that you won’t see any clip that is longer than about 10 seconds in length. You can thank music videos for shortening our attention span, but the reality is that your video will look much more professional if you shoot in shorter clips and then edit them together, which brings me to the next tip.
Stage Your Shots
If you are trying to produce a good-looking video, take some time before you begin shooting to determine what you want to shoot and where you want to shoot it from. You can mark the floor with tape to give your “actors” a mark to hit. You can also use staging to figure out where your lens needs to be set for correct focus on these different scenes.
Manual Focus
This will be difficult to do at first, but the fact is that if you want to change the point of focus in your video while you are recording then you should learn to manually focus the lens. The autofocus system will work while you are recording but only when you press the focus button. This isn’t a problem unless you are recording sound with your video, in which case you will hear the autofocus motor moving back and forth as your camera refocuses. Even if you aren’t recording audio, the autofocus can be slow, and it has a tendency to move in and out of focus several times before settling on the right spot.
To change your focus, you need to set the camera lens to manual focus and then use the focus ring on the front of the lens. This will be difficult at first, especially if you have never had to manually focus in the past, but with a little practice you can become fairly adept to the process.
Avoid the Quick Pan
Your camera uses something called a rolling shutter while recording video that, as the name implies, rolls from the top to the bottom of the frame. If you are panning quickly from one side to another, you will see your video start to jiggle like it is being shot through Jell-O. This is something that can’t be overcome except by using a slower panning motion. If you are going to be shooting a fast subject consider using a lower resolution to get a faster frame rate and smoother motion such as the 60-frames-per-second option. The more frames you record, the smoother the video will look when played back.
Use a Fast Memory Card
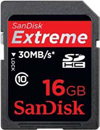
Your video will be recording at up to 60 frames per second, and as it is recording it’s placing the video into a buffer, or temporary holding spot while the camera writes the frames to your memory card. If you are using a slower, bargain memory card, it might not be able to keep up with the flow of video—with the result being dropped frames. The camera will actually not record some frames because the buffer will fill up before the images have time to be written. This will be seen as small skips in the video when you watch it later. You can pre vent this from happening by using an SD card that has a speed rating of class 6 or higher (Figure 12.5). These cards have faster writing speeds and will keep the video mov ing smoothly from the camera to the card.
Figure 12.5. A fast card such as this Sandisk SDHC Class 10 card will help capture more of your video frames.
Although the manufacturer suggests class 6 or faster media, my recommendation is that you only use class 10 cards for video applications. I have found that some class 6 cards just can’t meet the demands of video and have caused my camera to pause or stop while in the middle of a video shoot.
Get Yourself a Mini-HDMI Cable
When you are ready to play back your video, you can run the video directly from your camera to your TV. If you want to get the best quality picture on your TV, you will want to use a TV capable of displaying high-definition video, which also means that you will want to use an HDMI cable to connect the camera to the TV. HDMI (High Definition Multimedia Interface) cables will carry your uncompressed video to your HD TV in all its glory. The only problem is that your camera didn’t have an HDMI cable included in the box when you bought it. This means that you will have to purchase one to take advantage of the HD playback. If you are thinking that you already own an HDMI cable for connecting your other media components to your TV, you might want to take another look. Your camera uses a mini-HDMI connection, so most standard cables designed for video components won’t work. If you do decide to purchase one, make sure you get a Mini-HDMI-to-HDMI cable. You can find them at most electronics stores where HD cameras and TVs are sold. (Here’s a little hint for purchasing a Mini-HDMI cable: search the Internet for the best prices. Most electronics stores have huge mark-ups on cables and you can usually find a suitable one online for about a third of the price of those that you would find in your local store.)
Turn off the Sound
In Chapter 2, I told you how to turn off the audio option while recording your video. If you don’t have an external mic hooked up to your camera your only audio option is to use the built-in microphone on the camera. The truth is that the mono microphone does not produce audio that is up to the quality of the video. To make your videos stand out, try turning it off and then add a music soundtrack. You will be amazed at how the right music can really enhance a video. Of course you will need to do this on your computer, which will require special video editing software, which leads us to our next section.
Watching and Editing Your Video
Watching Video
There are a couple of different ways for you to watch your videos. Actually, there are three:
• In your camera
• On your TV
• On your computer
To watch your video clips on your camera, simply press the Playback button and press the Set button to activate the play commands. Pretty simple.
To watch on your TV, you can use the Mini-HDMI cable discussed above and connect to your HDMI-compatible TV. You’ll need to tune your TV to the channel used for HDMI input and then play the video just as you would if you were watching it in-camera.
If you don’t have an HDMI cable or compatible TV, you can use the standard AV cable that came with your camera. Plug it into the AV port on the side of your camera, and then plug the yellow and black RCA plugs into the color-coded RCA AV input jacks on your TV. There will only be one audio cable (black) to plug in since the T3i records mono, not stereo sound.
If you would like to watch your video on your computer, you will first need to download the files or access them using an SD card reader. For Apple owners, you can use Apple’s QuickTime Player to watch the video. If it is too large for your screen, try pressing Command-0 to make the video half-size, or Command-3 to fit the video to your screen. For Microsoft Windows users, it is possible to use the Windows Media Player, but you will need to download a special CODEC. Instead, try downloading the Apple QuickTime Player (www.apple.com/quicktime). The basic player is free and will allow you to view your movie files.
Editing Video
If you are a Mac owner, you can edit your HD video using the iMovie ′11 application. Windows XP users will have to purchase an editing program for editing HD video, since the Windows Movie Maker application doesn’t do a very good job in handling HD video resolutions. There are many different applications for Windows editing, such as Adobe’s Premiere Elements 8 video editing software. You can find more information and download a trial version at www.adobe.com/products/premiereel.
If you are using Windows 7 operating system then you should check out the Windows Live Movie Maker program. It has a variety of editing features, handles HD video, and allows you to send your finished videos to places like YouTube and Facebook. If you don’t already have Windows Live Movie Maker on your system, try this link for more information on how to download and install the free program: http://explore.live.com/windows-live-movie-maker/.
Expanding Your Knowledge
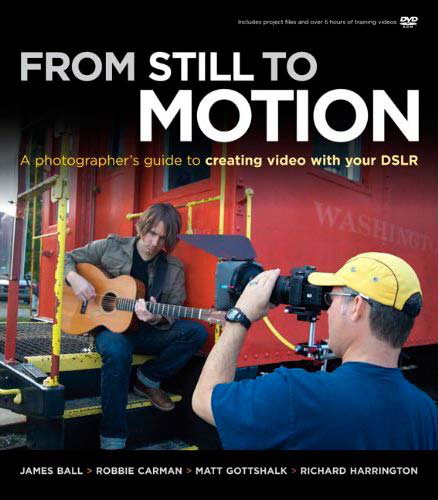
I have given you a couple of quick tips and suggestions in this chapter to get you started with your movie making but if you really want to get serious there is a lot more you need to know. Videography can be a complex endeavor and there is much to learn and know if you want to move beyond the simple video capture of the kids in the backyard or the trip to the amusement park. If you really want to explore all your camera has to offer in the way of video movie making then I suggest you read From Still to Motion: A photographer’s guide to creating video with your DSLR (Figure 12.6). I had the pleasure of being a technical editor for this book and I can tell you that it is packed solid with everything you need to know about taking your DSLR video making to the next level and beyond.
Figure 12.6. I highly recommend From Still to Motion for taking your video work to the next level.