
We just saw how to get moving effects, let's try to add effects to a moving image.
Before we do that, it is a good idea to make a copy of our project (BasicEffects). Let's rename the folder of the new project to BasicEffectsMotion. Open the project file (xcode/BasicEffects.xcodeproj on Ma OS X or vc10BasicEffects.sln on Windows).
Note
For Windows users, you will have to add QTMLClient.lib and CVClient.lib to Linker | Input | Additional Dependencies in the project properties. You will also have to add path to the QuickTime SDK (C:QuickTimeSDK-7.3Libraries) in Linker | General | Additional Library Directories in the project properties. You can access project properties from the menu bar by clicking on Project | BasicEffects Properties.
First we need to find a movie file that we can use. http://vimeo.com/groups/freehd seems a good place where you can find free video footage. I found one with a footage of an industrial site.
Place the movie file in the assets folder of the project, open the code editor, and start with including the QuickTime.h file:
#include "cinder/qtime/QuickTime.h"
Next we have to declare some new variables. Since we have a surface and a texture already, we just need to declare a variable for the movie:
qtime::MovieSurface movie;
With that done, let's move to the setup() method part and load the movie by adding the following highlighted code:
// comment out or remove this line
// surface = Surface( loadImage( loadAsset("OurImage.png") ) );

// add these lines
movie = qtime::MovieSurface( getAssetPath("OurMovie.mp4") );
movie.setLoop();
movie.play();
Next we have to copy each frame to a surface and transform that surface to a texture so we can draw it on the screen. Let's move to the update() method implementation to do that, remove all the previous code and add the following:
if ( movie.checkNewFrame() ) {
  surface = movie.getSurface();
  // add effects here
  if ( surface ) texture = gl::Texture( surface );
}
As loading the
movie is an asynchronous process, we have to check if there is a surface before we pass it to the texture. In the same way we have to check if we have a texture before we draw it. Change the gl::draw part in the draw() method to the following:
if ( texture ) gl::draw( texture, getWindowBounds() );We need to make sure that the movie is being drawn within the bounds of our application window. We make sure of that by passing the result of the getWindowBounds() function as the second parameter to the gl::draw() function.
Compile and run the project now. You should see the movie playing. Now we are going to combine this with the effect we made earlier. Find the place in the update() method between the surface and texture initialization (I left a comment // add effects here there). Add the following code there:
if ( surface ) {
  Area area = surface.getBounds();
  Surface::Iter iter = surface.getIter( area );
  while( iter.line() ) {
    while( iter.pixel() ) {
      iter.r() += addR;
      iter.g() += addG;
      iter.b() += addB;
    }
  }
  addR += 1;
  addG += 2;
  addB += 3;
}
As you probably must have already guessed, now we have to declare the addR, addG, and addB variables and set their initial values as follows:
// add this in the class declaration
uint8_t addR, addG, addB;

// add this in the setup() implementation
addR = addG = addB = 0;
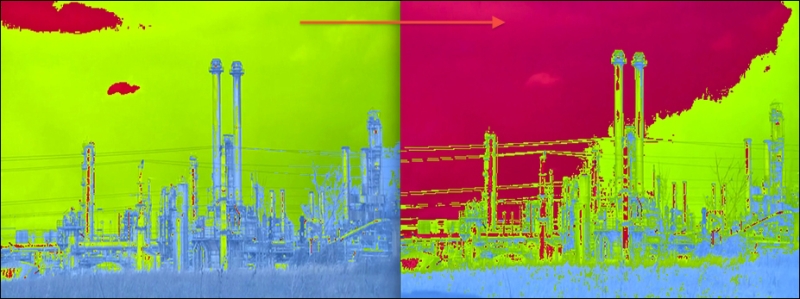
Compile and run the project. You should see the colors of the movie changing as shown in the following screenshot:
Experiment with the addR, addG, and addB values to see what kind of different effects you are able to get out of this.