
It is possible to create nested states by using the previously discussed functions. By using two pushModelView() calls in a row, we are storing two different states. By calling one popModelView() afterwards, we pop just the last pushed modelview matrix.
Let's change our draw() method implementation to the following:
void Basic3DApp::draw() {
   gl::clear( Color( 0, 0, 0 ) );

   // make a copy of the current modelview matrix
   gl::pushModelView();

   // translate the origin of the world to the center of the screen
   gl::translate( Vec3f(getWindowWidth()/2,getWindowHeight()/2,0) );

   // draw a ring of cubes
   int i; // iterator
   int numCubes = 10; // number of cubes in the ring
   for ( i=0; i < numCubes; i++ )
   {
           // make another copy of the current modelview matrix
           gl::pushModelView();

          // rotate the world around z axis
          gl::rotate( Vec3f::zAxis() * (360.f / numCubes * i) );

          // draw a relatively small cube
          // 200 pixels to the right from the center of the world
          gl::drawCube( Vec3f(200,0,0), Vec3f(25,25,25) );

          // return to the previous state
          gl::popModelView();
   }

   // rotate the world around the origin
   gl::rotate( Vec3f(35,20,0) );
   	// draw a bigger cube in the center of the world
   gl::drawCube( Vec3f::zero(), Vec3f(100,100,100) );
   	// return to the initial state
   gl::popModelView();
}
Note the use of gl::pushModelView() and gl::popModelView(). Compile and run the project, you should see a ring of smaller cubes surrounding the one we saw earlier.
Now try to move the gl::rotate() call before the for loop and after the gl::translate() call. Compile and run the project. You should see a bit of a different image than the one you saw earlier:
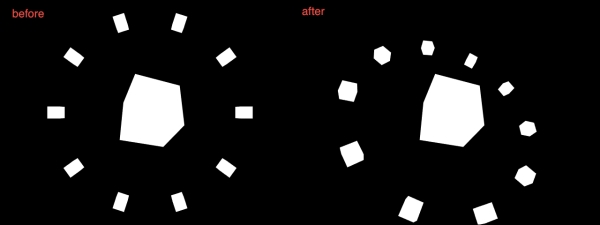
This is a simple demonstration of nested states. Try to experiment in the way we just did, by adding extra transformations and changing their order. Furthermore, OpenGL is not limited to just two levels of nested states. You could try to add orbiting objects around each of the small squares by adding more pushModelView() and popModelView() functions inside another for loop, for example.