
Chapter 4. CoreOS in production
This chapter covers
- CoreOS deployment options
- Networking layers to support your systems
- Large-scale persistent storage
In chapter 3, we talked about how to achieve some fault tolerance using CoreOS’s features; bringing everything together into production is, of course, more complex. You have an unsurprisingly wide range of options to choose from in terms of how and where you want to deploy CoreOS and how you and your organization will maintain it long term. This chapter covers the planning and information gathering you’ll need to do in a few of the most common scenarios.
The first section of the chapter goes through the things you should consider when you’re planning deployments on IaaS services, in-house VMs, and bare metal. Then we’ll move on to how to approach the network topology and how to think about mass storage and large data sets within your cluster.
Note
To be prepared for this chapter, you should have a basic understanding of networking and storage and at least some notion of your target for deployment.
4.1. Planning and deployment options
CoreOS supports a wide range of deployment options, both those supported by the CoreOS organization and community-supported efforts. You can check this list and associated official documentation at https://coreos.com/os/docs/latest/#running-coreos. By far the most common platforms for running CoreOS are these three:
- Amazon Web Services (AWS)
- Internal VM infrastructure (such as OpenStack)
- Bare metal (your own hardware)
Table 4.1 breaks down the costs for each option.
Table 4.1. High-level cost breakdown of common CoreOS platform options
|
AWS |
Internal VMs |
Bare metal |
|
|---|---|---|---|
| Physical hardware investment | X | X | |
| Personnel to manage host software | X | ||
| Personnel to manage hardware | X | X | |
| Personnel to manage CoreOS | X | X | X |
| Personnel to manage cloud infrastructure | X | ||
| High initial cost (not including personnel) | X | X | |
| High recurring cost (not including personnel) | X |
Of course, this table is just a guideline; capital expenditures and total cost of ownership (TCO) can be complex topics and are unique for each organization. In my personal experience, it’s usually difficult to find personnel. The high recurring cost of AWS is generally offset by needing fewer people and by its ability to get your infrastructure where you want to be much more quickly—a factor you should certainly consider.
In chapter 9, we’ll go through a full end-to-end deployment in AWS, using some of the information from this chapter. In addition to being the most likely target platform, AWS’s flexibility lets you cover all of CoreOS’s features and scenarios without too many caveats regarding your own infrastructure.
4.1.1. Amazon Web Services
Infrastructure as a service (IaaS) has gained significant momentum over the last 10 years, and there’s no denying that AWS is the market leader in this space. Its biggest competitors are Microsoft Azure and Google Compute Engine (GCE); smaller (but also rapidly growing) competitors include DigitalOcean and Rackspace Cloud. CoreOS supports all of these officially, but we’ll primarily discuss IaaS in the context of AWS; most IaaS providers share a lot of the same design patterns, so the examples and language in this chapter should translate easily to any provider with which you have experience.
The biggest difference with AWS is that you have to make an extra decision about your architecture. You can choose to run CoreOS and all your applications on Elastic Compute Cloud (EC2), or you can run a controlling CoreOS cluster (such as just fleet and etcd) on EC2 and use Amazon’s ecs-agent to drive the runtime of your applications in AWS’s relatively new Elastic Container Service (ECS). Figure 4.1 illustrates how a cluster looks with just EC2, and figure 4.2 shows it with ECS. Public IaaS providers now have pretty good convergence of features as far as simple compute services go; but AWS is the only one supported by CoreOS that has this abstraction, which can drastically simplify your deployment—you can scale your compute independently of how many CoreOS machines you must manage.
Figure 4.1. AWS deployment with EC2

With just EC2 (figure 4.1), the configuration looks a lot like the local workspace you built in chapter 2: three instances, with your application containers running in some configuration on each of the VMs and being controlled with fleet and etcd. Figure 4.2 introduces some interesting abstraction that you may find useful: ecs-agent, which is officially distributed by Amazon in a Docker container (https://hub.docker.com/r/amazon/amazon-ecs-agent). It essentially acts as a proxy for all of Docker’s commands and runtime, forwarding them into your ECS environment. This means you can have a more attractive separation of concerns between your controllers (your EC2 CoreOS cluster), for which you can now use small instances, and the runtime environment of your applications. fleet and etcd will still run the show, but they can operate independently of ECS’s infrastructure. This also means you don’t even need to run the CoreOS cluster in EC2, which opens other hybrid approaches: you can have your CoreOS cluster running in your data center, controlling an ECS cluster in AWS.
Figure 4.2. AWS deployment with EC2 and ECS

Chapter 8 will go through detailed examples using both of these models in AWS. Luckily, you don’t need to make this choice at the outset. Because ecs-agent is transparent to the Docker runtime, you can transition into or out of this model without a huge effort. Either way, for both models, assume for the sake of this section that you’re running a CoreOS cluster in AWS EC2.
CoreOS (the company) suggests that you run your machine cluster in EC2 via CloudFormation. If you’re unfamiliar with CloudFormation, or if you’re new to AWS, check out Amazon Web Services in Action by Andreas Wittig and Michael Wittig (Manning, 2015, www.manning.com/books/amazon-web-services-in-action). Briefly, CloudFormation is an AWS system that allows you to write a descriptive manifest of your AWS environment and manage the deployment and changes that occur in that environment. It’s a way to record your entire infrastructure and keep it in version control, code review, and so on.
CoreOS provides a basic CloudFormation template to get started with CoreOS in EC2, available at https://coreos.com/os/docs/latest/booting-on-ec2.html. It’s a great starting point, but keep in mind that it’s not sufficient for a robust production deployment, which we’ll go through in its entirety later in the book.
4.1.2. Using in-house VM infrastructure
You may already have some level of virtualization in your data center that you want to use for the deployment of CoreOS. Currently, CoreOS only officially supports OpenStack as a target for VM deployment, but the community supports some commonly used products like VMware. Additionally, nothing prevents you from creating CoreOS images for any VM system you’re using, although doing so is likely to be time consuming.
Note
In my opinion, running CoreOS on a data-center VM platform for production adds little value and a lot of unnecessary complexity. If you already have the hardware, CoreOS is providing the application and infrastructure abstraction for which you’d use virtualization. Running this on top of another abstraction makes it difficult for fleet to understand the topological zones of failure; and because you don’t care much about the machine image, the advantages of VM image manipulation aren’t useful.
CoreOS on OpenStack uses the common tools glance to do image definition and nova to initialize the cluster. The official documentation for CoreOS on OpenStack can be found at https://coreos.com/os/docs/latest/booting-on-openstack.html.
4.1.3. On bare metal
CoreOS on bare metal (your own data-center hardware) is a great option if you have the engineering resources to manage it and the capacity requirements to make it worthwhile over IaaS. We won’t go too much into the economics of this approach, but you’ll have to determine where the cost curves meet for IaaS versus bare metal for your organization. Truly massive capacity can see some cost benefits in bare metal over IaaS, if you can afford the time and resources. CoreOS is designed to facilitate that kind of capacity, so it’s a great choice if that’s your type of environment. You may also have security considerations that forbid the use of IaaS platforms.
CoreOS on your own hardware is officially supported and has some up-front requirements. For simple deployments (such as testing and development), you can use the ISO that CoreOS provides burned onto a CD or thumb drive. This obviously isn’t very scalable, so the real requirement for running CoreOS here is running a Preboot Execution Environment (PXE) or iPXE server. With this configuration, CoreOS runs entirely in memory. You can optionally install it to disk, but running in memory from PXE yields a high-performance cluster out of the box.
CoreOS on bare metal also likely means the somewhat manual configuration of a network, the specifics of which we’ll cover in the next section.
4.2. Networking considerations
In all the previous examples in this book, we’ve assumed that your network for your CoreOS machines is flat and internally open between nodes. This is how a development environment in VirtualBox behaves, but of course this isn’t always the case, especially in production environments where you may want to lock things down a little better internally. You have a few options when it comes to configuring networks alongside your CoreOS cluster, some of which are very platform specific (for example, we’ll go into how it’s done in AWS in chapter 8). Initially, you can refer to figure 4.3 to get an idea of what your CoreOS cluster needs to be functional in terms of port mappings.
Figure 4.3. CoreOS port mappings

Figure 4.3 shows two crucial classes of network configuration you have to do for a CoreOS cluster. First, ports you need to open for administration are (obviously) SSH (TCP/22) and, optionally, the client port for etcd (TCP/2379). Fundamentally, you won’t often be sshing to your nodes directly; but you’ll remember from chapter 1 that fleetctl can use SSH as a tunnel for executing commands to your cluster remotely. You can get away with leaving SSH closed; if you open your etcd client port, fleetctl can use the etcd API remotely with the --driver=API --endpoint=<URI> flags.
The second critical class of services that need network communications are those that CoreOS (and you!) use to message between machines. You’ll also use this internal communication to talk to etcd with etcdctl or curl in your sidekick services, as you did in examples in chapters 2 and 3. etcd uses TCP/2379 for client communication (etcdctl) and TCP/2380 to internally maintain the cluster configuration. If you want to be able to run fleetctl from one node and have it automatically ssh to the correct node for your command, you’ll also have to open SSH (TCP/22) between machines. The legacy ports for etcd are TCP/4001 and TCP/7001. etcd still binds to these ports, too, for backward compatibility, but opening them between machines is entirely optional.
Finally, you also have to decide what ports or ranges of ports to open between machines internally for your application stack. For example, does your Ruby on Rails app need to talk to a Redis instance on another CoreOS machine on port TCP/6379?
The third class of network configuration, which is completely defined by you and your applications (and not shown in figure 4.3) includes the ports and protocols you wish to expose to the world or your customers, or to external firewalls, load balancers, or other networking equipment. Managing this much more dynamic network configuration, as well as the configuration of the networking for your services between machines, is what we’ll dive deeply into in this section.
4.2.1. How programmable is your network?
As a simple scenario, let’s say you have a PHP application that needs to communicate with MySQL. You can run your PHP app on all machines in your cluster, but MySQL can run on only one machine. You have a security requirement to maintain a default deny policy between every machine in your network, but you also want MySQL to be able to run on any one machine so that it can move around if there are failures. How can you make your network aware of service changes?
You learned how service sidekick units can announce services on etcd. The same is true in this scenario: your sidekicks should apply some configuration to the networking infrastructure that opens the MySQL port to other machines when it moves. If you’re in a public cloud, there are usually well-supported APIs to do this; if you’re maintaining your own networking equipment, this can be much more difficult or impossible if you can’t configure these access control lists (ACLs) programmatically.
There are a couple of options to resolve these problems without an additional system, as shown in figure 4.4 (described in the next subsection):
- Option 1— You have an easily programmable network, and you can set this policy with a sidekick.
- Option 2— You open a range of ports reserved for internal service mapping.
Figure 4.4. Internal networking options

The other difficulty with automated network configuration internally is that it can become difficult to maintain over time, and you may end up with a lot of complex, opaque configuration in your sidekick unit files. An alternative is to write custom software that uses etcd’s ability to have clients listen or poll for changes and apply some network configuration as a result. Obviously, this comes with its own set of complexities and maintenance challenges.
You’ll also likely be using some kind of load balancer in front of your CoreOS machines, and this device or service will need a level of programmability. You can initially configure your load balancer to only route requests to a machine based on a health check, or you can use a sidekick service to announce the availability of a service through whatever API your load balancer uses. This is typically less complex and more likely to exist as a feature on load balancers than layer 3 switches, but you’ll need to consider your approach (for example, will your service be available if it responds to a port, or does it need to do some bootstrapping?).
4.2.2. Up and running with flannel
Flannel is CoreOS’s solution to managing a lot of this network complexity within the CoreOS cluster rather than on your networking infrastructure. If you take the same example of a PHP and MySQL app, the connection between the PHP app and MySQL becomes encapsulated and sent over a single port. This way, the MySQL sidekick only needs to tell the PHP app where it is (via etcd), not both the application and the networking infrastructure.
Flannel creates an overlay network for all of your containers across all the machines in your CoreOS cluster. Flannel encapsulates all this traffic over UDP/8285, which will be the only ACL you have to make between your machines for your own services. Depending on the environment you’re in, you can use back ends other than the UDP one: for example, if you’re in an AWS VPC, you can use a VPC route table as the back end for flannel. The use of flannel has almost no impact on bandwidth and adds a small penalty to latency.
Let’s dive into the example from chapter 3, where you had an NGINX server acting as a load-balancing proxy for Node.js servers, and use the flannel overlay network for communication rather than the VirtualBox network between machines. Refer to figures 4.5 and 4.6 to see the differences in topology (simplified down to just two machines).
Figure 4.5. Original topology

Figure 4.6. Topology with flannel

Figure 4.5 shows the original network topology of the example in chapter 3. It’s a simple internal network topology: a shared /24 network between machines. VirtualBox and Vagrant set up an internal network for the cluster in an address space like 172.17.8.0/24 and set up eth1 as an interface for your machines in that subnet. You use that internal network for service discovery and attachment of the NGINX server to the Node.js processes.
As you can see in figure 4.6, a lot more is going on in terms of networking. You still have the same /24 private network between machines, but now its only purpose is to provide an abstraction for flannel, which encapsulates all container traffic over UDP/8285. An internal /16 network on each machine is created on the interface flannel0, and a /24 network is created within that address space for docker0. This keeps traffic between containers running on the same machine efficiently, and it also helps flannel understand the topology.
Back in section 2.1.2, you copied the default Vagrant repo file user-data.sample to user-data. If you look at that file now, you’ll see that you already told CoreOS to set up flannel. In the units: section, you can see flanneld.service and the 50-network-config.conf file that fires etcdctl to set a network for flannel. This is the minimal configuration to get flannel up and running, so if you followed along in chapter 2, you should have everything you need already. flanneld should be running, and your Docker containers are already using it.
Note
You’ll use the tool jq here: it’s a command-line JSON processor, self-described as “sed for JSON data.” It’s included by default in CoreOS, and you can read more about it at https://stedolan.github.io/jq.
Let’s look at how you can change some things to use flannel. You won’t have to change helloworld-nginx@ or helloworld-nginx-sidekick@ to make this work, just helloworld@ and its sidekick. You still want NGINX to listen on the “real” machine port eth1, because you’re considering NGINX to be the edge of this application stack; and because you already have NGINX configured to dynamically change its configuration when the upstream Node.js instances change (see section 3.2.2), you don’t have to touch it. You do, of course, have to change helloworld@ (listing 4.1) and helloworld-sidekick@ (listing 4.2).
Listing 4.1. code/ch4/helloworld/[email protected]: flannel version

As you can see, there isn’t much to change in the service unit from chapter 3. You’re just adding an extra step to provide a little more context to the service (its Docker IP).
Listing 4.2. code/ch4/helloworld/[email protected]: flannel version

Once you’ve updated the files, you should be able to destroy your current services and start these updated ones:
$ fleetctl destroy helloworld@{1..3}.service
  helloworld-sidekick@{1..3}.service
$ fleetctl start
  code/ch4/helloworld/helloworld@{1..3}.service
  code/ch4/helloworld/helloworld-sidekick@{1..3}.service
What does this get you?
- You no longer need to expose a port to the physical interface of your CoreOS machines.
- Your container has internal ownership of a dedicated IP address.
- You don’t have to implement port-mapping logic to run the same container on the same machine.
- You can lock down the network between your CoreOS machines.
Now that you have a better understanding of CoreOS networking with fleet, complex application architectures should be much easier to compose, and you can abstract your network configuration out of the docker command being run by your service unit. In some situations, you can also remove the burden of some network configuration from operations and make it easier for the implementers of a service to decide its network configuration in a secure and controllable way. Next, we’ll look at the last component of dealing with CoreOS in production: mass storage.
4.3. Where is your mass storage?
Mass storage in CoreOS can seem like a mystery. If you’re treating individual machines as appliances, you shouldn’t care much about their storage. But the reality is that almost all systems eventually need some capacity to manage important data, and how to construct your storage system in a way that doesn’t add stateful dependencies to CoreOS may be a little different than how you’ve done things in the past.
Abstracting mass storage isn’t a new concept. People have been doing it in data centers forever—storage area networks (SANs), network-attached storage (NAS), and filesystems like NFS have been in use for a long time. Storage in public clouds is also abstracted, with elastic volumes and services dedicated to storing data as files like AWS S3 or in managed database systems like AWS RDS. But what do you do when you need access to a filesystem shared among machines? This isn’t a problem exclusive to CoreOS, of course. Horizontally scaling application stacks that are in some way heavily reliant on local filesystem access is always difficult. There are a few ways to solve this problem and a few factors to consider with respect to your application stack.
4.3.1. Data systems background
At the outset, I’d like to point out that, architecturally, relying on a local filesystem for a source of state is generally a bad idea. It’s almost always better to keep your data in some kind of distributed database that’s designed to maintain its own reliability across a cluster of nodes to fit your specific needs. You may have heard of the CAP (consistency, availability, partition tolerance) theorem applied to database systems. In any environment in which you’re treating computers as appliances for high horizontal scalability, CoreOS or otherwise, partition tolerance becomes a strong requirement for your data system. Famously, the CAP theorem suggests that you can “choose two of three” (see figure 4.7). This idea can be a little overused and misapplied, but it suggests that these three reliability concepts are more or less impossible to implement simultaneously.
Figure 4.7. CAP theorem: “choose two”

You need partition tolerance, which means you’re limited by your application needs when it comes to other reliability features you want to use. To achieve high consistency with partition tolerance, some operations must be blocking until an operation completes. We can conclude that availability suffers in this scenario. To be clear, availability doesn’t mean operations fail, but they might have to wait in a queue, which usually affects write operations more than read operations. Data systems that guarantee high consistency and high partition tolerance often use the Raft protocol (https://raft.github.io). etcd in CoreOS is an example of a data system that uses Raft; it needs high consistency so you can be sure of the state of your cluster at any point in time.
Highly available data systems with partition tolerance are also sometimes required. If your application has high-throughput write requirements or doesn’t have a strong requirement for data to be consistent everywhere in the cluster at the same time, you can use such a data system. These systems typically resolve consistency asynchronously; people often use the term eventual consistency to describe them. They frequently align with a Dynamo-like protocol.[1] Examples of Dynamo-like databases are (of course) AWS’s DynamoDB, Cassandra, and Riak.
Named after this paper: Giuseppe DeCandia et al., “Dynamo: Amazon’s Highly Available Key-value Store,” Amazon.com, 2007, http://mng.bz/YY5A.
Describing modern data systems could comprise multiple volumes of books, so I won’t go into much more depth; but it’s important to describe the context in which your data choices will need to be made, and these terms are used throughout this section. In any distributed system, partition tolerance is the most important factor in technology choices. We discussed at the end of chapter 3 how greenfield applications are easier to implement in distributed systems than in legacy application stacks, and this is one of the reasons. It can be difficult to migrate a stack that has a data layer that isn’t very partition tolerant.
4.3.2. NAS and storage outsourcing
The first option for abstracting your persistent filesystems for distribution among nodes is to completely host your filesystems elsewhere. To be clear, this option doesn’t include SANs. Although a SAN can be involved at the appropriate layer, we care about the actual filesystem when talking about mass storage in the context of CoreOS, not necessarily how it’s attached at the block level. NAS solutions should be pretty familiar to you if you’ve been in operations for any length of time.
NFS has been the de facto standard NAS protocol for decades. This subsection’s title includes “storage outsourcing” for a reason: it’s inadvisable to attempt to run NFS on CoreOS as a server. NFS has no facility for sharing its block-level source (which would be completely out of its scope as a service) across nodes, so you’re essentially adding another layer of partition intolerance by trying to share a filesystem from CoreOS. The other direction is fine, however. If you have a reliable NAS that provides NFS or another networked filesystem in your infrastructure, CoreOS as a client of that service is a fine way to add a shared filesystem among nodes. If you go this route, you should be sure to use a system that runs NFSv4, because it has a robust built-in file-locking mechanism to ensure high consistency, which is a requirement for using a filesystem.
Various NAS products provide NFSv4. AWS’s new (still currently in preview) Elastic File System (EFS) provides NFSv4, and a great many commercial NASs like NetApp serve this protocol as well. The last option for external distributed filesystems is using a user-space filesystem like s3Fs that mounts an S3 bucket as a filesystem. These solutions tend to have pretty poor performance, especially on writes, but they may fit your needs if performance isn’t a huge concern.
4.3.3. Ceph
The second option for common access to mass storage is a truly distributed filesystem. There are a few out there, and one of the most popular is Ceph. The Ceph kernel module is officially part of the CoreOS default install and is the only distributed parallel filesystem module included. Setup for Ceph can be nontrivial, but it’s a lot less difficult than it was even a year ago. Ceph officially now supports etcd or consul (a system similar to etcd by HashiCorp) as a configuration back end, which makes things significantly easier. A vast array of tunable parameters are provided for Ceph; these are out of scope for this book, but we’ll cover some basic usage.
The goal of a Ceph cluster is to unify the storage of several machines in a reliable way. At the end of this example, your Ceph cluster will look like figure 4.8.
Figure 4.8. Ceph cluster

This figure shows the discrete parts of a Ceph cluster: monitors and object storage daemons (OSDs) run on as many machines in your cluster as you want (although, you should have at least three monitors for a quorum). Together, they make up the storage cluster on which the metadata server (MDS) coordinates access and namespacing. The filesystem interface is provided through the ceph kernel module. Ceph has some other interfaces available as well, which you can read about at ceph.com.
Let’s jump into this example with the development cluster you set up in chapter 2. Before you start running Ceph, you need to attach some more storage to your VMs. You can do this with VirtualBox’s command-line utilities:

Now that you have your disks, you need to shut down the cluster, get the VM names, and attach your storage with the following commands:

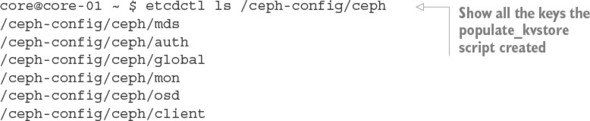
The disks are attached to your VMs; you need to bootstrap one of your nodes with configuration into etcd. ssh into one of your nodes (vagrant ssh core-01, for example), and run the following command:

This will exit quickly with a Ceph cluster key (which you don’t have to record). If you want to, you can use etcdctl to explore what was written to etcd:
Next, you need to write some unit files to get Ceph up and running; they’re shown in listings 4.3, 4.4, and 4.5. Ceph requires three systems: the monitor (mon), the object storage daemon (osd), and the metadata service (mds). You have to run mon and osd on each machine, but you need only one mds (although you can run multiple).
Listing 4.3. code/ch4/ceph/[email protected]


Listing 4.4. code/ch4/ceph/ceph-osd@service


Listing 4.5. code/ch4/ceph/ceph-mds.service

Let’s get these files up and running on your machines with fleetctl:
$ fleetctl start
    code/ch4/ceph/ceph-mon@{1..3}.service
    code/ch4/ceph/ceph-osd@{1..3}.service
    code/ch4/ceph/ceph-mds.service
You now have Ceph distributing a filesystem across your cluster. You can optionally use Ceph’s S3 API work-alike called RADOS to provide a distributed S3 interface to this data, or you can mount it directly in CoreOS:

This is only a basic example of how to get Ceph up and running as a solution to distributing stateful data across your cluster on a filesystem. Ceph is a complex system and could fill a book by itself; this should get you started, but your exact implementation will have a lot of unique details. If you’re planning to (or must) use Ceph, reading the documentation available at ceph.com is crucial.
At the end of the day, you must determine the right kind of storage mechanism for you and your organization. Ceph can be difficult to support. If you’re already in AWS, using AWS EFS (although still currently in preview at the time of this writing) is probably a better bet for solving your problems around distributed storage and relieving you of this kind of burden. But Ceph will remain a leader in this space; the company was recently acquired by Red Hat, Inc., so the tooling and documentation should continue to improve.
4.4. Summary
- CoreOS officially supports some of the most popular IaaS platforms: AWS, GCE, DigitalOcean, and Rackspace Cloud.
- CoreOS officially only supports OpenStack, but there is community support for VMware.
- Bare-metal deployments are officially supported via iPXE.
- CoreOS clusters expect communication between its essential services (etcd and fleet) and, optionally, your own services.
- You can use flannel to abstract network configuration into software with minimal overhead and performant, pluggable back ends.
- Your choice of database system can affect various aspects of reliability in CoreOS.
- Mass object storage can be a challenge when you’re porting legacy applications that rely on filesystems.
- You can provide distributed filesystems either via external components (NAS or AWS EFS) or internally via Ceph.