You're about to undo the most sacred of all camera rules: "Thou shalt hold your camera as steady as humanly possible."You're not only going to undo it, you're going to smash that rule to smithereens. You're going to do things with your camera that seem not only zany, but crazy. Guess what? They are. And so are the results, too.
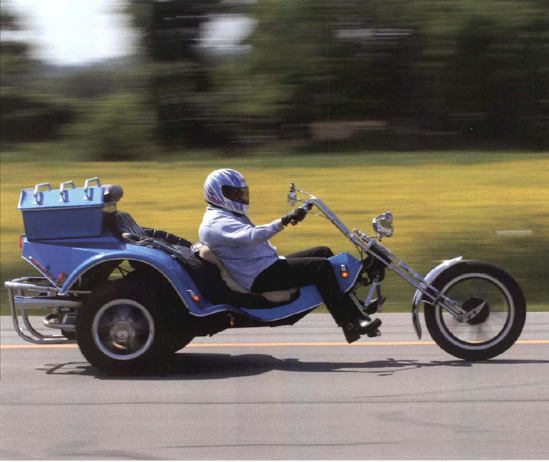
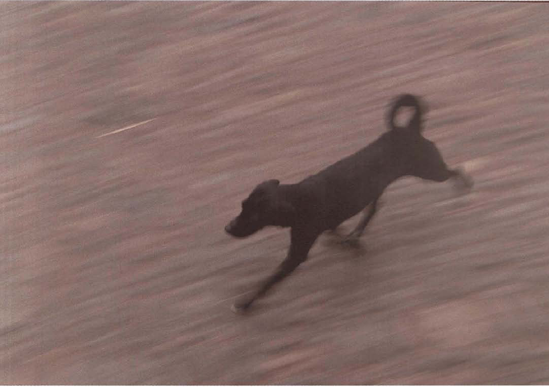
Figure 6.1. With a relatively fast shutter speed such as 1/60 or 1/1 25 second, you can predictably count on fairly sharp results but with less of the motion-conveying blur that results from using a slower shutter speed, such as 1/8 or 1/15 second. Exposure at 1/60 second, f/18.
But they'll also be amazing results. Pictures that are amazingly bad, amazingly good, and, best of all, amazingly fun, especially for those of you with a creative rebel clamoring to break out Now you'll get to play with your camera as if it were a ping pong paddle instead of a fragile electronic device. For a brief time you will no longer pursue that perfect sharp picture because you'll be after the far more elusive perfect blurred picture, Best of all—you get to decide what's perfect.
To enter the photographic world of shake, rattle, and roll. prepare to pan, zoom, jiggle, wiggle, spin, jump, and swing—usually with your camera. Although the destination—and your pictures—will be totally unpredictable, getting there will be a blast.
So remember as you read through this section, there are no rules. I'll give you ideas, I'll spell out techniques, and at times I'll even give you specific settings. And if I happen to forget myself and speak in a serious tone, feel free to disregard what I say and uncork your own creativity as we turn the camera into a bouncing pogo stick. (Hey, now that's one I haven't tried yet.) Maybe you'll even become a reverse Philippe Halsman. His photographs of famous people jumping became famous themselves—as did be. Maybe you can become famous for creating a portfolio of pictures taken while you do the jumping.
If you're one of those people who slinks away moments before the start of the office's annual Secret Santa party, then panning may not be your bag. After all, panning is also full of surprises. But mostly pleasant ones. That's why 1 love to pan.
Panning is the primary technique photographers use to instill a strong sense of motion in photos through blur. Because it's so important and pretty easy to perform, we're going to give it in-depth coverage.
Here's a refresher. Panning creates a picture in which the moving subject appears nearly sharp and the still areas very blurred. That contrast between sharpness and blur imparts a terrific sense of movement. By now you've seen in this book a lot of pictures taken using the panning technique.
How does it work? By breaking that time-honored tradition of holding your camera still while taking a picture. Instead of holding your camera steady, you sweep it in synchronization with a moving subject such as a bicyclist. The motion mimics that of a birder looking through binoculars while tracking a seagull flying in front of him. While sweeping the camera across the scene, you take the picture. For example, by moving the camera in sync with a bicyclist, you keep the image of the bicyclist in the same position on the sensor, so the bicyclist appears sharp. Of course, everything else that wasn't moving is blurred by the motion of the camera.
Depending on your approach to panning, the results can be either predictable or unpredictable. If you want your panning to be predictable, you'll need to consistently create sharp subjects with blurred backgrounds. Here's how. First, choose a subject that's passing directly across your field of view. An example would be when you're standing on a sidewalk looking across the street and you intend to photograph a bicyclist coming down the road just as be passes in front of you. Use a shutter speed that's two to three times as fast as your subject (for example, 1/30 second for a bicyclist going 10 mph). Synchronize the camera motion to the subject motion and try to pan the camera as smoothly as possible.
Be sure to keep moving the camera after you press the shutter button. Just as follow-through is important in swinging a golf club, shooting a basketball, and throwing a football, so it is in panning. The follow-through motion is critical, especially for beginners, because if you briefly stop, pause, or even slow down your panning movement as you press the shutter release, you'll interrupt the blur created by the moving camera and produce an unattractive picture. The indication of success is that the numbers, words, and logos on uniforms and equipment in your photo are clearly legible.
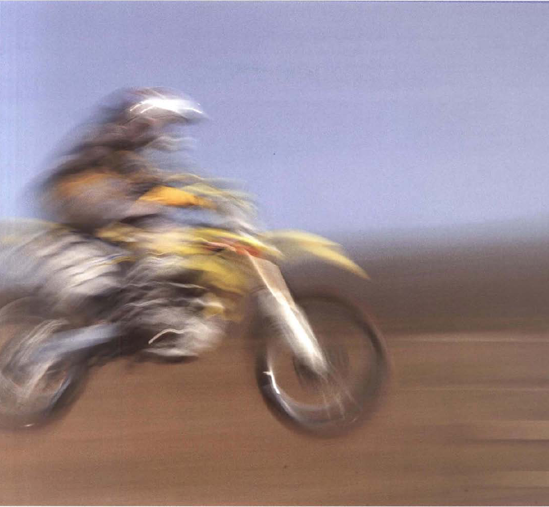
Purposely achieving blur for creating artistic effect rests not solely on moving the camera while using a slow shutter speed. Sure, that's important. But it also depends on the scene's background or foreground (or both) being structured to facilitate showing blur. For example, if you pan a seagull or eagle soaring against a cloudless blue sky, you'll nor see any blur because a clear blue sky lacks detail to become blurred. You can easily find this out at motocross events in which you try to pan a cyclist soaring off a jump and the background is blue sky. But if the background is a leafy canopy, then your panning will create huge amounts of blur.
The advice bere is to avoid excessively plain, colorless backgrounds and foregrounds and find vantage points that offer surroundings resplendent with colorful and richly derailed objects. When I found a field of sunflowers with a path running through it, I knew immediately it would excel for panning because colorful sunflowers grew both in front of and behind the path the bicyclist would ride. Of course, there was no bicyclist when 1 first saw the sunflower field. The bicyclist appeared only when I went home and conscripted ber for photographic duty.
You now know the conventional way to pan. Now bere's the fun way. You can become another Jackson Pollock. But instead of hurling gobs of paint across your canvas, let's use gobs of light. With this slight change to technique, your results become unpredictable, abstract, often unusable, but occasionally supremely expressionistic. I often pan a couple of pictures with a fairly fast shutter speed, just to be sure I've got a couple good shots, then switch to this technique.
Let's start off by changing just one variable: use a slower shutter speed (one that is 1/6 to 1/2 the speed of the subject—for example 1/2 to 1/5 second for a bike going 10 mph). That slower shutter speed revs up the blur. Take several shots on the rapid fire mode and work extra hard to synchronize the motion of the camera with the subject. If you achieve good subject-camera synchronization, the background will be dizzyingly blurred.
If you have an external flash (you can use the built-in flash if the subject is within ten feet of your camera), use it and set the flash mode to rear-curtain sync. The short duration of the flash will give you a very sharp image of a portion of the subject that's embedded within the subject that was successfully blurred by panning.
Now let's start improvising. Choose your shutter speed (slow or fast) but try one or several of these additional techniques:
Pan with an occasional (or frequent) bump in the motion.
Use a different perspective, and don't just pan subjects crossing directly in front of you.
Choose an angle so the subject moves diagonally to you.
Pan and zoom simultaneously; for this you'll need a fairly slow shutter speed, say less than 1/5 second.
How do you know when you're successful? When you like the results.
Since panning is one of the easiest, most effective, and powerful techniques for conveying motion, I thought I'd show a small gallery of images to encourage you to pan even more of your shots at a variety of shutter speeds. The captions will provide the details.
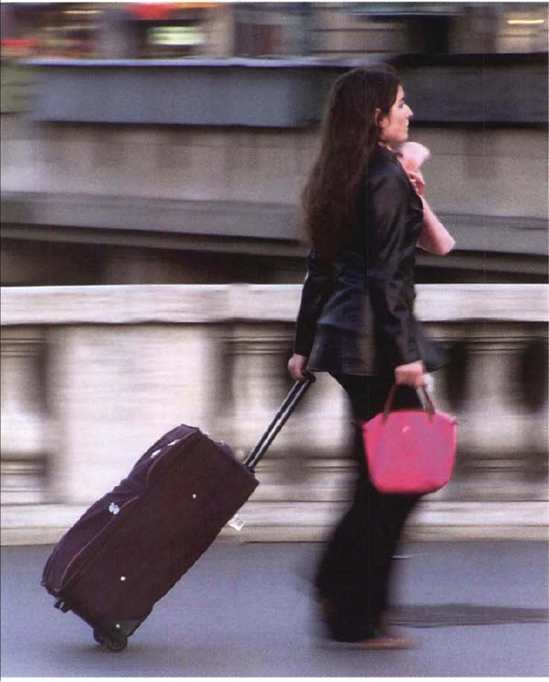
Figure 6.4. Even when panning you should hold the camera vertically when the subject seems to better fit a vertical format. Exposure at 1/10 second, f/8.
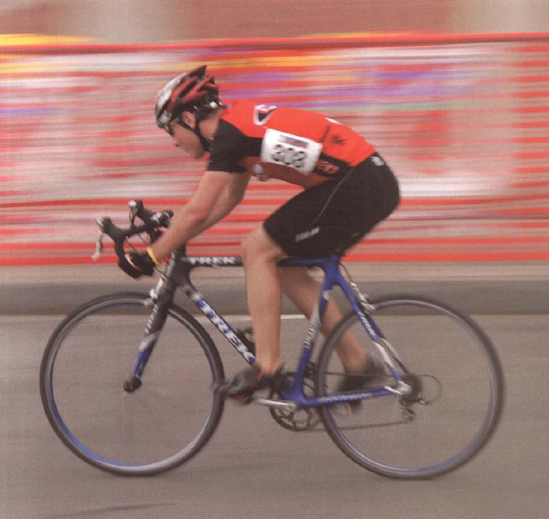
Figure 6.5. A shutter speed of 1/30 second conveyed die speed of this cyclist racing down a straightaway. Exposure at 1/30 second, f/16.
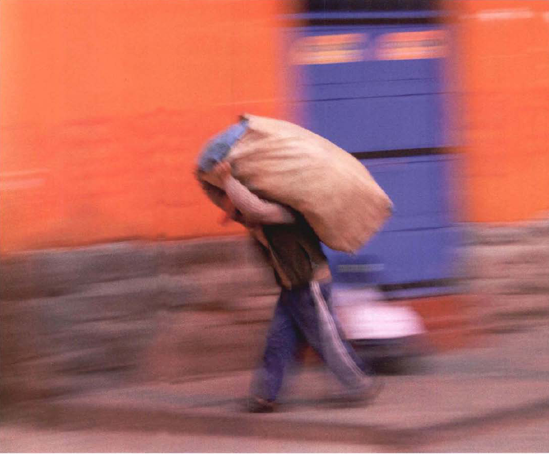
Figure 6.6. In the small villages of Peru, the main method of transporting things is by carrying them. All day long people lumber by under large loads. Exposure at 1/5 second, f/4.5.

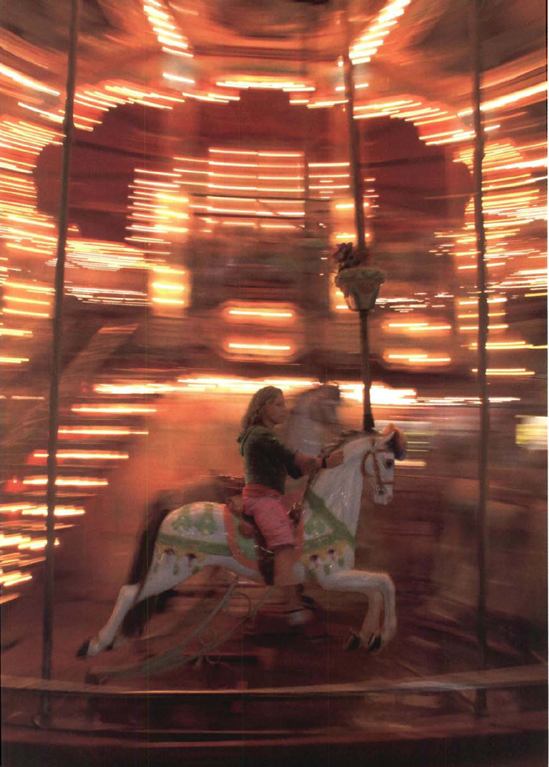
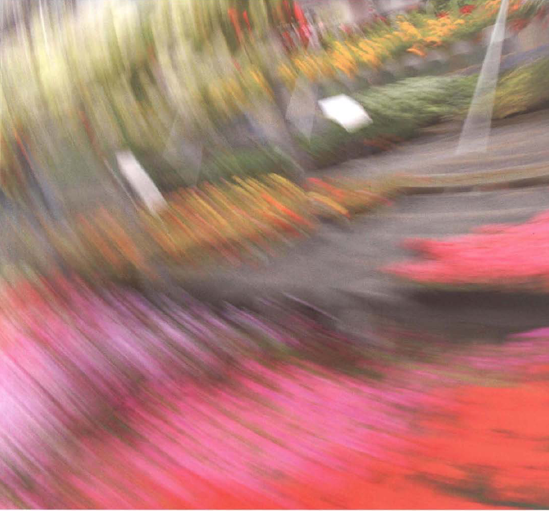
Figure 6.7. Every motion photographer loves a parade. What better place to practice your motion techniques? Exposure at 1/6 second, f/32.
This time-honored technique makes your subject look like it's exploding in a radiating pattern. Like a fingerprint, the unmistakable pattern of radiating lines identifies a shot as having been zoomed.
It's pretty easy to create a zoom photo. You need a zoom lens, a fairly slow shutter speed—typically from 1 second to I/I 5 second, and, optionally, a tripod. Because you vigorously rack the zoom through a range of focal lengths, if you handhold the camera, the picture stands little chance of being sharp.
By fixing the camera to a tripod, you minimize the jerk of the camera motion from abruptly twisting or pulling the zoom control. The tripod gives you well-defined zoom shots with the signature radiating lines.
But there's no reason not to handhold the camera while zooming. 1 encourage trying it, and you may find that you prefer less predictability and more variation in your photos. Just expect to see some color streaks swirling across your photo, particularly if you're using a lens with a rotating zoom control. Unlike the push-pull zoom collars that when moved direct the force on the same axis as the subject, a rotating zoom collar almost always torques the camera sideways, forcing you to jerk the camera to the left or right.
There are several variables you can play with. These include the duration of the shutter speed, the range of the zoom, the speed of the zoom motion, and whether you choose to pause for a fraction of a second at the end of the shot or to zoom continuously during the whole exposure.
I like to use a 70-300mm lens for zooming. I choose a focal length and distance from the subject that lets me nearly fill the viewfinder area with the subject—typically around 200mm. Then I set the aperture so that I can get a shutter speed of 1/6 second or longer, using a neutral density or polarizing filter as required to get the longer shutter speed. If it's an intriguing subject, I'll try it with and without a tripod, but more often with a tripod.
Finally, just zoom away. I take umpteen variations, adjusting how fast I zoom, changing the focal-length range of the zoom (try for at least double, such as 200mm to 100mm), zooming both inwards (200m to 100mm) and outwards (100mm to 200mm), varying the shutter speed and also how long I pause at the start or end of the zoom. This pause at the beginning or end of the zoom adds just an extra dash of subject sharpness for greater recognition of what's buried in that zoomed shot.
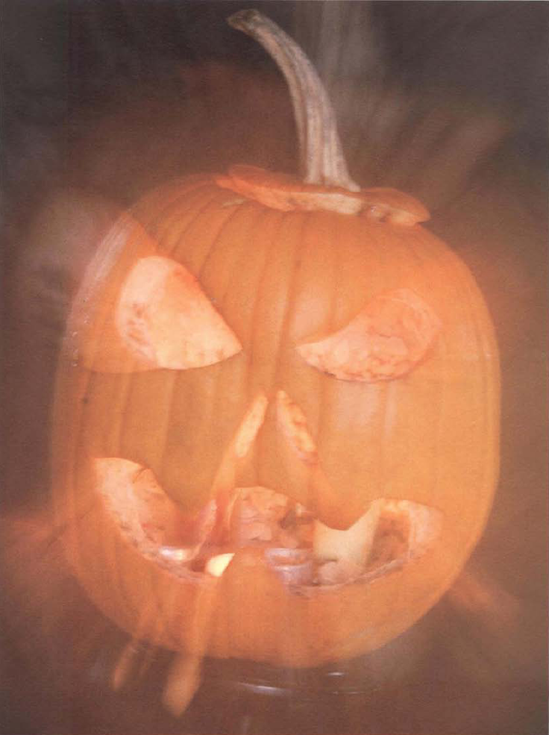
Figure 6.10. Not all subjects work well for the zooming technique, but it seems appropriate for this jack-o-lantern. Shutter speed I second with the camera mounted on a tripod, Exposure at 1 second, f/14.
Coming to a dead stop in the middle of the sidewalk at Times Square can be a rush (and a risk) as the crowds suddenly part and flow around you like you're a rock in a stream. I love photographs that convey this sense of stillness, of solidness amidst change, of immobility in a relentless swirl of movement.

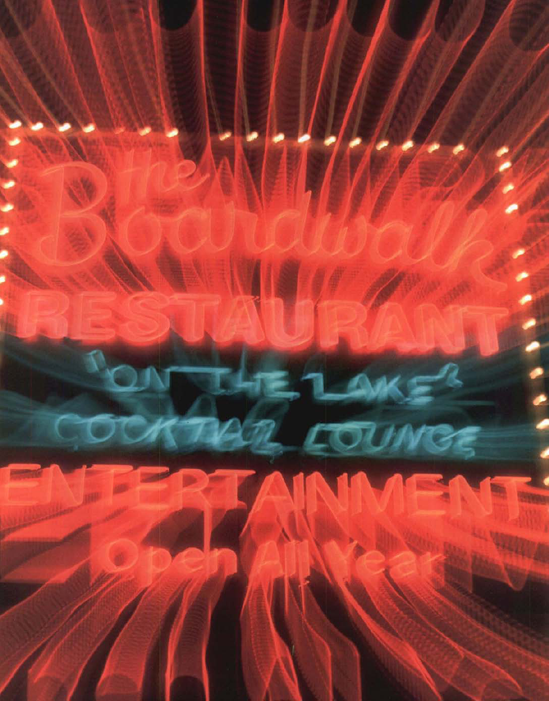
Figure 6.13. A slower shutter speed than the 1/4 second used bere would have worked even belter to blur the people into a blurry stream of motion. I took a separate picture of the sign at a fast shutter speed and used photoshop to replace the somewhat blurred sign in the original scene. Exposure at 1/4 second, f/22.
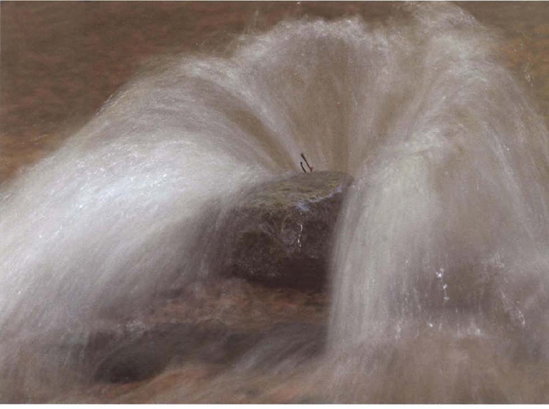
You can do this quite easily with a variety of subjects. The rock in a stream analogy nicely conveys the scene requirements: a large area of movement containing a smaller immobile subject. But this analogy need not just be an analogy. In many streams you'll find not only water but an abundance of rocks. If the water level is at the right beight, the stream will fan gracefully over the rock; if it's running low, the flow simply parts to flow around the rock and then rejoins, usually forming an attractive pattern.
This streaming effect excels when the subject offers a surprise or delight or tension of some kind; for instance, a golden retriever napping in the sun as clouds of orange and yellow autumn leaves whirl past him; a person standing still, alone on a traffic island as cars whiz by; a sandpiper standing tall as a wavelet laps around its feet; or a field of wheat undulating around a rusty, abandoned pickup truck.
Although the concept is fairly simple, coming across the right combination of movement and still subject can pose a challenge. When you find your potential subject combination, use a tripod and a fairly slow shutter speed such as 1/4 or 1/2 second. (For pictures of fast-moving vehicles, start out with a shutter speed of about 1/15 second.)

Sometimes the best way to convey a sense of motion is to let the moving subject blur itself in a scene that is otherwise sharp.
You have to balance subject blur with attractiveness and recognition. If the subject is so blurred that you don't recognize it or that it loses appeal, then the picture may fail. The trick is to manage the amount of blur to keep it attractive and appropriate, bur not let blur obliterate the subject's identity and impact within the context you've chosen.
For instance, you could create a very appealing blur of a pirouetting ballerina or a spinning figure skater. You may find people engaged in an activity in which they move only a part of their body; this gives you the opportunity to use a shutter speed that reveals overall body sharpness but blurs their moving hands or feet. The result is a telling depiction of the action critical to their activity. You can, for example, animate fiddlers, pianists, dancers, drummers, sculptors, painters, jugglers, barbers, bakers, basket ballets—and any others who create a flurry of motion with their hands or feet.
The approach is fairly simple. You hold the camera still (mount it on a tripod for slow shutter speeds) so that non-moving picture parts appear sharp, then use a shutter speed slow enough to moderately blur the subject. Since choosing the shutter speed is critical—as it is with nearly all motion techniques—you'll have to experiment to find the appropriate shutter speed that yields the results you want.
For a musician or artist, 1/8 to 1/30 second might work. For a BMX biker performing mid-air stunts, you could try 1/30 to 1/125 second.

Are you beginning to get the idea that maybe all these crazy motion techniques are good for people who get bored easily? Could that be you? Let's now put our whole body into the effort and turn our pictures into a whirlwind of motion and blur.
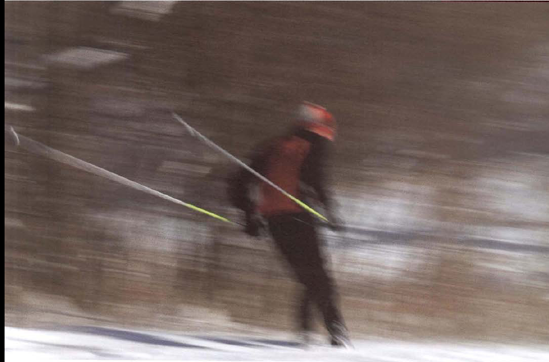
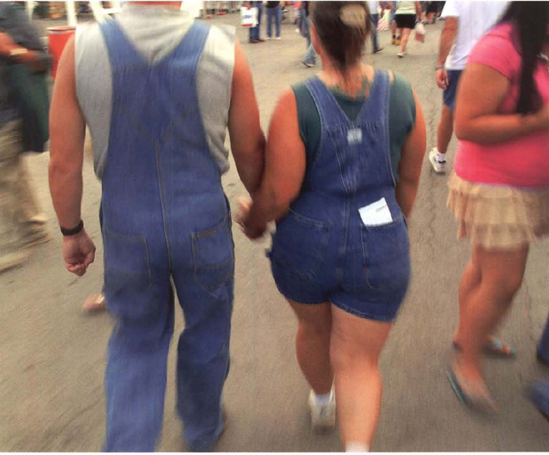
Take a look at the picture below to see how my running with the camera in a lighted tunnel created a rather unusual result. For the picture on the next page, 1 was walking with the camera at the state fair. If you have young children you might want to try running alongside them while aiming the camera their way and snapping a few shots. This technique is a rough version of what you see in the movies quite frequently, where an actor in motion is photographed—smoothly—by a camera on a track, or (more commonly done nowadays) by a handheld camera so the actor's movement is made intentionally jerky.
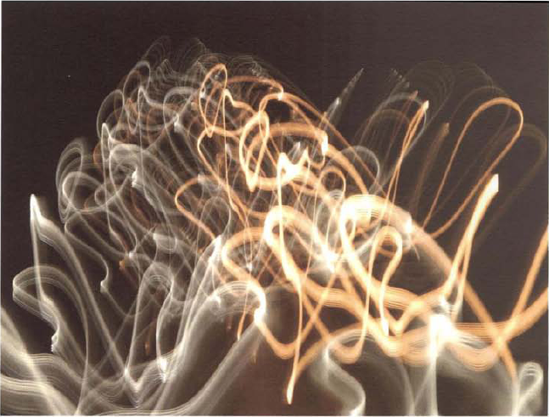
Figure 6.16. This is what a picture links like when von run in a lamp-lit pedestrian tunnel while pointing the- camera ahead of you. Exposure at 3 seconds, ff 18.
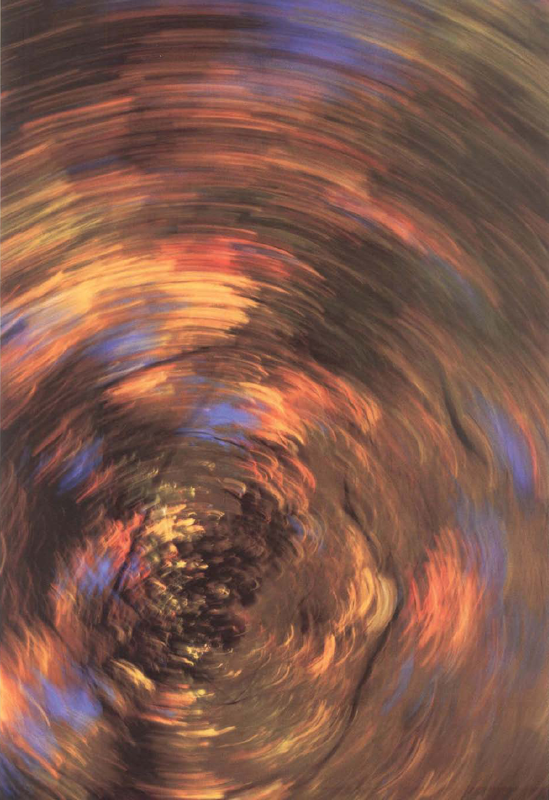
You can even spin the camera—and yourself—while aiming down at a flower or pointing overhead at a canopy of tree tops. There's no end to the acrobatics you can put yourself and your camera through until (sooner or later) you get dizzy and fall down.
While taking pictures for some books on upstate New York, 1 spent so much time driving back roads that I got bored and started taking pictures from the car. I was just fooling around but I liked some of the shots.
First of all, I want to say that there's only one safe way to shoot from a moving vehicle: let somebody else drive. I'd also advise doing this on a road with low traffic volume. Not that I'm developing a mothering complex, but never take any actions that could put others at risk.
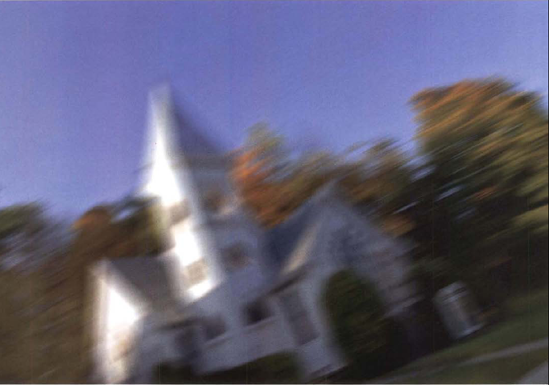
Figure 6.19. Yes, I know, it looks like I tripped and took a picture accidentally. But I'll be remembered for this artful picture one day. When shooting drive-by blur photos, find unobscured buildings with distinct shapes. Shutter speed 1/4 second, f/11. Car speed approximately 30 mph. Brain speed quite high.
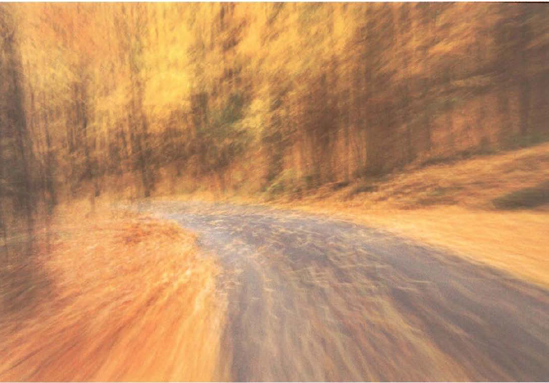
Figure 6.20. Country roads lined with trees tend themselves well to creative blur. Shutter speed 1/4 second, f/22. Car speed unknown.
So, with your spouse or friend or your chauffeur at the wheel, open the window and catch some scenes flying by. It's hard to suggest what subject matter will work well, or even what shutter speed to try. Just play the numbers game by taking lots of pictures at different shutter speeds, ranging from about 1/4 second to 1/125 second to vary the blur. Use a wide-angle lens and set the camera on Manual Focus mode and the focus to the infinity (far distance) mark, (You can try auto focus, but it may not react well—mine doesn't—to this shooting situation).
The combination of blur and the somewhat tilted camera angle can create some very disorienting pictures. If you point the camera straight ahead of the car—while moving down a road surrounded by houses or trees—you can create a sort of vortex funnel effect that zooms with motion.
So let's move on and wrap up this warped series of techniques with the ultimate—camera tossing. If you're keeping abreast of the extreme photo trends (I'm not, hut fellow photographer Jeff Wignall told me about this), then you may know about the new trend of camera tossing. Many practitioners actually do this in front of a monitor for which they create a graphic design and produce elegant and intricate light patterns reminiscent of the Spirograph designs of our youth.
But that's the sophisticated approach. Let's go rough-and-ready and undertake the athletic method. Here's how it works. Set your camera's self timer to a second or two, activate it, and then toss the camera skyward and let it take a picture while tumbling through its ascent or descent. The kicker in all this is whether you can catch the camera before it hits the ground. (No, this is not a ploy by camera stores to boost camera sales.)
Although it sounds risky, to qualify as a certified tosser you need only have your hands off the camera body when the shutter opens up. So you don't have to toss it twenty, ten, or even five feet into the sky. You can just gently toss it from hand to hand as if you were fidgeting with an apple.
Regardless of the distance you toss your camera, the technique risks both limb and lens. And pearly-whites. For the safety of you and those nearby, as well as my peace of mind, follow these few guidelines, whose belpfulness is admittedly dubious (as well it may be, but the technique sounds like a hoot).
Use a camera whose destruction won't leave you weeping.
Clear all loved ones from the launch area.
Invite a local politician to catch the camera (throw it extra high).
Choose an environment with some interesting features on the ground and up in the air.
Start out with a shutter speed of 1/500 or 1/1000 second in Shutter-Priority mode to try and stop the blur from the spinning camera. Then try some incrementally slower shutter speeds for that creative blur.
Practice catching a can of tomato soup for a few days or maybe your old film SLR.
Wear a mouth guard, belmet, and steel-toed safety shoes.
Yell "Fore!" when you release the camera.
And good luck—you'll need it.
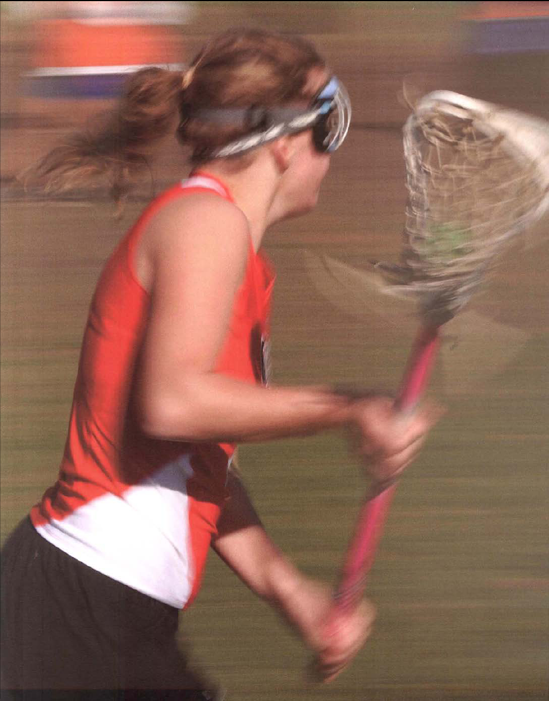
Powerful pictures derive from powerful composition. But it's one thing to leisurely compose a sunset scene with a sailboat drifting in front of the sun and another to snatch an attractive composition from a writhing web of stick-whacking lacrosse players weaving down the field.
As the action picks up on the field, so does the level of your panic as you begin to realize you may not get any good shots, so thoughts of composition fall to the side and photo survival pushes to the front. After only a few sessions of fast action photography, you realize you're in a different ball game. No longer can you compose pictures in a leisurely manner. It's not like landscape photography where you're driving along the coast and find a beautiful vista at which you can linger and consider the possibilities. Should you get low to emphasize that driftwood stump, or stand taller to capture the surf lapping the shore?
When the ball is kicked off or the hockey puck dropped, mayhem ensues and your reactions sometimes have to be faster than the athletes or you miss the shot. In other words, all bell breaks loose and you don't get to call "Time-out!" to sort your options. Where you point the camera, what focal length and shutter speed you use, and possibly where you position yourself — these are the primary decisions you must make.
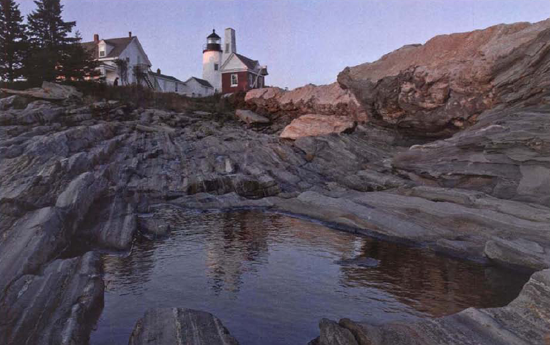
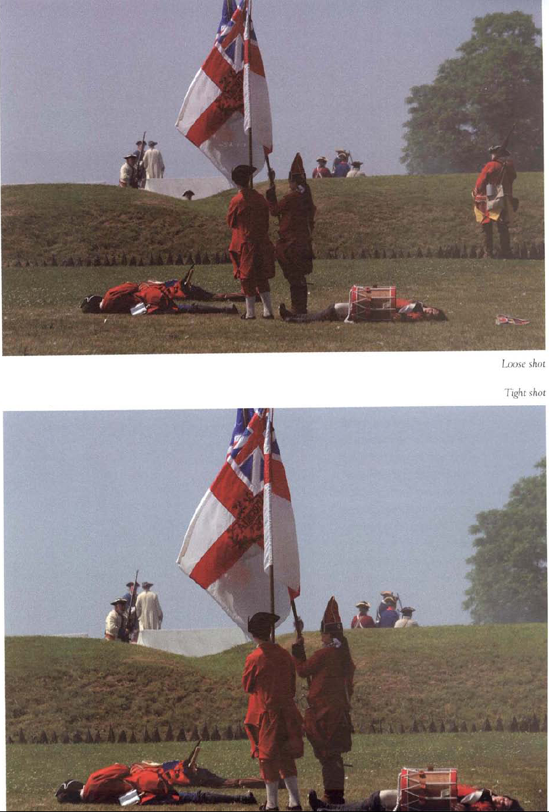
Figure 6.22. Conventional subjects usually give you enough time to leisurely compose your picture in any way you see fit. Exposure at 1 /60 second, f/13.
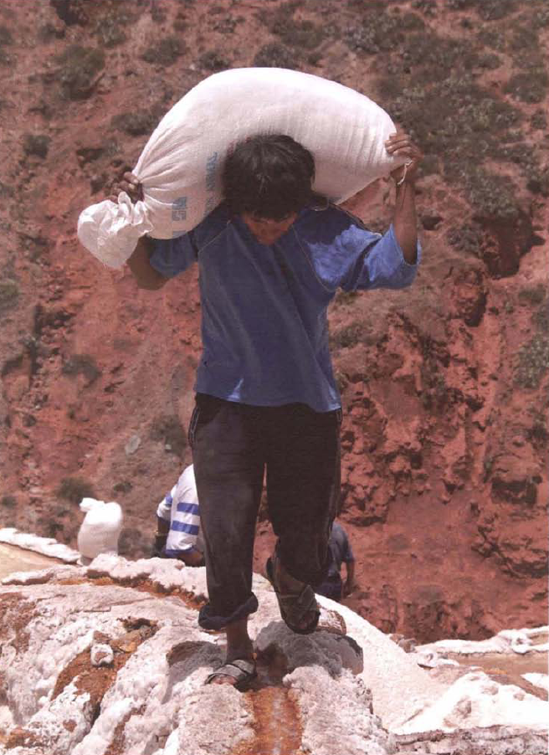
Figure 6.23. This salt miner in Peru repeatedly carried his fifty-pound bag of sail along the same route, giving me a chance to take the shot I wanted. My daughter later spoke to him in Spanish and be surprised us by talking ber be likes his job. Exposure at 1/250 second, f/11.
Being able to act fast enough to compose a picture almost instantaneously is like trying to write a love note as a tornado roars toward the house while you're crouching under the kitchen sink.
But when you live in tornado country, you're always prepared and you know just what to do when the siren sounds. The same is true for experienced action photographers. When the buzzer bleats, they respond instinctively because they've thoroughly rehearsed their options until they become second nature.
Shooting high-speed activities can be a rush. But it's also a bit like trying to catch a jumping frog. If you're experienced at frog catching, you just might be able to sneak up from behind and snatch it on the first try.
But most of us aren't experienced, so we'd be better off rounding up our friends and surrounding it. And if we still failed to capture it, well, at least the frog had some fun.
The photographic equivalent of a having a lot of friends is taking a lot of pictures. So in just a few pages we'll show you how to set up your camera to take a lot of pictures quickly and increase your odds of snatching several good pictures from the pandemonium in front of you.
When you're photographing team sports like soccer and football, you can try to isolate an action that occurs in the open field. That way you can single out one or two individuals and not have to deal with a confusing tangle of players.
You might also compose a bit more loosely than normal to accommodate unexpected action, and then crop the picture later in Photoshop. Instead of zooming all the way out to 300mm, settle for 200mm or maybe even 135mm. This runs counter to capturing the flying spit, bloody noses, and clawing fingers that you might better reveal with an in-tight, frame-filling composition; hut it gives you more leeway. Simply put, by casting a wider net you'll catch more of the action. With your zoom lens at a midway setting, you'll also find it easier to zoom out to a wider setting when the action comes pounding toward you, or zoom to a telephoto setting when the action retreats. It's sort of like a tennis player who after each shot returns to the middle of the court so she can better cover the total court.
This loose composition technique works best with a camera offering a resolution of 12 megapixels or more. With such a high resolution camera, even if you need to crop the picture later in Photoshop, you will still have sufficient resolution to make a good-sized print.
Another piece of advice that runs counter to general composition practices is that you may be better off (especially if you're inexperienced) shooting fast action with the camera constantly in the horizontal position—even for vertical subjects—for two reasons. One is that horizontal is the more natural position for holding the camera, so you'll be able to compose and adjust controls easily and quickly. The second is that this orientation reinforces the loose composition technique in that it includes more of the action. You can crop to vertical later.
If you're already comfortable photographing fast action, then by all means hold the camera vertically and fill the frame to strengthen the composition of your photos.
The beight at which you position the camera dramatically impacts how powerful a subject appears.
If for some reason you are shooting from a high angle down at a subject, the subject will appear flat and one dimensional. That high angle sucks the dominance right out of it. Shooting from above, might, however, instill a sense of originality or abstractness, because most of us—except for the times we might be spectators at professional sports stadiums—seldom see subjects from a high angle.
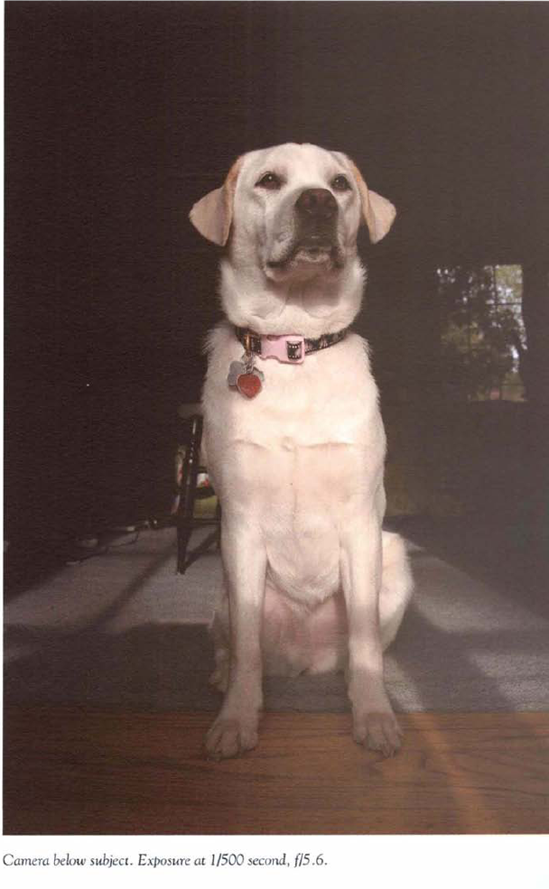
From a low angle you instill athletes with the strength and power you'd expect of them: a soccer goalie, entire body stretched out above you as she leaps, stretches, and deflects a goal attempt, or a hitter's swing exploding as bat strikes ball As you raise the camera, you lower the power of the subject. (Normal viewing angles tend to reveal normal strength and skill.)
Shooting from a low angle exaggerates power even in those who lack it. It turns the feeble and the fumblers into decisive subjects who could be the model of any "after" picture showing the advantages of sports drinks or exercise equipment. From a low angle, even toddlers tower and puppies predominate.
Whether you're crouched or prone on the ground, you'll find holding the camera straight more difficult. Strive to keep the camera square to its subject, unless of course, you want to try the technique of tilting it for a specific effect.
The camera's rectangle presents you a 3:2 ratio of width to beight. Where you choose to place a moving subject within the picture area can dramatically affect interpretation of it. The picture area defines itself with very distinct borders—walls if you would. And who wants to bump into a wall? Well, you just might want your photo subject to, if you seek drama in the picture.
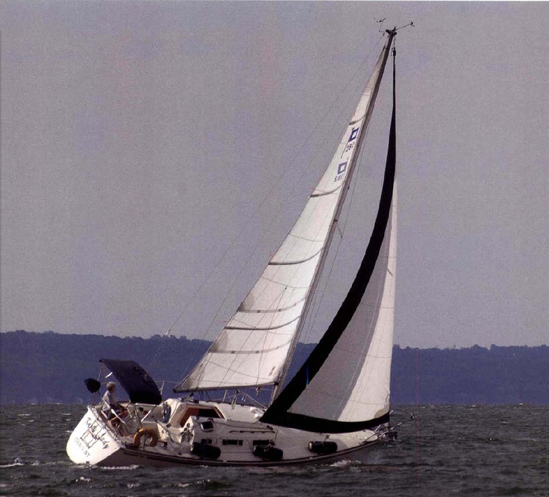
Figure 6.27. For a relaxed and pleasing composition of a moving subject, provide some space in front of its path so the composition doesn't seem cramped and claustrophobic Exposure at 1/640 second, f/9.
Back to the main question: Where should you place the subject within that rectangle? That all depends on your intent. If your intent is to present balance and harmony, follow the famous rule of thirds (itself derived from a golden rule created by Greek mathematicians and embodied in the design of theParthenon). It dictates a specific placement to achieve visual balance. Imagine a tic-tac-toe grid imposed over your scene or the camera viewfinder. Any of the intersections of lines pinpoint a "thirds" area of the grid where you could place the subject or an important part of the subject.
Another general guideline for action shooting is to leave about one-third of the picture area in front of a moving subject so it has space to move into. Speed seems to demand an area to move into because the essence of fast-moving subjects is that they depart almost as soon as they arrive—so give them a place to go. That space ahead also implies a runway or track for building acceleration. For that reason, a cyclist racing across the photo will more likely seem to be gaining speed when there's space in front of him to move into.
By both western culture and photographic convention, the preferred direction of movement is left to right. That's largely because the alphabet of the western world is written left to right, which trains our eyes from early childhood to expect to move left to right when looking at paper (or a monitor). So it's a natural and expected eye movement for us to scan for subjects left to right, despite the fact that you'll often be photographing subjects moving in the opposite direction.
But what if you don't want to convey just speed? What if you want to depict recklessness or daring on the edge of disaster, or uncontrolled power? Then jam the front wheel of that motocross bike into the lower right corner as if it were about to splat into the ground. Or toss that leaping wave runner into the upper right quadrant so it seems to be rocketing out of control by putting part of it out of the picture. You don't even have to do this on purpose: more times than you'd think possible, you'll find you've taken a number of pictures in which your high-speed subject has already half fled the scene.
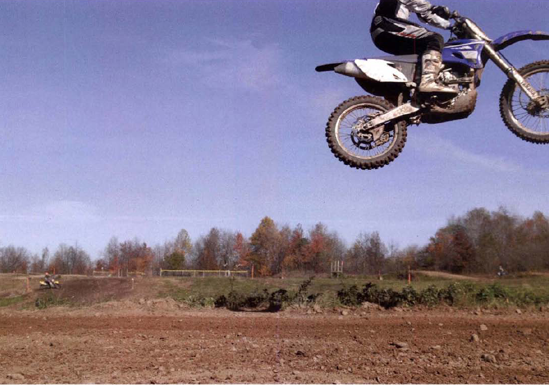
Figure 6.28. Want to convey a sense of recklessness and speed? Push your subject to the pictures edge and maybe even cut part of it off. Exposure at 1/ 2500 second, f/8,
When positioning your subject in the picture area, you can follow the guidelines for placing subjects, or you can ignore them to achieve your own purposes. But whatever you do, use that rectangular picture frame to amplify attitude and modulate mood.
How big should you show the subject? Should it fill the entire frame, half the frame, one quarter? Would there ever be a reason to show an action subject filling only a tenth of the frame—reducing it to an almost insignificant force? (Hmm, how tempting.) Although you usually decide these things almost automatically and subconsciously, taking pictures requires you to make hundreds of choices.
Should you show that beach volleyball player tightly-framed as she grimaces and dives to dig out a wayward ball; or should you show ber smaller, with ber teammates positioning themselves for ber save; or pull back even farther to show the spectators rising to their feet in anticipation of a spectacular play? I think you're beginning to see how subject size impacts the picture.

Figure 6.29. Showing a subject from a distance adds atmosphere and context while reducing intensity. Exposure at 1/90 second, f/5.6.
If you're still not with me, let's spell it out. How big you show a subject largely determines the mood or objective you're setting. Showing a subject small and its surroundings relatively Large establishes context and interaction and dependency on others. Showing your subject big, almost frame-filling, can reveal an individual effort of grace, power, or skill (or even the opposite—clumsiness and blunder). You can add many nuances between those bookends, depending on any additional factors you want to consider.
Subject size affects not only mood. The bigger you show the subject, the greater the number of technical challenges you impose on yourself. Accurate focus, fast focus, sufficient depth of field, freezing the action, an appealing composition; all these and more becomes increasingly difficult as the subject starts to fill the picture area.
With the subject smaller, seen from a distance as it were, small and middle-sized details (hands, for example) draw less attention. Fingers awkwardly bent, a face turned away, and other minor "errors" present few problems because they aren't of a significant size. But up close, even small flaws are thrust before you for inspection. You can expect your yield of pictures to fall when you show a subject large, because a problem that might otherwise have been minor tends to be magnified and become a big deal.
Imagine that you want to take a sharply-focused shot of a frame-filling gymnast as she performs a twisting dismount from the balance beam. Not only must you catch ber in a pleasing position from among the hundreds of rapidly evolving positions of the dismount, but you must freeze ber movement with a very fast shutter speed; your camera's focus mechanism must keep up with ber during all these gyrations; and your aperture and focus must work in concert, so that—if you freeze ber motion—the depth of field is deep enough that nearly ber whole body appears sharp.
That's a lot to keep track of, isn't it?
Like subject size, subject direction influences the resulting mood of the picture.
Let's simplify this discussion by reducing the infinite possibilities of subject direction to three broad categories: subject movement directly toward or directly away from you (advancing or receding action that moves perpendicular to your outstretched arms); subject movement crossing in front of you ("crossways" action that moves parallel to your outstretched arms); and diagonal subject motion.
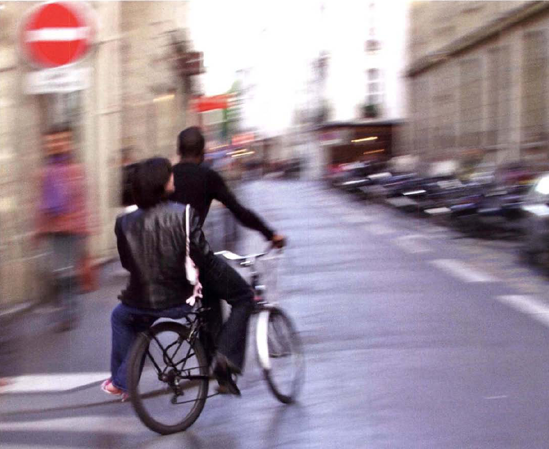
Figure 6.31. Mating a turn, bicyclist and friend seem to be leaving you behind as they bead down a Parisian street for an unknown destination. Exposure at 118 second, f/11.
Technically speaking, a subject moving directly toward you (or directly away from you) is the easiest to photograph.
Creatively, bead-on movement offers you fewer choices. You can't really pan a subject that is moving directly at you, so the option of a motion-blur photograph falls to the wayside (although you could zoom it). A subject moving directly at you offers none of the dramatic profile of legs, arms, chest, bead, and other body parts extended in action postures. So conveying the drama of action in a freeze shot also becomes more difficult. With the subject coming directly at you, you do, however, put the viewer in a direct line of action so it might seem as if a fullback or a racehorse is about to run right over you.
Creatively, subjects moving across the scene in front of you offer a variety of opportunities to reveal action and portray excitement and emotion. Imagine a sprinter rising out of the starting blocks. From the side you are presented a profile that reveals all the action postures: arms cocked and stretching out, legs lunging, bead tilted. It's when they're seen from the side that most subjects best show positions and movements that shout power and speed.
Not surprisingly, subjects moving diagonally to the camera offer a Technical and aesthetic mix of the other two directions. Direct or implied diagonal lines are often considered both powerful and dynamic. They tend to lead the eye through most of the picture establishing the greatest range of dimension possible in rectangular picture.
Unlike bead-on and crossing subjects, diagonally moving subjects usually show two sides of themselves, making the picture seem more three-dimensional. In action shots the added dimensionality of showing another side can reveal muscles or postures that reinforce strength and agility.