Successful photographers and artists have an intimate understanding of the importance of light in shaping an image. Rembrandt was a master of using light to create moods and reveal the character of his subjects. Late artist Thomas Kinkade’s official tagline was “Painter of Light.” Dean Collins, co-founder of Finelight Studios, revolutionized how a whole generation of photographers learned and used lighting. It’s impossible to underestimate how the use of light adds to—and how misuse can detract from—your photographs.
All forms of visual art use light to shape the finished product. Sculptors don’t have control over the light used to illuminate their finished work, so they must create shapes using planes and curved surfaces so that the form envisioned by the artist comes to life from a variety of viewing and lighting angles. Painters, in contrast, have absolute control over both shape and light in their work, as well as the viewing angle, so they can use both the contours of their two-dimensional subjects and the qualities of the “light” they use to illuminate those subjects to evoke the image they want to produce.
Photography is a third form of art. The photographer may have little or no control over the subject (other than posing human subjects) but can often adjust both viewing angle and the nature of the light source to create a particular compelling image. The direction and intensity of the light sources create the shapes and textures that we see. The distribution and proportions determine the contrast and tonal values: whether the image is stark or high key, or muted and low in contrast. The colors of the light (because even “white” light has a color balance that the sensor can detect), and how much of those colors the subject reflects or absorbs, paint the hues visible in the image.
As a Nikon D5500 photographer, you must learn to be a painter and sculptor of light if you want to move from taking a picture to making a photograph. This chapter provides an introduction to using the two main types of illumination: continuous lighting (such as daylight, incandescent, or fluorescent sources) and the brief, but brilliant snippets of light we call electronic flash.
Continuous Illumination versus Electronic Flash
Continuous lighting is exactly what you might think: uninterrupted illumination that is available all the time during a shooting session. Daylight, moonlight, and the artificial lighting encountered both indoors and outdoors count as continuous light sources (although all of them can be “interrupted” by passing clouds, solar eclipses, a blown fuse, or simply by switching off a lamp). Indoor continuous illumination includes both the lights that are there already (such as incandescent lamps or overhead fluorescent lights indoors) and fixtures you supply yourself, including photoflood lamps or reflectors used to bounce existing light onto your subject.
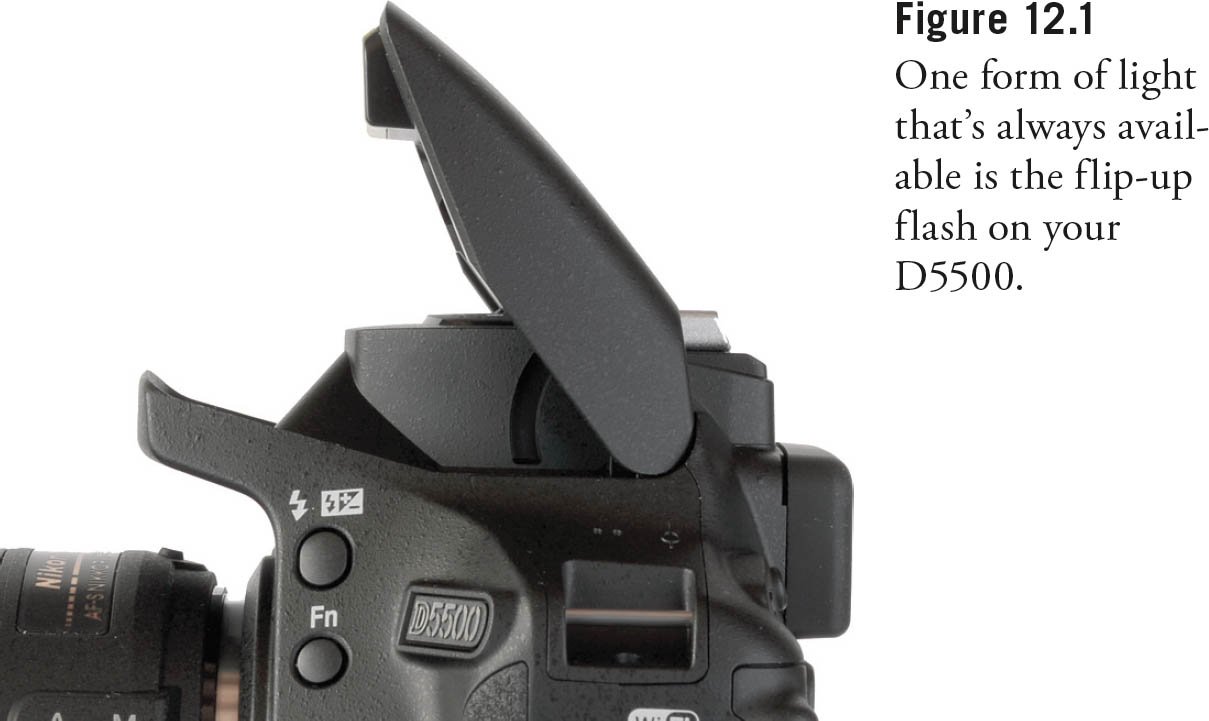
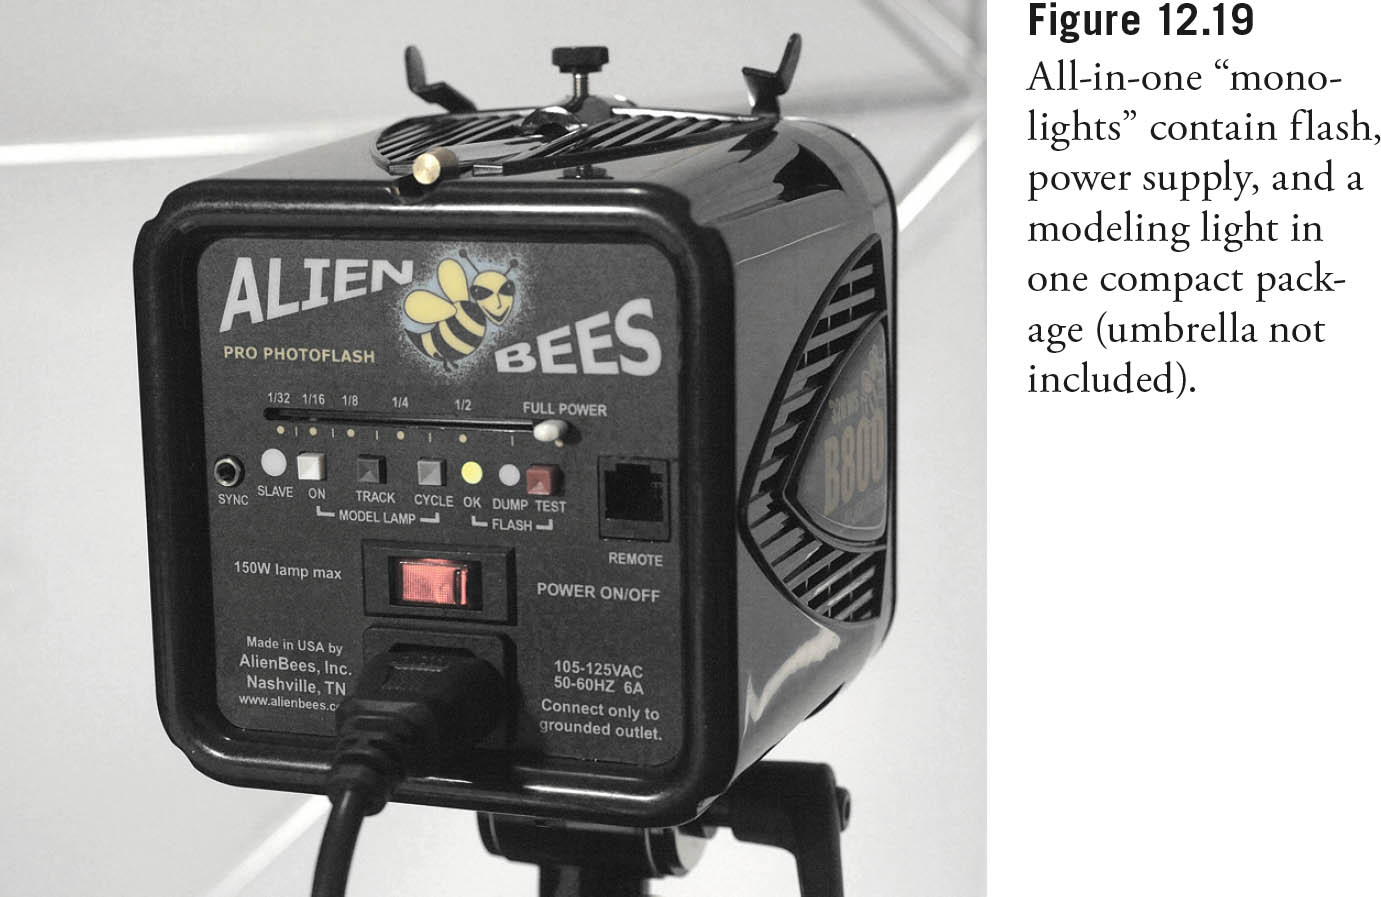
Your D5500 has a flip-up electronic flash unit built in, as shown in Figure 12.1. But you can also use an external flash, either mounted on the D5500’s accessory shoe or used off-camera and linked with a cable or triggered by a wireless trigger or a slave light (which sets off a flash when it senses the firing of another unit). Studio flash units are electronic flash, too, and aren’t limited to “professional” shooters, as there are economical “monolight” (one-piece flash/power supply) units available in the $200 price range. Serious photographers with some spare cash can buy a couple to store in a closet and use to set up a home studio, or use as supplementary lighting when traveling away from home. You’ll need a remote trigger mounted on the D5500’s accessory/hot shoe, or an accessory/ hot shoe–to-PC connector adapter to use studio flash with your camera.
There are advantages and disadvantages to each type of illumination. Here’s a quick checklist of pros and cons:
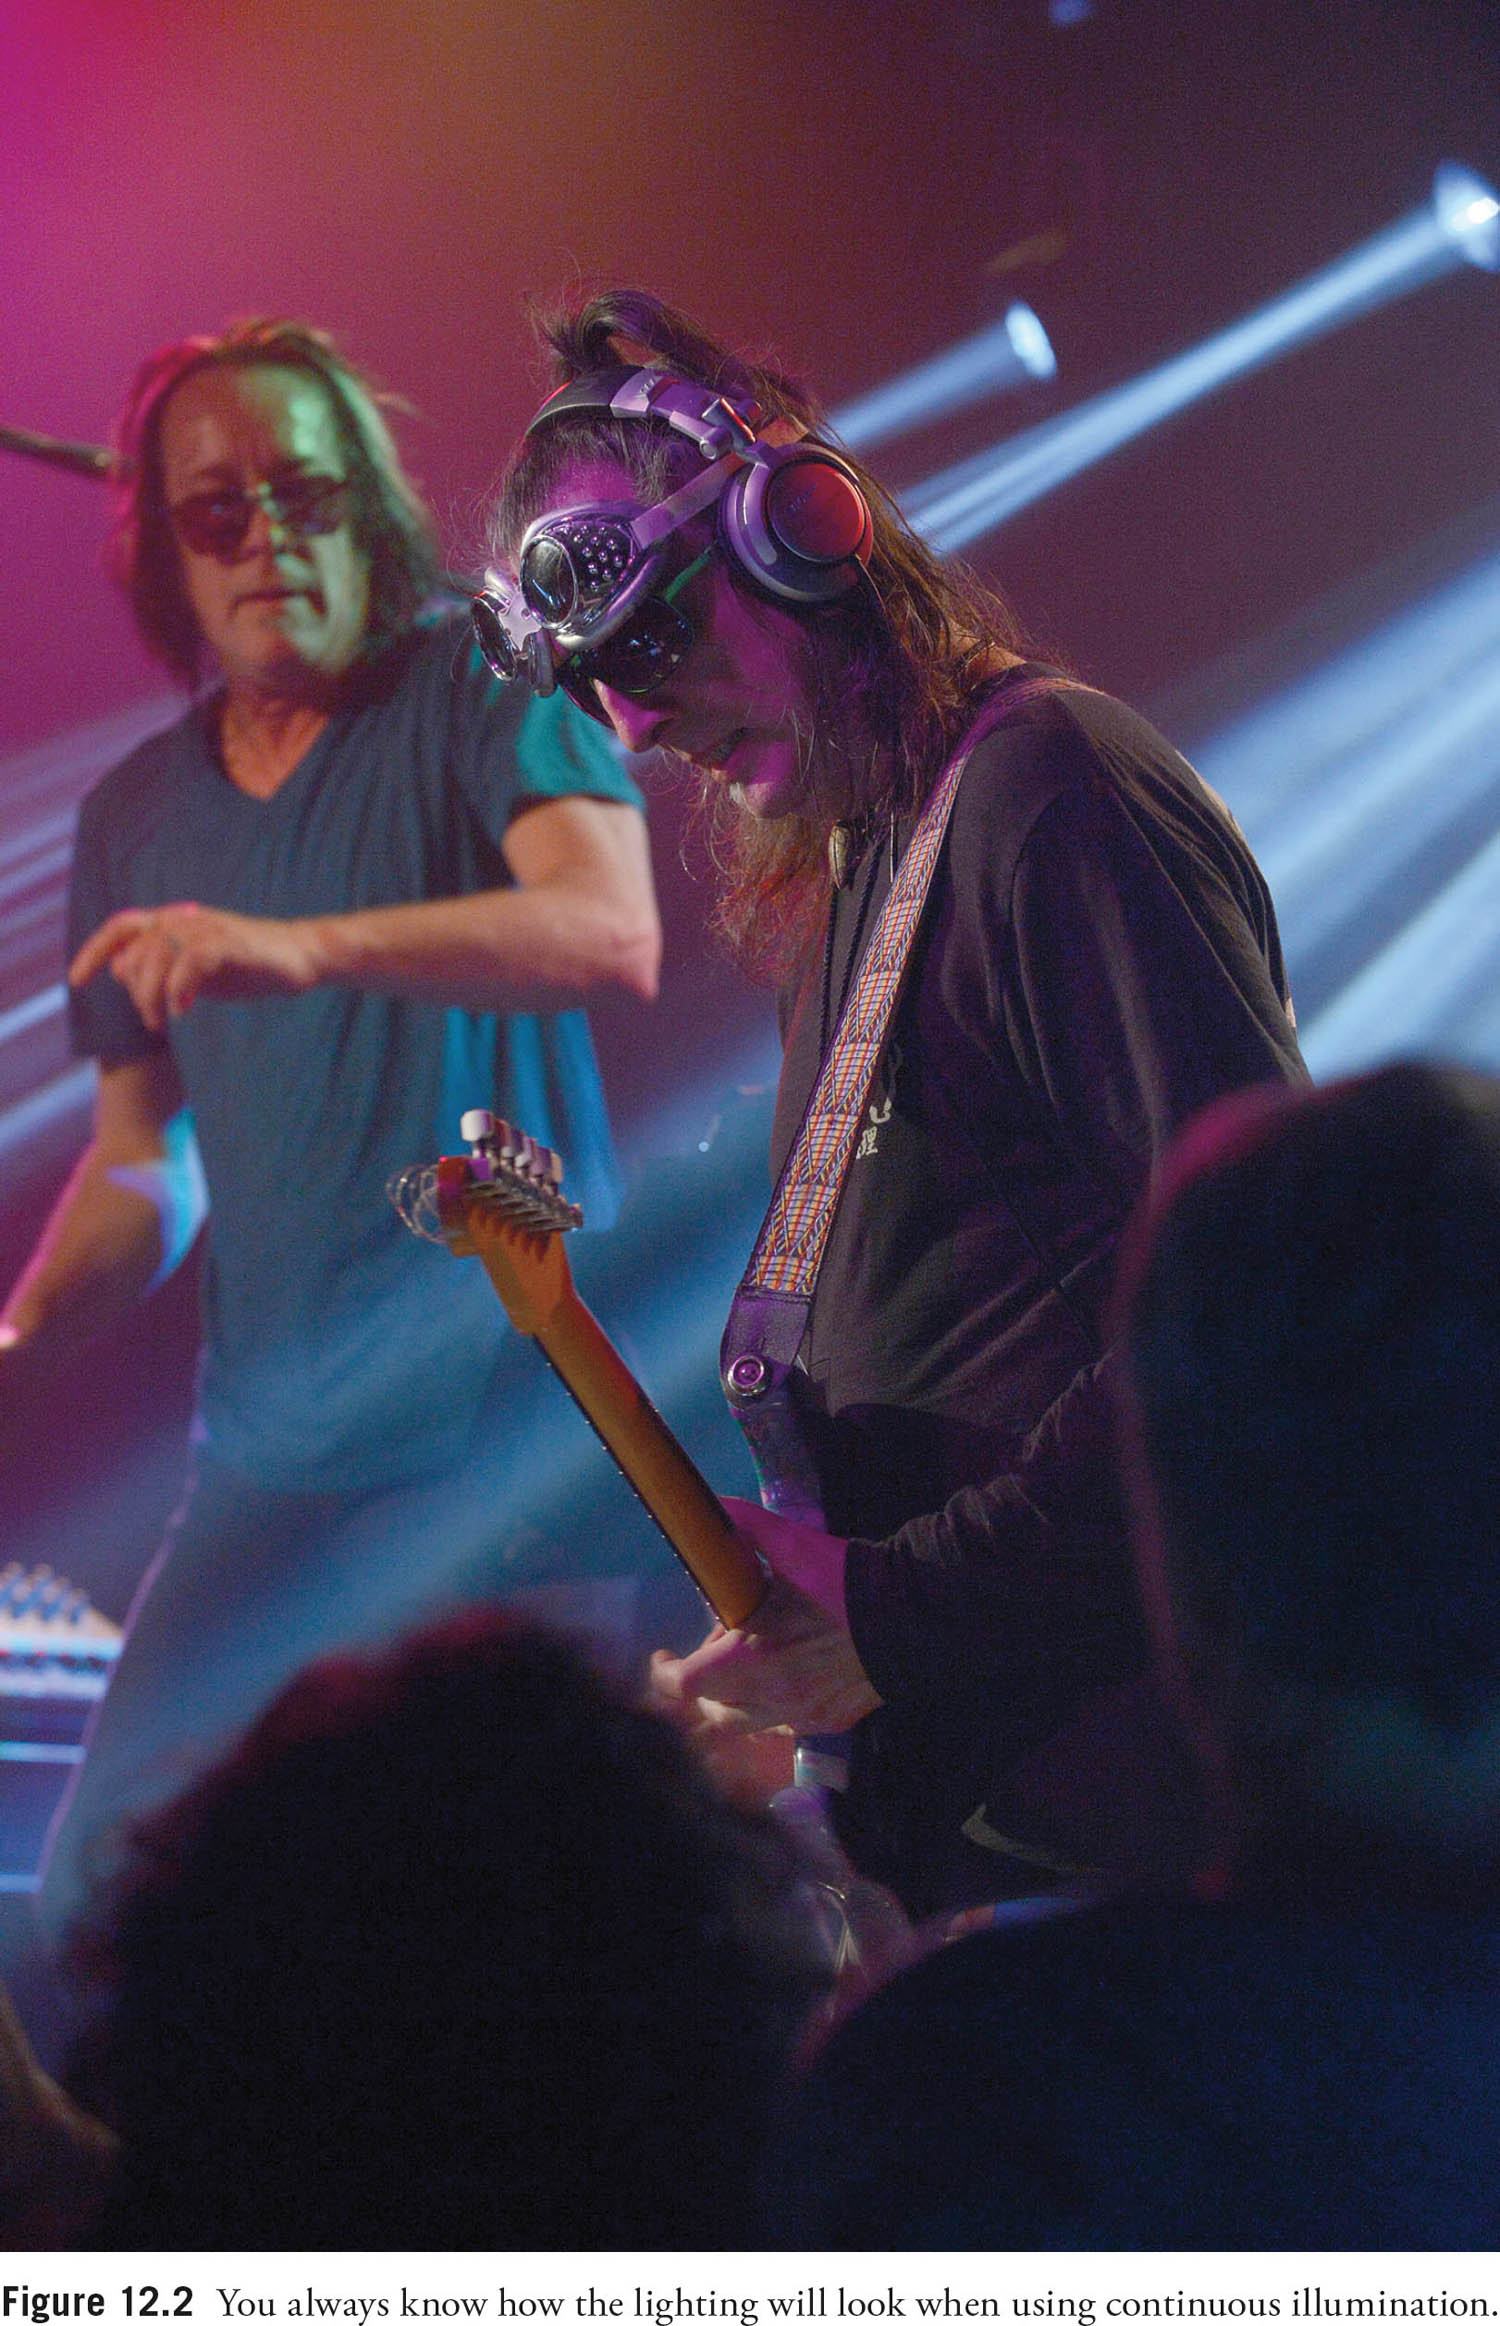
![]() Lighting preview—Pro: continuous lighting. With continuous lighting, you always know exactly what kind of lighting effect you’re going to get and, if multiple lights are used, how they will interact with each other, as shown in Figure 12.2.
Lighting preview—Pro: continuous lighting. With continuous lighting, you always know exactly what kind of lighting effect you’re going to get and, if multiple lights are used, how they will interact with each other, as shown in Figure 12.2.
![]() Lighting preview—Con: electronic flash. With flash, the general effect you’re going to see may be a mystery until you’ve built some experience, and you may need to review a shot on the LCD, make some adjustments, and then reshoot to get the look you want. (In this sense, a digital camera’s review capabilities replace the Polaroid test shots pro photographers relied on in decades past.)
Lighting preview—Con: electronic flash. With flash, the general effect you’re going to see may be a mystery until you’ve built some experience, and you may need to review a shot on the LCD, make some adjustments, and then reshoot to get the look you want. (In this sense, a digital camera’s review capabilities replace the Polaroid test shots pro photographers relied on in decades past.)
![]() Exposure calculation—Pro: continuous lighting. Your D5500 has no problem calculating exposure for continuous lighting, because it remains constant and can be measured through the 2,016-pixel sensor that interprets the light reaching the viewfinder. The amount of light available just before the exposure will, in almost all cases, be the same amount of light present when the shutter is released. The D5500’s Spot metering mode can be used to measure and compare the proportions of light in the highlights and shadows, so you can make an adjustment (such as using more or less fill light) if necessary. You can even use a hand-held light meter to measure the light yourself.
Exposure calculation—Pro: continuous lighting. Your D5500 has no problem calculating exposure for continuous lighting, because it remains constant and can be measured through the 2,016-pixel sensor that interprets the light reaching the viewfinder. The amount of light available just before the exposure will, in almost all cases, be the same amount of light present when the shutter is released. The D5500’s Spot metering mode can be used to measure and compare the proportions of light in the highlights and shadows, so you can make an adjustment (such as using more or less fill light) if necessary. You can even use a hand-held light meter to measure the light yourself.
![]() Exposure calculation—Con: electronic flash. Electronic flash illumination doesn’t exist until the flash fires, and so can’t be measured by the D5500’s exposure sensor when the mirror is flipped up at the moment of exposure. Instead, the light must be measured by metering the intensity of a pre-flash triggered an instant before the main flash, as it is reflected back to the camera and through the lens. A less attractive alternative, available with higher-end Nikon flash units like the SB-910, is to use a sensor built into the external flash itself and measure reflected light that bounces back, but which has not traveled through the lens. If you have a do-it-yourself bent, there are hand-held flash meters, too, including models that measure both flash and continuous light, so you need only one meter for both types of illumination.
Exposure calculation—Con: electronic flash. Electronic flash illumination doesn’t exist until the flash fires, and so can’t be measured by the D5500’s exposure sensor when the mirror is flipped up at the moment of exposure. Instead, the light must be measured by metering the intensity of a pre-flash triggered an instant before the main flash, as it is reflected back to the camera and through the lens. A less attractive alternative, available with higher-end Nikon flash units like the SB-910, is to use a sensor built into the external flash itself and measure reflected light that bounces back, but which has not traveled through the lens. If you have a do-it-yourself bent, there are hand-held flash meters, too, including models that measure both flash and continuous light, so you need only one meter for both types of illumination.
![]() Evenness of illumination—Pro/con: continuous lighting. Of the continuous light sources, daylight, in particular, provides illumination that tends to fill an image completely, lighting up the foreground, background, and your subject almost equally. Shadows do come into play, of course, so you might need to use reflectors or fill-in additional light sources to even out the illumination further. But, barring objects that block large sections of your image from daylight, the light is spread fairly evenly. Indoors, however, continuous lighting is commonly less evenly distributed. The average living room, for example, has hot spots near the lamps and overhead lights, and dark corners located farther from those light sources. But on the plus side, you can easily see this uneven illumination and compensate with additional lamps.
Evenness of illumination—Pro/con: continuous lighting. Of the continuous light sources, daylight, in particular, provides illumination that tends to fill an image completely, lighting up the foreground, background, and your subject almost equally. Shadows do come into play, of course, so you might need to use reflectors or fill-in additional light sources to even out the illumination further. But, barring objects that block large sections of your image from daylight, the light is spread fairly evenly. Indoors, however, continuous lighting is commonly less evenly distributed. The average living room, for example, has hot spots near the lamps and overhead lights, and dark corners located farther from those light sources. But on the plus side, you can easily see this uneven illumination and compensate with additional lamps.
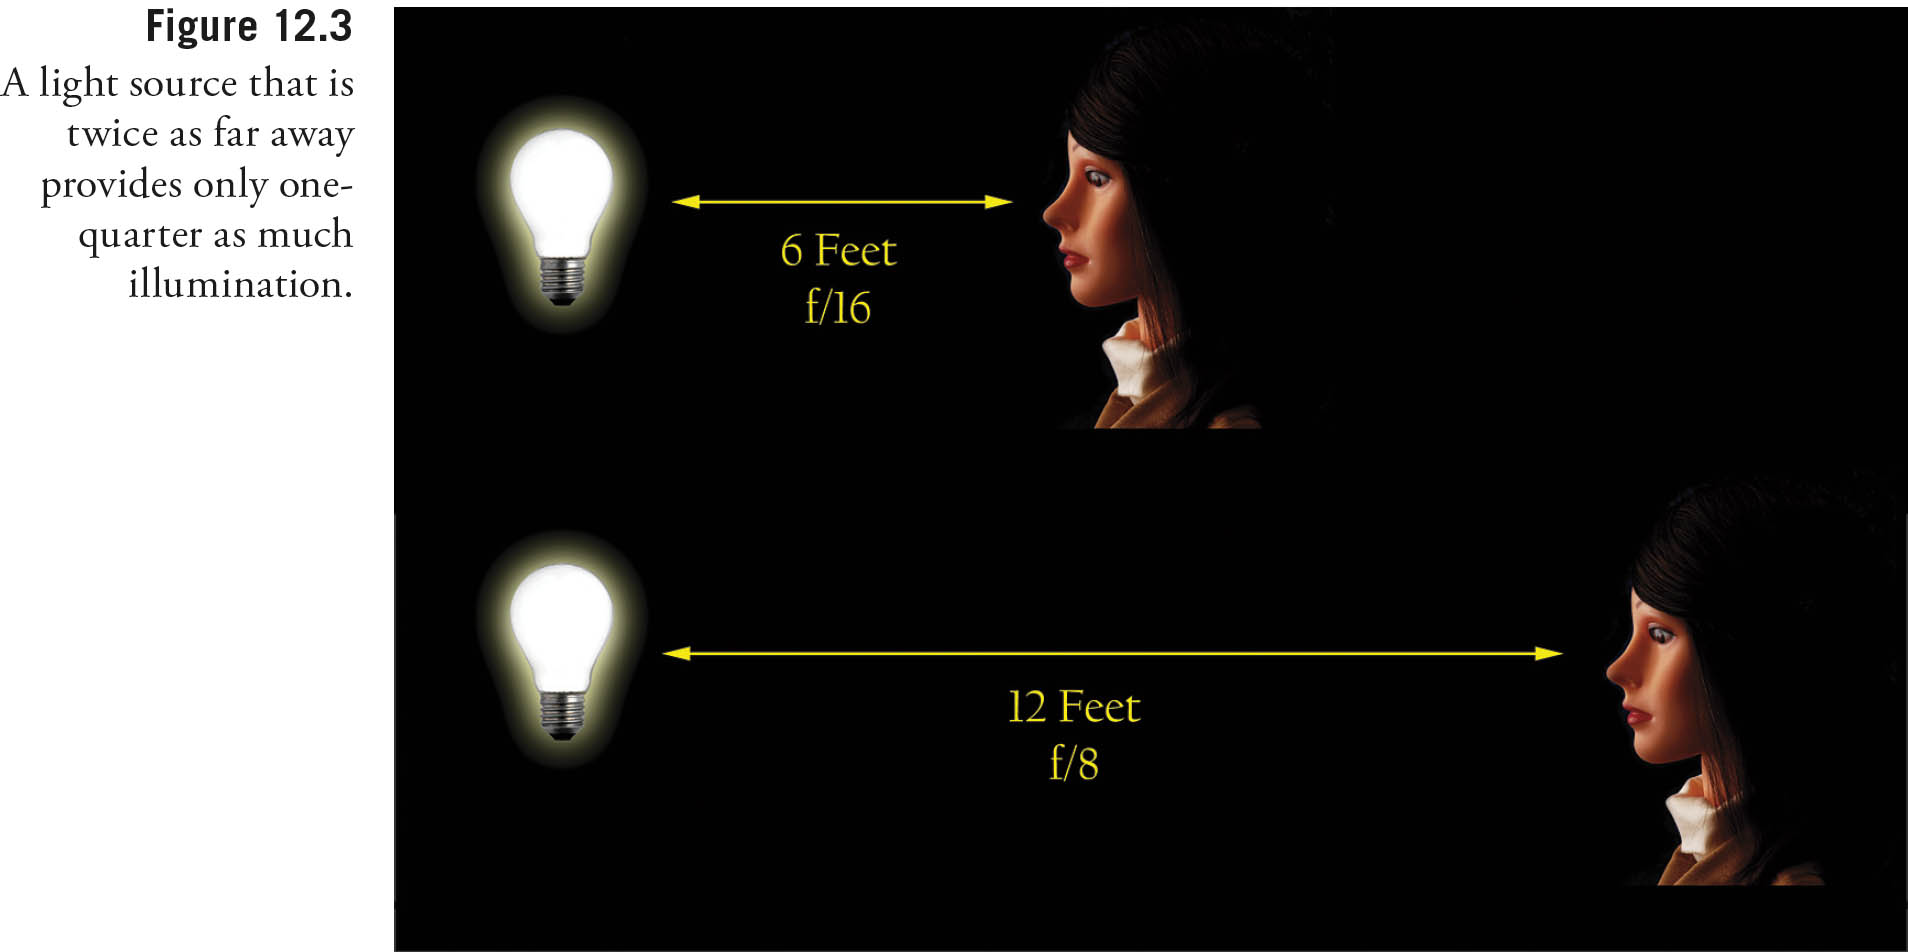
![]() Evenness of illumination—Con: electronic flash. Electronic flash units, like continuous light sources such as lamps that don’t have the advantage of being located 93 million miles from the subject, suffer from the effects of their proximity. The inverse square law, first applied to both gravity and light by Sir Isaac Newton, dictates that as a light source’s distance increases from the subject, the amount of light reaching the subject falls off proportionately to the square of the distance. In plain English, that means that a flash or lamp that’s 12 feet away from a subject provides only one-quarter as much illumination as a source that’s 6 feet away (rather than half as much). (See Figure 12.3.) This translates into relatively shallow “depth-of-light.”
Evenness of illumination—Con: electronic flash. Electronic flash units, like continuous light sources such as lamps that don’t have the advantage of being located 93 million miles from the subject, suffer from the effects of their proximity. The inverse square law, first applied to both gravity and light by Sir Isaac Newton, dictates that as a light source’s distance increases from the subject, the amount of light reaching the subject falls off proportionately to the square of the distance. In plain English, that means that a flash or lamp that’s 12 feet away from a subject provides only one-quarter as much illumination as a source that’s 6 feet away (rather than half as much). (See Figure 12.3.) This translates into relatively shallow “depth-of-light.”
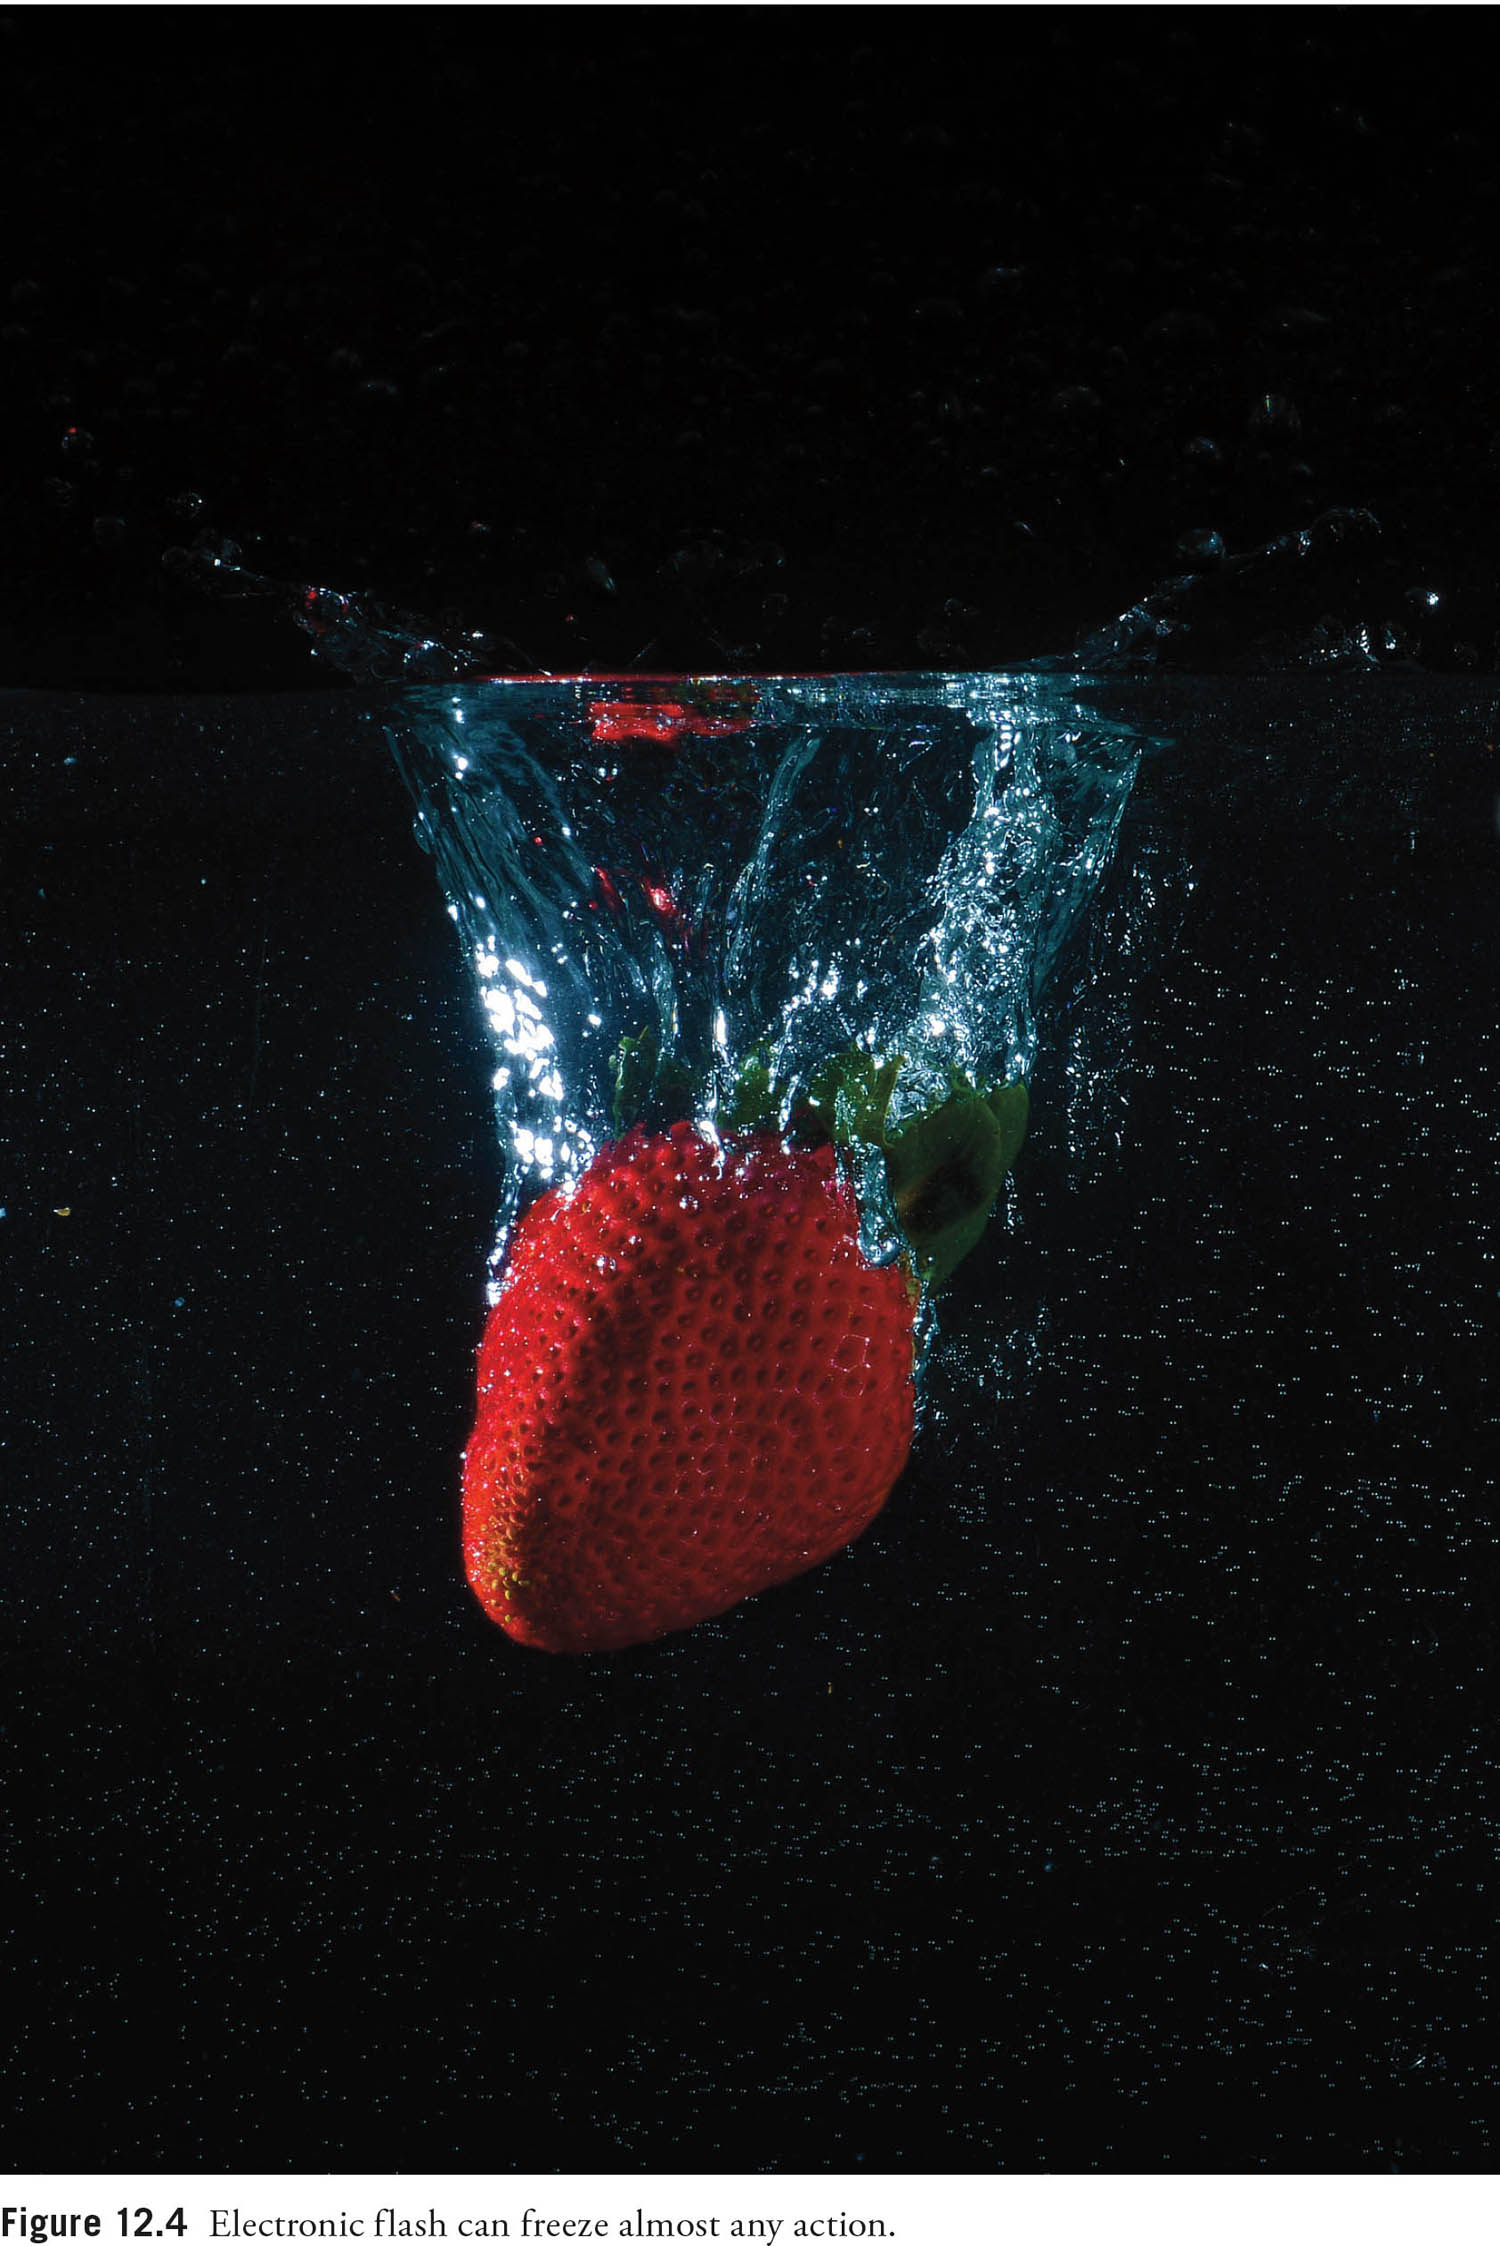
![]() Action stopping—Pro: electronic flash. When it comes to the ability to freeze moving objects in their tracks, the advantage goes to electronic flash. The brief duration of electronic flash serves as a very high “shutter speed” when the flash is the main or only source of illumination for the photo. Your D5500’s shutter speed may be set for 1/200th second during a flash exposure, but if the flash illumination predominates, the effective exposure time will be the 1/1,000th to 1/50,000th second or less duration of the flash, as you can see in Figure 12.4, in a shot of a strawberry dropping into a tank of water. The only fly in the ointment is that, if the ambient light is strong enough, it may produce a secondary, “ghost” exposure, as I’ll explain later in this chapter.
Action stopping—Pro: electronic flash. When it comes to the ability to freeze moving objects in their tracks, the advantage goes to electronic flash. The brief duration of electronic flash serves as a very high “shutter speed” when the flash is the main or only source of illumination for the photo. Your D5500’s shutter speed may be set for 1/200th second during a flash exposure, but if the flash illumination predominates, the effective exposure time will be the 1/1,000th to 1/50,000th second or less duration of the flash, as you can see in Figure 12.4, in a shot of a strawberry dropping into a tank of water. The only fly in the ointment is that, if the ambient light is strong enough, it may produce a secondary, “ghost” exposure, as I’ll explain later in this chapter.
![]() Action stopping—Con: continuous lighting. Action stopping with continuous light sources is completely dependent on the shutter speed you’ve dialed in on the camera. And the speeds available are dependent on the amount of light available and your ISO sensitivity setting. Outdoors in daylight, there will probably be enough sunlight to let you shoot at 1/2,000th second and f/6.3 with a non-grainy sensitivity setting for your D5500 of ISO 400. That’s a fairly useful combination of settings if you’re not using a super-telephoto with a small maximum aperture. But inside, the reduced illumination quickly has you pushing your D5500 to its limits. For example, if you’re shooting indoor sports, there probably won’t be enough available light to allow you to use a 1/2,000th second shutter speed (although I routinely shoot indoor basketball with my D5500 at ISO 1600 and 1/500th second at f/4). The D5500 is not my favorite indoor sports camera, but it works surprisingly well. But in many indoor sports situations, the lack of available light, and the D5500’s increased visual noise at settings of ISO 6400 and above, you may find yourself limited to 1/500th second or slower.
Action stopping—Con: continuous lighting. Action stopping with continuous light sources is completely dependent on the shutter speed you’ve dialed in on the camera. And the speeds available are dependent on the amount of light available and your ISO sensitivity setting. Outdoors in daylight, there will probably be enough sunlight to let you shoot at 1/2,000th second and f/6.3 with a non-grainy sensitivity setting for your D5500 of ISO 400. That’s a fairly useful combination of settings if you’re not using a super-telephoto with a small maximum aperture. But inside, the reduced illumination quickly has you pushing your D5500 to its limits. For example, if you’re shooting indoor sports, there probably won’t be enough available light to allow you to use a 1/2,000th second shutter speed (although I routinely shoot indoor basketball with my D5500 at ISO 1600 and 1/500th second at f/4). The D5500 is not my favorite indoor sports camera, but it works surprisingly well. But in many indoor sports situations, the lack of available light, and the D5500’s increased visual noise at settings of ISO 6400 and above, you may find yourself limited to 1/500th second or slower.
![]() Cost—Pro: continuous lighting. Incandescent or fluorescent lamps are generally much less expensive than electronic flash units, which can easily cost several hundred dollars. I’ve used everything from desktop high-intensity lamps to reflector flood lights for continuous illumination at very little cost. There are lamps made especially for photographic purposes, too. Maintenance is economical, too: many incandescent or fluorescents use bulbs that cost only a few dollars.
Cost—Pro: continuous lighting. Incandescent or fluorescent lamps are generally much less expensive than electronic flash units, which can easily cost several hundred dollars. I’ve used everything from desktop high-intensity lamps to reflector flood lights for continuous illumination at very little cost. There are lamps made especially for photographic purposes, too. Maintenance is economical, too: many incandescent or fluorescents use bulbs that cost only a few dollars.
![]() Cost—Con: electronic flash. Electronic flash units aren’t particularly cheap. The lowest-cost dedicated flash designed specifically for the Nikon dSLRs is about $150. Such units are limited in features, however, and intended for those with entry-level cameras. Plan on spending some money to get the features that a sophisticated electronic flash offers. I paid more than $500 for my SB-910, and only a little less for its “mate,” an SB-900 that I purchased a couple years ago. I’ve got nearly $1,000 sunk into just two battery-operated strobes, and also invested that much—and more—in studio flash units.
Cost—Con: electronic flash. Electronic flash units aren’t particularly cheap. The lowest-cost dedicated flash designed specifically for the Nikon dSLRs is about $150. Such units are limited in features, however, and intended for those with entry-level cameras. Plan on spending some money to get the features that a sophisticated electronic flash offers. I paid more than $500 for my SB-910, and only a little less for its “mate,” an SB-900 that I purchased a couple years ago. I’ve got nearly $1,000 sunk into just two battery-operated strobes, and also invested that much—and more—in studio flash units.
![]() Flexibility—Pro: electronic flash. Electronic flash’s action-freezing power allows you to work without a tripod in the studio (and elsewhere), adding flexibility and speed when choosing angles and positions. Flash units can be easily filtered, and, because the filtration is placed over the light source rather than the lens, you don’t need to use high-quality filter material. For example, Roscoe or Lee lighting gels, which may be too flimsy to use in front of the lens, can be mounted or taped in front of your flash with ease.
Flexibility—Pro: electronic flash. Electronic flash’s action-freezing power allows you to work without a tripod in the studio (and elsewhere), adding flexibility and speed when choosing angles and positions. Flash units can be easily filtered, and, because the filtration is placed over the light source rather than the lens, you don’t need to use high-quality filter material. For example, Roscoe or Lee lighting gels, which may be too flimsy to use in front of the lens, can be mounted or taped in front of your flash with ease.
![]() Flexibility—Con: continuous lighting. Because incandescent and fluorescent lamps are not as bright as electronic flash, the slower shutter speeds required (see “Action stopping,” above) mean that you may have to use a tripod more often, especially when shooting portraits. The incandescent variety of continuous lighting gets hot, especially in the studio, and the side effects range from discomfort (for your human models) to disintegration (if you happen to be shooting perishable foods like ice cream). The heat also makes it more difficult to add filtration to incandescent sources.
Flexibility—Con: continuous lighting. Because incandescent and fluorescent lamps are not as bright as electronic flash, the slower shutter speeds required (see “Action stopping,” above) mean that you may have to use a tripod more often, especially when shooting portraits. The incandescent variety of continuous lighting gets hot, especially in the studio, and the side effects range from discomfort (for your human models) to disintegration (if you happen to be shooting perishable foods like ice cream). The heat also makes it more difficult to add filtration to incandescent sources.
Continuous Lighting Basics
While continuous lighting and its effects are generally much easier to visualize and use than electronic flash, there are some factors you need to take into account, particularly the color temperature of the light. (Color temperature concerns aren’t exclusive to continuous light sources, of course, but the variations tend to be more extreme and less predictable than those of electronic flash, which output relatively consistent daylight-like illumination.)
Color temperature, in practical terms, is how “bluish” or how “reddish” the light appears to be to the digital camera’s sensor. Indoor illumination is quite warm, comparatively, and appears reddish to the sensor. Daylight, in contrast, seems much bluer to the sensor. Our eyes (our brains, actually) are quite adaptable to these variations, so white objects don’t appear to have an orange tinge when viewed indoors, nor do they seem excessively blue outdoors in full daylight. Yet, these color temperature variations are real and the sensor is not fooled. To capture the most accurate colors, we need to take the color temperature into account in setting the color balance (or white balance) of the D5500—either automatically using the camera’s smarts or manually using our own knowledge and experience.
When using the Nikon D5500, you don’t need to think in terms of actual color temperature (although you can measure existing color temperature using the Preset feature described later), because the camera won’t let you set white balance using color temperature values, which are measured in degrees Kelvin. But it is useful to know that warmer (more reddish) color temperatures (measured in degrees Kelvin) are the lower numbers, while cooler (bluer) color temperatures are higher numbers. It might not make sense to say that 3,400K is warmer than 6,000K, but that’s the way it is. If it helps, think of a glowing red ember contrasted with a white-hot welder’s torch, rather than fire and ice.
You can set white balance by type of illumination, and then fine-tune it in the D5500 using the Shooting menu’s White Balance option, as described in Chapter 8. In most cases, however, the Nikon D5500 will do an acceptable job of calculating white balance for you, so Auto can be used as your choice most of the time. Use the preset values or set a custom white balance that matches the current shooting conditions when you need to. The only really problematic light sources are likely to be fluorescents.
Remember that if you shoot RAW, you can specify the white balance of your image when you import it into Photoshop, Photoshop Elements, or another image editor using Nikon Capture NX, Adobe Camera Raw, or your preferred RAW converter. While color-balancing filters that fit on the front of the lens exist, they are primarily useful for film cameras, because film’s color balance can’t be tweaked as extensively as that of a sensor.
Daylight
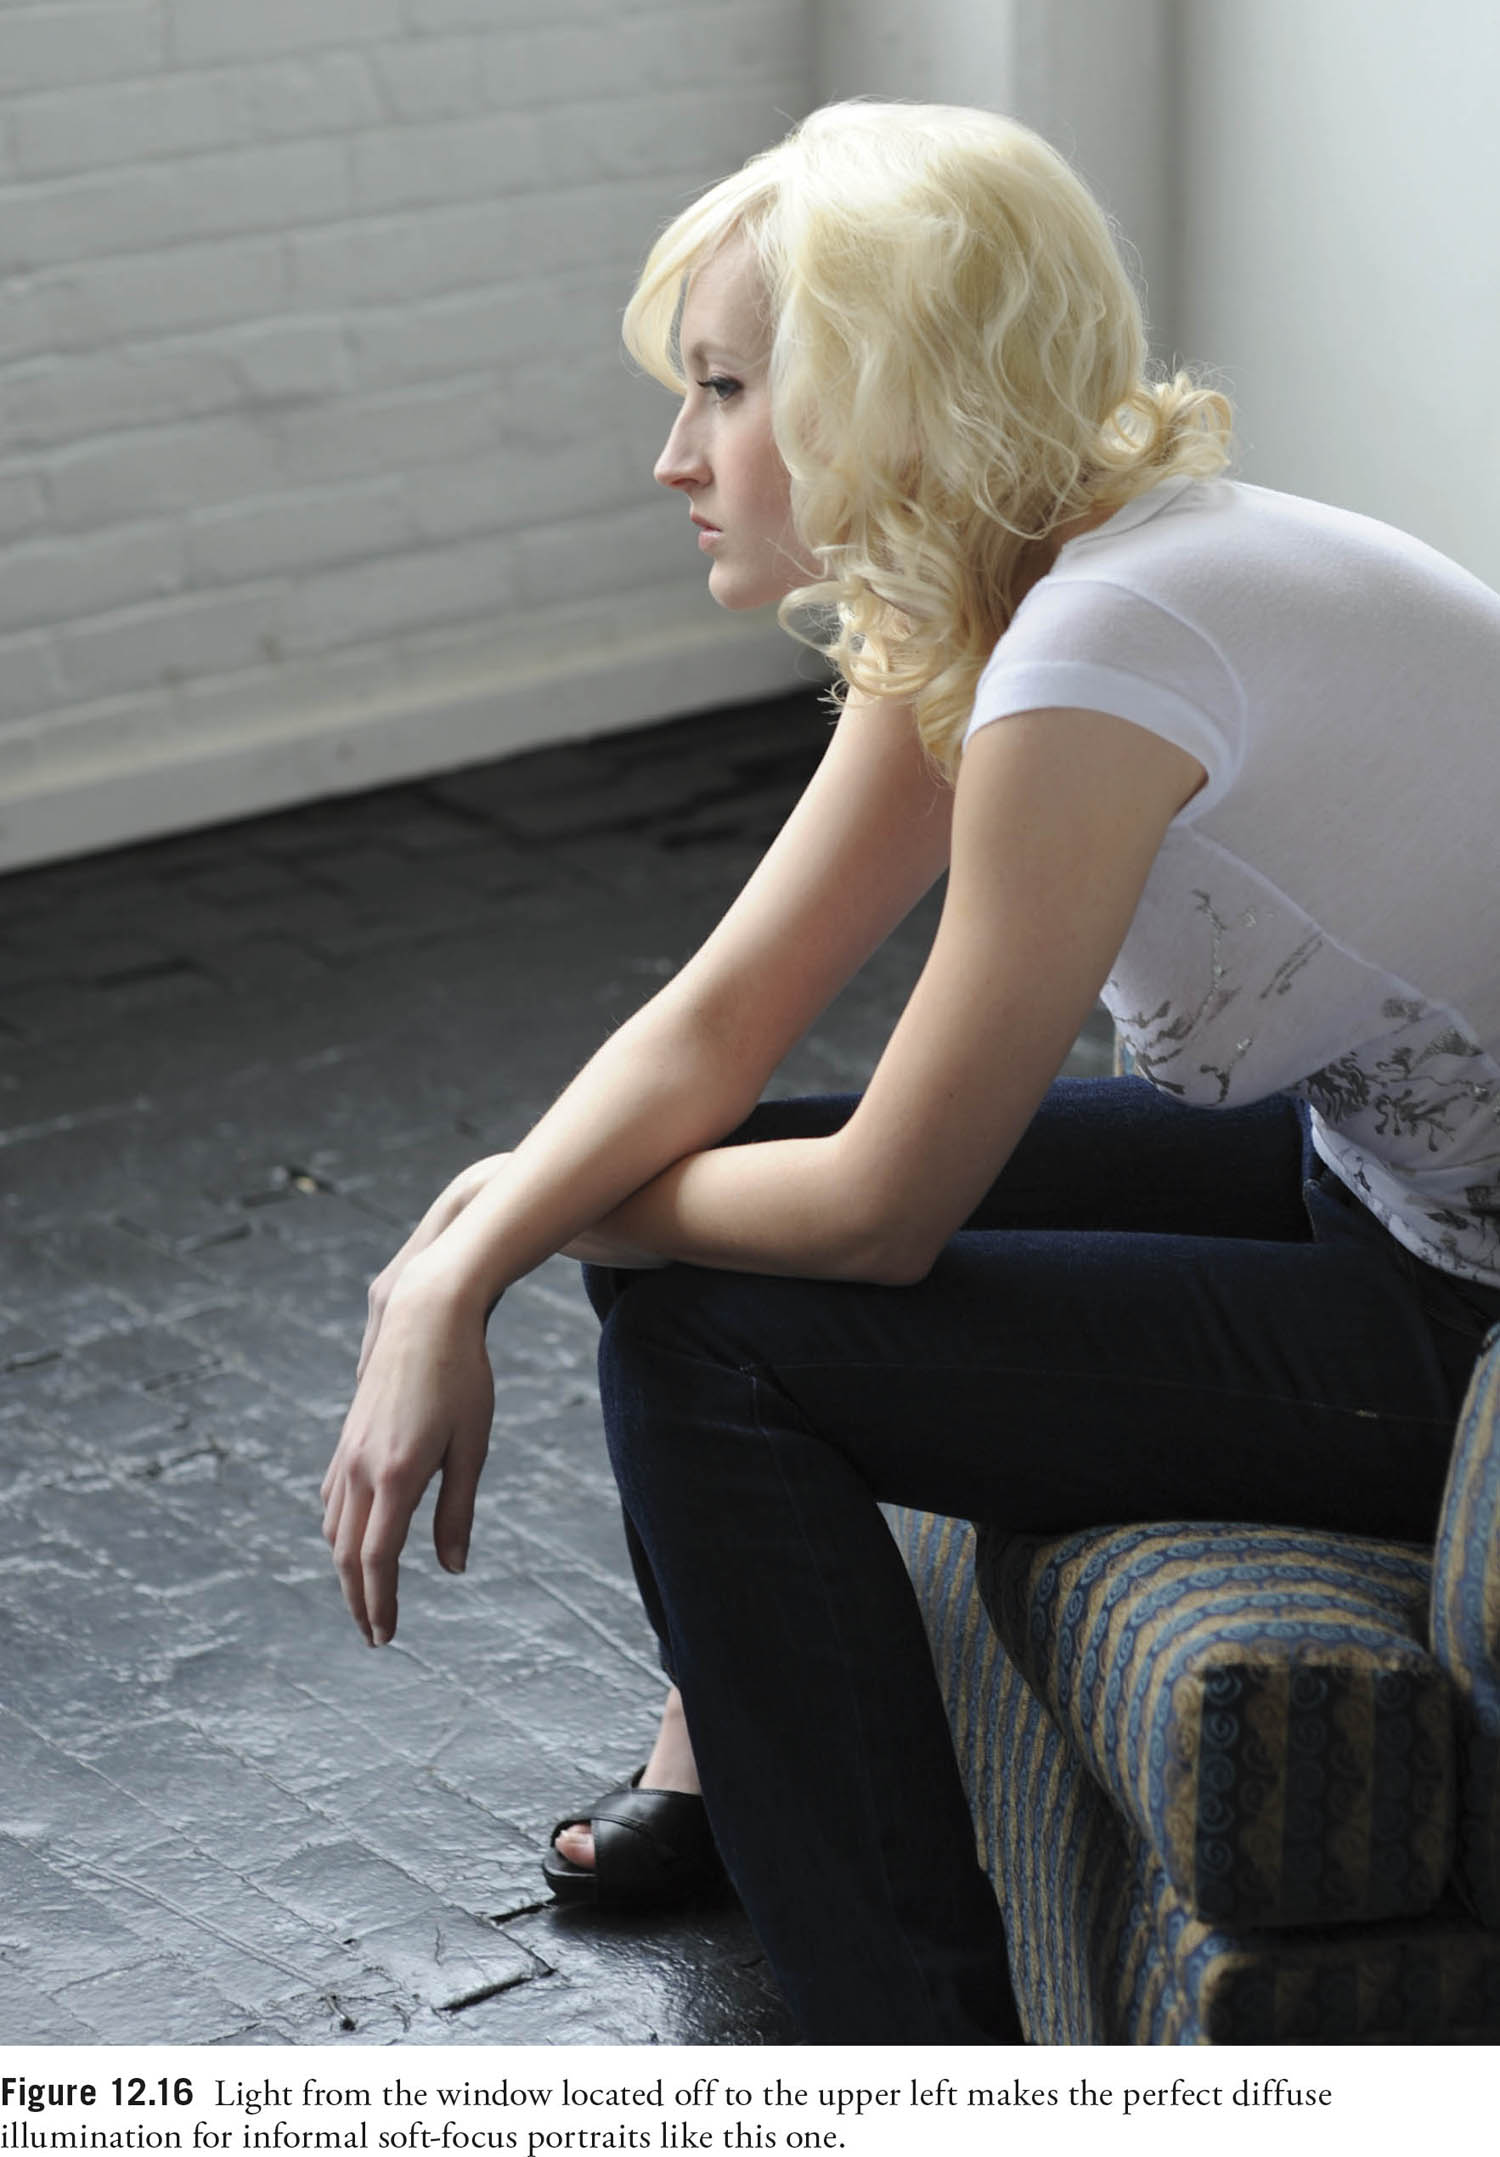
Daylight is produced by the sun, and so is moonlight (which is just reflected sunlight). Daylight is present, of course, even when you can’t see the sun. When sunlight is direct, it can be bright and harsh. If daylight is diffused by clouds, softened by bouncing off objects such as walls or your photo reflectors, or filtered by shade, it can be much dimmer and less contrasty.
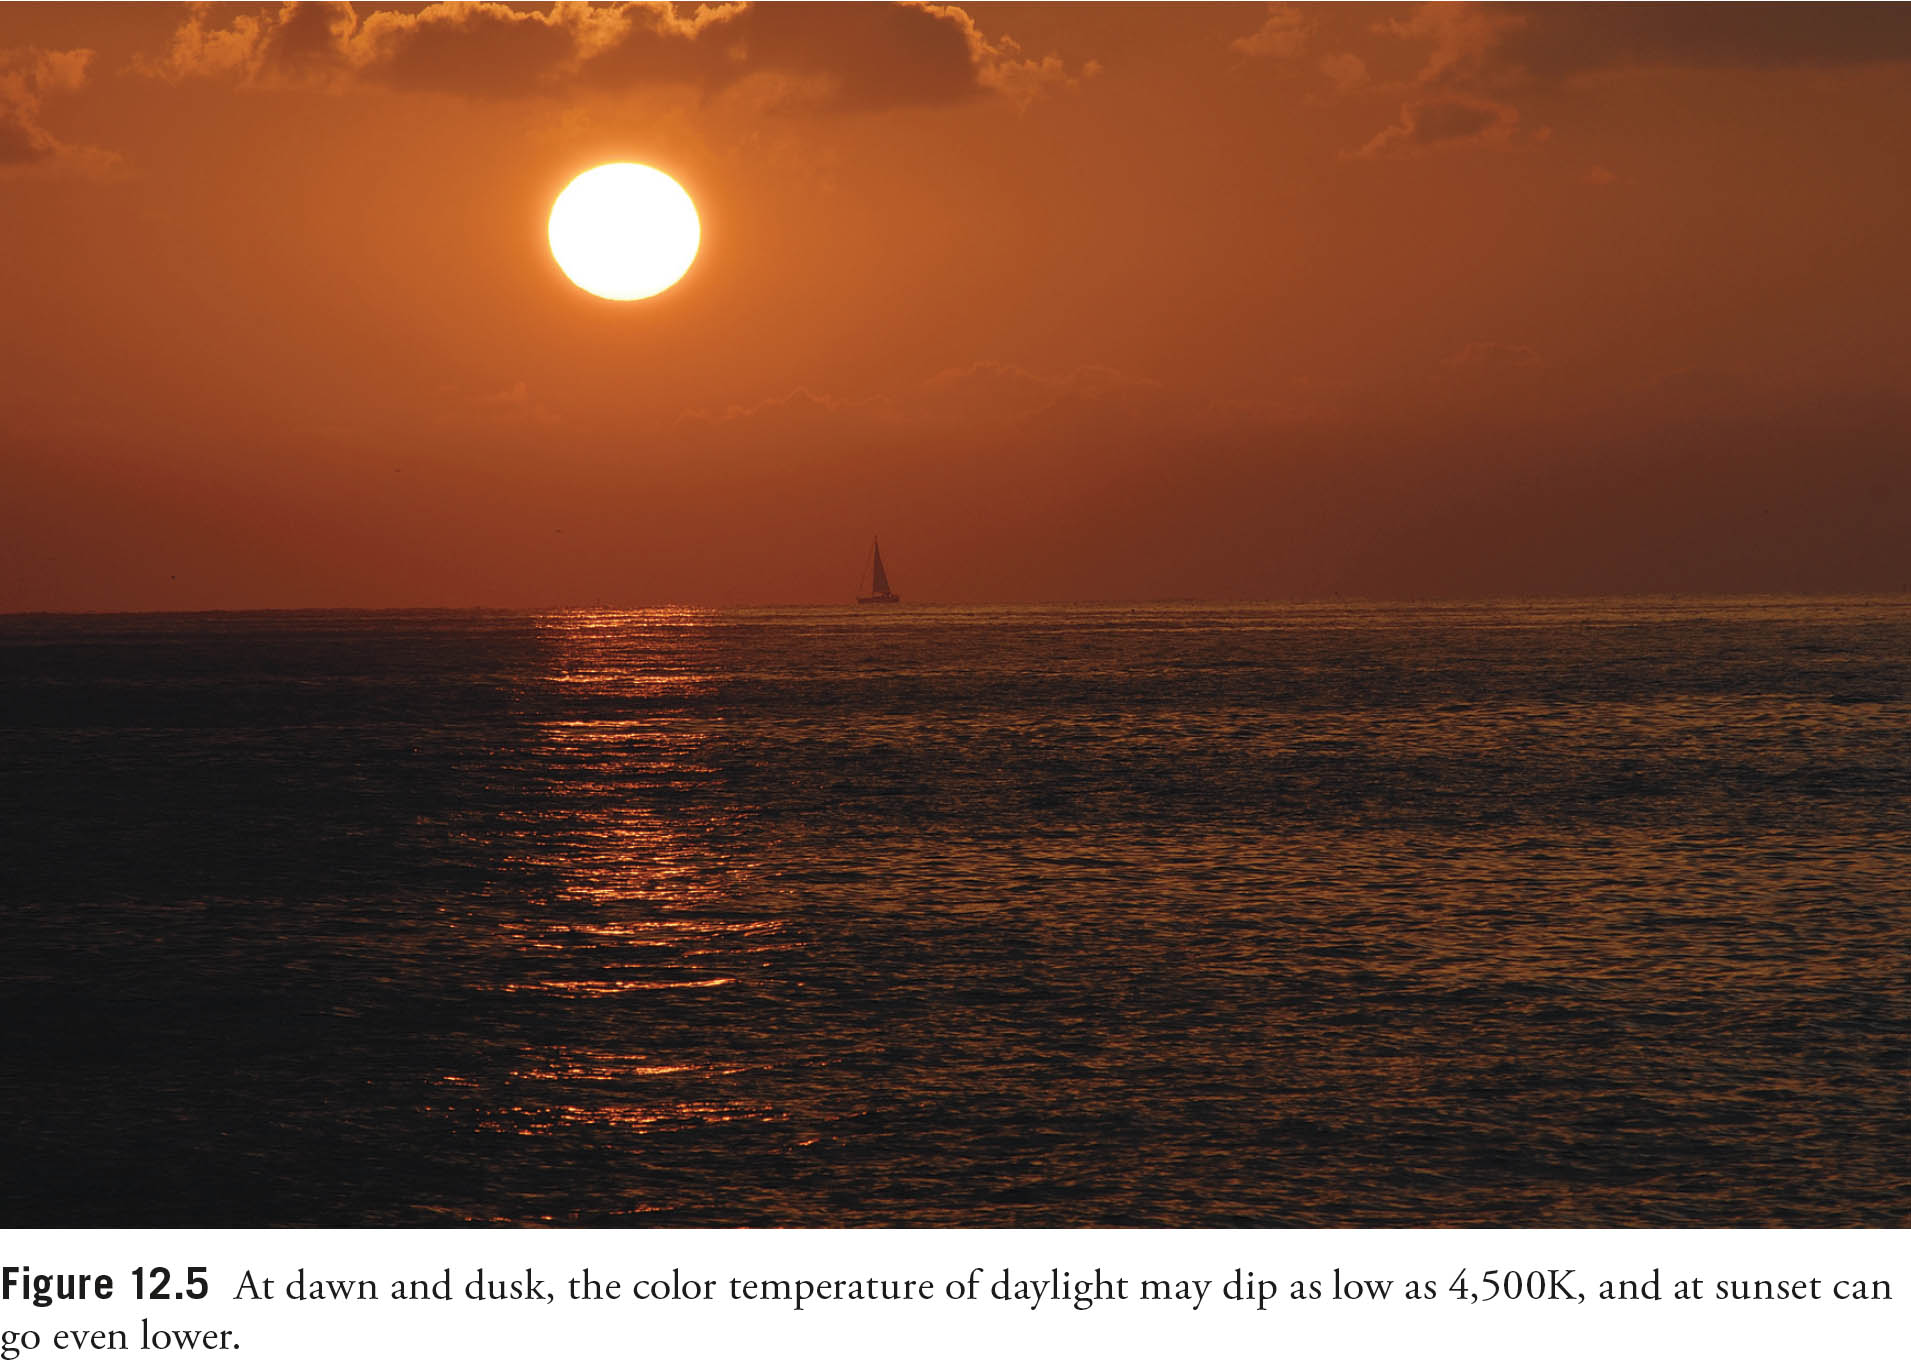
Daylight’s color temperature can vary quite widely. It is highest in temperature (most blue) at noon when the sun is directly overhead, because the light is traveling through a minimum amount of the filtering layer we call the atmosphere. The color temperature at high noon may be 6,000K. At other times of day, the sun is lower in the sky and the particles in the air provide a filtering effect that warms the illumination to about 5,500K for most of the day. Starting an hour before dusk and for an hour after sunrise, the warm appearance of the sunlight is even visible to our eyes when the color temperature may dip to 4,500K, as shown in Figure 12.5.
Incandescent/Tungsten Light
The term incandescent or tungsten illumination is usually applied to the direct descendents of Thomas Edison’s original electric lamp. Such lights consist of a glass bulb that contains a vacuum, or is filled with a halogen gas, and contains a tungsten filament that is heated by an electrical current, producing photons and heat. Tungsten-halogen lamps are a variation on the basic light bulb, using a more rugged (and longer-lasting) filament that can be heated to a higher temperature, housed in a thicker glass or quartz envelope, and filled with iodine or bromine (“halogen”) gases. The higher temperature allows tungsten-halogen (or quartz-halogen/quartz-iodine, depending on their construction) lamps to burn “hotter” and whiter. Although popular for automobile headlamps today, they’ve also been used for photographic illumination.
The other qualities of this type of lighting, such as contrast, are dependent on the distance of the lamp from the subject, type of reflectors used, and other factors that I’ll explain later in this chapter.
Fluorescent Light/Other Light Sources
Fluorescent light has some advantages in terms of illumination, but some disadvantages from a photographic standpoint. This type of lamp generates light through an electro-chemical reaction that emits most of its energy as visible light, rather than heat, which is why the bulbs don’t get as hot. The type of light produced varies depending on the phosphor coatings and type of gas in the tube. So, the illumination fluorescent bulbs produce can vary widely in its characteristics.
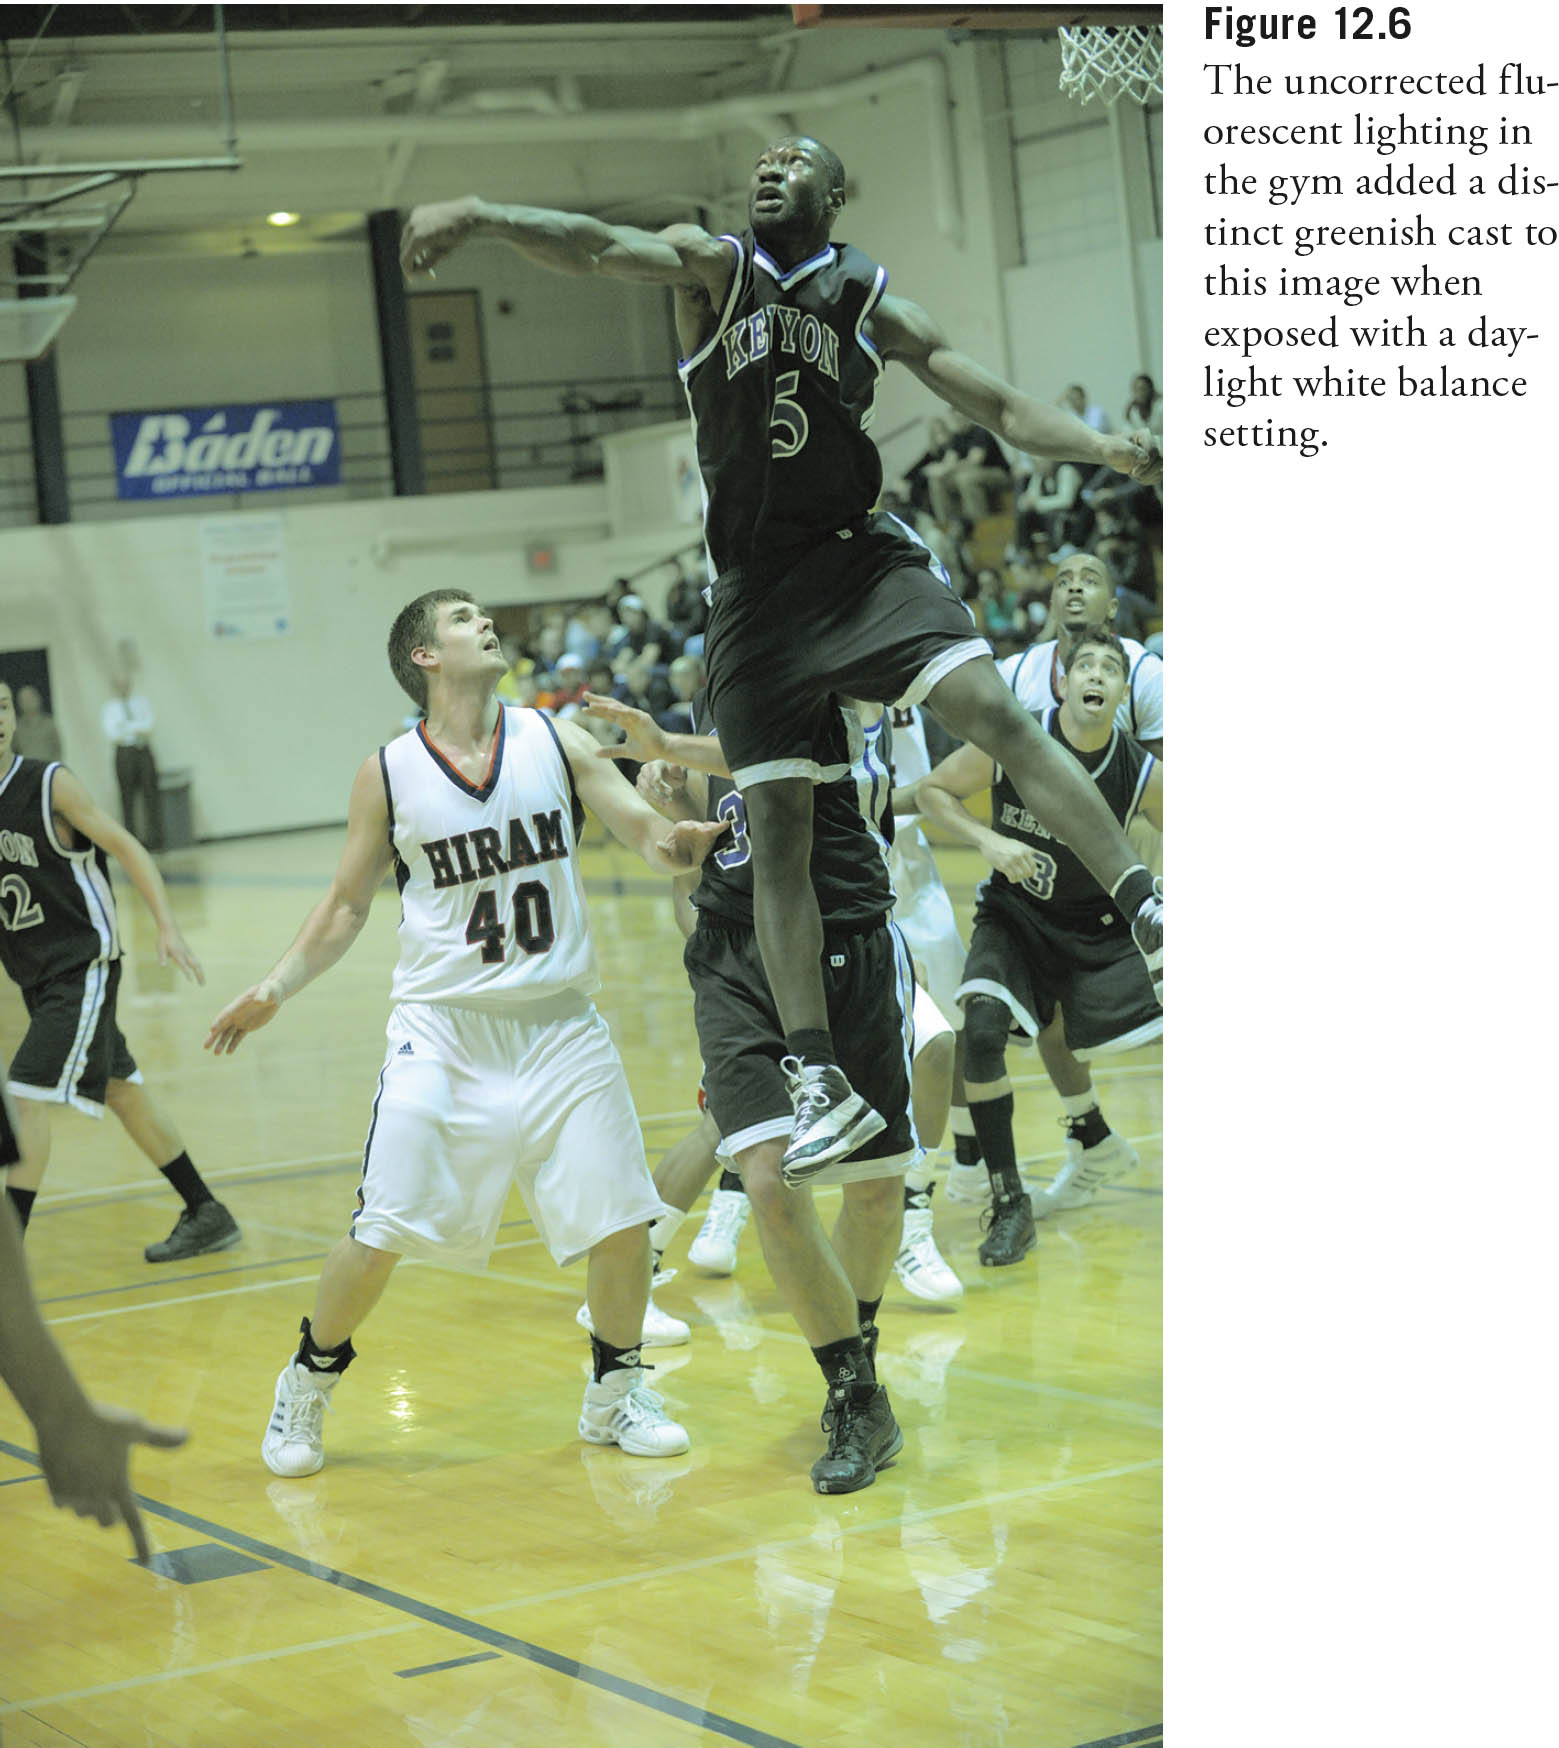
That’s not great news for photographers. Different types of lamps have different “color temperatures” that can’t be precisely measured in degrees Kelvin, because the light isn’t produced by heating. Worse, fluorescent lamps have a discontinuous spectrum of light that can have some colors missing entirely. A particular type of tube can lack certain shades of red or other colors (see Figure 12.6), which is why fluorescent lamps and other alternative technologies such as sodium-vapor illumination can produce ghastly looking human skin tones if the white balance isn’t set correctly. Their spectra can lack the reddish tones we associate with healthy skin and emphasize the blues and greens popular in horror movies.
There is good news, however. There are special fluorescent and LED lamps compatible with the Spiderlite lighting fixtures sold through dealers affiliated with the F. J. Westcott Company (www.fjwestcott.com), designed especially for photography, with the color balance and other properties required. They can be used for direct light, placed in soft boxes (described later), and used in other ways.
Adjusting White Balance
I showed you how to adjust white balance in Chapter 4, using the D5500’s built-in presets, white balance shift capabilities, and white balance bracketing (there’s more on bracketing in Chapter 4, too).
In most cases, however, the D5500 will do a good job of calculating white balance for you, so Auto can be used as your choice most of the time. Use the preset values or set a custom white balance that matches the current shooting conditions when you need to. The only really problematic light sources are likely to be fluorescents. Vendors, such as GE and Sylvania, may actually provide a figure known as the color rendering index (or CRI), which is a measure of how accurately a particular light source represents standard colors, using a scale of 0 (some sodium-vapor lamps) to 100 (daylight and most incandescent lamps). Daylight fluorescents and deluxe cool white fluorescents might have a CRI of about 79 to 95, which is perfectly acceptable for most photographic applications. Warm white fluorescents might have a CRI of 55. White deluxe mercury vapor lights are less suitable with a CRI of 45, while low-pressure sodium lamps can vary from CRI 0 to 18.
Remember that if you shoot RAW, you can specify the white balance of your image when you import it into Photoshop, Photoshop Elements, or another image editor using your preferred RAW converter. While color-balancing filters that fit on the front of the lens exist, they are primarily useful for film cameras, because film’s color balance can’t be tweaked as extensively as that of a sensor.
Electronic Flash Basics
Until you delve into the situation deeply enough, it might appear that serious photographers have a love/hate relationship with electronic flash. You’ll often hear that flash photography is less natural looking, and that the built-in flash in most cameras should never be used as the primary source of illumination because it provides a harsh, garish look. Indeed, most “pro” cameras like the Nikon D4 don’t have a built-in flash at all. Available (“continuous”) lighting is praised, and built-in flash photography seems to be roundly denounced.
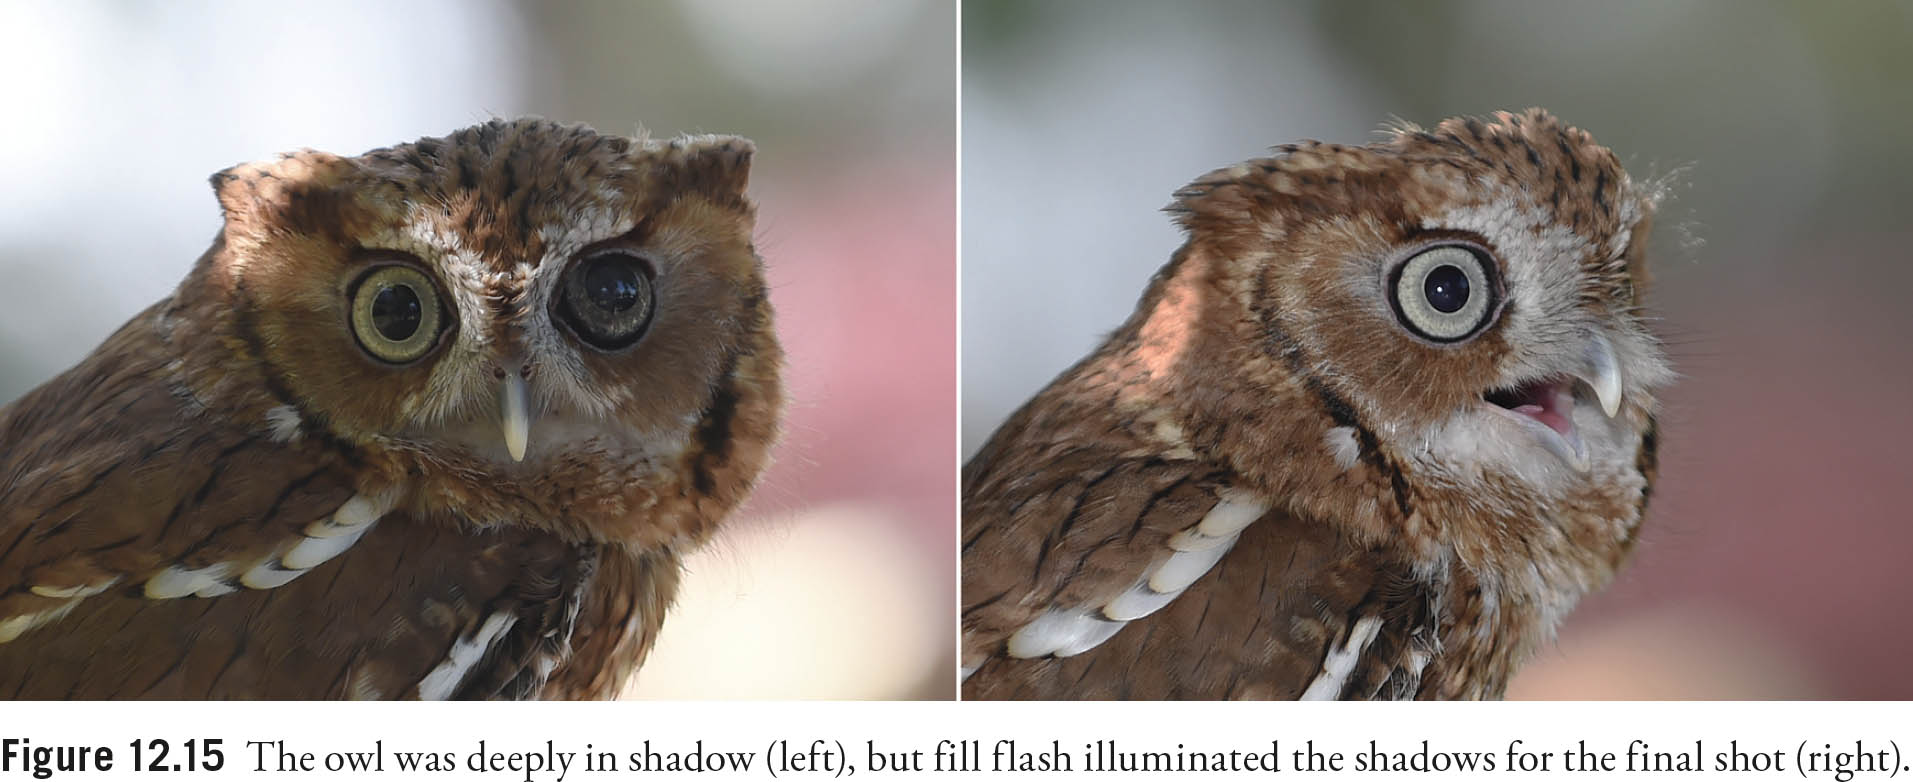
In truth, however, the bias is against bad flash photography. Indeed, flash has become the studio light source of choice for pro photographers, because it’s more intense (and its intensity can be varied to order by the photographer), freezes action, frees you from using a tripod (unless you want to use one to lock down a composition), and has a snappy, consistent light quality that matches daylight. (While color balance changes as the flash duration shortens, some Nikon flash units can communicate to the camera the exact white balance provided for that shot.) And even pros will cede that the built-in flash of the Nikon D5500 has some important uses as an adjunct to existing light, particularly to illuminate dark shadows using a technique called fill flash.
But electronic flash isn’t as inherently easy to use as continuous lighting. As I noted earlier, electronic flash units are more expensive, don’t show you exactly what the lighting effect will be (unless you use a second source called a modeling light for a preview), and the exposure of electronic flash units is more difficult to calculate accurately.
How Electronic Flash Works
The bursts of light we call electronic flash are produced by a flash of photons generated by an electrical charge that is accumulated in a component called a capacitor and then directed through a glass tube containing xenon gas, which absorbs the energy and emits the brief flash. For the pop-up flash built into the D5500, the full burst of light lasts about 1/1,000th second and provides enough illumination to shoot a subject 10 feet away at f/4 using the ISO 100 setting. In a more typical situation, you’d use ISO 200, f/5.6 to f/8 and photograph something 8 to 10 feet away. As you can see, the built-in flash is somewhat limited in range; you’ll see why external flash units are often a good idea later in this chapter.
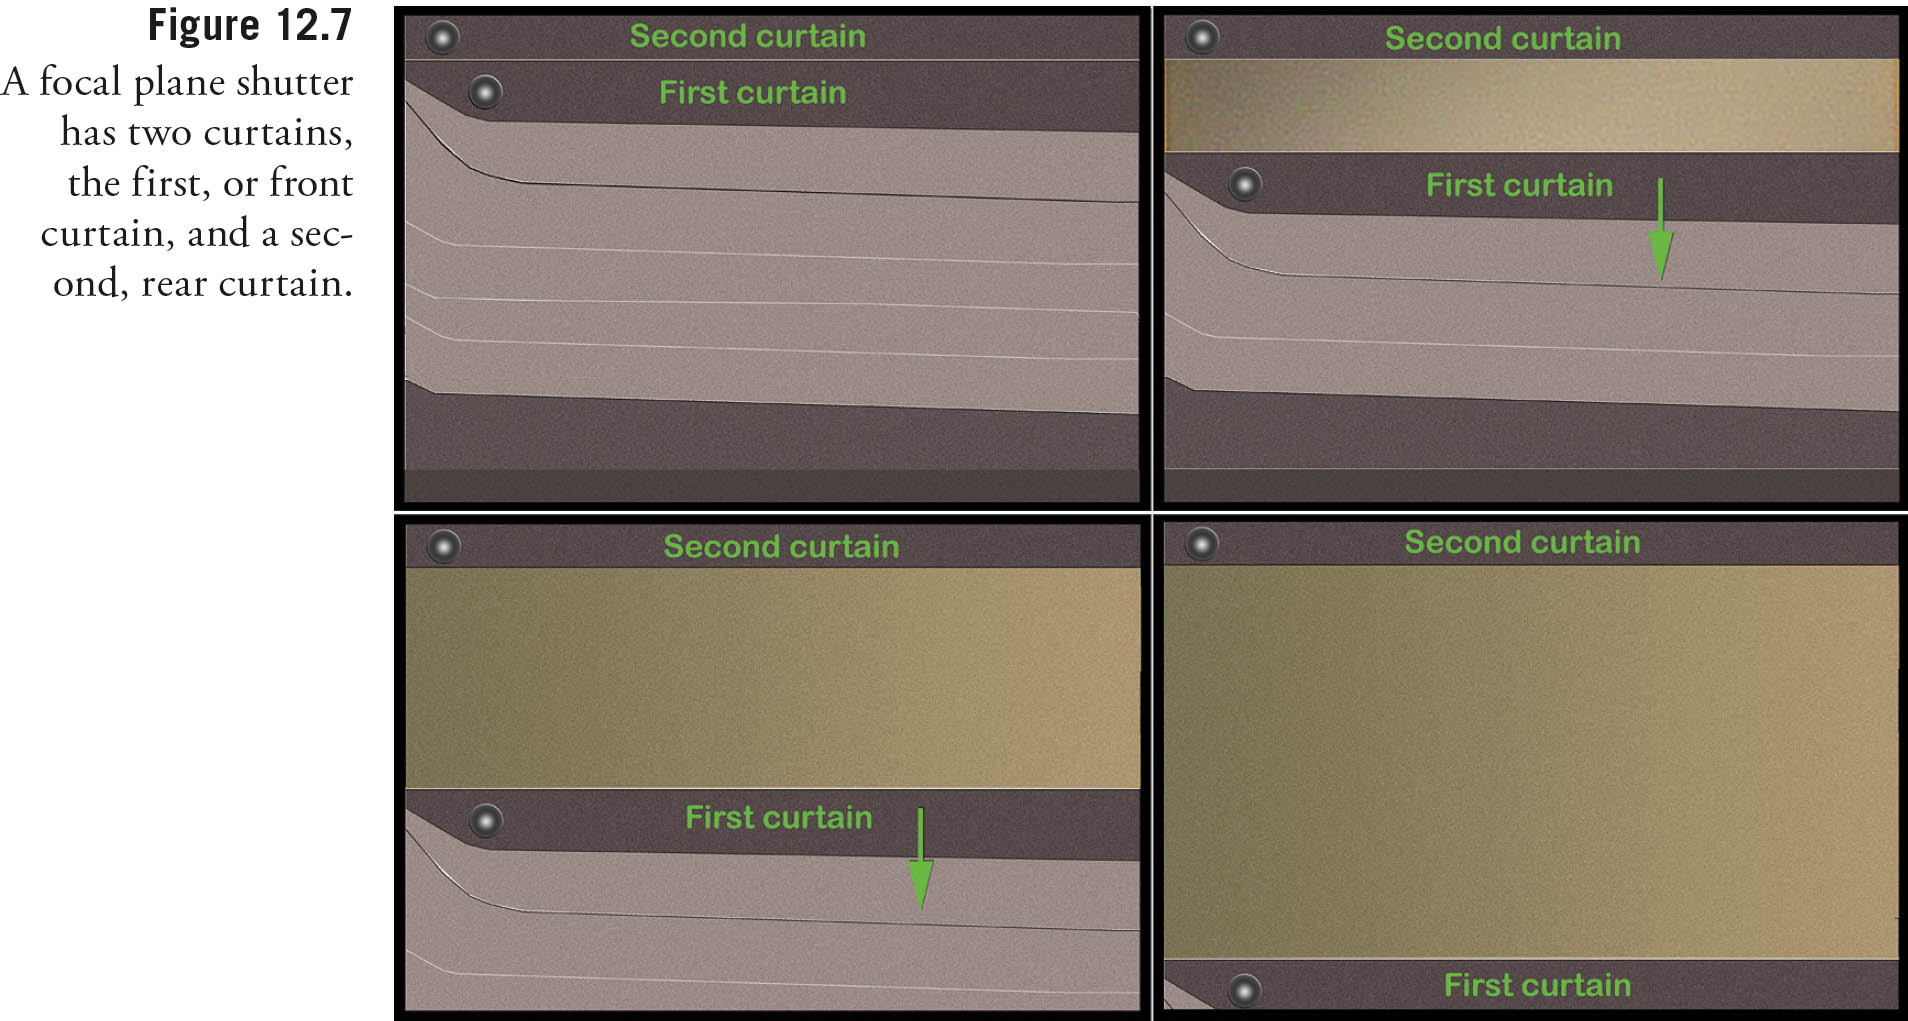
An electronic flash (whether built in or connected to the D5500 through a cable plugged into a hot shoe adapter) is triggered at the instant of exposure, during a period when the sensor is fully exposed by the shutter. As I mentioned earlier in this book, the D5500 has a vertically traveling shutter that consists of two curtains. The front curtain opens and moves to the opposite side of the frame, at which point the shutter is completely open. The flash can be triggered at this point (so-called front-curtain sync or first-curtain sync), making the flash exposure. Then, after a delay that can vary from 30 seconds to 1/200th second (with the D5500; other cameras may sync at a faster or slower speed), a rear curtain begins moving across the sensor plane, covering up the sensor again. If the flash is triggered just before the rear curtain starts to close, then rear-curtain sync (also called second-curtain sync) is used. In both cases, though, a shutter speed of 1/200th second is the maximum that can be used to take a photo.
Figure 12.7 illustrates how this works, with a fanciful illustration of a generic shutter (your D5500’s shutter does not look like this, and some vertically traveling shutters move bottom to top rather than the top-to-bottom motion shown). Both curtains are tightly closed at upper left. At upper right, the front curtain begins to move downward, starting to expose a narrow slit that reveals the sensor behind the shutter. At lower left, the front curtain moves downward farther until, as you can see at lower right in the figure, the sensor is fully exposed.
When front-curtain sync is used, the flash is triggered at the instant that the sensor is completely exposed. The shutter then remains open for an additional length of time (from 30 seconds to 1/200th second), and the rear curtain begins to move downward, covering the sensor once more. When rear-curtain sync is activated, the flash is triggered after the main exposure is over, just before the rear curtain begins to move downward.
Ghost Images
The difference between triggering the flash when the shutter just opens, or just when it begins to close might not seem like much. But whether you use front-curtain sync (the default setting) or rear-curtain sync (an optional setting) can make a significant difference to your photograph if the ambient light in your scene also contributes to the image.
At faster shutter speeds, particularly 1/200th second, there isn’t much time for the ambient light to register, unless it is very bright. It’s likely that the electronic flash will provide almost all the illumination, so front-curtain sync or rear-curtain sync isn’t very important. However, at slower shutter speeds, or with very bright ambient light levels, there is a significant difference, particularly if your subject is moving, or the camera isn’t steady.
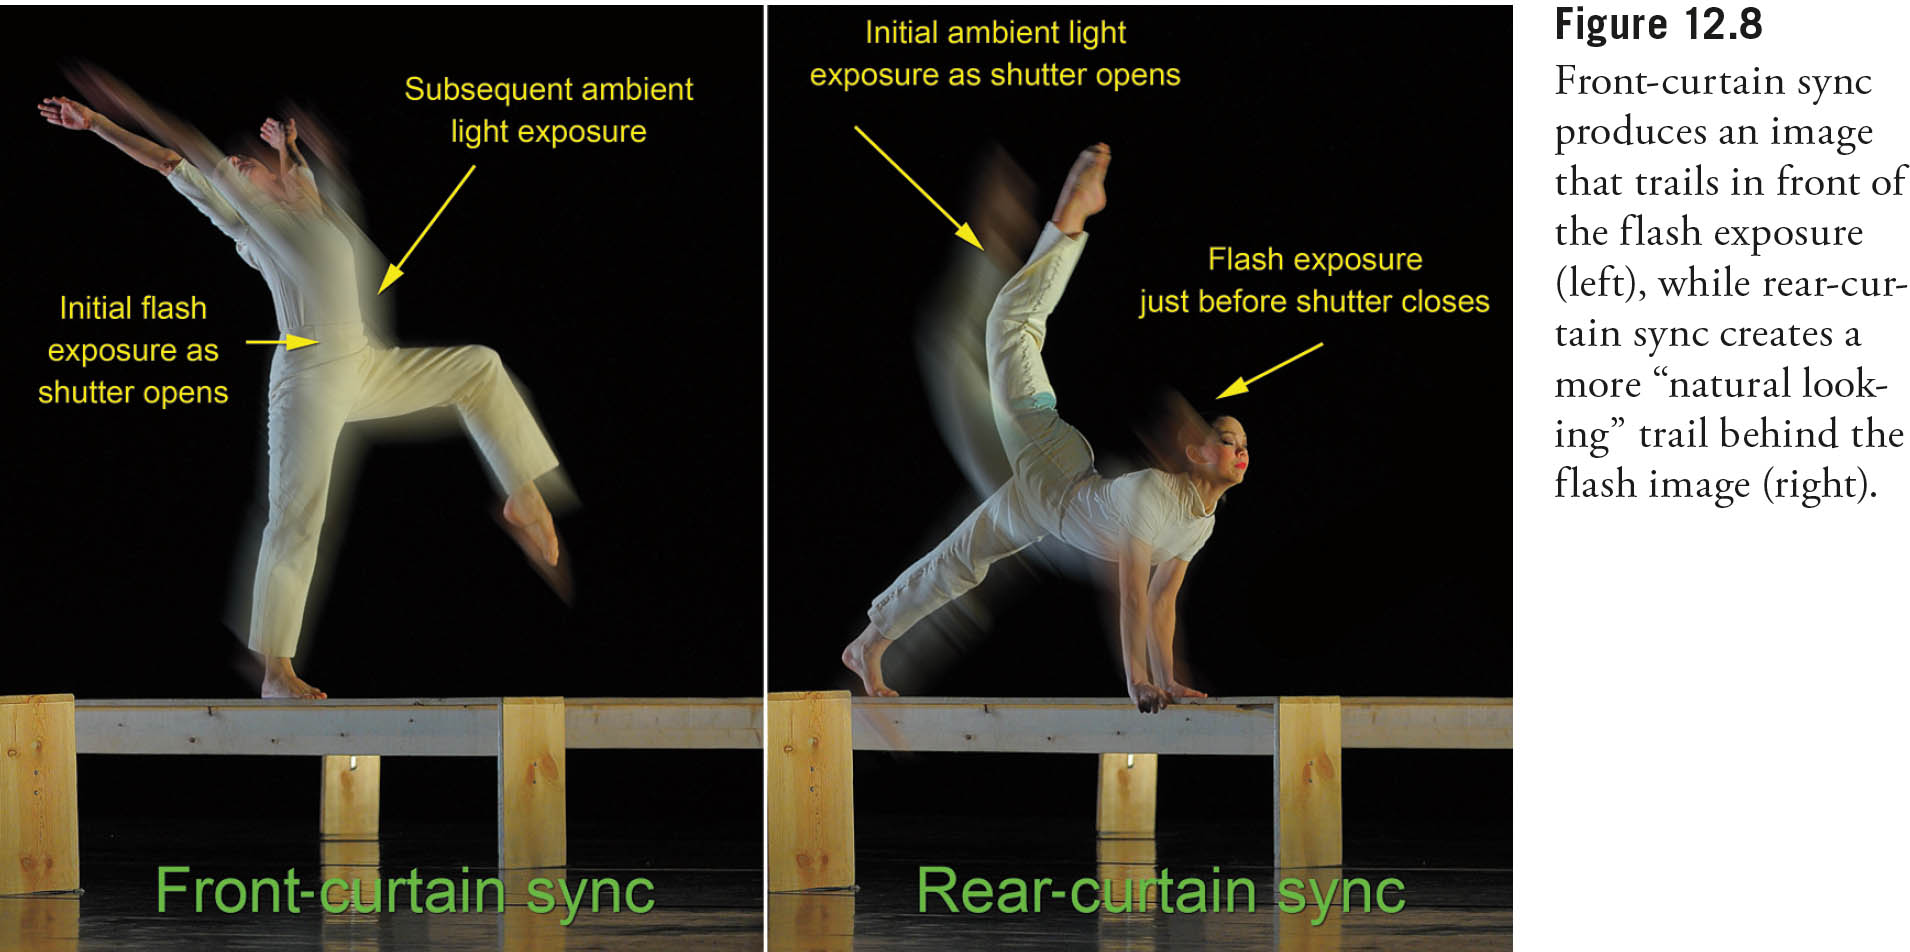
In any of those situations, the ambient light will register as a second image accompanying the flash exposure, and if there is movement (camera or subject), that additional image will not be in the same place as the flash exposure. It will show as a ghost image and, if the movement is significant enough, as a blurred ghost image trailing in front of or behind your subject in the direction of the movement.
As I noted, when you’re using front-curtain sync, the flash’s main burst goes off the instant the shutter opens fully (a pre-flash used to measure exposure in auto flash modes fires before the shutter opens). This produces an image of the subject on the sensor. Then, the shutter remains open for an additional period (30 seconds to 1/200th second, as I said). If your subject is moving, say, toward the right side of the frame, the ghost image produced by the ambient light will produce a blur on the right side of the original subject image, making it look as if your sharp (flash-produced) image is chasing the ghost. For those of us who grew up with lightning-fast superheroes who always left a ghost trail behind them, that looks unnatural (see Figure 12.8, left).
So, Nikon uses rear-curtain sync to remedy the situation. In that mode, the shutter opens, as before. The shutter remains open for its designated duration, and the ghost image forms. If your subject moves from the left side of the frame to the right side, the ghost will move from left to right, too. Then, about 1.5 milliseconds before the rear shutter curtain closes, the flash is triggered, producing a nice, sharp flash image ahead of the ghost image.
Avoiding Sync Speed Problems
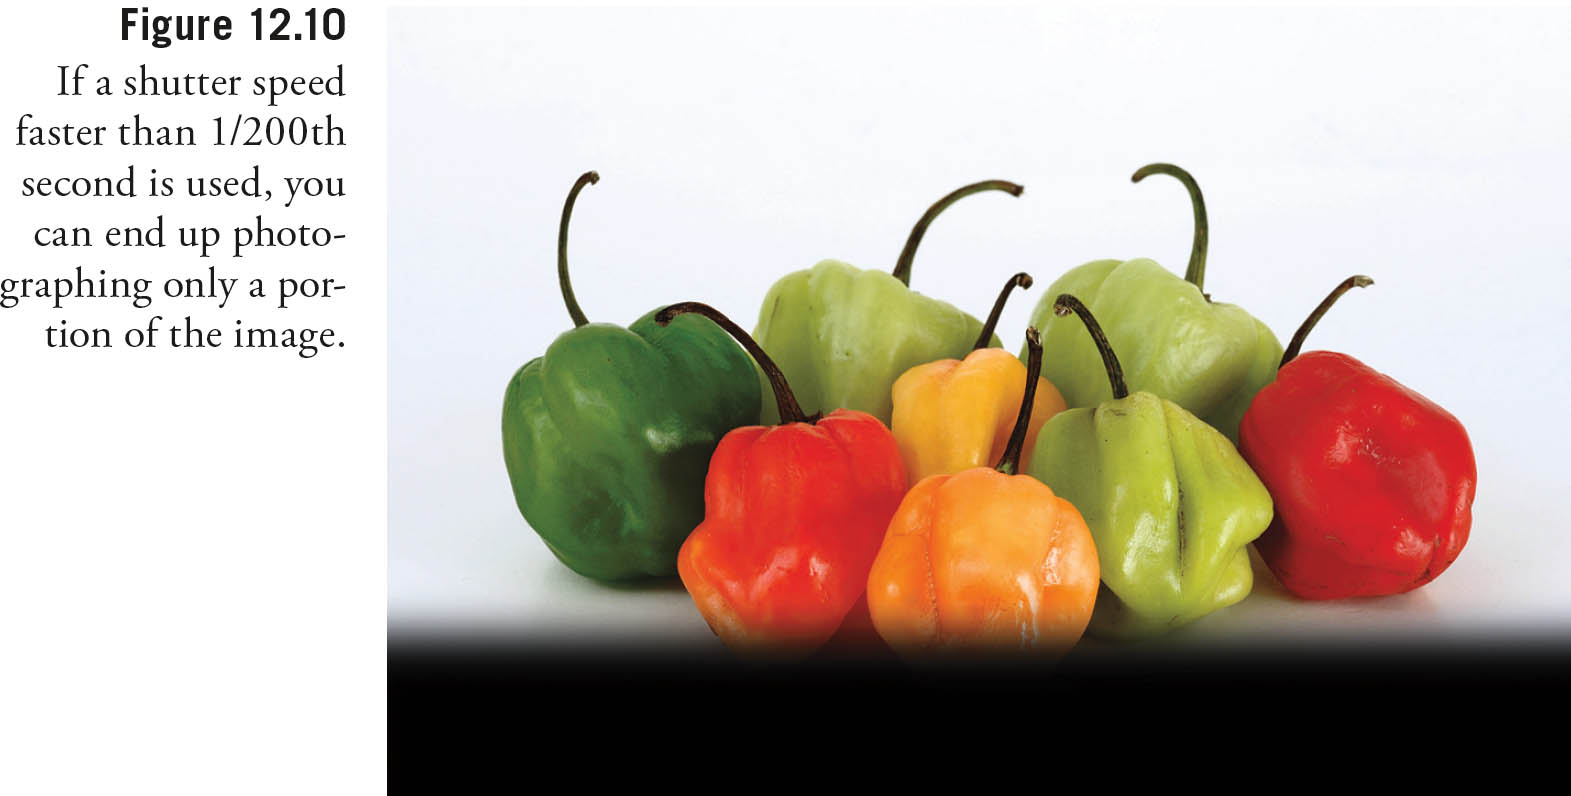
Using a shutter speed faster than 1/200th second can cause problems. Triggering the electronic flash only when the shutter is completely open makes a lot of sense if you think about what’s going on. To obtain shutter speeds faster than 1/200th second, the D5500 exposes only part of the sensor at one time, by starting the rear curtain on its journey before the front curtain has completely opened, as shown in Figure 12.9. That effectively provides a briefer exposure as a slit that’s narrower than the full height of the sensor passes over the surface of the sensor. If the flash were to fire during the time when the front and rear curtains partially obscured the sensor, only the slit that was actually open would be exposed.
You’d end up with only a narrow band, representing the portion of the sensor that was exposed when the picture is taken. For shutter speeds faster than 1/200th second, the rear curtain begins moving before the front curtain reaches the bottom of the frame. As a result, a moving slit, the distance between the front and rear curtains, exposes one portion of the sensor at a time as it moves from the bottom to the top. Figure 12.9 shows three views of our typical (but imaginary) focal plane shutter. At left is pictured the closed shutter; in the middle version you can see the front curtain has moved about 1/4 of the distance from the top; and in the right-hand version, the rear curtain has started to “chase” the front curtain across the frame toward the bottom.
If the flash is triggered while this slit is moving, only the exposed portion of the sensor will receive any illumination. You end up with a photo like the one shown in Figure 12.10. Note that a band across the bottom of the image is black. That’s a shadow of the rear shutter curtain, which had started to move when the flash was triggered. Sharp-eyed readers will wonder why the black band is at the bottom of the frame rather than at the top, where the rear curtain begins its journey. The answer is simple: your lens flips the image upside down and forms it on the sensor in a reversed position. You never notice that, because the camera is smart enough to show you the pixels that make up your photo in their proper orientation during picture review. But this image flip is why, if your sensor gets dirty and you detect a spot of dust in the upper half of a test photo, if cleaning manually, you need to look for the speck in the bottom half of the sensor.
I generally end up with sync speed problems only when shooting in the studio, using studio flash units rather than my D5500’s built-in flash or a Nikon dedicated Speedlight. That’s because if you’re using either type of “smart” flash, the camera knows that a strobe is attached, and remedies any unintentional goof in shutter speed settings. If you happen to set the D5500’s shutter to a faster speed in S or M mode, the camera will automatically adjust the shutter speed down to 1/200th second. In A, P, or any of the Scene modes, where the D5500 selects the shutter speed, it will never choose a shutter speed higher than 1/200th second when using flash. In P mode, shutter speed is automatically set between 1/60th to 1/200th second when using flash. But when using a non-dedicated flash, such as a studio unit plugged into the D5500’s hot shoe connector, the camera has no way of knowing that a flash is connected, so shutter speeds faster than 1/200th second can be set inadvertently.
Determining Exposure
Calculating the proper exposure for an electronic flash photograph is a bit more complicated than determining the settings for continuous light. The right exposure isn’t simply a function of how far away your subject is (which the D5500 can figure out based on the autofocus distance that’s locked in just prior to taking the picture). Various objects reflect more or less light at the same distance so, obviously, the camera needs to measure the amount of light reflected back and through the lens. Yet, as the flash itself isn’t available for measuring until it’s triggered, the D5500 has nothing to measure.
The solution is to fire the flash twice. The initial shot is a monitor pre-flash that can be analyzed, then followed virtually instantaneously by a main flash (to the eye the bursts appear to be a single flash) that’s given exactly the calculated intensity needed to provide a correct exposure. As a result, the primary flash may be longer in duration for distant objects and shorter in duration for closer subjects, depending on the required intensity for exposure. This through-the-lens evaluative flash exposure system is called i-TTL (intelligent Through-The-Lens), and it operates whenever the popup internal flash is used, or you have attached a Nikon dedicated flash unit to the D5500.
Guide Numbers
Guide numbers, usually abbreviated GN, are a way of specifying the power of an electronic flash in a way that can be used to determine the right f/stop to use at a particular shooting distance and ISO setting. In fact, before automatic flash units became prevalent, the GN was actually used to do just that. A GN is usually given as a pair of numbers for both feet and meters that represent the range at ISO 100. For example, the Nikon D5500’s built-in flash has a GN in i-TTL mode of 12/39 (meters/feet) at ISO 100. To calculate the right exposure at that ISO setting, you’d divide the guide number by the distance to arrive at the appropriate f/stop.
Using the D5500’s built-in flash as an example, at ISO 100 with its GN of 43 in Manual mode, if you wanted to shoot a subject at a distance of 10 feet, you’d use f/3.9 (39 divided by 10), or, in practice, f/4.0. At 5 feet, an f/stop of f/8 would be used. Some quick mental calculations with the GN will give you any particular electronic flash’s range. You can easily see that the built-in flash would begin to peter out at about 13 feet if you stuck to the lowest ISO of 100, because you’d need an aperture of f/2.8. Of course, in the real world you’d probably bump the sensitivity up to a setting of ISO 800 so you could use a more practical f/8 at 13 feet, and the flash would be effective all the way out to 20 feet or more at wider f/stops.
Today, guide numbers are most useful for comparing the power of various flash units, rather than actually calculating what exposure to use. You don’t need to be a math genius to see that an electronic flash with a GN in feet of, say, 111.5 at ISO 100 (like the SB-910) would be a lot more powerful than your built-in flash. At ISO 100, you could use f/5.6 to shoot as far as 20 feet.
Flash Control
The Nikon D5500’s built-in flash has two modes, TTL and Manual. It does not have a repeating flash option, nor can it be used to trigger other Nikon flashes in wireless Commander mode, unlike its siblings the Nikon D90 and above. You can choose between TTL and Manual modes using Custom Setting e1, Flash Control for Built-In Flash, as first described in Chapter 9. Other Nikon external flash units, such as the Nikon SB-700 or SB-910, have additional exposure modes, which I’ll discuss later in this chapter. Your Flash Control options are as follows:
![]() TTL. When the built-in flash is triggered, the D5500 first fires a pre-flash and measures the light reflected back and through the lens to calculate the proper exposure when the full flash is emitted a fraction of a second later.
TTL. When the built-in flash is triggered, the D5500 first fires a pre-flash and measures the light reflected back and through the lens to calculate the proper exposure when the full flash is emitted a fraction of a second later.
![]() Manual. You can set the level of the built-in flash from full power to 1/32 power. A flash icon blinks in the viewfinder and on the shooting information display when you’re using Manual mode, and the built-in flash has been flipped up.
Manual. You can set the level of the built-in flash from full power to 1/32 power. A flash icon blinks in the viewfinder and on the shooting information display when you’re using Manual mode, and the built-in flash has been flipped up.
Flash Metering Mode
You don’t select the way your flash meters the exposure directly; the two modes, i-TTL Balanced Fill-in Flash and Standard i-TTL Fill-Flash, are determined by the camera metering mode—Matrix, Center-weighted, or Spot—that you select. Indeed, the built-in flash in the Nikon D5500, as well as external flash units attached to the camera, use the same three metering modes that are available for continuous light sources: Matrix, Center-weighted, and Spot. So, you can choose the flash’s metering mode based on the same subject factors as those explained in Chapter 4 (for example, use Spot metering to measure exposure from an isolated subject within the frame). Choice of a metering mode determines how the flash reacts to balance the existing light with the light from the electronic unit:
![]() i-TTL balanced fill-flash. This flash mode is used automatically when you choose Matrix or Center-weighted exposure metering. The Nikon D5500 measures the available light and then adjusts the flash output to produce a natural balance between main subject and background. This setting is useful for most photographic situations.
i-TTL balanced fill-flash. This flash mode is used automatically when you choose Matrix or Center-weighted exposure metering. The Nikon D5500 measures the available light and then adjusts the flash output to produce a natural balance between main subject and background. This setting is useful for most photographic situations.
![]() Standard i-TTL fill-flash. This mode is activated when you use Spot metering or choose the standard mode with an external flash unit’s controls. The flash output is adjusted only for the main subject of your photograph, and the brightness of the background is not factored in. Use this mode when you want to emphasize the main subject at the expense of proper exposure for the background.
Standard i-TTL fill-flash. This mode is activated when you use Spot metering or choose the standard mode with an external flash unit’s controls. The flash output is adjusted only for the main subject of your photograph, and the brightness of the background is not factored in. Use this mode when you want to emphasize the main subject at the expense of proper exposure for the background.
Choosing a Flash Sync Mode
The Nikon D5500 has five flash sync modes that determine when and how the flash is fired (as I’ll explain shortly). They are selected from the information edit screen, or by holding down the Flash button on the front of the camera lens housing while rotating the command dial. In both cases, the mode chosen appears in the information edit screen as the selection is made.
Not all sync modes are available with all exposure modes. Depending on whether you’re using Scene modes, or Program, Aperture-priority, Shutter-priority, or Manual exposure modes, one or more of the following sync modes may not be available. I’m going to list the sync options available for each exposure mode separately, although that produces a little duplication among the options that are available with several exposure modes. However, this approach should reduce the confusion over which sync method is available with which exposure mode.
In Program and Aperture-priority modes you can select these flash modes:
![]() Front-curtain sync/fill flash. In this mode, represented by a lightning bolt symbol, the flash fires as soon as the front curtain opens completely. The shutter then remains open for the duration of the exposure, until the rear curtain closes. If the subject is moving and ambient light levels are high enough, the movement will cause a secondary “ghost” exposure that appears to be a stream of light advancing ahead of the flash exposure of the same subject. You’ll find more on “ghost” exposures next.
Front-curtain sync/fill flash. In this mode, represented by a lightning bolt symbol, the flash fires as soon as the front curtain opens completely. The shutter then remains open for the duration of the exposure, until the rear curtain closes. If the subject is moving and ambient light levels are high enough, the movement will cause a secondary “ghost” exposure that appears to be a stream of light advancing ahead of the flash exposure of the same subject. You’ll find more on “ghost” exposures next.
![]() Rear-curtain sync. With this setting, the front curtain opens completely and remains open for the duration of the exposure. Then, the flash is fired and the rear curtain closes. If the subject is moving and ambient light levels are high enough, the movement will cause a secondary “ghost” exposure that appears to stream behind the flash exposure. In Program and Aperture-priority modes, the D5500 will combine rear-curtain sync with slow shutter speeds (just like slow sync, discussed below) to balance ambient light with flash illumination. (It’s best to use a tripod to avoid blur at these slow shutter speeds.)
Rear-curtain sync. With this setting, the front curtain opens completely and remains open for the duration of the exposure. Then, the flash is fired and the rear curtain closes. If the subject is moving and ambient light levels are high enough, the movement will cause a secondary “ghost” exposure that appears to stream behind the flash exposure. In Program and Aperture-priority modes, the D5500 will combine rear-curtain sync with slow shutter speeds (just like slow sync, discussed below) to balance ambient light with flash illumination. (It’s best to use a tripod to avoid blur at these slow shutter speeds.)
![]() Red-eye reduction. In this mode, there is a one-second lag after pressing the shutter release before the picture is actually taken, during which the D5500’s red-eye reduction lamp lights, causing the subject’s pupils to contract (assuming they are looking at the camera), and thus reducing potential red-eye effects. Don’t use with moving subjects or when you can’t abide the delay.
Red-eye reduction. In this mode, there is a one-second lag after pressing the shutter release before the picture is actually taken, during which the D5500’s red-eye reduction lamp lights, causing the subject’s pupils to contract (assuming they are looking at the camera), and thus reducing potential red-eye effects. Don’t use with moving subjects or when you can’t abide the delay.
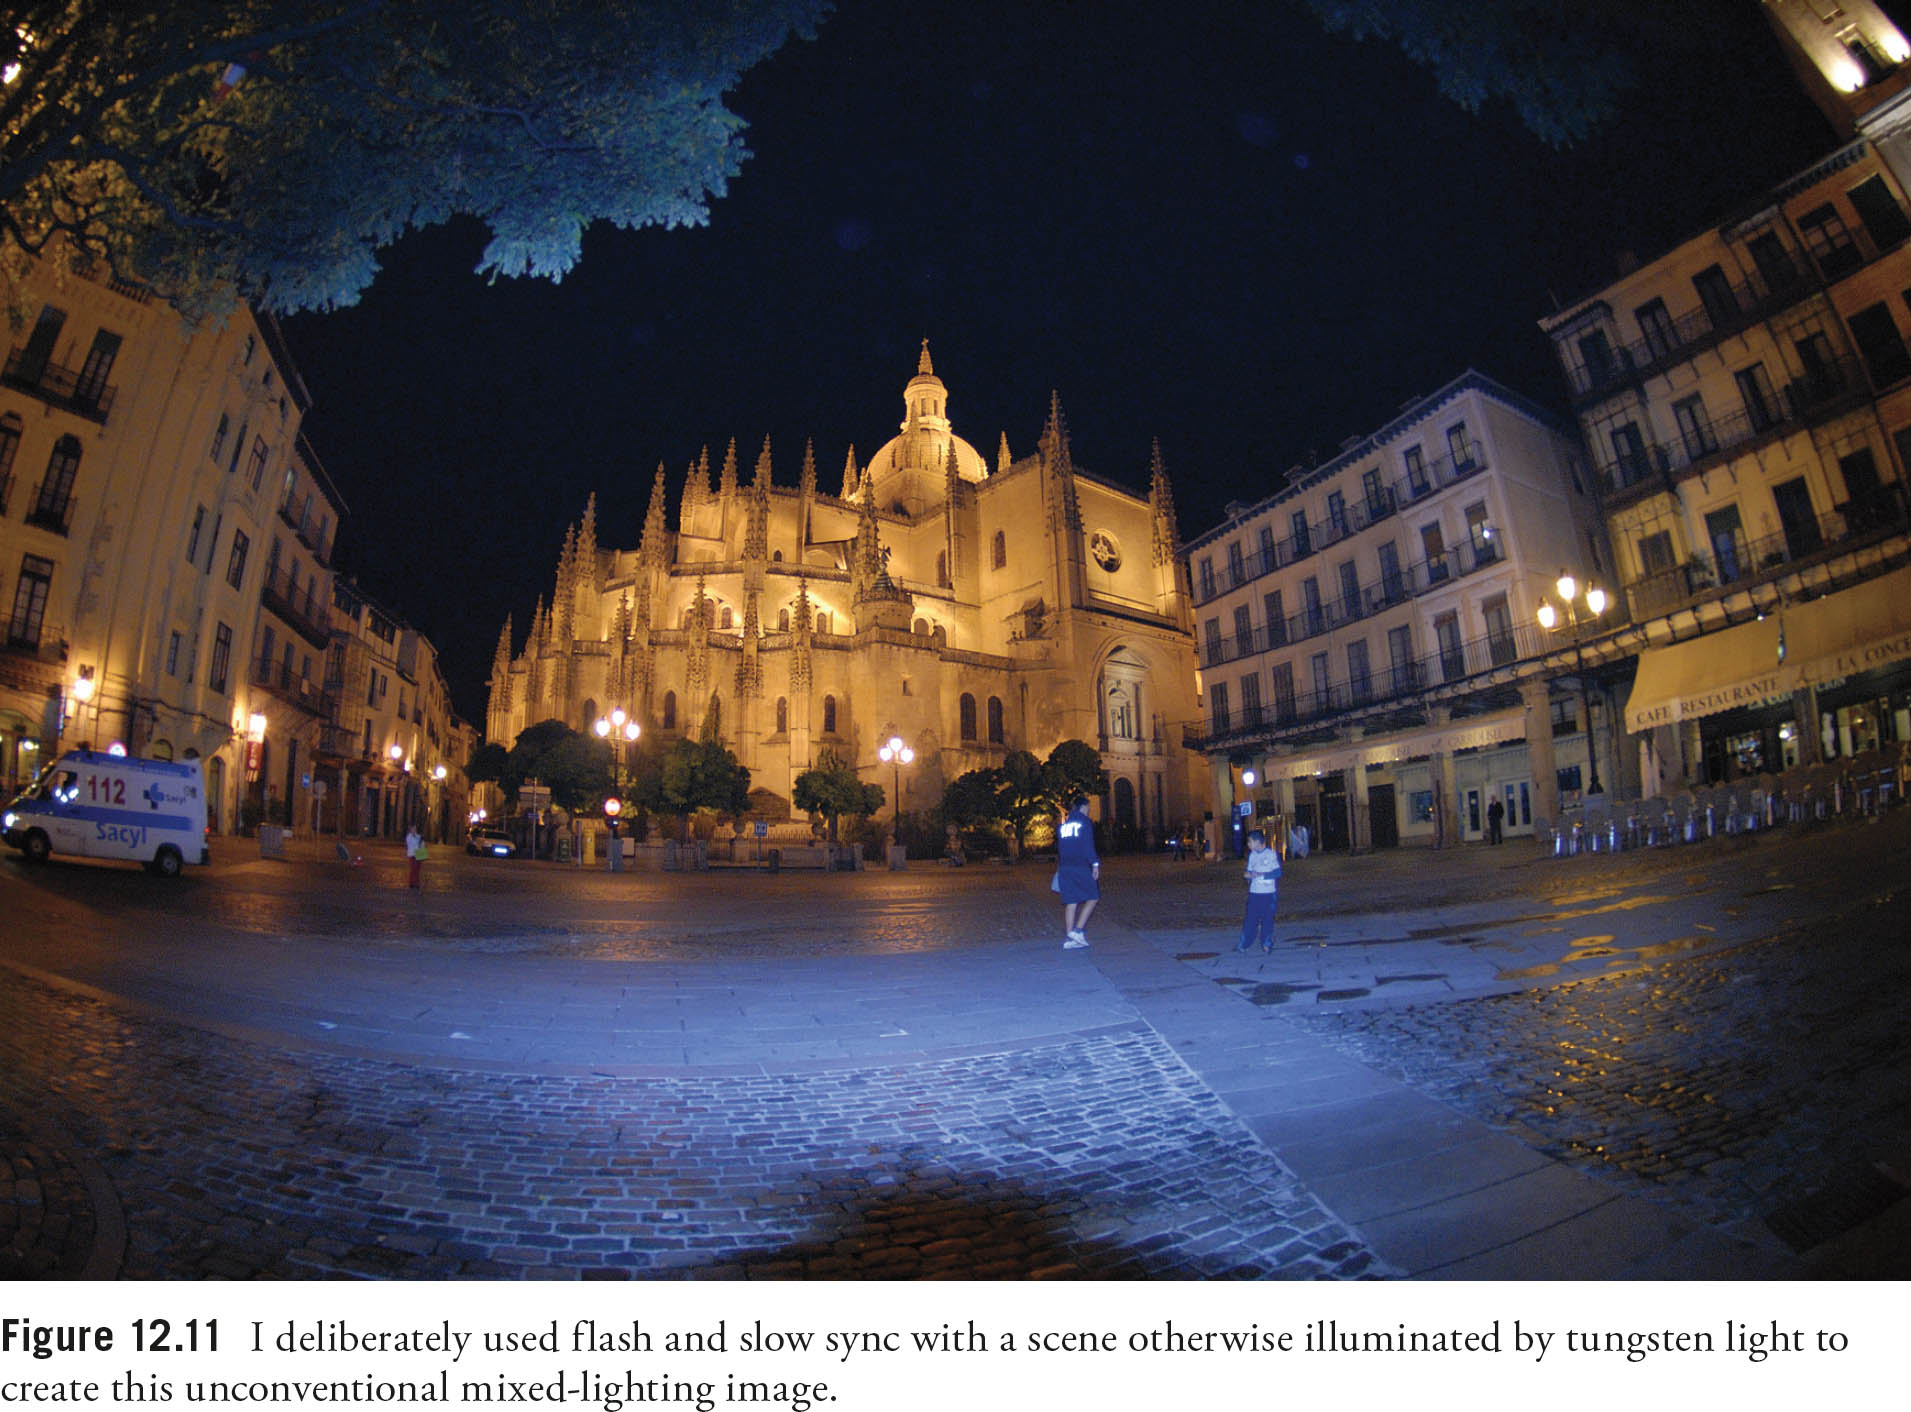
![]() Slow sync. This setting allows the D5500 in Program and Aperture-priority modes to use shutter speeds as slow as 30 seconds with the flash to help balance a background illuminated with ambient light with your main subject, which will be lit by the electronic flash. You’ll want to use a tripod at slower shutter speeds, of course. As shown in Figure 12.11, it’s common that the ambient light will be much warmer than the electronic flash’s “daylight” balance, so, if you want the two sources to match, you may want to use a warming filter on the flash. That can be done with a gel if you’re using an external flash like the SB-900, or by taping an appropriate warm filter over the D5500’s built-in flash. (That’s not a convenient approach, and many find the warm/cool mismatch not objectionable and don’t bother with filtration.)
Slow sync. This setting allows the D5500 in Program and Aperture-priority modes to use shutter speeds as slow as 30 seconds with the flash to help balance a background illuminated with ambient light with your main subject, which will be lit by the electronic flash. You’ll want to use a tripod at slower shutter speeds, of course. As shown in Figure 12.11, it’s common that the ambient light will be much warmer than the electronic flash’s “daylight” balance, so, if you want the two sources to match, you may want to use a warming filter on the flash. That can be done with a gel if you’re using an external flash like the SB-900, or by taping an appropriate warm filter over the D5500’s built-in flash. (That’s not a convenient approach, and many find the warm/cool mismatch not objectionable and don’t bother with filtration.)
![]() Red-eye reduction with slow sync. This mode combines slow sync with the D5500’s red-eye reduction behavior when using Program or Aperture-priority modes.
Red-eye reduction with slow sync. This mode combines slow sync with the D5500’s red-eye reduction behavior when using Program or Aperture-priority modes.
In Shutter-priority and Manual exposure modes, you can select the following three flash synchronization settings:
![]() Front-curtain sync/fill flash. This setting should be your default setting. This mode is also available in Program and Aperture-priority mode, as described above, and, with high ambient light levels, can produce ghost images, discussed below.
Front-curtain sync/fill flash. This setting should be your default setting. This mode is also available in Program and Aperture-priority mode, as described above, and, with high ambient light levels, can produce ghost images, discussed below.
![]() Red-eye reduction. This mode, with its one-second lag and red-eye lamp flash, is described above.
Red-eye reduction. This mode, with its one-second lag and red-eye lamp flash, is described above.
![]() Rear-curtain sync. As noted previously, in this sync mode, the front curtain opens completely and remains open for the duration of the exposure. Then, the flash is fired and the rear curtain closes. If the subject is moving and ambient light levels are high enough, the movement will cause that “ghost” exposure that appears to be trailing the flash exposure.
Rear-curtain sync. As noted previously, in this sync mode, the front curtain opens completely and remains open for the duration of the exposure. Then, the flash is fired and the rear curtain closes. If the subject is moving and ambient light levels are high enough, the movement will cause that “ghost” exposure that appears to be trailing the flash exposure.
In Auto, Portrait, Child, Close-Up, Party, and Pet Scene modes, the following flash sync options are available:
![]() Auto. This setting is the same as front-curtain sync, but the flash pops up automatically in dim lighting conditions.
Auto. This setting is the same as front-curtain sync, but the flash pops up automatically in dim lighting conditions.
![]() Red-eye reduction auto. In this mode, there is a one-second lag after pressing the shutter release before the picture is actually taken, during which the D5500’s red-eye reduction lamp lights, causing the subject’s pupils to contract (assuming they are looking at the camera), and thus reducing potential red-eye effects. Don’t use with moving subjects or when you can’t abide the delay.
Red-eye reduction auto. In this mode, there is a one-second lag after pressing the shutter release before the picture is actually taken, during which the D5500’s red-eye reduction lamp lights, causing the subject’s pupils to contract (assuming they are looking at the camera), and thus reducing potential red-eye effects. Don’t use with moving subjects or when you can’t abide the delay.
![]() Flash Off. This is not really a sync setting, although it is available from the same selection screen. It disables the flash for those situations in which you absolutely do not want it to pop up and fire.
Flash Off. This is not really a sync setting, although it is available from the same selection screen. It disables the flash for those situations in which you absolutely do not want it to pop up and fire.
In Night Portrait mode, only slow synchronization flash and flash off modes are available:
![]() Auto slow sync. This setting allows the D5500 to select shutter speeds as slow as 30 seconds with the flash to help balance a background illuminated with ambient light with your main subject, which will be lit by the electronic flash. Best for shooting pictures at night when the subjects in the foreground are important, and you want to avoid a pitch-black background. I recommend using a tripod in this mode.
Auto slow sync. This setting allows the D5500 to select shutter speeds as slow as 30 seconds with the flash to help balance a background illuminated with ambient light with your main subject, which will be lit by the electronic flash. Best for shooting pictures at night when the subjects in the foreground are important, and you want to avoid a pitch-black background. I recommend using a tripod in this mode.
![]() Auto red-eye reduction with slow sync. Another mode that calls for a tripod, this sync setting mode combines slow sync with the D5500’s red-eye reduction pre-flash. This is the one to use when your subjects are people who will be facing the camera.
Auto red-eye reduction with slow sync. Another mode that calls for a tripod, this sync setting mode combines slow sync with the D5500’s red-eye reduction pre-flash. This is the one to use when your subjects are people who will be facing the camera.
![]() Flash off. Disables the flash in museums, concerts, religious ceremonies, and other situations in which you absolutely do not want it to pop up and fire.
Flash off. Disables the flash in museums, concerts, religious ceremonies, and other situations in which you absolutely do not want it to pop up and fire.
When using the Food Scene mode, you can’t change sync modes; only Fill Flash mode is available. Other Scene and Special Effects modes not mentioned, such as Silhouette, Miniature Effect, etc., disable the flash, and so have no sync mode options.
A Typical Electronic Flash Sequence
Here’s what happens when you take a photo using electronic flash, either the unit built into the Nikon D5500 or an external flash like the Nikon SB-900, after you’ve selected an exposure mode:
1. Sync mode. Choose the flash sync mode by holding down the Flash button and rotating the command dial to choose the sync mode, as described above. The flash head pops up and the flash’s power capacitor is charged.
2. Metering method. Choose the metering method you want, from Matrix, Center-weighted, or Spot metering, using the information edit screen.
3. Activate flash. Press the flash pop-up button to flip up the built-in flash, or mount (or connect with a cable) an external flash and turn it on. A ready light appears in the viewfinder or on the back of the flash when the unit is ready to take a picture.
4. Check exposure. Select a shutter speed up to 1/200th second when using Manual, Program, or Shutter-priority modes; select an aperture when using Aperture-priority and Manual exposure modes. The D5500 will set both shutter speed and aperture if you’re using P mode, or a Scene or Auto mode.
5. Take photo. Press the shutter release down all the way.
6. D5500 receives distance data. A D- or G-series lens now supplies focus distance to the D5500.
7. Pre-flash emitted. The internal flash, if used, or external flash sends out one pre-flash burst used to determine exposure.
8. Exposure calculated. The pre-flash bounces back and is measured by the 2,016-pixel RGB sensor in the viewfinder. It measures brightness and contrast of the image to calculate exposure. If you’re using Matrix metering, the D5500 evaluates the scene to determine whether the subject may be backlit (for fill flash), or a subject that requires extra ambient light exposure to balance the scene with the flash exposure, or classifies the scene in some other way. The camera-to-subject information as well as the degree of sharp focus of the subject matter is used to locate the subject within the frame. If you’ve selected Spot metering, only standard i-TTL (without balanced fill-flash) is used.
9. Mirror up. The mirror flips up. At this point exposure and focus are locked in.
10. Flash fired. At the correct triggering moment (depending on whether front or rear sync is used), the camera sends a signal to one or more flashes to start flash discharge. The flash is quenched as soon as the correct exposure has been achieved.
11. Shutter closes. The shutter closes and the mirror flips down. You’re ready to take another picture.
12. Exposure confirmed. Ordinarily, the full charge in the flash may not be required. If the flash indicator in the viewfinder blinks for about three seconds after the exposure, that means that the entire flash charge was required, and it could mean that the full charge wasn’t enough for a proper exposure. Be sure to review your image on the LCD to make sure it’s not underexposed, and, if it is, make adjustments (such as increasing the ISO setting of the D5500) to remedy the situation.
Working with Nikon Flash Units
If you want to work with dedicated Nikon flash units, at this time you have an array of choices: including the D5500’s built-in flash, the Nikon SB-900/910, SB-700, SB-500, SB-400 on-camera flash units, and the SB-R200/R1 wireless remote flash systems. These share certain features, which I’ll discuss while pointing out differences among them. Nikon may introduce additional flash units during the life of this book, but the current batch and the Nikon Creative Lighting System ushered in with them were significant steps forward.
Nikon D5500 Built-in Flash
In automatic mode, the built-in flash has a guide number of 12/39 (meters/feet) at ISO 100, and must be activated by manually flipping it up when not using one of the Scene modes that feature automatic pop-up. This flash is powerful enough to provide primary direct flash illumination when required, but can’t be angled up for diffuse bounce flash off the ceiling. It’s useful for balanced fill flash, but cannot operate in Commander mode, which allows the built-in flash to trigger one or more off-camera flash units. You can use Manual flash mode and the Built-in Flash settings in the Shooting menu to dial down the intensity of the built-in flash to 1/32 power.
Changing settings is easy:
![]() Elevate the built-in flash. Press the Flash button on the front left side of the viewfinder housing to pop up the flash.
Elevate the built-in flash. Press the Flash button on the front left side of the viewfinder housing to pop up the flash.
![]() Choose sync mode. If you want to change the flash sync mode, after the flash is elevated, hold down the Flash button and rotate the command dial. The sync mode you’ve selected will appear on the shooting information screen.
Choose sync mode. If you want to change the flash sync mode, after the flash is elevated, hold down the Flash button and rotate the command dial. The sync mode you’ve selected will appear on the shooting information screen.
![]() Apply flash exposure compensation. If your pictures in a session are consistently overexposed or underexposed, you can dial in flash compensation by holding down the compensation button (just southeast of the shutter release) and the Flash button at the same time, and rotating the main dial. The amount of compensation from +1.0 to –3.0EV is displayed on the shooting information screen.
Apply flash exposure compensation. If your pictures in a session are consistently overexposed or underexposed, you can dial in flash compensation by holding down the compensation button (just southeast of the shutter release) and the Flash button at the same time, and rotating the main dial. The amount of compensation from +1.0 to –3.0EV is displayed on the shooting information screen.
![]() Use the information edit screen. You can also choose sync mode and flash compensation using the information edit screen. Press the Info button, navigate to the function you want to adjust, press OK, and use the up/down buttons to enter the value.
Use the information edit screen. You can also choose sync mode and flash compensation using the information edit screen. Press the Info button, navigate to the function you want to adjust, press OK, and use the up/down buttons to enter the value.
![]() Set color temperature. The D5500’s Auto color temperature setting will adjust for the built-in flash nicely. But there might be times when you want to set the color temperature manually. For example, you might be shooting under incandescent illumination and have put an orange gel over your internal or external flash so both light sources match. You’d want to set the color temperature manually to incandescent. Or, you might want to use an oddball setting as a special effect. Use the information edit screen to adjust the color temperature to Flash, Incandescent, or any of the other choices, as described in Chapter 2.
Set color temperature. The D5500’s Auto color temperature setting will adjust for the built-in flash nicely. But there might be times when you want to set the color temperature manually. For example, you might be shooting under incandescent illumination and have put an orange gel over your internal or external flash so both light sources match. You’d want to set the color temperature manually to incandescent. Or, you might want to use an oddball setting as a special effect. Use the information edit screen to adjust the color temperature to Flash, Incandescent, or any of the other choices, as described in Chapter 2.
Because the built-in flash draws its power from the D5500’s battery, extensive use will reduce the power available to take pictures. For that reason alone, use of an external flash unit can be a good idea when you plan to take a lot of flash pictures.
Nikon Add-on Flash Units
Nikon offers a broad range of accessory electronic Speedlight flash units that will work with the D5500. You can mount a Speedlight in the flash accessory shoe, or use it off-camera with a dedicated cord like the SC-29 TTL Off-Camera Shoe Cord that plugs into the flash shoe. The other end of the cable is equipped with its own flash shoe where you can plug in your external flash unit. When that cable connects the external flash unit to the camera, full communications between the two is maintained and all the flash features available with on-camera flash continue to function. A quick summary of the available units follows:
Nikon SB-300
This entry-level Speedlight, at about $150, is the smallest and most basic of the Nikon series of Speedlights. The SB-300 has a limited, easy-to-use feature set suited for point-and-shoot photography and some slightly more advanced techniques. Do note however that it does not support wireless off-camera flash. The SB-300 has a moderate guide number of 18/59 at ISO 100. Its main advantage, then, is to provide some additional elevation of the flash above the camera to provide an improved coverage angle and less chance of red-eye effects. Its flash head tilts up to 120 degrees, with click stops at 120, 90, 75, and 60 degrees when the flash is pointed directly ahead. It has a zoom flash head. The SB-300 is lighter in weight at 3.4 ounces than the SB-400 it replaces, and uses two AAA batteries.
Nikon SB-400
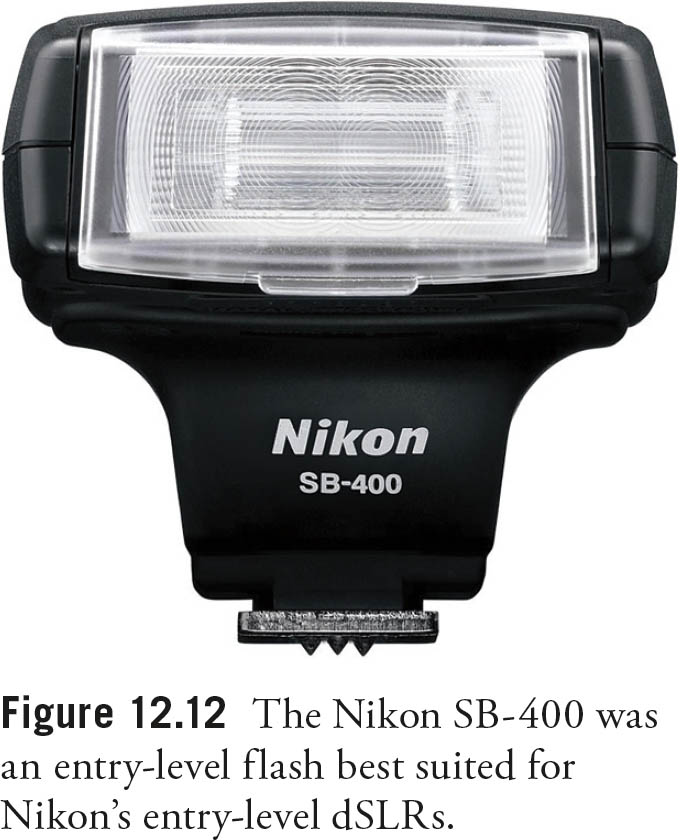
Recently discontinued, but still widely available new from many retailers, this entry-level Speedlight (see Figure 12.12) was, until the SB-300 was unveiled, the smallest and most basic of the series. The SB-400 has a limited, easy-to-use feature set suited for point-and-shoot photography and some slightly more advanced techniques. Do note however that, like the SB-300, it does not support wireless off-camera flash. The 4.5-ounce SB-400 has a moderate guide number of 21/69 at ISO 100 when the zooming head (which can be set to either 18mm or 27mm) is at the 18mm position. It tilts up to 90 degrees, allowing you to bounce the light off of a ceiling, but it cannot be rotated to the side.
Nikon SB-500
This newest Nikon flash unit ($250) has a guide number of 24/79 at ISO 100, a speedy recycle time of about 3.5 seconds, and runs on 2 AA batteries for up to 140 flashes. It includes a built-in LED video light with three output levels. The SB-500’s head tilts up to 90 degrees, with click-stops at 0, 60, 75, and 90. It rotates horizontally 180 degrees to the left and right, for flexible bounce-flash lighting. If you need a zoom head to adjust flash output to better distribute light at various focal lengths, you’re better off with the SB-700 even with its limited zoom range (described next); this unit lacks zooming capabilities. It can, however, serve as a master flash for compatible off-camera units.
Nikon SB-700
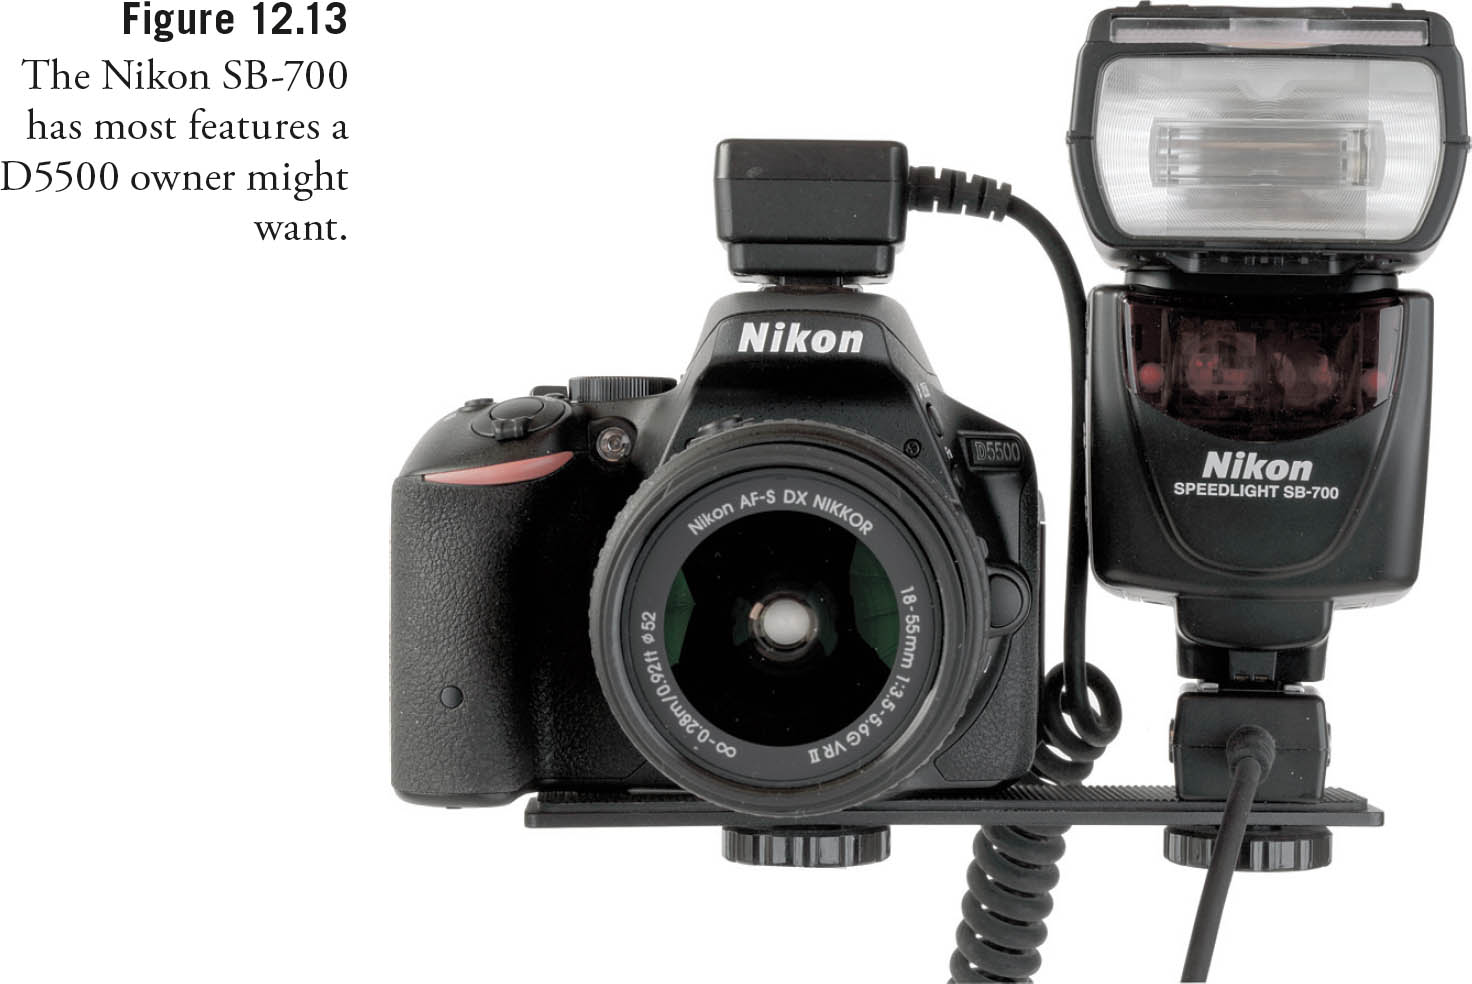
This affordable (about $330) unit (see Figure 12.13, attached to the D5500 using an optional bracket and SC-28 cable) has a guide number of 28/92 (meters/feet) at ISO 100 when set to the 35mm zoom position. It has many of the top-model SB-910’s features, including zoomable flash coverage equal to the field of view of a 16-56mm lens on the D5500 (24-120mm settings with a full-frame camera), and 14mm with a built-in diffuser panel. It has a built-in modeling flash feature, a wireless Commander mode, and automatic detection of DX format when mounted on non-FX camera models.
Figure 12.13 shows the SB-700 fastened to the optional Nikon SC-7 bracket, and linked to the D5500 through the available SC-29 cable. There are a couple of advantages to this configuration. First, the side-mounting moves the flash even farther from the axis of the lens, providing additional red-eye protection. You can still tilt the flash for bounce effects. I find this setup easier to hold, and not as awkward because you don’t have a top-heavy flash unit mounted above the camera.
But, best of all, it’s easy to uncouple the flash/SC-29 from the bracket and use both off-camera. There’s no need to fuss with wireless modes, channels, groups, or other settings; the SB-910 thinks that it’s still connected directly to the D5500—which it is, of course. Another nine-foot cable, the SC-28, is available but does not have the SC-29’s built-in focus assist illuminator. I own both, but like having the SC-29’s focus-assist lamp on top of the camera, so that it is aimed at my subject should the D5500 need a bit of extra illumination for focusing. Although many flashes have their own focus-assist lamp, it may or may not be pointed at your subject when it comes time to use it.
But the SB-700 lacks some important features found in the SB-910. Depending on how you use your Speedlight, these differences may or may not be important to you. Most D5500 owners will not miss these capabilities:
![]() No repeating flash mode. You can’t shoot interesting stroboscopic effects with the SB-700, as you can with the SB-910.
No repeating flash mode. You can’t shoot interesting stroboscopic effects with the SB-700, as you can with the SB-910.
![]() No port for external power pack. Using an external battery pack, like those available from Quantum and others can be important for wedding and event photographers who want to fire off a bunch of shots quickly, while avoiding frequent changes of the AA batteries the SB-700 uses. An external pack has another benefit: more exposures before the Speedlight slows down to prevent overheating. External batteries don’t generate heat inside the flash as internal batteries do.
No port for external power pack. Using an external battery pack, like those available from Quantum and others can be important for wedding and event photographers who want to fire off a bunch of shots quickly, while avoiding frequent changes of the AA batteries the SB-700 uses. An external pack has another benefit: more exposures before the Speedlight slows down to prevent overheating. External batteries don’t generate heat inside the flash as internal batteries do.
![]() Limited zoom range. The SB-700’s zoom head is limited. The ability to match the zoom head to the focal length you’re using can match the coverage to the field of view, so the flash’s output isn’t wasted illuminating areas that aren’t within the actual frame.
Limited zoom range. The SB-700’s zoom head is limited. The ability to match the zoom head to the focal length you’re using can match the coverage to the field of view, so the flash’s output isn’t wasted illuminating areas that aren’t within the actual frame.
Nikon SB-R200
One oddball flash unit in the Nikon line is the SB-200. This is a specialized wireless-only flash that’s especially useful for close-up photography, and is often purchased in pairs for use with the Nikon R1 and R1C1 Wireless Close-Up Speedlight systems. Its output power is low at 10/33 (meters/feet) for ISO 100 as you might expect for a unit used to photograph subjects that are often inches from the camera. It has a fixed coverage angle of 78 degrees horizontal and 60 degrees vertical, but the flash head tilts down to 60 degrees and up to 45 degrees (with detents every 15 degrees in both directions). In this case, “up” and “down” has a different meaning, because the SB-R200 can be mounted on the SX-1 Attachment Ring mounted around the lens, so the pair of flash units are on the sides and titled toward or away from the optical axis. It supports i-TTL, D-TTL, TTL (for film cameras), and Manual modes.
Nikon SB-910
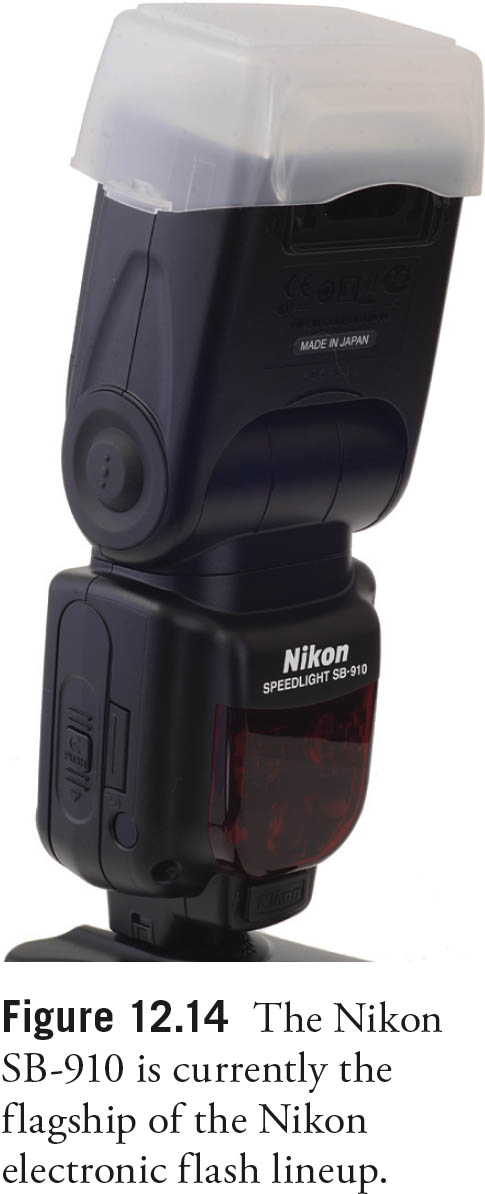
The Nikon SB-910, shown in Figure 12.14, is currently the flagship of the Nikon flash line up at around $550, and has a guide number of 34/111.5 (meters/feet) when the “zooming” flash head (which can be set to adjust the coverage angle of the lens) is set to the 35mm position. It has all the features of the D5500’s built-in flash unit, including Commander mode, repeating flash, modeling light, and selectable power output, along with some extra capabilities.
The SB-910 is basically a slight reboot of the older SB-900, which gained a bad reputation for overheating and then shutting down after a relatively small number of consecutive exposures (as few as a dozen or so shots). The SB-910 also can overheat, but features a different thermal protection system. Instead of disabling the flash as it begins warming up, the SB-910 increases the recycle time between flashes, giving the unit additional time to cool a bit before the next shot. While this “improvement” is not a real fix, it does encourage you to slow your shooting pace a bit to stretch out the number of flashes this Speedlight produces before it must be shut down for additional cooling.
Nikon estimates that you should be able to get 190 flashes from the SB-910 when using AA 2600 mAh rechargeable batteries, if firing the Speedlight at full output once every 30 seconds, with a minimum recycling time of 2.3 seconds (which gradually becomes longer as the flash heats up and the thermal protection kicks in). To get the maximum number of shots from your batteries, Nikon figures that AF-assist illumination, power zoom, and the LCD panel illumination are switched off.
There are some improvements, such as illuminated buttons and a restyled soft case, but, in general, the SB-910 is very similar to the SB-900 that we Nikon photographers have learned to know and fear. For example, you can angle the flash and rotate it to provide bounce flash. It includes additional, non-through-the-lens exposure modes, thanks to its built-in light sensor, and can “zoom” and diffuse its coverage angle to illuminate the field of view of lenses from 12mm to 200mm on a D5500 in FX mode. (In DX mode, coverage ranges from 8mm to 200mm.)
The SB-910/SB-900 also has its own powerful focus assist lamp to aid autofocus in dim lighting, and has reduced red-eye effects simply because the unit, even when attached to the D5500 and not used off-camera, is mounted in a higher position that tends to eliminate reflections from the eye back to the camera lens.
I power my SB-910 with Panasonic (formerly Sanyo) Eneloop AA nickel metal hydride batteries. These are a special type of rechargeable battery with a feature that’s ideal for electronic flash use. The Eneloop cells, unlike conventional batteries, don’t self-discharge over relative short periods of time. Once charged, they can hold onto their juice for a year or more. That means you can stuff some of these into your Speedlight, along with a few spares in your camera bag, and not worry about whether the batteries have retained their power between uses. There’s nothing worse than firing up your strobe after not using it for a month, and discovering that the batteries are dead.
Note that the SB-910, like your camera, contains firmware that can be updated. The custom settings readouts on the flash itself will tell you what firmware version you currently have. If an update is required, you’ll need to download the firmware module from the Nikon website. Load it onto a memory card, and then mount the flash on your D5500 and power it up. You’ll find a fourth entry in the Firmware section of the Setup menu, marked S (for Speedlight or Strobe). The SB-910’s firmware can be updated through the camera/flash connection just like the camera’s own firmware.
Flash Techniques
This next section will discuss using specific features of the Nikon D5500’s built-in flash, as well as those of the Nikon dedicated external flash units. It’s not possible to discuss every feature and setting of the external flash units in this chapter (entire books have been written to do that), so I’ll simply provide an overview here.
Using the Zoom Head
Some external flash zoom heads can adjust themselves automatically to match lens focal lengths in use reported by the D5500 to the flash unit, or you can adjust the zoom head position manually. With flash units prior to the SB-900, automatic zoom adjustment wasted some of your flash’s power, because the flash unit assumed that the focal length reported comes from a full-frame camera. Because of the 1.5X crop factor, the flash coverage when the flash is set to a particular focal length was wider than is required by the D5500’s cropped image. The SB-900, on the other hand, automatically determines whether your camera is an FX-format, full-frame model, or is a DX “cropped sensor” model like the Nikon D5500, and adjusts coverage angle to suit.
You can manually adjust the zoom position yourself, if you want the flash coverage to correspond to something other than the focal length in use. Just press the Zoom button on the SB-910, and turn the selector dial clockwise to increase the zoom value, or counterclockwise to decrease the zoom value. You can also adjust the zoom position by repeatedly pressing the Zoom button.
Flash Modes
The TTL automatic flash modes available for the SB-900/910 are as follows:
![]() AA. Auto Aperture flash. The SB-900 uses a built-in light sensor to measure the amount of flash illumination reflected back from the subject, and adjusts the output to produce an appropriate exposure based on the ISO, aperture, focal length, and flash compensation values set on the D5500. This setting on the flash can be used with the D5500 in Program or Aperture-priority modes.
AA. Auto Aperture flash. The SB-900 uses a built-in light sensor to measure the amount of flash illumination reflected back from the subject, and adjusts the output to produce an appropriate exposure based on the ISO, aperture, focal length, and flash compensation values set on the D5500. This setting on the flash can be used with the D5500 in Program or Aperture-priority modes.
![]() A. Non-TTL auto flash. The SB-900’s sensor measures the flash illumination reflected back from the subject, and adjusts the output to provide an appropriate exposure. This setting on the flash can be used when the D5500 is set to Aperture-priority or Manual modes. You can use this setting to manually “bracket” exposures, as adjusting the aperture value of the lens will produce more or less exposure.
A. Non-TTL auto flash. The SB-900’s sensor measures the flash illumination reflected back from the subject, and adjusts the output to provide an appropriate exposure. This setting on the flash can be used when the D5500 is set to Aperture-priority or Manual modes. You can use this setting to manually “bracket” exposures, as adjusting the aperture value of the lens will produce more or less exposure.
![]() GN. Distance priority manual. You enter a distance value, and the SB-900 adjusts light output based on distance, ISO, and aperture to produce the right exposure in either Aperture-priority or Manual exposure modes. Press the Mode button on the flash until the GN indicator appears, then press the SEL button to highlight the distance display, using the plus and minus buttons to enter the distance value you want (from 1 to 65.6 feet, or 0.3 to 20 meters). The SB-800 will indicate a recommended aperture, which you then set on the lens mounted on the D5500.
GN. Distance priority manual. You enter a distance value, and the SB-900 adjusts light output based on distance, ISO, and aperture to produce the right exposure in either Aperture-priority or Manual exposure modes. Press the Mode button on the flash until the GN indicator appears, then press the SEL button to highlight the distance display, using the plus and minus buttons to enter the distance value you want (from 1 to 65.6 feet, or 0.3 to 20 meters). The SB-800 will indicate a recommended aperture, which you then set on the lens mounted on the D5500.
![]() M. Manual flash. The flash fires at a fixed output level. Press the Mode button until M appears on the SB-900’s LCD panel. Press the SEL button and the plus or minus buttons to increase or decrease the output value of the flash. Use the table in the flash manual to determine a suggested aperture setting for a given distance. Then, set that aperture on the D5500 in either Aperture-priority or Manual exposure modes.
M. Manual flash. The flash fires at a fixed output level. Press the Mode button until M appears on the SB-900’s LCD panel. Press the SEL button and the plus or minus buttons to increase or decrease the output value of the flash. Use the table in the flash manual to determine a suggested aperture setting for a given distance. Then, set that aperture on the D5500 in either Aperture-priority or Manual exposure modes.
![]() RPT. Repeating flash. The flash fires repeatedly to produce a multiple flash strobing effect. To use this mode, set the D5500’s exposure mode to Manual. Then set up the number of repeating flashes per frame, frequency, and flash output level on the SB-900/SB-910.
RPT. Repeating flash. The flash fires repeatedly to produce a multiple flash strobing effect. To use this mode, set the D5500’s exposure mode to Manual. Then set up the number of repeating flashes per frame, frequency, and flash output level on the SB-900/SB-910.
BURN OUT
When using repeating flash with the SB-900, or any large number of consecutive flashes in any mode (more than about 15 shots at full power), allow the flash to cool off (Nikon recommends a 10-minute time out) to avoid overheating the flash. The SB-900 will signal you with a warning chime that rings twice when it’s time for a cooling-off period. The flash will actually disable itself, if necessary, to prevent damage. The newer SB-910 has circuitry that allows longer usage cycles.
Working with Wireless Commander Mode
The D5500’s built-in flash cannot be set to Commander mode and used to control other compatible flash units. However, if you mount one of several compatible external dedicated flash units, such as the Nikon SB-500, SB-700 or SB-910 (and some earlier, discontinued models), they can serve as a flash “Commander” to communicate with and trigger other flash units. Nikon offers a unit called the SU-800, which is a commander unit that has no built-in visible flash, and which controls other units using infrared signals.
The SU-800 has several advantages. It’s useful for cameras like the D5500, which lacks a Commander mode, and several “pro” cameras, like the D4, Df, D3x, D3s, and D2xs, which have no built-in flash to function in Commander mode. The real advantage the SU-800 has is its “reach.” Because it uses IR illumination rather than visible light to communicate with remote flashes, the infrared burst can be much stronger, doubling its effective control range to 66 feet.
Once you have set the SB-910 or other flash as the Master/Commander, you can specify a shooting mode, either Manual with a power output setting you determine from 1/1 to 1/128 or for TTL automatic exposure. When using TTL, you can dial in from –1.0 to +3.0 flash exposure compensation for the master flash. You can also specify a channel (1, 2, 3, or 4) that all flashes will use to communicate among themselves. (If other Nikon photographers are present, choosing a different channel prevents your flash from triggering their remotes, and vice versa.)
Each remote flash unit can also be set to one of three groups (A, B, or C), so you can set the exposure compensation and exposure mode of each group separately. For example, one or more flashes in one group can be reduced in output compared to the flashes in the other group, to produce a particular lighting ratio of effect.
Connecting External Flash
You have three basic choices for linking an external flash unit to your Nikon D5500. They are as follows:
![]() Mount on the accessory shoe. Sliding a compatible flash unit into the Nikon D5500’s accessory shoe provides a direct connection. With a Nikon dedicated flash, all functions of the flash are supported.
Mount on the accessory shoe. Sliding a compatible flash unit into the Nikon D5500’s accessory shoe provides a direct connection. With a Nikon dedicated flash, all functions of the flash are supported.
![]() Connect to the accessory shoe with a cable or adapter. The Nikon SC-28 and SC-29 TTL coiled remote cords have an accessory shoe on one end of a nine-foot cable to accept a flash, and a foot that slides into the camera accessory shoe on the other end, providing a link that is the same as when the flash is mounted directly on the camera. The SC-29 version also includes a focus assist lamp, like that on the camera and SB-900/910. You can also use an adapter in the accessory shoe that accepts a standard flash cable. In all cases, you should make sure that the external flash doesn’t use a triggering voltage high enough to “fry” your camera’s circuitry. You’ll find more information on this, and recommendations for a voltage isolator to prevent problems, later in this chapter.
Connect to the accessory shoe with a cable or adapter. The Nikon SC-28 and SC-29 TTL coiled remote cords have an accessory shoe on one end of a nine-foot cable to accept a flash, and a foot that slides into the camera accessory shoe on the other end, providing a link that is the same as when the flash is mounted directly on the camera. The SC-29 version also includes a focus assist lamp, like that on the camera and SB-900/910. You can also use an adapter in the accessory shoe that accepts a standard flash cable. In all cases, you should make sure that the external flash doesn’t use a triggering voltage high enough to “fry” your camera’s circuitry. You’ll find more information on this, and recommendations for a voltage isolator to prevent problems, later in this chapter.
![]() Wireless link. Certain external Nikon electronic flash can be triggered by another Master flash such as the Nikon SB-500/700/900/910 in Commander mode or by the SU-800 infrared unit.
Wireless link. Certain external Nikon electronic flash can be triggered by another Master flash such as the Nikon SB-500/700/900/910 in Commander mode or by the SU-800 infrared unit.
More Advanced Lighting Techniques
As you advance in your Nikon D5500 photography, you’ll want to learn more sophisticated lighting techniques, using more than just straight-on flash, or using just a single flash unit. Entire books have been written on lighting techniques (check out David Busch’s Quick Snap Guide to Lighting). I’m going to provide a quick introduction to some of the techniques you should be considering.
Diffusing and Softening the Light
Direct light can be harsh and glaring, especially if you’re using the flash built in to your camera, or an auxiliary flash mounted in the hot shoe and pointed directly at your subject. The first thing you should do is stop using direct light (unless you’re looking for a stark, contrasty appearance as a creative effect). There are a number of simple things you can do with both continuous and flash illumination.
![]() Use fill light. Your D5500’s built-in flash makes a perfect fill-in light for the shadows, brightening inky depths with a kicker of illumination (see Figure 12.15).
Use fill light. Your D5500’s built-in flash makes a perfect fill-in light for the shadows, brightening inky depths with a kicker of illumination (see Figure 12.15).
![]() Use window light. Light coming in a window can be soft and flattering, and a good choice for human subjects. Move your subject close enough to the window that its light provides the primary source of illumination. You might want to turn off other lights in the room, particularly to avoid mixing daylight and incandescent light (see Figure 12.16).
Use window light. Light coming in a window can be soft and flattering, and a good choice for human subjects. Move your subject close enough to the window that its light provides the primary source of illumination. You might want to turn off other lights in the room, particularly to avoid mixing daylight and incandescent light (see Figure 12.16).
![]() Bounce the light. External electronic flash units mounted on the D5500 usually have a swivel that allows them to be pointed up at a ceiling for a bounce light effect. You can also bounce the light off a wall. You’ll want the ceiling or wall to be white or have a neutral gray color to avoid a color cast.
Bounce the light. External electronic flash units mounted on the D5500 usually have a swivel that allows them to be pointed up at a ceiling for a bounce light effect. You can also bounce the light off a wall. You’ll want the ceiling or wall to be white or have a neutral gray color to avoid a color cast.
![]() Use reflectors. Another way to bounce the light is to use reflectors or umbrellas that you can position yourself to provide a greater degree of control over the quantity and direction of the bounced light. Good reflectors can be pieces of foamboard, Mylar, or a reflective disk held in place by a clamp and stand. Although some expensive umbrellas and reflectors are available, spending a lot isn’t necessary. A simple piece of white foamboard does the job beautifully. Umbrellas have the advantage of being compact and foldable, while providing a soft, even kind of light. They’re relatively cheap, too, with a good 40-inch umbrella available for as little as $20.
Use reflectors. Another way to bounce the light is to use reflectors or umbrellas that you can position yourself to provide a greater degree of control over the quantity and direction of the bounced light. Good reflectors can be pieces of foamboard, Mylar, or a reflective disk held in place by a clamp and stand. Although some expensive umbrellas and reflectors are available, spending a lot isn’t necessary. A simple piece of white foamboard does the job beautifully. Umbrellas have the advantage of being compact and foldable, while providing a soft, even kind of light. They’re relatively cheap, too, with a good 40-inch umbrella available for as little as $20.
![]() Use diffusers. Nikon supplies a Sto-Fen-style diffuser dome with the SB-900/910 and SB-700 flash units. You can purchase a similar diffuser for other flash from Nikon, Sto-Fen, and some other vendors that offer clip-on diffusers. The two examples shown in Figures 12.17 and 12.18 fit over your electronic flash head and provide a soft, flattering light. These add-ons are more portable than umbrellas and other reflectors, yet provide a nice diffuse lighting effect.
Use diffusers. Nikon supplies a Sto-Fen-style diffuser dome with the SB-900/910 and SB-700 flash units. You can purchase a similar diffuser for other flash from Nikon, Sto-Fen, and some other vendors that offer clip-on diffusers. The two examples shown in Figures 12.17 and 12.18 fit over your electronic flash head and provide a soft, flattering light. These add-ons are more portable than umbrellas and other reflectors, yet provide a nice diffuse lighting effect.
Using Multiple Light Sources
Once you gain control over the qualities and effects you get with a single light source, you’ll want to graduate to using multiple light sources. Using several lights allows you to shape and mold the illumination of your subjects to provide a variety of effects, from backlighting to side lighting to more formal portrait lighting. You can start simply with several incandescent light sources, bounced off umbrellas or reflectors that you construct. Or you can use more flexible multiple electronic flash setups.
Effective lighting is the one element that differentiates great photography from candid or snapshot shooting. Lighting can make a mundane subject look a little more glamorous. It can make subjects appear to be soft when you want a soft look, or bright and sparkly when you want a vivid look, or strong and dramatic if that’s what you desire. As you might guess, having control over your lighting means that you probably can’t use the lights that are already in the room. You’ll need separate, discrete lighting fixtures that can be moved, aimed, brightened, and dimmed on command.
Selecting your lighting gear will depend on the type of photography you do, and the budget you have to support it. It’s entirely possible for a beginning D5500 photographer to create a basic, inexpensive lighting system capable of delivering high-quality results for a few hundred dollars, just as you can spend megabucks ($1,000 and up) for a sophisticated lighting system.
Basic Flash Setups
If you want to use multiple electronic flash units, the Nikon Speedlights described earlier will serve admirably. The higher-end models can be used with Nikon’s wireless i-TTL features, which allow you to set up to three separate groups of flash units (several flashes can be included in each group) and trigger them using a master flash and the camera. Just set up one master unit, and arrange the compatible slave units around your subject. You can set the relative power of each unit separately, thereby controlling how much of the scene’s illumination comes from the main flash, and how much from the auxiliary flash units, which can be used as fill flash, background lights, or, if you’re careful, to illuminate the hair of portrait subjects.
Studio Flash
If you’re serious about using multiple flash units, a studio flash setup might be more practical. The traditional studio flash is a multi-part unit, consisting of a flash head that mounts on your light stand, and is tethered to an AC (or sometimes battery) power supply. A single power supply can feed two or more flash heads at a time, with separate control over the output of each head.
When they are operating off AC power, studio flash don’t have to be frugal with the juice, and are often powerful enough to illuminate very large subjects or to supply lots and lots of light to smaller subjects. The output of such units is measured in watt seconds (ws), so you could purchase a 200ws, 400ws, or 800ws unit, and a power pack to match.
Their advantages include greater power output, much faster recycling, built-in modeling lamps, multiple power levels, and ruggedness that can stand up to transport, because many photographers pack up these kits and tote them around as location lighting rigs. Studio lighting kits can range in price from a few hundred dollars for a set of lights, stands, and reflectors, to thousands for a high-end lighting system complete with all the necessary accessories.
A more practical choice these days is monolights (see Figure 12.19), which are “all-in-one” studio lights that sell for about $200 to $400. They have the flash tube, modeling light, and power supply built into a single unit that can be mounted on a light stand. Monolights are available in AC-only and battery-pack versions, although an external battery eliminates some of the advantages of having a flash with everything in one unit. They are very portable, because all you need is a case for the monolight itself, plus the stands and other accessories you want to carry along. Because these units are so popular with photographers who are not full-time professionals, the lower-cost monolights are often designed more for lighter duty than professional studio flash. That doesn’t mean they aren’t rugged; you’ll just need to handle them with a little more care, and, perhaps, not expect them to be used eight hours a day for weeks on end. In most other respects, however, monolights are the equal of traditional studio flash units in terms of fast recycling, built-in modeling lamps, adjustable power, and so forth.
Connecting Multiple Non-Dedicated Units to Your Nikon D5500
Non-dedicated electronic flash units can’t use the automated i-TTL features of your Nikon D5500; you’ll need to calculate exposure manually, through test shots evaluated on your camera’s LCD, or by using an electronic flash meter. Moreover, you don’t have to connect them to the accessory shoe on top of the camera. Instead, you can remove them from the camera and plug in an adaptor like the Nikon AS-15 onto the accessory shoe to provide a PC/X connector for use with an old-style camera sync cord.
You should be aware that older electronic flash units sometimes use a triggering voltage that is too much for your D5500 to handle. You can actually damage the camera’s electronics if the voltage is too high. You won’t need to worry about this if you purchase brand-new units from Alien Bees, Adorama, or other vendors. But if you must connect an external flash with an unknown triggering voltage, I recommend using a Wein Safe Sync, which isolates the flash’s voltage from the camera triggering circuit.
Finally, some flash units have an optical slave trigger built in, or can be fitted with one, so that they fire automatically when another flash, including your camera’s built-in unit, fires (modern slave triggers ignore the pre-flash). Or, you can use radio control devices such as those available from PocketWizard and RadioPopper.
Other Lighting Accessories
Once you start working with light, you’ll find there are plenty of useful accessories that can help you. Here are some of the most popular that you might want to consider.
Soft Boxes
Soft boxes are large square or rectangular devices that may resemble a square umbrella with a front cover, and produce a similar lighting effect. They can extend from a few feet square to massive boxes that stand five or six feet tall—virtually a wall of light. With a flash unit or two inside a soft box, you have a very large, semi-directional light source that’s very diffuse and very flattering for portraiture and other people photography.
Soft boxes are also handy for photographing shiny objects. They not only provide a soft light, but if the box itself happens to reflect in the subject (say you’re photographing a chromium toaster), the box will provide an interesting highlight that’s indistinct and not distracting.
You can buy soft boxes or make your own. Some lengths of friction-fit plastic pipe and a lot of muslin cut and sewed just so may be all that you need.
Light Stands
Both electronic flash and incandescent lamps can benefit from light stands. These are lightweight, tripod-like devices (but without a swiveling or tilting head) that can be set on the floor, tabletops, or other elevated surfaces and positioned as needed. Light stands should be strong enough to support an external lighting unit, up to and including a relatively heavy flash with a soft box or umbrella reflectors. You want the supports to be capable of raising the lights high enough to be effective. Look for light stands capable of extending six to seven feet high. The nine-foot units usually have larger, steadier bases, and extend high enough that you can use them as background supports. You’ll be using these stands for a lifetime, so invest in good ones.
Backgrounds
Backgrounds can be backdrops of cloth, sheets of muslin you’ve painted yourself using a sponge dipped in paint, rolls of seamless paper, or any other suitable surface your mind can dream up. Backgrounds provide a complementary and non-distracting area behind subjects (especially portraits) and can be lit separately to provide contrast and separation that outlines the subject, or which helps set a mood.
I like to use plain-colored backgrounds for portraits, and white seamless backgrounds for product photography. You can usually construct these yourself from cheap materials and tape them up on the wall behind your subject, or mount them on a pole stretched between a pair of light stands.
Snoots and Barn Doors
These fit over the flash unit and direct the light at your subject. Snoots are excellent for converting a flash unit into a hair light, while barn doors give you enough control over the illumination by opening and closing their flaps that you can use another flash as a background light, with the capability of feathering the light exactly where you want it on the background.
