
There are many different software programs available for digital photographers. I have already discussed Photo Mechanic (www.camerabits.com) in my Digital workflow, but there are three additional programs on the market that are very popular: Adobe® Photoshop®, Adobe® Lightroom® and Apple Aperture®. Many people don't understand the difference between the three, and while it is possible to think of them as image editors, that is not strictly true. Photoshop actually changes the image on a pixel level, while Lightroom and Aperture keep a list of the changes you want to make but don't actually do anything to the image file until it is output for use. This functionality allows you to always go back to the original file as it came from the camera.
Adobe is the leading manufacturer of software for digital photographers with the industry standard Photoshop. In early 2007, Adobe released Photoshop Lightroom, a product aimed at professional photographers to help streamline digital photography workflow. This powerful program allows photographers to import, sort, edit and output images easily and quickly. I highly recommend reading Nathaniel Coalson's book Adobe Photoshop Lightroom 2: Streamlining Your Digital Photography Process to learn more about how to effectively use Lightroom.
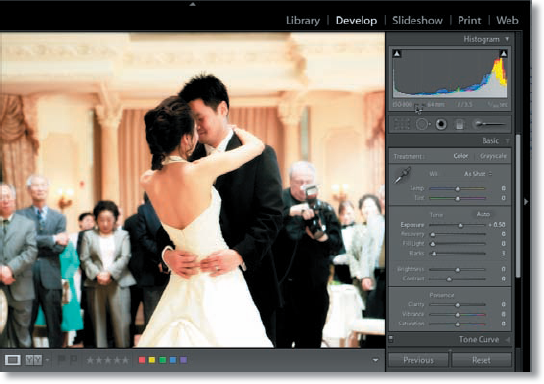
The program is divided into five separate modules: Library, Develop, Slideshow, Print and Web, plus an image importer. Since I use Photo Mechanic to import my images and I do not do any of my own printing or Web gallery creation, I am mainly concerned with the first three modules, Library, Develop and Slideshow when I use Lightroom. The first module, Library is where I do all my sorting and where I make the decisions on what will stay and what will go.

The goal is to find the best photos from the shoot. Lightroom offers three different ways to rate your images: a five star rating system, a color label system, and a flag system. You can use one rating system or a combination of all three to sort your images.
The Five Star system allows you to rank your images from 0 starts to 5 stars, with your best being 5 stars and the worst are 0 or 1 star.
A color label in Red, Yellow, Green, Blue or Purple can be applied to each image.
The flag system allows you to either flag an image as a Pick or as Rejected. Of course, you also have the option to not flag the images at all.
I often use all three of these methods in conjunction with each other. For example I give an image a star rating, give it a red label and flag it as a pick. Then I can also sort by any or all of the rating methods to organize my images and look at them in a variety of sorting orders.
All the editing done in Adobe Photoshop Lightroom is non-destructive editing. When a file is cropped or converted to black and white, the image is actually unchanged until it is exported. Lightroom actually creates a set of instructions on how to display the image inside of Lightroom and writes those instructions into the file if using the DNG file format or into a sidecar XML if you are using camera raw, JPEG or TIFF formats. While this sounds very complicated, in practice it is pretty simple and convenient. It means you can edit the same image in a variety of ways and see what you like best without ever actually changing any of the image information.
Lightroom uses a file structure based on Catalogs. Each catalog can have one shoot or hundreds of shoots in them. I have chosen to have a catalog for each wedding I shoot. This catalog contains all the photos from that wedding—mine and any from the second shooter, all in the same catalog.
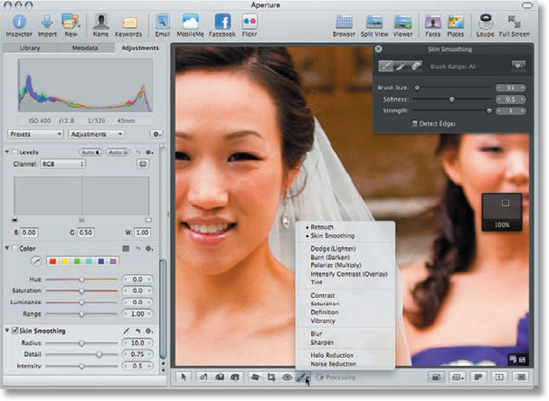
With the recent release of version 3.0, Aperture has made leaps and bounds with their software. Version 3 includes over 200 new features and improvements including a new and improved import module, non-destructive adjustment brushes, improved histograms and adjustment presets. The new non-destructive brushes allow you to paint an effect selectively onto parts of your image.
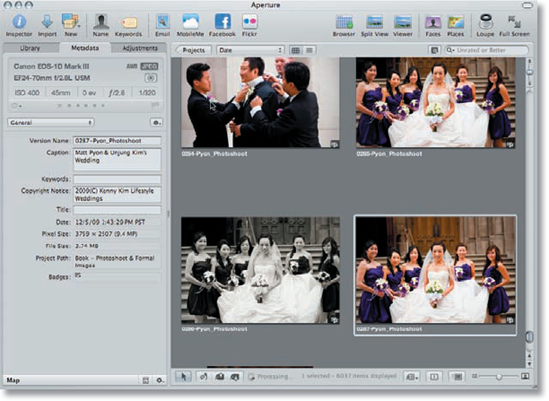
Two features unique to Apple and their image editors are Faces and Places. These two started as features in the consumer iPhoto software, but now have been integrated into Aperture. Faces uses facial recognition software to automatically detect people in your images, while Places allows GPS-enabled cameras to place the location of the image on a map without having to do much work.
Apple has also improved the slideshow functions of Aperture making it possible to create full multi-media presentations combining still images, audio and video into a single presentation. It is also possible to add titles, borders, and special effects to create a full slideshow presentation from a single program. Aperture also allows you to sort, tag and rate your images like you can in Adobe Photoshop Lightroom

One nice thing about using Aperture is that it works well in conjunction with rest of the Apple software collection. My friend Joseph Linaschke (www.apertureexpert.com) is actually an Apple Aperture expert and has written a great eBook about Getting Started with Aperture. Register on his Web site to gain access to this book and other great resources.
If you want to edit digital photographs, Adobe Photoshop is the leader. There is no possible way to cover all of Photoshop in this appendix and there is no need to with the amount of Photoshop books in the market place. I just wanted to share a couple ways I use Photoshop. Often I use it to create black and white images from color shots. I also frequently use the touchup tools including the healing brush and the Liquify filter coupled with some of my favorite preset actions.
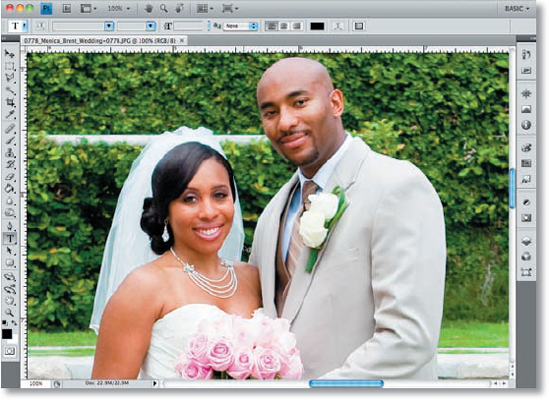
Black and white photographs have a very classic look to them, especially when it comes to weddings. The bride dressed in a white dress with the groom dressed in a black tuxedo naturally lends itself to black and white photography. There are many different methods to create black and white photos in Photoshop including the built-in Black & White filter. When I started using Photoshop, I used a set of purchased actions, which are preset commands that can be used over and over again to convert the selected images to Black & White. One of the more popular Black & White conversion methods is with Nik Software's Silver Efex Pro, a plug-in that allows you to control all aspects of the black & white conversion and save the setting so they can be used over and over again to give your images consistency.

Photoshop is powerful enough to change just about everything in an image and make it look real. However, just because it can be done, doesn't mean it should be done. My personal belief is to try to make the image look as good as possible, but when it comes to making cosmetic changes, I only change what I believe will not be there in a few weeks. That might mean doing a little Photoshop blemish removal, but not major Photoshop plastic surgery.
For example, there are times, when no matter what you wish, things don't go perfectly to plan. This is very true when it comes to skin. I know every bride and groom would like to have perfect blemish-free skin on their important day, but sometimes that doesn't happen. The Photoshop healing brush can help with those little imperfections by allowing you to select an area of skin that is unblemished and use it to paint over the blemished area. This will remove the blemished area and replace it with the unblemished skin.
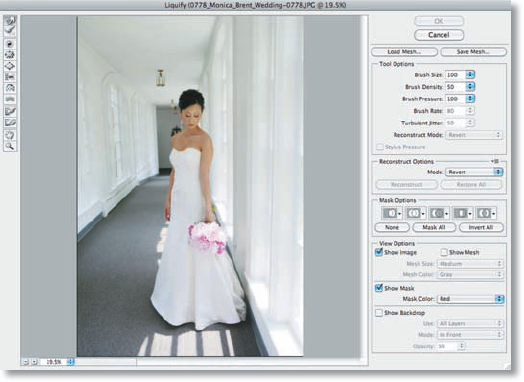
The Liquify filter allows me to make other minor changes when needed. Maybe there is an out of place bulge or bump that needs to be slightly reduced. By nudging it slightly, I can make it not as noticeable. The idea is not to change the image but to slightly enhance it. I would never want a bride or groom to look at the images and wonder what I did with Photoshop to make them look so different.
A final note about the actions — as a photographer, you want to capture everything on camera as much as possible. So knowing the camera settings and the right combination of shutter speed, ISO, aperture and white balance can help you achieve the effect you want. Using software should just enhance your images, not recover or recreate what was not there. Get in the habit of getting things right on camera first.