
Chapter 8. Getting Online: Wi-Fi, 3G, and Mobile Hot Spots
The Droid X is filled with plenty of nifty features, but it really comes to life when you take it online. With it, you’ve got the whole Internet in your hand—and on a screen larger than on other smartphones. Whether you need to search, get maps and directions, watch YouTube videos, or do pretty much anything else on the Internet, the Droid X lets you do it.
But first, of course, you need to get connected. You’ll get the rundown on how to do that in this chapter, along with learning about one of the Droid X’s more amazing capabilities—the ability to turn into a Wi-Fi hotspot to give computers and other devices Internet connections.

How the Droid X Gets Online
Whenever it’s powered on, the Droid X is ready to hop onto the Internet. Whenever Verizon’s state-of-the-art third-generation network is available, the phone uses it—you can tell by the 3G symbol in the status bar. The 3G network was built for data and the Internet, so you can quickly send and receive good-sized email attachments, download music, watch YouTube videos…pretty much everything Internet.
With Verizon’s excellent 3G coverage, you’ll be able to hitch a 3G ride in most places you use the Droid X. Not everything is hunky-dory in 3G land, though; it sucks up more power than non-3G connections, so your battery charge won’t last as long.
When the 3G network isn’t available, the Droid X drops down to the older network used for voice calls, indicated by the bars in the status bar. It’s much slower than 3G, but at least you’re not cut off from civilization completely.
To connect via 3G or the voice network, there’s nothing you need to do. The Droid X connects automatically depending on what’s available. Wi-Fi, the fastest connection of them all, takes a little more work, as you’ll see in the next section.
Connecting via Wi-Fi
When you connect to the Internet via a Wi-Fi hot spot, you’ve hit the mother lode of connection speeds. Wi-Fi hot spots can be as fast as your cable modem connection at home.
If you’ve ever taken a laptop on the road, you may already know where the best Wi-Fi hot spots are. Some coffee shops and hotels, for example, offer customers free Wi-Fi, while others make you pay for it. More and more, you’ll find Wi-Fi coverage in airplanes, libraries, and even entire cities. In fact, if you connect your computers to the Internet at home using a wireless router, you have your own Wi-Fi hot spot, and you can connect your Droid X to the Internet via your home network.
Your actual connection speed varies from hot spot to hot spot. When you’re at a public hot spot, you’re sharing the connection with other people. So if a lot of people are using it at once, and the hot spot isn’t set up to handle that many connections, your speed may suffer. Also, Wi-Fi isn’t a good bet when you’re in motion. Hot spots have a range of only about 300 feet, so you and your Droid X can quickly move right past them. 3G is a better option when you’re moving.
Note
When you’re connected to a Wi-Fi hot spot, the Droid X uses it for more than just Internet access. It also uses Wi-Fi for finding your current location in apps like Google Maps (unless you turn on GPS, as described on Location & Security). The phone uses a clever technology that finds nearby Wi-Fi networks and uses fancy algorithms to determine your location. It’s not as precise as GPS, but it’s still pretty good.
Unlike the 3G connection, which happens automatically, Wi-Fi doesn’t work unless you turn it on. That’s a good thing, since Wi-Fi connections sap much more battery power.
Once you’re ready to hook up to a hot spot, here’s how:
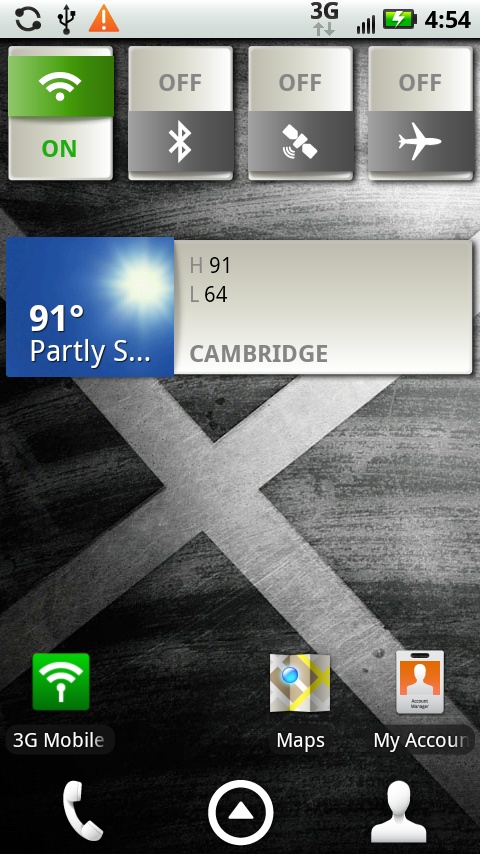
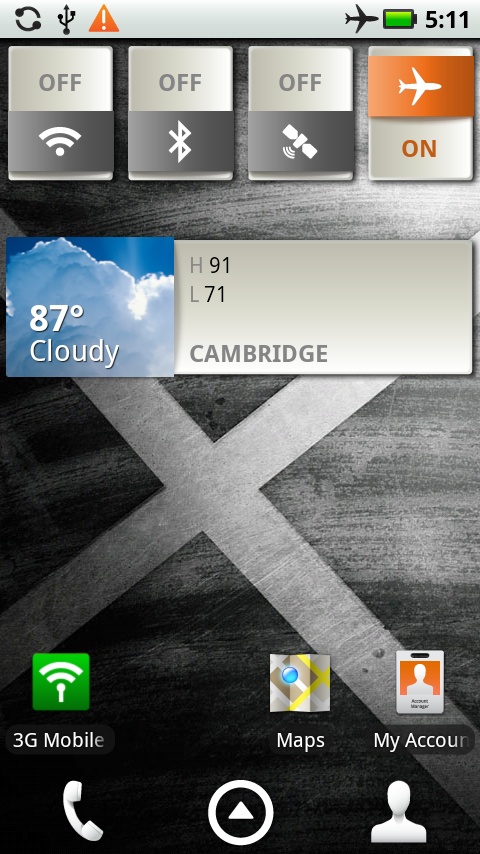
Use the Power Control widget. Slide over to the Settings pane (Settings Pane), and at the top you’ll find the Power Control widget. The leftmost button controls your Wi-Fi radio. If the button is gray, tap it, and it turns green, meaning you’ve turned on Wi-Fi. If it’s already green, you don’t need to do anything. (If it’s on and you want to turn it off, tap it.)
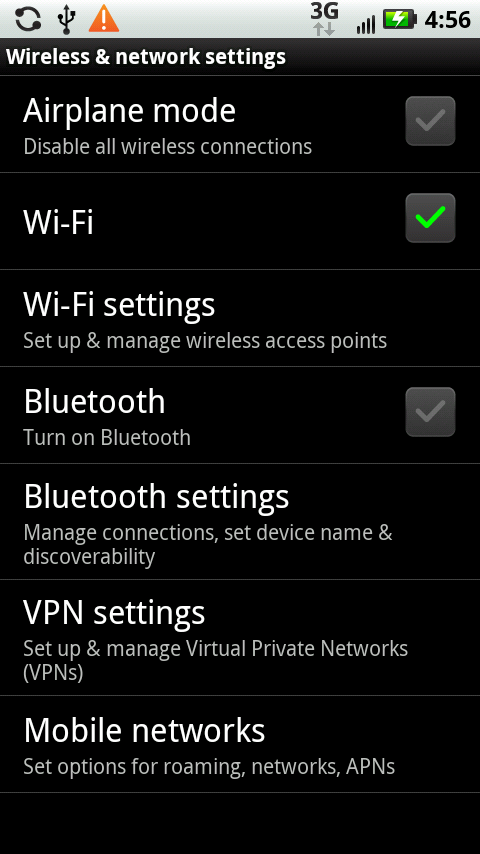
Use Wireless & network settings. From your Home screen or any pane, press the Menu key, select “Wireless & networks”, and then tap Wi-Fi. A green checkmark appears to show that you’ve turned it on. To turn it off, tap it again.
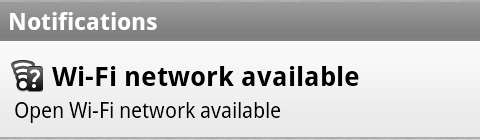
Now that you’ve got Wi-Fi turned on, when you’re in range of an open Wi-Fi network, a message should appear in the Notification area, telling you that a Wi-Fi network is nearby and ready to be connected to. Drag down the status bar and you’ll see the Wi-Fi network icon, and the message, “Wi-Fi network available.”
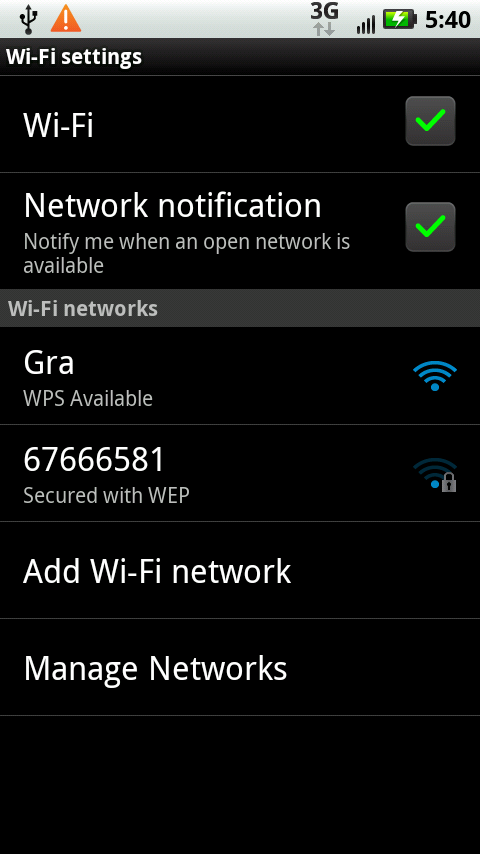
Tap it, and you see a list of nearby Wi-Fi networks. The list tells you the name of each Wi-Fi network and also whether it’s an open network (that is, it doesn’t require a password) or whether it’s password protected.
Tip
If you find yourself getting disconnected from Wi-Fi networks, try this. From the Home screen press the Menu key, then select Wireless & Networks→Wi-Fi Settings, press the Menu key, and tap Advanced→Wi-Fi sleep policy. Select “Never” and your Wi-Fi won’t go to sleep when the Droid X’s screen turns off. Select “Never when plugged in” and Wi-Fi won’t go to sleep when your Droid X is plugged in.
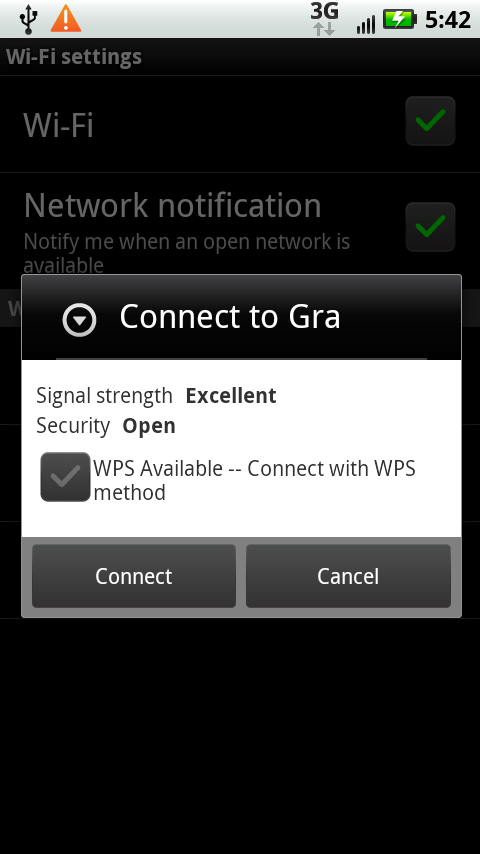
Tap any network on the list, and a connection screen appears. Tap Connect if it’s open, or, if it’s protected, type the password. Either way, after a few seconds, you make the connection. The network to which you just connected shows up in your list with the word “Connected” underneath it. A blue Wi-Fi indicator also appears in the status bar, showing that you’re connected.
What if there’s no notification telling you that there’s a nearby Wi-Fi network? No problem—it’s still easy to connect. From the Home screen or a pane, press the Menu key and tap Settings→“Wireless & networks”→“Wi-Fi settings”. You come to the screen that shows you all the nearby Wi-Fi networks so you can make a connection.
Tip
If your cellphone plan includes a limit on the amount of data you can use every month, and charges you more if you go over the limit, the Droid X’s Wi-Fi capabilities can be your best friend. When you’re sending or receiving data via Wi-Fi, it’s not counted as part of your data plan. So using Wi-Fi whenever possible can help make sure you don’t bump up against your limits. And if you know you’re going to be downloading large files, such as songs or movies, try to do it via Wi-Fi. In addition to not racking up data use, it’ll be faster than 3G as well.
Disconnecting and Reconnecting
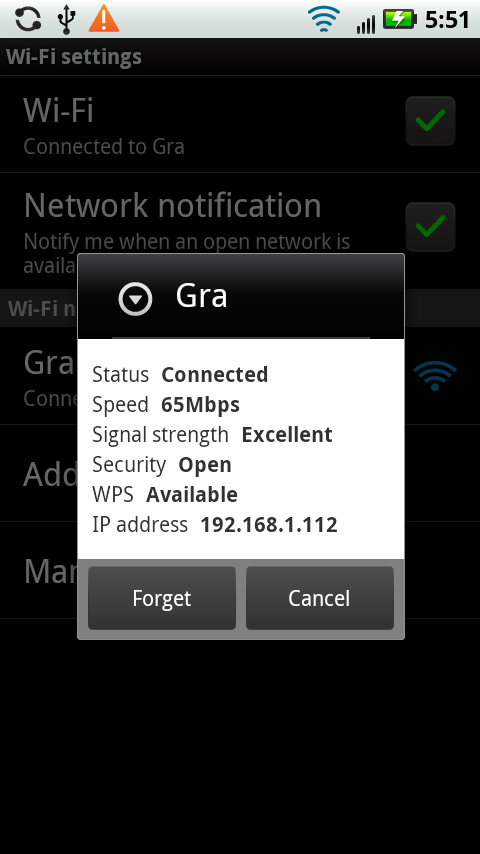
To disconnect from a Wi-Fi network, turn off Wi-Fi. If you want to keep Wi-Fi on, but want to disconnect from the network, go back to the screen that lists the nearby Wi-Fi networks, tap the network to which you’re connected, and then tap Forget. Boom—you’re disconnected.
There’s a downside to disconnecting this way, though. Normally whenever you connect to a Wi-Fi network, the Droid X remembers that connection. So the next time it’s in range, it automatically connects you, including using the network’s password. If you tap Forget, though, it won’t log you in automatically the next time you’re in range.
Note
The Droid X will tell you in the Notification area that there’s a nearby Wi-Fi network if that network is an open one—that is, one that doesn’t use security. It won’t notify you if you’ve previously connected to the network, and your Droid X is set to remember it and connect automatically. If you want to turn off ever being notified, from the Home screen or a pane, press the Menu key, and then select “Wireless & networks”→“Wi-Fi settings”. Then tap “Network notification” so that the green checkmark goes away.
Connecting to For-Pay Wi-Fi Networks
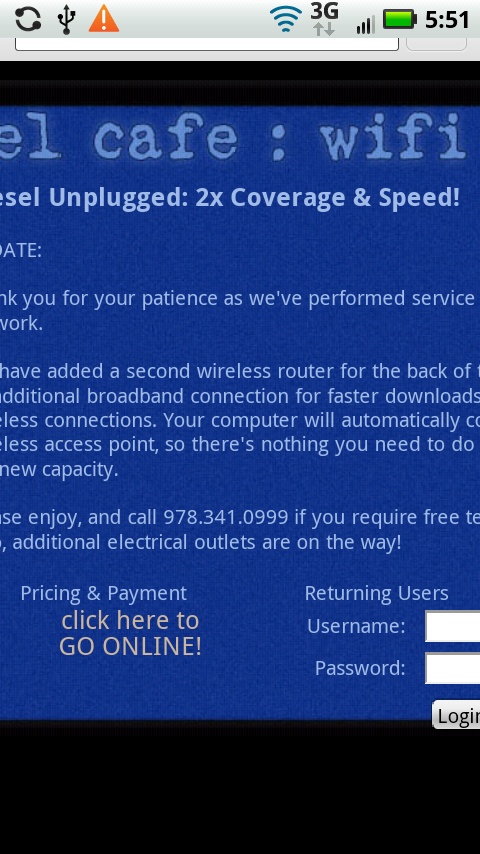
Some Wi-Fi hot spots require you to pay a fee for their use. In those instances, you’ll have to take one more step when connecting. First make the connection in the normal way. Then launch the Droid X’s web browser by tapping its icon on the Home screen or in the Application Tray. A screen appears, delivered by the network, asking you to first register and pay.
Some free Wi-Fi networks require you to first agree to terms of service before you can use them. In that case, when you launch the browser, those terms of service will appear. So if you’re at a free Wi-Fi hot spot and connect to it, but can’t get an Internet-based app like Pandora to work, it might be because you haven’t yet launched your browser and agreed to the terms of service.
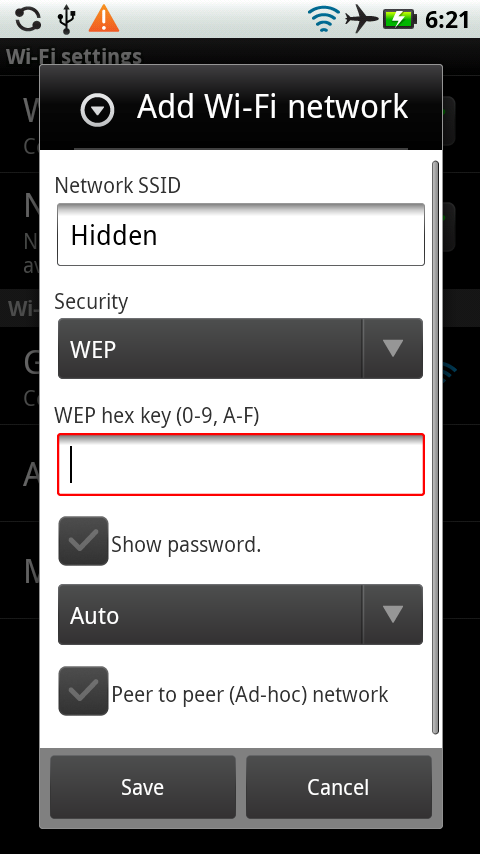
Connecting to an “Invisible” Network
For security reasons, some people or businesses tell their network not to broadcast its names—its Service Set Identifier (SSID). That way, the network may appear invisible to people passing by. (Dedicated hackers, though, can easily detect it.)
If you need to connect to a network that isn’t broadcasting its SSID, you can still connect, as long as you’ve been provided with its name, the type of security it uses, and its password. From the Home screen or a pane, press the Menu button, and then select “Wireless & networks”→“Wi-Fi Settings”→“Add Wi-Fi network”. Type the network’s SSID, choose the security type, type the password, and then tap Save to connect to the network.
Managing Wi-Fi Networks
The more you use your Droid X, the more Wi-Fi networks you’re going to connect to. Over time, that means you may have a long list of networks to which you automatically connect—and maybe you don’t want to always connect to so many of them. You want some control over your connections.
It’s easy to tell your Droid X to “forget” the connections to which you don’t want to connect. From the Home screen or a pane, press the Menu key, and then select “Wireless & networks”→“Wi-Fi Settings”→Manage Networks. You see the Manage Network Options screen, with a list of all the networks to which you automatically connect. Tap any you don’t want to connect to automatically, and then tap Forget. From now on, you won’t automatically connect when you’re within range, and you’ll have to make the connection yourself.
Turning Your Droid X into a Wi-Fi Hot Spot
The Droid X can do more than just connect you to a hot spot. It can create its own hot spot, so that other computers, cellphones, and devices can connect to the Internet through it. That means, for example, that if you’ve got a computer that you want to connect to the Internet, but there’s no Wi-Fi hot spot or Internet service nearby, you can still connect to the Internet using your Droid X. So from now on, wherever you are, you’ve got Internet access as long as you’ve got your Droid X with you. The Droid X calls this setting up a 3G Mobile Hotspot.
Doing this, you can provide Internet access not just for one PC, but for up to five—that’s right, count them, five—devices.
Note
If you don’t have a 3G connection, you won’t be able to set up a mobile hot spot. So try doing this only when you see the 3G signal in the status bar.
To perform this magic, the Droid X connects to a 3G network as it normally does, using its 3G radio. Then it uses its Wi-Fi radio to set up a Wi-Fi hot spot, and lets up to five computers, phones, and other devices connect to it as well. They connect to it as they would connect to any other hot spot, and share its single 3G connection. So don’t expect blazing speed if several people use it simultaneously. Still, it’s a high-speed connection.
Be aware that this does come at a price. As of this writing, you’ll have to pay an extra $20 per month in addition to your normal data fee to be able to use this feature. And there may be maximum data limits imposed as well. At this writing, the limit was 2 GB, but that applies only to data sent and received via the 3G hot spot, not toward your normal data plan.
Okay, enough introduction. Here’s how to do it: First, make sure Wi-Fi is turned on and you’ve got a 3G connection. Once you’ve done that, go to the Application Tray and tap 3G Mobile Hotspot, or else slide over to the Settings pane and tap 3G Mobile. From the screen that appears, tap 3G Mobile Hotspot, and you get a warning screen telling you that the hot spot uses a lot of battery power, so you might want to plug in your Droid X. Click OK, and the AP Settings screen appears (AP stands for access point). It looks techie at this point, but don’t be scared. The next steps are actually easy.
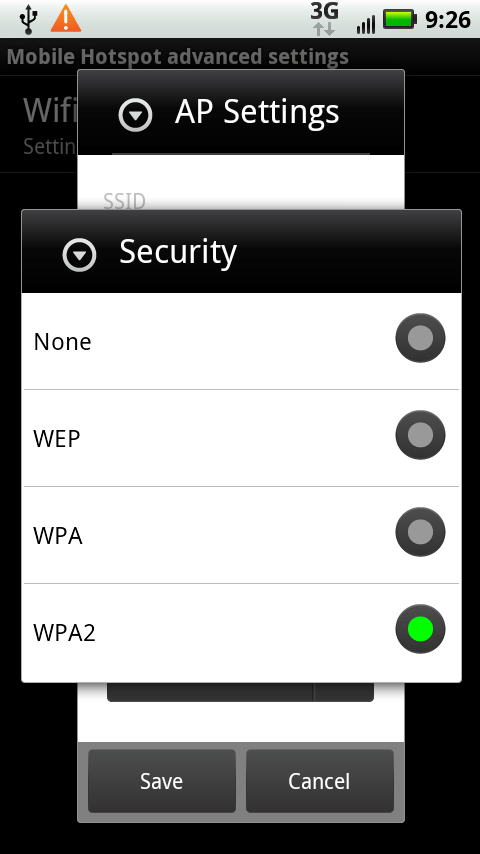
At the top of the screen, type a name for your hot spot. Below that, there’s a drop-down box that lets you choose the kind of security you want to use. Your best bet is WPA2, because that’s the most secure. (If WPA2 isn’t already visible, tap the drop-down box and select WPA2.)
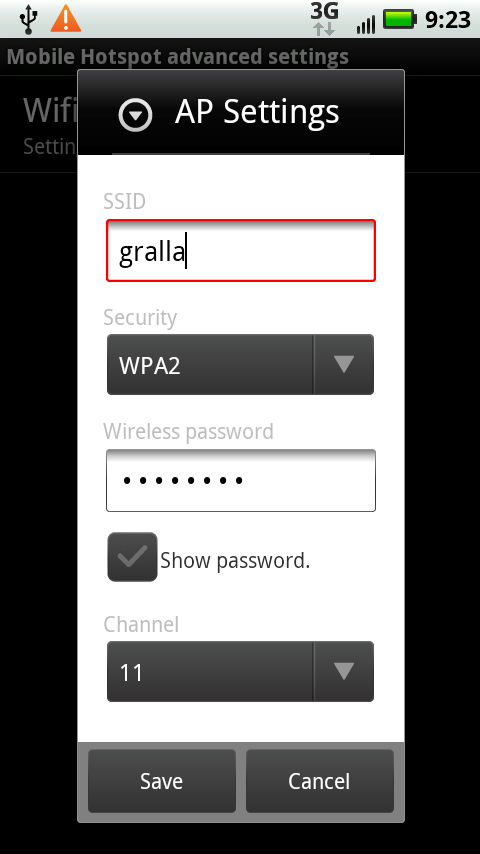
Next, type a password, and make sure to remember it. You need it to connect to the hot spot. Finally, at the bottom of the screen, you’ll notice a number, most likely the number 11. That’s the channel number. Your hot spot can use any one of 11 channels. Most of the time, you’ll just leave this number as is. But if you’re having problems with staying connected to the hot spot you create, you may want to change the channel number. The problem may be that there’s another Wi-Fi network nearby that communicates on the same channel, causing some interference. If you happen to know the channel number of the interfering network, choose a channel that’s numerically far away from it. But if you don’t know the channel number, simply pick another number.
Note
Because the Mobile Hotspot service uses a good deal of battery power, the Droid X includes a built-in battery-saving feature. If you turn on the service, and no device connects to it within 10 minutes, the Droid X turns it off (and tell you that it’s turned it off via a notification).
That’s all there is to it. Click Save, and your hot spot springs into action. Now you can connect to it with your computer or other devices. You can see which computers and devices are connected to it by going to the 3G Mobile Hotspot screen. Most of the time, you see the computer name or device name, but sometimes they don’t have names, and in those instances you see an asterisk. Underneath the name, you also see a string of numbers and letters, something like this: 00:1f:5b:dc:17:79. As you might guess, those are numbers that only a geek could love. Every device that can connect to the Internet gets a unique MAC address number, and that’s what this is.

Tip
What if you want to create a mobile hot spot, and you’re a bit low on battery life, but there’s no electrical source for your Droid X nearby? Assuming that you’ve got a computer you want to provide a connection to, plug your Droid X into your computer with a USB cable, and the PC will provide power for your Droid X. Your Droid X can then provide Wi-Fi for your computer—a perfect symbiotic relationship.
Changing Your Mobile Hot Spot Settings
Once you’ve set up your mobile hot spot the first time, each time you start it after that, it will have the same name, password, encryption level, and channel number. Unless you change it. To do so, tap the 3G Mobile Hotspot app. Don’t actually turn on the hot spot, though. (And if it’s on, turn it off by tapping on it.)
Once you do that, with the app running, press the Menu key and select Advanced from the screen that appears at the bottom of the screen. You see a screen that reads “WiFi AP mode”. Tap it, and you see the same setup screen that greeted you when you first set up the hot spot. Make any changes, tap Save, and you’re ready to go.
Note
Some people have reported problems with devices getting disconnected from their 3G Mobile Hotspots for no apparent reason. If that happens to you, try changing the hot spot’s security method and the channel over which it transmits. Also, remember that if no one uses the hot spot for 10 consecutive minutes, it will turn off as well.
Airplane Mode
Airlines ban the use of cellphone signals during flights. But they don’t actually ban the use of cellphones themselves. So you can still use your Droid X to run apps, play games, and so on, as long as its radios aren’t turned on.
That’s where Airplane mode comes it. It turns off all your Droid X’s radios but lets you use your cellphone for everything else.
There are two ways to turn on Airplane mode:
Use the Power Control widget. Go to the Power Control widget (Connecting via Wi-Fi). Then tap its rightmost icon—the one that looks like an airplane. It turns orange and switches off all of the Droid X’s radios.
Use “Wireless & network settings”. From your Home screen or any pane, press the Menu key, select “Wireless & networks”, and then select Airplane mode. A green checkmark appears to show that you’ve turned it on. To turn it off, tap it again.