Regardless of you being a seasoned web developer or someone who is just about to start learning Drupal, there are few things that everybody needs to have in place before we can get started:
- First, is to make sure that we have an Application stack that will meet Drupal 8's system requirements. MAMP provides us with a standalone web server that is generally referred to as an AMP (Apache, MySQL, PHP) stack and is available for both OS X and Windows. We will look at installing and configuring this local web server in preparation to install Drupal 8.
- Second, is to set up a Drupal 8 instance and learn the process of installing Drupal instances into our AMP stack. There are a few changes on how the configuration and installation processes work in Drupal 8, so we will take a closer look to ensure that we all begin development from the same starting point.
- Third, we will be reviewing the Admin interface, including the new responsive Admin menu and any configuration changes that have been made as we navigate to familiar sections of our site. We will also look at how to extend our website using contributed modules, review changes to the files and folder structure that make up Drupal 8, and discuss best practices to manage your files.
- Finally, we will review the exercise files that we will be using throughout the series, including how to download and extract files, how to use phpMyAdmin—a database administration tool to back up and restore database snapshots—and how to inspect elements within our HTML structure using Google Chrome.
Let's get started by installing our web environment that we will be using as we take an exciting look at Drupal 8 theming with Twig.
To install and run Drupal 8, our server environment must meet and pass certain requirements. These requirements include a web server (Apache, NGINX, or Microsoft IIS) that can process server-side languages such as PHP, which Drupal 8 is built on.
Our server should also contain a database that can manage the data and content that Drupal 8's content management system will store and process. The preferred database is MySQL. However, Drupal 8 can also support PostgreSQL along with Microsoft SQL Server and Oracle with an additional module support.
Finally, Drupal 8 requires PHP 5.5.9 or later, with the CURL extension.
However, because this book is not meant to be a "How-to" on installing and configuring Apache, MySQL, or PHP, we will take all the guesswork and trial by fire out of the equation and instead turn to MAMP.
MAMP can be found at https://www.mamp.info/en and is a tool that allows us to create Drupal sites locally without the need or knowledge of installing and configuring Apache, MySQL, or PHP on a specific platform.
The application stack will consist of the following:
- Apache: The world's most popular web server
- MySQL: The world's most popular database server
- PHP: Various versions of PHP
- phpMyAdmin: A tool to manage MySQL databases via your browser
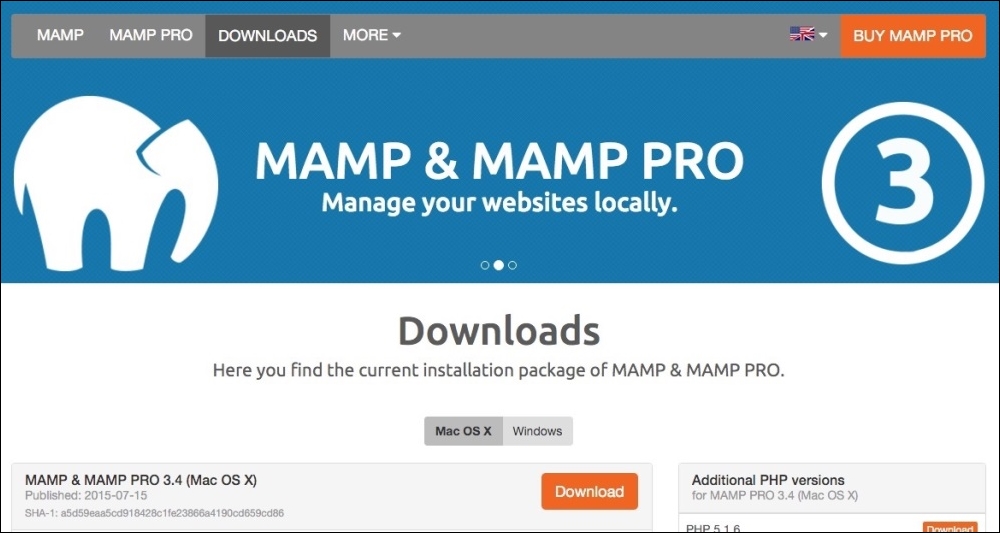
Let's begin with the steps involved in quickly downloading, installing, and configuring our very own AMP stack along with an initial instance of Drupal that we will be using throughout the rest of this book. Begin by opening up our web browser and navigating to https://www.mamp.info/en/downloads and selecting either Mac OS X or Windows and then clicking on the Download button, as shown in the following image:

MAMP will allow us to install a local web server on either Mac or Windows and provides us with all the tools we will need to develop most open source websites and applications including Drupal 8.
Once the download has completed, we will need to locate the .dmg (Mac users) or .exe (Windows users) installation file and double-click on it to begin the installation process. Once the executable is opened, we will be presented with a splash screen that will guide us through the process of installing and configuring MAMP.
Clicking on the Continue button located on the Introduction pane, will take us to the Read Me information. MAMP will notify us that two folders will be created: one for MAMP and the other for MAMP PRO. It is important to not move or rename these two folders.
Click on the Continue button, which will take us to the license information. Simply accept the terms of the license agreement by clicking on Continue and then on Agree when prompted.
We can finally click on the Install button to complete the installation process. Depending on the operating system, we may need to enter our credentials for MAMP to be able to continue and configure our local web server. Once the install has completed, we can click on the Close button.
