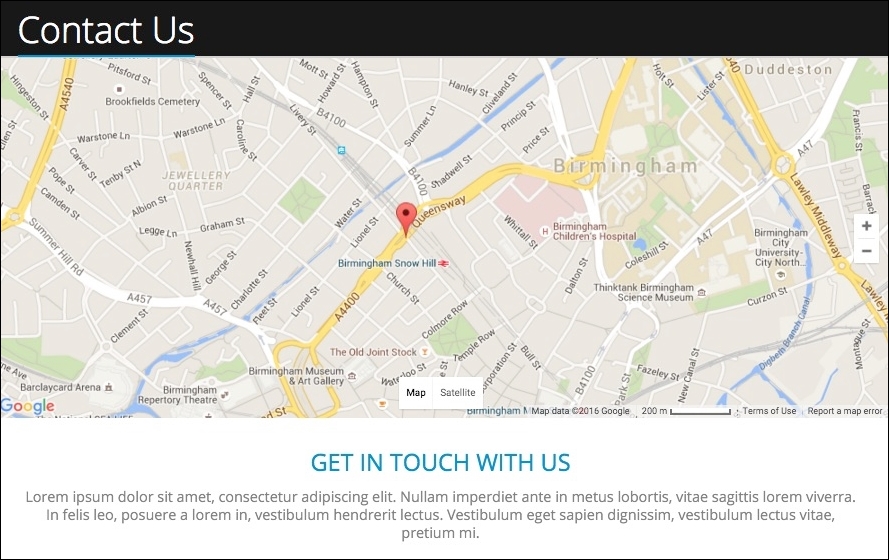
The Google Maps API provides developers with the flexibility to add interactive mapping functionality to any website. With our Contact page, we are implementing a map that provides a map marker pointing to a specific location based on the latitude and longitude that we will provide. As we implement this functionality, it is important to note that we will not be covering the in-depth details required to create a Google map or work with the developer API found at https://developers.google.com/maps/tutorials/fundamentals/adding-a-google-map.
Instead, we will take advantage of one of the many libraries that simplify the JavaScript knowledge required. For our next lesson, we have chosen to work with the jQuery-gMap plugin, which can be found at https://github.com/marioestrada/jQuery-gMap.
In order to implement our map, we will need to follow a series of steps that involve making sure that Drupal can locate the jquery-gMap library, create a library entry with any dependencies, create our custom block, and finally attach the library to our template.
Because the JavaScript to initialize Google Maps is quite long, we have broken the script into its own file. This allows us to keep specific functionality organized better for implementation. Let's get started by configuring the necessary files.
In order to configure the Google Maps library, we will be adding two different library entries to our octo.libraries.yml file. The first will be pointing to our custom map script. The second will be pointing to the jquery-gmap library, which includes an external reference of the Google Maps API.
Before we get started, let's ensure that we have the proper files copied to our theme. Begin by navigating to the Chapter10/start/themes/octo/vendor folder and copy the jquery-gmap folder to our themes/octo/vendor folder. Next, copy the map.js file from the Chapter10/start/themes/octo/js folder to our themes/octo/js folder.
With the two files now accessible by Drupal, we can add the library entries:
- Open
octo.libraries.yml. - Add the following entry:
map:
  version: VERSION
  js:
    js/map: {}
  dependencies:
    - octo/jquery-gmap
Note the dependency to jquery-gmap; we will add that entry directly below the jquery-gmap entry.
- Add the following entry:
jquery-gmap:
  version: 2.1.5
  js:
    vendor/jquery-gmap/jquery.gmap.min.js: {}
    //maps.google.com/maps/api/js?sensor=true: { type: external }
  dependencies:
    - core/jquery
Make sure to save octo.libraries.yml and clear Drupal's cache to ensure that our new library entries are added to the theme registry. To recap, we added two library entries that will allow us to enable Google Maps.
The first entry points to our custom JavaScript that initializes the map and then looks for any markup within our page that has an ID of #map, and renders a map. The first entry also has a dependency of jquery-gmap, which we have added.
The second entry points to our vendor library, which simplifies the creation of Google Maps, and because it obviously requires both jQuery and the Google Maps API, we add those to our entry.
With Google Maps now configured, we will need to create a new block and add the required markup that will render our map.
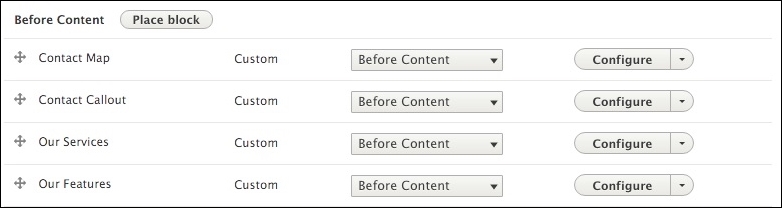
We will take advantage of the Before Content region to add our Contact Map block. Being by navigating to /admin/structure/block and follow these steps.
- Click on the Place block button in the Before Content region:
- Click on the Add custom block button.
- Enter a Block description of Contact Map.
- Select HTML No Editor from the Text format dropdown.
- Add the markup located in the
Chatper10/start/content/ContactMap.txtfile to the Body field, as shown in the following image: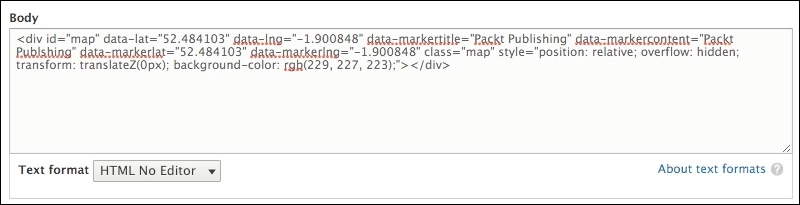
The markup we are adding introduces data attributes, which allow us to better describe the element being displayed while storing extra information. For example, we are adding data attributes for latitude and longitude that our custom script uses to render our map.
- Click on the Save button to proceed to the Configure block screen.
- Uncheck the Display title checkbox.
- Select the Pages vertical tab within the Visibility section.
- Enter a value of
/contactin the Pages text area. - Choose Show for the listed pages under Negate the condition.
- Choose Before Content from the Region field.
- Click on the Save block button.
Once the block has been saved, make sure that the order of our Blocks with the Before Content region has the Contact Map displaying before our Contact Callout block.
Now that we have our Contact Map block created and assigned to the correct region, we will need to create a Twig template that will allow us to attach the library entry to it.
If we navigate back to our Contact page, we will see the outline for our map represented by a gray box. Our markup is actually being output correctly, but we do not yet have a reference to the Google Maps script that renders the map. We can remedy this by using the FILE NAME SUGGESTIONS to create a Twig template for our block.
Navigate to the core/modules/block/templates folder and copy the block.html.twig template to our themes/octo/templates folder. Next, we will need to rename the template to block--contactmap.html.twig and then replace the markup with the following:
New markup
{{ attach_library('octo/map') }}

<div{{ attributes.addClass(classes) }}>
  {{ title_prefix }}
  {% if label %}
    <h4{{ title_attributes }}>{{ label }}</h4>
  {% endif %}
  {{ title_suffix }}
  {% block content %}
    {{ content }}
  {% endblock %}
</div>
Make sure to save the template, clear Drupal's cache, and refresh the Contact page in the browser then. Now we have our map rendering properly.