Chapter 4: Theming
The most obvious part of Drupal's theming system is the Appearance admin page found at admin/appearance, which lists all the themes installed on your website:
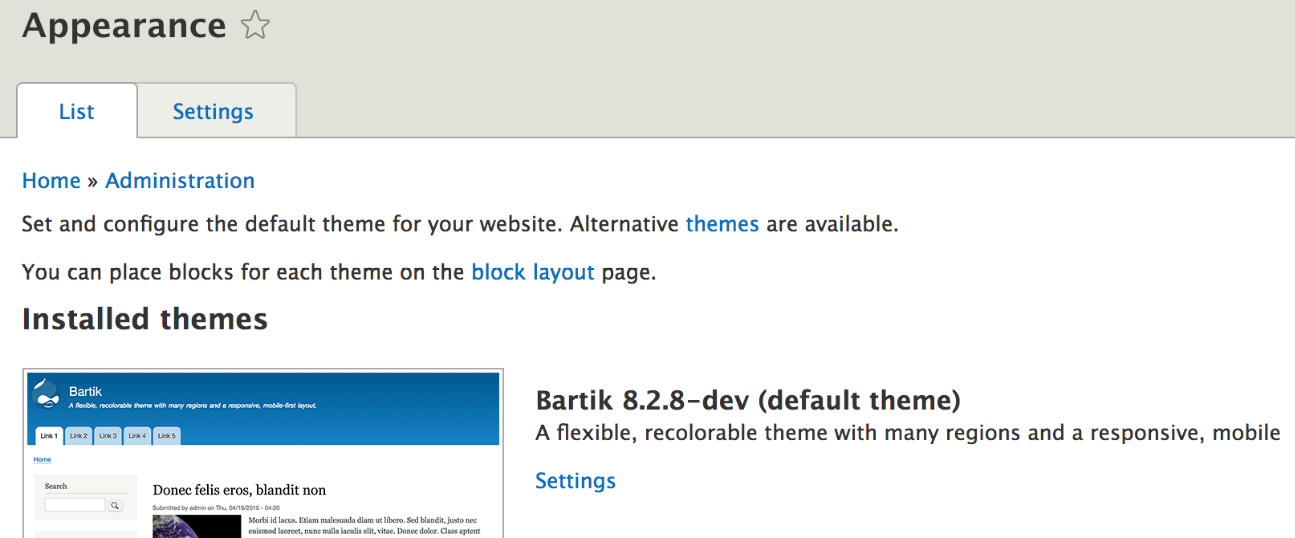
Figure 4.1: Appearance admin page
When you choose a theme from the Appearance page, you are applying a specific graphic design to your website's data and functionality. However, the applied theme is in reality only a small part of the entire theming layer.
This book focuses mostly on building modules that encapsulate chunks of functionality. However, since we're ultimately building a web application, everything output by our functionality will need to be marked up with HTML. In Drupal, this process of wrapping data in HTML and CSS is called theming.
In this chapter, we will discuss how our module integrates with the theme layer. We will talk about the architecture of the system, theme templates, hooks, render arrays, and others. Then, we will provide some practical examples.
The major topics we will cover in the chapter are as follows:
- Theme hooks, templates, and suggestions
- Render arrays and layouts
- Assets and libraries
- Theming our Hello World module using the lessons learned
Business logic versus presentation logic
We start this chapter by discussing an important architectural choice that modern applications make: how to turn data into presentation.
So, what would be the best way to get our data and functionality marked up? Do we simply wrap each piece of data in HTML and return the whole thing as a giant string, as shown in the following example?
return '<div class="wrapper">' . $data . '</div>';
No, we don't. Like all other well-designed applications, Drupal separates its business logic from its presentation logic. It's true, previous versions of Drupal did use this kind of approach, especially when it came to theme functions, but even so, they were easily overridable. So, constructs like these were not found smack in the middle of business logic but were encapsulated in a special theming function that was called by the client code. So, the separation of business logic from presentation logic was clearly there.
Traditionally, the primary motivations for this separation of concerns were as follows:
- To make the code easier to maintain
- To make it possible to easily swap out one layer's implementation without having to rewrite the other layers
As we will see, Drupal takes the "swapability" aspect quite far. You may think that the theme you select on the Appearance page is responsible for applying the HTML and CSS for the website. This is true, but only to some extent. There are thousands of contributed modules on Drupal.org. Also, you can write a bunch of your own. Should the theme be responsible for marking up all of those modules' data? Obviously not.
Since a module is most intimately familiar with its own data and functionality, it is its own responsibility to provide the default theme implementation—that initial look and feel that is independent of design and that should display the data correctly regardless of the theme. However, as long as the module uses the theme system properly, a theme will be able to override any HTML and/or CSS by swapping the module's implementation with its own.
In other words, after data is retrieved and manipulated inside the module (the business logic), it will need to provide the default theme implementation to wrap it inside its markup. Sometimes, a particular theme will need to override this implementation in order for it to achieve a specific design goal. If the theme provides its own implementation, Drupal will use that theme implementation instead of the module's default implementation. This is usually called overriding. Otherwise, the default fallback will still be there. The theme also provides the option of applying styling via CSS only and leaving the markup provided by the module intact.
Twig
Theme engines are responsible for doing the actual output via template files. Although previous versions of Drupal were capable of using different theme engines, one stood out and was used 99.9 percent of the time (statistic made up by me on the spot): PHPTemplate. This theme engine used PHP files with the .tpl.php extension and contained both markup and PHP. Seasoned Drupal developers grew accustomed to this practice, but it was always more difficult for frontend developers to use and theme against.
Since Drupal 8, it was abandoned in favor of the Twig templating engine created by SensioLabs (the people responsible for the Symfony project). As mentioned, theme functions were also deprecated in favor of outputting everything through a Twig file. This brought about many improvements to the theme system and quite some joy to the frontend community. For example, it has improved security and readability, and has made it much less important to be actually versed in PHP to be able to take part in the theming of a Drupal site.
All Twig template files in Drupal have the .html.twig extension.
Theme hooks
Since we have covered some of the principles behind the Drupal theme system—most notably, the separation of concerns—let's go a bit deeper and take a look at how they are actually put into practice. This all starts with the theme hooks. Yes, Drupal loves to call things hooks.
Theme hooks define how a specific piece of data should be rendered. They are registered with the theme system by modules (and themes) using hook_theme(). In doing so, they get a name, a list of variables they output (the data that needs to be wrapped with markup), and other options.
The modules and themes that register theme hooks also need to provide an implementation (one that will be used by default).
As an example, let's take a look at two common ways of registering a theme hook that we'll often find. For this, we will use Drupal core examples that already exist:
function hook_theme($existing, $type, $theme, $path) {
return [
'item_list' => array(
'variables' => array('items' => array(), 'title' => '', 'list_type' => 'ul', 'wrapper_attributes' => array(), 'attributes' => array(), 'empty' => NULL, 'context' => array()),
),
'select' => array(
'render element' => 'element',
),
];
}
In the above hook_theme() example, I included two theme hooks from Drupal core. One is based on variables, whereas the other is based on a render element. There are, of course, many more options that can be defined here, and I strongly encourage you to read the Drupal.org API documentation page for this hook.
However, right off the bat you can see how easy it is to register a theme hook. In the first case, we have item_list, which, by default (if not otherwise specified), will map to the item-list.html.twig file for outputting the variables. In its definition we find the variables it uses, with some handy defaults in case they are not passed in from the client. The second theme hook is select, which doesn't use variables but a render element (which we will discuss soon). Also, its template file is easy to determine based on the name: select.html.twig. I encourage you to check out both of these template files in the core code (provided by the System module).
In addition to the actual implementation, the modules and themes that register a theme hook can also provide a default template preprocessor. The responsibility of this is to "preprocess" (that is, prepare) data before being sent to the template. For example, if a theme hook receives an entity (a complex data object) as its only variable, a preprocessor can be used to break that entity into tiny pieces that are needed to be output in the template (such as title and description).
Template preprocessors are simple procedural functions that follow a naming pattern and are called by the theme system before the template is rendered. As I mentioned earlier, the modules and themes that register a theme hook can also provide a default preprocessor. So, for a theme hook named component_box, the default preprocessor function would look like this:
function template_preprocess_component_box(&$variables) {
// Prepare variables.
}
The function name starts with the word template to denote that it is the original preprocessor for this theme hook, then follows the conventional preprocess word, and ends with the name of the theme hook. The argument is always an array passed as a reference and contains some info regarding that theme hook, and more importantly, the data variables that were defined with the theme hook and passed to it from the calling code. That is what we are usually working with in this function. Also, since it's passed by a reference, we don't return anything in this function, but we always manipulate the values directly in the $variables array. In the end, the template file can print out variables named after the keys in this array. The values will be, of course, the values that map to those keys.
Another module (or theme) can override this preprocessor function by implementing its own. However, in its naming, it needs to replace the word template with the module name (to avoid collisions). If one such override exists, both preprocessors will be called in a specific order. The first is always the default one, followed by the ones defined by modules, and then the ones defined by themes. This is another great extension point of Drupal because altering data or options found inside the preprocessor can go a long way in customizing the existing functionality to your liking.
As an alternative to following the previous naming convention, you also have the option to specify the preprocessor function names in the hook_theme() definition when you register it. However, I recommend that you stick to the default naming convention because it's much easier to spot what the purpose of the function is. As you become more advanced, you'll, in turn, appreciate being able to quickly understand these convention functions at a quick glance.
I mentioned a bit earlier that modules and themes can also override theme hooks defined by other modules and themes. There are two ways to do this.
The most common one is for a theme to override the theme hook. This is because of the rationale I was talking about earlier—a module defines a default implementation for its data, but a theme can then take over its presentation with ease. Also, the way themes can override a theme hook is by simply creating a new Twig file with the same name as the original and placing it somewhere in its templates folder. If that theme is enabled, it will be used instead. A less common but definitely valid use case is for a module to override a theme hook defined by another module. For example, this might be because you need to change how data is rendered by a popular contributed module. To achieve this, you will need to implement hook_theme_registry_alter() and change the template file used by the existing theme hook. It's also worth adding that you can change the entire theme hook definition using this hook if you want, not just the template. Moreover, since we mentioned this hook, note that theme hooks, upon definition, are stored and cached in a theme registry for optimized performance, and that registry is what we are altering with this hook. This also means that we regularly need to clear the cache when we make changes to the theme registry.
All this is good and fine, but the business logic still has to interact with the theme system to tell it which particular theme hook to use. And we do so by using something called render arrays, which contain the theme hook information, the variables, and any other metadata on how that component needs to be rendered. We will also talk about render arrays in this chapter.
Theme hook suggestions
A great thing about theme hooks is that they are reusable. However, one problem you'll encounter is that theme hook templates lose context when a theme hook is reused. For example, the item_list theme hook, whose definition we saw in the previous section, has no idea what list it is theming. And this makes it difficult to style differently depending on what that content is. Fortunately, we can provide context to the theme system by using a theme hook pattern instead of the original theme hook name, and this pattern looks something like this:
base_theme_hook__some_context
The parts of the pattern are separated with a double underscore and together they are called a theme hook suggestion. But how does this work?
Client code (the render arrays, as we will soon see), when using a theme hook to render a piece of data, can append the context to the theme hook, turning it into a suggestion. The theme system will then check for the following:
- If there is a template file that matches that suggestion (inside a theme), it uses it instead of the original theme hook template.
- Alternatively, if there is a theme hook registered that has that actual name, it uses that instead.
- Alternatively, it checks for the base theme hook and uses that instead (the fallback).
In this case, the caller (the render array) is responsible for "proposing" a suggestion. For example, consider the following render array:
return [
'#theme' => 'item_list__my_list',
'#items' => $items,
];
The base theme hook is item_list, which is rendered using the item-list.html.twig template file provided by Drupal core. If there is no item-list--my-list.html.twig template file in the theme, and there is no item_list__my_list theme hook registered, the default item_list theme hook will be used. Otherwise, we will follow the order that I mentioned before. A module can register that suggestion as a hook, which will be used instead. However, a theme can override that further by just creating the template file with that name.
And all this is done so that when rendering something with a reusable theme hook, we give the possibility to determine what exactly is being themed. However, the example we saw just now is static in the sense that we hardcoded my_list as the theme hook suggestion. We can do better than that.
A module that registers a theme hook can also provide a list of suggestions that should go with that theme hook automatically. It does so by implementing hook_theme_suggestions_HOOK(), where HOOK is the theme hook name. This hook is fired at runtime by the theme system, trying to determine how a certain render array needs to be rendered. It receives the same $variables array as an argument as the template preprocessors do. This means that we can make use of those variables and dynamically provide theme hook suggestions. We will see an example of this later in the chapter.
Moreover, as module developers, we can also provide a list of theme hook suggestions to theme hooks registered by other modules or Drupal core. We can do so by implementing hook_theme_suggestions_HOOK_alter(), where we receive the available suggestions for that theme hook in addition to the variables.
In summary, theme hook suggestions are a powerful way of adding some context to the generic theme hooks that are responsible for rendering multiple things.
Render arrays
Render arrays also existed in the previous versions of Drupal and they were important to the theme system. Since Drupal 8, however, they have become the thing—a core part of the Render API that is responsible for transforming markup representations into actual markup.
Acknowledging my limits as a writer, I will defer to the definition found in the Drupal.org documentation, which best describes what render arrays are:
Simple, but powerful.
One of the principal reasons behind having render arrays is that they allow Drupal to delay the actual rendering of something into markup to the very last moment. What do I mean by this? For example, in Drupal 7, oftentimes as module developers we were calling the actual rendering service (the theme() function) inside a preprocessor to "render" some data in order to print the resulting string (markup) in the template. However, this made it impossible to change that data later in the pipeline, for example, in another preprocessor that comes after the one that did this rendering.
For this reason, since Drupal 8, we no longer have to/should render anything manually (except in very specific circumstances). We work with render arrays at all times. Drupal will know how to turn them into markup. This way, modules and themes can intercept render arrays at various levels in the process and make alterations.
We will now talk about render arrays and the different aspects of working with them.
The structure of a render array
Render arrays are rendered by the renderer service (RendererInterface), which traverses the array and recursively renders each level. Each level of the array can have one or more elements, which can be of two types: properties or children. The properties are the ones whose keys are preceded by a # sign, whereas children are the ones whose properties are not preceded by that sign. The children can themselves be an array with properties and children. However, each level needs to have at least one property in order to be considered a level because it is responsible for telling the render system how that level needs to be rendered. As such, property names are specific to the Render API and to the actual thing they need to render, while the names of children can be flexible. In addition to these two types (yes, I lied, there can be more than two), we can also have the variables defined by a theme hook, which are also preceded by the # sign. They are not properties per se but are known by the theme system because they have been registered inside hook_theme().
There are many properties that the Render API uses to process a render array. Some of them are quite important, such as #cache and #attached. However, there are a few that are mandatory in order for a render array to make sense, in that they define its core responsibility. The following are the properties that describe what the render array should do and each render array should have one of these.
#type
The #type property specifies that the array contains data that needs to be rendered using a particular render element. Render elements are plugins (yes, plugins) that encapsulate a defined renderable component. They essentially wrap another render array, which can use a theme hook or a more complex render array to process the data they are responsible for rendering. You can think of them as essentially standardized render arrays.
There are two types of render elements: generic and form input elements. Both have their respective plugin types, annotations and interfaces. They are similar in that they both render a standardized piece of HTML; however, form input elements have the complexity of having to deal with form processing, validation, data mapping, and so on. Remember that when we defined our form in Chapter 2, Creating Your First Module, we encountered arrays with # signs. These were (form) render elements with different options (properties).
To find examples of these two types of render elements, look for plugins that implement the ElementInterface and FormElementInterface interfaces.
#theme
The #theme property ties in strongly with what we've been talking about earlier in this chapter—theme hooks. It specifies that the render array needs to render some kind of data using one of the theme hooks defined. Together with this property, you will usually encounter other properties that map to the name of the variables the theme hook has registered in hook_theme(). These are the variables the theme system uses to render the template.
This is the property you will use in your business logic to convey that your data needs to be rendered using a specific theme hook. If you thought that you can only use theme hooks you registered, you'd be incorrect. There are many theme hooks that have been already registered by Drupal core and also contributed modules that make the life of a Drupal developer much easier. Just look inside drupal_common_theme() for a bunch of common theme hooks that you can perhaps use.
#markup
Sometimes, registering a theme hook and a template for outputting some data can be overkill. Imagine that all you have is a string you need to wrap in a <span> tag or something. In this case, you can use the #markup property, which specifies that the array directly provides the HTML string that needs to be output. Note, however, that the provided HTML string is run through DrupalComponentUtilityXss::filterAdmin for sanitization (mostly, XSS protection). This is perfectly fine because if the HTML you are trying to include here is stripped out, it's a good indication that you are overusing the #markup property and should instead be registering a theme hook.
Going a bit further than just simple markup is the #plain_text property via which you can specify that the text provided by this render array needs to be escaped completely. So basically if you need to output some simple text, you have the choice between these two for very fast output.
Now, if you remember in Chapter 2, Creating Your First Module, at some point our controller returned this array:
return [
'#markup' => $this->t('Hello World')
];
This is the simplest render array you'll ever see. It has only one element, a tiny string output using the #markup property. Later in this chapter we will adjust this and use a render array provided by our HelloWorldSalutation service in order to make things a bit more themeable. That will be the section where we put into practice many of the things we learn here.
However, as small as you see this array here, it is only part of a larger hierarchical render array that builds up the entire Drupal page and that contains all sorts of blocks and other components. Also responsible for building this entire big thing is the Drupal render pipeline.
The render pipeline
In Chapter 1, Developing for Drupal 9, when we outlined a high-level example of how Drupal handles a user request in order to turn it into a response, we touched on the notion of a render pipeline. So let's see what this is about, as there are essentially two render pipelines to speak of: the Symfony render pipeline and the Drupal one.
As you know, Drupal 9 uses many Symfony components, one of which being the HTTPKernel component (http://symfony.com/doc/current/components/http_kernel.html). Its main role is to turn a user request (built from PHP super globals into a Request object) into a standardized response object that gets sent back to the user. These objects are defined in the Symfony HTTP Foundation component (http://symfony.com/components/HttpFoundation). To assist in this process, it uses the Event Dispatcher component to dispatch events meant to handle the workload on multiple layers. As we saw, this is what happens in Drupal as well.
Controllers in Drupal can return one of two things—either a Response object directly or a render array. If they return the first, the job is almost done, as the Symfony render pipeline knows exactly what to do with that (assuming the response is correct). However, if they return a render array, the Drupal render pipeline kicks in at a lower level to try to turn that into a Response. We always need a Response.
The kernel.view event is triggered in order to determine who can take care of this render array. Drupal comes with the MainContentViewSubscriber, which listens to this event and checks the request format and whether the controller has returned a render array. Based on the former, it instantiates a MainContentRendererInterface object (which, by default—and most of the time—will be the HTML-based HtmlRenderer) and asks it to turn the render array into a Response. Then, it sets the Response onto the event so that the Symfony render pipeline can continue on its merry way.
In addition to the HTML renderer, Drupal comes with a few others that need to handle different types of requests:
- The AjaxRenderer handles Ajax requests and integrates with the Ajax framework. We'll see examples of Ajax-powered functionalities later in the book.
- The DialogRenderer handles requests meant to open up a dialog on the screen.
- The ModalRenderer handles requests meant to open up a modal on the screen.
Returning to the HTML renderer, let's see what it does to turn our render arrays into actual relevant HTML on a Response object. Without going into too much detail, here is a high-level description of what it does:
- Its first goal is to build a render array that has #type => 'page' as a property because this is the render element responsible for the entire page. Meaning that if the Controller returned it, it doesn't have to do much. However, usually controllers don't include that, so it dispatches an event to determine who can build this render array.
- By default, the SimplePageVariant plugin is used for building up the page array, but with the Block module enabled, the BlockPageVariant plugin is used, taking things even further down some levels in the render pipeline. The main content area gets wrapped with blocks in the sidebar, header, footer, and so on.
- Once it has the page render array, it wraps it into yet another render element, which is #type => 'html' (responsible for things such as the <head> elements).
- Once it has the main render array of the entire page, it uses the Renderer service to traverse it and do the actual rendering at each level (and there can be many). It does so by translating render elements (#type), theme hooks (#theme), simply marked-up text bits (#markup), or plain text bits (#plain_text) into their respective HTML representations.
So, as you see, the render pipeline starts at Symfony level, goes down into Drupal territory when it encounters render arrays, but continues going down to build each component found on a page around the main content returned by the Controller. Then, it comes back up those levels, all the way until a great render array is created and can be turned into HTML. Also, as it goes back up, various metadata can bubble up to the main render array.
I purposefully left out caching from this equation, which although very important, we will cover in a later chapter. However, suffice to say, cache metadata is one such example that bubbles up from the lower levels all the way to the top and is gathered to determine page-level caching. But more on that later.
Now that we know more about render arrays, how they are structured, and the pipeline they go through, we can talk a bit about asset management from a module development perspective. Because even though it is usually a theme responsibility, module developers often have to add and use CSS and JS files to their modules, and it all happens in render arrays.
Assets and libraries
Working with CSS and JS files has become standardized in Drupal 8 compared to its previous version where we had more than one way to do things. And this, of course, continues in Drupal 9. Libraries are key, so let's see how they work by going through some examples of making use of some CSS or JS files.
There are three steps to adding assets to your page:
- Creating your CSS/JS file
- Creating a library that includes them
- Attaching that library to a render array
Libraries
Assuming that you already have the CSS/JS files, libraries are defined inside a module_name.libraries.yml file in the module root folder. A simple example of a library definition inside this file would look like this:
my-library:
version: 1.x
css:
theme:
css/my_library.css: {}
js:
js/my_library.js: {}
This is a standard YAML notation by which we define a library called my-library and provide some information about it. We can specify a version number and then add as many CSS and JS file references as we need. The file paths are relative to the module folder this library definition is in, and we can add some options between the curly braces (more advanced, but we will see an example in a moment).
Additionally, you'll note that the CSS file has an extra level key called theme. This is to indicate the type of CSS to be included and can be one of the following (based on SMACSS (https://smacss.com/) standards):
- base: Usually contains CSS reset/normalizers and HTML element styling
- layout: High-level page styling, such as grid systems
- component: UI elements and reusable components
- state: Styles used in client-side changes to components
- theme: Visual styling of components
The choice here is also reflected in the weighting of the CSS file inclusion, the latter being the "heaviest"—it will be included last.
Another important aspect of using libraries in any application is the ability to include externally hosted files (usually from a CDN). Let's take a look at an example library definition that uses externally hosted files:
angular.angularjs:
remote: https://github.com/angular/angular.js
version: 1.4.4
license:
name: MIT
url: https://github.com/angular/angular.js/blob/master/ LICENSE
gpl-compatible: true
js:
https://ajax.googleapis.com/ajax/libs/angularjs/1.4.4/ angular.min.js: { type: external, minified: true }
This example is taken from a Drupal.org example (https://www.drupal.org/docs/8/creating-custom-modules/adding-stylesheets-css-and-javascript-js-to-a-drupal-8-module) on defining libraries in Drupal since version 8. However, as you can see, the structure is the same as our previous example, except that it has some more meta information regarding the external library. And instead of a local path reference, we have a remote URL to the actual resource. Moreover, we also see some options within the curly braces with which we can specify that the file is actually externally located and minified.
An important note when it comes to JS in Drupal is that it doesn't include all libraries such as jQuery by default. It does so only when and where it's needed. This has, therefore, brought the concept of library dependencies to the forefront, as certain scripts require other libraries to be loaded for them to work.
Let's assume that my-library depends on jQuery and specify it as a dependency. All we need to add to our library definition is the following:
dependencies:
- core/jquery
Keep in mind that the dependencies key is at the same YML level as css and js.
With this, we declare the Drupal core jQuery library to be required by our library. This means that if we use our library somewhere and jQuery is not included, Drupal will process the dependencies and include them all. A side-benefit of this is that dependencies are always included before our scripts, so we can also control that.
The core/jquery notation indicates that the extension (module or theme) that defines the jquery library is Drupal core. If it had been a module or theme, core would have been replaced by the module or theme machine name. So, for example, to use our new library somewhere, it would be referenced as module_name/my-library.
Attaching libraries
The most common way you'll be using libraries is attaching them to your render arrays. This approach implies that the library is needed for the rendering of that component so that if said component is missing from the page, the library assets are no longer included.
Here is what a render array would look like with the previous library we defined attached to it:
return [
'#theme' => 'some_theme_hook',
'#some_variable' => $some_variable,
'#attached' => [
'library' => [
'my_module/my-library',
],
],
];
The #attached property is important here, and it signifies that we are essentially attaching something to the render array, which in our case happens to be a library.
However, you may have cases in which the library you need is not linked to a specific render array (a component on the page) but to the entire page itself—all pages or a subset. To attach libraries to an entire page, you can implement hook_page_attachments(). Consider the following example:
function hook_page_attachments(array &$attachments) {
$attachments['#attached']['library'][] = 'my_module/my- library';
}
This hook is called on each page, so you can also attach libraries contextually (for example, if the user has a specific role or something like that). Moreover, there is also the hook_page_attachments_alter() hook, which you can use to alter any existing attachments (for example, to remove attachments from the page).
Another way you can attach libraries is inside a preprocess function. We talked about preprocess functions earlier in this chapter; it's simple to achieve:
function my_module_preprocess_theme_hook(&$variables) {
$variables['#attached']['library'][] = 'my_module/my_ library';
}
All you have to do is add the #attached key (if it doesn't already exist) to the variables array.
These three methods of attaching libraries are the most common ones you'll encounter and use yourself. However, there are a few other ways and places where attachments can be added—you can alter an existing render element definition and you can attach libraries directly to a Twig file. I recommend that you read the Drupal.org documentation (https://www.drupal.org/docs/8/creating-custom-modules/adding-stylesheets-css-and-javascript-js-to-a-drupal-8-module) for more information on these methods.
Common theme hooks
In this section, we will look at three common theme hooks that come with Drupal core that you are likely to use quite often. The best way to understand them is, of course, by referring to an example of how to use them. So, let's get to it.
Lists
One of the most common HTML constructs are lists (ordered or unordered), and any web application ends up having many of them, either for listing items or for components that do not even look like lists. But for the purposes of marking up, an ul or ol fits the bill best. Luckily, Drupal has always had the item_list theme hook, which is flexible enough to allow us to use it in almost all cases.
The item_list theme hook is defined inside drupal_common_theme(), is preprocessed (by default) in template_preprocess_item_list(), uses the item-list.html.twig template by default, and has no default theme hook suggestions (because it's so generic and registered outside the context of any business logic). If we inspect its definition, we'll note that it takes a number of variables that build up its flexibility. Let's take a look at an example of how to use it.
Imagine that we have the following array of items:
$items = [
'Item 1',
'Item 2'
];
The simplest way we can render this as an <ul> is as follows:
return [
'#theme' => 'item_list',
'#items' => $items
];
Do note that the respective <ul> is wrapped in a <div class="item_list"> and that the items in our array can also render arrays themselves.
If we want to change the list into an <ol>, we set the #list_type variable to ol. We can even have a title heading (<h3>) before the list if we set the #title variable. Moreover, we can add more attributes on the <div> wrapper. For more information on how the other options work, I suggest that you inspect the template file and preprocessor function. However, these are the ones you'll most often use.
Links
In Chapter 2, Creating Your First Module, we briefly looked at how we can work with links programmatically and how to build and render them in two different ways. We also noted that it's better to use the #link render element (and we now understand what this is) if we want the link to be alterable somewhere down the line. Now, let's take a look at how we can build a list of links using the helpful links theme hook.
The links theme hook takes an array of links to be rendered, optional attributes, an optional heading, and a flag to set the active class dynamically. It then uses the links.html.twig template to construct a <ul>, much like the item_list hook.
The most important variable here is the array of links, as it needs to contain individual arrays with the following keys: title (the link text), url (a Url object), and attributes (an array of attributes to add to each link item). If you look inside the template_preprocess_links preprocessor, you'll see that it takes each of these items and transforms them into a render array with the #type => 'link' (the render element).
In addition to the array of links, we can also pass a heading (just like with item_list) and a flag for setting the active class—set_active_class. The latter will make it add an is-active class onto the <li> item in the list and the link itself if the link matches the current route. Handy stuff, isn't it? However, for more information, check out the documentation above the template_preprocess_links() implementation. Now, let's see a quick example of using this in practice:
$links = [
[
'title' => 'Link 1',
'url' => Url::fromRoute('<front>'),
],
[
'title' => 'Link 1',
'url' => Url::fromRoute('hello_world.hello'),
]
];
return [
'#theme' => 'links',
'#links' => $links,
'#set_active_class' => true,
];
That is all. We build an array of link data and then construct the render array using the links theme hook. We also use the set_active_class option just for kicks. This means that the is-active class will be present on the first link if this is rendered on the home page or on the second link if rendered on the Hello World page. As simple as that.
Tables
The last common theme hook we will look at now will help you build tables. It has always been a Drupal best practice to use the theme hook when building tables rather than creating the markup yourself. This is also, in part, because it has always been very flexible. So, let's take a look.
The table theme hook takes a bunch of variables, many of them optional. The most important, however, are the header (an array of header definitions) and rows (a multidimensional array of row definitions). It's not worth repeating all the possible options you have for building tables here because they are all very well documented above the template_preprocess_table() preprocessor function. So, do check there for more information. Instead, we'll focus on a simple use case of rendering a table, and we'll do so via an example:
$header = ['Column 1', 'Column 2'];
$rows = [
['Row 1, Column 1', 'Row 1, Column 2'],
['Row 2, Column 1', 'Row 2, Column 2']
];
return [
'#theme' => 'table',
'#header' => $header,
'#rows' => $rows,
];
So, as you can see, we have the two critical variables. We have the list of header items and the rows (whose cells are in the array in the same order as the header). Of course, you have many more options, including attributes at all levels of the table, handy sorting capability that makes it easy to integrate with a database query, and more. I strongly encourage you to explore these options in the documentation.
Attributes
In the previous three examples of theme hooks, we encountered the concept of attributes in the context of using them to render HTML elements. Attributes here are understood in the same way as with HTML. For example, class, id, style, and href are all HTML element attributes. Why is this important?
The reusability of theme hooks makes it so that we cannot hardcode all our HTML attributes in the Twig template files. We can have some, including classes, but we will always need to allow business logic to inform the theme hook of certain attribute values it needs printed on the HTML element. For example, an active class on a link. This is why we have this concept of attributes.
Most theme hooks you'll see have attributes in some form or another, with the variable usually being called $attributes, $wrapper_attributes, or something of that nature. Also, this variable always needs to be a multidimensional array with the attribute data you want passed. The keys in this array are the name of the attribute, whereas the value is the attribute value. If the value can have multiple items, such as classes, it will also be an array. Consider the following example:
$attributes = [
'id' => 'my-id',
'class' => ['class-one', 'class-two'],
'data-custom' => 'my custom data value'
];
As you can see, we have some common attributes, but you can also make up your own as needed (usually in the form of data attributes). However, in no way is this mandatory, and you can add only the ones you actually need. Do always, though, read the documentation on the theme hook to see how they are used and which elements are actually going to get them.
From an API point of view, Drupal handles attributes via a handy class called Attribute. You'll note that many template preprocessors will take that array and construct a new Attribute object for manipulating them with more ease. Additionally, such an object is also renderable because it implements the MarkupInterface and Twig will know directly how to transform it into a string. And to make dealing with attribute collections easier, a helper class called AttributeHelper was introduced.
So, keep that in mind if you are writing your own theme hooks and need to handle attributes with more class (pun intended).
Layouts
As part of the Drupal 8 release cycle, the Layouts API has been introduced in order to provide contributed modules with a unified approach for defining layouts. For example, modules such as Panels and Layout Builder make use of this API to define layouts that contain regions and that can render content and all sorts of things inside.
Layouts were introduced in version 8.3 of Drupal as an experimental module (called Layout Discovery) and marked stable in version 8.4. At the same time, a new experimental module has been introduced, called Layout Builder, which uses this API to provide site builders a way to build layouts for regular content. And since Drupal 8.8, the latter has also been marked as stable.
We won't be using layouts going forward in this book but it's important you know how to work with them in case you need them. So let's quickly talk about how you, as a module developer, can define and make use of layouts programmatically.
Defining layouts
Simply put, layouts are plugins. But unlike the plugins we've seen before, these are defined in YAML files instead of annotations above a class. One of the reasons for this is that layouts are more definition than functionality, so they don't necessarily require classes. They can be simply defined in a few lines inside a YAML file.
Although not necessarily, YAML-based plugins are typically defined inside a file named module_name.plugin_type_name.yml found in the root of the module defining the plugin. So in the case of layouts, this would be module_name.layouts.yml. But what does a definition contain?
Let's imagine we want to define a two-column layout with a left and right region. Our simplest definition could look like this:
two_column:
label: 'Two column'
category: 'My Layouts'
template: templates/two-column
regions:
left:
label: Left region
right:
label: Right region
So what do we learn from this definition?
- First, we have a name and category, which are mandatory. These can be used in whatever UI to show information about the layout.
- Second, we specify the template that should render this layout. The corresponding theme hook gets defined under the hood. In the case above, the template file would be in the templates folder and would be called two-column.html.twig.
- Lastly, we define the regions of the layout with a label for each. The left and right keys are important as they are the machine names of the regions.
- As a bonus, if we wanted to attach a library, we could add another line to this definition, like so:
library: my_module/my_library
Before the layout registration is complete, we'd also need to create the template file we referenced. And it could look like this:
<div class="two-column">
<div class="left-region">
{{ content.left }}
</div>
<div class="right-region">
{{ content.right }}
</div>
</div>
In the template we have access to the content variable on which we can access the values of the regions we can print.
And that's pretty much it. Clearing the cache (and enabling the Layout Discovery module) would register this layout with the system.
Rendering a layout
OK, but registering a layout doesn't help us with much. Unless, of course, we use Layout Builder or some contributed module that uses layouts for various things. In which case we'd already be providing great value. But what if we want to use this layout ourselves? In other words, render stuff with it.
The simplest way of rendering something with this layout could look like this:
$layoutPluginManager = Drupal::service('plugin.manager.core.layout');
$layout = $layoutPluginManager->createInstance('two_column');
$regions = [
'left' => [
'#markup' => 'my left content',
],
'right' => [
'#markup' => 'my right content',
],
];
return $layout->build($regions);
Without going into too much detail about the plugin system (yet), but with the above we use the Layout plugin manager to create a new instance of the layout we defined (whose machine name is two_column). Then we prepare the data to print inside the layout in the $regions array. As you can see, the array construct mirrors the regions in the layout. Finally, we build the layout by passing the regions data. And that is it. The resulting render array would render the template with the content printed in the corresponding regions.
Theming our Hello World module
The HelloWorldController we built in Chapter 2, Creating Your First Module, currently uses a service to retrieve the string to be used as the salutation and then returns a simple markup render array with it. Let's imagine now that we want to output this message but wrap it in our own specific markup. To make an easy thing complicated, we want to break up the salutation string into parts so that they can be styled slightly differently. Additionally, we want to allow others to override our theme using suggestions that depend on whether or not the salutation has been overridden via the configuration form. So, let's see how we can do these things.
To get things started, this is the markup we are after:
<div class="salutation">
Good morning <span class="salutation—target">world</span>
</div>
The first thing we need to do is to define our own theme hook capable of outputting this. To this end, we implement hook_theme():
/**
* Implements hook_theme().
*/
function hello_world_theme($existing, $type, $theme, $path) {
return [
'hello_world_salutation' => [
'variables' => ['salutation' => NULL, 'target' => NULL, 'overridden' => FALSE],
],
];
}
For now, we only return one theme hook called hello_world_salutation, which takes the variables you can see. Each of them has a default value in case one is not passed from the client (through the render array). The first two are obvious, but we also want to have a flag on whether or not the salutation has been overridden. This will help with the theme hook suggestions.
By default, if we don't specify a template filename, this theme hook will look for a Twig template with the name hello-world-salutation.html.twig inside the /templates folder of our module. Since this is good enough for us, let's go ahead and create it:
<div {{ attributes }}>
{{ salutation }}
{% if target %}
<span class="salutation—target">{{ target }}</span>
{% endif %}
</div>
Twig notation is easy to understand. {{ }} means that we are printing a variable with that name (which can even be a render array) and {% %} refers to control structures, such as if statements or loops. Do check out the Twig documentation (https://twig.symfony.com/) for more information if you are unsure.
Note
There are some great ways to debug what values end up being printed in the Twig template. You can use the native Twig dump() function, which will output things using the PHP var_dump(), or you can install the Devel module and use the kint() function, which will format things in a more readable way.
We wrapped the target variable in an if statement so that if by any chance it's missing, we don't print an empty span tag. It's best practice to have your template mirror the possibilities of the theme hook being called with the defaults.
Finally, we also have an attributes array, which we are printing on the wrapper. We did not define this, but each theme hook comes with it. The variable is an Attribute object, as we discussed earlier, which gets printed into a string of the individual attributes.
Now, instead of printing the class we want directly in the template, we will use the preprocessor to make things more dynamic.
So let's implement the preprocessor next:
/**
* Default preprocessor function for the hello_world_salutation theme hook.
*/
function template_preprocess_hello_world_salutation(&$variables) {
$variables['attributes'] = [
'class' => ['salutation'],
];
}
As I mentioned earlier, at this stage we are still working with an array of attributes. The theme system will turn it into the Attribute object before rendering the template, which in turn will know how to handle that.
Other modules or themes can now implement this preprocessor themselves and change the classes (or any other wrapper attributes) as they need. Had we hardcoded the class in the template file, they would have had to override the entire template—which, although still a viable option, is overkill if you just need to add a class.
Now, let's allow themers to have different implementations for our salutation message depending on whether or not it is overridden by an admin. I know this particular example is quite a stretch in terms of usefulness, but it allows us to demonstrate the approach, which is very useful.
So, as we discussed, we can define a suggestion for our theme hook:
/**
* Implements hook_theme_suggestions_HOOK().
*/
function hello_world_theme_suggestions_hello_world_salutation($variables) {
$suggestions = [];
if ($variables['overridden'] === TRUE) {
$suggestions[] = 'hello_world_salutation__overridden';
}
return $suggestions;
}
If you remember, our theme hook had the overridden variable, which can be used for this flag. So, in our theme hook suggestion implementation, we check for it, and if it's true, we add our suggestion. This function gets called on the fly at the time of rendering and the most specific suggestion encountered is used if, of course, the salutation is overridden. If that is the case, it will try hello_world_salutation__overridden, and if not found, it will fall back to hello_world_salutation, which exists.
Themes can now have two different templates that render the salutation in two different ways, depending on whether or not the message has been overridden:
- hello-world-salutation.html.twig
- hello-world-salutation--overridden.html.twig
Okay, our theme hook is now ready for use. Let's use it.
Since our theme template breaks our salutation message up into pieces, and can even receive the overridden flag, it will not be enough to just use this theme hook in the HelloWorldController. Instead, we will need to go back to our service and have it return the render array responsible for outputting the salutation. After all, business logic knows the structural aspects of how a certain component needs to be rendered. Theming just needs to style and alter that based on the flexibility offered by a good functional implementation.
However, let's not override the getSalutation() method on the service, but instead create a new one called getSalutationComponent(). This will then return the render array, which can output the whole thing:
/**
* Returns the Salutation render array.
*/
public function getSalutationComponent() {
$render = [
'#theme' => 'hello_world_salutation',
];
$config = $this->configFactory->get('hello_world.custom_ salutation');
$salutation = $config->get('salutation');
if ($salutation !== "" && $salutation) {
$event = new SalutationEvent();
$event->setValue($salutation);
$this->eventDispatcher->dispatch(SalutationEvent::EVENT, $event);
$render['#salutation'] = $event->getValue();
$render['#overridden'] = TRUE;
return $render;
}
$time = new DateTime();
$render['#target'] = $this->t('world');
if ((int) $time->format('G') >= 00 && (int) $time- >format('G') < 12) {
$render['#salutation'] = $this->t('Good morning');
return $render;
}
if ((int) $time->format('G') >= 12 && (int) $time- >format('G') < 18) {
$render['#salutation'] = $this->t('Good afternoon');
return $render;
}
if ((int) $time->format('G') >= 18) {
$render['#salutation'] = $this->t('Good evening');
return $render;
}
}
This is how it will look. We start by creating the render array that uses our new theme hook. Then, we look in the configuration object and if there is a message stored in there, we use that, set the overridden flag to true, and return the render array. You'll note that we didn't set a target, which means that it won't get printed in the template file (as expected). If, however, it is not overridden, we proceed with our previous logic and set the message dynamically while keeping the target the same. You can easily see how this now maps to what the theme hook and template expect for the different cases.
A couple of points to be made before going forward. First, I want to reiterate the warning that due to things such as caching, the dynamic salutation message won't actually work as expected. We'd need to set some cache metadata to prevent this render array from being cached in order for it to work. However, we will see more on that in Chapter 11, Caching. Second, you will have noted that the variables we defined in the theme hook show up preceded by a # sign, as if they were properties known to the render system. As I said earlier, they are in fact not properties, but they are known by the theme system as variables because we defined them as such. So, it's important to be able to distinguish these kinds of things when reading code that you didn't write yourself. There are, of course, many properties you don't know off the top of your head, but with experience, you'll be able to read the code, figure out the source, and understand what it means. In this, the difference between a good developer and a great one is the ability of the latter to figure things out by reading the source code rather than relying on documentation. And third, you can see quite some code duplication here between the two methods. This is not great but I'll leave you to come up with more creative ways of refactoring this service to avoid this.
Now, we have a service that can return a string representation of our message, and a fully-fledged renderable component. It follows that we edit our Controller and have it return this component instead of its own render array:
/**
* Hello World.
*
* @return array
*/
public function helloWorld() {
return $this->salutation->getSalutationComponent();
}
You'll note that we don't need the #markup property anymore, as we have our own render array. For the salutation token and the block we created, let's not use this component but rely on the string version. This way we keep both options in the code for you to see.
Summary
The Drupal theming system is complex and flexible and thus impossible to cover fully in one chapter of a module development book. However, we did go through the basics necessary to get you started—understanding the core tenets of the theme system, some of its most important Drupal specificities and practical use cases.
We started this chapter by discussing the abstract principle of separating business from presentation logic—a principle that is used by many modern web applications. We saw why it is critical for flexible and dynamic theming. Next, we discussed a great deal about how Drupal does this separation—the mighty theme hooks that act as a bridge between the two layers. Here, we also covered some of the highly used practices surrounding them—preprocessor functions and theme hook suggestions for added flexibility. Then, we covered how the business logic can actually use theme hooks—the render arrays (perhaps one of the most important Drupal constructs). Also, since we were on the subject, we outlined the Drupal and Symfony render pipeline to get a better understanding of the process that builds the entire page render array. Next, we discussed libraries and how we can "attach" them to render arrays. We will definitely see some more examples later in the book when we talk about JavaScript.
Finally, we started transitioning into the practical aspects of theming a module by exemplifying a few common theme hooks found in Drupal core. In doing so, we also encountered the topic of Attributes, an important one to understand when dealing with making theme hooks more dynamic. We ended the chapter with an overhaul of our Hello World salutation message to create a themable component. We did so by putting into practice much of what we learned about theme hooks earlier on: we defined a theme hook and corresponding template, a preprocess function, as well as a theme hook suggestion, and built a render array dynamically to fire them all. Not a bad day in the life of a Drupal 9 module developer.
In the next chapter, we will look at menus and the different types of menu links in Drupal. What kind of web application would it be without any menu links in it?