
Chapter 3. Integrating Other Clients
I’d like to say that I love everything about kayaking, but that’s not quite true. I hate dragging my boat to the put-in, and back out again. In fact, if I have to hike more than a couple of miles to get where I’m going, I’m probably not going to run the river. It’s not that I hate hiking, or even backpacking. It’s just that those in my sport don’t hike with our boats enough, so we haven’t usually thought through the problem.
Note
New Spring code gets introduced in the sandbox. When the code matures, it’s added to the main Spring project.
Building a Struts User Interface
In the first example, you’ll build a portion of our user interface with Java’s most popular user interface framework, Struts. You’ll also learn how to wire it to Spring.
If you’re starting a new project, you may decide to choose an alternative to Struts. We believe that emerging MVC frameworks improve the user and developer experience, but Struts is still the most popular choice.
How do I do that?
The Struts user interface looks much like the web MVC interface. You’ll configure a central dispatcher. The dispatcher will send requests to a controller, and the controller will invoke business logic in the form of actions.
First, you need to configure Struts. That happens in two places:
web.xml configures your central dispatcher and
struts-config.xml manages the Struts Controller.
Example 3-1 shows web.xml.
<!DOCTYPE web-app
   PUBLIC  "-//Sun Microsystems, Inc.//DTD Web Application 2.2//EN"
   "http://java.sun.com/j2ee/dtds/web-app_2_2.dtd">

<web-app>

    <display-name>RentABike</display-name>
    <description>
        Renting bikes for fun and profit.
    </description>

    <context-param>
        <param-name>contextConfigLocation</param-name>
        <param-value>
          /WEB-INF/rentABikeApp-servlet.xml
        </param-value>
    </context-param>

    <servlet>
       <servlet-name>SpringContext</servlet-name>
       <servlet-class>
           org.springframework.web.context.ContextLoaderServlet
       </servlet-class>
       <load-on-startup>1</load-on-startup>
    </servlet>

    <servlet>
       <servlet-name>RentABike</servlet-name>
       <servlet-class>
           org.apache.struts.action.ActionServlet
       </servlet-class>
       <init-param>
          <param-name>config</param-name>
          <param-value>/WEB-INF/struts-config.xml</param-value>
       </init-param>
       <init-param>
          <param-name>validate</param-name>
          <param-value>true</param-value>12
       </init-param>
       <load-on-startup>2</load-on-startup>
    </servlet>

    <servlet-mapping>
       <servlet-name>RentABike</servlet-name>
       <url-pattern>*.do</url-pattern>
    </servlet-mapping>

    <welcome-file-list>
        <welcome-file>
            start.html
        </welcome-file>
    </welcome-file-list>

    <context-param>
        <param-name>log4jConfigLocation</param-name>
        <param-value>/WEB-INF/log4j.properties</param-value>
    </context-param>

   <listener>
        <listener-class>
            org.springframework.web.util.Log4jConfigListener
        </listener-class>
    </listener>

    <taglib>
        <taglib-uri>/spring</taglib-uri>
        <taglib-location>/WEB-INF/spring.tld</taglib-location>
    </taglib>

    <taglib>
        <taglib-uri>http://java.sun.com/jstl/core</taglib-uri>
        <taglib-location>/WEB-INF/c.tld</taglib-location>
    </taglib>

    <taglib>
        <taglib-uri>/struts</taglib-uri>
        <taglib-location>/WEB-INF/struts-bean.tld</taglib-location>
    </taglib>

    <listener>
        <listener-class>
            org.springframework.web.context.ContextLoaderListener
        </listener-class>
    </listener>

</web-app>
If you’ve seen Struts before, you understand that
there’s nothing new here. We configured two
servlets, one for loading the Spring context and one for controlling
Struts. Each is labeled in load in a particular order (Spring first,
then Struts) using the <load-on-startup>
element. We load Spring first because the Struts actions rely on the
Spring-created RentABike object, which has to be
accessible by the time Struts starts loading its own objects. Notice
also that the file loads several tag libraries for use by the
.jsp pages via the
<taglib> element. Finally, in classic Struts
style, we created a custom suffix mapping to map inbound URL requests
to the Struts controller. The
<servlet-mapping> element says that any URL
request whose filename ends in
“.do” will be mapped to the Struts
controller. There are many books on the inner workings of Struts, and
we’ll not repeat them here.
Next, you’ll need to configure the mappings that tie
a request to individual actions (Example 3-2). This
action map defines the basic flow of the application, and is part of
struts-config.xml.
<?xml version="1.0" encoding="UTF-8"?>
<!DOCTYPE struts-config PUBLIC
 "-//Apache Software Foundation//DTD Struts Configuration 1.1//EN"
 "http://jakarta.apache.org/struts/dtds/struts-config_1_1.dtd">

<struts-config>

   <form-beans>
      <form-bean name="EditBikeForm"
                 type="com.springbook.forms.EditBikeForm"/>
   </form-beans>

   <action-mappings>

      <action  path="/bikes"
               type="org.apache.struts.actions.ForwardAction"
               parameter="/bikes.jsp"/>

      <action  path="/editBike"
               type="org.apache.struts.actions.ForwardAction"
               parameter="/editBike.jsp"/>

      <action  path="/submitBike"
               type="com.springbook.actions.SubmitBikeAction"
               name="EditBikeForm"
               scope="request"
               validate="true"
               input="/editBike.jsp">

               <display-name>Submit Bike</display-name>

               <forward name="success" path="/bikes.jsp"/>
               <forward name="failure" path="/editBike.jsp"/>

      </action>

   </action-mappings>

</struts-config>
This file also contains definitions for any beans used to hold form
information. In this case, there is a bean to hold information about
the bike being edited, EditBikeForm.
You’ll need to define a stub for the scheduling part of the application. Once again, you’ll read the stub from an array list (Example 3-3).
public class ArrayListRentABike implements RentABike {
    private String storeName;
    final List bikes = new ArrayList( );

    public void saveBike(Bike bike) {
        if(bikes.contains(bike)) bikes.remove(bike);
        bikes.add(bike);
    }

    public void deleteBike(Bike bike) {
        bikes.remove(bike);
    }

    public ArrayListRentABike( ) {
        initBikes( );
    }

    public ArrayListRentABike (String storeName) {
        this.storeName = storeName;
        initBikes( );
    }

    private void initBikes( ) {
        bikes.add(new Bike(1, "Shimano",
           "Roadmaster", 20, "11111", 15, "Fair"));
        bikes.add(new Bike(2, "Cannondale",
           "F2000 XTR", 18, "22222",12, "Excellent"));
        bikes.add(new Bike(3, "Trek",
           "6000", 19, "33333", 12.4, "Fair"));
    }

    public String toString( ) {
        return "com.springbook.ArrayListRentABike: " + storeName;
    }

    public String getStoreName( ) {
        return storeName;
    }

    public void setStoreName(String storeName) {
        this.storeName = storeName;
    }

    public List getBikes( ) {
        return bikes;
    }

    public Bike getBike(String serialNo) {
        Iterator iter = bikes.iterator( );
        while(iter.hasNext( )) {
            Bike bike = (Bike)iter.next( );
            if(serialNo.equals(bike.getSerialNo( ))) return bike;
        }
        return null;
    }

    public Bike getBike(int bikeId) {
       if(bikeId > bikes.size( )) return null;
       return (Bike)bikes.get(bikeId);
    }

    //etc...
}
Each action will need access to your façade. You’ll build a base action (Example 3-4), which gets the bike shop façade from the Spring context.
public abstract class BaseAction extends Action {

   private RentABike rentABike;

   public void setServlet(ActionServlet actionServlet) {
      super.setServlet(actionServlet);
      ServletContext servletContext = actionServlet.getServletContext( );
      WebApplicationContext wac =
         WebApplicationContextUtils.
            getRequiredWebApplicationContext(servletContext);
      this.rentABike = (RentABike) wac.getBean("RentABike");
   }

   protected RentABIke getRentABike( ) {
      return rentABike;
   }

   // Plus other utility methods suitable for a base action

}
Remember that you have to define the RentABike
bean in rentABikeApp-servlet.xml (Example 3-5).
<beans>
    <bean id="rentaBike" class="com.springbook.ArrayListRentABike">
        <property name="storeName"><value>Bruce's Bikes</value></property>
    </bean>

    <!-- etc. -->
</beans>
Each action then does its job (Example 3-6).
public class SubmitBikeAction extends BaseAction {

    public SubmitBikeAction( ) {
        super( );
    }

    public ActionForward execute(
        ActionMapping mapping,
        ActionForm form,
        HttpServletRequest request,
        HttpServletResponse response)
        throws java.lang.Exception {

        EditBikeForm editBikeForm = (EditBikeForm) form;

        Bike bike = new Bike( );
        bike.setManufacturer(editBikeForm.getManufacturer( ));
        bike.setModel(editBikeForm.getModel( ));
        bike.setFrame(editBikeForm.getFrame( ));
        bike.setSerialNo(editBikeForm.getSerialNo( ));
        bike.setWeight(editBikeForm.getWeight( ));

        try {
            this.rentABike.saveBike(bike);
            return mapping.findForward("success");
        } catch (Exception ex) {
            return mapping.findForward("failure");
        }

    }
}
You’ll need to use Struts tags to render the pages. Example 3-7 is the EditBike.jsp page.
<%@ page import="com.springbook.*"%>
<%@ include file="include.jsp" %>
<%@ taglib prefix="spring" uri="/spring" %>
<%@ taglib uri="/WEB-INF/struts-html-el.tld" prefix="html-el" %>

<html>
    <head>
        <title>
            Edit Bike
        </title>
    </head>
    <body>
        <h1>Edit Bike</h1>
        <form method="POST">
            <table border="1" cellspacing="2" cellpadding="2">
                <tr>
                    <td align="right">Manufacturer:</td>
                    <td>
                        <html-el:text property="manufacturer" size="25"
                        maxlength="50" styleClass="textBox" tabindex="1" />
                    </td>
                </tr>
                <tr>
                    <td align="right">Model:</td>
                    <td>
                        <html-el:text property="model" size="25"
                        maxlength="50" styleClass="textBox" tabindex="1" />
                    </td>
                </tr>
                <tr>
                    <td align="right">Frame:</td>
                    <td>
                        <html-el:text property="frame" size="25"
                        maxlength="50" styleClass="textBox" tabindex="1" />
                    </td>
                </tr>
                <tr>
                    <td align="right">Serial Number:</td>
                    <td>
                        <html-el:text property="serialNo" size="25"
                        maxlength="50" styleClass="textBox" tabindex="1" />
                    </td>
                </tr>
                <tr>
                    <td align="right">Weight:</td>
                    <td>
                        <html-el:text property="weight" size="25"
                        maxlength="50" styleClass="textBox" tabindex="1" />
                    </td>
                </tr>
                <tr>
                    <td align="right">Status:</td>
                    <td>
                        <html-el:text property="status" size="25"
                        maxlength="50" styleClass="textBox" tabindex="1" />
                    </td>
                </tr>
            </table>
            <html-el:submit styleClass="normal">
                Submit Bike
            </html-el:submit>
        </form>
    </body>
</html>
There’s nothing special here.
You’re using standard Struts tags. Finally,
you’ll need to code up the
EditBikeForm to transfer HTML element values to
the Controller (Example 3-8).
public class EditBikeForm extends ActionForm {

    private String manufacturer;
    private String model;
    private int frame;
    private String serialNo;
    private double weight;
    private String status;

    public void reset(ActionMapping mapping, HttpServletRequest request) {
        manufacturer = null;
        model = null;
        frame = 0;
        serialNo = null;
        weight = 0.0;
        status = null;
    }

    public ActionErrors validate(
        ActionMapping mapping,
        HttpServletRequest request) {
        ActionErrors errors = new ActionErrors( );

        String mappingName = mapping.getPath( );

        if (mappingName.equalsIgnoreCase("/SubmitBike")) {
            if (manufacturer == null
                || manufacturer.trim( ).length( ) == 0) {
                errors.add(
                    "bike",
                    new ActionError("error.manufacturer.required));
            }

            if (model == null
                || model.trim( ).length( ) == 0) {
                errors.add(
                    "bike",
                    new ActionError("error.mo del.required"));
            }
        }

        return errors;
    }

    public EditBikeForm( ) {
        super( );
    }

    public void setManufacturer(String manufacturer) {
        this.manufacturer = manufacturer;
    }

    public String getManufacturer( ) {
        return manufacturer;
    }

    public void setModel(String model) {
        this.model = model;
    }

    public String getModel( ) {
        return model;
    }

    public void setFrame(int frame) {
        this.frame = frame;
    }

    public int getFrame( ) {
        return frame;
    }

    public void setSerialNo(String serialNo) {
        this.serialNo = serialNo;
    }

    public String setSerialNo( ) {
        return serialNo;
    }

    public void setWeight(Double weight) {
        this.weight = weight;
    }

    public Double getWeight( ) {
        return weight;
    }

    public void setStatus(String status) {
        this.status = status;
    }

    public String getStatus( ) {
        return status;
    }

}
And you can run the application.
As before, you’ll want to test what you have written (Example 3-9). One thing that is often important to test in applications like this are the validation rules for the forms being submitted. You can easily test just the validation rules with a simple JUnit test.
public void testBikeValidation( ) throws Exception {
   ActionMapping mapping = new ActionMapping( );
   mapping.setPath("/SubmitBike");
   EditBikeForm ebf = new EditBikeForm( );
   ebf.setManufacturer("a manufacturer");
   ebf.setModel("a model");
   ActionErrors errors = ebf.validate(mapping, null);
   assertEquals(0, errors.size( ));
   ebf = new EditBikeForm( );
   ebf.setManufacturer("a manufacturer");
   ebf.setModel("");
   errors = ebf.validate(mapping, null);
   assertEquals(1, errors.size( ));
}
For more complex testing of the workings of the
Actions and ActionMappings
themselves, we recommend starting with Lu Jian’s
fine article “Unit Test Your Struts
Application” at http://www.onjava.com/pub/a/onjava/2004/09/22/test-struts.html.
What just happened?
Not much. You see a typical Struts application, without Spring. Figure 3-1 shows the flow of control. A client issues an
HTTP request. The request goes through a central dispatcher. You
configured the central dispatcher in web.xml. A
Struts mapping (in struts-config.xml) associates a
request with a controller, and the dispatcher routes control to the
appropriate controller, which inherits from servlet. Struts then can
invoke business logic through actions. Struts, like Spring, also has
a generic form submission workflow that manages validation, and error
form processing. The key question is this: how does
RentABike get access to the Spring context?

As you’ve seen, the pieces of your Spring application will normally resolve dependencies through the container. Spring instantiates the objects in the application and injects dependencies in the form of properties, into the application. When you’re integrating third-party frameworks, dependency injection is not always possible.
This version of the application manages the flow through Struts. When Struts gets a request, it reads the mapping file, which associates an HTTP request with a controller. The controller fires an action. This Struts action then fires a method.
The Struts action is where Spring comes in. Each action inherits from a base action. This base action gets the Spring context from the servlet context. Then, the application easily retrieves our façade, and has access to all of the business methods in the application.
Using JSF with Spring
In this section you’ll see how to use JavaServer Faces and Spring together. Then we’ll see how you can use the JSF expression language to access Spring beans.
JSF, like Spring MVC and Tapestry, is a second-generation web application framework. The first generation, represented by frameworks such as Struts, have taught us a lot over the past three or four years, and better frameworks have evolved as a result. For example, both JSF and Tapestry have component models, which makes it easier to extend those frameworks and share that work with others.
JSF, Tapestry, and Spring MVC also support value bindings—wiring HTML elements (in the case of Spring MVC) or components (JSF and Tapestry) to JavaBean properties. In that simple mechanism lies a lot of power. More about that later...
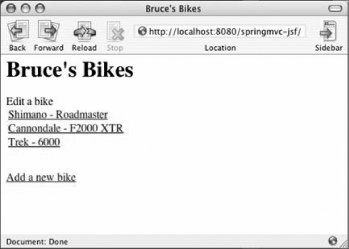
In the first example, you’ll implement Bruce’s Bike Shop using JSF and Spring.
How do I do that?
The JSF version of Bruce’s Bike Store looks nearly identical to the Struts and Spring MVC versions, as you can see from Figure 3-3.
You can dive right into the JSF version of bikes.jsp:
<%@ taglib prefix="f" uri="http://java.sun.com/jsf/core" %>
<%@ taglib prefix="h" uri="http://java.sun.com/jsf/html" %>

<html>
   <f:view>
      <head>
         <title>
<h:outputText value="#{rentABike.storeName}"/> </title>
</head>
<body>
<h1><h:outputText value="#{rentABike.storeName}"/></h1>
<h:outputText value="Edit a bike"/>
<h:form>
<h:dataTable value="#{rentABike.bikes}" var="bike">
<h:column>
<h:commandLink action="#{editBikeController.editBike}">
<h:outputText
value="#{bike.manufacturer} - #{bike.model}"/>
<f:param name="bikeSerialNo" value="#{bike.serialNo}"/>
</h:commandLink>
</h:column>
</h:dataTable>
<h:outputText value="<br/><br/>" escape="false"/>
<h:commandLink action="#{editBikeController.newBike}">
<h:outputText value="Add a new bike"/>
</h:commandLink>
</h:form>
</body>
</f:view>
</html>The preceding code uses JSF tags, such as f:view,
h:form, h:outputText, and
h:dataTable to create the same web page that you
implemented with Spring MVC and Struts. You start by importing the
JSF tag libraries with the taglib directive.
As you use the JSF tags, keep in mind that tag names represent
component/renderer pairs. Components maintain state and renderers
generate markup. For example, the h:dataTable tag
represents the data component paired with the table renderer. This
distinguishes JSF from component-less frameworks such as Struts,
whose JSP tags typically generate markup directly.
The first thing to do in this JSP page
is
create a view. All JSP pages in a JSF application must enclose all
component tags, such as h:outputText and
h:commandLink, in a view component. That component
is represented by the f:view tag.
After the f:view tag, you use an
h:outputText tag to set the window title to a
value
binding—#{rentABike.storeName}—which
references the bike store’s name. Notice
you’re using value bindings such as
#{bike.model} and
#{bike.serialNo} throughout the rest of the page
to access the bikes in the bike store.
A few things about this JSP page are worth mentioning before moving on:
h:dataTableiterates over an array of bikes and makes each bike available as a variable named bike. Notice the similarity to JSTL tags, many of which also havevarattributes.Besides value bindings that represent JavaBean properties, such as
#{rentABike.storeName}, you are also using value bindings that bind to methods; for example, the action attribute of the link that creates a new bike—#{editBikeController.newBike}—represents thenewBikemethod of theeditBikeController. Using Java reflection, JSF will invoke that method when you activate the link.You’re using the
f:paramtag to attach a parameter to the request when that tag’s enclosingh:commandLinkis activated. That request parameter’s name isbikeSerialNo; its value is#{bike.serialNo}, which represents the serial number of the current bike. You will use that request parameter in theeditBikeController.editBike( )method. That method is specified with the action attribute for the firsth:commandLinktag in the preceeding JSP page.
Now you need to implement the editBike.jsp, as
shown in Figure 3-3.
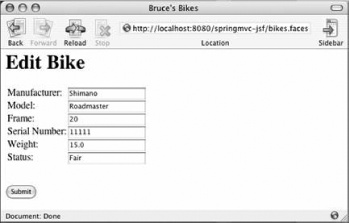
Here’s how you implement
editBike.jsp with JSF:
<%@ taglib prefix="f" uri="http://java.sun.com/jsf/core" %>
<%@ taglib prefix="h" uri="http://java.sun.com/jsf/html" %>

<html>
   <f:view>
      <head>
         <title>
            <h:outputText value="#{rentABike.storeName}"/>
         </title>
      </head>

      <body>
         <h1><h:outputText value="Edit Bike"/></h1>

         <h:form>
            <h:panelGrid columns="2">
               <h:outputText value="Manufacturer:"/>
               <h:panelGroup>
                  <h:inputText id="manufacturer" required="true"
                     value="#{editBikeController.bikeToEdit.manufacturer}"/>
                  <h:message for="manufacturer" style="color: Red"/>
               </h:panelGroup>
Note
This grouping defines the grouping for the manufacturer control. If the user value doesn’t pass validation, you’ll get an error message in red.
               <h:outputText value="Model:"/>
               <h:panelGroup>
                  <h:inputText id="model" required="true"
                            value="#{editBikeController.bikeToEdit.model}"/>
                  <h:message for="model" style="color: Red"/>
               </h:panelGroup>

               <h:outputText value="Frame:"/>
               <h:panelGroup>
                  <h:inputText id="frame" required="true"
                            value="#{editBikeController.bikeToEdit.frame}"
                        converter="javax.faces.Integer"/>
                  <h:message for="frame" style="color: Red"/>
               </h:panelGroup>

               <h:outputText value="Serial Number:"/>
               <h:panelGroup>
                  <h:inputText id="serialNo" required="true"
                         value="#{editBikeController.bikeToEdit.serialNo}"/>
                  <h:message for="serialNo" style="color: Red"/>
               </h:panelGroup>

               <h:outputText value="Weight:"/>
               <h:panelGroup>
                  <h:inputText id="weight" required="true"
                            value="#{editBikeController.bikeToEdit.weight}"
                        converter="javax.faces.Double"/>
                  <h:message for="weight" style="color: Red"/>
               </h:panelGroup>

               <h:outputText value="Status:"/>
               <h:panelGroup>
                  <h:inputText id="status" required="true"
                           value="#{editBikeController.bikeToEdit.status}"/>
                  <h:message for="status" style="color: Red"/>
               </h:panelGroup>
            </h:panelGrid>

            <h:outputText value="<br/><br/>" escape="false"/>

            <h:commandButton value="Submit"
            action="#{editBikeController.saveBike}"/>
         </h:form>
      </body>
   </f:view>
</html>
Once again, you’re using JSF tags to create a web
page. You use converters to convert each bike’s
frame and weight properties from strings to integers and floats,
respectively. You’re also performing server-side
validation by specifying required field values. Finally, you use
h:message tags to display error messages next to
offending text fields, in red, when the user neglects to enter a
value for a required field, as shown in Figure 3-4.
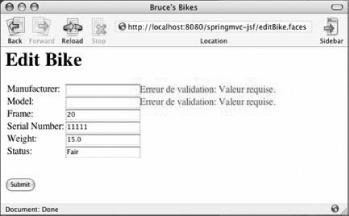
Notice the error messages in the preceding snapshot are in French. That’s because the user has set his browser settings to prefer French. JSF detects that browser setting and automatically localizes error messages.
Now that you’ve implemented the requisite JSP pages for Bruce’s Bike Shop, it’s time to specify navigation between those pages. In the faces configuration file, you enter the following:
<?xml version="1.0"?>

<!DOCTYPE faces-config PUBLIC
  "-//Sun Microsystems, Inc.//DTD JavaServer Faces Config 1.0//EN"
  "http://java.sun.com/dtd/web-facesconfig_1_0.dtd">

<faces-config>
   <navigation-rule>
               <navigation-case>
               <from-outcome>edit</from-outcome>
               <to-view-id>/editBike.jsp</to-view-id>
               </navigation-case>
               </navigation-rule>
Note
The jsf-config file looks a lot like the Struts config file. You specify an action and a result, in the form of a JSP page.
   <navigation-rule>
      <navigation-case>
         <from-outcome>bikes</from-outcome>
         <to-view-id>/bikes.jsp</to-view-id>
      </navigation-case>
   </navigation-rule>
</faces-config>
Navigation rules are easy
to
define and read. Here, you’ve defined one rule that
loads /editBike.jsp whenever an action returns an
outcome of “edit” and a second rule
that loads /bikes.jsp whenever an action returns
an outcome of “bikes”. Those
outcomes are returned by the following
EditBikeController methods:
public class EditBikeController {
    ...
    public String editBike( ) {
        HttpServletRequest request = (HttpServletRequest)
                                     FacesContext.getCurrentInstance( ).
                                     getExternalContext( ).getRequest( );
        bikeToEdit = facade.getBike(request.getParameter("bikeSerialNo"));
        return "edit";
    }

    public String newBike( ) {
        bikeToEdit = new Bike( );
        return "edit";
   }

   public String saveBike( ) {
       facade.saveBike(bikeToEdit);
       return "bikes";
   }
}
The preceding methods are invoked by JSF. You ensure that invocation
by specifying those methods as actions for the links in
/bikes.jsp and the submit button in
/editBike.jsp.
What just happened?
You just implemented a JSF application that:
Converts and validates user input
Navigates from one JSP page to another
Automatically transports data from web forms to bean properties and vice versa
Notice the last bullet item listed above. Previously, I mentioned that value bindings were a powerful concept. To grasp just how powerful value bindings are, it pays to consider the most fundamental aspect of any web application: binding fields in a form to model objects.
With Struts, you accomplish that task by manually transferring data from a form bean and pushing it to your model. That involves a fair bit of overhead: implementing an action class, mapping that action class to a URL in the Struts configuration file, invoking form bean methods to extract field values, invoking model object methods to set the corresponding bean properties, and, if you are a consientious developer, implementing a test class that tests your action. Wow. That’s a lot of work.
With second-generation web application frameworks like JSF, Tapestry, and Spring MVC, however, you simply use a value binding. In JSF, you specify a value binding in a JSP page. For example:
<h:inputText value="#{someBean.someProperty}"/>Then you just implement the method:
public class SomeBean {
    ...
    public int setSomeProperty(int property) { ... }
}
That’s all there is to it. No action class, no
action mapping, no manually transferring form bean properties to
model properties. Value bindings remove all that overhead. Also,
notice that value bindings are not invasive: the
SomeBean need not know that it’s
a backing bean for a JSP page in a JSF application because there are
no ties to the JSF API. That makes JSF backing beans easy to test.
Integrating JSF with Spring
Spring comes with a JSF variable resolver that lets you use JSF and Spring together. You can access Spring beans using JSF and vice versa. Integrating JSF and Spring lets you tap into the capabilities of two of the most powerful server-side Java frameworks.
How do I do that?
You already did! In the previous example you used value bindings to
bind JSF components to model objects. For example, in
/bike.jsp, you did this:
         ...
         <h:form>
            <h:dataTable value="#{rentABike.bikes}" var="bike">
               <h:column>
                  ...
               </h:column>
            </h:dataTable>
            ...
         </h:form>
         ...
The #{rentABike.bikes} value binding references
the bikes property of the bean named rentABike.
Recall that previously, the rentABike bean was
defined in a Spring configuration file, like this:
<?xml version="1.0" encoding="UTF-8"?>
<!DOCTYPE beans PUBLIC "-//SPRING//DTD BEAN//EN" "http://www.springframework.org/dt
d/spring-beans.dtd">

<beans>
    <bean name="rentABike" class="com.springbook.ArrayListRentABike">
        <property name="storeName"><value>Bruce's Bikes</value></property>
    </bean>

    ...
</beans>
Things are no different in the JSF version of
Bruce’s Bike Shop, which means that the
JSF expression
#{rentABike.bikes}
accesses a Spring bean. That’s
made possible by the DelegatingVariableResolver
from the org.springframework.web.jsf package. You
declare that variable resolver, which extends the JSF expression
language to include references to Spring beans, in the faces
configuration file:
<faces-config>
   <application>
      <variable-resolver>
         org.springframework.web.jsf.DelegatingVariableResolver
      </variable-resolver>
   </application>
   ...
</faces-config>
What just happened?
You saw how easy it is to integrate JSF and Spring. You can access Spring beans with the JSF expression language. That seamless integration makes it easy to use these two powerful frameworks together.
What about...
...JSF managed beans? Like Spring, JSF has a bean factory. You specify managed beans in a faces configuration file and JSF instantiates and initializes those beans. In our JSF version of Bruce’s Bike Shop, we didn’t use any managed beans; instead, we used Spring beans exclusively. However, most web applications built on JSF and Spring will have ample quantities of both Spring beans and managed beans.