
The Windows Communication Foundation provides a unified messaging API that provides the capability to integrate with a number of legacy technologies. This chapter focuses on WCF’s capability to integrate with COM+ and non-WCF–based MSMQ applications.
The Windows Communication Foundation provides a rich environment for creating distributed applications. If you have a substantial investment in component-based application logic hosted in COM+, you can use WCF to extend your existing logic rather than having to rewrite it. A common scenario is when you want to expose existing COM+ or Enterprise Services business logic through Web services.
When an interface on a COM+ component is exposed as a Web service, the specification and contract of those services are determined by an automatic mapping to be performed at application initialization time. The conceptual model for this mapping is as follows:
There is one service for each exposed COM class.
The contract for the service is derived directly from the selected component’s interface definition.
The operations in that contract are derived directly from the methods on the component’s interface definition.
The parameters for those operations are derived directly from the COM interoperability type corresponding to the component’s method parameters.
Default addresses and transport bindings for the service are provided in a service configuration file, but those can be reconfigured as required.
Note
The contracts for the generated WCF services are tied to the underlying COM+ application’s interfaces and configuration.
Modifying the COM+ component methods automatically results in an updated service when the application is next started. However, a modification to the number of interfaces does not automatically update the available services. In the latter scenario you will need to rerun the COM+ Service Model Configuration tool (ComSvcConfig.exe).
The authentication and authorization requirements of the COM+ application and its components continue to be enforced when used as a Web service. If the caller initiates a Web service transaction, components marked as transactional enlist within that transaction scope.
The steps that are required to expose a COM+ component’s interface as a Web service without modifying the component are as listed here:
Determine whether the COM+ component’s interface can be exposed as a Web service.
Select an appropriate hosting mode.
Use the COM+ Service Model Configuration tool (
ComSvcConfig.exe) to add a Web service for the interface.
There are some restrictions on the type of interfaces that can be exposed as a Web service. Here’s the list of restricted interface types:
Interfaces that accept object references as parameters
Interfaces that accept types that are not compatible with the .NET Framework COM Interop conversions
Interfaces for applications that have application pooling enabled when hosted by COM+
Interfaces of components that are marked as “private” to the application
COM+ infrastructure interfaces
Interfaces from the system application
Interfaces from managed components that have not been added to the Global Assembly Cache
As is stated in the documentation, COM+ can expose Web services in one of the following three hosting modes.
The Web service is hosted within the application’s dedicated COM+ server process (Dllhost.exe). This mode requires the application to be explicitly started before it can receive Web service requests. The COM+ options Run as an NT Service or Leave Running When Idle can be used to prevent idle shutdown of the application and its services. This mode has the benefit that it provides both Web service and DCOM access to the server application.
The Web service is hosted within a Web server worker process. This mode does not require the COM+ application to be active when the initial request is received. If the application is not active when this request is received, it is automatically activated before the request is processed. This mode also provides both Web service and DCOM access to the server application, but it incurs a process hop for Web service requests. This typically requires the client to enable impersonation. In WCF, this can be done with the SetSspiSettings method and the Impersonation enumeration value.
The Web service and the COM+ application logic are hosted within the Web server worker process. This provides automatic activation of the web hosted mode, without incurring the process hop for Web service requests. The disadvantage is that the server application cannot be accessed through DCOM.
The mechanism used to configure COM+ interfaces to be exposed as Web services is the COM+ Service Model Configuration command-line tool (ComSvcConfig.exe). This tool will be used in this exercise to expose a COM+ business object.
The calling convention and command-line switches for ComSvcConfig are as shown here:
ComSvcConfig.exe /install | /list | /uninstall [/application:<ApplicationID|ApplicationName>] [/contract<ClassID | ProgID | *,InterfaceID| InterfaceName | *>] [/
Table 6.1 describes the modes that can be used with ComSvcConfig.exe.
Table 6.1. Modes That Can Be Used with ComSvcConfig.exe
Option | Description |
|---|---|
| Configures a COM+ interface for Service Model integration. Short form |
| Removes a COM+ interface from Service Model integration. Short form |
| Queries for information about COM+ applications and components that have interfaces that are configured for Service Model integration. Short form |
Table 6.2 describes the options that can be used with ComSvcConfig.exe.
Table 6.2. Flags That Can Be Used with ComSvcConfig.exe
Option | Description |
|---|---|
| Specifies the COM+ application to configure. |
| Short form |
Specifies the COM+ component and interface to configure as a service contract. | |
| Short form |
| Although the wildcard character ( |
Specifies whether to use the COM+ hosting mode or the Short form | |
| Using the COM+ hosting mode requires explicit activation of the COM+ application. Using the web hosting mode allows the COM+ application to be automatically activated as required. If the COM+ application is a library application, it runs in the Internet Information Services (IIS) process. If the COM+ application is a server application, it runs in the |
| Specifies the website for hosting when web hosting mode is used (see the |
Short form | |
If no website is specified, the default website is used. | |
| Specifies the virtual directory for hosting when web hosting is used (see the |
Short form | |
| Adds a Metadata Exchange (MEX) service endpoint to the default service configuration to support clients that want to retrieve a contract definition from the service. |
Short form | |
| Displays the application, component, and interface information as IDs. |
Short form | |
| Prevents |
Short form | |
| Output additional tool progress information. |
Short form | |
| Displays the usage message. |
Short form |
For this series of exercises, we will focus on a scenario in which a school has an application for registering students. The business logic for this application resides within an Enterprise Service component hosted in COM+. It is desired to expose that component as a Web service that can be consumed both by the school’s web-based management application and from a Windows Forms-based smart client application.
This exercise involves taking a legacy COM+ component and exposing it as a Windows Communication Foundation service that is consumed in the smart client application. To begin, let’s examine the COM+ component to understand its functionality.
Open C:WCFHandsOnExerciseFiveBeforeComPlus.sln.
Within the Student Management Application, open the Students.cs file.
Because this component is being placed within COM+, it contains several attributes. The ApplicationName attribute identifies the name of the COM+ application into which this class will be installed. Also note that the interface and the class are attributed with GUIDs, and the class is attributed with a ProgID. Even though this was written in .NET, the component will be living in COM+, with the attributes providing the information necessary for consistent interop registration (See Listing 6.1).
Example 6.1. The COM+ Code
using System;
using System.Collections.Generic;
using System.Text;
using System.Messaging;
using System.Data;
using System.Data.SqlClient;
using System.EnterpriseServices;
using System.Runtime.InteropServices;


[assembly: ApplicationName("StudentManagement")]
[assembly: ApplicationID("2C9BFEA5-005D-4218-8C69-A03F6B9037BA")]
[assembly: ApplicationActivation(ActivationOption.Server)]
[assembly: ApplicationAccessControl(false, AccessChecksLevel = AccessChecksLevelOption
.Application)]

namespace WCFHandsOn
{
    [Guid("1C5677EC-8046-4c5b-B361-BA354CFA3DB3")]
    public interface IStudents
    {

        string Add(string FirstName, string LastName, string PhoneNumber);
        bool Update(string ID, string FirstName, string LastName, string PhoneNumber);
        bool Delete(string ID);
        System.Collections.ArrayList GetAll();

    }

    [Guid("E4A5D9FD-3B5F-4598-9E42-EC8D1329EE9D")]
    [ProgId("StudentManagement.Students")]
    public class Students : ServicedComponent, IStudents
    {
        public Students() { }

        string qPath = @"FormatName:DIRECT=OS:w2k3eeprivate$school";
        public string Add(string FirstName, string LastName, string PhoneNumber)
        {
            //For any modifications to the data, we place the
            //request on a queue.

            //First we generate a System.Messaging.Message for the queue.
            try
            {
            string ID = Guid.NewGuid().ToString();
            Student student = new Student(ID, FirstName, LastName, PhoneNumber);


            System.Messaging.Message msg = GenerateAddMessage(student);


            //Now we place it to the queue
            PlaceMessageOnQueue(msg);

            //This is a new student, return the GUID
            return ID;
        }
        catch (Exception e)
        {

            //Debug.WriteLine(e.ToString());
            throw e;
        }
    }
As you go through the file, you’ll see that this class provides methods to the user interface for additions, updates, and retrieval of basic student information. For additions and updates, the changes are sent to an MSMQ using the System.Messaging libraries. In this exercise, we will be invoking only the Add method.
In this exercise, we would like to expose the IStudents interface from the COM+ application as a Web service using WCF. This provides the capability to take this legacy component and allow it to provide a WS-* compatible service that can be consumed on any platform.
Because the component is a legacy application, it is already in COM+. To expose this as a WCF service, the ComSvcConfig utility will be used.
Before using this utility, you will need to create a virtual directory in which to house the service:
Choose Start, Programs, Administrative Tools, Internet Information Services Manager.
Create a directory at
C:WCFHandsOnChapterFiveBeforeStudentManagementService.Navigate to the Default Website and create a new Virtual Directory. The alias for the directory should be
WCFHandsOn_StudentMgmt,and the path for the directory isC:WCFHandsOnChapterFiveBeforeStudentManagementService.
You are now ready to use the ComSvcConfig utility:
Open a Visual Studio command prompt.
Navigate to
C:WCFHandsOnChapterFiveBefore.Run the following script to register the COM+ Component:
C:WindowsMicrosoft.NETFrameworkv2.0.50727ComSvcConfig.exe /i/application
Reviewing this script, you can see that you are configuring the IStudents interface on the component from the StudentManagement application, hosting using IIS (versus COM+) and will be placing the files in the virtual directory WCFHandsOn_StudentMgmt.
If you now navigate to the virtual directory created earlier, you’ll find that a service—named after the interface—was generated and placed in this directory.
To test the service, open the service file in your web browser. Navigate to http://localhost/WCFHandsOn_StudentMgmt/Service.svc. If the service is functioning properly, a page is displayed that identifies the location of the WSDL and how to consume the service (see Figure 6.1).

Record the address of the WSDL specified in the first box on this screen, because it is used in the next part of the exercise.
The next step in the exercise is to connect the service to a Windows Forms client. It should be noted that although in this exercise you will be using a Windows Form client to consume the service, it is for the sake of simplicity. This service can be consumed in any application that can consume services:
Open a Visual Studio command prompt.
Run the following script to generate proxy code and a configuration file that can be used:
"C:Program FilesMicrosoft SDKsWindowsv1.0Binsvcutil.exe " http://localhost
/WCFHandsOn_StudentMgmt/StudentManagement.Students.svc/out:proxy.cs
This generates two files,
proxy.csandoutput.config.Add both files to the Teacher Application project.
Rename the configuration file to
Web.Configfor the website andApp.Configfor the Windows Forms application.The application provides an interface that provides the capability to add new students to the system.
Open the
Proxy.csfile and note the name of the new proxy class that was created. This class will be referenced in your code to execute the service.Modify the code for the button to add the students using the new Web service. This is done by adding the following code to the
btnUpdate_Clickmethod:StudentsProxy proxy = new StudentsProxy("Students"); string result = proxy.Add(tbFirstName.Text,tbLastName.Text,tbPhone.Text); MessageBox.Show("Student Added!"); proxy.Close();Enter a first name, last name, and phone number into the application, and click Add to test it (see Figure 6.2). A message box will be displayed identifying that the student has been added.

You’ve successfully integrated with a Legacy COM+ application, and established a platform-agnostic, WS-*–compliant service. You’ve also used the SvcUtil utility to generate proxies from this new service, and connected to a Windows Forms client.
In this next exercise, we will be creating an MSMQ service. The service will send requests to a queue. A separate queue monitor application monitors this queue and retrieves the messages placed there by the service.
This scenario is not a “pure” Windows Communication Foundation scenario, meaning that one of the systems is using WCF and the other is using System.Messaging. In scenarios in which WCF will be used with native MSMQ applications, the MsmqIntegrationBinding is used.
The client application is a WCF application that uses the MsmqIntegrationBinding binding to send a durable, transactional message to the queue. The client application has a dummy contract to mimic invoking a service operation, but, in reality, the message is consumed by an MSMQ service.
The service contract is IStudents, which defines a one-way service that is suitable for use with queues. An MSMQ message does not have an Action header. It is not possible to map different MSMQ messages to operation contracts automatically. Therefore, there can be only one operation contract. If you want to define more than one operation contract for the service, the application must provide information as to which header in the MSMQ message (for example, the Label or correlationID) can be used to decide which operation contract to dispatch.
The MSMQ message also does not contain information in itself as to which headers are mapped to the different parameters of the operation contract. So there can be only one parameter in the operation contract. The parameter is of type Generic MsmqMessage (MsmqMessage<T>) and contains the underlying MSMQ message. The type T in the generic MsmqMessage (MsmqMessage<T>) represents the data that is serialized into the MSMQ message body. In this exercise, a Student type is serialized into the MSMQ message body.
In our scenario, we will be creating a Windows Communication Foundation service that provides the capability to update student records. We will begin by creating a struct that will contain the student information used when adding or updating a record. This will be followed by the creation of our service and client.
The resulting solution will yield in a WCF client that posts a message to MSMQ that is later received by a non-WCF application monitoring the queue. That receiver application would take the message and process it as appropriate.
During this exercise, you will be sending requests to manipulate student information. A student is represented by four pieces of information, studentID, firstName, lastName, and phoneNumber. If we add or update a student, we will need to pass all of this information in the body of the message. You will create a new project that contains a struct containing this information, and this project will later be referenced by your service and client:
Create a new class library project named StudentManagementRequest in
C:AppsWCFHandsOnExerciseThreeBefore.Delete
Class1.cs.Using Solution Explorer, add a new class named
StudentManagementRequest.cs.
Populate the new class with the following code to create the struct:
using System;
using System.Collections.Generic;
using System.Text;

namespace WCFHandsOn
{
     [Serializable]
     public struct StudentManagementRequest
     {
           public string studentID;
           public string firstName;
           public string lastName;
           public string phoneNumber;
      }
}
Now you will create the service for the scenario:
Create a new class library project named Service in
C:WCFHandsOnChapterFiveBefore.Delete
Class1.cs.Add a reference to
System.Messaging.Add a reference to
System.Configuration.Add a reference (project reference) to your project StudentManagementRequest.
Using Solution Explorer, add a new Application Configuration file.
The configuration for our MSMQ Integration service is listed in the following code. In addition, the file also contains the name of our MSMQ queue. For this exercise, we’re using a private queue on the local machine named
school.Modify your
App.Configfile to resemble the following:<?xml version="1.0" encoding="utf-8" ?> <configuration> <appSettings> <!-- use appSetting to configure MSMQ queue name --> <add key="queueName" value=".private$school" /> </appSettings> </configuration>Using Solution Explorer, add a new class to the project named
Program.cs.Open
Program.cs, and the following namespaces to the top of the file:using System; using System.Collections.Generic; using System.Text; using System.Messaging; using System.Configuration; using System.Data; using System.Data.SqlClient; namespace WCFHandsOn
Next you will create the core of the service. Because this service is queue based, the code reads the queueName specified in the
App.Configfile and checks for its existence. If the queue does not exist, the queue is created. Note that the second parameter sent toMessageQueue.Createistrue. This will create the queue as a transactional queue.The queue will be receiving messages at various times. To be notified of the arrival of a message, the code also assigns an event handler. The
ProcessMessagemethod of this class will be called when new messages are received.The
BeginReceivefunction is then called, and as its name implies, theMessageQueueobject is monitoring for received messages.In
Program.cs, enter the following code:static void Main(string[] args) { // Create a transaction queue using System.Messaging API // You could also choose to not do this and instead create the // queue using MSMQ MMC--make sure you create a transactional queue if (!MessageQueue.Exists(ConfigurationManager.AppSettings["queueName"])) MessageQueue.Create(ConfigurationManager.AppSettings["queueName"], true); //Connect to the queue MessageQueue Queue = new MessageQueue(ConfigurationManager.AppSettings["queueName"]); Queue.ReceiveCompleted += new ReceiveCompletedEventHandler(ProcessMessage); Queue.BeginReceive(); Console.WriteLine("Message Processing Service is running"); Console.ReadLine(); }The
ProcessMessagemethod is called when the queue begins receiving a message. The message body is read and assigned to aStudentManagementRequestobject and the message label inspected.The server determines which action to take from the message label. Based on the text of the label, corresponding methods on the object are called.
Enter the following code:
public static void ProcessMessage(Object source, ReceiveCompletedEventArgs asyncResult) { try { // Connect to the queue. MessageQueue Queue = (MessageQueue)source; // End the asynchronous receive operation. System.Messaging.Message msg = Queue.EndReceive(asyncResult.AsyncResult); msg.Formatter = new System.Messaging.XmlMessageFormatter(new Type[] { typeof(StudentManagementRequest) });
StudentManagementRequest request = (StudentManagementRequest)msg.Body;
switch (msg.Label)
{
case "Add":
AddStudent(request);
break;
case "Update":
UpdateStudent(request);
break;
case "Delete":
DeleteStudent(request.studentID);
break;
default:
Console.WriteLine("The label of the message is of an unknown type
or not set correctly.");
break;
}
Queue.BeginReceive();
}
catch (System.Exception ex)
{
Console.WriteLine(ex.Message);
}
}The
ProcessMessagefunction interprets the message and calls one of three methods:UpdateStudent, AddStudent,orDeleteStudent.Enter the following code to process these requests:private static void UpdateStudent(StudentManagementRequest s) { Console.WriteLine("Just updated student {0} {1} with a phone number of {2}", s.
firstName, s.lastName, s.phoneNumber);
}
private static void AddStudent(StudentManagementRequest s)
{
Console.WriteLine("Just added student {0} {1} with a phone number of {2}", s.
firstName, s.lastName, s.phoneNumber);
}
private static void DeleteStudent(string studentID)
{
Console.WriteLine("Just deleted student with ID {0}";, studentID);
}
Open the Client application found at
C:WCFHandsOnChapterFiveBefore.Add a reference to
System.ServiceModel.Using Solution Explorer, add a reference to the StudentManagementRequest project.
Using Solution Explorer, add a new class called
StudentManagementProxy.cs.This class will contain the service interface and proxy code we will use to communicate to MSMQ.
Add the following code, taking note of several key pieces:
using System.ServiceModel; using System.ServiceModel.Channels; namespace WCFHandsOn { [System.ServiceModel.ServiceContractAttribute(Namespace = "http://Microsoft.ServiceModel.Samples")]
public interface IStudentManagement
{
[System.ServiceModel.OperationContractAttribute(IsOneWay = true, Action = "*")]
void ProcessMessage(MsmqMessage<StudentManagementRequest> msg);
}
public interface IStudentManagementChannel : IStudentManagement, System.ServiceModel
.IClientChannel
{
}
public partial class StudentManagementProxy : System.ServiceModel
.ClientBase<IStudentManagement>, IStudentManagement
{
public StudentManagementProxy()
{
}
public StudentManagementProxy(string configurationName)
:
base(configurationName)
{
}
public StudentManagementProxy(System.ServiceModel.Binding binding)
:
base(binding.Name.ToString())
{
}
public StudentManagementProxy(System.ServiceModel.EndpointAddress address, System
.ServiceModel.Binding binding)
:
base(address.Uri.ToString(), binding.Name.ToString())
{
}
public void ProcessMessage(MsmqMessage<StudentManagementRequest> msg)
{
base.InnerProxy.ProcessMessage(msg);
}
}
}The service interface provides only a single operation,
ProcessMessage. This may seem odd, because you’re aware that there areAdd, Update, andDeleteoperations on the client. For MSMQ integration, you define a single operation that takes an MSMQ message of a particular type as a parameter. In this case, the parameter is theStudentManagmentRequestdefined earlier.It is not possible to map different MSMQ messages to operation contracts automatically. As a result, there can be only one operation contract. As seen earlier, the server determines which action to take based on the message label. Thus, as you will see with the
ProcessMessageoperation is called by the client, theStudentManagementRequestobject will be populated and the operation to be performed will be identified by theLabelproperty.Using Solution Explorer, add a new Application Configuration file.
Populate the configuration file as shown in the following code:
<?xml version="1.0" encoding="utf-8" ?>
<configuration xmlns="http://schemas.microsoft.com/.NetConfiguration/v2.0">
     <system.serviceModel>
        <client>
             <!-- Define NetProfileMsmqEndpoint -->
             < endpoint name="StudentManagementEndpoint"
               address="msmq.formatname:DIRECT=OS:.private$school"
               binding="msmqIntegrationBinding"
                        bindingConfiguration="Binding2"
                        contract="WCFHandsOn.IStudentManagement, Client">
             </endpoint>
        </client>

        <bindings>
            <msmqIntegrationBinding>
                <binding name="Binding2">
                   <security mode="None" />
                </binding>
            </msmqIntegrationBinding>
        </bindings>

     </system.serviceModel>

</configuration>
Modify the
Program.csfile to include the following code:static void Main(string[] args) { AddStudent("Marc", "Mercuri", "123456789"); Console.WriteLine(); Console.WriteLine("Press <ENTER> to terminate client."); Console.ReadLine(); } private static void AddStudent(string firstName, string lastName, string phoneNumber) { using (StudentManagementProxy p = new StudentManagementProxy("StudentManagementEndpoint")) { using (TransactionScope tx = new TransactionScope(TransactionScopeOption.Required))
{
StudentManagementRequest request = new StudentManagementRequest();
MsmqMessage<StudentManagementRequest> msg = new
MsmqMessage<StudentManagementRequest>(request);
request.firstName = firstName;
request.lastName = lastName;
request.phoneNumber = phoneNumber;
request.studentID = System.Guid.NewGuid().ToString();
msg.Label = "Add";
msg.Body = request;
p.ProcessMessage(msg);
//Commit the transaction
tx.Complete();
}
}
}This code will generate a message and send it to the queue. Our service will extract the message and enter the data into the database.
With the code completed, it is time to test the application.
Using Solution Explorer, right-click on the Client project and select Debug, New Instance.
Using Solution Explorer, right-click on the Service project and select Debug, New Instance.
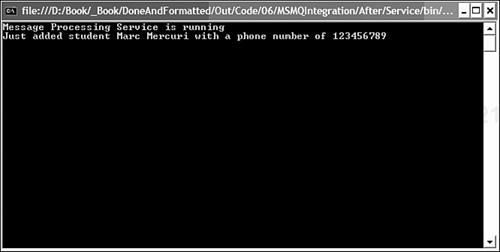
The client and server consoles will be displayed. The information entered in the client’s Main method will send a message to the queue using WCF, which will be received by the waiting service using MSMQ.
To verify that the message was transferred, check the window of the Service application. The information provided should be displayed as in Figure 6.3.
Very few Enterprises are starting from scratch; they’ve evolved over time and have multiple legacy systems in place. Leveraging the information and business processes in these legacy applications is of keen interest to the Enterprise. In this chapter we reviewed how well WCF works with two of the most popular types of legacy applications, those that utilize COM+ and MSMQ.