
In This Chapter
Chapter 2, “The Fundamentals,” which covered the fundamentals of the Windows Communication Foundation, showed that the technology makes security simple. Just opting to use the WSHttpBinding in configuring a service ensures not only that communications with the service are kept confidential, but also that the identities of the users of the clients are conveyed to the service so that the service can evaluate whether to grant the clients access to its resources.
More generally, by configuring the binding of a service, one can select how clients of the service are to be authenticated and how communications with the service are to be kept confidential. The built-in options for how a client may be authenticated are by a username and password combination, by its user’s Windows identity, and by an X.509 certificate. However, one can also define custom tokens for authenticating clients. Communications with a service can be kept confidential either by using a secure transport protocol or by having messages encrypted before being transported.
All of these security facilities of the Windows Communication Foundation are well documented by the samples in the Microsoft Windows Software Development Kit (SDK) referred to in the Introduction. So those facilities are not covered in detail here. The auditing of security events is covered in Chapter 12, “Manageability.” What this chapter focuses on is the Extensible Security Infrastructure (XSI) that the Windows Communication Foundation incorporates, which promises to greatly simplify the automation of business processes that extend across organizations.
Organizations interact with one another. They do so a lot. In fact, many organizations exist solely for the purpose of interacting with other organizations. Only particular types of organizations, such as retailers, schools, hospitals, social service agencies, and some government departments, focus on dealing with individuals. Among those organizations, a recent trend has been to reduce their activity to the ownership of their brand, relying on other organizations for manufacturing, logistics, and customer service (Means and Schneider 2000, 1-18). That trend is evident even in government departments outsourcing their activities to private enterprises.
Yet, despite the fact that their processes involve other organizations, the automation of those processes has mostly been kept stubbornly internal (Daly 2000). Organizations tend to design their automation to suit their own requirements, and make only the most rudimentary accommodation for their automated systems working together with those of other organizations.
This problem is especially evident in how information about the users of systems is managed. If the users of the systems of one organization are to be able to use them to access the systems of another organization, some information about those users must be shared for use in authorizing access to the other organization’s facilities. However, not only is information about users seldom organized for access by multiple organizations, but it is also often not properly organized within any single organization. It is very typical for individual systems to be designed to have their own store of information about their users, so as people join or leave an organization, their information has to be added to, or removed from, each system’s repository of user data.
As long ago as 1988, the organization that is now known as the International Telecommunication Union, and the International Organization for Standardization, released a standard for directory services called X.500. In the mid-1990s, the Internet Engineering Task Force began to publish a slimmer version of X.500 exclusively designed for TCP/IP environments, which is called the Lightweight Directory Access Protocol, or LDAP. The directory services defined by those standards are meant to serve as the central repository for every asset and user in an organization, and also provide a language and an application programming interface for querying that repository.
Microsoft Active Directory, which was initially released as part of Microsoft Windows 2000 Server, was Microsoft’s LDAP-compliant directory service offering. In accordance with its corporate strategy at the time, Microsoft made Active Directory not only LDAP-compliant, but COM-compliant as well.
However, the adoption of directory services like Microsoft Active Directory tends to have been limited to managing access to network resources: to computer desktops, shared folders, printers, and electronic mail. It seldom extends to managing access to software applications, yet less to particular features of those applications or to the items of information they manage.
So anyone designing a software application today can be certain only of these articles of uncertainty:
Although the users of the system may initially be a quite restricted group, perhaps including the members of only a particular department within an organization, if the application is useful, the community of users may expand, quite possibly to include users from other organizations.
What may be known about those users in order to assess their privileges within the application could be quite unpredictable. Some users might be listed in a directory service, but others might not be.
What the application may need to do in order to determine the privileges for which a user is eligible not only may be quite specific to that application, but also may need to change over time. Although it would be ideal for the application to simply query a directory service to determine a user’s privileges, that seldom suffices.
Consequently, to secure an application today, one would like to have a technology by which access can be readily expanded to include a wider community of legitimate users with diverse ways of identifying themselves. One would also like to have flexibility in how one determines the privileges to which users of the application are entitled. XSI is intended to be just such a technology: a flexible and easily customizable way of controlling access to the resources of a software application.
XSI consists of the set of classes in the System.Security.Authorization namespace of the System.Security.Authorization assembly. That assembly is another of the constituent assemblies of the Windows Communication Foundation, others being the System.ServiceModel and System.Runtime.Serialization assemblies discussed in the previous chapters.
XSI provides a way of controlling access to resources based on claims. To understand how it works, consider this scenario. A man walks into a bar, places his driver’s license and a small sum of money on the bar, and asks the bartender for a beer. The bartender looks at the driver’s license, takes the money, and serves the man a beer.
In this scenario, the bar represents a service. The serving of beer is an operation. The beer is a protected resource. To access it, a person must be of legal drinking age, and must pay a sum of money for it.
The driver’s license and the money both represent claim sets. A claim set is a number of claims provided by the same issuer. In the case of the driver’s license, the issuer is a government department that licenses drivers, and in the case of the money, the issuer is a country’s central bank. However, those issuers are themselves present merely as sets of claims: as logos, signatures, and images on the driver’s license and the money.
Claims consist of a type, a right, and a value. One of the claims in the set of claims represented by the driver’s license is the driver’s date of birth. The type of that claim is date of birth, and the value of that claim is the driver’s birth date. The right that a claim confers on the bearer specifies what the bearer can do with the claim’s value. In the case of the claim of the driver’s date of birth, the right is simply possession. The driver possesses that date of birth but cannot, for example, alter it.
In examining the driver’s license and the money, the bartender translates the claim about the bearer’s date of birth provided by the driver’s license into a claim about the bearer’s age. The bartender also translates the value of each of the proffered items of money on the bar into a claim about the total sum of money being offered. The rules by which the bartender performs these translations from an input claim set to an output claim set constitute the bartender’s authorization policy. The input claim set of an authorization policy is referred to as the evaluation context, and the output claim set is referred to as the authorization context. A set of authorization policies constitute an authorization domain.
In taking the money and serving the beer, the bartender compares the claim about the age of the person asking for a beer to the minimum drinking age, and compares the total sum of money being offered to the price of the requested beer. In that process, the bartender is comparing the authorization context claim set yielded by the authorization policy, to the access requirements for the operation of serving a beer. It so happened that the authorization context claim set of the age of the man asking for the beer, and the total sum of money being offered, satisfied the access requirements for the operation, so the bartender served the man a beer.
To summarize, in XSI, access to an operation on a protected resource is authorized based on claims. Claims have a type, a right, and a value. A claim set is a number of claims provided by the same issuer. The issuer of a claim set is itself a claim set. Authorization based on claims is accomplished in two steps. First, an authorization policy is executed, which takes an evaluation context claim set as input and translates that into an authorization context claim set that it outputs. Then the claims in the authorization context claim set are compared to the access requirements of the operation, and, depending on the outcome of that comparison, access to the operation is denied or granted.
How does this claims-based approach to authorization compare to role-based authorization, which is a fairly common approach to controlling what users can do with software applications? A definition of role-based authorization would be helpful in answering that question.
“Role-based authorization is a mechanism that uses roles to assign users suitable rights for performing system tasks and permissions for accessing resources” (Tulloch 2003, 281). A role is a “symbolic category that collects together users who share the same levels of security privileges” (Tulloch 2003, 281).
Role-based authorization requires first identifying the user, then ascertaining the roles to which the user is assigned, and finally comparing those roles to the roles that are authorized to access a resource. Thus, in the role-based authorization system provided by Microsoft .NET role-based security, for example, the most important element is the principal object, which incorporates a user’s identity and any roles to which the user belongs (.NET Framework Class Library 2006; Freeman and Jones 2003, 249).
By contrast, if one recalls what the bartender did in deciding whether to serve a beer to the man requesting one in the previous scenario, it is noteworthy that identifying the man was not important. Certainly, the proffered driver’s license could also be used to establish the man’s identity, because driver’s licenses do typically make claims about the bearer’s identity, but those claims were not important to the bartender; the bartender was only interested in the license’s claim about the date of birth of the bearer. If the man proceeded to rob the bartender, then no doubt identifying him would become important.
In general, claims-based authorization subsumes role-based authorization. To be precise, roles membership is determined based on identity, identity is just one sort of right to the value of a claim, the right of using the value of the claim to identify oneself. A birth date is not a value of a claim that one has the right to use to identify oneself, because many people share the same birth date, whereas a photographic portrait is a value of a claim that one has the right to use identify oneself. Also, a role is just one type of claim.
How does the claims-based approach to authorization provided by XSI compare to controlling the use of resources with access control lists (ACLs), an approach that is common in administering access to network resources? Once again, having a definition of ACLs would be useful in answering the question.
“ACLs are composed of a series of Access Control Entries (ACEs) that specify which operations [a user or group] can perform on [a resource]” (Tulloch 2003, 7). An ACE consists of a security identifier (SID) identifying a user or group, and a set of access rights defining which operations the user or group is allowed or not allowed to perform on the resource (Tulloch 2003, 7).
ACLs “are used on Microsoft Windows platforms to control access to securable [resources] such as files, processes, services, shares, [and] printers” (Tulloch 2003, 7). Specifically, “[w]hen a user account is created on a Microsoft Windows platform, it is assigned a [SID] that uniquely identifies the account to the operating system” (Tulloch 2003, 7). When the user logs on using that account, an access token is created that contains the SID for that account and the SIDs of the groups to which the account belongs. That token “is then copied to all processes and threads owned by the account” (Tulloch 2003, 7). When the user tries to access a resource secured using an ACL, the SIDs in the token are compared with the SIDs in each ACE of the ACL, until a match is found, and access is either granted or denied (Tulloch 2003, 7).
Once again, claims-based authorization subsumes access control lists as a special case. The credentials by which a user logs on to an operating system, and the SIDs contained in the access token, are both claim sets. The process by which the operating system exchanges the credentials by which the user logs on for the SIDs in the access token that it issues is simply one case of the execution of an authorization policy. Comparing the SIDs in an access token with the SIDs in an ACL is merely an instance of comparing the claims in an authorization context claim set to the access requirements of whatever operation the user wants to perform on the resource secured by the ACL.
However, the more general model provided by XSI works far better than ACLs to accommodate the requirements of authorizing access to a distributed system. There are three reasons.
First, access tokens were never designed to be exchanged across platforms. Claims, by contrast, can be readily expressed in standard, interoperable formats like the one defined by the Security Assertion Markup Language (SAML).
Second, access tokens are issued by operating systems. Claims, however, can be issued by any source.
Third, and most important, the SIDs in access tokens and ACLs are generally useful only within the scope of the operating system issuing the access tokens. If that operating system is a domain controller, the utility of its SIDs will extend as far as the domain does. In contrast, a claim can be meaningful wherever the issuer of the claim is trusted.
However, despite these advantages of claims-based authorization over role-based authorization and access control lists, one should not necessarily eschew role-based authorization and access control lists in favor of claims-based authorization. The use of role-based authorization and access control lists is supported by a vast number of powerful tools. Many such tools are built into Microsoft Windows and their use is customary among network administrators. Support for claims-based authorization is mostly limited to XSI.
So instead of seeing claims-based authorization as a superior alternative to role-based authorization and access control lists, a wiser approach would be to use them together, leveraging their respective strengths where it is most appropriate to do so. Claims-based authorization is especially effective for controlling access to resources across platforms and between organizations. Therefore, in cases in which the users of one organization need to access resources managed by the systems of another organization, have them exchange their access tokens for claims that the other organization can use to decide whether to grant the users access.
How exactly might such a solution be implemented? Well, the Web Services Trust Language (WS-Trust) is a standard language for requesting and issuing claim sets. A system that issues claim sets in accordance with that language is called a security token service (STS) (Gudgin and Nadalin 2005, 7; Cabrera and Kurt 2005, 24-27). An organization whose users need to access the facilities of another organization’s systems could provide their users with an STS from which they could request claim sets that the other organization’s systems would understand. That STS would take the claims constituted by the SIDs in the users’ access tokens and apply an authorization policy that would yield claims with types, rights, and values agreed on with the other organization. That other organization would provide a second STS to accept those claims and apply an authorization policy of its own to yield claims that the other systems within that organization could then use to decide whether to grant a user access to their resources. This solution is depicted in Figure 4.1. The approach has several important virtues.
First, trust relationships are minimized and the management of them is centralized. Specifically, the services with resources to protect need to trust the claims from only a single issuer, namely, their own organization’s STS. That STS can be configured to trust claims issued by any number of other organizations’ STSs. Configuring an STS to trust claims issued by another organization’s STS is simply a matter of giving it access to the other organization’s public key.
Second, the claims that one organization makes about its users attempting to access another organization’s services are also hidden from the services by the authorization policy of the STS they trust. That STS applies the authorization policy to translate the claims made by the other organizations into claims that are familiar to the services. That process of translating the diverse sorts of claims that various organizations might make into the sorts of claims that are familiar to a suite of services is commonly referred to as claims normalization.
Third, the administration of access to services is truly federated. Federation is the formation of a unity in which the participants retain control over their internal affairs (Oxford Dictionary of Current English 2001), thereby minimizing the cost of maintaining the unity. In this case, the addition or removal of users and the elevation or reduction in users’ privileges by the system administrators in one organization will determine their rights to access the services of the other organization, without the system administrators of that other organization needing to be involved. This benefit will be vividly demonstrated in the following exercise.
The exercise begins with a Windows Communication Foundation solution in which access to an Intranet resource is controlled using role-based authorization. That solution will show how the securing of Windows Communication Foundation applications simply leverages existing, familiar facilities of Microsoft Windows and Microsoft .NET, saving system administrators from having to learn new concepts and tools and saving software developers from having to learn new concepts and class libraries.
The exercise then proceeds to show how, with XSI, the same resource can be accessed from the same client deployed in a separate, federated organization, with the access being authorized based on claims. What should be impressive is that neither the code of the client nor the code of the service managing the resource will need to be altered to accomplish a fundamental change in how access to the resource is controlled. That should serve as yet another eloquent demonstration of the power of the software factory template for software communications that the Windows Communication Foundation provides, allowing one to fundamentally alter the behavior of an application by making some changes to a model while leaving its code intact.
This first step will demonstrate a Windows Communication Foundation solution in which access to an Intranet resource is controlled using role-based authorization. The role-based authorization is accomplished using .NET Role-Based Security, the ASP.NET 2.0 AuthorizationStoreRoleProvider and the Windows Server 2003 Authorization Manager.
Readers using Windows XP Service Pack 2 can install the Windows Server 2003 Authorization Manager onto their systems by installing the Windows Server 2003 Service Pack 1 Administration Tools Pack. That can be obtained by searching for “Windows Server 2003 SP1 Administration Tools Pack” from the Microsoft Downloads Center.
Follow these instructions to get started:
Copy the code associated with this chapter that you downloaded from www.samspublishing.com to the folder C:WCFHandsOn. The code is all in a folder called Security, and it contains a single Visual Studio solution with the same name. After the code has been unzipped, there should be a folder that looks like the one shown in Figure 4.2.
Open the solution,
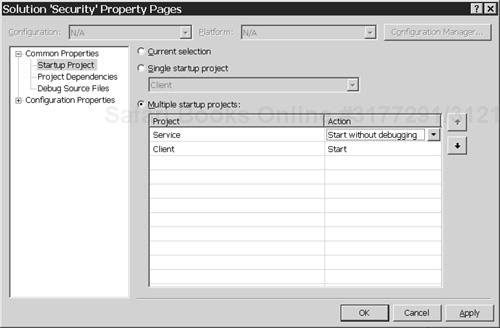
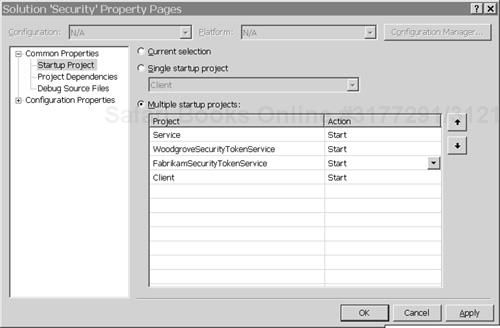
C:WCFHandsOnSecuritySecurity.sln,in Visual Studio 2005.Confirm that the startup project property of the solution is configured as shown in Figure 4.3.
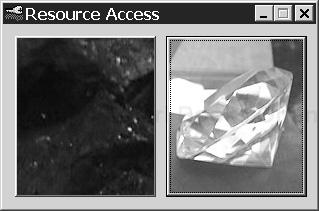
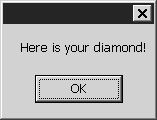
Start debugging the solution. The console application of the service should appear, as well as the user interface of the Resource Access client application, which is shown in Figure 4.4. That user interface has two large buttons. The button on the left has a picture of coal on its face, and the one on the right has a picture of a more valuable resource, a diamond, on its face.
After the console application of the service has shown some activity, click the coal button. A message box should appear confirming that the less valuable resource, coal, has been accessed, as shown in Figure 4.5.
Now click the diamond button. Alas, access to the more valuable resource of a diamond should be denied. Specifically, a message box like the one shown in Figure 4.6 should appear.
Choose Debug, Stop Debugging from the Visual Studio 2005 menus, and close the console of the service.
The next few steps will explain why the coal was accessible but the diamond was not. Begin by following these instructions to open the Windows Server 2003 Authorization Manager user interface:
Open the Microsoft Management Console by choosing Run from the Windows Start menu, and entering this command in the Run dialog box:
mmc
Select File, Add/Remove Snap-in from the Microsoft Management Console’s menus.
Click the Add button on the Add/Remove Snap-in dialog.
Select Authorization Manager from the Add Standalone Snap-in dialog; click the Add button, and then the Close button.
Back on the Add/Remove Snap-in dialog, click the OK button.
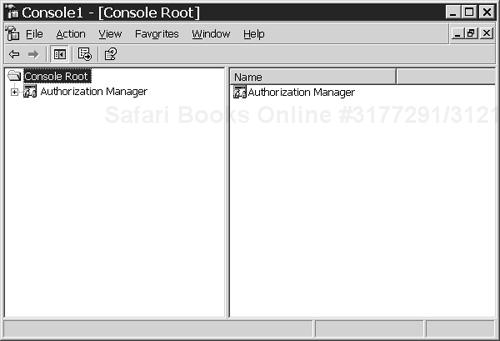
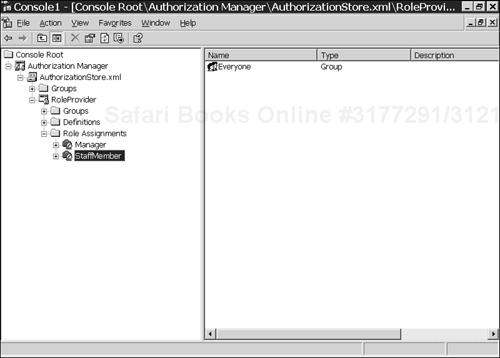
Now the Windows Server 2003 Authorization Manager user interface should be open, as shown in Figure 4.7. Proceed to examine the authorization store used to control access to the service’s resources.
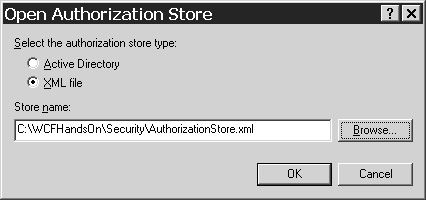
In the tree in the left pane of the Authorization Manager user interface in the Microsoft Management Console, right-click on Authorization Manager, and choose Open Authorization Store from the context menu.
Click Browse in the Open Authorization Store dialog shown in Figure 4.8, browse to the file
C:WCFHandsOnSecurityAuthorizationStore.xmlin the file dialog that appears, and click on the Open button.Expand the Authorization Manager tree in the left pane as shown in Figure 4.9. Select the
StaffMembernode in the tree on the left, and observe, in the pane on the right, that the users in the Everyone group are assigned to the StaffMember role.Select the
Managernode and see that no user is assigned to the Manager role.Right-click on the
Managernode, and select Assign Windows Users and Groups from the context menu. Enter the username of the currently logged-on user in the Select Users and Groups dialog, and click OK.Start debugging the application again.
When the console of the service shows some activity, click on the diamond button in the Resource Access client user interface. The message shown in Figure 4.10 should confirm that diamonds are now accessible.
Choose Debug, Stop Debugging from the Visual Studio 2005 menus, and close the console of the service.
Return to the authorization store console, and select the
Managernode underRoleAssignments. Right-click on the Administrator entry in the panel on the right, and choose Delete from the context menu to restore the access of the currently logged-on user to its original state.
Evidently, access to resources managed by the Windows Communication Foundation service is being controlled based on the roles to which the user of the client application is assigned within the Windows Server 2003 Authorization Manager authorization store, C:WCFHandsOnSecurityAuthorizationStore.xml. The next few steps will reveal how that is possible:
In the Security solution in Visual Studio 2005, open the
ResourceAccessServiceType.cscode module of the Service project. The content of the module is shown in Listing 4.1. There it is apparent that access to the operations of the service by which resources are made available is controlled by .NET Role-Based SecurityPrincipalPermissionattributes that specify that only users assigned to the role of Manager can access the more valuable resource of diamonds.Example 4.1.
Using PrincipalPermissionAttributesusing System; using System.Collections; using System.Collections.Generic; using System.Security.Permissions; using System.Runtime.Serialization; using System.ServiceModel; using System.Text; using System.Web; using System.Web.Security; namespace Service { public class ResourceAccessServiceType: IResourceAccessContract { #region IResourceAccessContract Members [PrincipalPermission(SecurityAction.Demand, Role = "StaffMember")] [PrincipalPermission(SecurityAction.Demand, Role = "Manager")] string IResourceAccessContract.AccessCoal() { return "Here is your coal!"; } [PrincipalPermission(SecurityAction.Demand, Role = "Manager")] string IResourceAccessContract.AccessDiamond() { return "Here is your diamond!"; } #endregion } }Open the
App.configfile in the Service project, the contents of which are shown in Listing 4.2.
Example 4.2. Role-Based Authorization Configuration
<?xml version="1.0" encoding="utf-8" ?>
<configuration>

         <!-- Application Settings -->
       <appSettings>
              <add key="BaseAddress" value="http://localhost:8000/Woodgrove"/>
       </appSettings>

             <!-- Service Configuration -->
       <system.serviceModel>
           <services>
               <service type="Service.ResourceAccessServiceType"
                           behaviorConfiguration="ServiceBehavior">
                    <endpoint
                           address="ResourceAccessService"
                           binding="wsHttpBinding"
                           contract="Service.IResourceAccessContract"/>
               </service>
           </services>
           <behaviors>
                <behavior name="ServiceBehavior"
                returnUnknownExceptionsAsFaults="true">
                    <serviceAuthorization
                          principalPermissionMode="UseAspNetRoles"  />
                </behavior>
          </behaviors>
      </system.serviceModel>

         <!-- Role Provider Configuration -->
      <system.web>
           <roleManager defaultProvider="AuthorizationStoreRoleProvider"
                           enabled="true"
                           cacheRolesInCookie="true"
                           cookieName=".ASPROLES"
                           cookieTimeout="30"
                           cookiePath="/"
                           cookieRequireSSL="false"
                           cookieSlidingExpiration="true"
                           cookieProtection="All"  >
           <providers>
                  <clear />
                  <add
                       name="AuthorizationStoreRoleProvider"
                       type="System.Web.Security.AuthorizationStoreRoleProvider"
                       connectionStringName="AuthorizationServices"
                       applicationName="RoleProvider" />
           </providers>
       </roleManager>
   </system.web>
         <!-- Connection Strings -->
   <connectionStrings>
            <add
                   name="AuthorizationServices"
connectionString="msxml://C:WCFHandsOnSecurityAuthorizationStore.xml" />
    </connectionStrings>
</configuration>
The binding for the Windows Communication Foundation service that has the resources is the WSHttpBinding. By default, that binding uses the Windows access tokens of the users of client applications to identify those users to the service.
Behaviors were introduced in the preceding chapter. Here the ServiceAuthorization behavior is configured with UseAspNetRoles for its principal permission mode. That configuration specifies that .NET Role-Based Security PrincipalPermission attributes will be evaluated based on output from an ASP.NET 2.0 Role Provider, taking the Windows access token of the users of client applications as input.
The ASP.NET Role Provider is configured lower down in the App.config file. The configuration of the role provider is such that it uses Authorization Manager to determine the roles of users, via the AuthorizationStoreRoleProvider, and the particular authorization store that is being used by Authorization Manager for that purpose is the store C:WCFHandsOnSecurityAuthorizationStore.xml.
So access to the resources of the Windows Communication Foundation service is being controlled by Role-Based Authorization using .NET Role-Based Security and an ASP.NET 2.0 Role Provider. This way of authorizing access to the service’s resources has several benefits.
First, the Windows Communication Foundation is simply configured to delegate authorization to other technologies, to .NET Role-Based Security, an ASP.NET 2.0 Role Provider, and the Windows Server 2003 Authorization Manager. Consequently, the use of the Windows Communication Foundation is not imposing any requirement on software developers or network administrators to learn or adopt new technologies for authorization. Instead, existing technologies that should already be familiar to them are being used.
Second, access to the resources of the service can be administered using the Windows Server 2003 Authorization Manager’s user interface. That user interface, which is very easy for system administrators to use, is built into Windows Server 2003, saving one from having to build a user interface for administering authorization. More information about the Windows Server 2003 Authorization Manager is provided in Dave McPherson’s article “Role-Based Access Control for Multi-tier Applications Using Authorization Manager” (2005).
Third, the selection of where the authorization information for the service is stored, and how it is administered, is controlled through the configuration of the ASP.NET 2.0 Role Provider. The particular Windows Server 2003 Authorization Manager authorization store being used is specified by the connection string so that it can be altered without changing any code. More important, the fact that a Windows Server 2003 Authorization Manager authorization store is being used at all is determined by the selection of the AuthorizationStoreRoleProvider. A different role provider that used a different kind of store for authorization information could be selected in the configuration file, thereby completely altering how access to the application is administered, but, again, without altering any code whatsoever.
One shortcoming of the existing solution is that the use of the .NET Role-Based Security PrincipalPermission attributes to control access to the service has the effect of winding the code for authenticating users into code of the service itself. The Windows Communication Foundation Service Model allows one to do better by isolating the code authorizing access to the operations of a service into a separate class that is identified by the configuration of the service. The following steps demonstrate how to accomplish that task:
Open the
ResourceAccessServiceType.cscode module of the Service project, and comment out thePrincipalPermissionattributes, as shown in Listing 4.3.Example 4.3. Foregoing
PrincipalPermissionAttributesusing System; using System.Collections; using System.Collections.Generic; using System.Security.Permissions; using System.Runtime.Serialization; using System.ServiceModel; using System.Text; using System.Web; using System.Web.Security; namespace Service { public class ResourceAccessServiceType: IResourceAccessContract { #region IResourceAccessContract Members //[PrincipalPermission(SecurityAction.Demand, Role = "StaffMember")] //[PrincipalPermission(SecurityAction.Demand, Role = "Manager")] string IResourceAccessContract.AccessCoal() { return "Here is your coal!"; } //[PrincipalPermission(SecurityAction.Demand, Role = "Manager")] string IResourceAccessContract.AccessDiamond() { return "Here is your diamond!"; } #endregion } }Modify the
App.configfile of the Service project to look like the configuration in Listing 4.4. To save one from having to make the changes manually, a copy of the configuration is in the fileApp.Config1.txtin theC:WCFHandsOnSecurityServicefolder.Example 4.4.
OperationRequirementType Configuration<?xml version="1.0" encoding="utf-8" ?> <configuration> <configSections> <section name="operationRequirements" type="Service.OperationRequirementsConfigurationSection, Service" /> </configSections> <!-- Operation Requirements --> <operationRequirements> <operation identifier="http://tempuri.org/IResourceAccessContract/AccessCoal"> <role name="Manager"/> <role name="StaffMember"/> </operation> <operation identifier="http://tempuri.org/IResourceAccessContract/AccessDiamond"> <role name="Manager"/> </operation> </operationRequirements> <!-- Application Settings --> <appSettings> <add key="BaseAddress" value="http://localhost:8000/Woodgrove"/> </appSettings> <!-- Service Configuration --> <system.serviceModel> <services> <service type="Service.ResourceAccessServiceType" behaviorConfiguration="ServiceBehavior"> <endpoint address="ResourceAccessService" binding="wsHttpBinding" contract="Service.IResourceAccessContract"/> </service> </services> <behaviors> <behavior name="ServiceBehavior" returnUnknownExceptionsAsFaults="true"> <serviceAuthorization principalPermissionMode="None" operationRequirementType="Service.AccessChecker, Service"> </serviceAuthorization> </behavior> </behaviors> </system.serviceModel> <!-- Role Provider Configuration --> <system.web> <roleManager defaultProvider="AuthorizationStoreRoleProvider" enabled="true" cacheRolesInCookie="true" cookieName=".ASPROLES" cookieTimeout="30" cookiePath="/" cookieRequireSSL="false" cookieSlidingExpiration="true" cookieProtection="All" > <providers> <clear /> <add name="AuthorizationStoreRoleProvider" type="System.Web.Security.AuthorizationStoreRoleProvider" connectionStringName="AuthorizationServices" applicationName="RoleProvider" /> </providers> </roleManager> </system.web> <!-- Connection Strings --> <connectionStrings> <add name="AuthorizationServices" connectionString="msxml://C:WCFHandsOnSecurityAuthorizationStore.xml" /> </connectionStrings> </configuration>The configuration contains this custom section:
<operationRequirements>
        <operation
        identifier="http://tempuri.org/IResourceAccessContract/AccessCoal">
            <role name="Manager"/>
            <role name="StaffMember"/>
        </operation>
        <operation>
        identifier="http://tempuri.org/IResourceAccessContract/AccessDiamond">
            <role name="Manager"/>
        </operation>
</operationRequirements>
That section names the roles authorized to access each operation of the service, those operations being identified by their URIs.
The modified configuration also changes how the
ServiceAuthorizationbehavior is configured:<behaviors> <behavior name="ServiceBehavior" returnUnknownExceptionsAsFaults="true"> <serviceAuthorization principalPermissionMode="None" operationRequirementType="Service.AccessChecker, Service"> </serviceAuthorization> </behavior> </behaviors>The new configuration signifies that authorization to access the facilities of the service will now be controlled by a class called
AccessChecker. That class, which must derive from the abstractSysem.ServiceModel.OperationRequirementclass, is defined in the next steps.Add the class module named
OperationRequirementsConfigurationSection.csin theC:WCFHandsOnSecurityServicefolder to the Service project of the Security solution. That class module contains classes for deserializing the information in the custom section of the configuration file that identifies the roles authorized to access the service’s operations.Add a class module named
AccessChecker.csto the Service project in the Security solution.Replace the contents of that module with the code in Listing 4.5. A copy of the code should be found in the
AccessChecker1.txtfile in theC:WCFHandsOnSecurityServicefolder.
Example 4.5. An OperationRequirement Type
using System;
using System.Collections.Generic;
using System.Configuration;
using System.IO;
using System.Security.Authorization;
using System.ServiceModel;
using System.Web;
using System.Web.Security;

namespace Service
{
    public class AccessChecker : OperationRequirement
    {

        private Dictionary<string, string[]> accessRequirements = null;

        public AccessChecker()
        {
            this.accessRequirements = new Dictionary<string, string[]>();

            OperationRequirementsConfigurationSection
                operationRequirementsConfigurationSection
                = ConfigurationManager.GetSection("operationRequirements")
                as OperationRequirementsConfigurationSection;

            OperationRequirementsCollection requirements =
                operationRequirementsConfigurationSection.OperationRequirements;
            List<string> roles = null;
            foreach (OperationElement operationElement in requirements)
            {
                roles = new List"string"(operationElement.Roles.Count);
                foreach (RoleElement roleElement in operationElement.Roles)
                {
                    roles.Add(roleElement.Name);
                }

                this.accessRequirements.Add(
                    operationElement.Identifier,
                    roles.ToArray());
            }

        }

        public override bool AccessCheck(OperationContext operationContext)
        {
            string header =
                operationContext.RequestContext.RequestMessage.Headers.Action;
            string[] requiredRoles = null;
            if (!(this.accessRequirements.TryGetValue(header, out requiredRoles)))
            {
                return false;
            }

            string userName =
OperationContext.Current.ServiceSecurityContext.WindowsIdentity.Name;
            foreach (string requiredRole in requiredRoles)
      {
         if (Roles.Provider.IsUserInRole(userName,requiredRole))
         {
             return true;
         }
      }
      return false;
    }
  }
}
Because the ServiceAuthorization behavior has been configured to use this AccessChecker class to control access to the service, an instance of the AccessChecker class will be created along with the service’s host. When that instance of the AccessChecker class is created, its constructor will execute.
That constructor reads the information from the configuration file that identifies the roles permitted to access the operations of the service. It populates a hash table that associates the names of the roles authorized to use each operation of the service with the URI of that operation.
When an attempt is made to use any one of the service’s operations, the AccessChecker class’s override of the AccessCheck() method of the abstract OperationRequirement class will be invoked. That method retrieves the URI of the operation to be used, as well as the identity of the user on whose behalf the attempt to use the operation is being made. Both the URI of the operation and the identity of the user are provided by the Windows Communication Foundation Service Model’s OperationContext class, which was introduced in Chapter 2. The code uses the URI of the operation to retrieve the names of the roles permitted to access that operation from the hash table created by the constructor. Then it uses the ASP.NET 2.0 Roles class to check whether the user is assigned to any of the roles permitted to access the operation. If the user is assigned to any of those roles, the user is permitted to use the operation.
Test the modified solution by following these instructions:
Start debugging the application once again.
When the console of the service shows some activity, click on the coal button in the Resource Access client user interface. The message confirming access to the coal should appear, as before.
Click on the diamond button of the Resource Access client user interface. The message denying access to the diamonds should appear.
Choose Debug, Stop Debugging from the Visual Studio 2005 menus, and close the console of the service.
By virtue of these modifications to the original application facilitated by the Windows Communication Foundation, permissions for the users—in particular, roles to access the operations of the service—are no longer entangled with the code of the service itself. The configuration of the application identifies a separate class that is responsible for managing access to the service’s operations.
Now assume that the intranet service used in the preceding steps is deployed within an organization called Woodgrove. In the following steps, attempts to use that service will be made from within a partner organization called Fabrikam.
That feat will be accomplished in accordance with the architecture depicted in Figure 4.1. Both Fabrikam and Woodgrove will provide an STS. The Woodgrove STS will be configured to trust claims about users issued by the Fabrikam STS, and the Woodgrove service will be configured to trust claims about the users made by the Woodgrove STS.
When a user of the Resource Access client application within Fabrikam uses that application to access an operation provided by the Woodgrove service, the application will request a set of claims from the Fabrikam STS. That STS will execute an authorization policy to determine the claims it should issue for the user. That authorization policy identifies the user by the user’s Windows access token and determines the roles to which the user is assigned using the ASP.NET 2.0 AuthorizationStoreRoleProvider and the Windows Server 2003 Authorization Manager. Based on the roles to which the user is assigned, the Fabrikam STS issues a set of claims about the user’s roles to the Resource Access client application.
The Resource Access client application will submit the claim set obtained from the Fabrikam STS to the Woodgrove STS, which trusts claims issued by the Fabrikam STS. The Woodgrove STS will execute an authorization policy to translate the claims about the user’s role made by the Fabrikam STS into a set of claims about the user’s roles with which Woodgrove’s service is familiar.
The Resource Access client application will submit the set of claims about the user’s roles issued by the Woodgrove STS to the Woodgrove service, which trusts claims issued by that STS. The Woodgrove service will compare the Woodgrove STS’s claims about the user’s roles with the roles that are permitted access to the operation that the user is attempting to employ via the Resource Access client. By doing so, it will be able to determine whether the user should be granted access to the operation:
Install the certificates that the STSs will use to identify themselves by executing the batch file
C:WCFHandsOnSecuritySetUp.bat. That batch file assumes that the tools included with the version of the Microsoft Windows SDK for use with WinFX are installed in the folderC:Program FilesMicrosoft SDKsWindowsv1.0Bin. If they are not installed there, modify the batch file accordingly. If their location is unknown, search the hard disks for the toolCertKeyFileTool.exe;the other tools should be in the same location. A second batch file,C:WCFHandsOnSecurityCleanUp.bat, is provided for removing the certificates after the exercise has been completed.Add the Fabrikam STS to the solution. Do so by adding the project
C:WCFHandsOnSecurityFabrikamSecurityTokenServiceFabrikamSecurityTokenService.csprojto the Security solution. One does not risk building STSs from scratch, but rather uses STSs that are widely known to function correctly. Consequently, prebuilt STSs have been provided for use in this exercise. Those happen to have been programmed by Martin Gudgin, one of the two editors of the WS-Trust specification by which STSs are defined, so those STSs could hardly have a finer lineage. The behavior of this particular STS will be customized in a later step.Open the
ISecurityTokenService.csfile of the FabrikamSecurityTokenService project in the Security solution, and examine theISecurityTokenServiceservice contract that the Fabrikam STS implements. It is shown in Listing 4.6.Example 4.6. STS Service Contract
using System;
using System.ServiceModel;

namespace SecurityTokenService
{
    [ServiceContract]
    public interface ISecurityTokenService
    {
        [OperationContract(
            Action =
            "http://schemas.xmlsoap.org/ws/2005/02/trust/RST/Issue",
            ReplyAction =
            "http://schemas.xmlsoap.org/ws/2005/02/trust/RSTR/Issue")]
        Message Issue(Message request);
        [OperationContract(
            Action =
            "http://schemas.xmlsoap.org/ws/2005/02/trust/RSTR/Issue",
            ReplyAction =
            "http://schemas.xmlsoap.org/ws/2005/02/trust/RSTR/Issue")]
        Message IssueChallenge(Message challenge);
        [OperationContract(
            Action =
            "http://schemas.xmlsoap.org/ws/2005/02/trust/RST/Renew",
            ReplyAction =
            "http://schemas.xmlsoap.org/ws/2005/02/trust/RSTR/Renew")]
        Message Renew(Message request);
        [OperationContract(
            Action =
            "http://schemas.xmlsoap.org/ws/2005/02/trust/RSTR/Renew",
            ReplyAction =
            "http://schemas.xmlsoap.org/ws/2005/02/trust/RSTR/Renew")]
        Message RenewChallenge(Message request);
        [OperationContract(
            Action =
            "http://schemas.xmlsoap.org/ws/2005/02/trust/RST/Cancel",
            ReplyAction =
            "http://schemas.xmlsoap.org/ws/2005/02/trust/RSTR/Cancel")]
            Message Cancel(Message request);
        [OperationContract(
            Action =
            "http://schemas.xmlsoap.org/ws/2005/02/trust/RST/Validate",
            ReplyAction =
            "http://schemas.xmlsoap.org/ws/2005/02/trust/RSTR/Validate")]
        Message Validate(Message request);
    }
 }
In this service contract, each operation is defined as receiving and returning instances of the Windows Communication Foundation’s
Messageclass. That class represents a SOAP message. So the operations are defined as simply receiving and returning SOAP messages.The
OperationContractattributes haveActionandReplyActionparameters. What do those signify?The
Actionparameter of anOperationContractprovides a URI as the address of an operation. Incoming messages that have that URI as the value of a Web Service Addressing (WS-Addressing) action header will be routed to the operation for processing by the Windows Communication Foundation Dispatcher.The
ReplyActionparameter specifies the URI that will be the value of the WS-Addressing action header of the response messages emitted by an operation. That value will allow the proxy code of a client using the operation to identify those messages that are the output of that particular operation from among any other messages emitted by the service.Thus, the values of the
ActionandReplyActionparameters ofOperationContractattributes are for correlating messages with operations. The Windows Communication Foundation usually provides default values for those parameters. In the case of theISecurityTokenServicecontract, specific values have been provided in accordance with the WS-Trust protocol, which specifies the WS-Addressing action headers for SOAP messages exchanged with an STS.Consequently, the service contract defines a number of operations that receive and return SOAP messages with the WS-Addressing action headers defined by the WS-Trust protocol for messages exchanged with an STS. Hence, the service contract is, in effect, describing the interface of an STS as defined by the specification of the WS-Trust protocol.
Open the
App.configfile of the FabrikamSecurityTokenService project in the Security solution to see how the Fabrikam STS is configured:<system.serviceModel> <services> <service type= "SecurityTokenService.SecurityTokenService, FabrikamSecurityTokenService" behaviorConfiguration="SecurityTokenServiceBehaviors"> <endpoint address="SecurityTokenService" binding="wsHttpBinding" contract= "SecurityTokenService.ISecurityTokenService, FabrikamSecurityTokenService" > </endpoint> </service> </services> </system.serviceModel>Its binding is the predefined
WSHttpBinding. By default, services configured with that binding identify users by their Windows access tokens.Add the Woodgrove STS to the Security solution by adding the project
C:WCFHandsOnSecurityWoodgroveSecurityTokenServiceWoodgroveSecurityTokenService.csproj.Open the
App.configfile of the WoodgroveSecurityTokenService project in the Security solution to see how the Woodgrove STS is configured. The pertinent elements of the configuration are shown in Listing 4.7.Example 4.7. Woodgrove STS Configuration
<system.serviceModel>
 <services>
  <service
   type=
"SecurityTokenService.SecurityTokenService, WoodgroveSecurityTokenService"
      behaviorConfiguration="SecurityTokenServiceBehaviors">
      <endpoint address="SecurityTokenService"
      binding="wsFederationBinding"
      bindingConfiguration="TrustFabrikamSecurityTokenService"
      contract=
"SecurityTokenService.ISecurityTokenService, WoodgroveSecurityTokenService" />
    </service>
  </services>
  <bindings>
    <wsFederationBinding>
      <binding name="TrustFabrikamSecurityTokenService">
             <security mode='Message'>
               <message
                 issuedTokenType=
"http://docs.oasis-open.org/wss/oasis-wss-saml-token-profile-1.1#SAMLV1.1">
              <issuer address=
"http://localhost:8001/Fabrikam/SecurityTokenService"/ >
              <issuerMetadata address=
"http://localhost:8001/Fabrikam/mex"/>
          </message>
        </security>
      </binding>
    </wsFederationBinding> </bindings>
  </system.serviceModel>
The definition of the Woodgrove STSs endpoint selects the predefined WSFederationBinding as the binding:
<endpoint address="SecurityTokenService"
        binding="wsFederationBinding"
        bindingConfiguration="TrustFabrikamSecurityTokenService"
        contract=
"SecurityTokenService.ISecurityTokenService, WoodgroveSecurityTokenService" />
That choice of binding implies that users will be expected to present security tokens to identify themselves.
The
bindingConfigurationattribute in the definition of the endpoint identifies a particular set of custom settings for theWSFederationBinding. Those custom settings identify the issuer of the security tokens that users must present. That issuer is identified by the URI of the Fabrikam STS, which was added to the solution in step 2:<bindings> <wsFederationBinding> <binding name="TrustFabrikamSecurityTokenService"> <security mode='Message'> <message issuedTokenType= "http://docs.oasis-open.org/wss/oasis-wss-saml-token-profile-1.1#SAMLV1.1"> <issuer address= "http://localhost:8001/Fabrikam/SecurityTokenService"/> <issuerMetadata address= "http://localhost:8001/Fabrikam/mex"/> </message> </security> </binding> </wsFederationBinding> </bindings>Now configure the Woodgrove service to demand a security token from the Woodgrove STS to authenticate the user. That can be done by replacing the
system.ServiceModelsection of theApp.configfile in the Service project of the Security solution with the configuration in Listing 4.8. The complete configuration is in the fileC:WCFHandsOnSecurityServiceApp.Config2.txt.Example 4.8. Service Configuration
<system.serviceModel>
  <services>
    <service
      type="Service.ResourceAccessServiceType,Service"
    behaviorConfiguration="ServiceBehaviors">
    <endpoint address="ResourceAccessService"
      binding="wsFederationBinding"
        bindingConfiguration="TrustWoodgroveSecurityTokenService"
      contract="Service.IResourceAccessContract,Service" >
      </endpoint>
     </service>
  </services>
  <behaviors>
     <behavior name="ServiceBehaviors"
     returnUnknownExceptionsAsFaults="true">
     <serviceSecurityAudit
       auditLogLocation="Application"
       messageAuthenticationAuditLevel="SuccessOrFailure"
       serviceAuthorizationAuditLevel="SuccessOrFailure"/>
     <serviceCredentials>
       <serviceCertificate
         storeLocation="LocalMachine"
         storeName="My"
         x509FindType="FindBySubjectName"
         findValue="Woodgrove" />
       </serviceCredentials>
     <serviceAuthorization
       principalPermissionMode="None"
       operationRequirementType="Service.AccessChecker, Service">
      </serviceAuthorization>
   </behavior>
</behaviors>
    <bindings>
       <wsFederationBinding>
       <binding name="TrustWoodgroveSecurityTokenService">
         <security mode="Message">
            <message>
               <issuerMetadata
                  address="http://localhost:8002/Woodgrove/mex"/>
               </message>
            </security>
         </binding>
        </wsFederationBinding>
    </bindings>
</system.serviceModel>
This definition of the service's endpoint in this revised configuration selects the predefined WSFederationBinding as the binding:
<endpoint address="ResourceAccessService"
  binding="wsFederationBinding"
  bindingConfiguration="TrustWoodgroveSecurityTokenService"
  contract="Service.IResourceAccessContract,Service" >
</endpoint>
As mentioned earlier, that choice of binding implies that users of the operations provided at that endpoint will be expected to present security tokens to identify themselves.
The bindingConfiguration attribute in the definition of the endpoint identifies custom settings for the WSFederationBinding, and those custom settings identify the issuer of the security tokens that users must present. That issuer is identified by the URI of the Woodgrove STS, which was added to the solution in step 5:
<bindings>
    <wsFederationBinding>
    <binding name=”TrustWoodgroveSecurityTokenService”>
      <security mode=”Message”>
        <message>
          <issuerMetadata
            address=”http://localhost:8002/Woodgrove/mex”/>
          </message>
       </security>
    </binding>
    </wsFederationBinding>
  </bindings>
So the Fabrikam STS identifies users by their Windows access tokens, while the Woodgrove STS demands that users identify themselves with security tokens issued by the Fabrikam STS, and the Woodgrove service requires that users identify themselves with security tokens issued by the Woodgrove STS. Now the Resource Access client application must be configured to reflect this arrangement:
Modify the startup project property of the solution as shown in Figure 4.11.
Start debugging the solution.
Open the Microsoft Windows Vista DEBUG Build Environment prompt by choosing All Programs, Microsoft Windows SDK, CMD Shell from the Windows Start menu.
Enter
C:
and then
cd c:WCFHandsOnSecurity
at that prompt to make the Security solution folder the current directory.
Enter this command to have the Windows Communication Foundation’s Service Metadata Tool generate the necessary configuration for the client application:
svcutil /config:app.config http://localhost:8000/Woodgrove
Stop debugging the solution.
Delete the existing configuration for the client by deleting the file
App.configfrom the Client project of the Security solution.Replace that configuration with the configuration file generated using the Service Metadata Tool by adding the file
C:WCFHandsOnSecurityApp.configto the Client project of the Security solution.Some modifications need to be made to the generated configuration file. So open the
App.configfile in the Client project of the Security solution, and modify the definition of the Woodgrove service’s endpoint therein, providing a name for the endpoint, changing how the contract is identified, and specifying a behavior configuration, so that the endpoint configuration looks like this:<client> <endpoint name="ResourceAccessService" address="http://localhost:8000/Woodgrove/ResourceAccessService" binding="customBinding" bindingConfiguration= "WSFederationBinding_IResourceAccessContract" contract="Client.IResourceAccessContract,Client" behaviorConfiguration="ResourceAccessClientBehavior"> <identity> <dns value="Woodgrove" /> </identity> </endpoint> </client>Add the behavior configuration named in the previous step as shown in Listing 4.9. The behaviors in this configuration specify that the client application will be relying on the STS to generate entropy to encrypt their conversation.
Example 4.9. Client Configuration
<client> <endpoint name="ResourceAccessService" address="http://localhost:8000/Woodgrove/ResourceAccessService" binding="customBinding" bindingConfiguration= "WSFederationBinding_IResourceAccessContract" contract="Client.IResourceAccessContract,Client" behaviorConfiguration="ResourceAccessClientBehavior"> <identity> <dns value="Woodgrove" /> </identity> </endpoint> </client> <behaviors> <behavior name="ResourceAccessClientBehavior"> <clientCredentials> <issuedToken keyEntropyMode ="ServerEntropy"> <issuerChannelBehaviors> <add issuerAddress= "http://localhost:8002/Woodgrove/SecurityTokenService" behaviorConfiguration= "WoodgroveSecurityTokenServiceBehavior" /> <add issuerAddress= "http://localhost:8001/Fabrikam/SecurityTokenService" behaviorConfiguration= "FabrikamSecurityTokenServiceBehavior" /> </issuerChannelBehaviors> </issuedToken> </clientCredentials> </behavior> <behavior name="WoodgroveSecurityTokenServiceBehavior"> <clientCredentials> <issuedToken keyEntropyMode ="ServerEntropy" /> </clientCredentials> </behavior> <behavior name="FabrikamSecurityTokenServiceBehavior"> <clientCredentials> <issuedToken keyEntropyMode ="ServerEntropy" /> </clientCredentials> </behavior> </behaviors> <bindings> [...]
To test the solution in its present state, follow these steps:
First, temporarily disable the authorization mechanism in the service. Open the
AccessCheckerclass module of the Service project within the Security solution, and disable the authorization mechanism therein by modifying theAccessCheck()method in this way so that it immediately responds by permitting any authenticated user access to any operation:public override bool AccessCheck(OperationContext operationContext) { return true; string header = operationContext.RequestContext.RequestMessage.Headers.Action; string[] requiredRoles = null; if (!(this.accessRequirements.TryGetValue(header, out requiredRoles))) { return false; } string userName = OperationContext.Current.ServiceSecurityContext.WindowsIdentity.Name; foreach (string requiredRole in requiredRoles) { if (Roles.Provider.IsUserInRole(userName,requiredRole)) { return true; } } return false; }Start debugging the solution.
When the console of the service, the Woodgrove STS, and the Fabrikam STS all show some activity, click on the coal button in the Resource Access client user interface. After a moment, there should be more activity in the console of the Fabrikam STS, as shown in Figure 4.12, as it issues a security token for use in obtaining a second security token from the Woodgrove STS. Then there should be similar activity in the console of the Woodgrove STS as it issues a security token for accessing the Woodgrove service. Finally, a message should appear confirming access to the coal resource, because the Woodgrove service is configured to accept requests from any users that have security tokens issued by the Woodgrove STS.
Click on the diamond button of the Resource Access client user interface. A message should appear confirming access to the diamond resource. That is a temporary state of affairs due to the authorization mechanism of the service having been disabled, thereby permitting any authenticated user to access any resource.
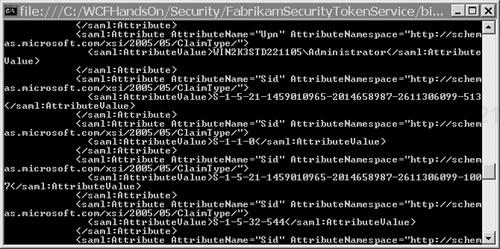
Scroll through the output in the console of the Fabrikam STS, and output like that shown in Figure 4.13 should be visible. It shows details of the claims incorporated in the SAML security token issued by the Fabrikam STS. What that STS is currently doing is simply taking the claims implicit in the user’s Windows access token and expressing those as User Principal Name and SID claims about the user.
Stop debugging the solution.
In the next few steps, the Fabrikam STS will be modified with the addition of an XSI authorization policy. By virtue of that policy, instead of simply passing through the claims in the user’s Windows access token, the Fabrikam STS will look up the user’s roles in an Authorization Manager authorization store, and insert claims about the user’s roles into the security token that it issues:
Open the
app.configfile of the FabrikamSecurityTokenService project in the Security solution.Locate the elements of the configuration that specify the Windows Communication Foundation behaviors of the Fabrikam STS, and modify those by adding a
serviceAuthorizationelement with an authorization policy like so:<behaviors> <behavior name="SecurityTokenServiceBehaviors" returnUnknownExceptionsAsFaults="true"> <serviceAuthorization> <authorizationPolicies> <add policyType= "SecurityTokenService.AuthorizationPolicy, FabrikamSecurityTokenService" /> </authorizationPolicies> </serviceAuthorization> </behavior> </behaviors>The new element identifies the Fabrikam STS’s XSI authorization policy module. That is the module in which claims presented by a user will be mapped to claims in the STS’s authorization context, which will in turn be included in the security token issued to the user. It will be in a claim translation routine within that authorization policy module where the claims implicit in the user’s Windows access token will be translated into claims about the user’s role that Woodgrove’s STS is expecting and will understand.
Add a new class module called
AuthorizationPolicy.csto the FabrikamSecurityTokenService project.Alter the code therein to contain an
AuthorizationPolicyclass that implements XSI’sIAuthorizationPolicyinterface, as in Listing 4.10.Example 4.10. An
AuthorizationPolicyClassusing System; using System.Collections.ObjectModel; using System.Collections.Generic; using System.Configuration; using System.Runtime.Serialization; using System.Security.Authorization; using System.Security.Cryptography; using System.Security.Cryptography.X509Certificates; using System.ServiceModel; using System.ServiceModel.Security; using System.ServiceModel.Security.Protocols; using System.ServiceModel.Security.Tokens; using System.Text; using System.Threading; using System.Web.Security; using System.Workflow.Runtime; using System.Workflow.Runtime.Hosting; using System.Xml; namespace SecurityTokenService { public class AuthorizationPolicy : IAuthorizationPolicy { public AuthorizationPolicy() { } public ClaimSet Issuer { get { return DefaultClaimSet.System.Issuer; } } #region IAuthorizationPolicy Members bool IAuthorizationPolicy.Evaluate( EvaluationContext evaluationContext, ref object state) { return true; } ClaimSet IAuthorizationPolicy.Issuer { get { return this.Issuer; } } #endregion #region IAuthorizationComponent Members string IAuthorizationComponent.Id { get { return Guid.NewGuid().ToString(); } } #endregion } }Alter the
IAuthorizationPolicy.Evaluate()method of the class as shown in Listing 4.11 so that it takes the claims incorporated in the user’s Windows access token and maps those to claims about the user’s role based on information in the Authorization Manager authorization store.Example 4.11.
AuthorizationPolicy Evaluate()Methodbool IAuthorizationPolicy.Evaluate( EvaluationContext evaluationContext, ref object state) { List<Claim> claimsToAdd = new List<Claim>(); ReadOnlyCollection<ClaimSet> inputClaims = evaluationContext.TargetClaimSets; for (int index = 0; index < inputClaims.Count; index++) { foreach (Claim claim in inputClaims[index].FindClaims( ClaimTypes.Upn, null)) { string[] roles = Roles.Provider.GetRolesForUser( (string)claim.Resource); foreach (string role in roles) { claimsToAdd.Add(Claim.CreateRoleClaim(role)); } } } if (claimsToAdd.Count > 0) { evaluationContext.AddToTarget( this, new DefaultClaimSet( this.Issuer, claimsToAdd)); } return true; }In this code that implements the
Evaluate()method of XSI’sIAuthorizationPolicyinterface, the information in the user’s Windows access token is incorporated in the XSIEvaluationContextobject. That object constitutes the claims that are input to the authorization policy. Based on information retrieved from the Windows Server 2003 Authorization Manager store, the code creates new XSIClaimobjects representing claims about the user’s roles. ThoseClaimobjects are added to a context called the target context using theAddToTarget()method of theEvaluationContract object.After the authorization policy has finished evaluating the input claims, that target context becomes the XSI authorization context, and the STS copies the claims therein into the security token that the STS issues for the user.Configure the ASP.NET role provider to retrieve information about the user’s roles from the same Authorization Manager authorization store used earlier. The necessary changes are shown in Listing 4.12, and are also in the file
C:WCFHandsOnSecurityFabrikamSecurityTokenServiceApp.Config1.txt.Example 4.12. Fabrikam STS Configuration
<?xml version="1.0" encoding="utf-8" ?>
<configuration>
    <appSettings>
        <add key="BaseAddress" value="http://localhost:8001/Fabrikam"/>
        <add key="IssuerName" value="Woodgrove"/>
    </appSettings>
    <connectionStrings>
        <add name="AuthorizationServices"
connectionString="msxml:// C:WCFHandsOnSecurityAuthorizationStore.xml" />
   </connectionStrings>
   <system.web>
       <roleManager defaultProvider="AuthorizationStoreRoleProvider"
                    maxCachedResults="0"
                    enabled="true"
                    cacheRolesInCookie="false"
                    cookieName=".ASPROLES"
                    cookieTimeout="1"
                    cookiePath="/"
                    cookieRequireSSL="false"
                    cookieSlidingExpiration="true"
                    cookieProtection="All" >
        <providers>
            <clear />
            <add
              name="AuthorizationStoreRoleProvider"
              type="System.Web.Security.AuthorizationStoreRoleProvider"
              connectionStringName="AuthorizationServices"
              cacheRefreshInterval="1"
              applicationName="RoleProvider" />
        </providers>
    </roleManager>
 </system.web>
 <system.serviceModel>
     <services>
          <service
              type="SecurityTokenService.SecurityTokenService,
FabrikamSecurityTokenService"
              behaviorConfiguration="SecurityTokenServiceBehaviors">
              <endpoint address="SecurityTokenService"
                  binding="wsHttpBinding"
                  contract="SecurityTokenService.ISecurityTokenService,
                            FabrikamSecurityTokenService" >
              </endpoint>
          </service>
      </services>
      <behaviors>
          <behavior
              name="SecurityTokenServiceBehaviors"
              returnUnknownExceptionsAsFaults="true">
              <serviceAuthorization>
                  <authorizationPolicies>
                      <add policyType=
"SecurityTokenService.AuthorizationPolicy, FabrikamSecurityTokenService" />
                    </authorizationPolicies>
                </serviceAuthorization>
            </behavior>
        </behaviors>
    </system.serviceModel>
</configuration>
Now the Fabrikam STS has been configured, using XSI, to issue claims about the user’s roles based on information retrieved from a Windows Server 2003 Authorization Manager store. To witness the effects of that, follow these instructions:
Start debugging the solution.
When the console of the service, the Woodgrove STS, and the Fabrikam STS all show some activity, click on the coal button in the Resource Access client user interface. Within a few moments, there should be more activity in the console of the Fabrikam STS as it issues a security token for use in obtaining a security token from the Woodgrove STS. Then there should be activity in the console of the Woodgrove STS as it issues a security token for accessing the Woodgrove service. A message should then appear confirming access to the coal resource.
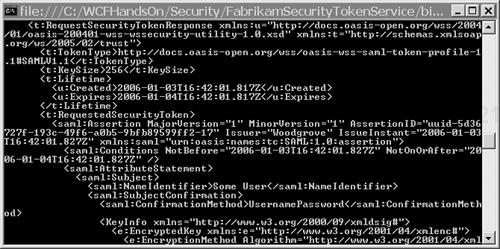
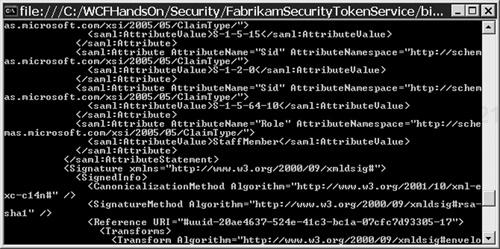
Scroll through the output in the console of the Fabrikam STS, and output like that shown in Figure 4.14 should be visible, showing that, now, the SAML security token issued by the Fabrikam STS makes claims about the user’s roles.
Leave the solution running.
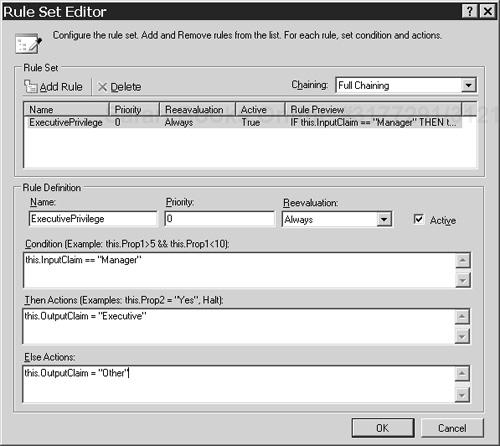
Now the Woodgrove STS will be modified. It will be enhanced with the addition of an XSI authorization policy by which it will translate claims about a user’s role in security tokens issued by the Fabrikam STS into claims about a user’s role suitable for use with services internal to Woodgrove. Woodgrove may have agreed with Fabrikam that when Fabrikam makes claims about its users in its security tokens, Fabrikam may refer to roles called StaffMember and Manager. However, Woodgrove’s internal services may not use the same language to decide whether to authorize access to their resources. Those services might only know about roles called Executive and Other, for example. So, the Woodgrove STS, in issuing Woodgrove security tokens for use with Woodgrove services, to Fabrikam users, in exchange for Fabrikam security tokens, will need to normalize the claims about roles in the Fabrikam tokens by translating them into claims that the Woodgrove services will understand.
There are many ways in which the Woodgrove STS could translate the claims in Fabrikam security tokens into claims that the services internal to Woodgrove can understand. The following steps use the Windows Workflow Foundation to provide a claims normalization mechanism that will be easy for a system administrator to configure.
Follow these steps to modify the service to require claims specific to the Woodgrove organization:
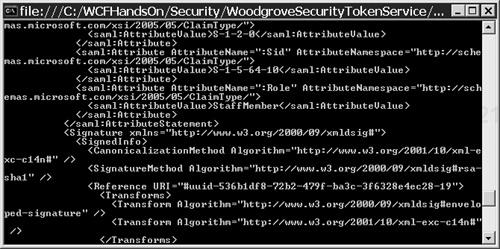
Scroll through the output in the Woodgrove STS console. As shown in Figure 4.15, the Woodgrove STS is currently merely issuing a Woodgrove SAML security token that contains exactly the same claims that the security token issued by the Fabrikam STS contains. Specifically, the Woodgrove STS’s token claims that the user is in the StaffMember role, just as the Fabrikam STS’s token does.
Stop debugging the solution.
Now reenable the authorization mechanism on the Woodgrove server. Do so by opening the
AccessCheckerclass module of the Service project within the Security solution, and replacing the code in that module with the code in Listing 4.13. That code can also be found in the fileC:WCFHandsOnSecurityServiceAccessChecker2.txt.Example 4.13. Reenabling the OperationRequirement Type
using System;
using System.Collections.Generic;
using System.Configuration;
using System.IO;
using System.Security.Authorization;
using System.ServiceModel;
using System.Web;
using System.Web.Security;

namespace Service
{

    public class AccessChecker : OperationRequirement
     {
        private Dictionary<string, Claim[]> accessRequirements = null;

        public AccessChecker()
        {
            this.accessRequirements = new Dictionary<string, Claim[]>();

            OperationRequirementsConfigurationSection
                operationRequirementsConfigurationSection
                = ConfigurationManager.GetSection("operationRequirements")
                as OperationRequirementsConfigurationSection;
                OperationRequirementsCollection requirements =
                    operationRequire1mentsConfigurationSection.OperationRequirements;
                List<Claim> roleClaims = null;
                foreach (OperationElement operationElement in requirements)
                {
                    roleClaims = new List<Claim>(operationElement.Roles.Count);
                    foreach (RoleElement roleElement in operationElement.Roles)
                    {
                        roleClaims.Add(
                            new Claim(
                    "http://schemas.microsoft.com/xsi/2005/05/ClaimType/:Role",
                                roleElement.Name,
                                Rights.PossessProperty));
                    }

                    this.accessRequirements.Add(
                        operationElement.Identifier,
                        roleClaims.ToArray());
                }

           }

           public override bool AccessCheck(OperationContext operationContext)
           {
               string header =
                   operationContext.RequestContext.RequestMessage.Headers.Action;
               Claim[] requiredClaims = null;
               if (!(accessRequirements.TryGetValue(header, out requiredClaims)))
               {
                   return false;
               }

               AuthorizationContext authorizationContext =
                   operationContext.ServiceSecurityContext.AuthorizationContext;

               foreach (Claim requiredClaim in requiredClaims)
               {
                  for (
                      int index = 0;
                      index < authorizationContext.ClaimSets.Count;
                      index++)
                  {
                      if (
                          authorizationContext.ClaimSets[index].
                          ContainsClaim(requiredClaim))
                         {
                             return true;
                         }
                   }
              }
              return false;
           }
     }
}
The new code for the authorization module of the service compares the claims from the user’s security token in the XSI authorization context with the claims required for accessing an operation. Note, in this code, the locution
new Claim(
"http://schemas.microsoft.com/xsi/2005/05/ClaimType/:Role",
    roleElement.Name,
    Rights.PossessProperty));
The reference to the URI
http://schemas.microsoft.com/xsi/2005/05/ClaimType/:Roleis to circumvent a defect in versions of the Windows Communication Foundation up to at least the February CTP version. Readers with later versions should instead use the locutionnew Claim( ClaimTypes.Role, roleElement.Name, Rights.PossessProperty));Now modify the configuration of the service so that it evaluates access to its diamond and coal resources based on whether the user is in the Executive role or the Other role, rather than based on whether the user is in the Manager role or the StaffMember role. Do that by opening the
App.configfile of the Server project within the Security solution and changing theoperationRequirementselement to look like this:<operationRequirements> <operation identifier= "http://tempuri.org/IResourceAccessContract/AccessCoal"> <role name="Executive"/> <role name="Other"/> </operation> <operation identifier= "http://tempuri.org/IResourceAccessContract/AccessDiamond"> <role name="Executive"/> </operation> </operationRequirements>When the console of the service, the Woodgrove STS, and the Fabrikam STS all show some activity, click on the coal button in the Resource Access client user interface. A message should appear, saying that access to the coal is denied. The reason is that the Fabrikam security token makes claims about whether the user is in the StaffMember or Manager roles, and the Woodgrove security token simply copies those claims; but the Woodgrove service is deciding whether to grant the user access based on whether the user is in the Executive or Other roles. To restore access to the coal resource, it will be necessary to enhance the Woodgrove STS with an XSI authorization policy to translate claims in the Fabrikam STS into claims that the Woodgrove service can understand.
The constituents of Windows Workflow Foundation workflows are called activities. The next few instructions are for creating a custom activity for controlling the translation of claims in Fabrikam security tokens into the claims that the Woodgrove service expects:
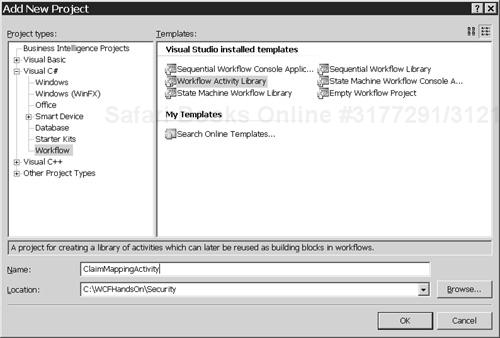
Choose File, New, Project from the Visual Studio 2005 menus to add a Visual C# Workflow Activity Library project called ClaimMappingActivity to the Security solution, as shown in Figure 4.16.
In the Solution Explorer in Visual Studio 2005, delete the class module
Activity 1.cs.Right-click on the ClaimMappingActivity project in the Solution Explorer, choose Properties from the context menu, and set the value of the Default Namespace property to
SecurityTokenService.Right-click on the ClaimMappingActivity project again, and choose Add, New Item from the context menu.
In the Add New Item dialog, select Activity, enter
ClaimMappingActivity.csin the Name box, and then click on the Add button.Drag the Policy activity from the Windows Workflow tab in the toolbox onto the surface of the ClaimMappingActivity in the workflow designer.
The newly added Policy activity will have the name policyActivity1 by default. Right-click on the activity, choose Properties from the menu, and use the property editor to change the name of the activity to ClaimMappingPolicy.
Choose View, Code from the Visual Studio 2005 menus, and modify the definition of the
ClaimMappingActivityclass to look like this, adding a property to represent an input claim, and a property to represent the claim into which that input claim gets translated:namespace SecurityTokenService { public partial class ClaimMappingActivity: SequenceActivity { public string InputClaim = null; public string OutputClaim = null; public ClaimMappingActivity() { InitializeComponent(); } } }Choose View, Designer from the Visual Studio 2005 menus, and select the ClaimMappingPolicy activity again.
Right-click and choose Properties from the menu, and use the property editor to enter the name
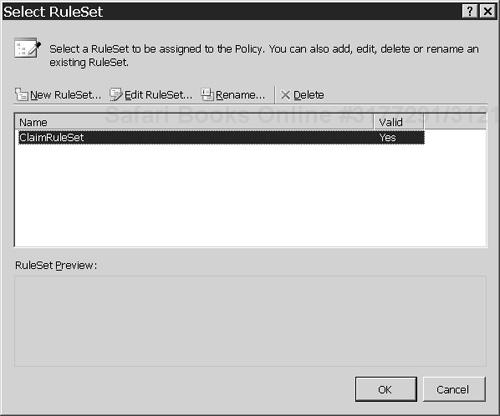
ClaimRuleSetas the value of theRuleSetReferenceproperty.Click on the ellipsis button next to the
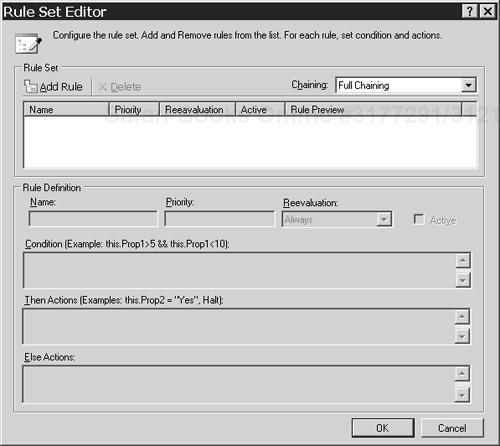
RuleSetReferenceproperty value to open the Select RuleSet dialog, as shown in Figure 4.17.Click on the Edit RuleSet button to open the Rule Set Editor shown in Figure 4.18.
Click on the Add Rule button and define a rule for mapping Fabrikam claims to Woodgrove claims, as shown in Figure 4.19.
Choose Build, Build ClaimMappingActivity from the Visual Studio 2005 menus.
Now a Windows Workflow Foundation activity has been created for translating Fabrikam claims into Woodgrove claims, and the rules it uses for the translation have been defined. Follow these steps to define a workflow to incorporate the policy activity, a workflow that the Woodgrove STS will execute to do the claims translation:
Add a Visual C# Sequential Workflow Library project to the Security solution, called ClaimMappingWorkflow, as shown in Figure 4.20.
In the Visual Studio 2005 Solution Explorer, delete the class module
Workflow1.cs.Right-click on the ClaimMappingActivity project in the Solution Explorer, choose Properties from the context menu, and set the value of the Default Namespace property to
SecurityTokenService.Right-click on the ClaimMappingActivity project in the Solution Explorer again, and choose Add, Sequential Workflow from the context menu.
Enter the name
ClaimMappingWorkflow.csin the Name box of the Add New Item dialog, and click on the Add button.Open
ClaimMappingWorkflow.csin the designer view, drag aReplicatoractivity from the Visual Studio Toolbox into the workflow represented in the designer, and set its Name property toReplicationManager, as shown in Figure 4.21.The Windows Workflow Foundation’s
Replicatoractivity is for the purpose of executing another activity multiple times. It is required in this case, because there may be several claims about a user’s role in the security tokens issued by the Fabrikam STS. Therefore, the claim-mapping policy that was created in the preceding set of steps will need to be executed for each of those claims so that all of them can be translated into the claims that the Woodgrove service is anticipating.Drag a
ClaimMappingPolicyactivity from the Visual Studio Toolbox into theReplicatoractivity. ThatClaimMappingPolicyactivity is the activity that was built in the preceding set of steps. Set itsNameproperty toClaimMappingActivity, as shown in Figure 4.22.Select the
Replicatoractivity.Right-click and choose Generate Handlers from the context menu. That should cause Visual Studio 2005 to switch to the code view of the
ClaimMappingWorkflow.csmodule to show the handlers it has generated for the events exposed by theReplicatoractivity.Modify the code in the module to conform to Listing 4.14.
Example 4.14.
ClaimMappingWorkflowusing System; using System.ComponentModel; using System.ComponentModel.Design; using System.Collections; using System.Collections.Generic; using System.Drawing; using System.Workflow.ComponentModel.Compiler; using System.Workflow.ComponentModel.Serialization; using System.Workflow.ComponentModel; using System.Workflow.ComponentModel.Design; using System.Workflow.Runtime; using System.Workflow.Activities; using System.Workflow.Activities.Rules; namespace SecurityTokenService { public sealed partial class ClaimMappingWorkflow : SequentialWorkflowActivity { private string requestIdentifier = null; private string[] inputClaims = null; private List<string> outputClaims = new List<string>(); public ClaimMappingWorkflow() { InitializeComponent(); } public string RequestIdentifier { get { return this.requestIdentifier; } set { this.requestIdentifier = value; } } public string[] InputClaims { get { return this.inputClaims; } set { this.inputClaims = value; } } public string[] OutputClaims { get { return this.outputClaims.ToArray(); } } private void ReplicationManager_ChildInitialized(object sender, ReplicatorChildEventArgs e) { ClaimMappingActivity child = (ClaimMappingActivity)e.Activity; child.InputClaim = (string)e.InstanceData; } private void ReplicationManager_Initialized(object sender, EventArgs e) { foreach (string inputClaim in this.InputClaims) { this.ReplicationManager.CurrentChildData.Add(inputClaim); } } private void ReplicationManager_Completed(object sender, EventArgs e) { } private void ReplicationManager_ChildCompleted(object sender, ReplicatorChildEventArgs e) { ClaimMappingActivity child = (ClaimMappingActivity)e.Activity; this.outputClaims.Add((string)child.OutputClaim); } } }The code in Listing 4.14 defines three properties for the workflow: the
InputClaims,OutputClaims, andRequestIdentifierproperties.The
InputClaimsproperty is an array of strings to contain the claims in the Fabrikam security token. TheOutputClaimsproperty is an array of strings to contain the Woodgrove claims into which the Fabrikam claims are to be translated.The
RequestIdentifierproperty will be used to correlate inputs to the workflow with outputs from the workflow. Specifically, it will be used to correlate sets of Fabrikam claims input to the workflow with sets of Woodgrove claims output by the workflow.The code in the handler of the
Replicatoractivity’sInitializeevent loops through the input claims, and prepares to initialize an instance of theClaimMappingActivityto translate each of those claims. The handler of theReplicatoractivity’sChildInitializedevent passes an input claim to an instance of theClaimMappingActivity.The code in the handler of theReplicatoractivity’sChildCompletedevent copies a translated claim from theClaimMappingActivityto the workflow’s list of output claims so that it can be retrieved from the workflow’sOutputClaimproperty.Choose Build, Build ClaimMappingWorkflow from the Visual Studio 2005 menus.
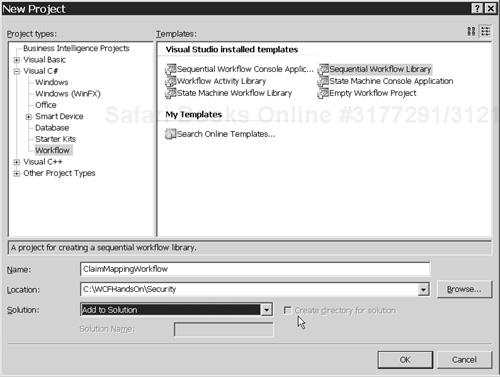

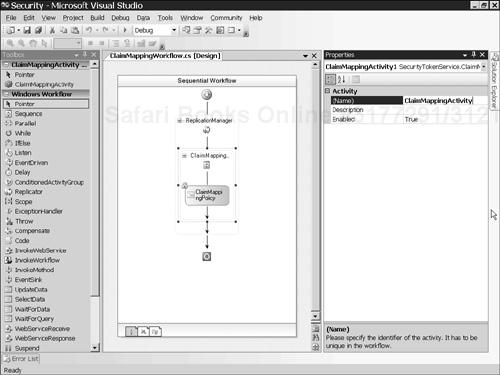
These next steps have the Woodgrove STS use the claim-mapping workflow to translate Fabrikam claims into Woodgrove claims:
Add a reference to the ClaimMappingWorkflow project to the WoodgroveSecurityTokenService project in the Security solution.
Open the
AuthorizationPolicy.csmodule of the WoodgroveSecurityTokenService project. XSI authorization policy classes, by which incoming claims are translated into the claims to be included in a security token, should be quite familiar by now. Replace the code in that module with the code in Listing 4.15, which is also in the fileC:WCFHandsOnSecurityWoodgroveSecurityTokenServiceAuthorizationPolicy1.txt.Example 4.15. Woodgrove STS
AuthorizationPolicyusing System; using System.Collections.ObjectModel; using System.Collections.Generic; using System.Configuration; using System.Runtime.Serialization; using System.Security.Authorization; using System.Security.Cryptography; using System.Security.Cryptography.X509Certificates; using System.ServiceModel; using System.ServiceModel.Security; using System.ServiceModel.Security.Protocols; using System.ServiceModel.Security.Tokens; using System.Text; using System.Threading; using System.Workflow.Runtime; using System.Workflow.Runtime.Hosting; using System.Xml; namespace SecurityTokenService { public class AuthorizationPolicy : IAuthorizationPolicy { private string claimMapLocation = null; private Dictionary<string, AutoResetEvent> waitHandles = new Dictionary<string, AutoResetEvent>(); private Dictionary<string, string[]> outputClaims = new Dictionary<string, string[]>(); private object waitHandlesLock = new object(); private object outputClaimsLock = new object(); public AuthorizationPolicy() { this.claimMapLocation = ConfigurationManager.AppSettings["ClaimMapLocation"]; } public ClaimSet Issuer { get { return DefaultClaimSet.System.Issuer; } } public void ClaimMappingCompleted(object sender, WorkflowCompletedEventArgs e) { string requestIdentifier = (string)e.OutputParameters[ "RequestIdentifier"]; string[] outputClaims = ( string[])e.OutputParameters[ "OutputClaims"]; lock (this.outputClaimsLock) { this.outputClaims.Add(requestIdentifier, outputClaims); } AutoResetEvent waitHandle = null; lock (this.waitHandlesLock) { this.waitHandles.TryGetValue(requestIdentifier, out waitHandle); if (waitHandle != null) { waitHandle.Set(); } this.waitHandles.Remove(requestIdentifier); } } private string[] MapClaims(string[] inputClaims) { if (Thread.CurrentThread.Name == null) { Thread.CurrentThread.Name = Guid.NewGuid().ToString(); } using (WorkflowRuntime workflowRuntime = new WorkflowRuntime()) { workflowRuntime.StartRuntime(); workflowRuntime.WorkflowCompleted += this.ClaimMappingCompleted; Type type = typeof(ClaimMappingWorkflow); Dictionary<string, object> parameters = new Dictionary<string, object>(); parameters.Add( "RequestIdentifier", Thread.CurrentThread.Name); parameters.Add( "InputClaims", inputClaims); AutoResetEvent waitHandle = new AutoResetEvent(false); lock (this.waitHandlesLock) { this.waitHandles.Add(Thread.CurrentThread.Name, waitHandle); } workflowRuntime.CreateWorkflow(type, parameters).Start(); waitHandle.WaitOne(); workflowRuntime.StopRuntime(); } string[] outputClaims = null; lock (this.outputClaimsLock) { this.outputClaims.TryGetValue( Thread.CurrentThread.Name, out outputClaims); this.outputClaims.Remove( Thread.CurrentThread.Name); } return outputClaims; } #region IAuthorizationPolicy Members bool IAuthorizationPolicy.Evaluate(EvaluationContext evaluationContext, ref object state) { List<Claim> claimsToAdd = new List<Claim>(); List<string> inputClaims = new List<string>(); AuthorizationContext context = OperationContext.Current.ServiceSecurityContext.AuthorizationContext; for (int index = 0; index < context.ClaimSets.Count; index++) { foreach (Claim claim in context.ClaimSets[index].FindClaims( "http://schemas.microsoft.com/xsi/2005/05/ClaimType/:Role", null)) { inputClaims.Add(claim.Resource.ToString()); } } string[] roleClaims = this.MapClaims(inputClaims.ToArray()); Claim targetClaim = null; foreach (string roleClaim in roleClaims) { targetClaim = new Claim(ClaimTypes.Role, roleClaim, Rights.PossessProperty); claimsToAdd.Add(targetClaim); } if (claimsToAdd.Count > 0) { evaluationContext.AddToTarget(this, new DefaultClaimSet( this.Issuer, claimsToAdd)); } return true; } ClaimSet IAuthorizationPolicy.Issuer { get { return this.Issuer; } } #endregion #region IAuthorizationComponent Members string IAuthorizationComponent.Id { get { return Guid.NewGuid().ToString(); } } #endregion } }
This new code defines an XSI authorization policy for the Woodgrove STS by which it can translate claims in security tokens issued by the Fabrikam STS into the claims that are understood by the Woodgrove service. The code retrieves the location of the rule set defining how Fabrikam claims are to be translated into Woodgrove claims from the Woodgrove STS’s configuration file. For each incoming request for a security token, the authorization policy sends the role claims in its evaluation context, which were read from the input security token, to an instance of the claim mapping workflow defined in the preceding steps, via the workflow’s parameters. Then it retrieves the translated claims output by the workflow instance from the workflow’s OutputClaims parameter. The claims emitted by the workflow instance are added to the target context, from which they will be copied by XSI to the authorization context. The claims in the authorization context will be incorporated into the security token issued by the Woodgrove Security Token Service.
This code again makes reference to the URI http://schemas.microsoft.com/xsi/2005/05/ClaimType/:Role to circumvent a defect in some prerelease versions of the Windows Communication Foundation. Readers with versions later than the February CTP version should instead use the expression
ClaimTypes.Role
in place of the URI.
Follow the next few instructions to see what has been accomplished:
Start debugging the solution.
When the console of the server shows some activity, click on the coal button in the Resource Access client user interface. Recall that access to the coal resource was denied on the last attempt. That was because the Woodgrove service was authorizing the user’s access based on claims about the user’s role membership in Woodgrove terms, whereas the security token issued to the user for accessing the service made claims about the user’s role membership in Fabrikam terms. This time access to the coal should be granted.
Click on the diamond button in the Resource Access client user interface. Access to the diamond resource should be denied. The reason is that the user is in the StaffMember role within Fabrikam, which maps to the Other role within Woodgrove, whereas one must be in a role that maps to the Executive role within Woodgrove in order to access the diamond resource.
Stop debugging the solution.
To witness the full benefit of the solution that has been built in this chapter, promote the current user within the Fabrikam organization and see that user instantly experience the benefit of enhanced access to resources within Woodgrove:
Promote the current user to the Manager role within Fabrikam. Do so by using the Windows Server 2003 Authorization Manager user interface to add the user to the Manager role in the Authorization Manager authorization store, according to the instructions for doing so provided earlier in this chapter.
Start debugging the solution.
When the console of the service, the Woodgrove STS, and the Fabrikam STS all show some activity, click on the diamond button in the Resource Access client user interface. Because the user has been promoted within Fabrikam, the user now has access to the more valuable diamond resource in Woodgrove that the user was previously prevented from accessing.
With that click on the diamond button in the Resource Access client user interface, the possibilities for commerce offered by XSI should have become vividly apparent. With not very much code at all, an application for secure messaging across organizations has been created that is, moreover, highly configurable. The authorization mechanisms in both organizations are available for modification by administrators using the Windows Server 2003 Authorization Manager user interface and the Windows Workflow Foundation Rule Set Editor.
The Extensible Security Infrastructure of the Windows Communication Foundation provides a flexible and easily customizable way of controlling access to the resources of a software application. It allows for access to resources to be controlled based on claims. Claims-based authorization subsumes both role-based authorization and authorization using access control lists.
The power of the Extensible Security Infrastructure was demonstrated by an exercise in which access to an intranet service controlled using role-based authorization was extended to permit controlled claims-based access by the users of another organization. That was accomplished by adding security token services built using the Extensible Security Infrastructure to the solution to serve as a foundation for federated identity. In the process, no changes had to be made to the code of either the client or the service, which is an eloquent demonstration of the power that the Windows Communication Foundation can bring to bear on complex business scenarios.