
The code samples for this book are available for download from http://www.microsoft.com/mspress/books/6432.asp. See the book’s Introduction for instructions on installing the code samples. The code samples are divided into four categories:
Practice files for each chapter. These are organized by version of Microsoft Visual Basic .NET, within the folders VB.NET 2002 and VB.NET 2003. Within each version folder are the chapter folders (for example, CH01_Encryption). Within each chapter folder are Start and Finished folders. The Start folder contains the project or projects that are the starting point for the exercises in the chapter. The Finished folder contains completed project or projects, reflecting what the result of each chapter’s exercises should be. Usually, the finished project from one chapter becomes the starting project for the next chapter.
Encryption demo. This sample is a project that displays the results of each encryption technique. The sample is located in the ExtrasEncryptionDemo folder within the version folders.
TogglePassportEnvironment utility. This utility toggles a client computer between Passport preproduction and live modes.
EmployeeDatabase.mdb. This is the Microsoft Access database used by the EmployeeManagementSystem practice files. It is installed in the same sample directory as the version folders.
The following sections explain some of the code samples in more detail.
The primary application used in this book is the Employee Management System (EMS). This application is a user management tool for a fictional miniature plastic dinosaur retailer. The application consists of a number of forms.
When the application starts, the Main procedure in the MainModule.vb opens the frmLogin form as shown in Figure A-1.

To log on, enter a valid username and password, and click OK. The list of valid usernames are shown in Table A-1.
Table A-1. List of Valid Usernames
UserName | Password |
|---|---|
ADodsworth | ADodsworth |
AFuller | AFuller |
JLeverling | JLeverling |
LCallahan | LCallahan |
MPeacock | MPeacock |
MSuyama | MSuyama |
NDavolio | NDavolio |
RKing | RKing |
SBuchanan | SBuchanan |
After clicking OK, the form creates a new instance of clsEmployee and assigns it to the global variable G_USER. It then sets the global flag G_OK to True and closes. Sub Main then checks whether G_OK is set to True (indicating a successful logon). If G_OK is not True (indicating either that Cancel was clicked or that frmLogin was closed without clicking OK), the application ends. If G_OK is set to True, Sub Main opens the frmDashboard form as shown in Figure A-2.
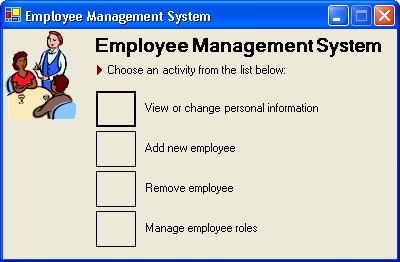
The dashboard is the launching pad for performing other functions of the EMS. Clicking View or Change Personal Information opens the frmMyInfo form. This form allows you to change profile information for the current user as shown in Figure A-3.
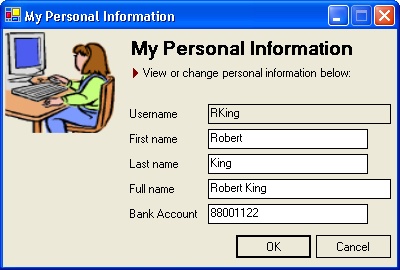
Clicking OK updates the G_USER global variable and saves the information to the database.
On the dashboard, clicking Add New Employee opens the frmAddNew form as shown in Figure A-4.
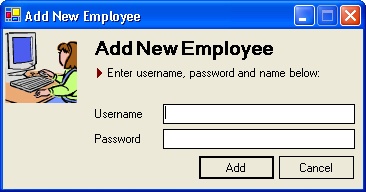
This form is used to add a new employee. After you enter a username and password and click Add, the form writes a new record to the Employee table in the database, filling in Username and Password with the values entered and using Username as the Fullname. All other fields are left blank.
On the dashboard, clicking Remove Employee opens the frmRemoveUser form as shown in Figure A-5.
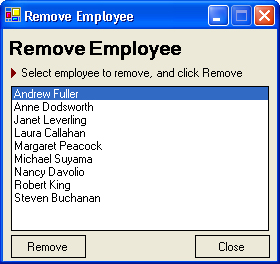
This form is used to delete users from the database. Deleting a user removes all entries for the selected user from the EmployeeRole and Employee tables in the database.
On the dashboard, clicking Manage Employee Roles opens the frmManage form as depicted in Figure A-6.
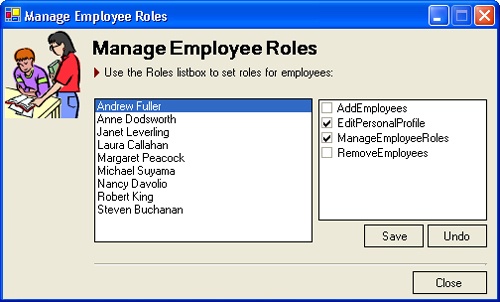
This form is used to manage which roles a user belongs to. The roles a user belongs to determines which buttons are shown on the dashboard (as implemented in Chapter 2). Clicking Save deletes all existing entries in the EmployeeRole table for a particular user and then adds new entries as selected in the Roles list box.
The workhorse of the Employee Management System is the clsEmployee class. This class contains the FirstName, LastName, and Fullname fields; the BankAccount read/write property; the username read-only property; and three methods. The three methods are: Create, for creating a new instance of an employee and loading associated profile information from the database; isValidPassword, for validating passwords; and SaveToDatabase, for saving profile information to the database.