
Chapter 6. Adding Hyperlinks to Web Pages
What You’ll Do
Create Hyperlinks Within a Web Page
Create Hyperlinks to Files and Web Pages
Create Hyperlinks to E-Mail Addresses
Introduction
When you are surfing the Web, a bookmark in your browser is a shortcut to a favorite Web site or page. In Expression Web, the term bookmark is used to denote a link that helps the reader navigate a long Web page quickly, rather than having to scroll through it. Hyperlinks, also known as links, connect you to information in other documents. Rather than duplicating the information stored in other documents, you can create hyperlinks to the relevant material. Web sites are continually changing as new content and hyperlinks provide greater functionality and ease of use for users.
Graphics, like text, can contain hyperlinks. If you set a default hyperlink for a graphic, the Web browser displays the hyperlink destination when the graphic is clicked. A hotspot is defined as an invisible region on a graphic or other Web area to which you have assigned a hyperlink. In Expression Web, hotspots can be shaped as rectangles, circles, or polygons. If you’re having trouble viewing hotspots within a graphic, you can use the Highlight Hotspots button on the Pictures toolbar to temporarily remove the graphic so you can see the hotspots.
Expression Web provides different ways to view hyperlinks. Hyperlinks view offers a simplified presentation of the source and destination of internal and external hyperlinks that appear on a given page. Hyperlinks view displays your links, but it doesn’t assure that they are correct. If a link becomes outdated or unnecessary, you can easily revise or remove it using the Hyperlinks task pane.
Creating Bookmarks
When you are surfing the Web, a bookmark or favorite in your browser is a shortcut to a Web site or page, a placeholder so that you can quickly access a favorite location in cyberspace. In Expression Web, the term bookmark (as known as an HTML anchor) is used to denote a link that helps the reader navigate a long Web page quickly, rather than having to scroll through it. After you have placed one or more bookmarks, they are available to navigate to in the Bookmark dialog box. If you no longer need a bookmark, you can delete it. However, when you delete a bookmark, any hyperlinks that are connected to the deleted destination are not automatically adjusted and are now dead links that you need to locate and repair.
Create a Bookmark
![]() Open the Web page you want to change in Design view.
Open the Web page you want to change in Design view.
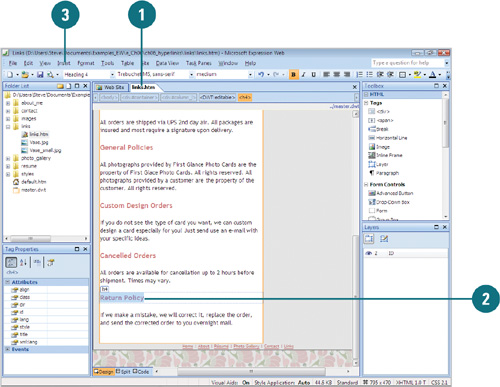
![]() Select the text or graphic element within the page that you want to bookmark. If you have broken the page into sections, section headers make excellent bookmarks.
Select the text or graphic element within the page that you want to bookmark. If you have broken the page into sections, section headers make excellent bookmarks.
![]() Click the Insert menu, and then click Bookmark.
Click the Insert menu, and then click Bookmark.
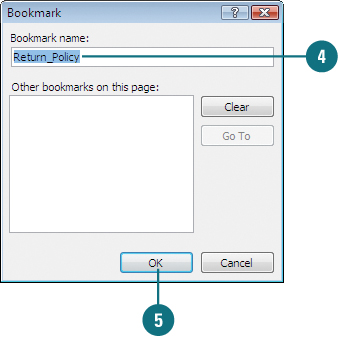
![]() Type a bookmark name.
Type a bookmark name.
![]() Click OK.
Click OK.
In Design view, the bookmark appears with a perforated underline.
Did You Know?
You can rename a bookmark. Right-click the bookmark, click Bookmark Properties, type the new name, and then click OK. Expression Web does the rest, reconfiguring any relevant hyperlinks.
Navigate to Bookmarks
![]() Click the Edit menu, and then click Go To Bookmark.
Click the Edit menu, and then click Go To Bookmark.
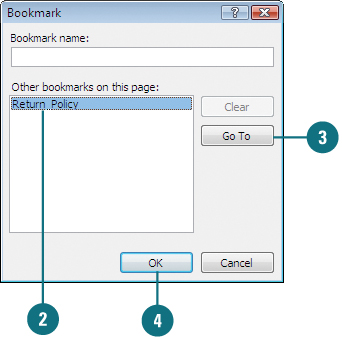
![]() Click the bookmark in which you want to navigate.
Click the bookmark in which you want to navigate.
![]() Click Go To.
Click Go To.
![]() Click OK.
Click OK.
Delete Bookmarks
![]() Click the Edit menu, and then click Go To Bookmark.
Click the Edit menu, and then click Go To Bookmark.
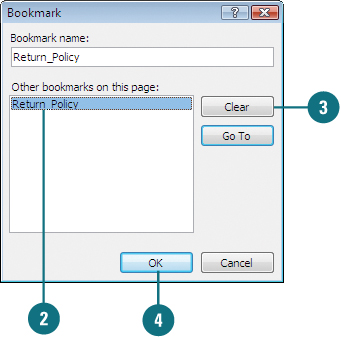
![]() Click the bookmark you want to remove.
Click the bookmark you want to remove.
![]() Click Clear.
Click Clear.
![]() Click OK.
Click OK.
See Also
See “Verifying Hyperlinks” on page 169 for information on verifying hyperlinks after you delete a bookmark.
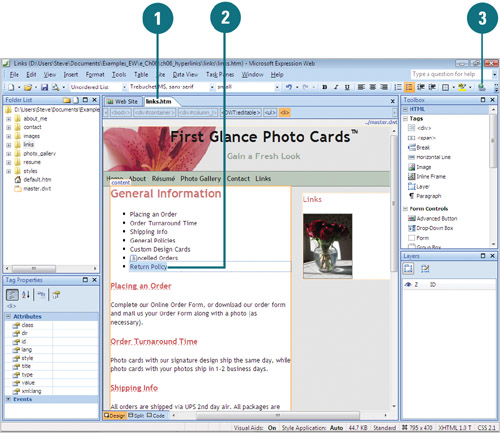
Creating Hyperlinks Within a Web Page
After you create bookmarks in a Web page, you can create hyperlinks to them. This is useful when you want to create an easy way for users to jump to different points within a Web page. Sometimes during the development process, you want to create a hyperlink, but the Web page file that doesn’t exist yet. You can create a hyperlink now and then create the Web page file later.
Create a Hyperlink to a Bookmark Within a Web Page
![]() Open the Web page you want to change in Design view.
Open the Web page you want to change in Design view.
![]() Select the word or words you want to link from.
Select the word or words you want to link from.
![]() Click the Insert Hyperlink button on the Common toolbar.
Click the Insert Hyperlink button on the Common toolbar.
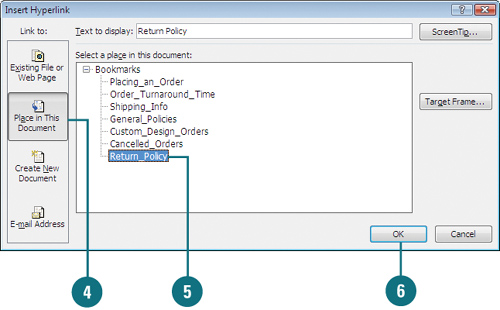
![]() Click the Place in This Document button on the Link to bar.
Click the Place in This Document button on the Link to bar.
The words you entered as the link on your Web page appear in the Text to display box.
![]() Select the bookmark within the Web page you want to link.
Select the bookmark within the Web page you want to link.
![]() Click OK.
Click OK.
The selected text appears as a hyperlink.
Create a Hyperlink to a Web Page Not Available
![]() Open the Web page you want to change in Design view.
Open the Web page you want to change in Design view.
![]() Select the word or words you want to link from.
Select the word or words you want to link from.
![]() Click the Insert Hyperlink button on the Common toolbar.
Click the Insert Hyperlink button on the Common toolbar.

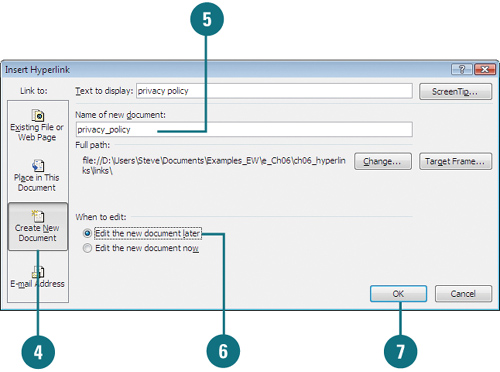
![]() Click the Create New Document button on the Link to bar.
Click the Create New Document button on the Link to bar.
The words you entered as the link on your Web page appear in the Text to display box.
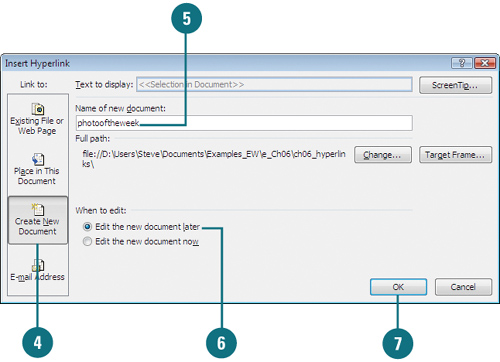
![]() Enter a name for the new document.
Enter a name for the new document.
![]() Click the Edit the new document later option.
Click the Edit the new document later option.
![]() Click OK to complete the link.
Click OK to complete the link.
Did You Know?
You can add parameters to a hyperlink. If you’re using ASP.NET, PHP, or other server side technology, you can add parameters to a hyperlink to pass information to the Web server in the form of a querystring. In the Hyperlink dialog box, click Parameters, click Add, enter a parameter name, enter a value, click OK, click OK, and then click OK again.
Creating Hyperlinks to Files and Web Pages
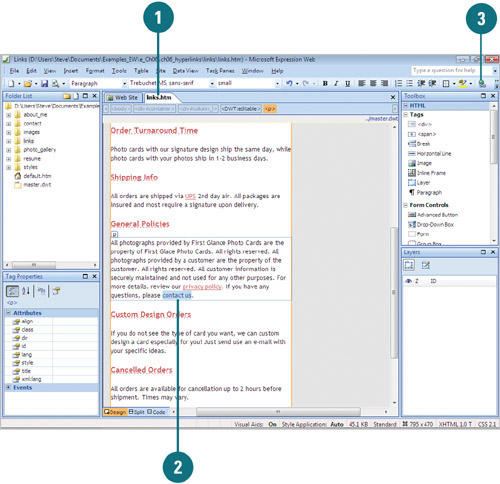
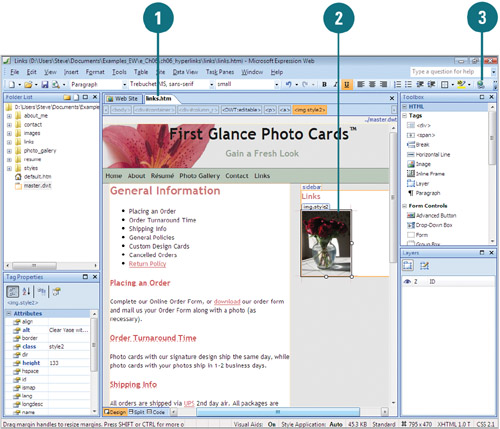
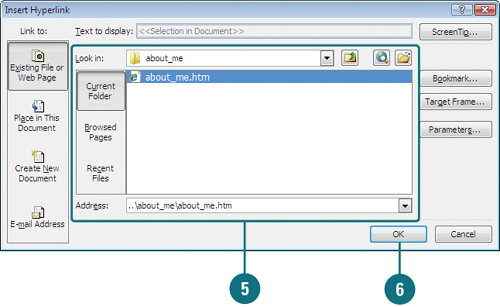
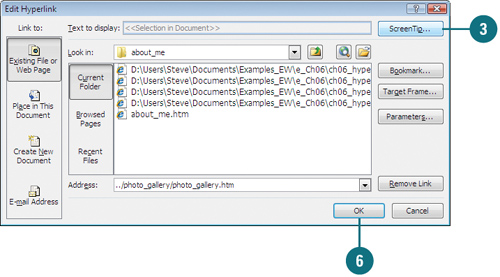
Hyperlinks connect you to information in other documents. Rather than duplicating the important information stored in other documents, you can create hyperlinks to the relevant material. You can create hyperlinks to pages in your Web site or to external files and pages from a local or Internet location. The Insert Hyperlink dialog box makes it easy to create hyperlinks to files and Web pages by keeping track and displaying the current folder (typically the Web site folder), and recently used files and browsed Web pages.
Create a Hyperlink to a Web Page
![]() Open the Web page you want to change in Design view.
Open the Web page you want to change in Design view.
![]() Select the word or words you want to link from.
Select the word or words you want to link from.
![]() Click the Insert Hyperlink button on the Common toolbar.
Click the Insert Hyperlink button on the Common toolbar.

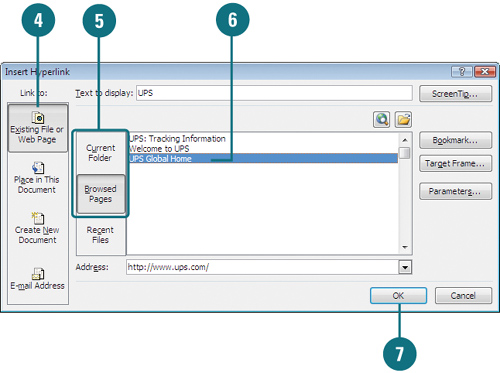
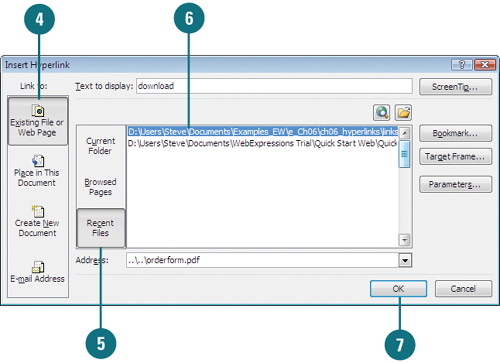
![]() Click the Existing File or Web Page button on the Link to bar.
Click the Existing File or Web Page button on the Link to bar.
The words you entered as the link on your Web page appear in the Text to display box.
![]() Click Current Folder or Browsed Pages to locate a Web page.
Click Current Folder or Browsed Pages to locate a Web page.
- If the Web page is not available in the list, click the Browse the Web button, go to the Web page you want to use, and then click the Close button.
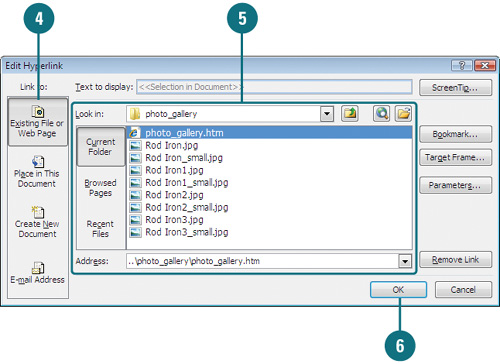
![]() Select the Web page to which you want to link, or type a URL to access an Internet location in the Address box.
Select the Web page to which you want to link, or type a URL to access an Internet location in the Address box.
![]() Click OK.
Click OK.
The selected text appears as a hyperlink.
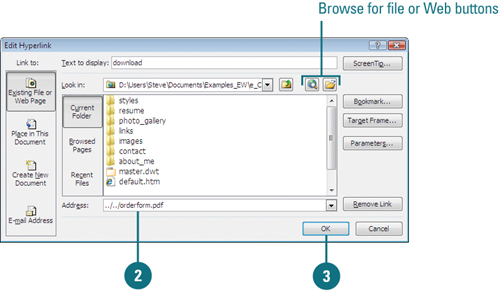
Create a Hyperlink to a File
![]() Open the Web page you want to change in Design view.
Open the Web page you want to change in Design view.
![]() Select the word or words you want to link from.
Select the word or words you want to link from.
![]() Click the Insert Hyperlink button on the Common toolbar.
Click the Insert Hyperlink button on the Common toolbar.
![]() Click the Existing File or Web Page button on the Link to bar.
Click the Existing File or Web Page button on the Link to bar.
The words you entered as the link on your Web page appear in the Text to display box.
![]() Click Recent Files to locate a file.
Click Recent Files to locate a file.
- If the file is not available in the list, click the Browse for File button, locate and select the file you want to use, and then click Open.
![]() Select the file to which you want to link, or type the location to the file in the Address box.
Select the file to which you want to link, or type the location to the file in the Address box.
![]() Click OK.
Click OK.
The selected text appears as a hyperlink.
Did You Know?
You can redirect a Web page. In Design or Code view, select the <body> tag, click the Task Panes menu, click Behaviors to display the Behaviors task pane, click Insert, and then click Go to URL. In the dialog box, specify the URL for the page or file you want to redirect the user, and then click OK.
For Your Information: Hyperlinking to Adobe Acrobat and Other Files
In addition to Web pages, you can create hyperlinks to Adobe Acrobat (PDF) files, Microsoft Office documents, and ZIP files to name a few. When a user clicks a hyperlink to a file, the related program starts and opens the file directly from the Web page. If the user’s computer doesn’t have the program, the file doesn’t open. To avoid this problem, you need to inform users what software they need to view the file. In many cases, you can provide a link to obtain the software.
Creating Hyperlinks to E-mail Addresses
Creating a hyperlink to an e-mail address allows users of your Web page to contact you, or any other e-mail recipient that you specify. When a user on one of your Web pages selects a hyperlink to an e-mail address, their default e-mail program opens with a new message already filled in. The new message includes the specified e-mail address and subject you specified in the Insert Hyperlink dialog box.
Create a Hyperlink to an E-mail Address
![]() Open the Web page you want to change in Design view.
Open the Web page you want to change in Design view.
![]() Select the word or words you want to link from.
Select the word or words you want to link from.
![]() Click the Insert Hyperlink button on the Common toolbar.
Click the Insert Hyperlink button on the Common toolbar.
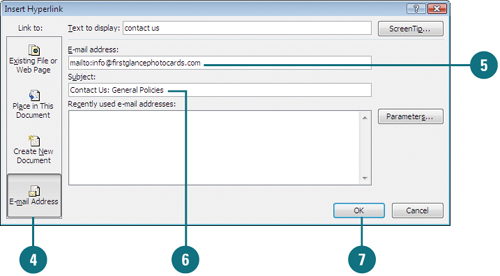
![]() Click the E-mail Address button on the Link to bar.
Click the E-mail Address button on the Link to bar.
The words you entered as the link on your Web page appear in the Text to display box.
![]() Enter the e-mail address you want to use or select one from the recently used list.
Enter the e-mail address you want to use or select one from the recently used list.
![]() Enter a subject for the e-mail message.
Enter a subject for the e-mail message.
![]() Click OK.
Click OK.
The selected text appears as a hyperlink.
Creating Target Hyperlinks
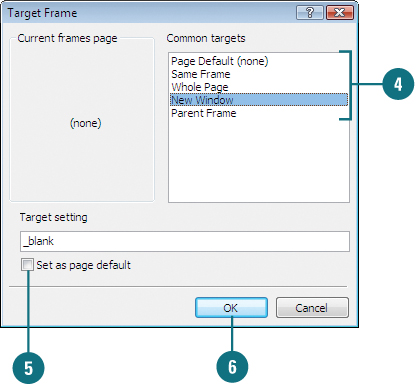
When you create a hyperlink, a Web browser normally replaces the current Web page with the new Web page. Instead of replacing the current Web page with the new Web page, you can keep the current page display and open the new page in a new window. This is useful for hyperlinks to external Web sites. Users stay at your site, yet they can still view another Web page. This is known as a target hyperlink. In Besides New Window, other common targets include Page Default, Same Frame, Whole Page, and Parent Frame.
Create a Hyperlink to a Target Frame
![]() Open the Web page you want to change in Design view.
Open the Web page you want to change in Design view.
![]() Right-click an existing hyperlink, and then click Hyperlink Properties.
Right-click an existing hyperlink, and then click Hyperlink Properties.
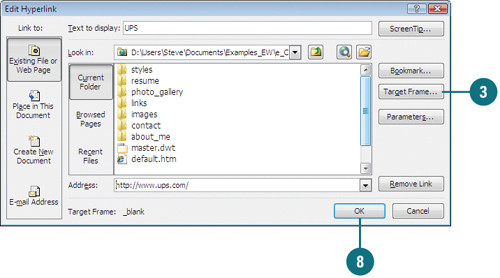
![]() Click Target Frame.
Click Target Frame.
![]() Click the target you want to use.
Click the target you want to use.
![]() If you want all your hyperlinks to use the target frame, select the Set as page default check box.
If you want all your hyperlinks to use the target frame, select the Set as page default check box.
![]() Click OK.
Click OK.
![]() If you want to change the hyperlink, select the file or Web page to which you want to link, or type a URL to access an Internet location in the Address box.
If you want to change the hyperlink, select the file or Web page to which you want to link, or type a URL to access an Internet location in the Address box.
![]() Click OK.
Click OK.
Editing Hyperlinks
Web site are continually changing as new content and hyperlinks provide greater functionality and ease of use for users. If a link becomes outdated or unnecessary, you can easily revise or remove it. When you click a hyperlink for the first time (during a session), the color of the hyperlink changes, indicating that you have accessed the hyperlink. If you prefer a different color, you can change the color of the hyperlink in different states.
Change a Hyperlink
![]() Right-click the hyperlink, and then click Hyperlink Properties.
Right-click the hyperlink, and then click Hyperlink Properties.
![]() Change the address for the link (use the Browse the Web or Browse for File buttons if necessary).
Change the address for the link (use the Browse the Web or Browse for File buttons if necessary).
![]() Click OK.
Click OK.
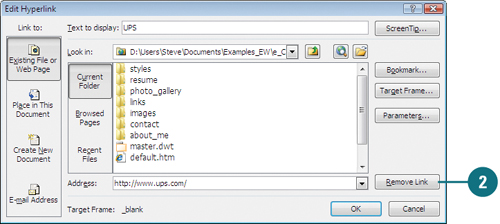
Remove a Hyperlink
![]() Right-click the hyperlink, and then click Hyperlink Properties.
Right-click the hyperlink, and then click Hyperlink Properties.
![]() Click Remove Link.
Click Remove Link.
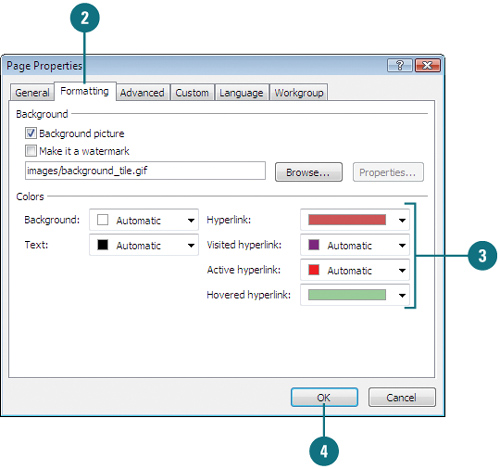
Change Hyperlink Colors
![]() Right-click a blank area in a Web page, and then click Page Properties.
Right-click a blank area in a Web page, and then click Page Properties.
![]() Click the Formatting tab.
Click the Formatting tab.
![]() Click the list arrow next to the corresponding hyperlink option, and then click a color.
Click the list arrow next to the corresponding hyperlink option, and then click a color.
- Hyperlink. The color used for a hyperlink that hasn’t been used yet.
- Visited Hyperlink. The color used after a hyperlink has been used.
- Active Hyperlink. The color used while the user is actually clicking the hyperlink.
- Hovered Hyperlink. The color used while the user points to the hyperlink.
![]() Click OK.
Click OK.
Adding Hyperlinks to Graphics
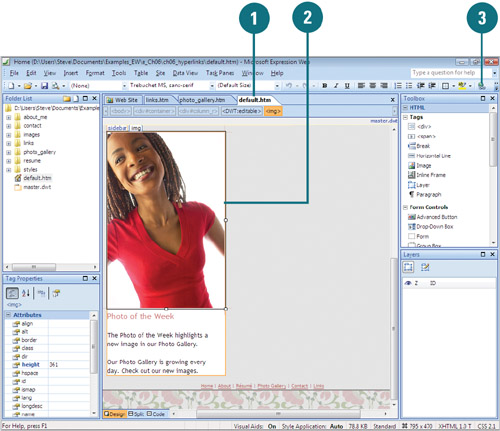
Graphics, like text, can contain hyperlinks. If you set a default hyperlink for a graphic, the Web browser displays the hyperlink destination when the graphic is clicked. When creating a button that is linked to your home page, for example, you can define a default hyperlink that leads to a specific destination, instead of drawing a hotspot around the entire button.
Create a Hyperlink to an Existing Internal Web Page
![]() Open the Web page you want to change in Design view.
Open the Web page you want to change in Design view.
![]() Select the graphic you want to use.
Select the graphic you want to use.
![]() Click the Insert Hyperlink button on the Common toolbar.
Click the Insert Hyperlink button on the Common toolbar.
![]() Click Existing File or Web Page.
Click Existing File or Web Page.
![]() Browse to select the target page. The URL for the designated page appears in the Address box.
Browse to select the target page. The URL for the designated page appears in the Address box.
![]() Click OK.
Click OK.
See Also
See “Adding Graphic Hotspots” on page 164 for information on creating hyperlink regions on a graphic.
Create a Hyperlink to a New Internal Page
![]() Open the Web page you want to change in Design view.
Open the Web page you want to change in Design view.
![]() Select the graphic you want.
Select the graphic you want.
![]() Click the Insert Hyperlink button on the Common toolbar.
Click the Insert Hyperlink button on the Common toolbar.
![]() Click Create New Document.
Click Create New Document.
![]() Enter the name of the new document.
Enter the name of the new document.
![]() Click the Edit the new document later option.
Click the Edit the new document later option.
![]() Click OK.
Click OK.
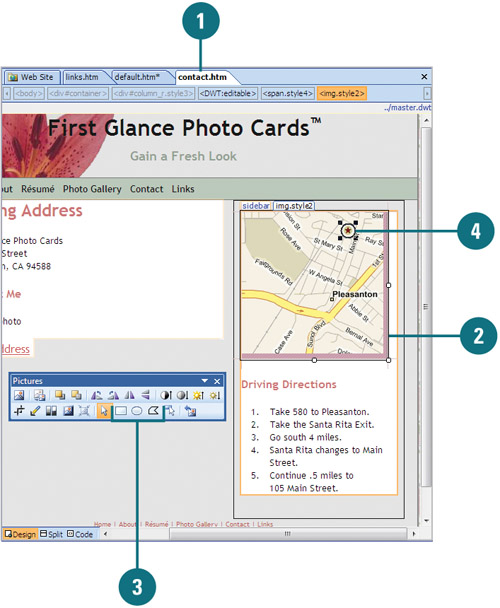
Adding Graphic Hotspots
A hotspot is defined as an invisible region on a graphic or other Web area to which you have assigned a hyperlink. When a site user clicks their cursor over that hyperlink, the link’s destination is displayed in the Web browser. In Expression Web, hotspots can be shaped as rectangles, circles, or polygons. However, a hotspot cannot overlap or extend beyond the image boundaries. A graphic containing one or more hotspots is an Image map. Image maps typically provide clues so that you know where to click. The areas of the graphic that doesn’t contain hotspots can be assigned a default hyperlink; when the user clicks anywhere outside a hotspot, they are directed to the destination you set as the graphic’s default hyperlink.
Add a Hotspot to a Graphic
![]() Open the Web page you want to change in Design view.
Open the Web page you want to change in Design view.
![]() Select the graphic you want to add a hotspot.
Select the graphic you want to add a hotspot.
![]() Click a hotspot button (Rectangular, Circular, or Polygonal) on the Pictures toolbar that conforms to the shape you want.
Click a hotspot button (Rectangular, Circular, or Polygonal) on the Pictures toolbar that conforms to the shape you want.
![]() Move the cursor over the picture until it becomes a drawing implement. Drag a hotspot to the shape you want, and then double-click to complete the shape. You can size the hotspot by dragging the sizing handles.
Move the cursor over the picture until it becomes a drawing implement. Drag a hotspot to the shape you want, and then double-click to complete the shape. You can size the hotspot by dragging the sizing handles.
When you’re done, the Insert Hyperlink dialog box opens.
![]() Enter or browse for the URL in which you want to link the hotspot.
Enter or browse for the URL in which you want to link the hotspot.
![]() Click OK.
Click OK.
Did You Know?
You can return a hotspot to its original position. Select the hotspot, and then press Esc.
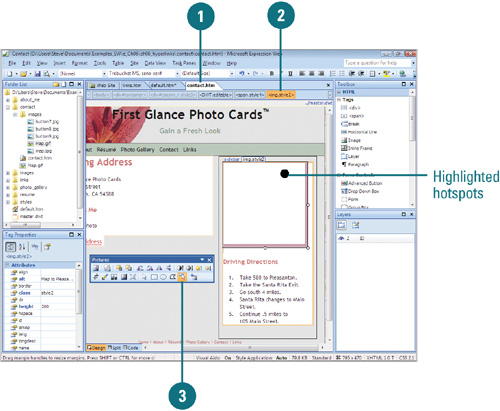
Highlighting Graphic Hotspots
If you’re having trouble viewing hotspots within a graphic, you can use the Highlight Hotspots button on the Pictures toolbar to temporarily remove the graphic so you can see the hotspots. Once you have identified the location of the hotspots you want to modify, you need to click the Highlight Hotspots button again to turn it off before you can edit the hotspot.
Highlight Hotspot Hyperlinks
![]() Open the Web page you want to change in Design view.
Open the Web page you want to change in Design view.
![]() Select the graphics that contains the hotspot you want to modify.
Select the graphics that contains the hotspot you want to modify.
![]() Click the Highlight Hotspots button on the Pictures toolbar. The graphic disappears so you can see the hotspots.
Click the Highlight Hotspots button on the Pictures toolbar. The graphic disappears so you can see the hotspots.
![]() Click the button again to view the graphic.
Click the button again to view the graphic.
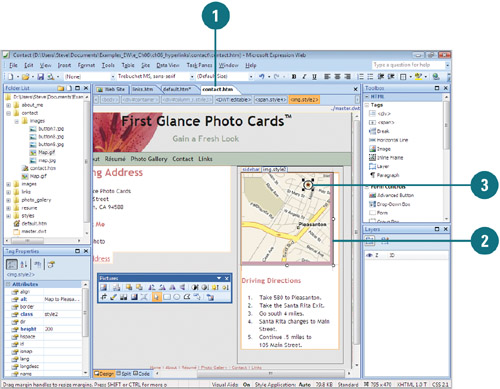
Modifying Graphic Hotspots
After you create a graphic hotspot using the buttons (Rectangle Hotspot, Circular Hotspot, or Polygonal Hotspot) on the Pictures toolbar, you can select, move, or resize the hotspot. You can edit the size and shape of a hotspot the same way you edit an object. To edit the URL for a hotspot, you need to double-click the hotspot. If you no longer need a hotspot, you can select it and press Delete.
Edit Hotspot Hyperlinks
![]() Open the Web page you want to change in Design view.
Open the Web page you want to change in Design view.
![]() Select the graphics that contains the hotspot you want to modify.
Select the graphics that contains the hotspot you want to modify.
![]() Perform one or more of the following:
Perform one or more of the following:
- Edit the URL for a hotspot. Double-click the hotspot, and then alter the destination in the Address box.
- Resize the hotspot. Drag the selection handles.
- Delete a hotspot. Press the Delete key on the keyboard.
- Move the hotspot. Drag it to a new position, or press the arrow keys to move the hotspot in small increments.
Adding ScreenTips to Hyperlinks
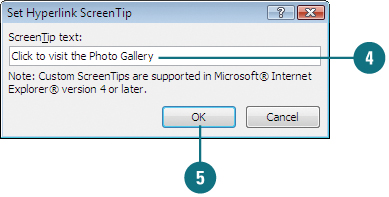
A ScreenTip (also known as tooltips) provides helpful information to users when they point to a hyperlink. When a user points to a hyperlink in a Web browser, a small tag appears displaying information you provide about the hyperlink. ScreenTips are not required, but they are useful for users.
Add a ScreenTip to a Hyperlink
![]() Open the Web page you want to change in Design view.
Open the Web page you want to change in Design view.
![]() Right-click an existing hyperlink, and then click Hyperlink Properties.
Right-click an existing hyperlink, and then click Hyperlink Properties.
![]() Click ScreenTip.
Click ScreenTip.
![]() Type the ScreenTip text you want users to see.
Type the ScreenTip text you want users to see.
![]() Click OK.
Click OK.
![]() Click OK.
Click OK.
Working with Hyperlinks View
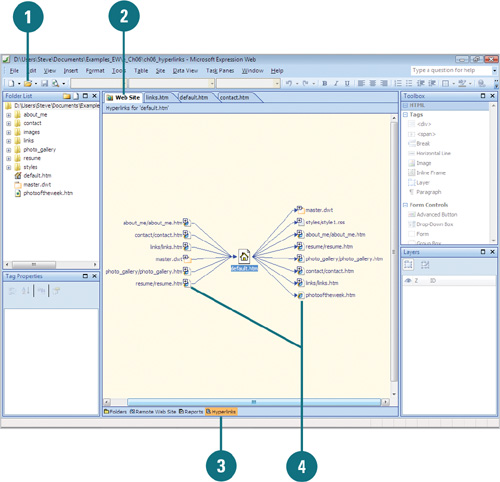
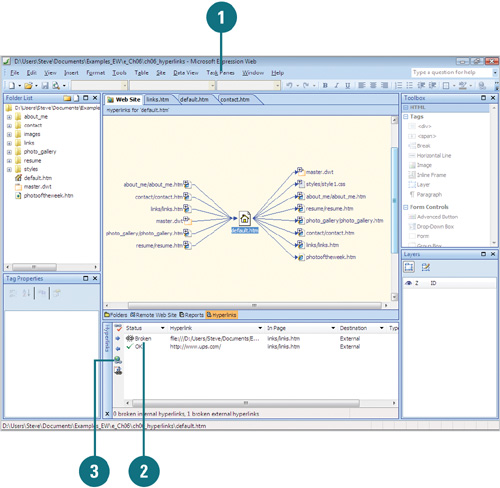
Hyperlinks view offers a simplified presentation of the source and destination of internal and external hyperlinks that appear on a given page. These links are displayed in a flowchart fashion. Clicking the plus sign (+) box for any page displays that page’s links. This provides a quick, easy method to expand or shrink the link view to display the entire link structure of the pages, or only those that link directly to the home page. Double-clicking a page automatically displays that page and moves it to the center of the hyperlink display when you revert to Hyperlinks view.
Display Hyperlinks View
![]() Open the Web site in which you want to display hyperlinks.
Open the Web site in which you want to display hyperlinks.
![]() Click the Web Site tab.
Click the Web Site tab.
![]() Click the Hyperlinks button at the bottom of the window.
Click the Hyperlinks button at the bottom of the window.
![]() Click a plus sign (+) to display the entire link structure of a page.
Click a plus sign (+) to display the entire link structure of a page.
Did You Know?
Hyperlinks are displayed using a variety of buttons. In Hyperlinks view, a page containing a globe button represents the presence of a link to the Web. A page featuring a picture button signifies a link to a visual element, and an envelope button indicates the hyperlink leads to a piece of e-mail.
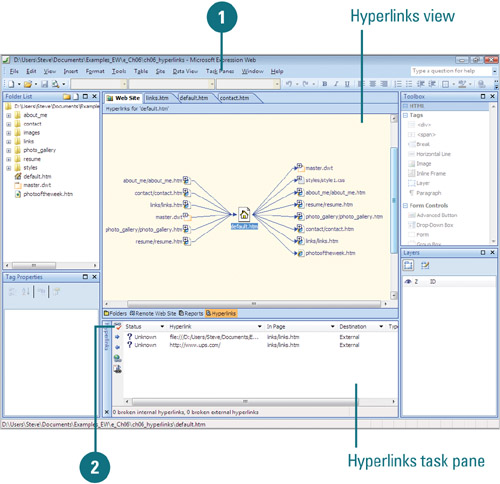
Verifying Hyperlinks
When you have a layout of your hyperlinks, you’ll want to confirm that they’re accurately linked. Because sites are purchased, re-started, and even shut down on a regular basis, URLs to external links can change. Hyperlinks view displays your links, but it doesn’t assure that they are correct. To verify links, use the Verify Hyperlinks button in the Hyperlinks task pane. If Expression Web discovers a problem with a link, you can open and fix it from the Hyperlinks task pane.
Verify Hyperlinks in Reports View
![]() Click the Task Panes menu, and then click Hyperlinks.
Click the Task Panes menu, and then click Hyperlinks.
![]() Click the Verify Hyperlinks button.
Click the Verify Hyperlinks button.
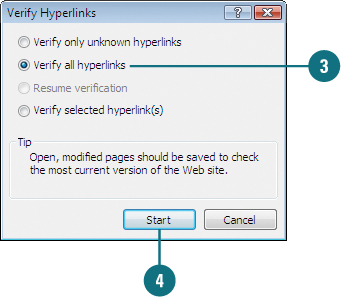
![]() Click the Verify all hyperlinks option.
Click the Verify all hyperlinks option.
![]() Click Start.
Click Start.
![]() If prompted to connect to the Web, click Yes.
If prompted to connect to the Web, click Yes.
Expression Web automatically checks any links that haven’t been confirmed as correct and generates a report. Scan the Status column and make sure you don’t have any broken links. If there are none, the process is over.
Did You Know?
You can check a single hyperlink. In Hyperlinks view, right-click then hyperlink you want to check, and click Verify Hyperlink. If the hyperlink is broken, the arrow connecting the file displays a break.
You can recalculate hyperlinks to correct property data associated with a Web page. The Recalculate Hyperlinks commands updates property data, known as metadata, to correct any data problems. Click the Site menu, click Recalculate Hyperlinks, and then click Yes.
Repairing Broken Hyperlinks
If a hyperlink is broken, the arrow connecting the file displays a break in Hyperlink view, while a broken chain icon displays a break in the Hyperlinks task pane. If an external hyperlink is unverified, a question mark appears next to it in the Hyperlinks task pane. To repair a broken hyperlink, you can use the Edit Hyperlink dialog box to select the correct hyperlink. If you’re repairing an external hyperlink, you also need to verify the hyperlink to change its status from Unknown to OK.
Repair Broken Hyperlinks
![]() Click the Task Panes menu, and then click Hyperlinks.
Click the Task Panes menu, and then click Hyperlinks.
![]() Select a broken hyperlink in the Hyperlinks task pane.
Select a broken hyperlink in the Hyperlinks task pane.
![]() Click the Edit Hyperlink button.
Click the Edit Hyperlink button.
The Edit Hyperlink dialog box opens with the link of the page in question, and a blank space for you to enter the correct address.
![]() Click Browse, and then locate and select the correct Web page.
Click Browse, and then locate and select the correct Web page.
![]() Click the Change in all pages or Change in selected pages option.
Click the Change in all pages or Change in selected pages option.
![]() Click Replace.
Click Replace.

The hyperlink is repaired. If a question mark appears next to a hyperlink, you need to verify the hyperlink.
![]() Click the Verify Hyperlinks button.
Click the Verify Hyperlinks button.
The Verify Hyperlink dialog box opens with the Verify only unknown hyperlinks option selected by default.
![]() Click Start, and then click Yes if prompted to connect to the Web.
Click Start, and then click Yes if prompted to connect to the Web.
Expression Web automatically checks any links that haven’t been confirmed as correct and generates a report.