Chapter 11. Seeing and Using Light
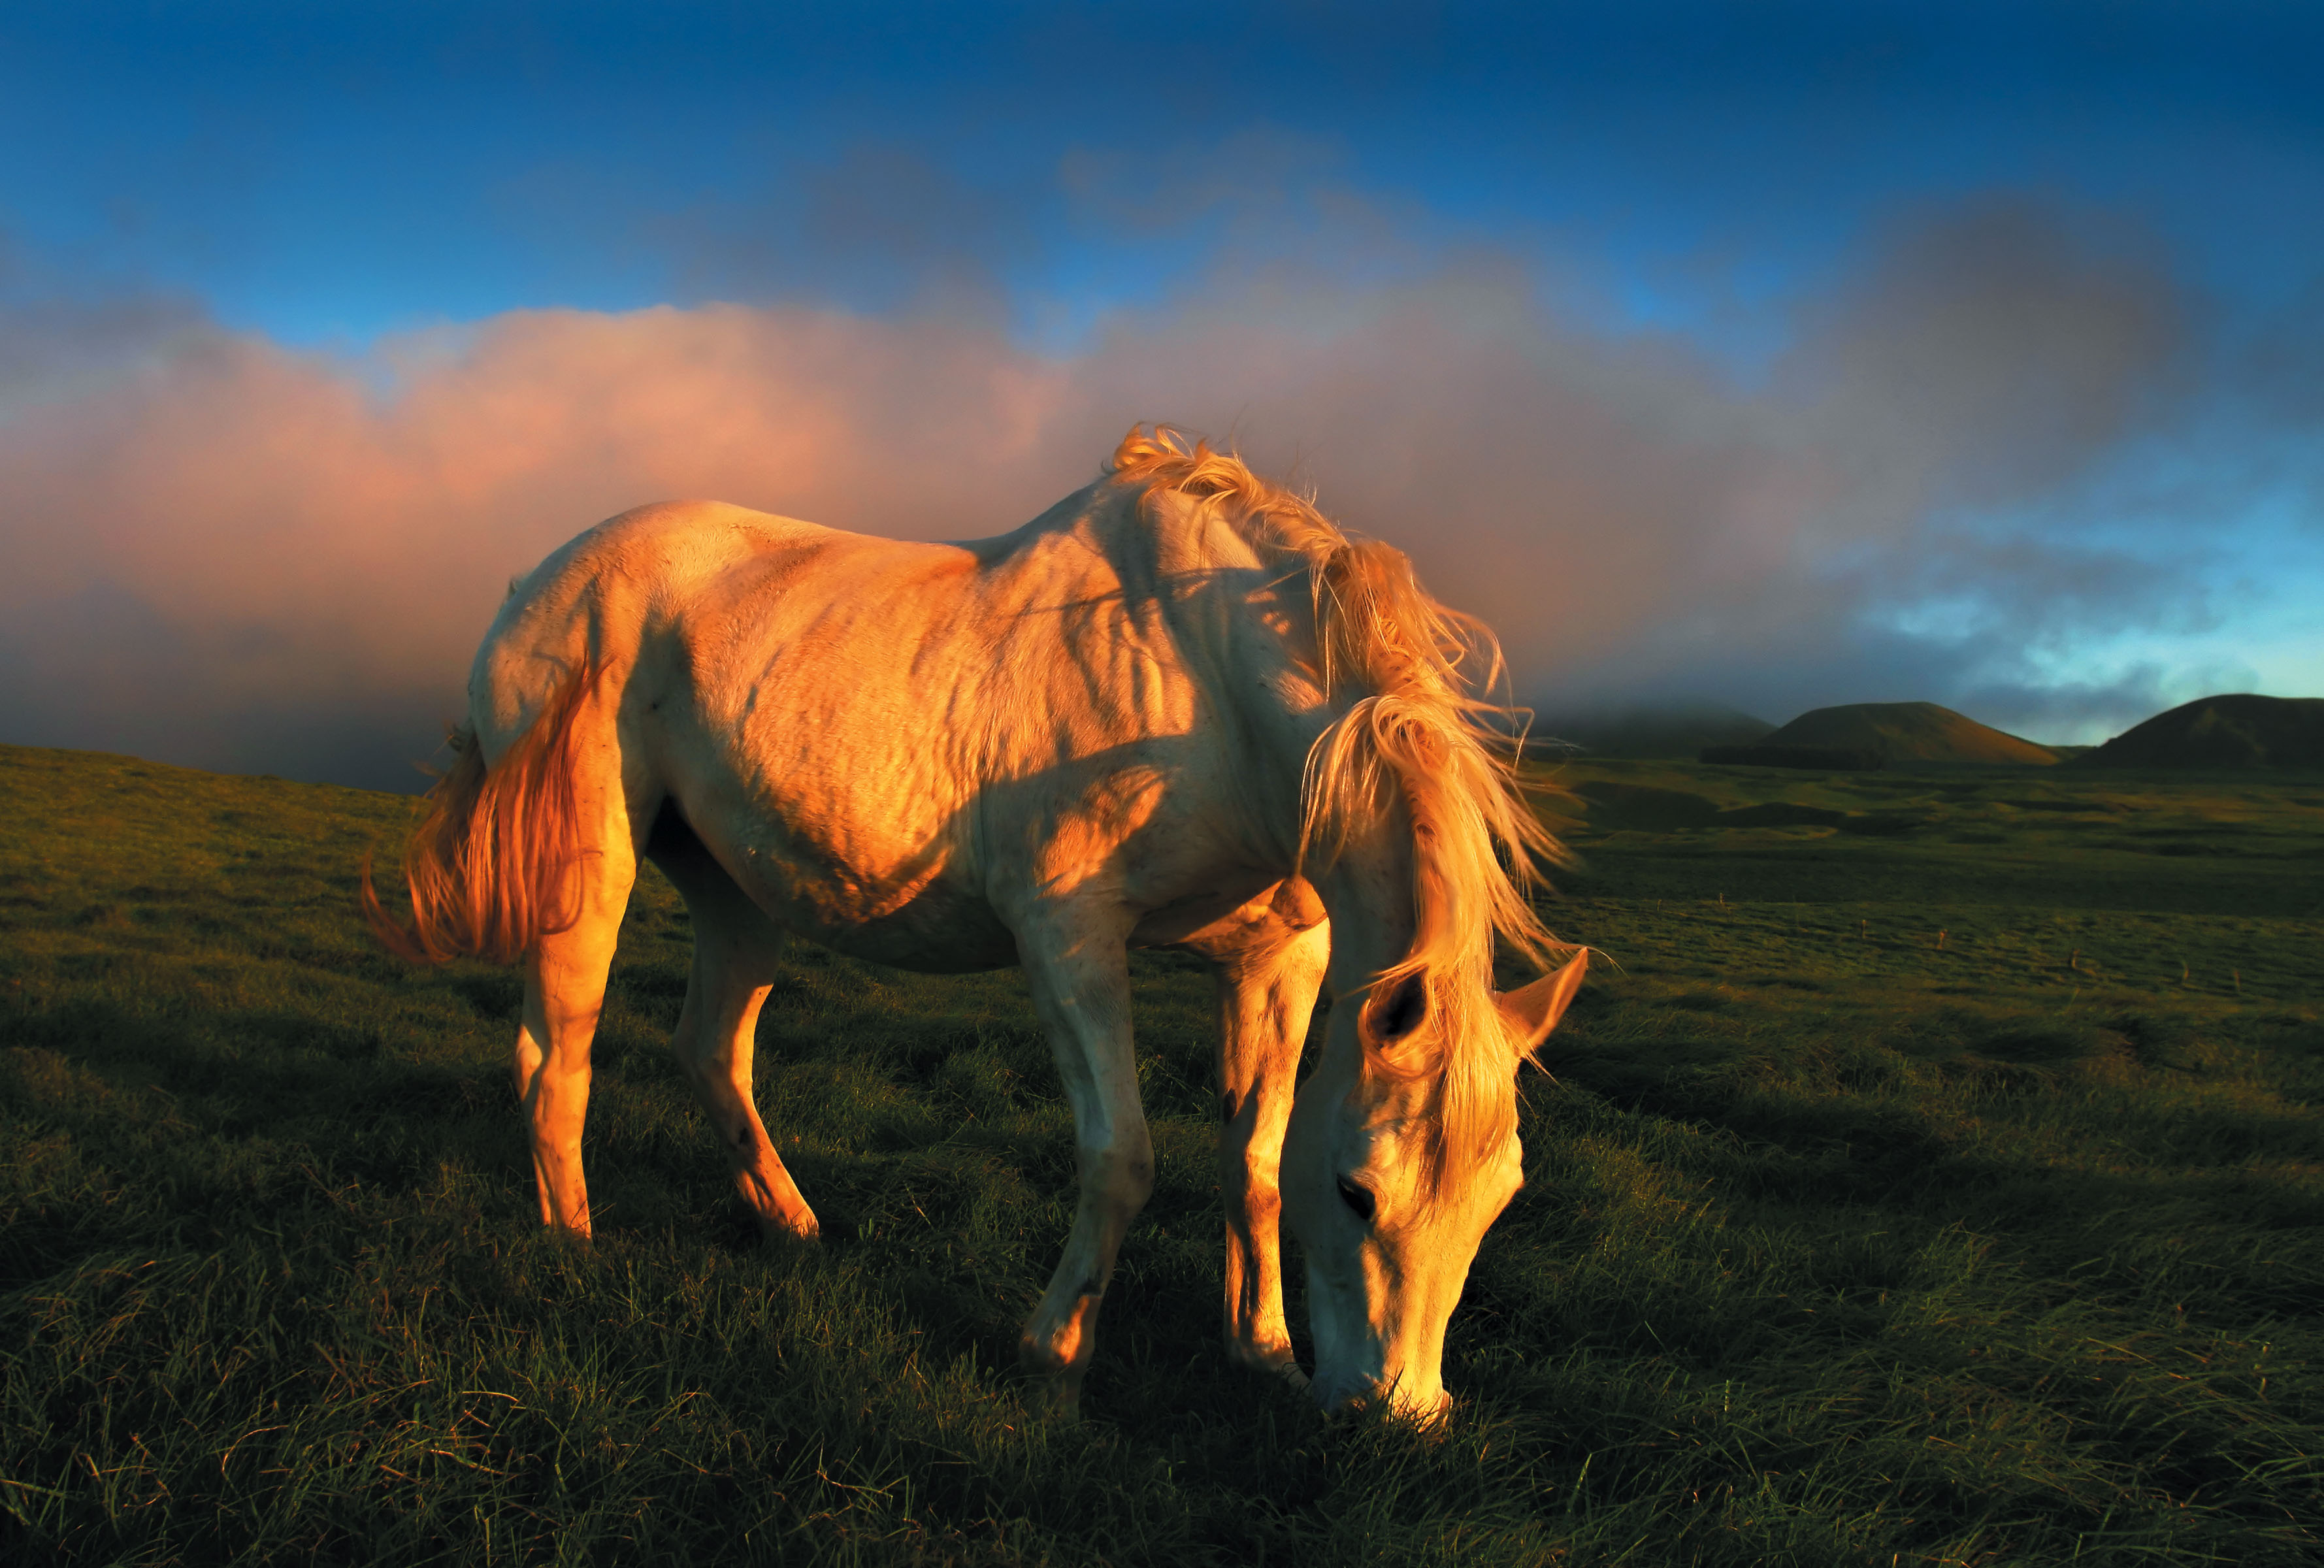
A lone horse grazes at sunset in Waimea on the Big Island of Hawaii.
ISO 200 f/6.3 1/320 16mm
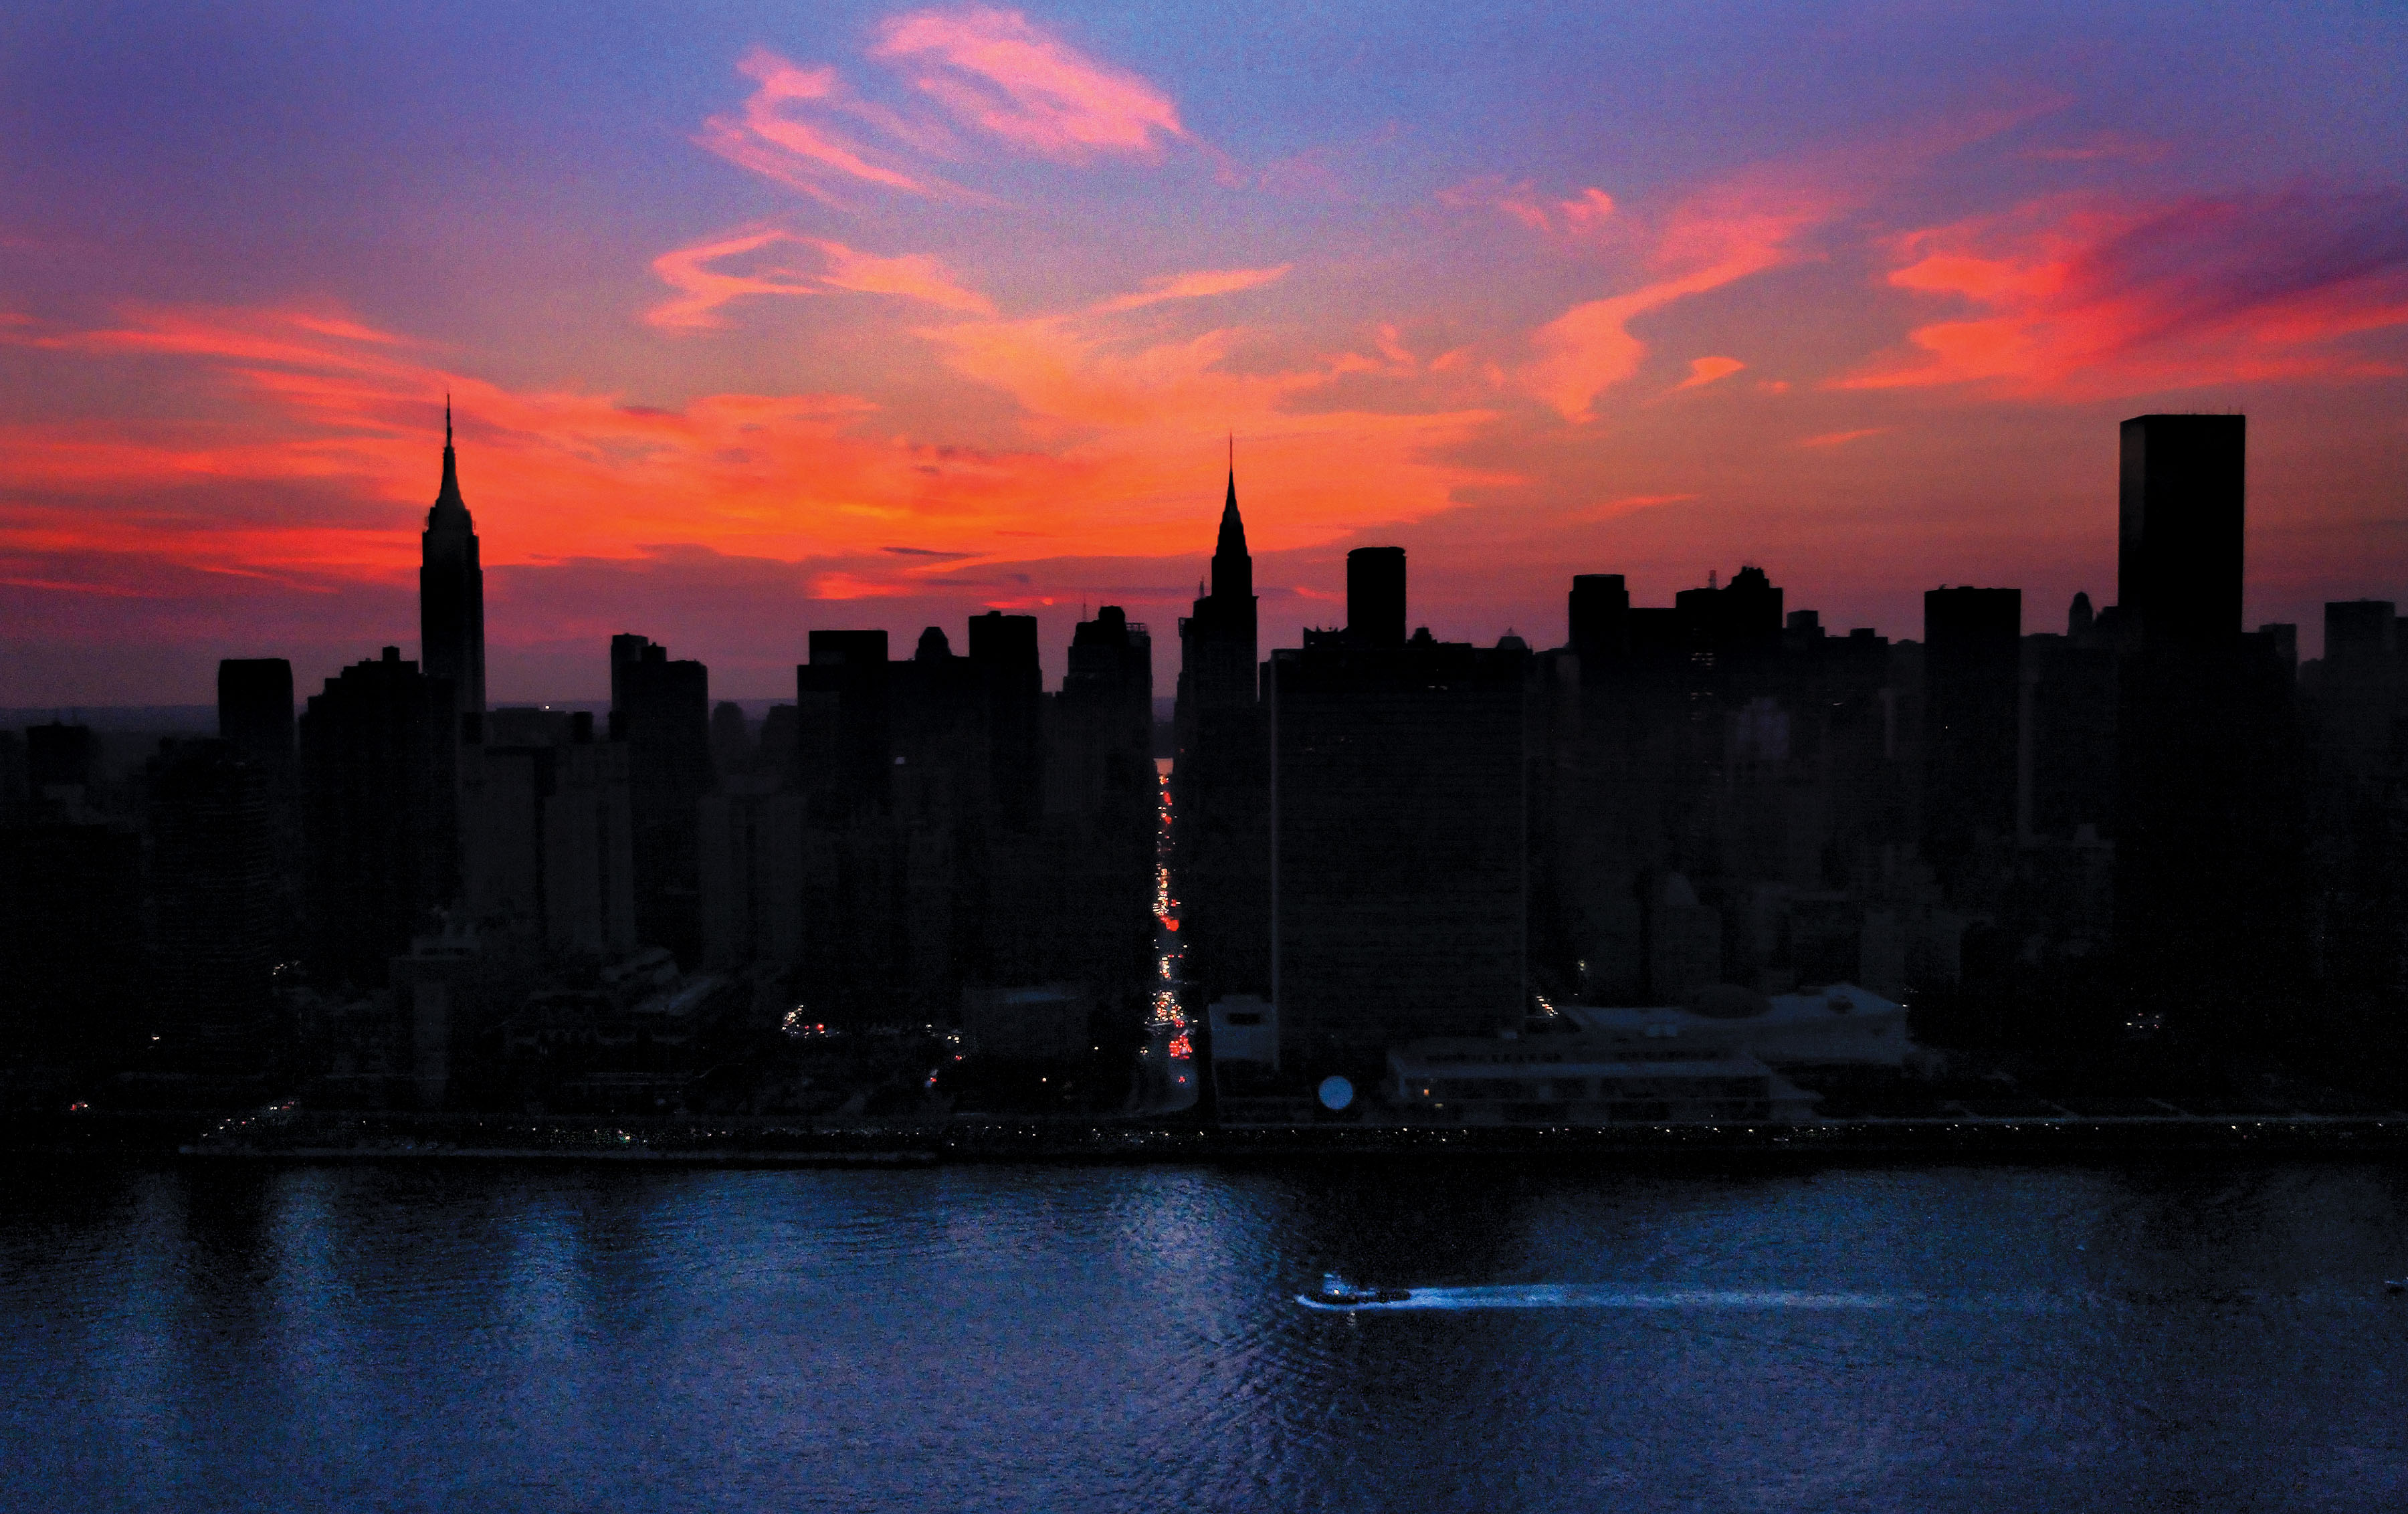
On August 14, 2003, New York City experienced the largest blackout in U.S. history. I was on the beat that day, and all the traffic lights were out. It was pure gridlock within minutes.
I drove against traffic for a few minutes and gave up, because it was not only dangerous, but also kind of pointless. I called my editor.
“I need to get in a helicopter, and I’d really like to get a shot of the New York skyline silhouetted against the sunset.”
“Sorry, Vince,” he said. “We can’t put you up in a helicopter every time you want to go. It’s too expensive.”
So I kept trying to make images. At the time I had an early digital camera that didn’t do very well in low light, let alone no light. I kept calling the editor, trying to convince him to put me in a helicopter.
I called him for the sixth time and said, “Jim, when’s the last time you saw the New York City skyline against the sunset with all the lights out? It’s only happened once or twice before.”
I reminded him of the famous black-and-white image of the southern part of Manhattan made during the 1965 blackout and finally sold him on it.
We chartered a helicopter, but when I showed up, there was no helicopter. There had been an issue with a credit card as well as the reality that people were paying $2,000 a seat to fly out of the city. Luckily, this is where it pays to know people and treat them well. I was able to get access to a helicopter for 30 minutes.
I photographed midtown Manhattan from the East River with only the headlights and brake lights on 42nd Street as my light sources. You can see a little bit of FDR Drive as well as a tugboat at the bottom of the frame.
After landing, I ran back to the New York Times passing by all these incredible scenes of people in the middle of the street, in front of their brownstones with flashlights. It was a very special, weird moment when New Yorkers were all part of the same melting pot for real, because it was incredibly hot and humid, sticky and disgusting.
I ran up to the New York Times offices through the stairwell, got the image to the paper, and it made the front page—not this particular version of it but a different one, with the sun still up.
The next morning, the editor I’d asked six times for the helicopter asked me for a print of the image for his office. I made a print for him that very day, but I put it in my locker and waited for him to ask me six times before I gave it to him.
As it turns out, I did a lot of traveling after that so it was about six months later when he asked me for the sixth time for the image and I told him I’d had it in my locker for months.
He chuckled, as he understood the humor in it. And if nothing else, it made for a good story.
Long exposure around Manhattan of street scenes during the East Coast blackout.
ISO 400 f/2.8 1/160 23mm
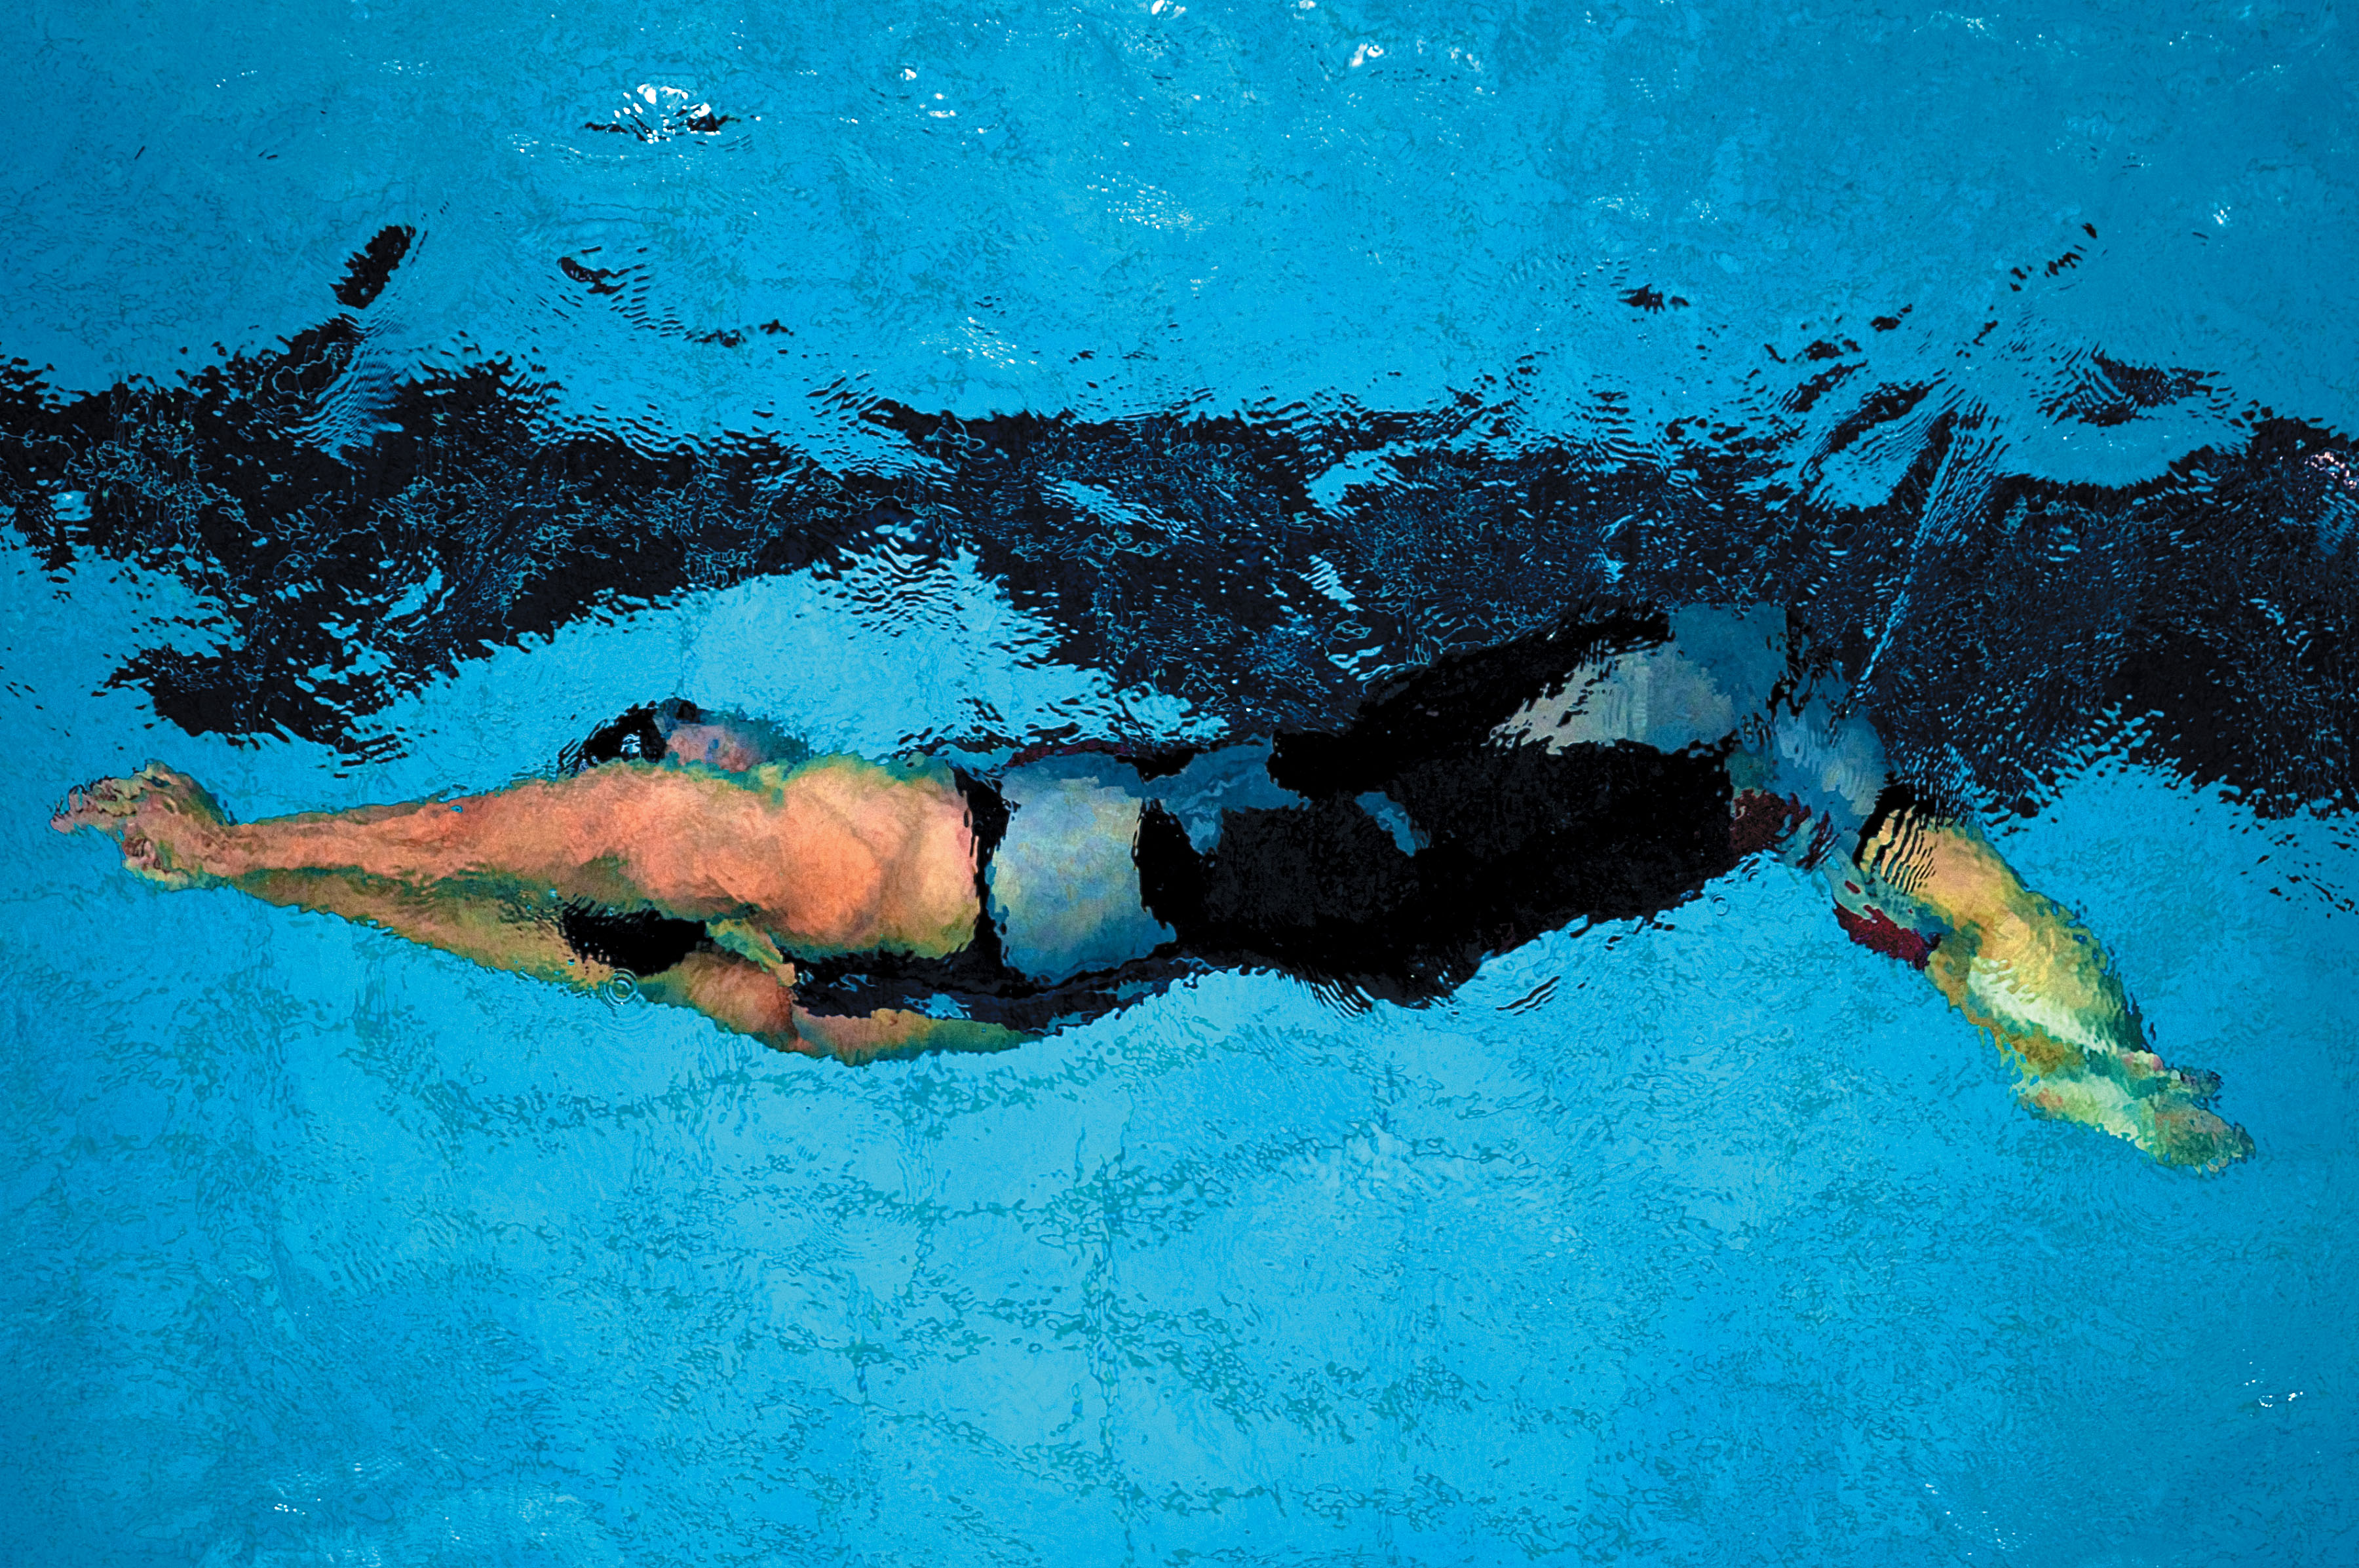
Natalie Coughlin, of the USA team, wins the bronze medal in the Women’s 100-meter freestyle during the 2008 Summer Olympics.
ISO 800 f/3.2 1/1250 400mm
It’s the ability to see light and how it’s shaped and changed by the world around you that helps elevate a snapshot into something more.
The Importance of Light
Although it was the lack of light that resulted in the drama of the previous photograph, light is actually the most important factor in any photograph. If you really want to break it down, the etymology of the word photography is “recording with light.” So without light, you can’t have an image.
Most of us learn photography first by studying lensing, or learning what lenses to use. We then get into how we frame images. We study timing and when to depress the shutter release. As we get more sophisticated, we see compositions in layers with a foreground, a middle ground, and a background.
But eventually you get to a point where you realize how important it is not only to know how to expose any given scene, but also to be able to see and evaluate the light itself. And when it comes to light, there are so many factors that you could write several books about it.
Some of the main considerations include the angle of light—how high is the light? Is it a high-noon light? Or is the sun kissing the horizon? What’s the color temperature of light—is it a warm light? Is it a cold light? Is it a fluorescent green light? And think about the fall-off: How quickly does the light die? Does it get darker very quickly, or is it a shaft of light that stays pretty consistent? Is it passing through something?
Then you’ll learn about negative fill and fill—is the light bouncing off of something, filling in the shadows? Or is it bouncing into something black, thus sucking out all the shadow detail?
It’s the ability to see light and how it’s shaped and changed by the world around you that helps elevate a snapshot into something more.
Move Yourself, Not the Light
One of the single most important pieces of advice I can share with photographers is if they want to learn about light, they should find one single light source.
For those who don’t have much money, use a household light bulb. What’s the easiest thing to do with it? Take some aluminum foil and form a cone so that you have your light pointing in a single direction. Put that light in one location, put your subject on a stool, and have that subject stare right into the light or just a little bit away from it.
Then don’t move your subject or the light, but instead move yourself.
By leaving the light and the subject exactly as they are, you force yourself to move relative to the two of them. That’s when you’ll start to learn about light, and how you can shoot using the same identical light with the subject staring in the exact same direction. And depending on whether the subject is three-quarters, frontal, backlit, or side lit, it’s an absolutely different image.
Next, alternate your exposure as well when your subject is backlit, and blow out the light coming at you and flare it into your lens. Or close down and capture that detail. Then you’ll start to understand how important your exposure relative to light is.
Some people are obsessed with changing the light itself—the intensity, the diffusion, the fall-off, and the angle. They forget that just changing your position is often change enough. And, that’s a better way to learn because unless you have lighting crews with you for assistance—most of us work with available light—you’ll learn that your relationship to the light and the subject is a huge and important decision.
Dissecting the Light
One of the things I like to do once I’ve lost the natural light for the day is to go ahead and do a series of portraits. In this case, I took the surfer in this photo up to the pier and did a portrait session with artificial light. We used two Elinchrom Ranger strobe packs, one with a beauty dish off to the side of his face. You can see it’s a very nice soft light, yet it’s quite focused. In the back we had a second light running off another Ranger battery-operated unit that rim-lit him. It was just a bare head with a grid—a spot grid that really creates that nice rim light around him. What you’re seeing in the air is just all of the mist coming off the shore.
We shot everything at 1/5 second at f/4.5. This allowed us to balance the ambient light with the strobe light, so you get a bit of warmth in the image. That’s where you see a little bit of that fill on the side where you don’t have the key light. Had I shot it at 1/250 second, it would have gone completely black.
Although this was shot with strobes, the principle of seeing where the light and the shadow fall applies whether you use flash or available light. It’s still about the light, regardless of where it’s coming from.
Portrait—Ventura, California, 2006.
ISO 50 f/4.5 1/5 85mm
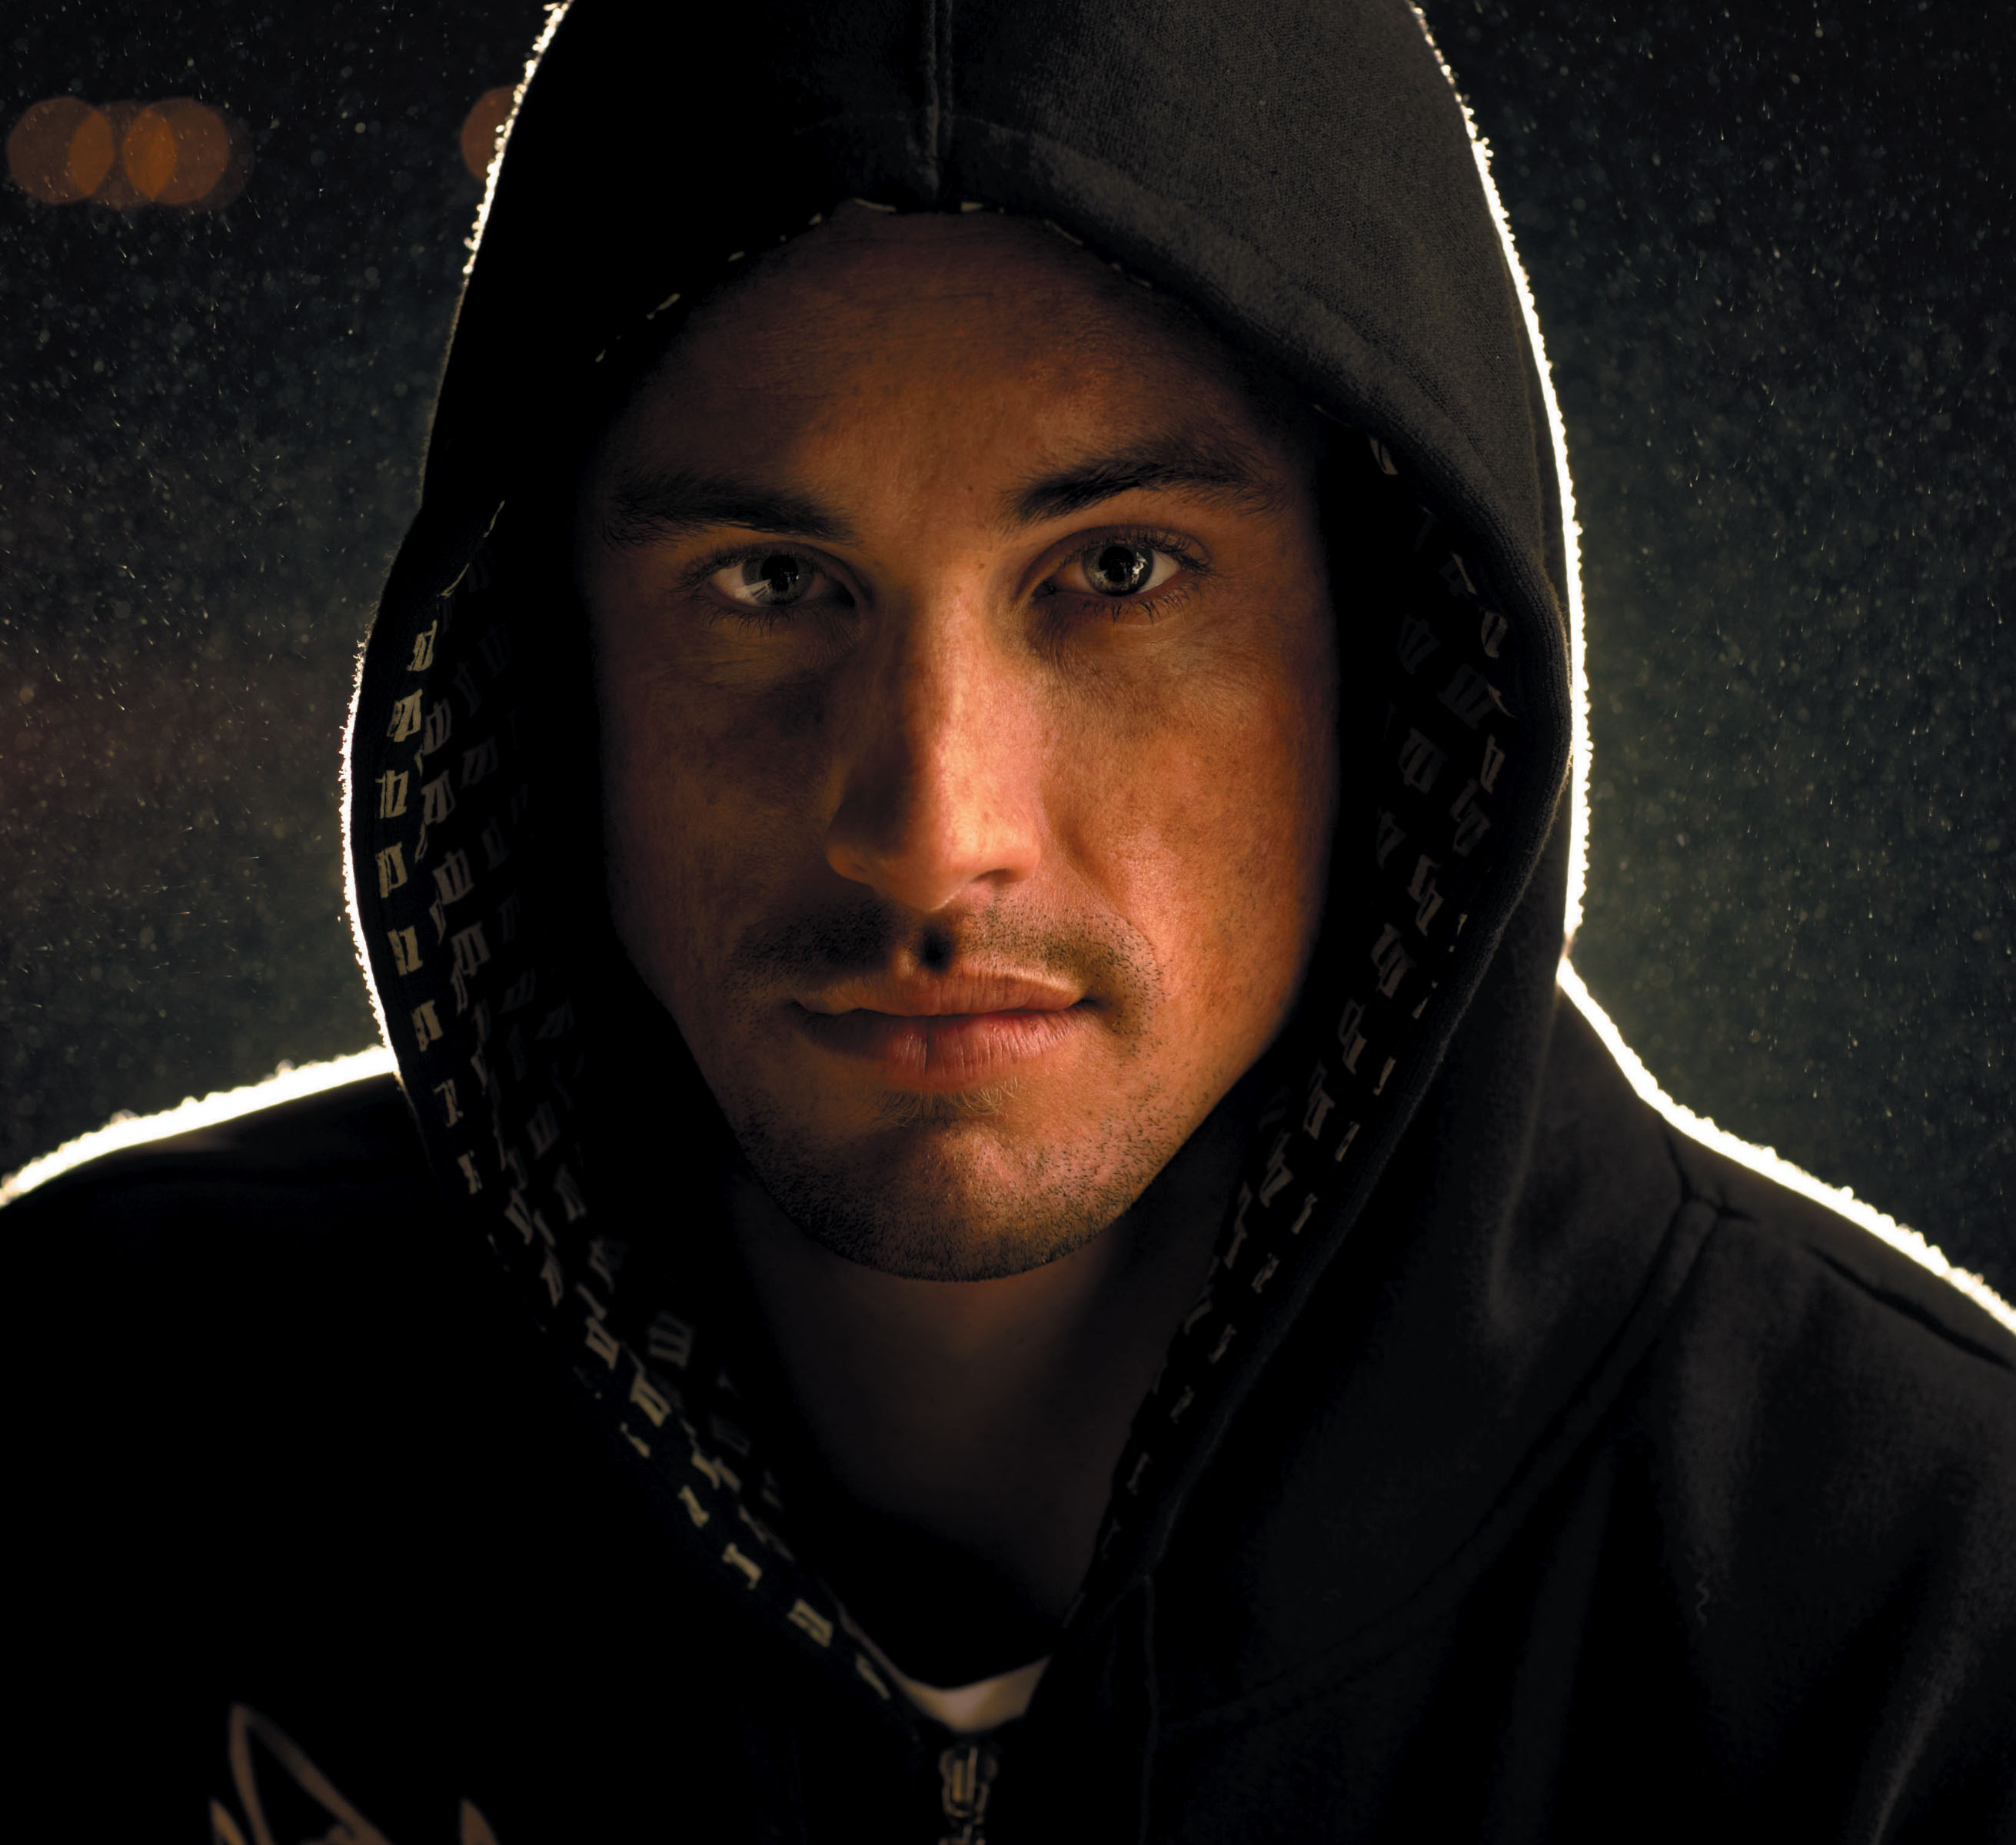
The general rule is that a heavier person will look better side lit, because you will see only half of them. Simple stuff. For a person with a long nose, being side lit is a disaster. For a model, frontal light is acceptable, but most people look horrible staring into a frontal light. Light from below makes a person look like a ghoul; it’s the lighting used in horror films. You never light from below unless you’re trying to make someone look scary.
Everyone has problem areas on their face. The angle from which you are shooting combined with the angle of light can make someone look really good or really bad. That’s where the art of lighting really begins.
When people think about light, they are often just concerned with getting the perfect exposure. But exposure is more than just a correct setting—exposure is an incredibly creative tool.
I could expose a subject with a window behind them and make them appear as a silhouette; or I could open up to see the detail in the shadows of their eyes and face, and thus blow out (overexpose) the background and get an absolutely different result. That’s what is so important to understand: how to use light and exposure is an aesthetic decision. There’s no such thing as a perfect exposure. The exposure is only perfect when it fits with what you are trying to achieve with the camera.
But, the point is, the rules that apply to a good portrait and someone’s face will apply to every single thing you shoot, whether it’s a car, a wedding couple, a rock, or a tree. It’s all about how you expose the image, how diffused the light is or isn’t, the angle of the light relative to your subject, your angle relative to the light and your subject, and diffusion of the shadow. It’s all the same principle.
The best thing I can share with you is what my father taught me. In life there’s only one light source: the sun. Learn with one light first and master that. And, then and only then, learn how to use a second or third light. But if you can’t light well with one light, you will never be able to light well with ten lights.
Matt Taylor, a lifelong surfer, catches some early morning waves in Ventura, California (2006).
ISO 100 f/4 1/320 500mm
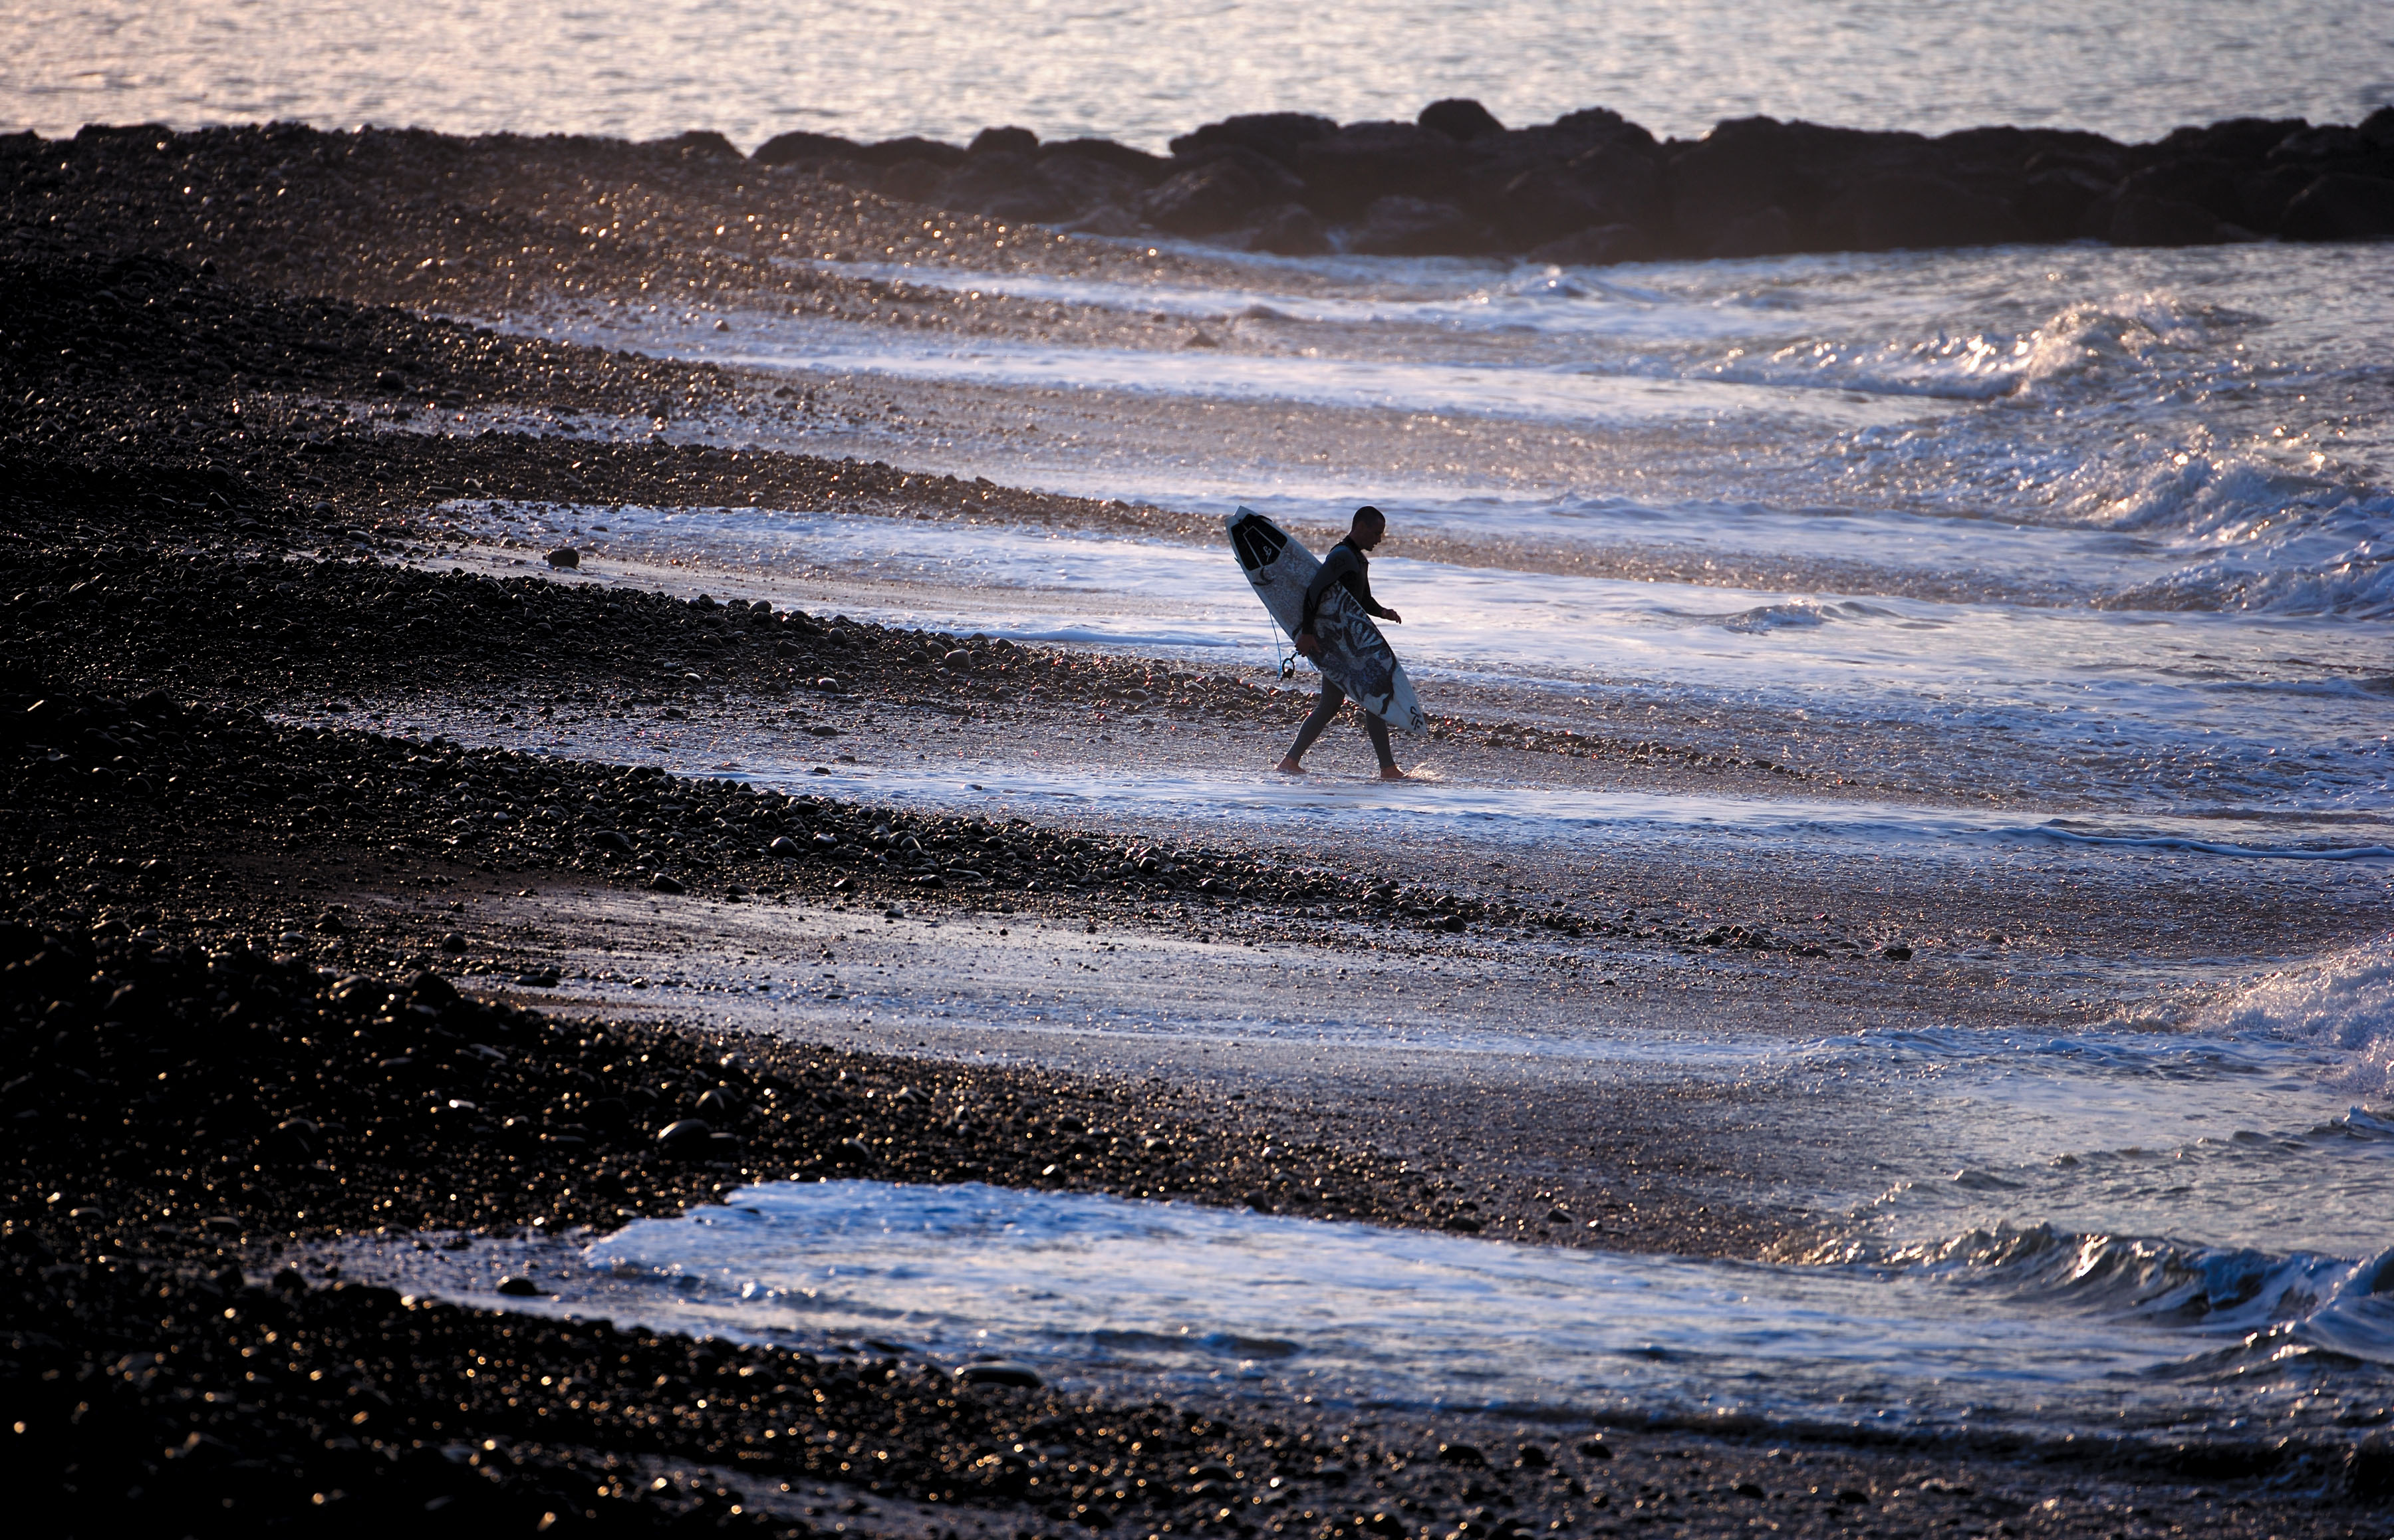
I had to anticipate the light, the gesture, and the moment, and hope that they would step into the spot of light.
The Art of Anticipation
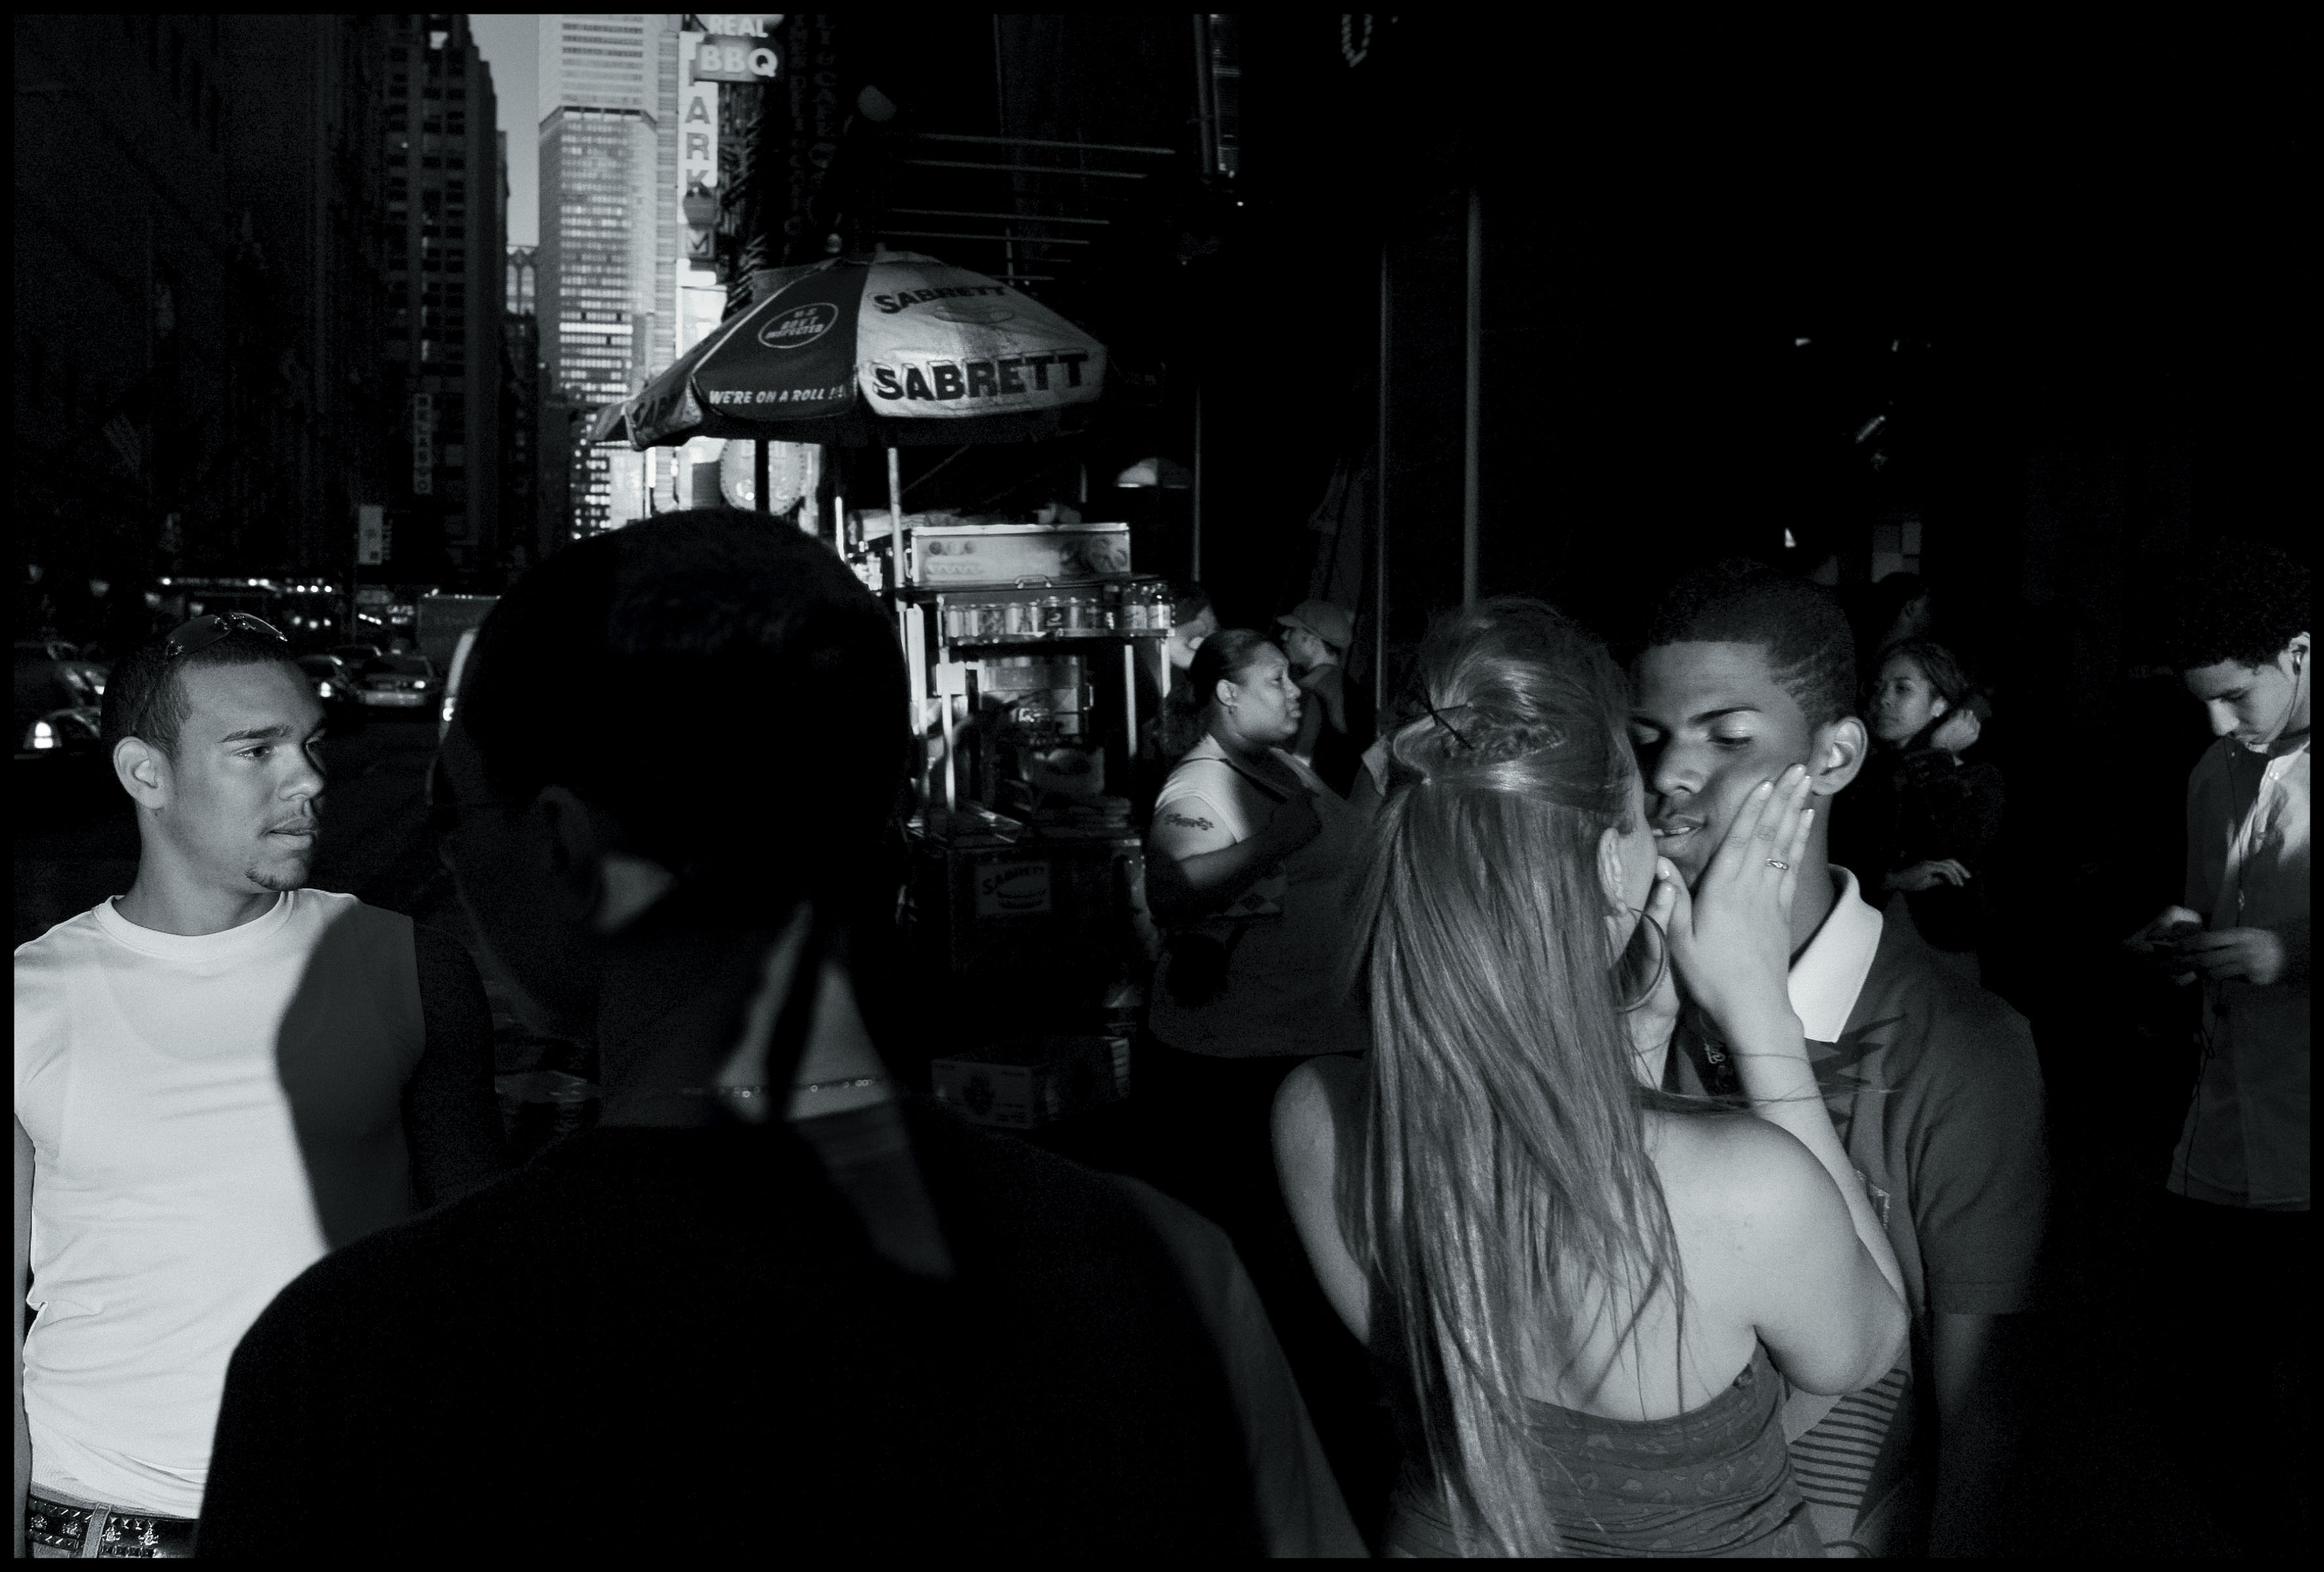
I made this image with light at sunset while photographing in Times Square. There were shafts of light coming through the very tall buildings. This girl was being playful with her boyfriend. The light around them was very angular; it was very harsh.
I had seen the light, and now I was hanging with them for a little bit and simply waiting for them to step in the spot of light. When they did, everything around them was dark because they were being hit by this spotlight of the sun.
I couldn’t tell them to do that. I had to visualize what would happen if they stepped in that spot of light and just wait patiently for the moment and the light to come together.
This is where 20 years of experience comes into play in the form of a visual anticipation. I had to anticipate the light, the gesture, and the moment, and hope that they would step into the spot of light.
And when they did, I had to pounce on it, because they were in the light for only a few seconds, and then they shifted back into the shadows. That’s when photography is a game of anticipation and experience.
Exploring the patterns of New York City’s street life in a 12-week column for the New York Times.
ISO 320 1/180 28mm
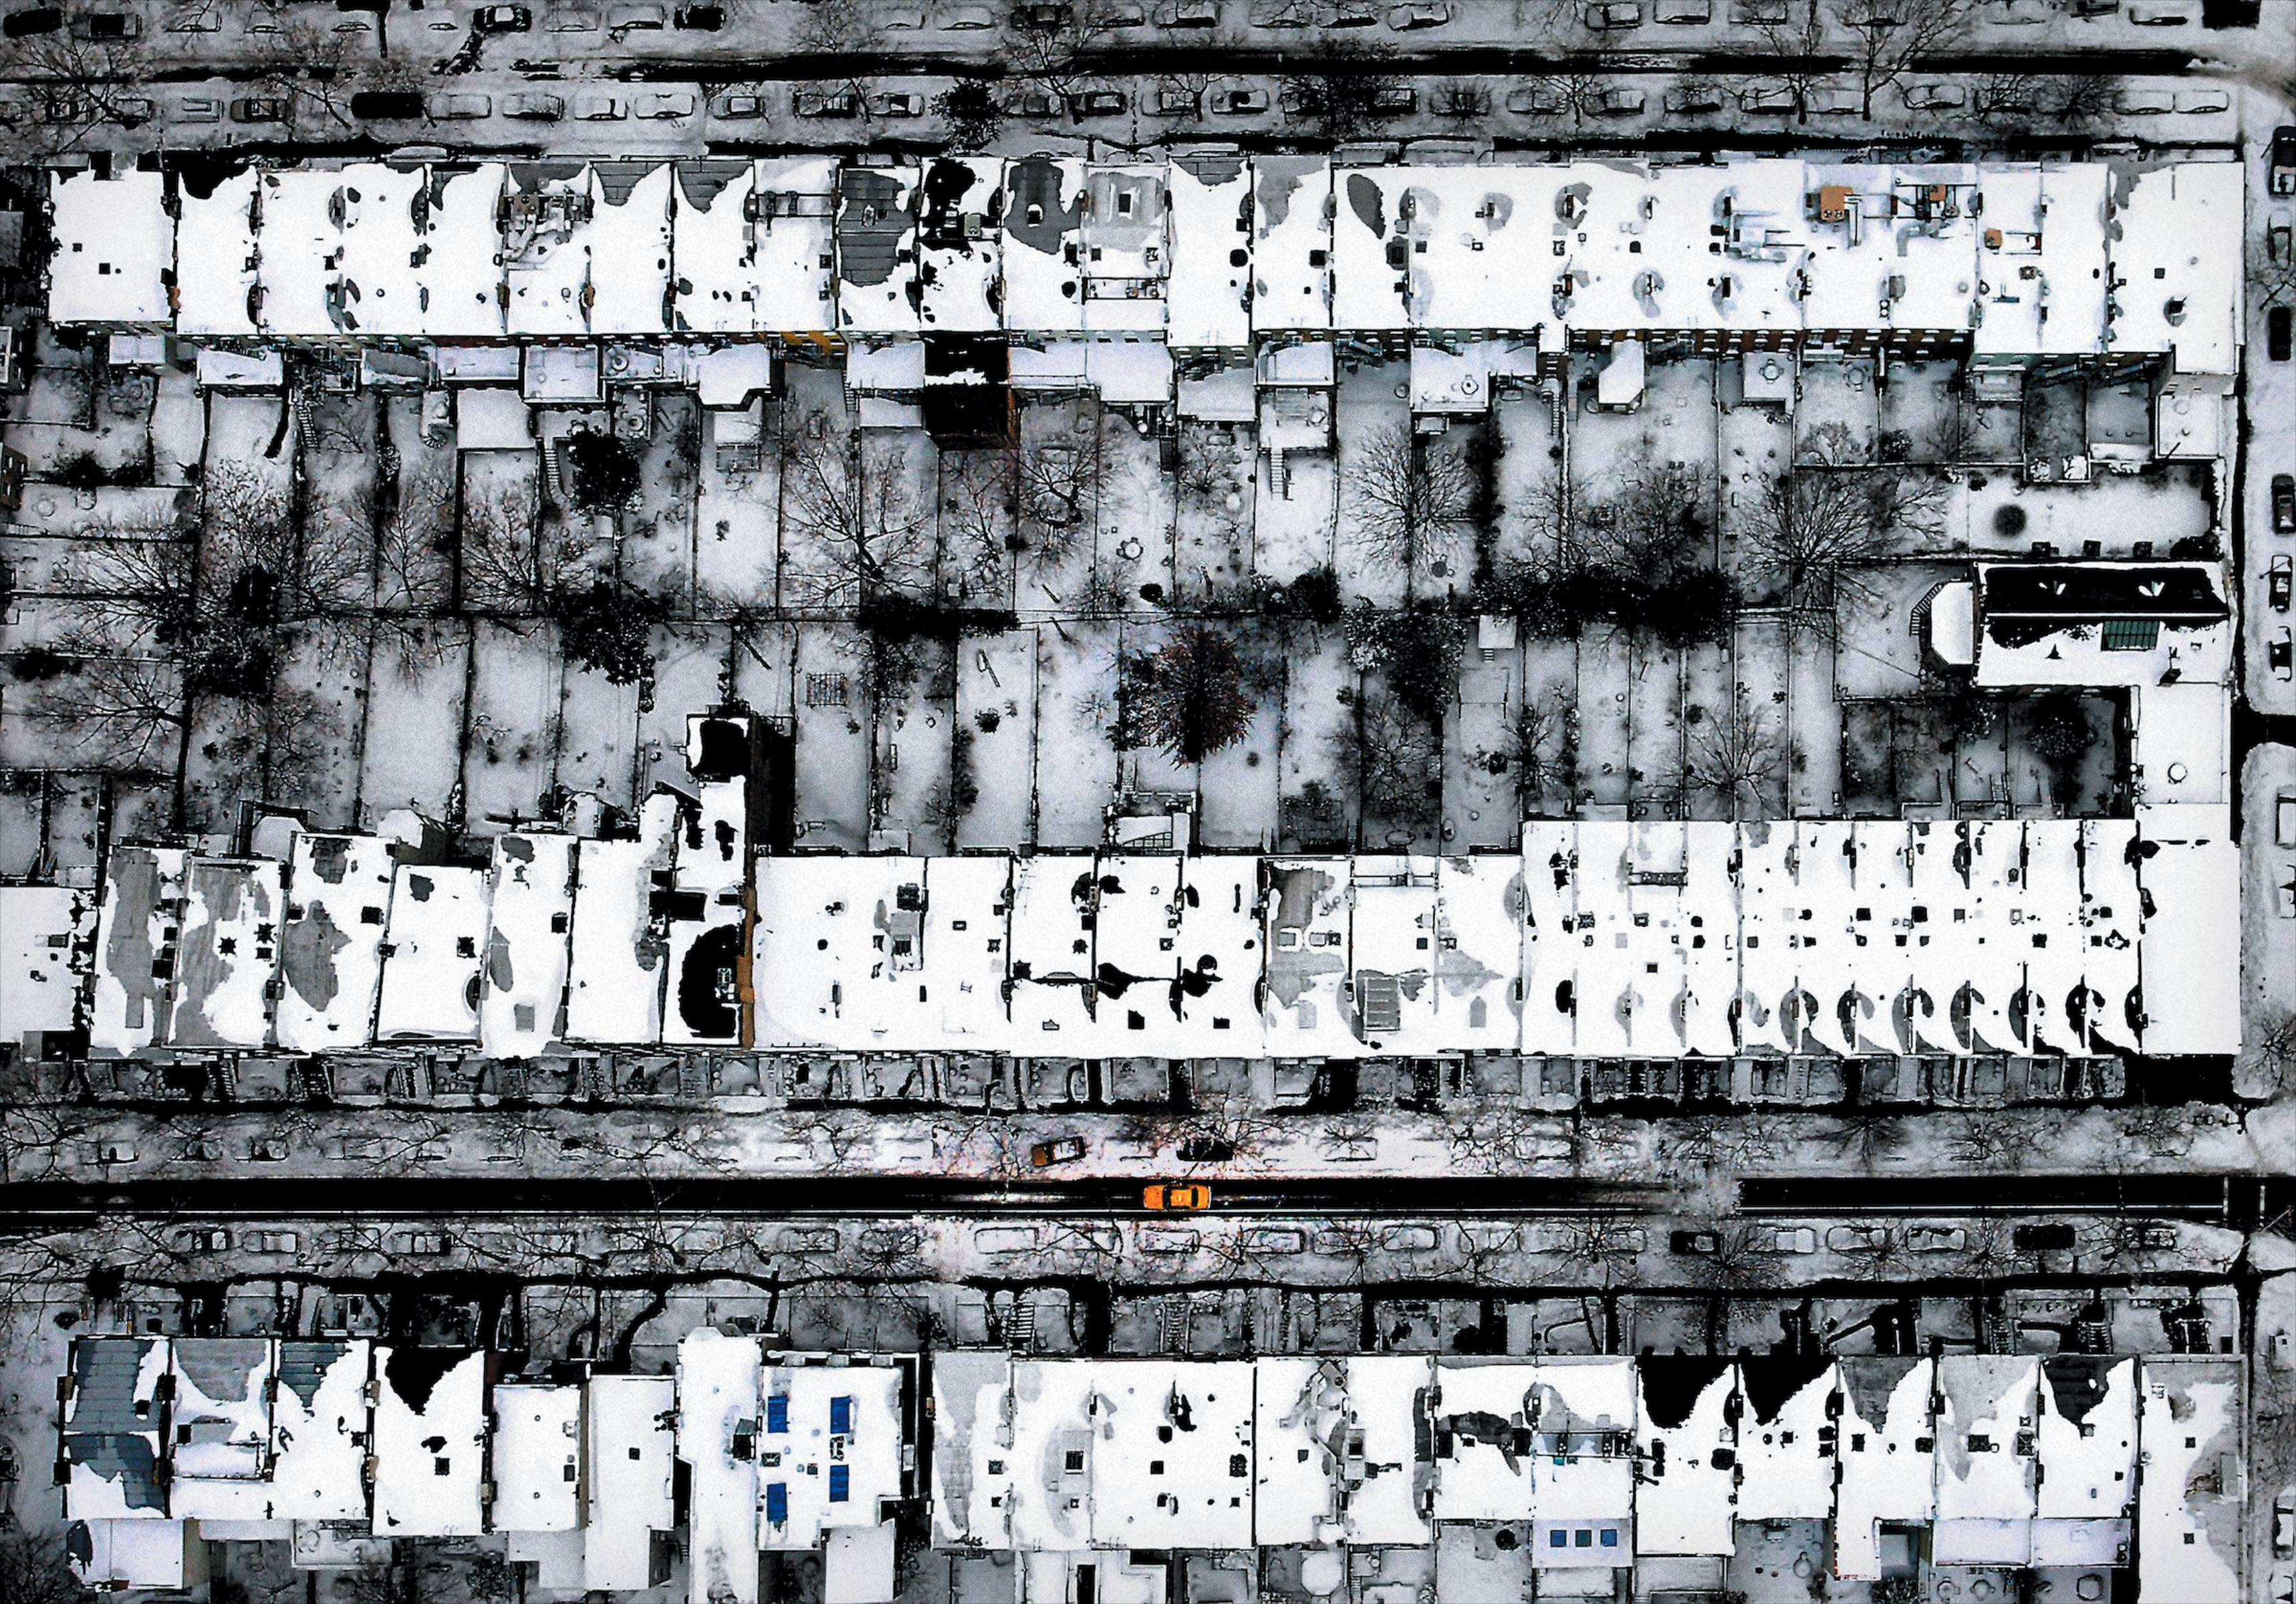
A lone taxi drives a narrowly plowed street in Flatbush, New York (2002).
ISO 800 f/2.8 1/800 24-70mm
The Magic of Overcast
This was shot during a huge snowstorm that dumped a few feet on New York City. This is a very different type of light that I love, overcast. Most photographers are unhappy with this quality of illumination because there’s no directional light, but I consider overcast light to be a giant soft box from God.
When you have overcast or very diffused light that’s very even, you learn that you need to rely a lot on geometry and color, or lack of color, to help make your frame. There’s always an opportunity to silhouette someone against a beautiful overcast sky, but for the most part the light tends to be very even and does not have much direction to it, especially from the air.
Why this image speaks to me is because it makes the extraordinary out of the ordinary. There’s no news value or anything special about a cab driving up an empty street. It happens about a thousand times a minute in New York. But what you have is a perfect geometry of buildings with one stripe down the lower bottom third, adhering to the rule of thirds.
Everything is monochromatic. Everything is black and white. If you look really carefully, you’ll see little colorful windows popping out of the buildings. But for the most part, the entire image is black and white naturally with the snow and the trees. The one spot of color is that one lone cab on the street.
Overcast light is a very different kind of light, but one that is just as capable of delivering a great result.
When you have overcast or very diffused light that’s very even, you learn that you need to rely a lot on geometry and color, or lack of color, to help make your frame.
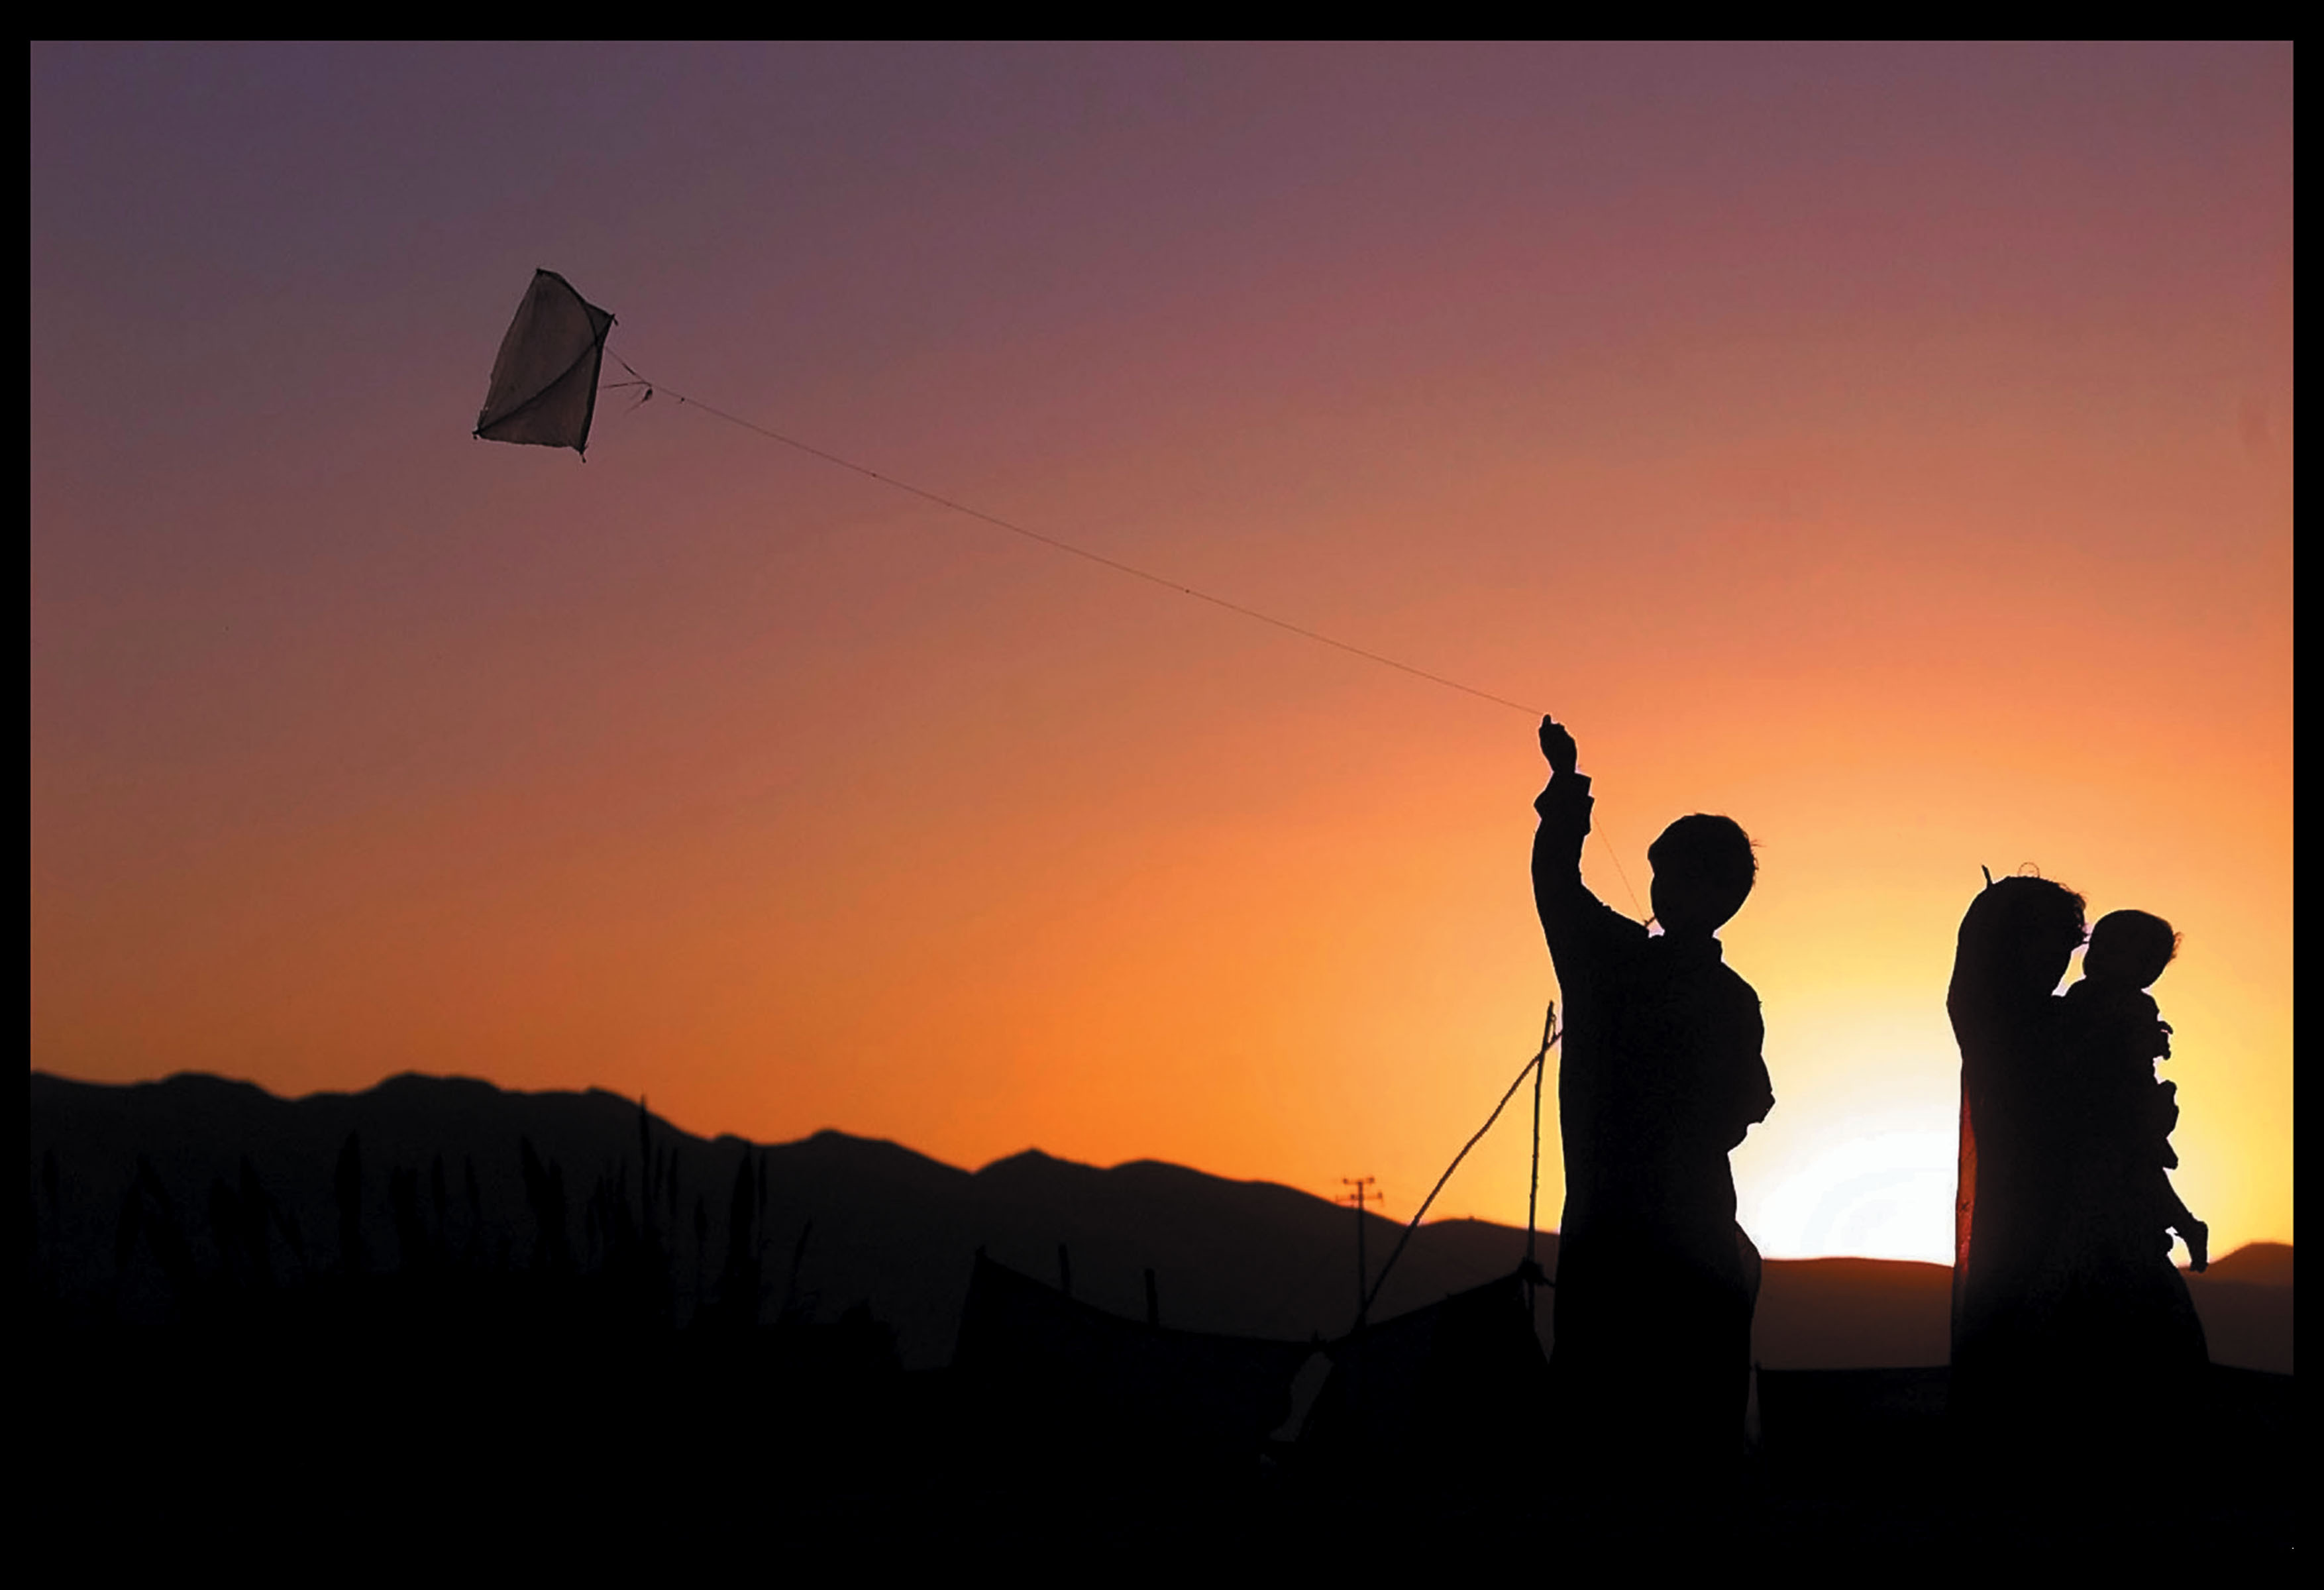
Amid all the chaos in the world, here were these two kids with their younger sibling flying a kite, which for me symbolized hope and freedom.
Using a Classic Approach
Very often with digital cameras, you can’t afford to have the sun flaring into your lens and keep the tonal range unless you have a really great sensor, or the air is a bit diffused as it is in Los Angeles. If flare happens, you lose contrast and color saturation. However, there are times when you do want to point the camera toward the light.
For this photo I waited for the sun to drop beneath the hill, and then used one of the oldest tricks in photography, which is to create a silhouette. It’s one of the best ways to obliterate a distracting background or to make an image that pops, especially when you’ve got a gorgeous colored sky. Simply expose for the sky and allow the shadows to go dark from underexposure.
With respect to lens choice, you don’t want to go so wide that the people become too small, or so tight that you can’t appreciate how the sky changes color from yellow to pink to blue.
At the time, this photograph spoke to the only sign of hope I saw after 9/11. Every image I was shooting was one of death, destruction, and misery, and this is one of the images I kind of threw out there as a sign of hope. Amid all the chaos in the world, here were these two kids with their younger sibling flying a kite, which for me symbolized hope and freedom. That’s the significance of this image to me. It’s not a masterful image, by any means, but at the time it was taken, I thought it was necessary.
A young man flies a kite as the sun sets over the Punj Puti refugee camp in Quetta, Pakistan.
Facing Technical Challenges
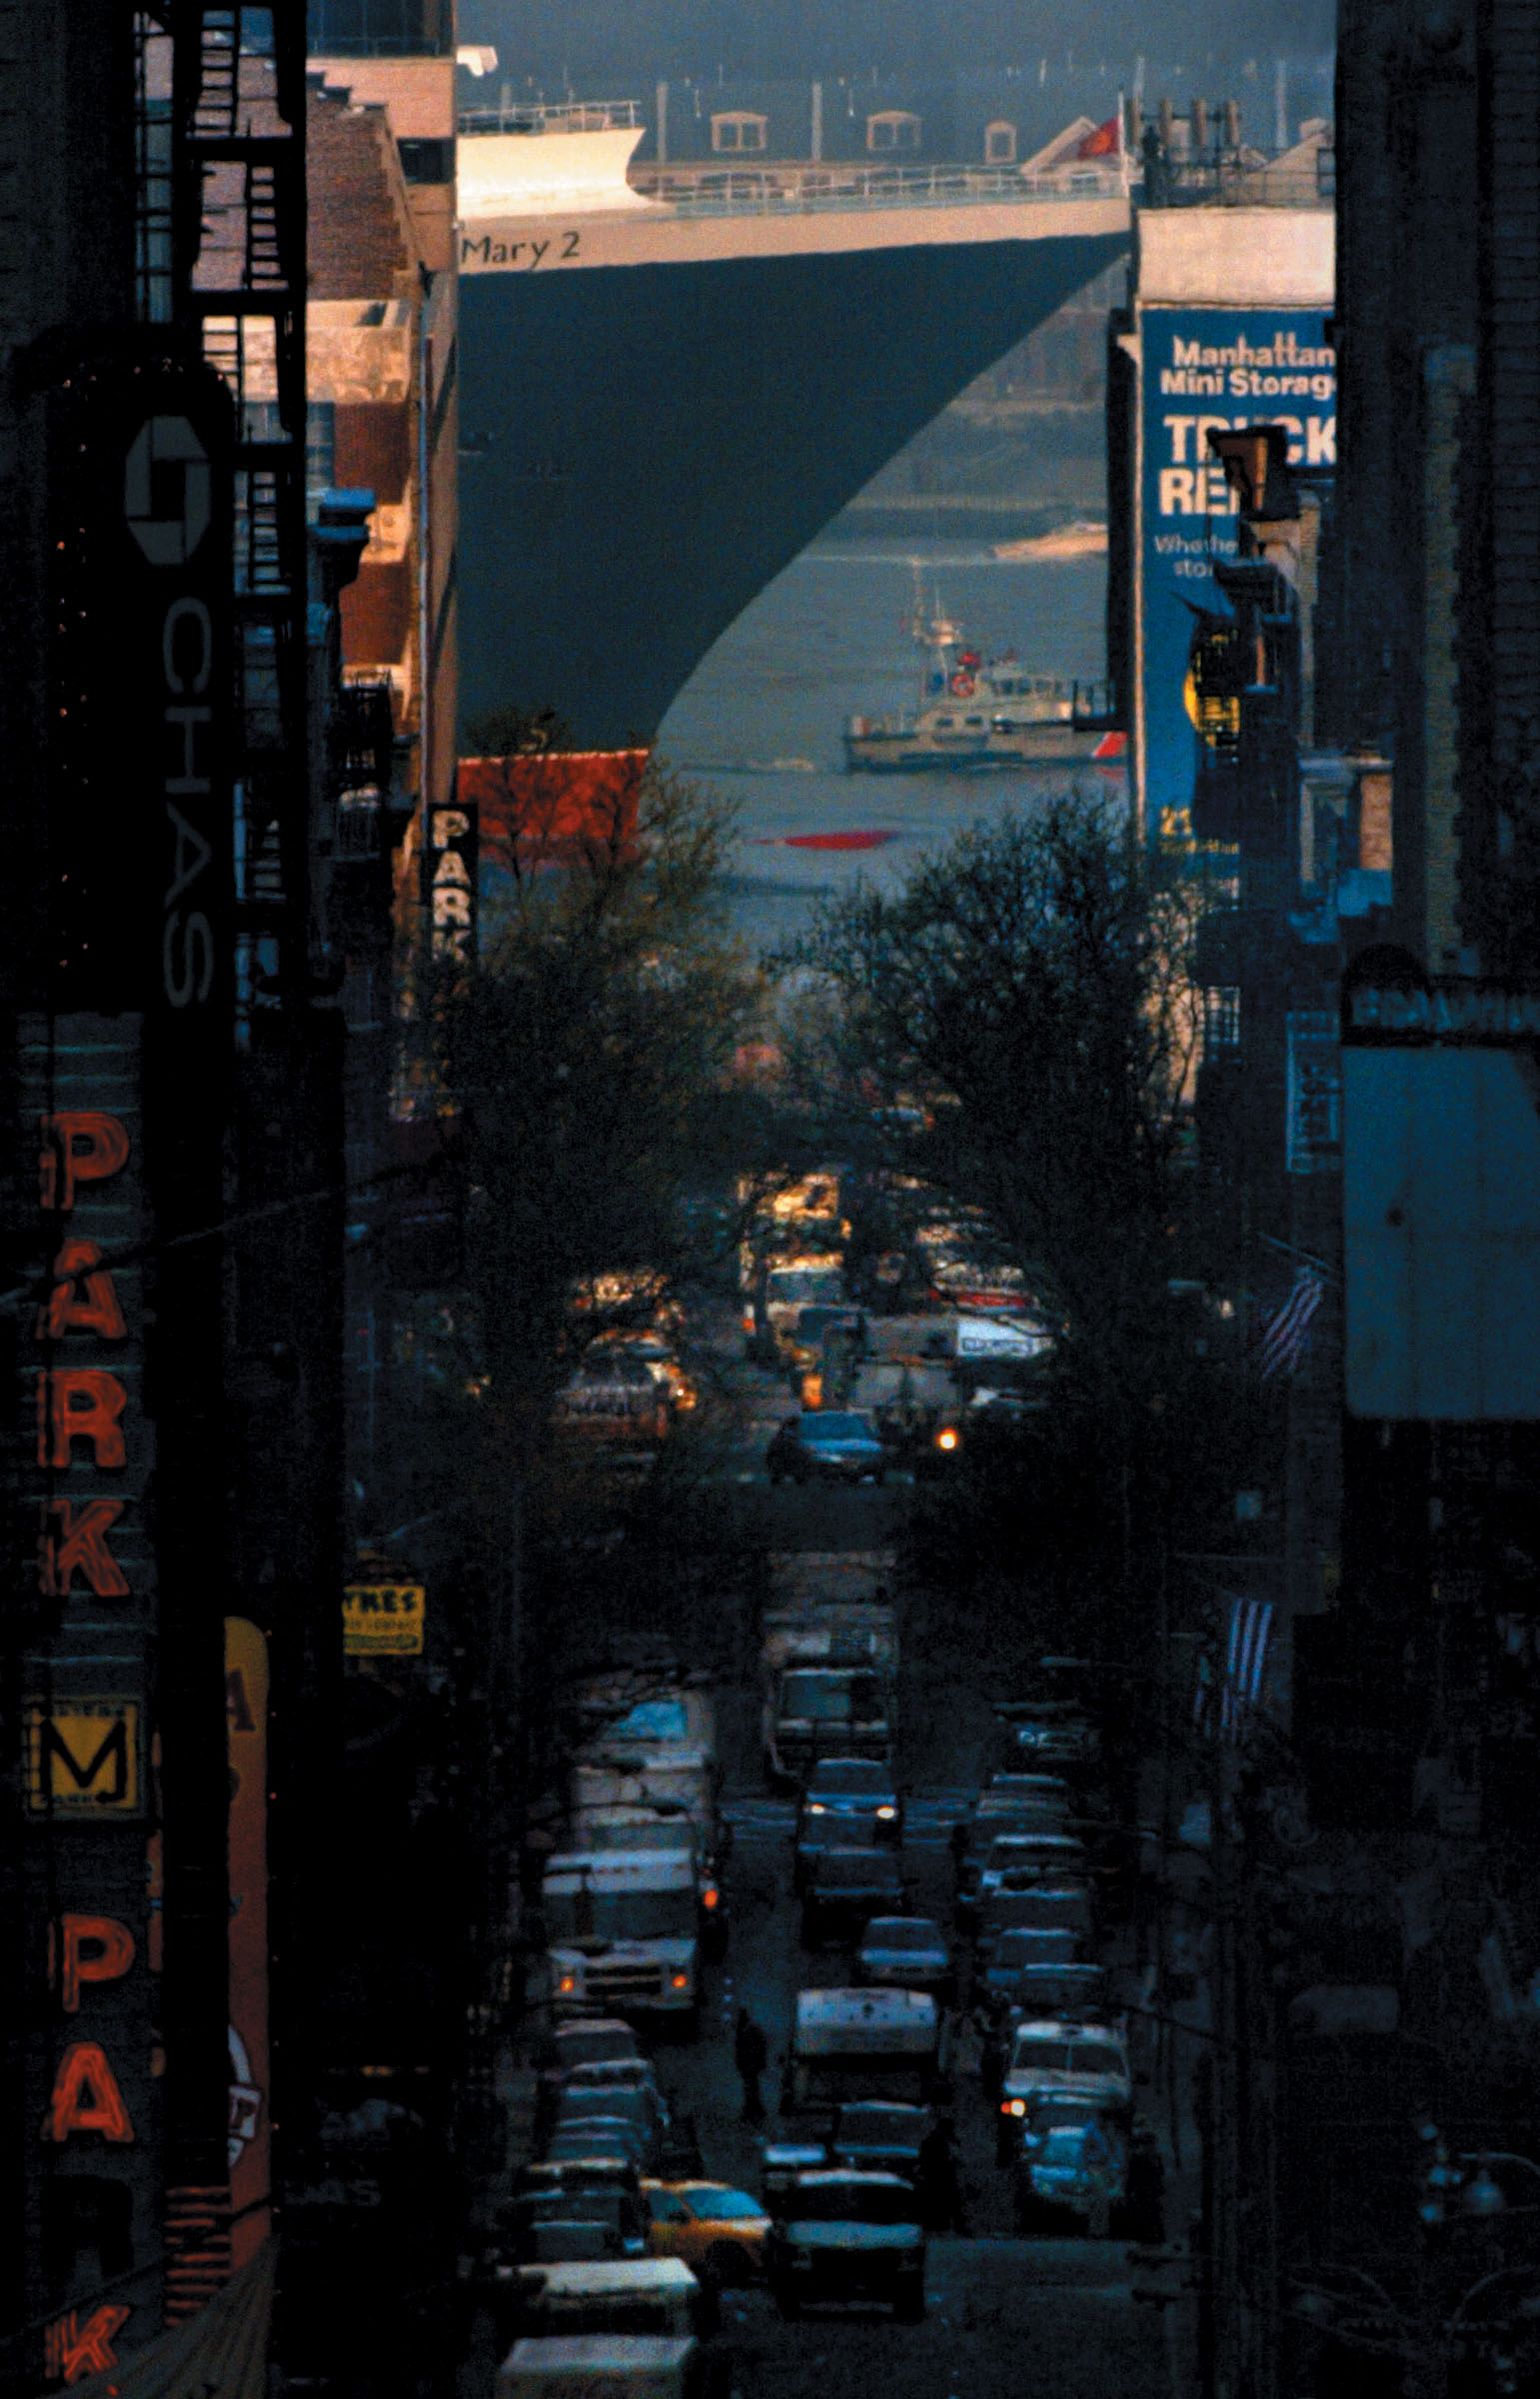
This is an image of the RMS Queen Mary 2, which at the time was the largest passenger ship ever built by man, and here she was pulling into New York City. It was shot from the roof of Grand Central Station looking down 44th Street, just one block from where the New York Times Building was at the time, and I think it shows the juxtaposition of this incredible large-scale ship with the downtown life of Manhattan. It’s a very unique New York moment; I think a big part of what any photographer does is to try and juxtapose elements to kind of show either a similarity or a difference, and it worked out quite well in this case.
In terms of technique, this was actually a pretty challenging image for two reasons. On the one hand, the exposure was all over the place. This was shot very early in the morning with the sun behind my back, and as you can see, the sun is hitting the hull of the ship but not any of the streets in the foreground.
You’ve got to remember there are lots of tall buildings in Manhattan, the sun rises of course from the east, and we’re shooting looking straight west. So the good thing that I did was to shoot this image in Raw mode. Had I shot this in JPEG, it would never have worked, but the Raw image allowed me to hold the detail in the highlights and also to pull out the shadows later, and that was pretty important.
The second thing I did involved a lot of luck. I shot with two cameras just to be safe—always a good idea. On the one hand, I shot with an 800mm lens, as this is what I thought would be my main image or where my main image would come from.
Using a PocketWizard wireless radio transmitter, each time I made a frame on my main camera, the PocketWizard would trigger a second frame. I used a 70–200mm lens, a significantly wider lens than the super telephoto I was using on my main camera. The idea is every time I fired a picture from the main camera, I would get two images for the price of one.
But while I had been practicing all morning using the 500mm lens on small tugboats and police boats, when the Queen Mary 2 arrived, it filled so much of the 500mm frame that I knew I was in really bad shape. But I kept shooting because I knew that my other camera was going to have a backup image, and that’s the image you see here, the image that showed up on the front page of the New York Times.
In a westbound view up West 44th street, the Queen Mary 2, the world’s largest passenger ship, makes its way to Pier 92 as its maiden voyage to New York from Southhampton, England, comes to a conclusion (2003).
ISO 500 f/10 1/640 800mm
Respecting the Process
Just as you have to learn the basics of aperture, shutter speed, exposure, and how to use your camera and lenses, you have to learn how to see and use light. You need to respect the techniques before you can actually accomplish what they’re intended for.
It’s important to understand that you’ve got to learn your scales before you can improvise as a musician. The same idea applies to photography. But I think the most important part is to understand light, accept it, and to enjoy learning about it. Because there are few things as fun as seeing and discovering a wonderful quality of light and using it to serve your vision.
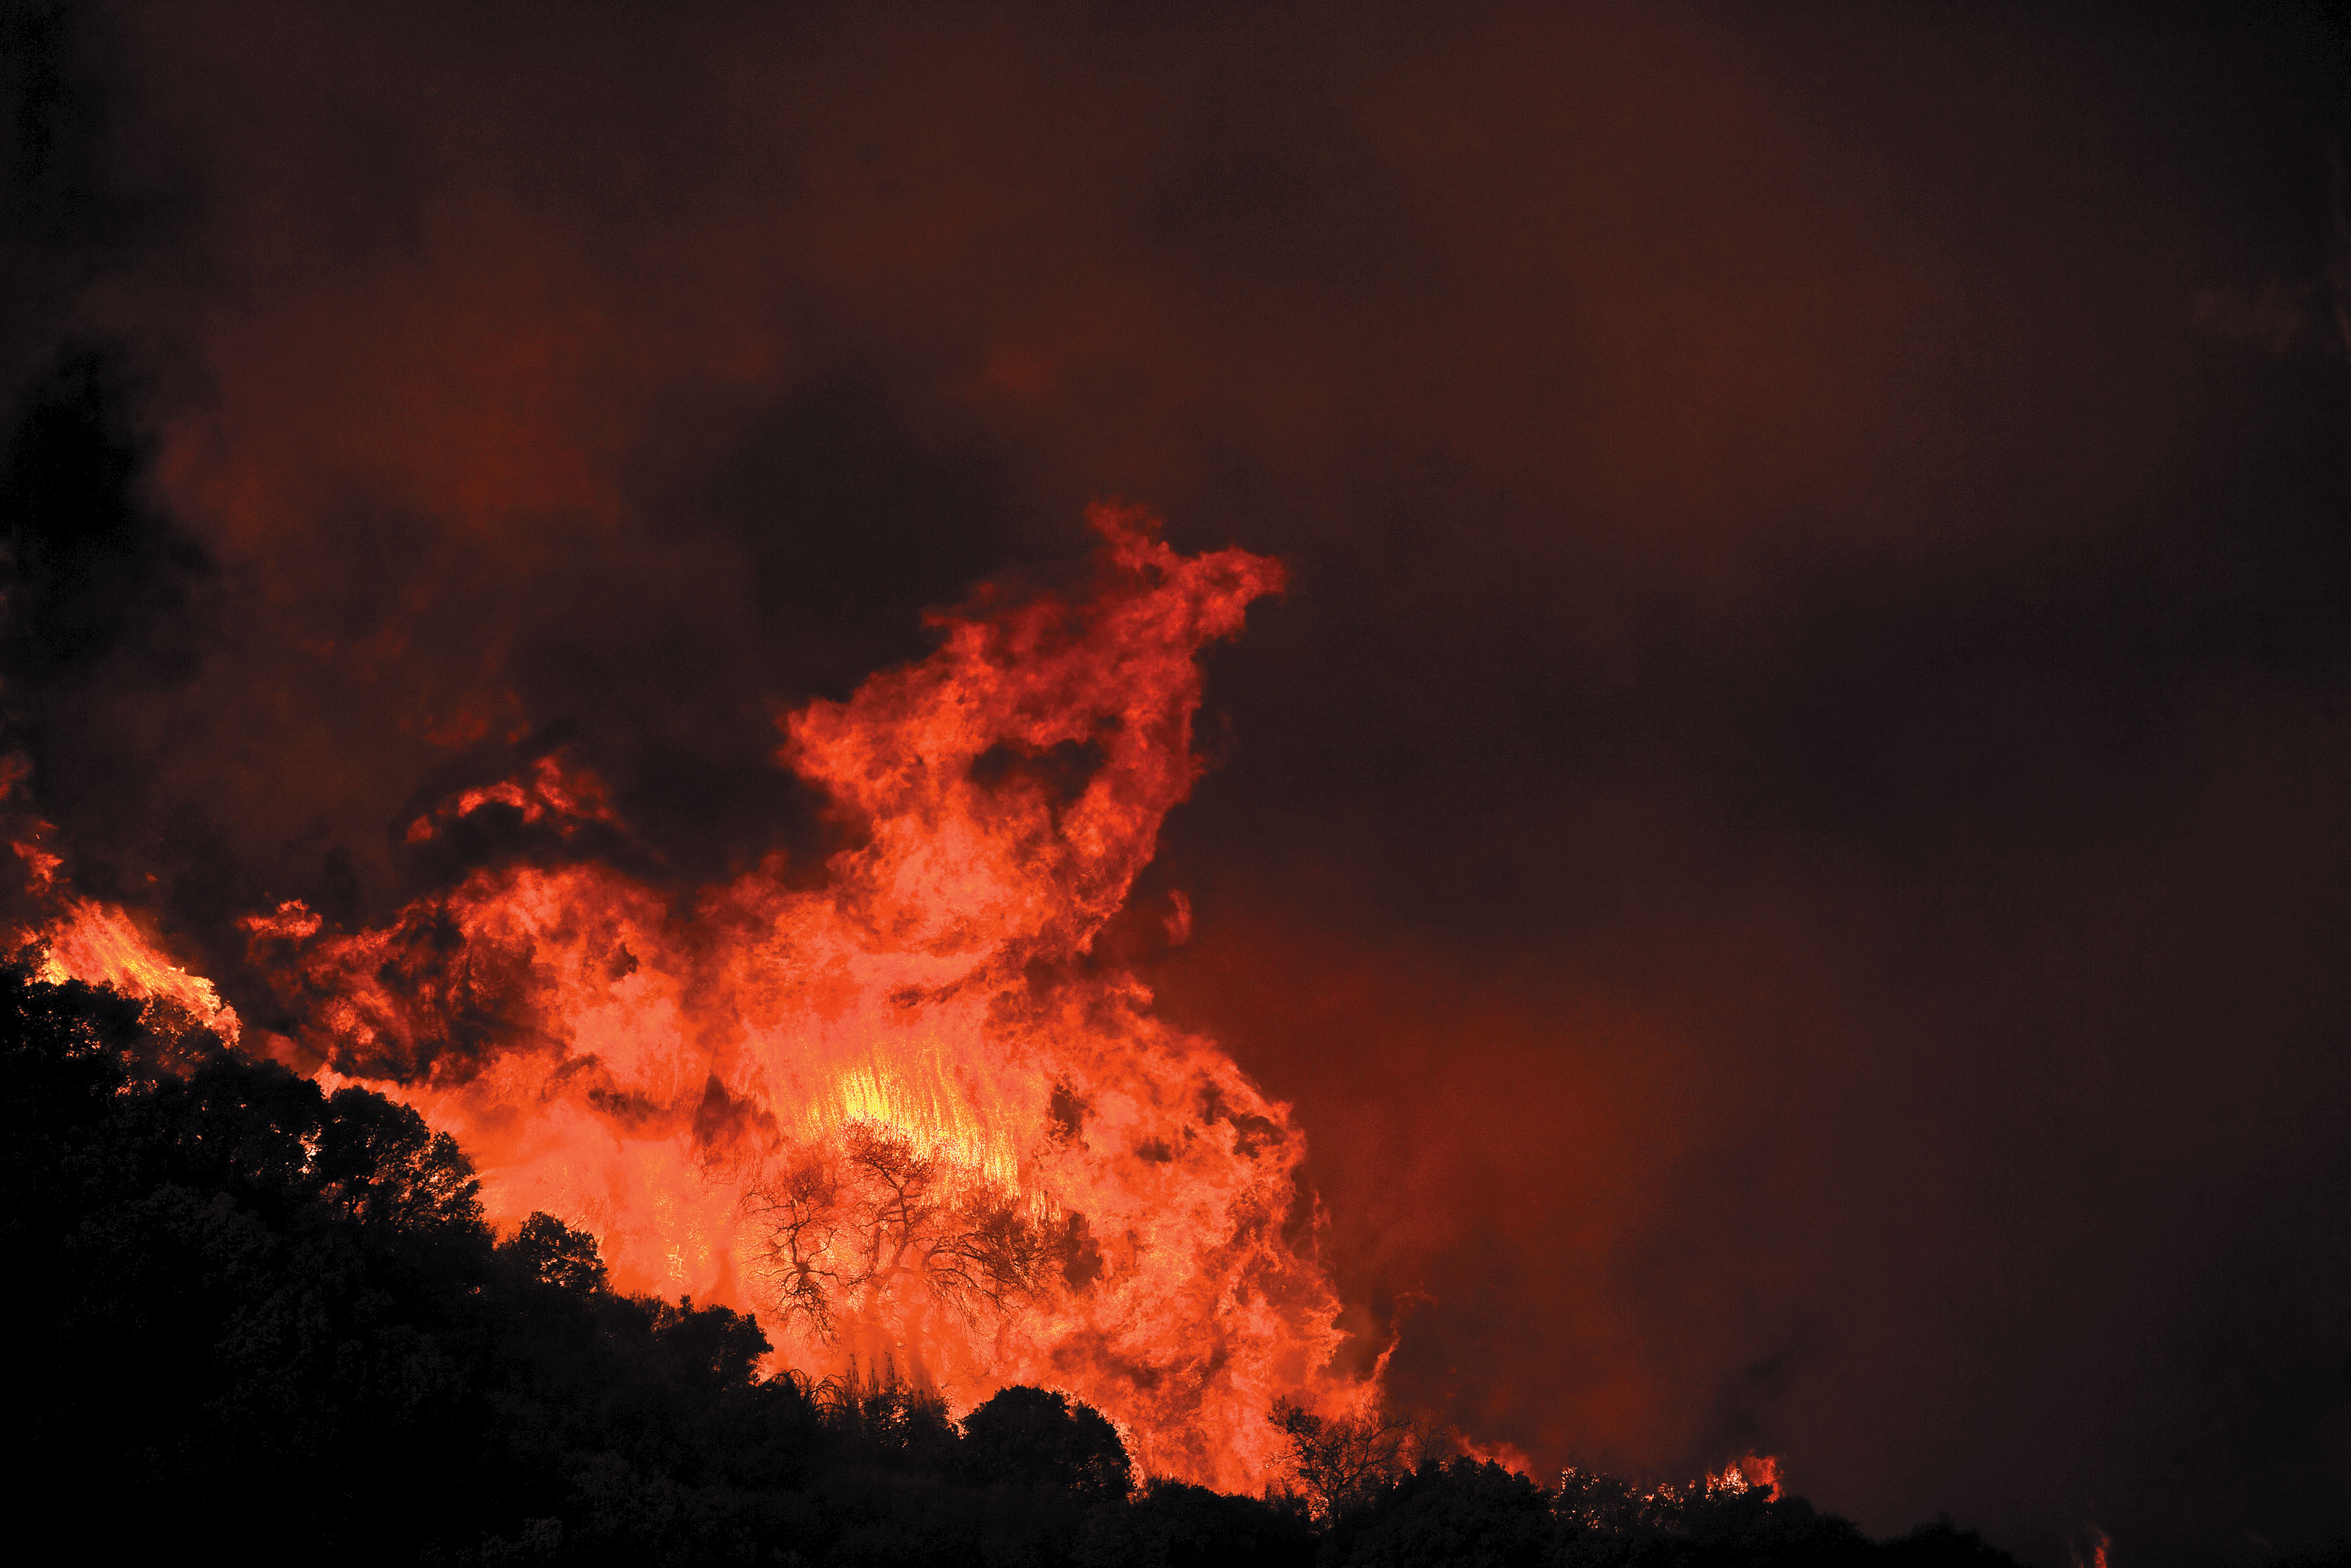
Hotspots flare up as firefighters battle the Zaca Lake wildfire north of Santa Barbara, California, in 2007.
ISO 200 f/4 1/1250 500mm
