5. Working with Events
In this chapter, you learn all the ways you can organize your photos by events.
→ Viewing event information
→ Setting and changing key photos
→ Creating new events
→ Merging and splitting events
The great thing about digital photography is that you can take as many photos as you want because you are no longer constrained by the cost of buying and developing film. However, taking more pictures than you may ever need can make organizing and navigating your photographs a chore.
Luckily, iPhoto lets you keep your photos organized with zero effort on your part. It does this by using the Events feature. So, what is an event? It’s a collection of your photographs that spans a certain time frame, automatically grouped by iPhoto upon import from your camera. By default, every time you import photos from your camera, iPhoto sorts them into events based on the day they were taken.
Changing Events Autosplitting Time Frame
iPhoto calls the sorting of your photos by date or time frame autosplitting. So if you import photos that were taken over a period of three days, iPhoto sorts, or autosplits, those photos into three separate events. However, you can change the default timespan iPhoto chooses to split events into.
1. Choose Preferences from the iPhoto menu bar.

2. Click the General tab.
3. From the Autosplit into Events drop-down menu, choose to have iPhoto group imported photos by one event per day, by one event per week, or into two-hour or eight-hour gaps.
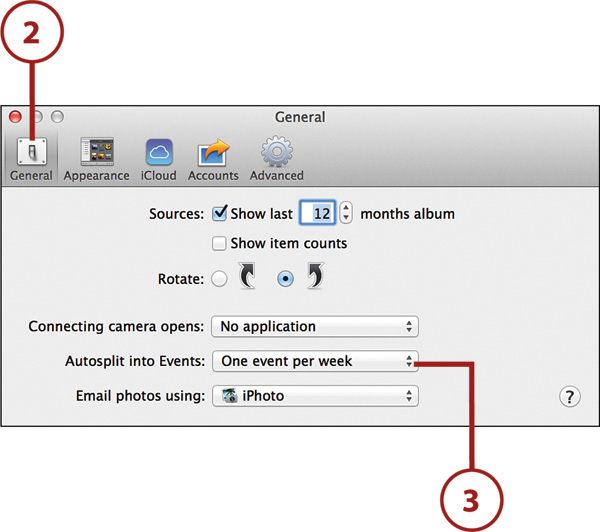
Times Are A’Changing
Changing events’ autosplitting time window from one event per day to two- or eight-hour gaps is handy if you were running around and took photos in several different locations on the same day. Provided there was at least a two-hour window between the times you took the photos at those different locations, you have a better chance of iPhoto sorting those locations into their own events.
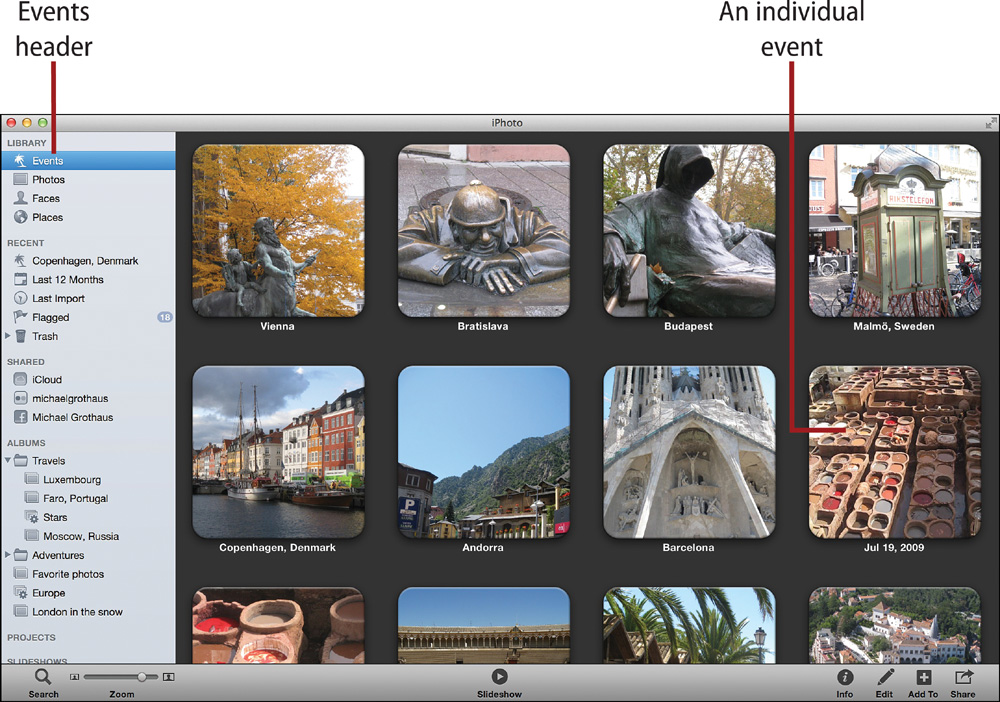
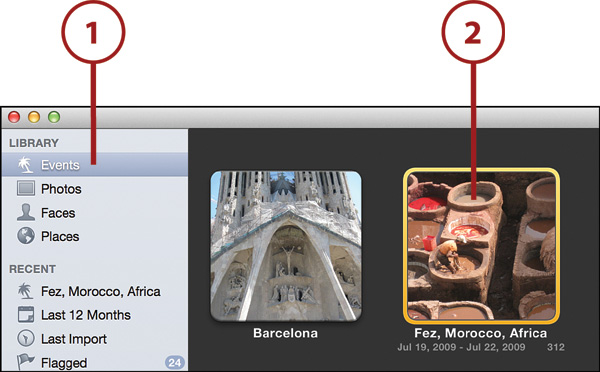
Viewing Event Information
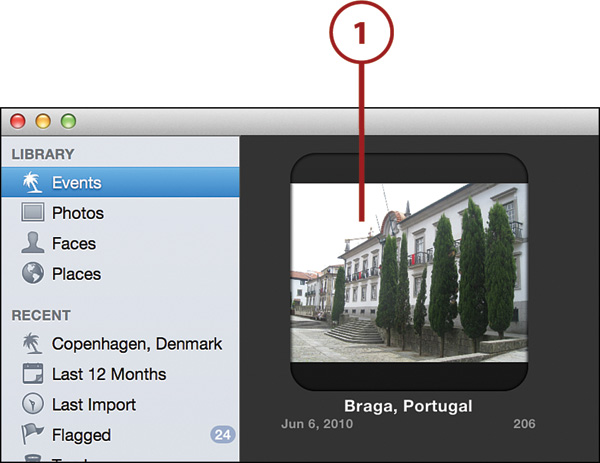
After you’ve imported your photos, they appear as events in the main body of iPhoto’s window when you have Events selected in iPhoto’s source list. Notice that your events are arranged one after the other as a series of squares with rounded corners. There are a few ways you can interact with events at this level.
1. Move your mouse’s cursor horizontally over an event to flip through the thumbnails of all the photos in that event in sequential order.
2. Double-click an event to be taken inside of it and see all the photos it contains.
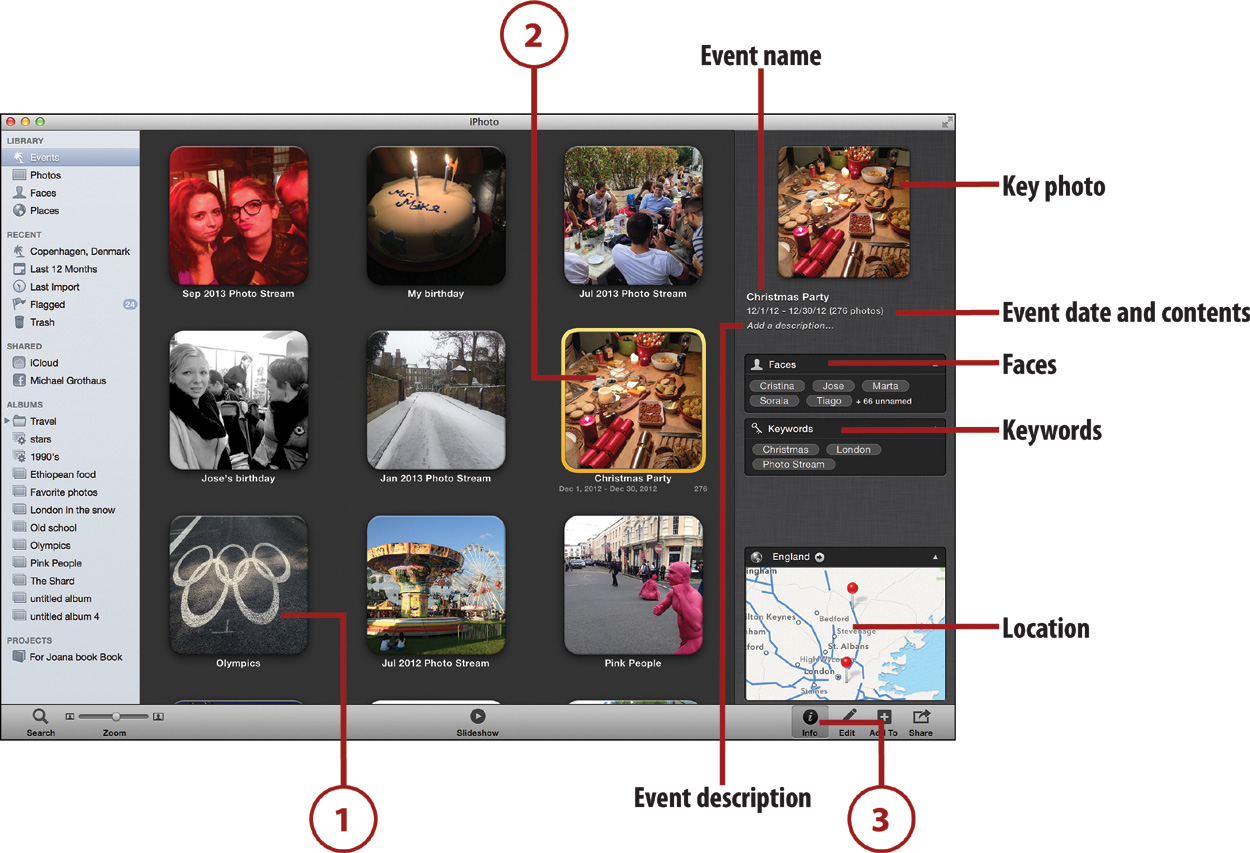
3. Click the Info button in iPhoto’s toolbar to get more information about the selected event. The event’s Information Pane shows you the following information:
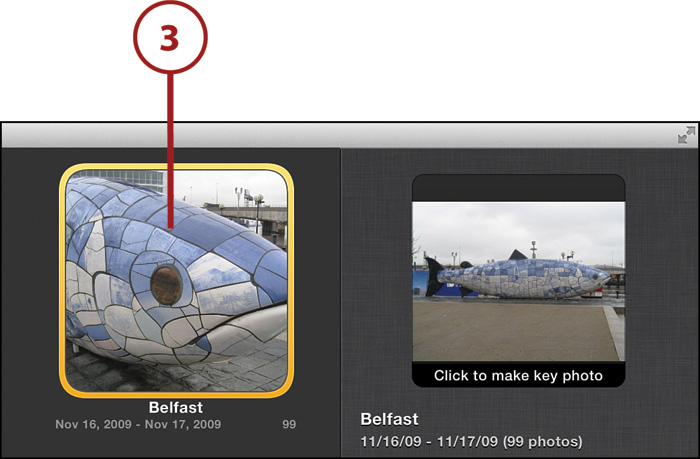
• Key photo: The key photo is the photo that represents the event. It’s a single photo from all the photos contained in the event.
• Event name: By default, the event is named after the date when the photos were taken. You can change the name of the event just like you would change the name of a single photo. Click its name in the Information Pane, and type in any name you want. You can also change the event’s name by clicking its current name below its thumbnail in the Events window.
• Event date and contents: Below the event’s name is the date or date range of the photos contained in the event. The number of items contained in the event is also displayed.
• Event description: You can write a short summary of the event here if you want.
• Faces: The Faces bar tells you who is in the photos contained in the event.
• Keywords: This lists all the keywords of the photos contained in the event. You can add additional keywords by clicking in the Keyword field. Adding a keyword to an event adds that keyword to every photo in the event.
• Location: The map at the bottom shows you the locations where the photos were taken.
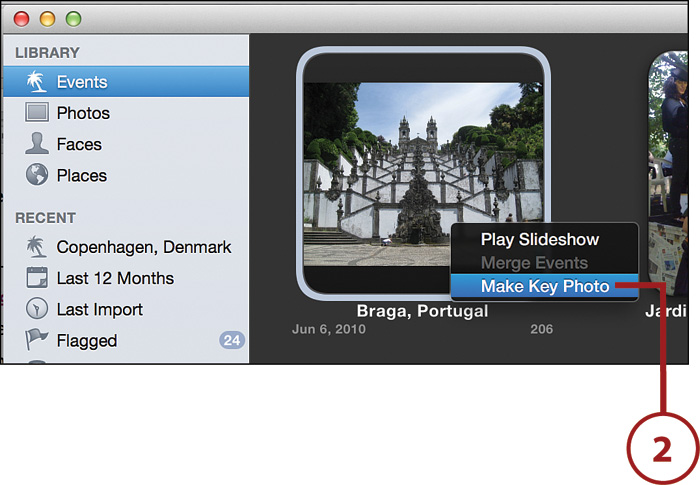
Setting an Event’s Key Photo
Each event has a key photo that visually represents all the photos in that event. By default, an event’s key photo is chosen by iPhoto, and it is always the first photo in the event. However, you can change any event’s key photo—and you probably should. To change an event’s key photo, you have five options:
A Good Photo Is Key
Selecting a good key photo is—excuse the pun—key. A good key photo lets you recognize an entire group of photos just by seeing that one image. For example, if you took your kids to the pumpkin patch, your first photo might have been of an ear of corn; however, a more representational photo of the event would probably be the one you took of a huge pumpkin.
1. With events selected in the source list, run your mouse over any event so you are skimming through the event’s photos. When you find a photo you like, stop skimming and press the spacebar on your keyboard. This sets the selected photo as the key photo. Or...
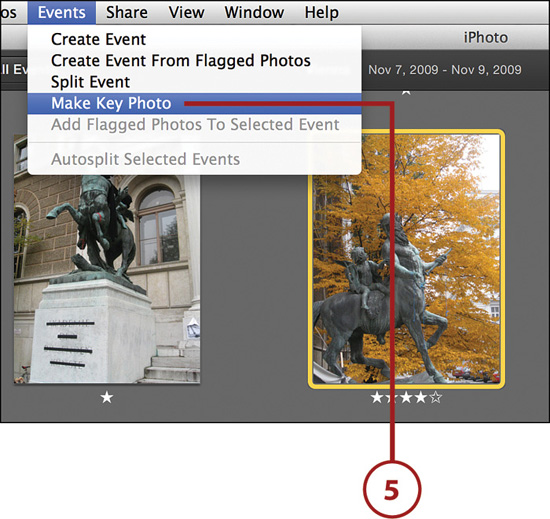
2. ...with events selected in the source list, run your mouse over any event so you are skimming through the event’s photos. When you find a photo you like, stop skimming and right-click. From the contextual menu that appears, select Make Key Photo. Or...
3. ...select an event so a yellow box highlights it. In the event’s Information Pane, skim your mouse over the event so its photos are displayed one after another. Click the photo you want to set as the key photo. Or...
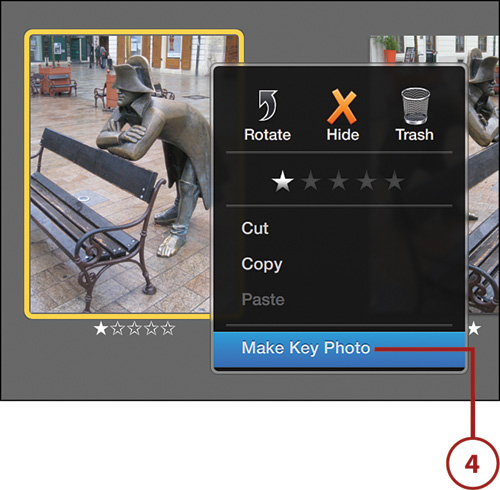
4. ...double-click an event to view its contents. Scroll through the photos in the event, and when you find the one you want to make the key photo, right-click it and from the contextual menu that appears, select Make Key Photo. Or...
5. ...double-click an event to view its contents. Scroll through the photos in the event, and when you find the one you want to make the key photo, select Events, Make Key Photo.
Creating New Events
You aren’t limited to only the events iPhoto has automatically created for you. iPhoto gives you the power to create new additional events based on three criteria: creating events using specific photos, creating events using flagged photos, and creating empty events.
Create a New Event Using Specific Photos
Creating events using specific photos enables you to easily combine photos, no matter where you took them or the length of time between taking them, into a single event.
1. Select Photos in iPhoto’s source list. The Photos list shows you every single photo in your library regardless of what event or album it is located in.
2. Select the photos you want in your new event. To select a group of photos, click and drag your mouse over a selection of them. To select photos that are not near each other in the library, hold down the Command key on the keyboard, and click each desired photo so that a yellow box highlights them.
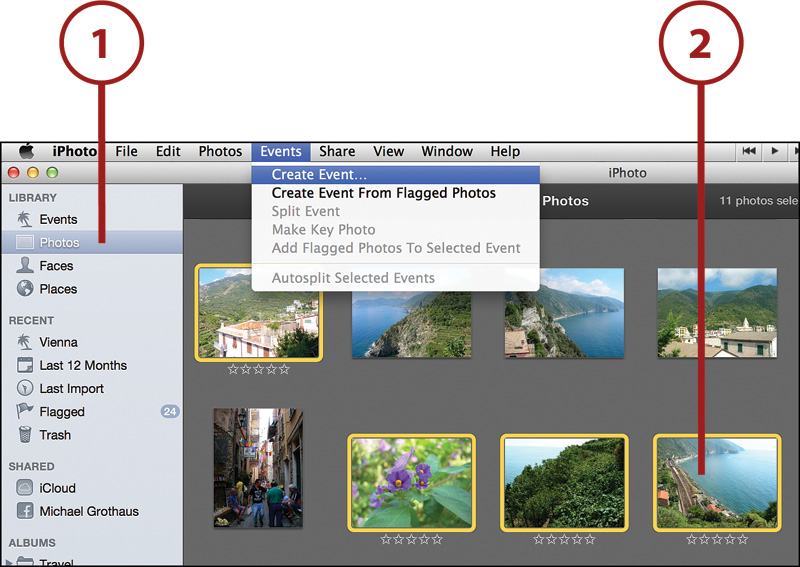
3. Choose Events, Create Event from the menu bar. You see a confirmation dialog box.

4. Click Create.
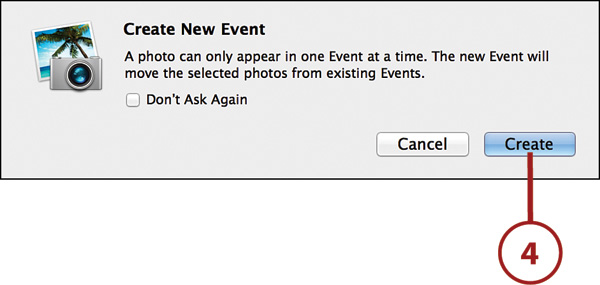
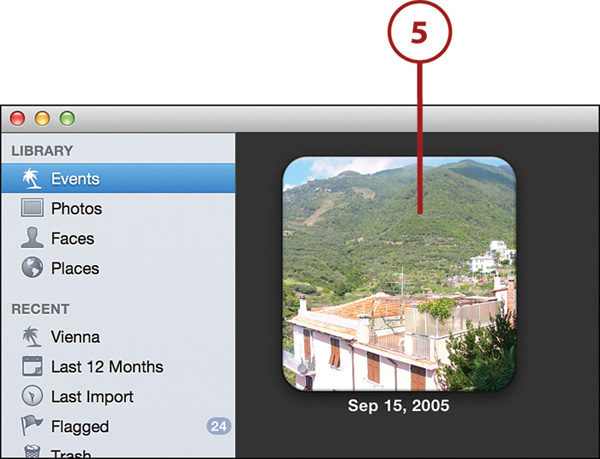
5. A new event is created in your Events list. The new event is named based on the date of the first photo in the event, so you might need to scroll through your Events list to see the new event if the first photo was taken well in the past.
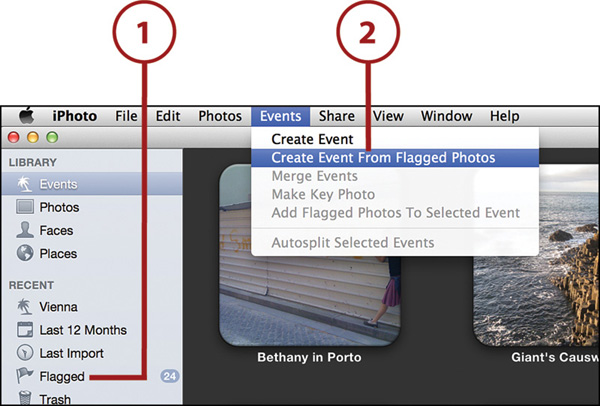
Create a New Event Using Flagged Photos
You can quickly create a new event using the photos you have previously flagged.
1. Make sure you have flagged the photos you want in your new event.
2. Choose Events, Create Event from Flagged Photos. You see a confirmation dialog box.
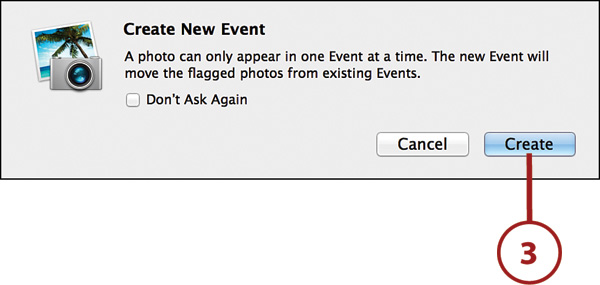
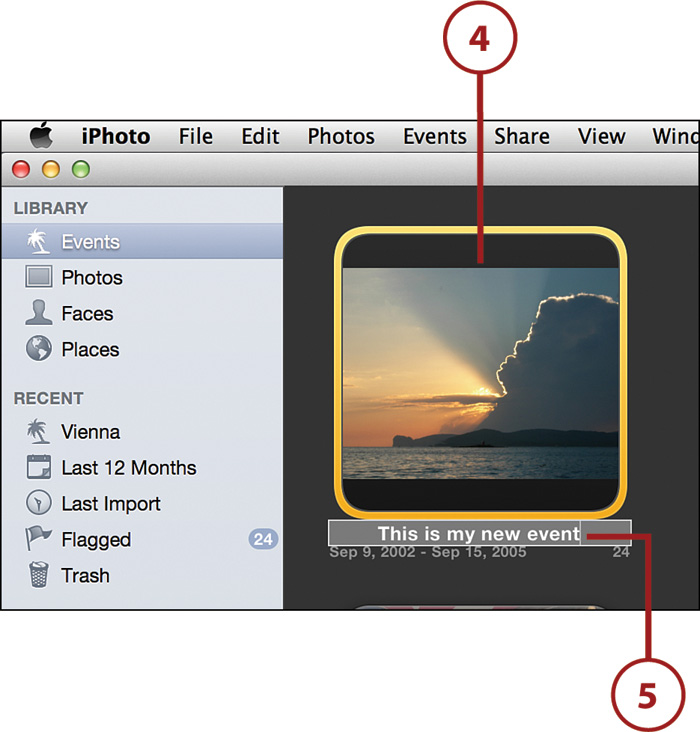
4. A new event is created in your Events list. The new event is named based on the date of the first flagged photo in the event, so you might need to scroll through your Events list to see the new event if the first photo was taken well in the past.
5. By default, the new event is called Untitled Event. Double-click it to rename it.
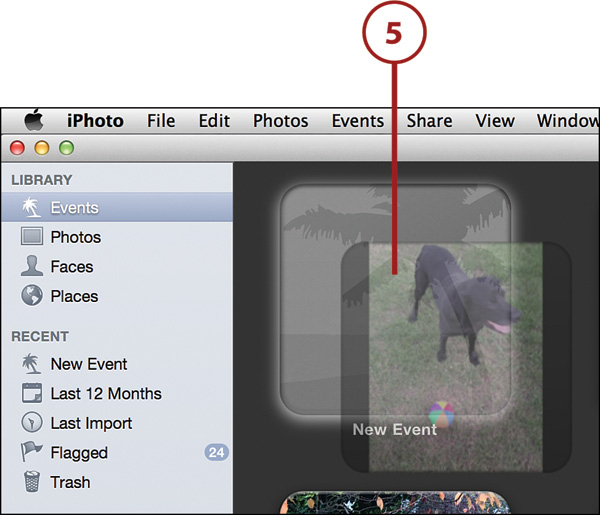
Create an Empty Event
You can create an empty event and then fill it with photos of your choosing at a later time.
1. Make sure you have selected events in the source list.
2. Make sure no events are selected in the main viewing window. You can quickly deselect an event by clicking in the empty space between events.
3. Choose Events, Create Event.
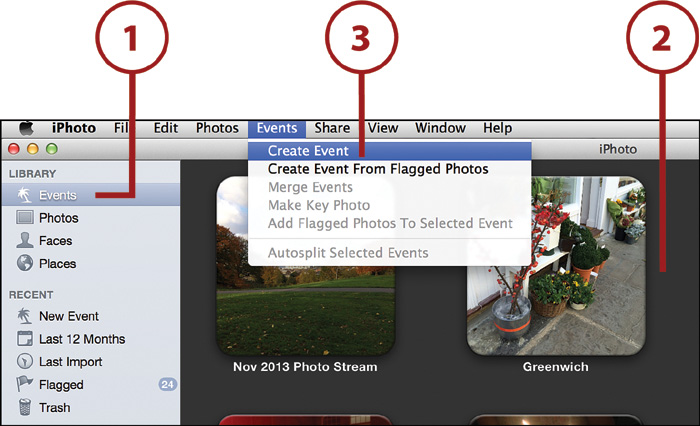
4. A placeholder event thumbnail appears in your events labeled New Event. As you can see, the event’s key photo is actually just a thumbnail of a black-and-white palm tree and sunset.

5. Add photos to this empty event by dragging and dropping them into it.
Merging Events
Merging events is a cool feature that enables you to combine two or more events into one. This is handy if you frequently visit and photograph the same location many times a year. For example, I have several events with pictures of London. I can combine them into one event so I can see all of them in one place. Another reason you might merge events is to assemble all of your kid’s birthday photos from their parties over the years into one event.
1. Select events in iPhoto’s source list.
2. Select two or more events you want to merge. You can drag a box around events that are near each other to select them or hold down the Command key on the keyboard to select events that are further away. You can also hold down the Shift key and click multiple events to select a range of events.
3. Choose Events, Merge Events. Or...
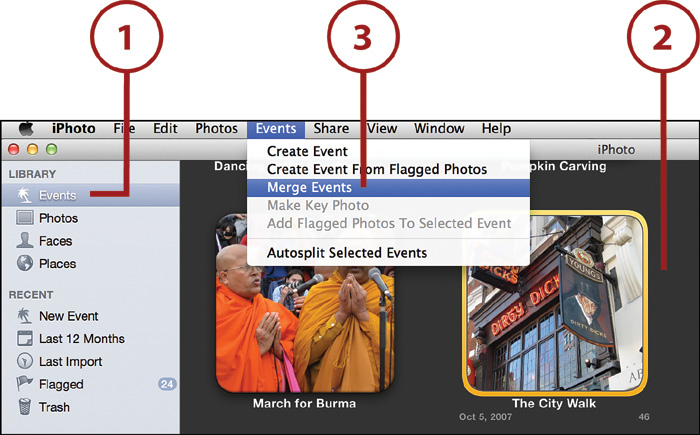
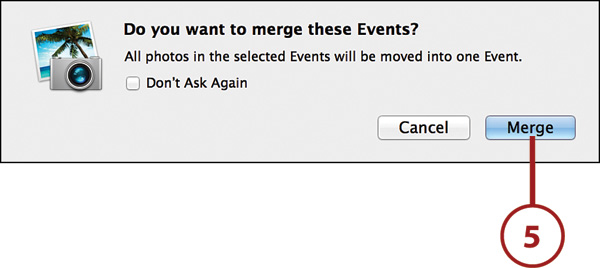
4. ...right-click any of the selected events and choose Merge Events from the contextual menu. You see a confirmation dialog box.
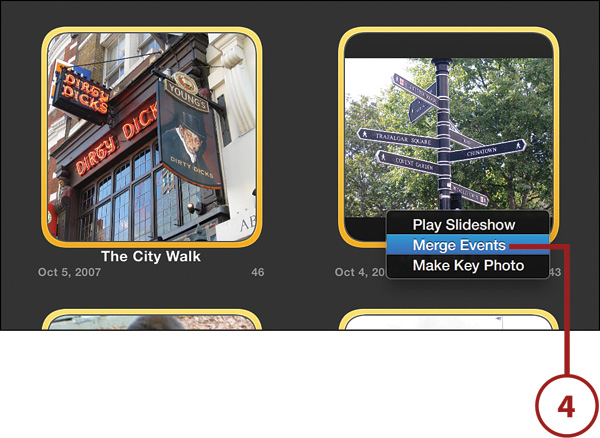
5. Click Merge.
Merging by Dragging
You can also merge two events by simply dragging one event on top of another event. Doing so adds all the photos of the dragged event to the stationary event. The name and key photo of the stationary event is the one used for the merged photos.
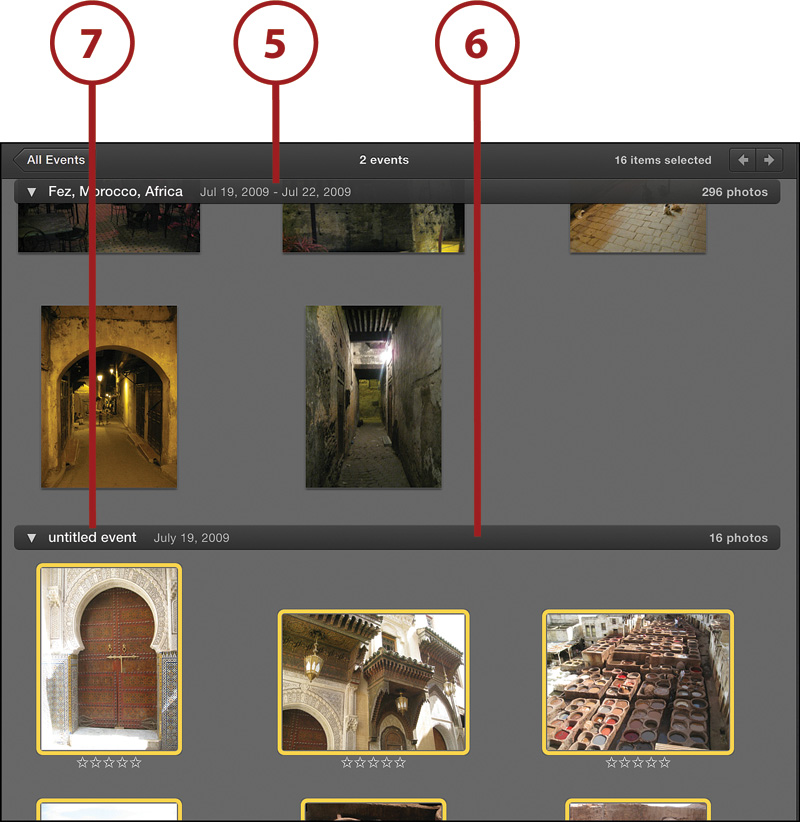
Splitting Events
Just as you can merge two events into one, you can split one event into two. This is really handy if you’ve been importing your photos using “one day” for the event autosplit settings and now want to divide that day’s photos into more manageable chunks.
1. Select events in iPhoto’s source list.
2. Double-click the event you want to split so you can see the photos in that event.
3. Find and click the photo that you want to be the start of a new event. All photos that appear after this photo are added to the new event. If you want to split an event using nonadjacent photos from the event, hold down the Command key on the keyboard and click the individual photos you want to split off from the main event.
4. Choose Events, Split Event.

5. You can see the results of an event split. In this example, the Morocco event was split. All the photos before the split remain in the original event.
6. Below the orginal event is the newly split event, titled Untitled Event.
7. Double-click Untitled Event to rename it.