6. Working with Albums

In this chapter, you discover all the ways you can organize your photos by albums and smart albums.
→ Creating regular albums
→ Creating smart albums
→ Creating folders to organize your albums
→ Sorting your albums
For those of you who like manually organizing your photographs, iPhoto offers you the option of sorting your photos into albums and smart albums.
At first glance, it’s a bit hard to tell the difference between an event and an album. After all, they are both ways of organizing your iPhoto Library and can contain multiple photos. So, what are the differences between the two?
• An individual photo can be contained in only one event, but the same photo can be placed in multiple albums.
• Photos in an event are arranged by their import sequence; you can’t manually arrange them. With an album, you can arrange the photos in any order you want.
Albums are great because you can create an unlimited number of them to suit your needs. You can arrange and sort your photos how you like, add or remove photos without affecting their other locations in your iPhoto Library, and put the same photo in two or more places at once.
No matter what, iPhoto does not keep two copies of your photos when you move them. If you have the same photo in three different albums, you still have only one copy of that photo in your iPhoto Library. When you place a photo in an album, you are effectively telling iPhoto to reference the photo from the main iPhoto Library.
Regular Versus Smart Albums
iPhoto lets you create two kinds of albums: regular and smart. Both types are similar in that they contain your photographs, but how you get photos into a regular album and a smart album differs greatly.
A regular album in iPhoto can contain any photo you manually add to it. Regular albums are great for grouping your favorite vacation shots or perhaps making a collection of photos that you want to burn to a CD and send to your grandma.
A smart album in iPhoto automatically groups any photos that match the criteria you set. For example, you might create a smart album to contain all the photos you have rated five stars. With a five-star smart album created, not only are you able to view all your five-star photos instantly, but also any photo you rate with five stars in the future is automatically added to that smart album.
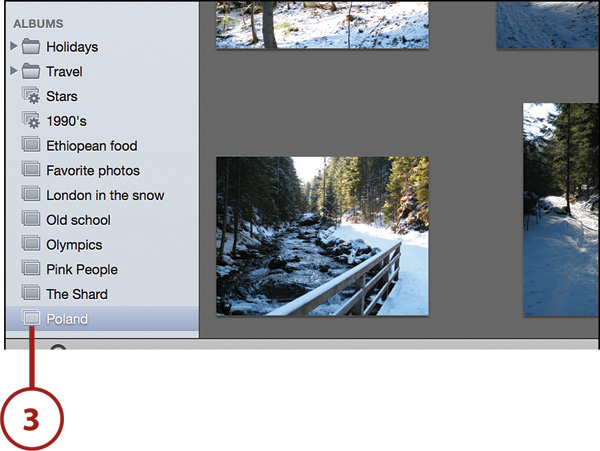
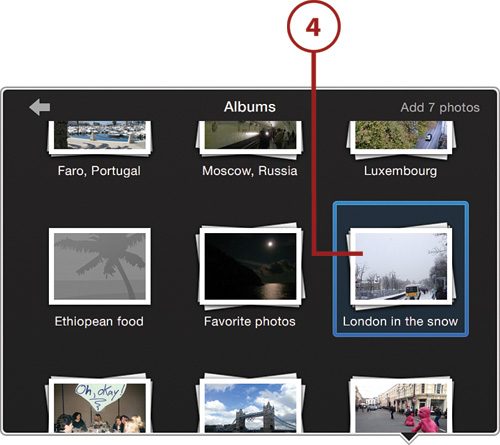
All albums—both regular and smart—show up beneath the Albums header in iPhoto’s source list. Depending on what you’ve created, you’ll find the following here:
• Folders: Represented by a small gray folder icon, a folder can contain multiple albums. Folders enable you to group related albums, both regular and smart, together.
• Regular albums: A regular album is represented by an icon that looks like the outline of a photograph. Regular albums contain any photos you’ve manually dragged there.
• Smart albums: The outline of a photograph with a cog in the corner represents a smart album. They contain your photos based on predefined search criteria.

Creating Regular Albums
iPhoto lets you create a regular album in a variety of ways. You can create empty albums, which you can then later populate at will, or you can create albums from currently selected events or photos, or from a folder of photos on your Mac’s hard drive.
Create an Empty Album
1. Choose File, New Album, but then hold down the Shift key so New Album becomes New Empty Album and click it.

2. Your new album appears in the source list with the name Untitled Album. You can rename it to whatever you want.
Why Are All My Photos in My New Album?
If you forget to hold down the Shift key while choosing File, New Album, you will still create a new album, but it will be populated with every single photo in your library. You can Select All (Command+A) and press the Delete key to remove the photos to clear the album, or just select the album in the source list and press the Delete key to delete the album entirely. The photos are still in your iPhoto Library.
Create an Album from Selected Photos or Events
With iPhoto, you can select a group of photos, or entire events, and quickly create an album containing those photos. This is handy when you are browsing your photo library and see a collection of photos you’d like to group into its own album. It eliminates the need to create an empty album first and then drag the photos in later.
To create an album from selected photos or events, you have four options.
The Menu Bar
1. Select the photo, photos, or events you want to create an album from.
2. Select File, New Album.
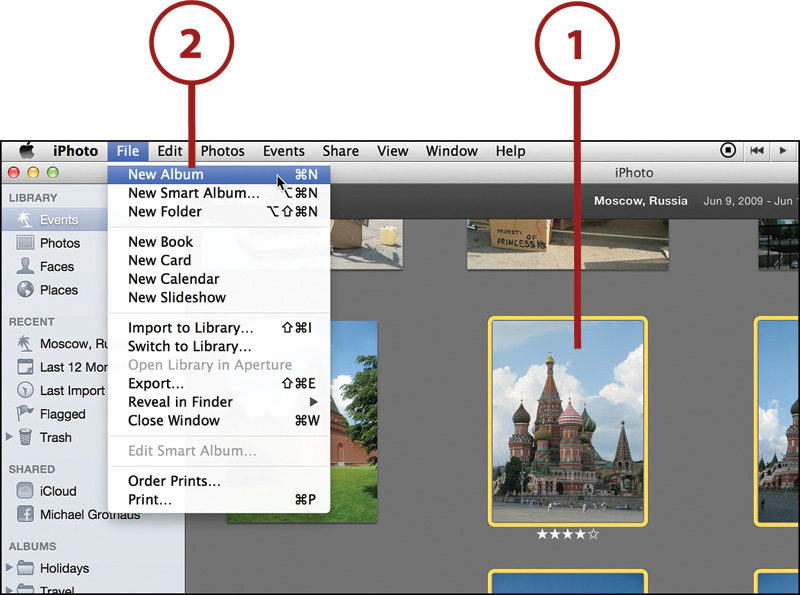
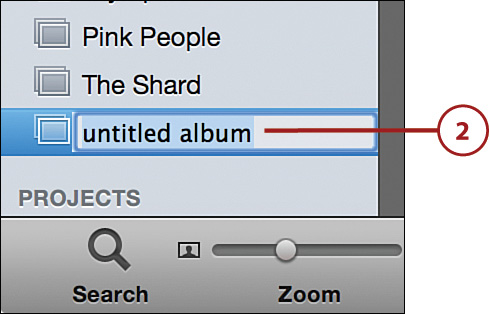
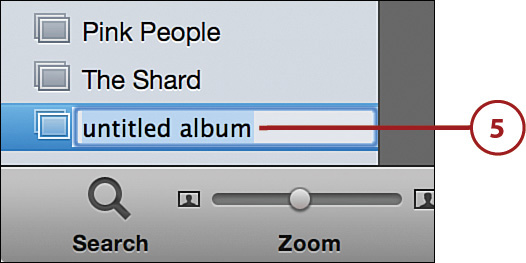
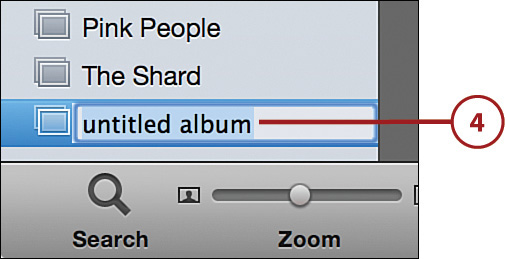
3. A new album containing the selected photos appears. You can begin typing to rename it. (By default the name is “untitled album.”)

2. Drag the selected photos to iPhoto’s source list.

3. A new album called “untitled album” containing the selected photos appears. Begin typing a new name to rename it.

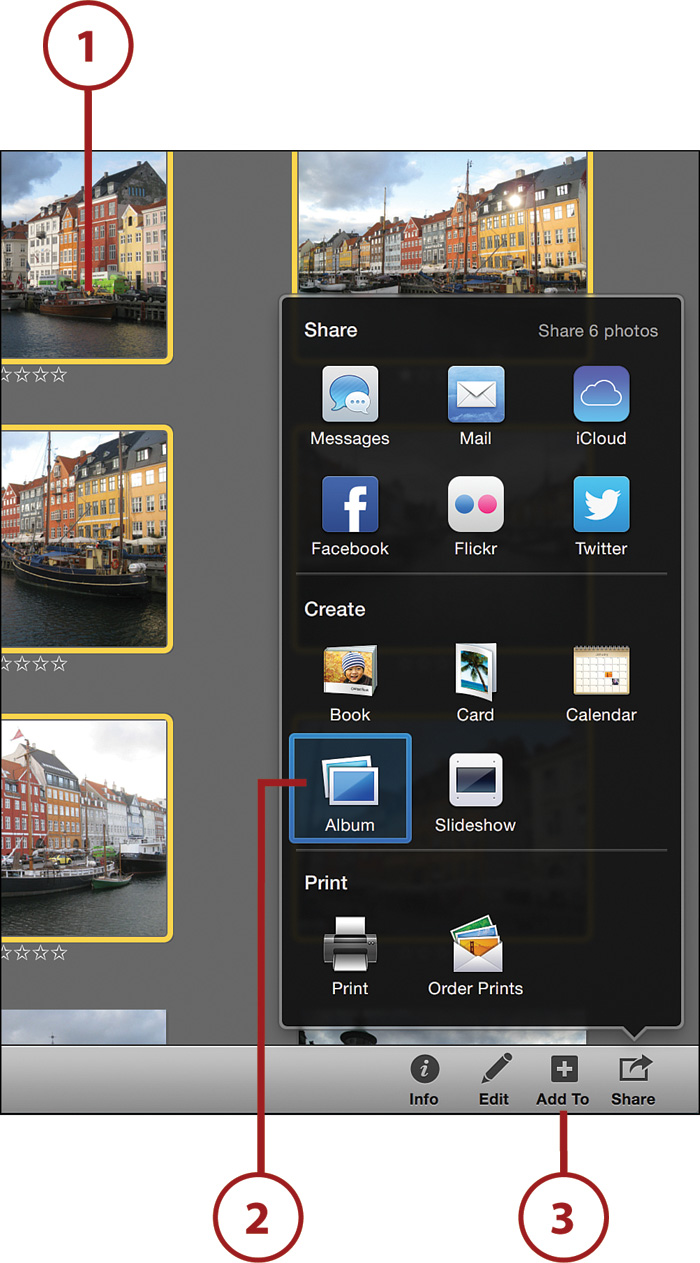
The Add To Button in the Toolbar
1. Select the photo, photos, or events you want to create an album from.
2. Click the Add To button.
3. Select Album from the pop-up menu.
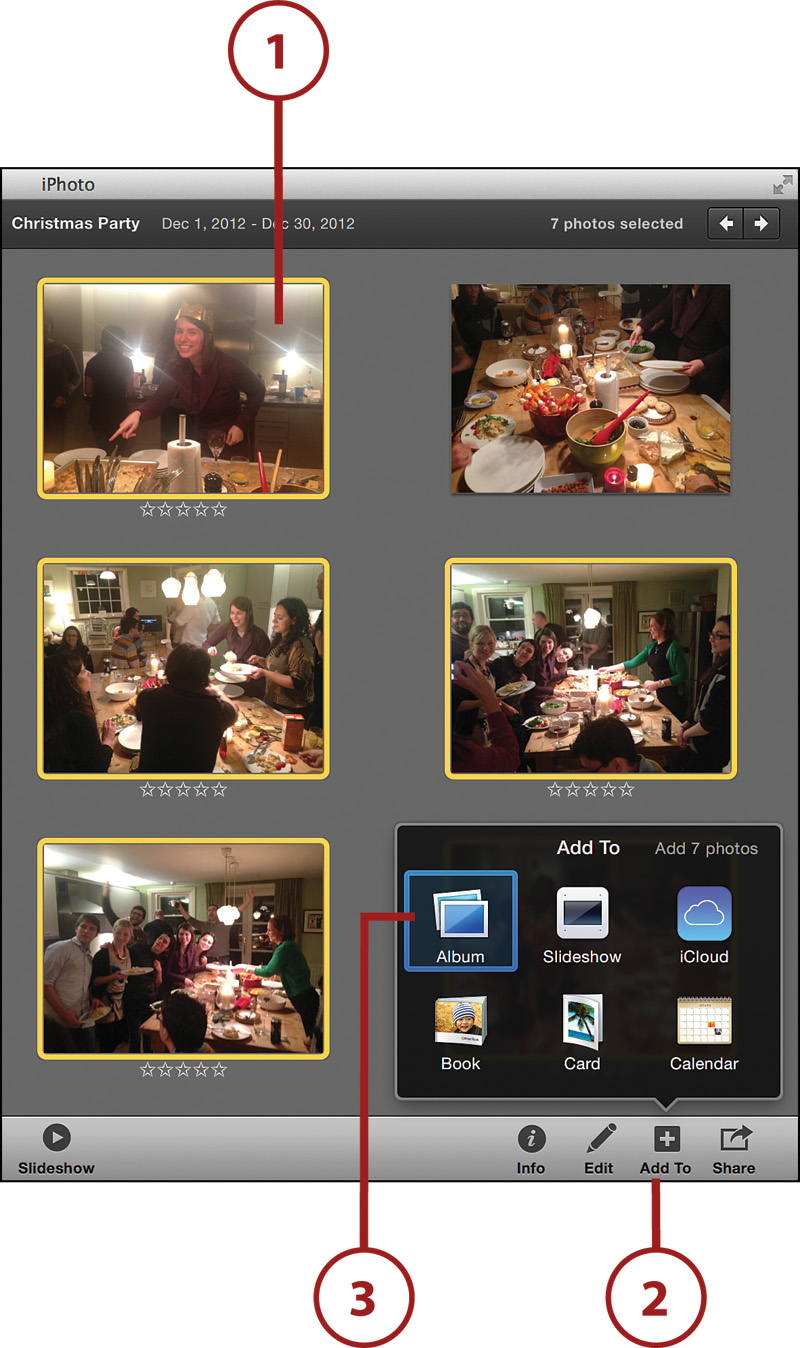
4. Select New Album from the expanded pop-up.

5. A new album called “untitled album” containing the selected photos appears. Begin typing a new name to rename it.
The Share Button in the Toolbar
1. Select the photo, photos, or events you want to create an album from.
2. Click the Share button. It looks like an arrow breaking out of a box.
3. Select Album from the Create menu.
4. A new album called “untitled album” containing the selected photos appears. Begin typing a new name to rename it.
Create an Album from a Folder on Your Mac
If you have a folder full of photos on your Mac, you can quickly import them to your iPhoto Library and create an album at the same time.
1. Find the folder of photos on your Mac and drag it to Albums in your iPhoto source list.
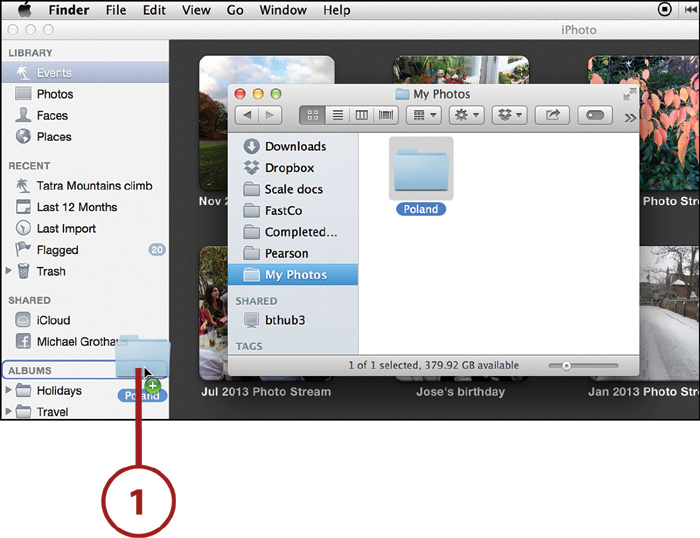
2. The Import process begins; just wait and let it do its thing.
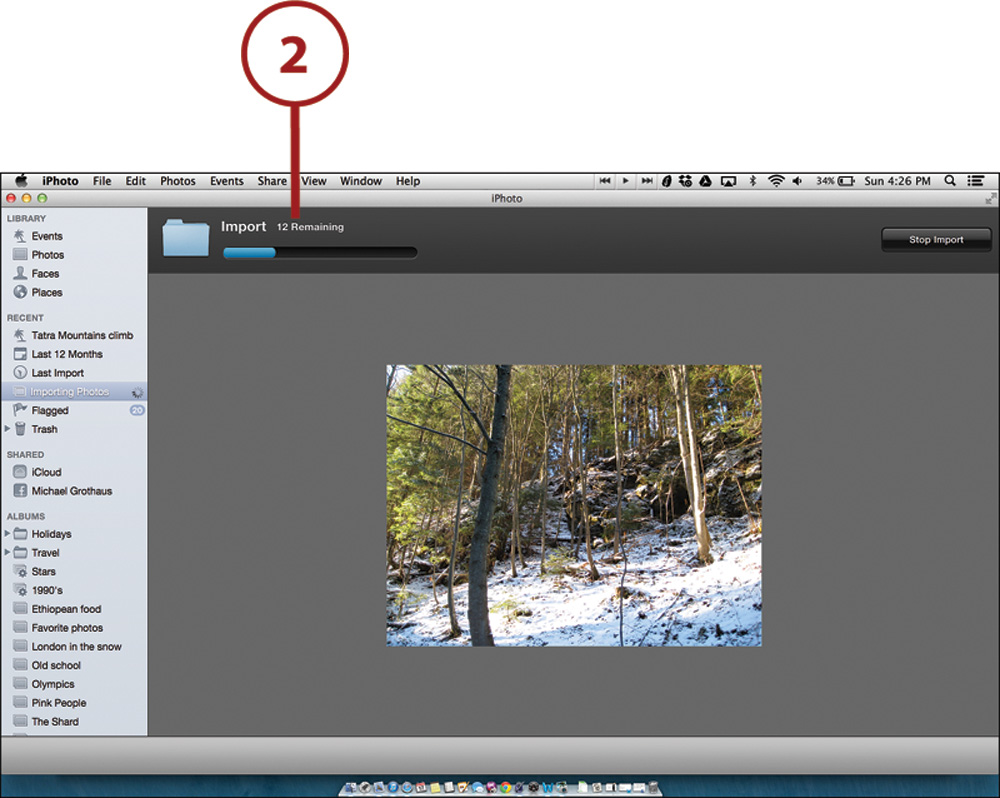
3. When it finishes, you’ll see all the photos contained in that folder in their own album. The album is named after the original folder name. You can double-click it to rename it if you want.
Changing the Contents of Your Regular Albums
After you’ve created a regular album, it has the same contents in it until you choose to add or remove photos. If you’ve created an empty album, this means it has no photos in it until you manually move some there. The great thing about regular albums is you can manually add more photos to them any time you want. There are multiple ways to do this—meaning there is no one right way. Find the way that works best for you and stick with that.
Add Photos to an Existing Album by Drag and Drop
1. Select individual photos one at a time and drag and drop them onto the album, select multiple photos by dragging a box around the photos you want in the album, or select nonsequential photos by Command-clicking them. You can also Shift-click to select a sequential range of photos.
2. Drag the selected photos onto an existing album. When the selected photos are over the album, you’ll be able to see how many will be added to the album via a red badge with a number in it displayed at the bottom of the dragged photos thumbnail.

Adding Events to Albums
You can also drag an entire event—or multiple events—into an album.
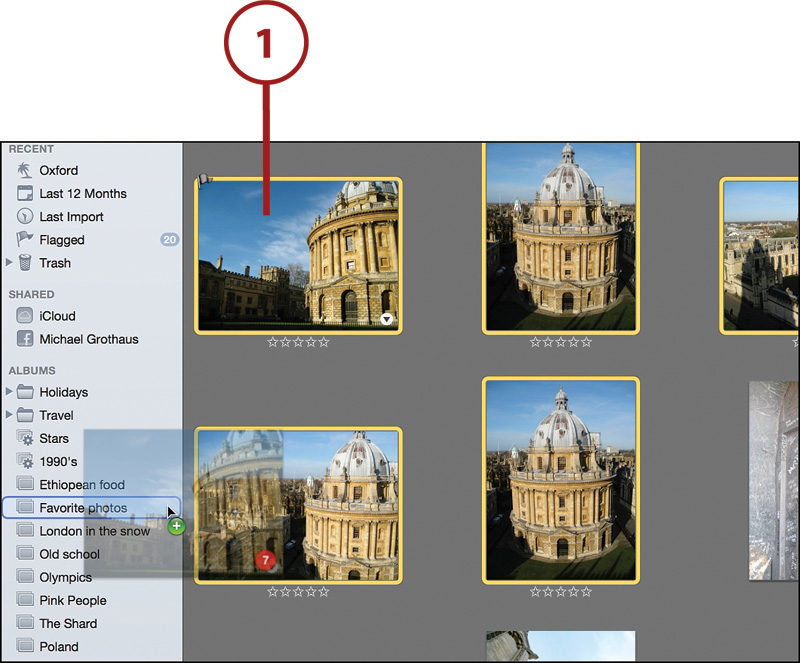
Add Photos to an Existing Album with the Add To Button
1. Select the photo, photos, or events you want to create an album from.
2. Click the Add To button.
3. Select Album from the pop-up menu.

4. Scroll through your list of existing albums in the expanded pop-up and click the desired album.
Removing Photos from Albums and Deleting Entire Albums
Just because you’ve created an album in the past doesn’t mean you are going to want to keep it the same forever. You might have created an album to quickly sort out photos for a project and now no longer need them grouped together, so you want to delete the entire album. Or you may find you like an album but want to remove some photos from it.
iPhoto makes either of these steps very simple when dealing with regular albums.
Remove Photos from Regular Albums
1. Select the album from iPhoto’s source list.
2. Select the photo or photos you want to remove.
3. Tap the Delete key on your keyboard. Or right-click one of the selected photos and choose Remove from Album from the contextual menu.

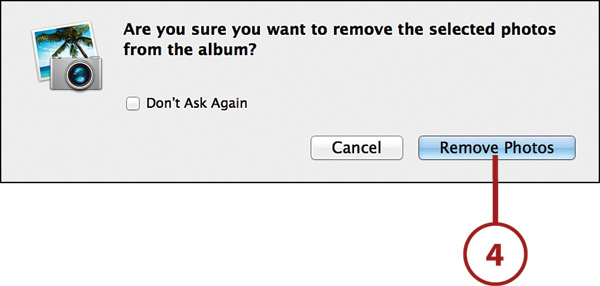
4. Click Remove Photos in the confirmation dialog box.
Not Really Gone
Remember, when you remove a photo from an album, you aren’t deleting it from your iPhoto Library. It still remains in your iPhoto Library and also in any other albums you have it in.
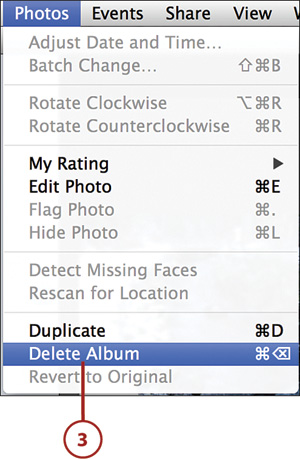
2. Press the Delete key on your keyboard. You can also right-click the album in the source list, and choose Delete Album from the contextual menu. Or...
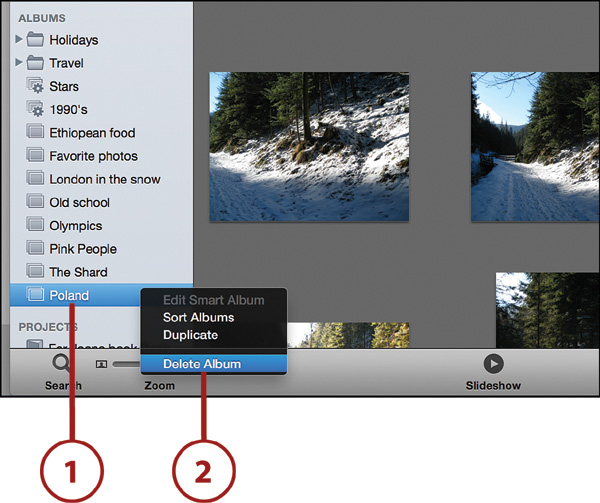
3. ...from iPhoto’s menu bar, choose Photos, Delete Album.
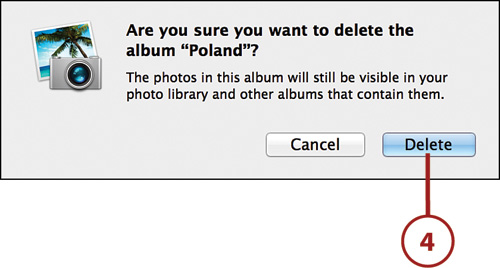
4. Click Delete in the confirmation dialog box.
Album’s Gone; Photos Aren’t
Remember, when you delete an album, you aren’t deleting the photos it contains. They still remain in your iPhoto Library and also in any other albums you have them in.
Creating Smart Albums
Now that you know how to create regular albums, you can see how useful they can be. They let you organize your photos in a way events do not—by putting the same photo in more than one location. However, as you can also see, regular albums involve a lot of manual work. To keep your albums updated, you must actively add or remove photos to them. Wouldn’t it be great if there were a way to automatically add photos to albums? That’s where smart albums come in.
Smart albums enable you to create albums containing photos based on certain parameters, such as rating, Exif information, text or description, date, keywords, and more. The best thing of all is that when you import photos to your iPhoto Library, they are automatically added to any smart albums they match the criteria for.
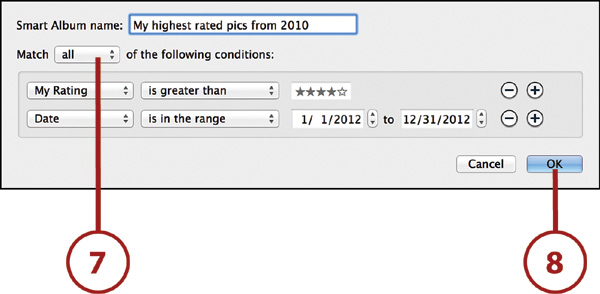
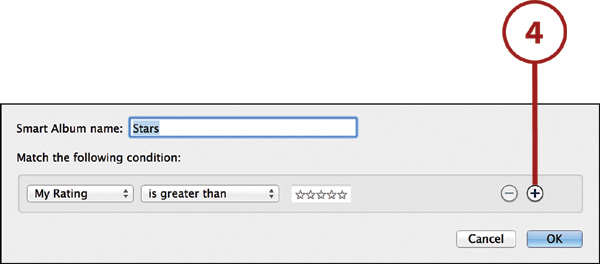
1. Choose File, New Smart Album.

2. From the Smart Album dialog box that appears, enter the name of the smart album.
3. Choose a filter from the first drop-down menu. A filter is a specific criterion that must be matched for iPhoto to judge whether the particular photo fits into one of your smart albums. A filter can be a keyword, the date the photo was taken, the photo’s rating, or even Exif information such as the camera’s model or focal length.
4. After you have selected a filter, choose a verb from the verb list. Common verbs in this list are Is, Is Not, and Contains.
5. Enter a requirement in the conditions list. This could be a star rating or a specific keyword.
6. Click the + button to add more criteria.

7. Select whether any or all of the multiple criteria must be met.
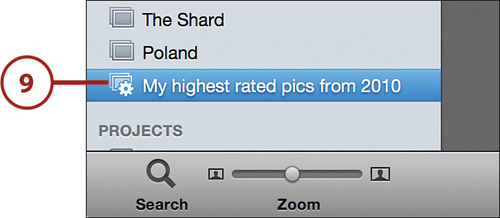
8. Click OK when you are done.
9. The smart list appears under the Albums header in iPhoto’s source list.
Automatic Photo Management
In this example, the smart album is created and appears in the Albums list in iPhoto’s source list after you click OK. All the photos in the iPhoto Library rated as four stars or more from 2010 show up in the album. If you were to reduce a photo’s rating in that smart album from four to three stars, the photo would automatically be removed from the smart album because it no longer meets the criteria.
Editing Smart Albums
As with regular albums, iPhoto lets you edit the contents of smart albums. However, instead of adding or deleting photos by drag and drop, to change the contents of a smart album you must edit the album’s parameters.
1. Select the smart album in iPhoto’s source list.
2. Choose File, Edit Smart Album. Or...
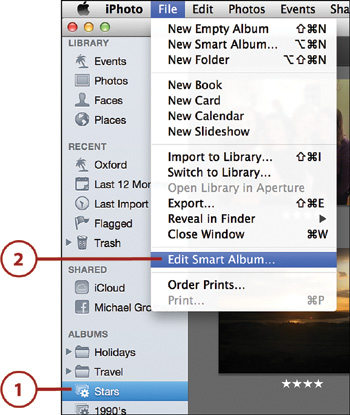
3. ...right-click the smart album in the source list and choose Edit Smart Album from the contextual menu.
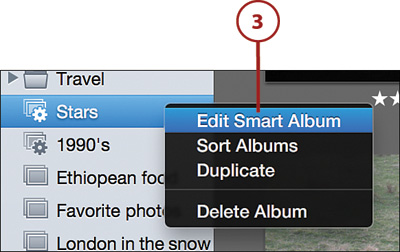
4. Make changes to the existing criteria, or delete the criteria entirely. You can also add criteria by clicking the + button.
Deleting Smart Albums
As with regular albums, you might find that you no longer need a smart album you’ve created. No problem. It’s easy to delete a smart album.
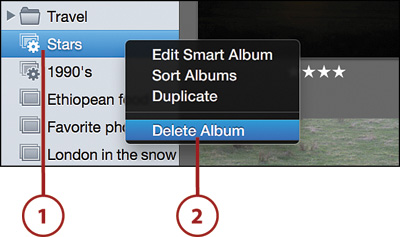
1. Select the smart album from iPhoto’s source list that you want to delete.
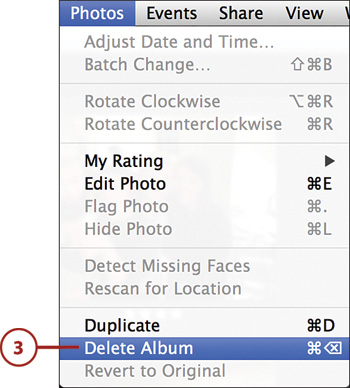
2. Press the Delete key on your keyboard. You can also right-click the smart album in the source list and choose Delete Album from the contextual menu. Or...
3. ...choose Photos, Delete Album.
4. Click Delete in the confirmation dialog box.
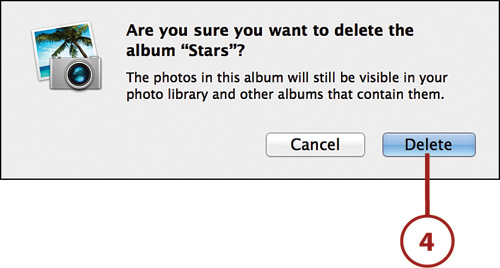
Deleting Albums, Not Photos
Remember, deleting an album, regular or smart, does not delete the photos within that album. The photos are always contained in their event (and therefore the iPhoto Library), and any other albums you have not deleted.
Duplicating Albums
iPhoto enables you to duplicate existing albums with just a few clicks. Why might you want to duplicate an album? Well, if it’s a smart album, you might like your search criteria but want to tweak it a little without changing the original smart album. Duplicating the album enables you to work from the original album without having to re-create it from scratch. The same goes for regular albums. Duplicating a regular album makes it easy to create an album with altered content based on photos you’ve already collected.
1. Select the album in iPhoto’s source list.
2. Choose Photos, Duplicate. Or...

3. ...right-click the album and choose Duplicate from the contextual menu.
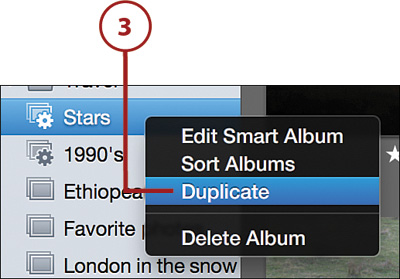
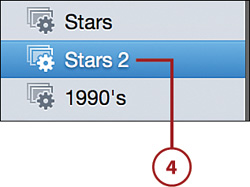
4. An exact duplicate of the album is created with a 2 appended to its name.
Organizing Albums into Folders
You might love creating both regular and smart albums, but sometimes things can get out of control when you have dozens of albums. When this happens, the things you’ve created to organize your photos become hard to organize themselves. Luckily, with iPhoto you can organize albums into folders. This enables you to group several albums together for clarity. For example, you can group all your travel albums into one folder and group all your Christmas albums into another.
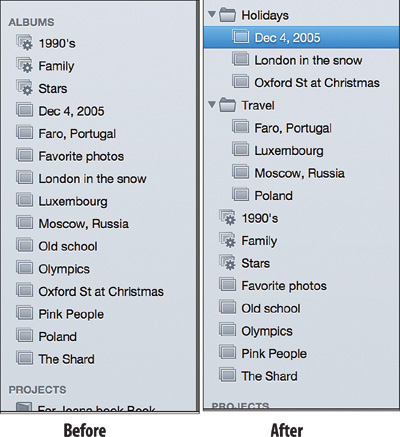
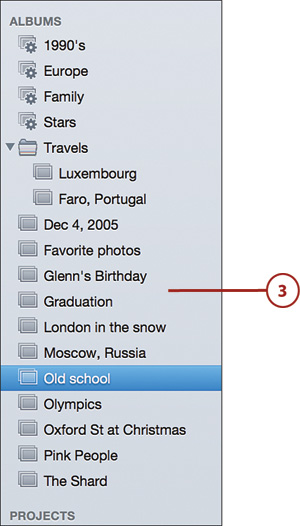
The “before” picture shows how albums are arranged in iPhoto without any folders. There are smart albums (cogs) and regular albums (no cogs).
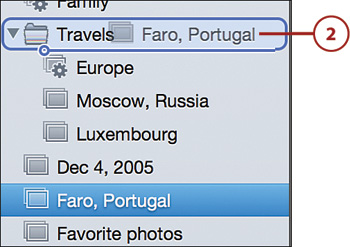
In the “after” version, you can see what happens when you create folders. The folders appear in the list and contain whatever smart or regular albums you’ve dragged into them. Albums within a folder are indented. Any albums that are not sorted into folders show up after the last folder—smart coming before regular. Folders can contain both smart and regular albums.
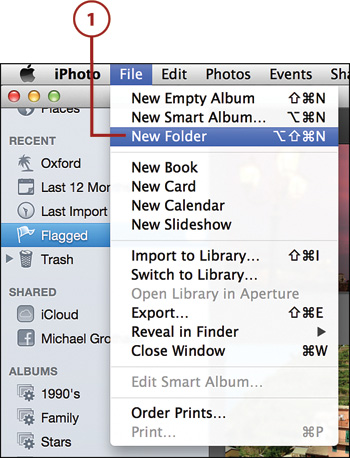
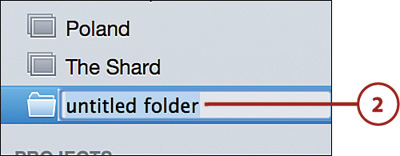
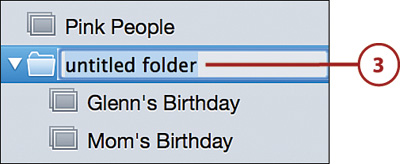
2. A new untitled folder appears under the Albums heading. Double-click the folder to rename it.
Add Albums to a Folder
After you’ve created a folder, it’s time to add albums to it. The albums you add can be regular, smart, or a combination of both.
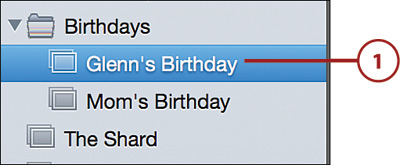
1. Select the regular or smart album in iPhoto’s source list.
2. Drag it on top of the folder.
Seeing Them All
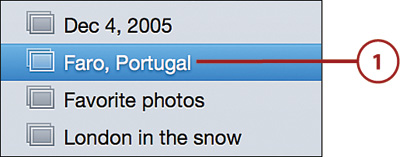
Selecting a folder displays all the photos in every album in that folder.
Create a Folder by Joining Two or More Albums
You can bypass the process of creating a new empty folder if you already know the albums you want to group under a single folder.
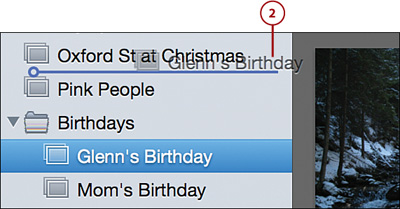
1. Select the first album.
2. Drag the album onto another album.
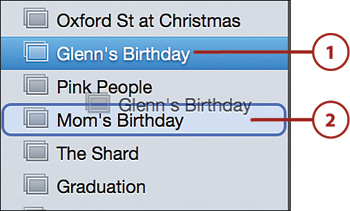
3. Both albums appear in a new untitled folder. Click twice on the folder to rename it.
Remove Albums from a Folder
If you change your mind and no longer want to group a specific album into an existing folder, you can easily remove it.
1. Select the regular or smart album in the folder in iPhoto’s source list.
2. Drag the album out of the folder and onto iPhoto’s source list.
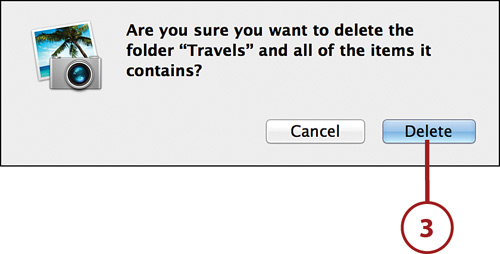
1. Select the folder you want to delete.
2. Press the Delete key on your keyboard. You can also right-click the folder and choose Delete Folder from the contextual menu.
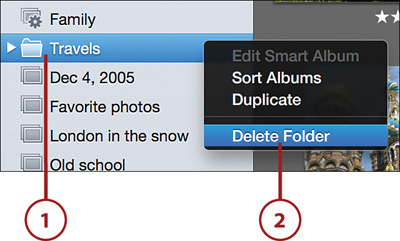
3. Click Delete in the confirmation dialog box to delete the folders and albums.
Deleting the Folder but Keeping the Albums
To delete only the folder and not the albums it contains, remove the albums from the folder first. If you delete a folder with no albums, it is removed instantly, and you will not see the delete folder confirmation dialog box.
Sorting Your Albums Alphabetically
After you’ve created many smart albums and regular albums, it becomes apparent how handy folders can be: They provide an extra way you can keep a tidy iPhoto Library. However, with so many folders and albums, things can still get messy. If that happens, you might want to alphabetize your albums and folders from time to time for easy ordering.
1. Right-click on any folder or album name under the Albums header in iPhoto’s source list.
2. Choose Sort Albums from the contextual menu.
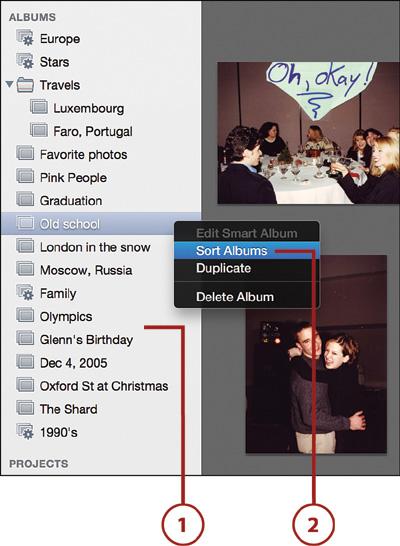
3. iPhoto instantly organizes all your folders and albums alphabetically. Note that if the album you right-click is in a folder, only the albums in that folder are sorted. To sort all the albums—no matter if they are in a folder or not—be sure to select a folder or album name directly under the Albums header.