
11. Advanced Editing Tricks
In this chapter, you learn how to edit your photographs using the advanced tools available to you in the editing window. These tools include the histogram and all the sliders that let you make granular changes to your photos. You also learn some cool iPhoto tricks that will help you in the editing process.
→ Using the histogram
→ Controlling contrast and highlights
→ Adjusting a photo’s color temperature, tint, and color cast
→ Making copy and paste edits
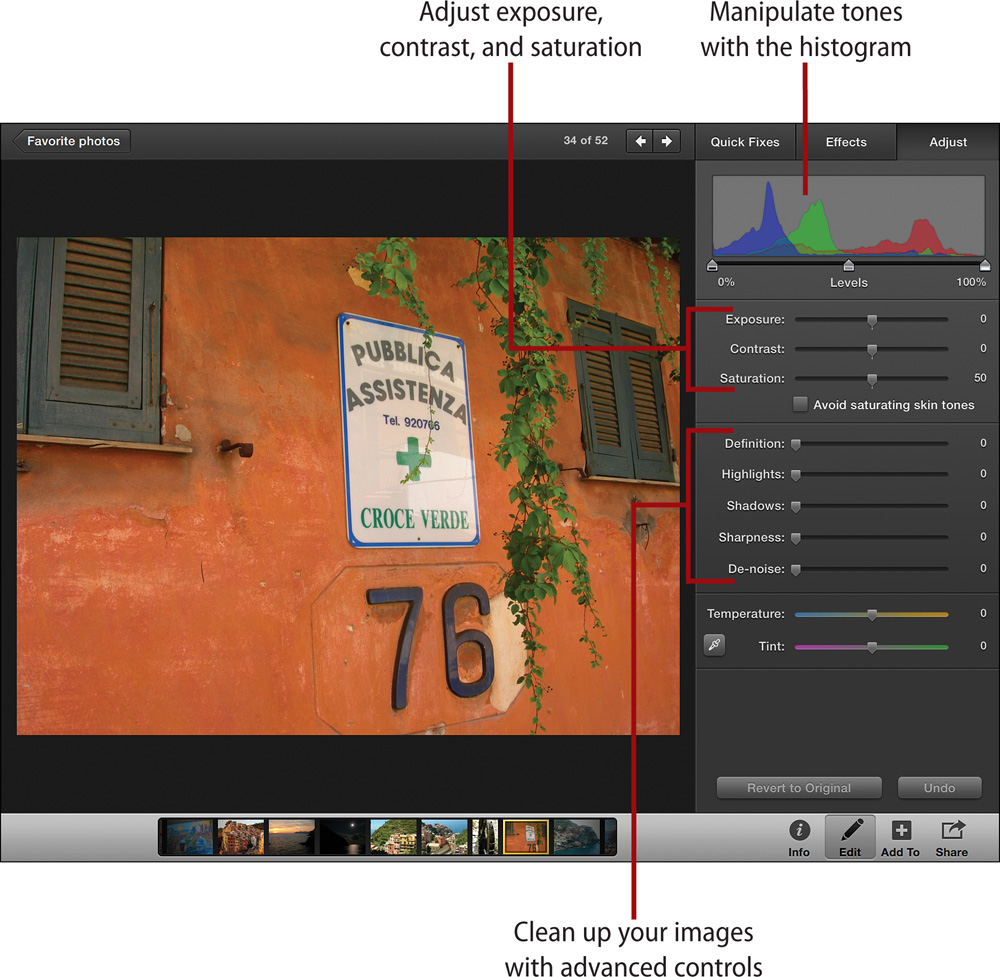
If you want to do some manual editing to your photographs, you’ll find all the tools you need on the Adjust tab. The Adjust tab offers the histogram and a multitude of sliders that enable you to tweak your photos in various ways.
Using the Histogram
Just what is a histogram? Entire books can be written on what a histogram is, but for our purposes, this section gives you a very basic description of what a histogram is and shows you how to use it. Don’t worry if this seems a little complex. You don’t need to understand the histogram to make edits to your photos—just stick with the Quick Fixes and Effects tabs.
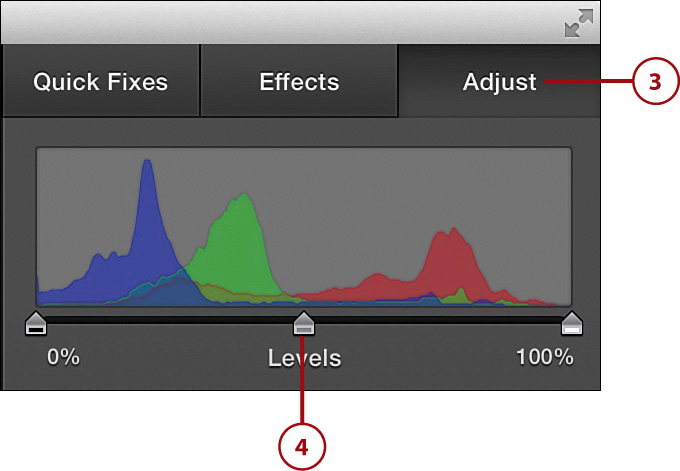
A histogram is a graphic representation of the distribution of tones, or light levels, for the three color channels (red, blue, and green) in an image. Black or dark tones are shown in the left of the histogram, mid-tones are shown in the middle, and white or light tones are shown on the right. The histogram graph itself looks like red, blue, and green mountain ranges overlayed on one another.
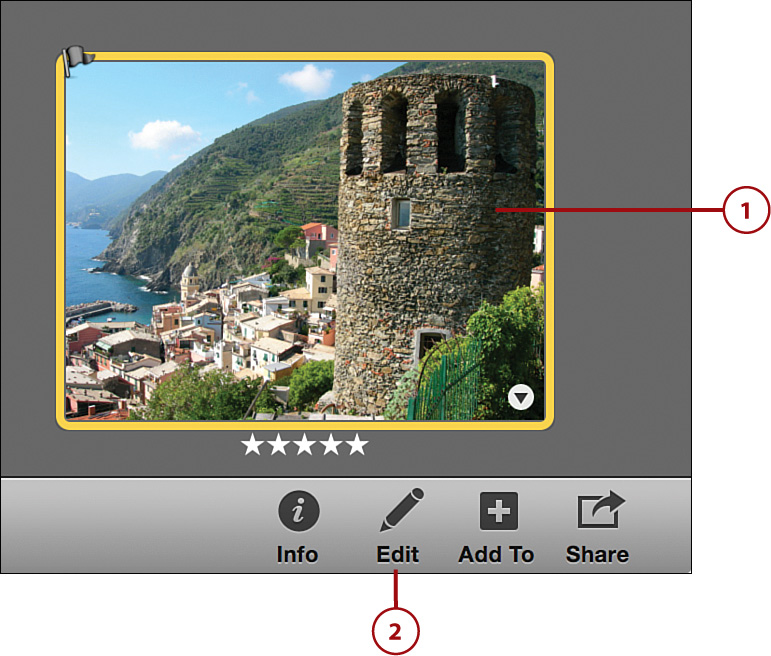
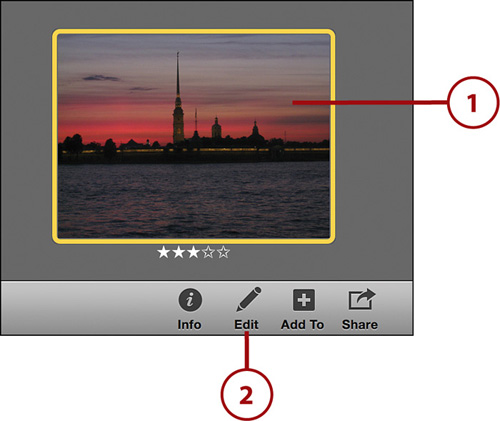
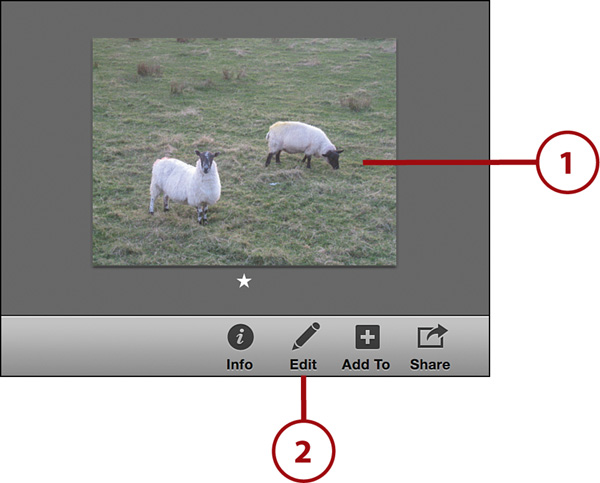
1. Select a photograph from your library for which you want to see the histogram.
2. Click the Edit button in the iPhoto toolbar. The Edit button resembles a pencil.

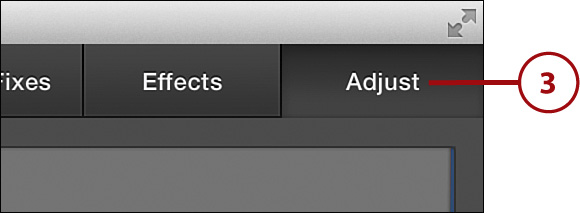
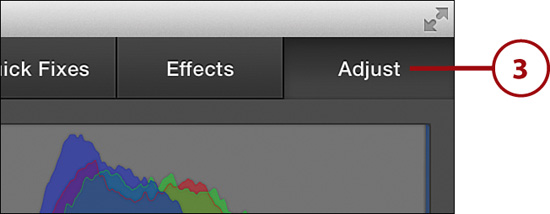
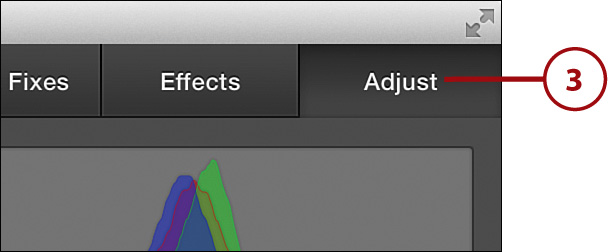
3. Click the Adjust tab at the top of the editing window.
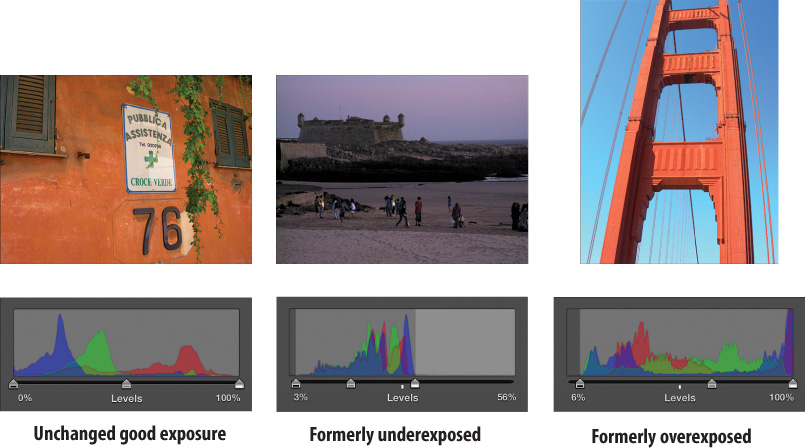
Looking at a histogram can instantly tell you whether your photo has good exposure or whether it is underexposed or overexposed. Underexposed photos appear darker than they should be, and on the histogram chart the mountains are bunched toward the left. Overexposed photos appear lighter, or more “blown-out,” than they should be; on the histogram chart, the mountains are bunched toward the right. Remember, though, that under- and overexposed photos aren’t necessarily bad. Like many things with photography, “good” exposure is somewhat subjective. Maybe you like your photos darker or lighter. Just because a photo is under- or overexposed doesn’t mean you have to correct it.
The examples show histograms for a photograph with “good” exposure and also for photographs that are underexposed and overexposed.
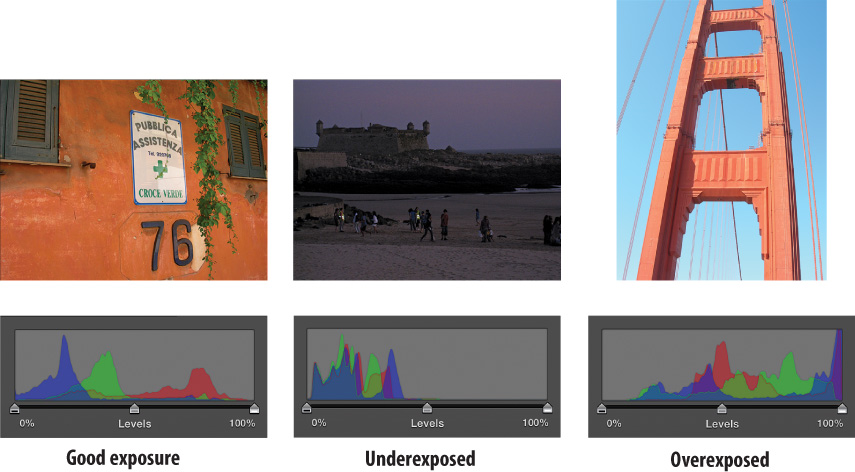
As you can see in the “good exposure” picture, the red, blue, and green colors are spread fairly evenly throughout the histogram. This signifies that the photo has relatively good exposure. In the middle picture, the photograph was taken at night, and you can see it’s quite dark. Without even looking at the photo, you could tell it was underexposed just by checking out its histogram. You can see all the colors in the chart are bunched up toward the left, or black, side. In the third photo (it’s a shot of the Golden Gate Bridge against a blue sky), notice that the colors in the chart are bunched up more to the right, or white side, of the histogram. This means the photograph is overexposed.
Adjust the Histogram
Beneath the histogram are three pyramid-shaped markers—one on the left, one in the middle, and one on the right. Below each of those markers is a small bar. The bar on the left is black, the bar in the middle is gray, and the bar on the right is white. These bars signify the black point (tone), mid-tone, or white point (tone) in a photograph. These small triangluar markers with bars are sliders you can adjust to tweak a photo’s histogram.

Ideally—and, again, this is all subjective—you want your photos to have a good tone range, with the colors of the chart spread evenly across the histogram. To this end, you can adjust the histogram sliders to clip the ends of the white and black points and adjust the mid-tones—thereby adjusting the photo’s light and dark levels—to produce a more balanced photograph.
1. Select a photograph from your library for which you want to adjust the histogram.
2. Click the Edit button in the iPhoto toolbar.
3. Click the Adjust tab at the top of the editing window.
4. Drag the black point, mid-tone, or white point sliders underneath the histogram to your desired locations.
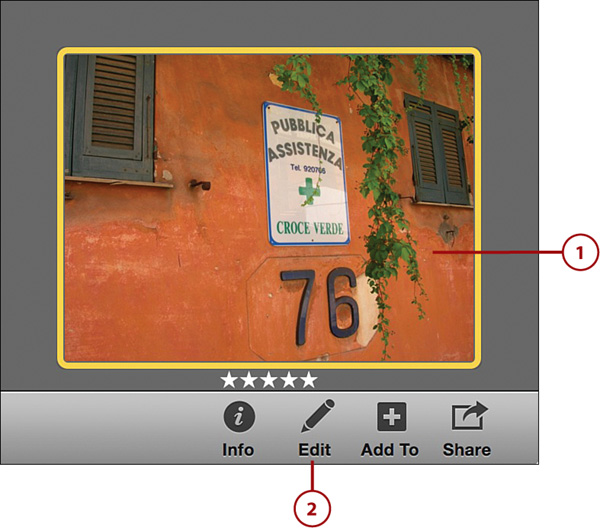
When you compare the photographs from earlier in the chapter with the ones shown here, you can see that I left the first one of the “76” wall unchanged because I was happy with the light levels. However, for the second photograph, I dragged the white point slider halfway across the histogram in order to lighten the entire image. I also adjusted the mid-tone slider. I can now see much more detail in the beach, and the overall image is much lighter. For the last photo of the Golden Gate Bridge, I adjusted the black point slider and the mid-tone slider to deepen the colors in the photograph. Note that the red iron and the blue sky are much richer in color now.
Remember, using the histogram takes practice. The more you play with the sliders, the better you’ll get at manually adjusting the tones in your photographs. But also remember that you don’t need to use the histogram at all if you don’t want to do so. You can adjust all the tones in your photograph by simply clicking the Enhance button on the Quick Fixes tab. Although manually adjusting the histogram sliders gives you greater control, most iPhoto users will probably find the Enhance button is more than enough for them.
You Can Always Go Back
Keep in mind that you can quickly undo your last edit by clicking the Undo button in the editing window. You can also revert to the original copy of the photograph you are editing—no matter how many edits you’ve applied—by clicking the Revert to Original button, so don’t worry about messing up your photos by playing around with the histogram. You can always undo what you have done.
Adjusting Exposure, Contrast, and Saturation
Below the histogram, the remainder of iPhoto’s Adjust editing tools consist of more sliders. iPhoto has these sliders divided into three individual sections, so let’s look at them one section at a time.
The first group of sliders are the Exposure, Contrast, and Saturation sliders. There’s also a check box regarding skin tones.
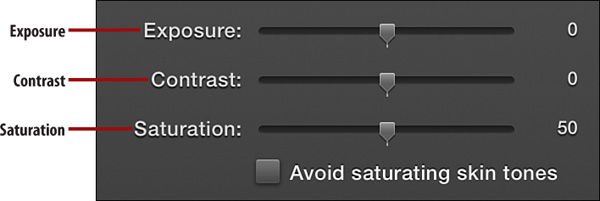
• Exposure: Moving this slider adjusts the overall lightness of a photograph. Unlike the sliders directly below the histogram chart, which adjust individual light tones, mid-tones, or dark tones, the Exposure slider adjusts all tones evenly. Drag it to the right of the 0 marker to increase a photo’s brightness, or drag it to the left of the 0 marker to decrease its brightness.
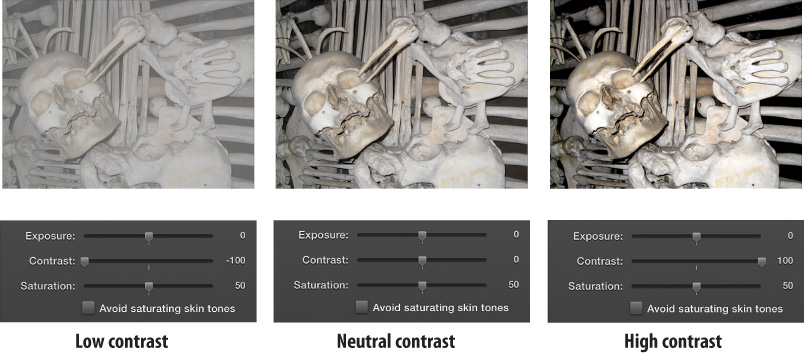
• Contrast: The contrast of a photo is the amount of difference between the light and dark areas in it. In a high-contrast photo, you see a sharper divide between light and dark. In a low-contrast photo, the divide isn’t as jarring.
• Saturation: Adjusting the Saturation slider changes the color richness, or intensity, of the photograph. The neutral (default) setting is 50. You decrease the intensity of the colors in your photo by dragging the slider left. If you drag the slider to 0, the photo becomes black and white. Conversely, drag the slider to the right to increase the intensity of the colors. If you drag the slider to 100, the colors in your photo look quite nuclear, as if they were radiating light.
It’s Not All Good: Avoid Saturating Skin Tones

Adjust a Photo’s Exposure, Contrast, and Saturation
1. Select a photograph from your library that you want to adjust.
2. Click the Edit button in the iPhoto toolbar.
3. Click the Adjust tab.
4. Drag the Exposure, Contrast, and Saturation sliders until you achieve levels you find satisfying.
5. (Optional) Click the Avoid Saturating Skin Tones check box to avoid changing a person’s skin tones as you adjust the exposure, contrast, and saturation of a photograph.

Adjusting Definition, Highlights, Shadows, Sharpness, and Noise
The second group of sliders in the Adjust tab enables you to adjust highlights and shadows in your photographs as well as manipulate the amount of details, grain, and focus in them. After you have adjusted your contrast and exposure, using these adjustment tools can really make your photos pop!
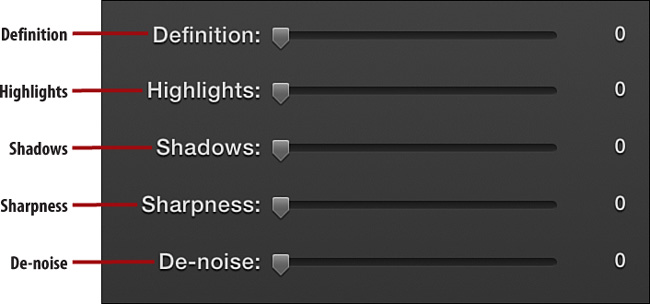
• Definition: This slider enables you to bring out the details in a photograph. Just like a person with six-pack abs is called “defined,” this slider allows you to chisel away soft lines in your photographs to make impressions stand out.
• Highlights: Use this slider to reduce the brightness of highlights in your photo. In other words, it darkens bright areas (such as a bright sky) so you can see more detail in them (such as wisps of clouds).
• Shadows: This is the opposite of the Highlights slider. This increases the brightness of shadows in your photo so you can see more detail in a dark area. For example, a person in your photo might be wearing a black shirt. In the photo, the black shirt might look like a solid, almost formless, mass of black. Using the Shadows slider, you can bring out the details in the shirt, such as the ripple in its fabric.
• Sharpness: When you edit a digital photo, the adjustments you make to its contrast or exposure can sometimes cause a soft, or blurred, edge to lined objects in your photo. You can use the Sharpness slider to fix the blurred edges so they show up more crisply in photos. (To see the benefit of the Sharpness slider, it helps to be zoomed in on your photograph to something that has defined edges, like a window frame.) Note that you cannot use the Sharpness slider to fix a photo that was taken out of focus.
• De-noise: If you’ve ever taken a photograph outside at night, you’ve seen noise in your images. Noise is distortion. It’s the little blips and specs that show up on your digital photos and appear almost as if they were dust or colored confetti. You can use the De-noise slider to minimize those specs of digital dust.
The best way to learn to use the tools on the Adjust tab is to play around with them. To see the benefits of making manual adjustments to your photo, see the sample Before and After versions of an adjusted photo.
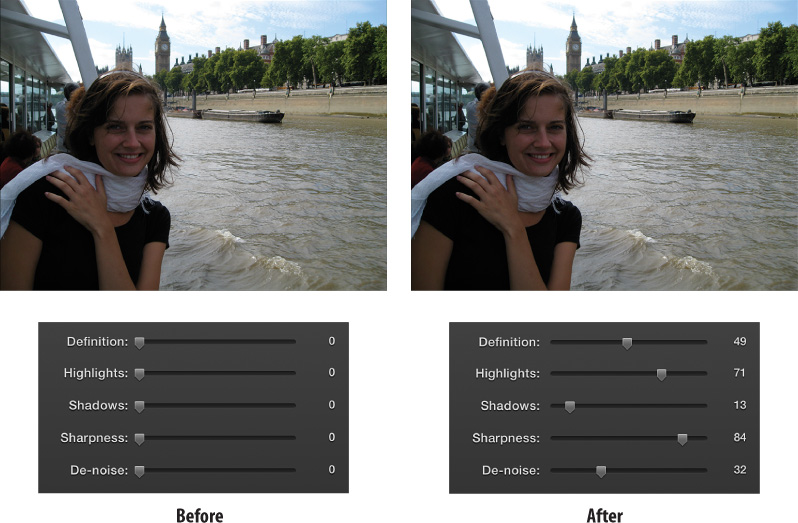
In the photograph I first used the Definition slider to bring out details in the white scarf and waves in the river. I then used the Highlights slider to darken the highlights in the sky, which brought out more clouds. Next, I used the Shadows slider to lighten the shadows in the trees on the riverbank. This allowed me to see more details in their leaves. Then I zoomed in on Big Ben in the background to restore some sharpness to its edges that was lost when adjusting the first three edits. Finally, I slightly adjusted the De-noise slider to remove a few minor artifacts in the image.
Adjust a Photo’s Definition, Highlights, Shadows, Sharpness, and Noise
You can try this all out on your own photographs. To adjust a photo’s definition, highlights, shadows, sharpness, and noise:
1. Select a photograph from your library for which you want to adjust the definition, highlights, shadows, sharpness, and noise.
2. Click the Edit button.

3. Click the Adjust tab.
4. Drag the Definition, Highlights, Shadows, Sharpness, and De-noise sliders until you achieve levels you find satisfying.

Adjusting Temperature, Tint, and Color Cast
When you hear temperature, you usually think about the weather outside. But in a photograph, temperature refers to color temperature, or the warmth and coolness of the colors in a photograph. Tint refers to the reds and greens in your photo. Taken together, temperature and tint are called color cast.
Photos in which you might want to adjust the color cast are photos that are shot indoors. Many times these photos have an orange hue because of the lighting in your house. Alternatively, photos that you take in shadow might look too blue. Also, an entire photo can be tinted blue or orange if there is a lot of that particular color in the photograph.
Use the Eyedropper Tool to Adjust Color Cast
There are two methods to adjust the color cast of a photograph. The easiest uses the Eyedropper tool.
1. Select a photograph from your library for which you want to adjust the color cast.
2. Click the Edit button.

3. Click the Adjust tab.
4. Click the Eyedropper tool. Your cursor turns into crosshairs.

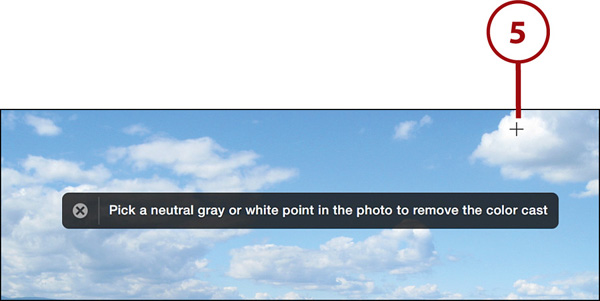
5. Move the crosshairs over your photo, and find an area of the photo with a neutral gray or white point to remove its color cast. The color tint and temperature change automatically. Note that it’s best to make sure the selected white point isn’t completely saturated (as with a bright light source).
6. (Optional) Deselect the Eyedropper tool or use it to click another location of the photograph to change the color temperature and tint again if you so desire.
In the example notice how that in the Before shot, the water took on the same hue as the sky. I used the Eyedropper tool to select a white point on a cloud in the photograph. This told iPhoto to color balance the photo to neutral based on that white point. The result is the same blue sky but a more correct color tone for the water (which was more blue-green) and the sand on the beach (which was darker).

Adjust Temperature and Tint Manually
If you want to adjust the temperature or tint of a photograph manually, you use the Temperature and Tint sliders.
1. Select a photograph from your library for which you want to adjust the temperature and tint.
2. Click the Edit button.
4. Drag the Temperature and Tint sliders until you get the right color cast you want for your photograph.

Cool iPhoto Editing Tricks
iPhoto has a number of cool little tricks that a lot of people don’t know about. Many of these tricks are very simple, but they go a long way toward helping you edit your photos quickly and easily.
Copy and Paste Edit Adjustments from One Photo to Another
Let’s say you’ve spent half an hour using the Adjust sliders to correct a photo to make the colors and exposures just perfect. That’s a big feat, and you want to apply those same changes to other similar photos (such as multiple shots of the same beach taken at the same time) without having to go through all the manual adjustments again.
You’re in luck! You can easily copy and paste adjustments from one photo to another.
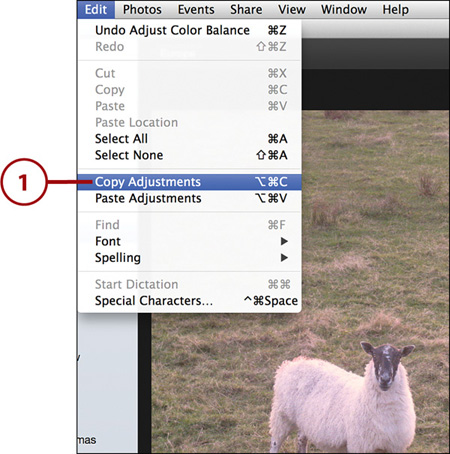
1. After you’ve adjusted a photo, select Edit, Copy Adjustments.
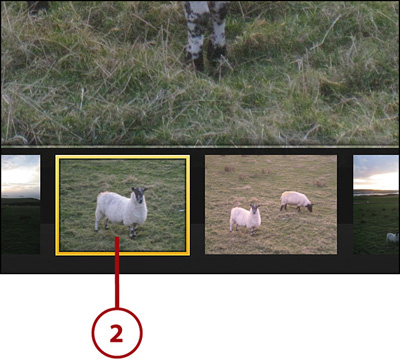
2. Select another photo that is similar to the one you have adjusted and that you want to apply the same adjustments to. Usually the easiest way to do this is by using the film roll at the bottom of the editing window.
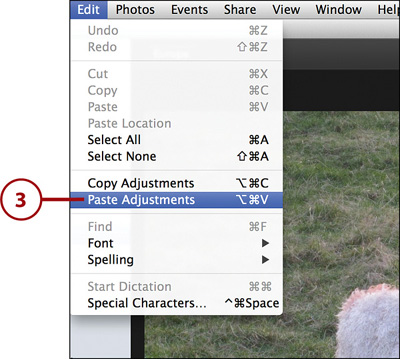
3. Select Edit, Paste Adjustments and—voila!—all your adjustments are applied from the first photo to the second. You can then continue tweaking the adjustments on the second photo if you want. Pretty cool, huh?
Duplicate Your Photos
Editing your photos is awesome, but sometimes you want to keep the original copy and have a separate, edited copy as well. You can easily do this by using the Duplicate Photo command in iPhoto. This creates two copies of the photo in your iPhoto Library, so only the copy you choose to edit is changed.
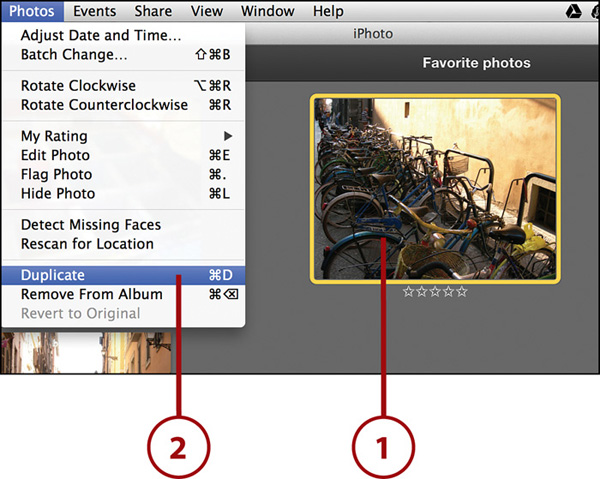
1. Select the photo you want to duplicate. Generally, it’s a good idea to duplicate it before you’ve started any edits.
2. Select Photos, Duplicate. You can also press Command+D on your keyboard.
3. The duplicated photo appears next to the original photo in the album or event you duplicated it in. Version 2 is appended to its filename. For example, for an original photograph with the name DSCN0732, the duplicate has the name DSCN0732 – Version 2.

Quickly Review Your Original Pre-edited Photograph
Sometimes when editing a photograph, you wonder just how far you’ve come. You can, of course, click the Revert to Original button to see the differences, but then you’ve lost all your edits. You can also duplicate the original photograph, but this would have to have been done before you started editing it. Even if you did duplicate it beforehand, you would have to navigate to the duplicate photo in your iPhoto Library to look at the differences.
Thankfully, Apple added a much easier option. With the press of a single key, you can quickly see how the photo you are editing originally looked.
1. While in Edit mode and with the edited photograph onscreen, press the Shift key at any time to see what the original photo looked like.
2. Release the Shift key to return to the edited photo.
Compare Two or More Photos
Digital cameras have made it easy to record multiple takes of the same image. We quickly rattle off endless shots of our child in front of his first birthday cake like it’s going out of style. That’s great for recording memories, but when it comes to deciding which of those shots to take the time to edit—because many are so similar—it can be a bit of a headache.
Luckily iPhoto lets you quickly compare two or more shots. This enables you to see them at the same time and choose which one you want to edit.
1. In iPhoto’s library, select two or more photos you want to compare. Click and drag the selection box around the photos if they are next to each other, or hold down the Command key on your keyboard and click each photo you want to compare so they are highlighted in a yellow box.
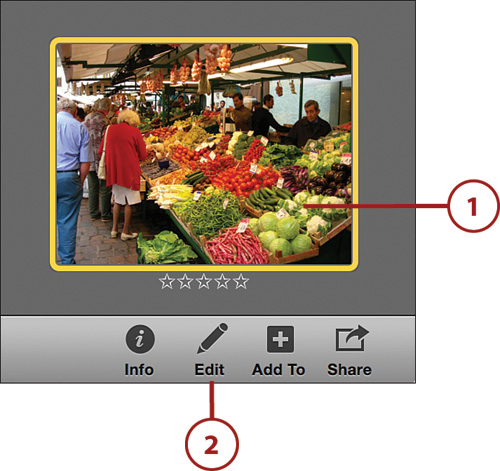
2. Click the Edit button.
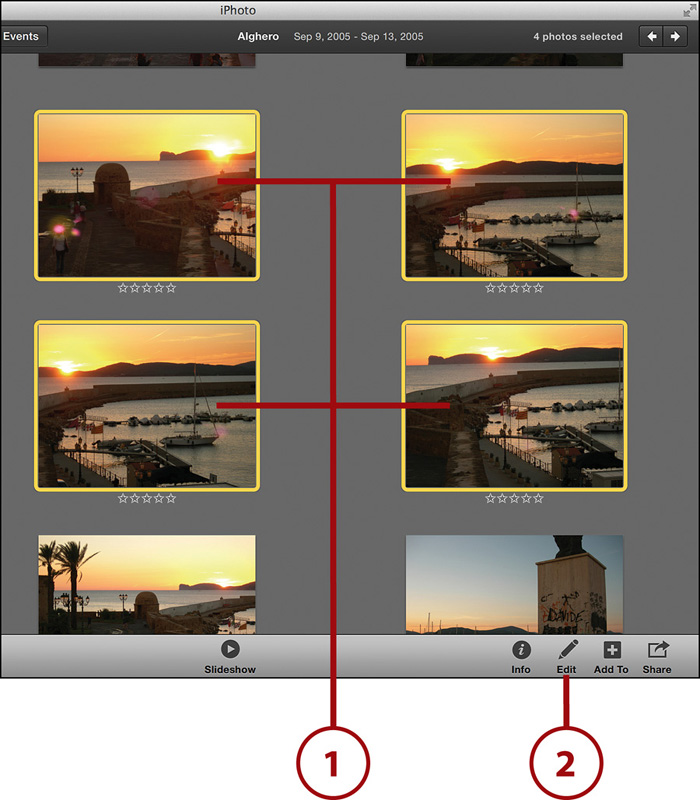
3. The photos you have selected to compare appear. Select one of the photos so it is highlighted in a white box. You can then proceed to edit the selected photo.
4. Click to select a new photo to edit from those you are comparing. When you do, a white box appears around it.
5. Select one of the compared photos and then click the X in its upper-left corner to remove it from view.

Use Contextual Menu Shortcuts to Edit Photos
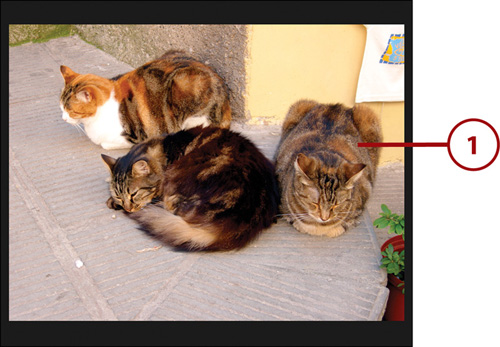
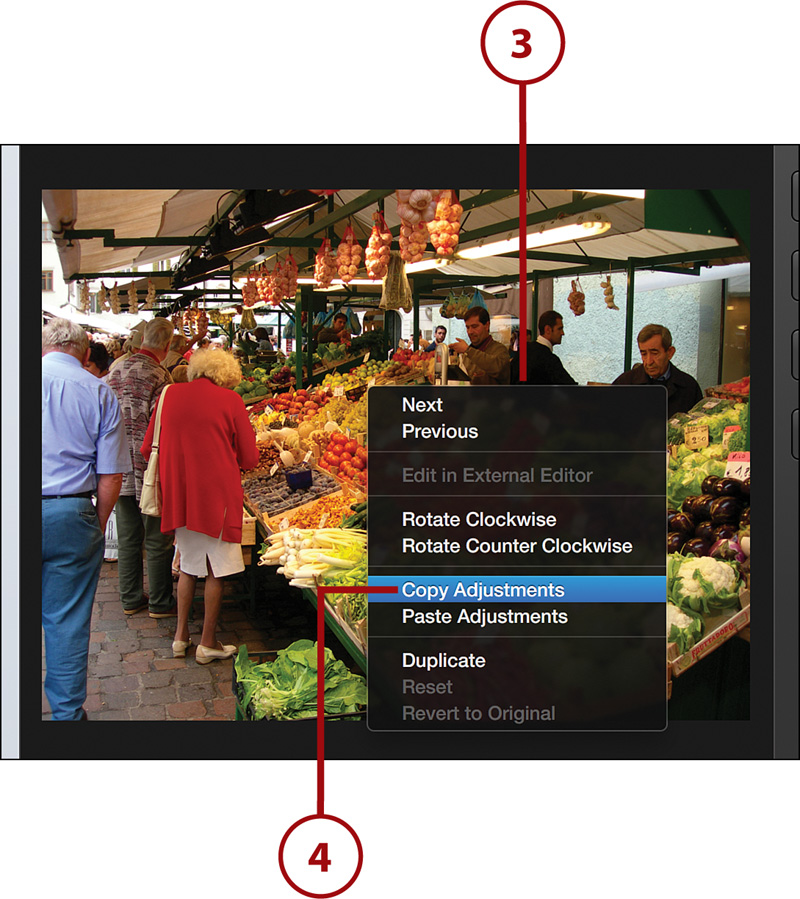
While editing a selected photo, you can right-click it to bring up a contextual menu of quick shortcuts. These shortcuts are more ways of carrying out certain editing commands that have already been discussed in this chapter.
1. Select a photograph from your library for which you want to see the histogram.
2. Click the Edit button.
3. Right-click or Control-click a photo to bring up the contextual menu.
4. Choose to rotate, make copying and pasting adjustments, duplicate photos, or revert to the original photograph.
Zoom Using the Keyboard
Zooming can be helpful for looking at a photo you are editing in fine detail. iPhoto has a Zoom slider built in to the iPhoto toolbar, but you can also use a couple of zoom tricks Apple has built in to iPhoto to make zooming easier and more precise. You do this by using the 1, 2, and 0 keys on your keyboard to quickly zoom in to and out of a photograph while editing it. These number keys also perform differently depending on whether your cursor is on the photo or you have moved it to another part of your screen so it is not over your photograph.
Here’s a list of ways to zoom using the keyboard when the cursor is not on your photograph:
• Press the 1 key on your keyboard to zoom into the center of the photo and view it at 100 percent.
• Press the 2 key on your keyboard to zoom into the center of the photo and view it at 200 percent.
• Press the 0 key on your keyboard to zoom back out.
And here’s a list of ways to zoom using the keyboard with the cursor over a specific part of your photo that you want to zoom in on:
• Move the cursor to the spot you want to zoom in on and press the 1 key on your keyboard to zoom into the exact spot your cursor is on in the photo and view it at 100 percent.
• Move the cursor to the spot you want to zoom in on, and press the 2 key on your keyboard to zoom into the exact spot your cursor is on in the photo and view it at 200 percent.
• Press the 0 key on your keyboard to zoom back out.