14. Navigating with Maps
In this chapter, you learn to use the Maps app to find locations and get directions.
• Searching for Places and Things
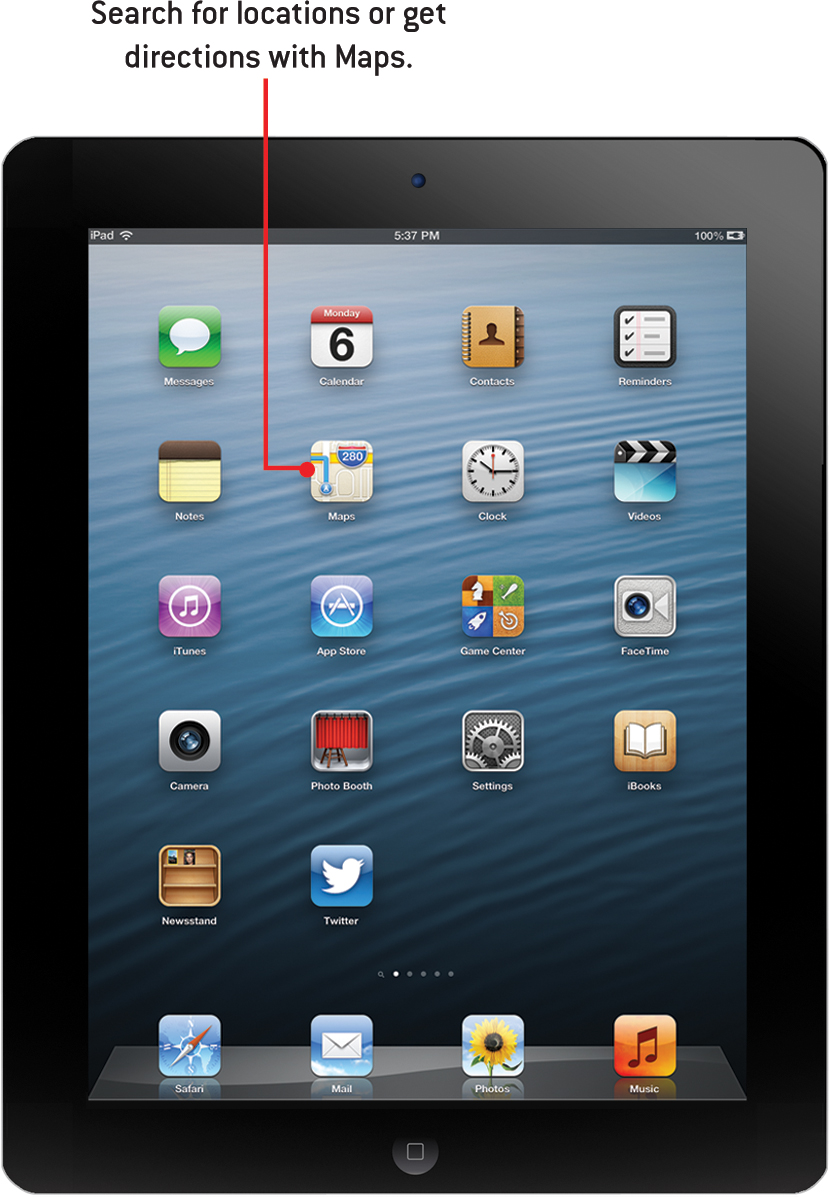
The Maps app is a great way to plan a trip—whether you’re going to the grocery store or across the country. Maps in iOS 6 is a complete overhaul of the app, which previously showed Google maps. Apple now has its own mapping system. If you’ve used the old Maps app, you’ll find this one familiar in how it works and where the controls are located, but the maps themselves look very different.
Finding a Location
The simplest thing you can probably do with Maps is to find a location.
1. Tap the Maps app on your Home screen.
2. Tap in the Search or Address field.
3. Type the name of a place.
4. Tap the Search button on the on-screen keyboard.

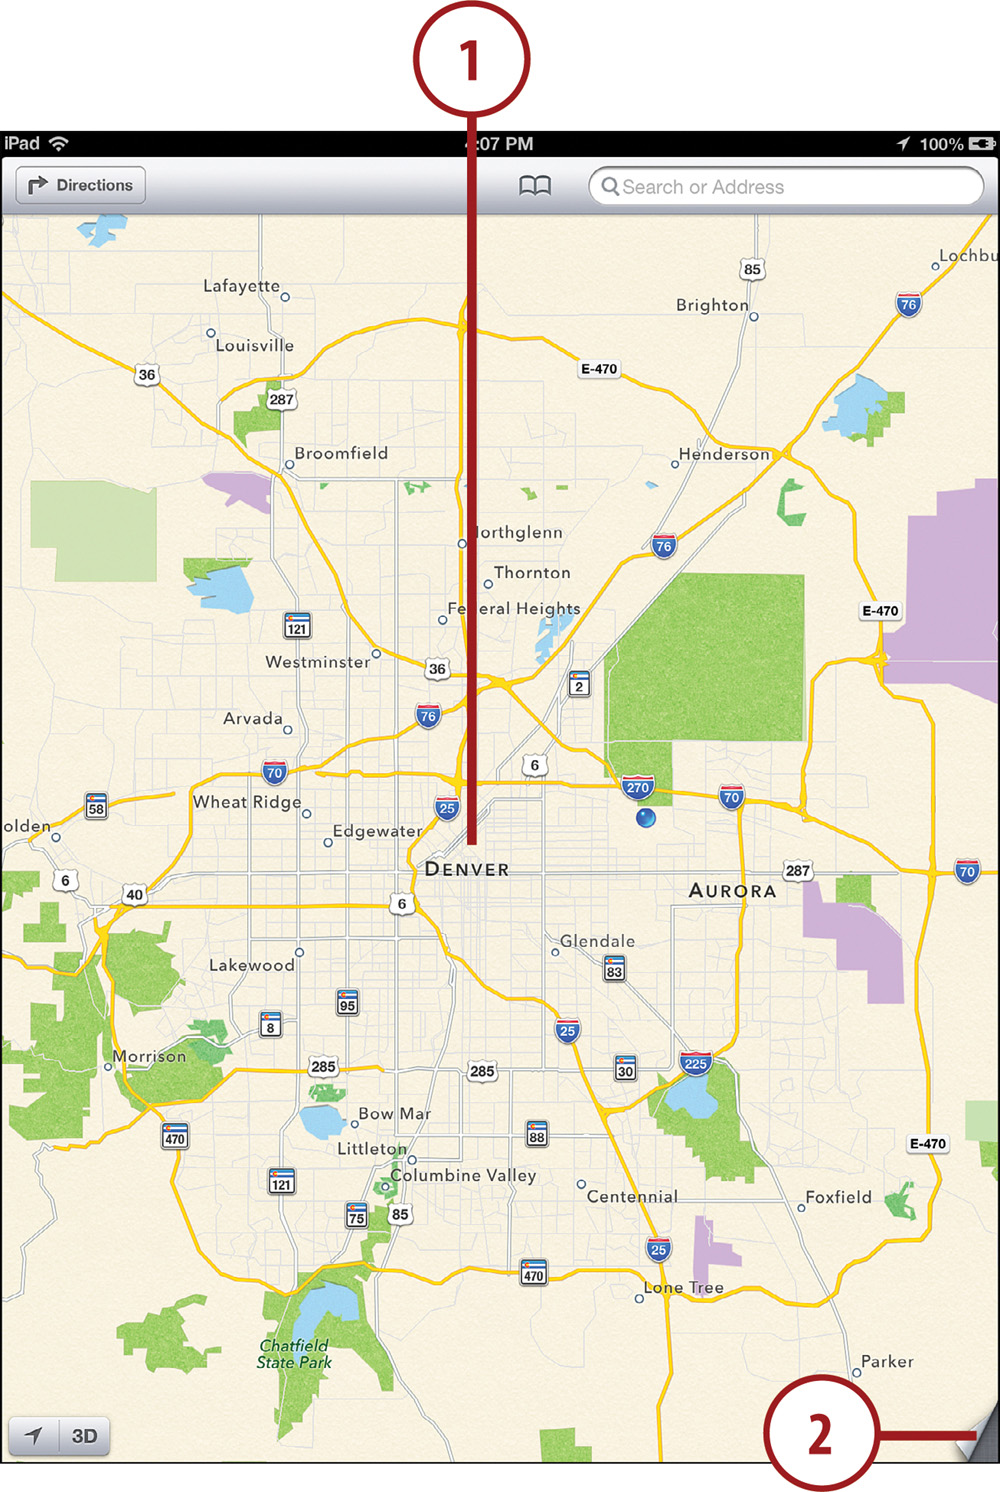
You can search for a specific address. You can also use a general time or the name of a place or person, and Maps does the best it can to locate it. For example, you can try three-letter airport codes, landmark names, street intersections, and building names. The search keeps in mind your current Maps view, so if you search for a general area first, such as Denver, CO, and then for a building name, it attempts to find the building in Denver before looking elsewhere in the world.
5. The map shifts to that location and zooms in.
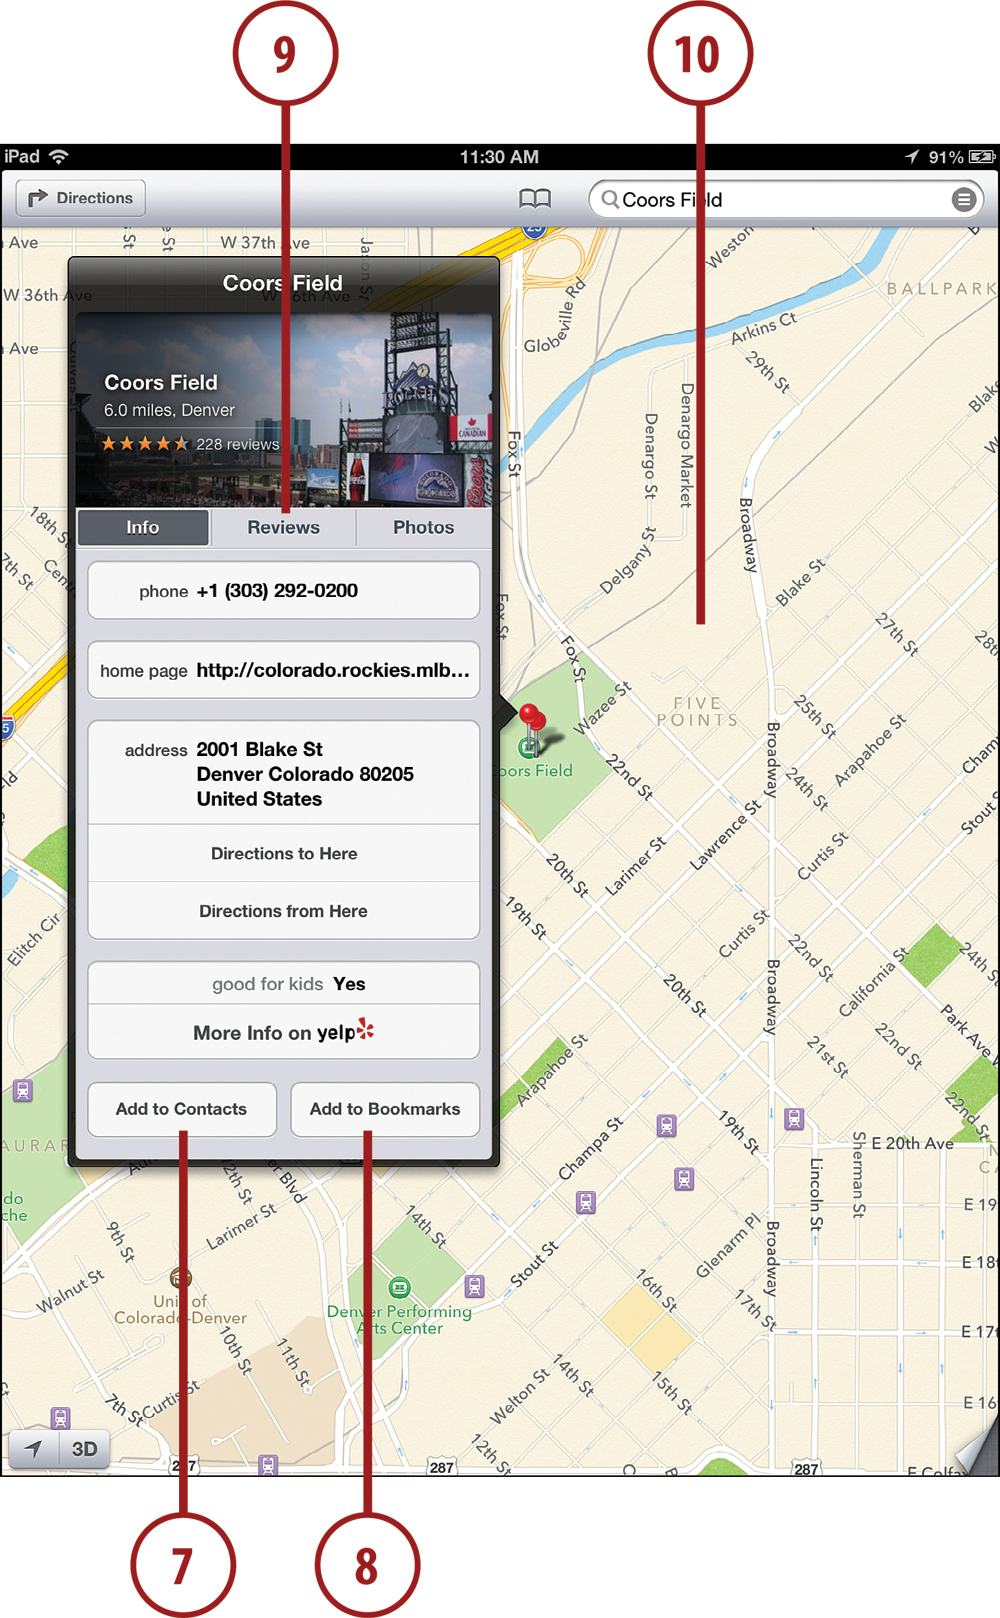
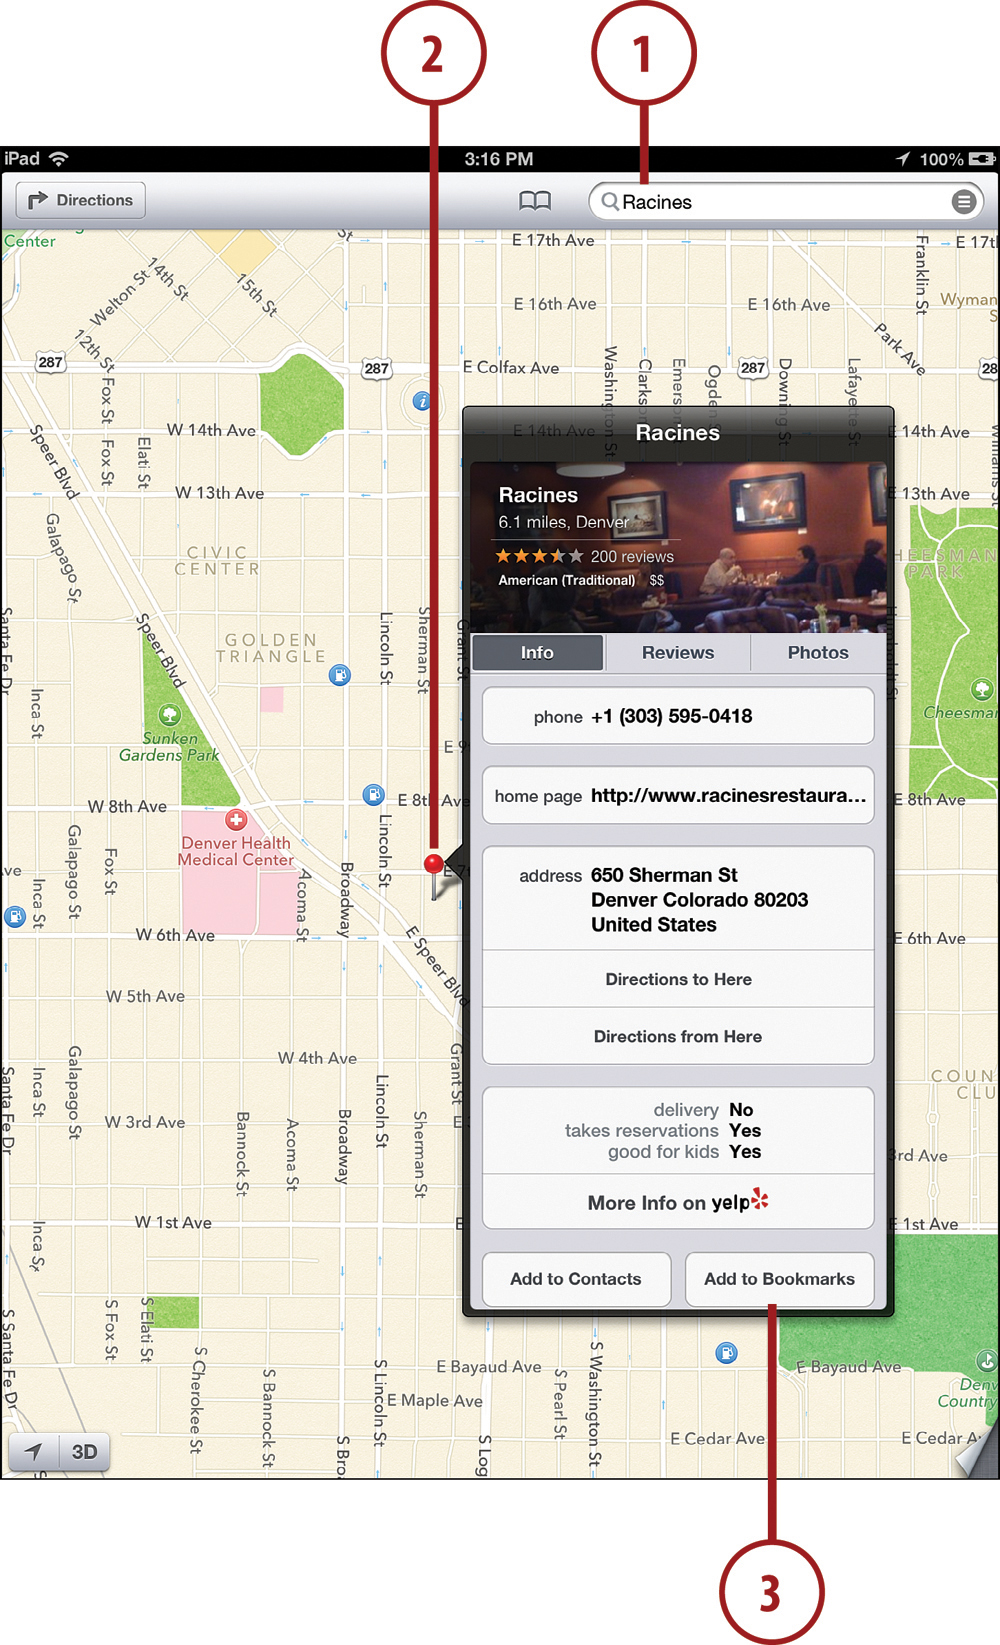
6. Tap the i button next to the location name to get more information.
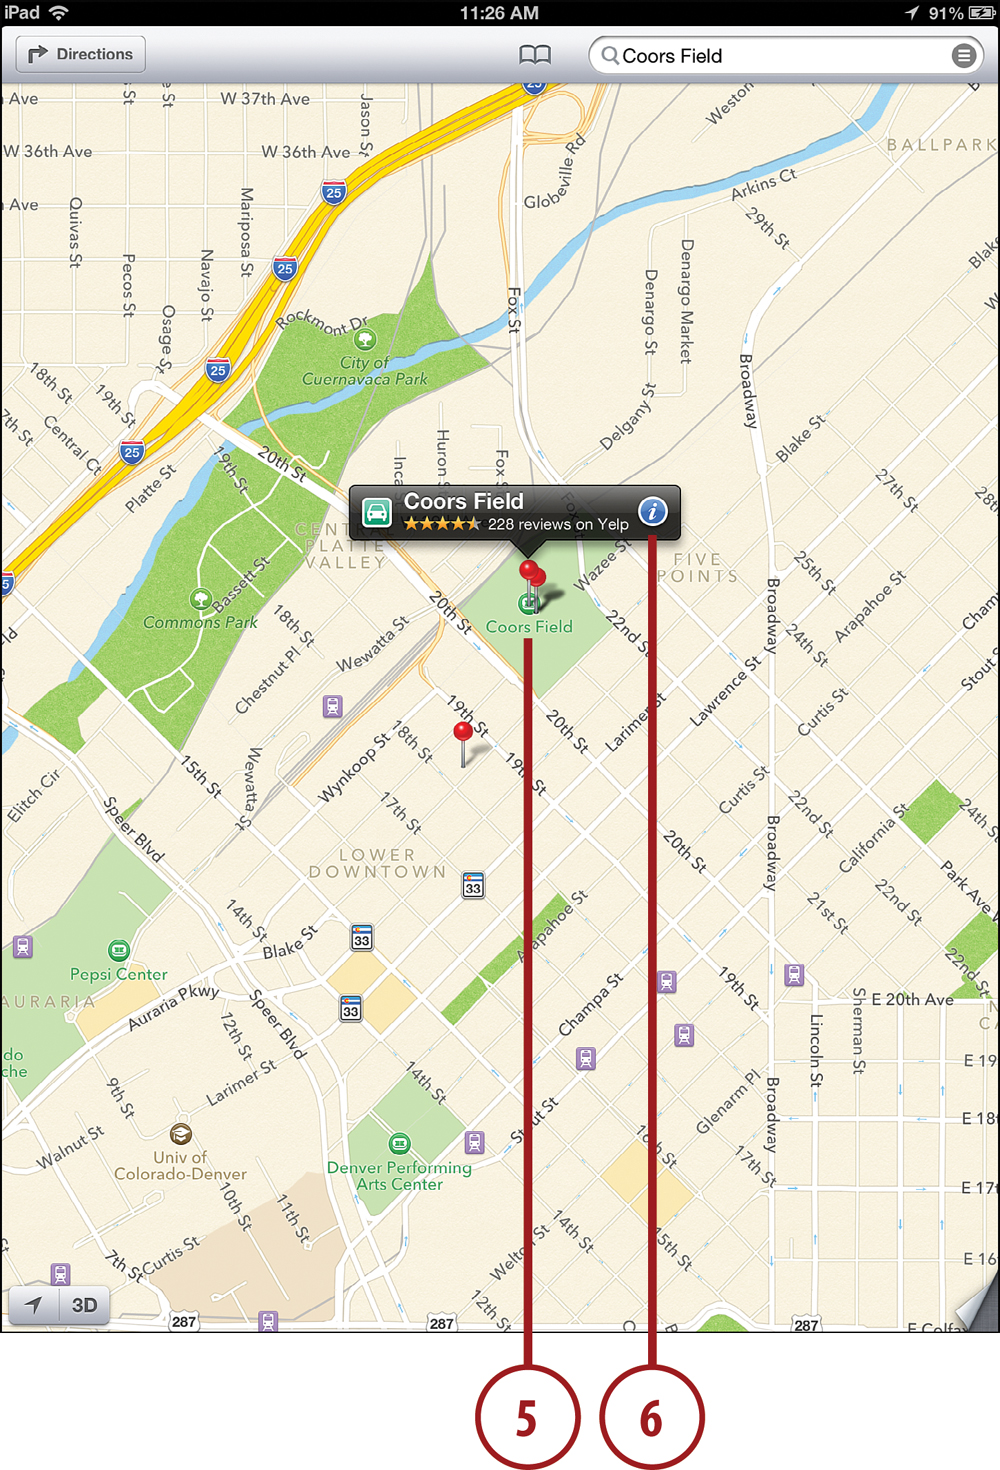
7. Use the Add to Contacts button to add the name, address, phone number, and other information to your Contacts app.
8. Use the Add to Bookmarks button to add the location as a bookmark in the Maps app.
9. Tap Reviews to read reviews of the location, assuming the location is a business or something else that has reviews on Yelp.
10. Tap outside the information area and try dragging and pinching to get a feel for using Maps.
Want to quickly center the map on your current location? Tap the GPS button (it looks like a small arrow) at the bottom-left corner of the screen. Even if your iPad doesn’t have a GPS receiver, it takes a good guess as to your current location based on the local Wi-Fi networks it can see.
Searching for Places and Things
You can also use Maps to search for something that has more than one location. For instance, you could search for one location of your favorite computer store.
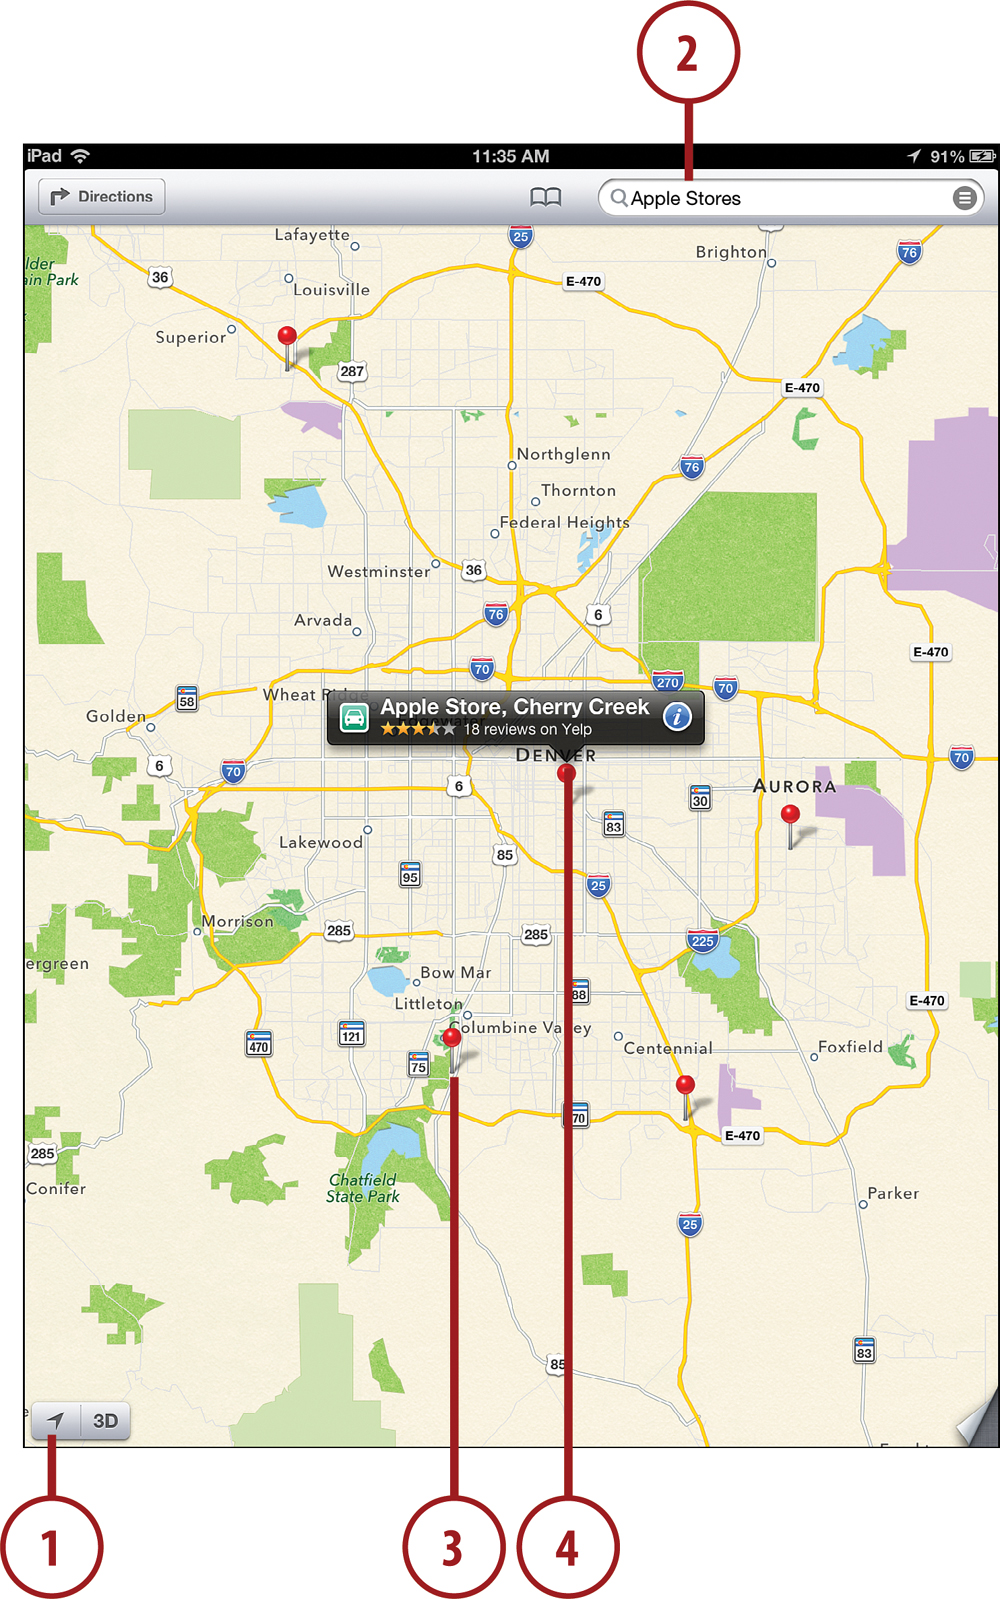
1. Start in Maps. You should see the last area you were viewing. If it is not your current location, search for that location or press the GPS button to go there.
2. Tap the search field and enter the name of a store.
3. Red pins appear on the map for all locations matching the search term in the general area. You might also see some dots representing other potential locations. Pinch to zoom in or out to see a wider area.
4. Tap a red pin to get the name of the location and an i button for more info.
Sometimes Being General Is Good
Don’t always restrict yourself to specific names such as “Apple store.” You can type in general terms such as “coffee” or “restaurant” to get a broader selection of results.
The maps database is huge, which means it also contains errors. Sometimes an address is wrong or the information is out of date, so you find yourself in front of a shoe shop instead of your favorite restaurant.
You can ask Siri to find locations without even being in the Maps app. A small map will appear in the Siri interface, and you can tap on it to open up the Maps app, centered on that location. Try commands like:
“Where is Coors Field?”
“Show me Broadway and First Avenue on the map.”
“Map 6th and Colorado Boulevard.”
Getting Directions
The new iOS Maps app has something that the previous Maps app did not: turn-by-turn directions. If you are stationary, you’ll need to settle for a map and a list of turns. But if you have a wireless mobile connection, you can use your iPad like a car’s navigation system with spoken instructions.
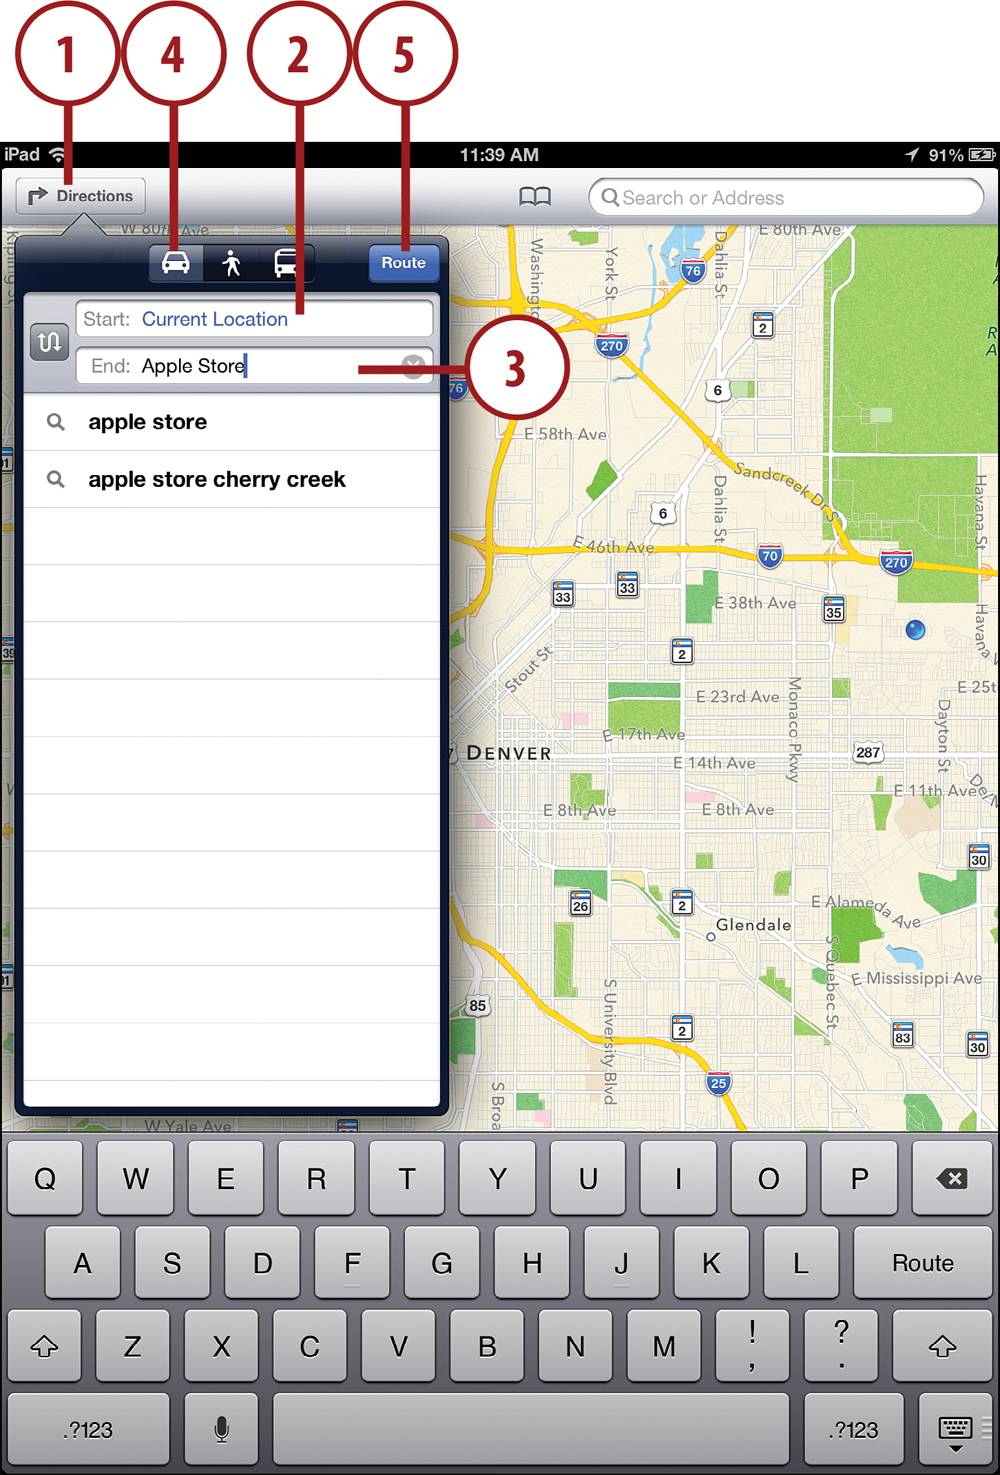
1. In Maps, tap the Directions button. At this point, you may be asked to confirm whether the Maps app is allowed to use your current location.
2. Two fields appear at the top. The left field is already filled in with your current location. Change the location by tapping the X in the field to clear it and typing a new address.
3. Tap in the second field and type the destination location. Suggestions appear underneath in a list. You can tap a suggestion to fill that into the destination box.
4. Select the mode of transportation. You can get directions for driving, walking, or public transportation.
5. Tap the Route button.
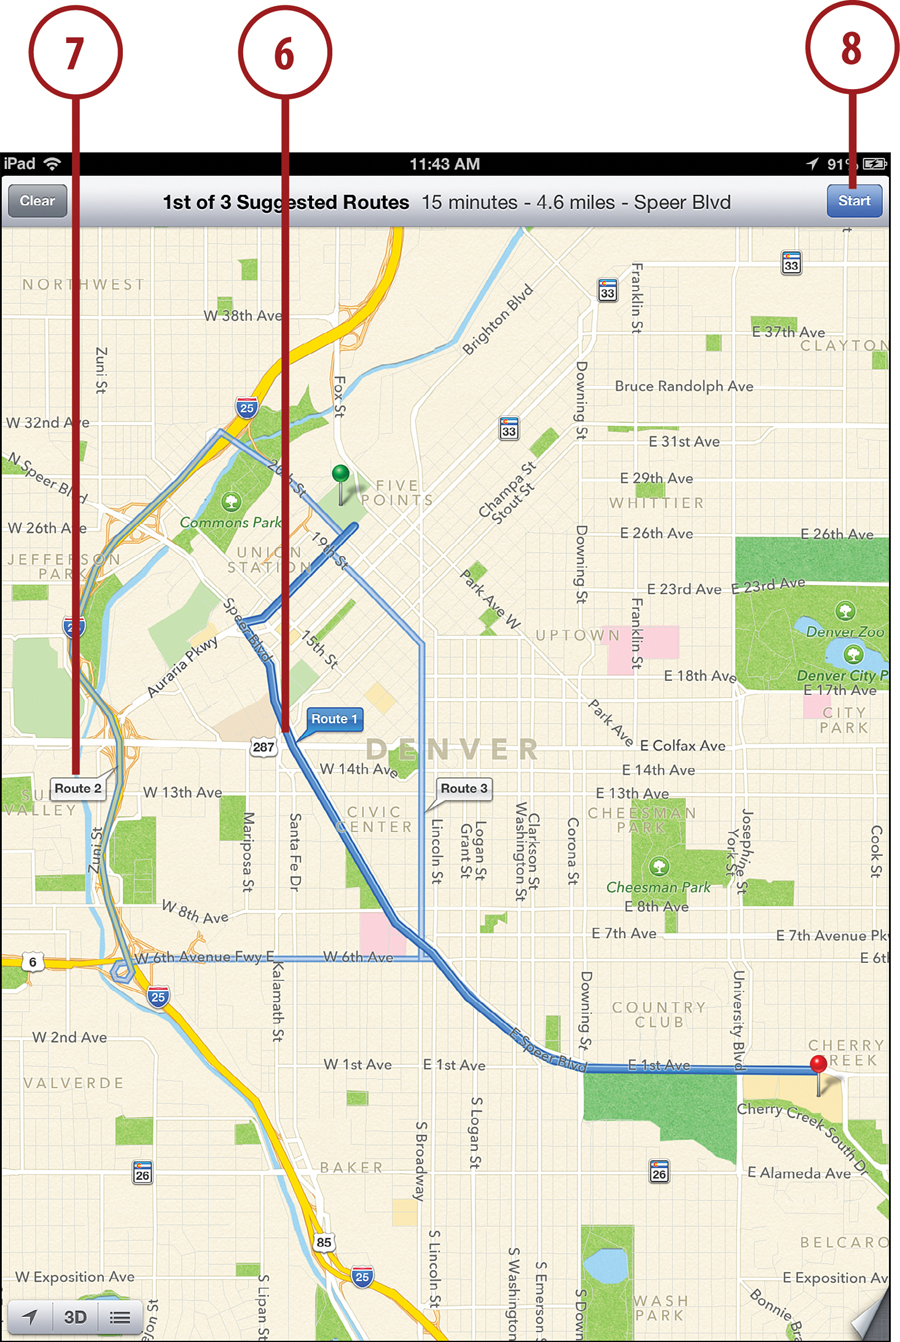
6. The directions show up as a blue line on the map. You might need to pinch to zoom out to see the whole route.
7. Alternate routes may also appear. Tap any route label to switch to that route.
8. Tap the Start button to go through the route turn-by-turn.
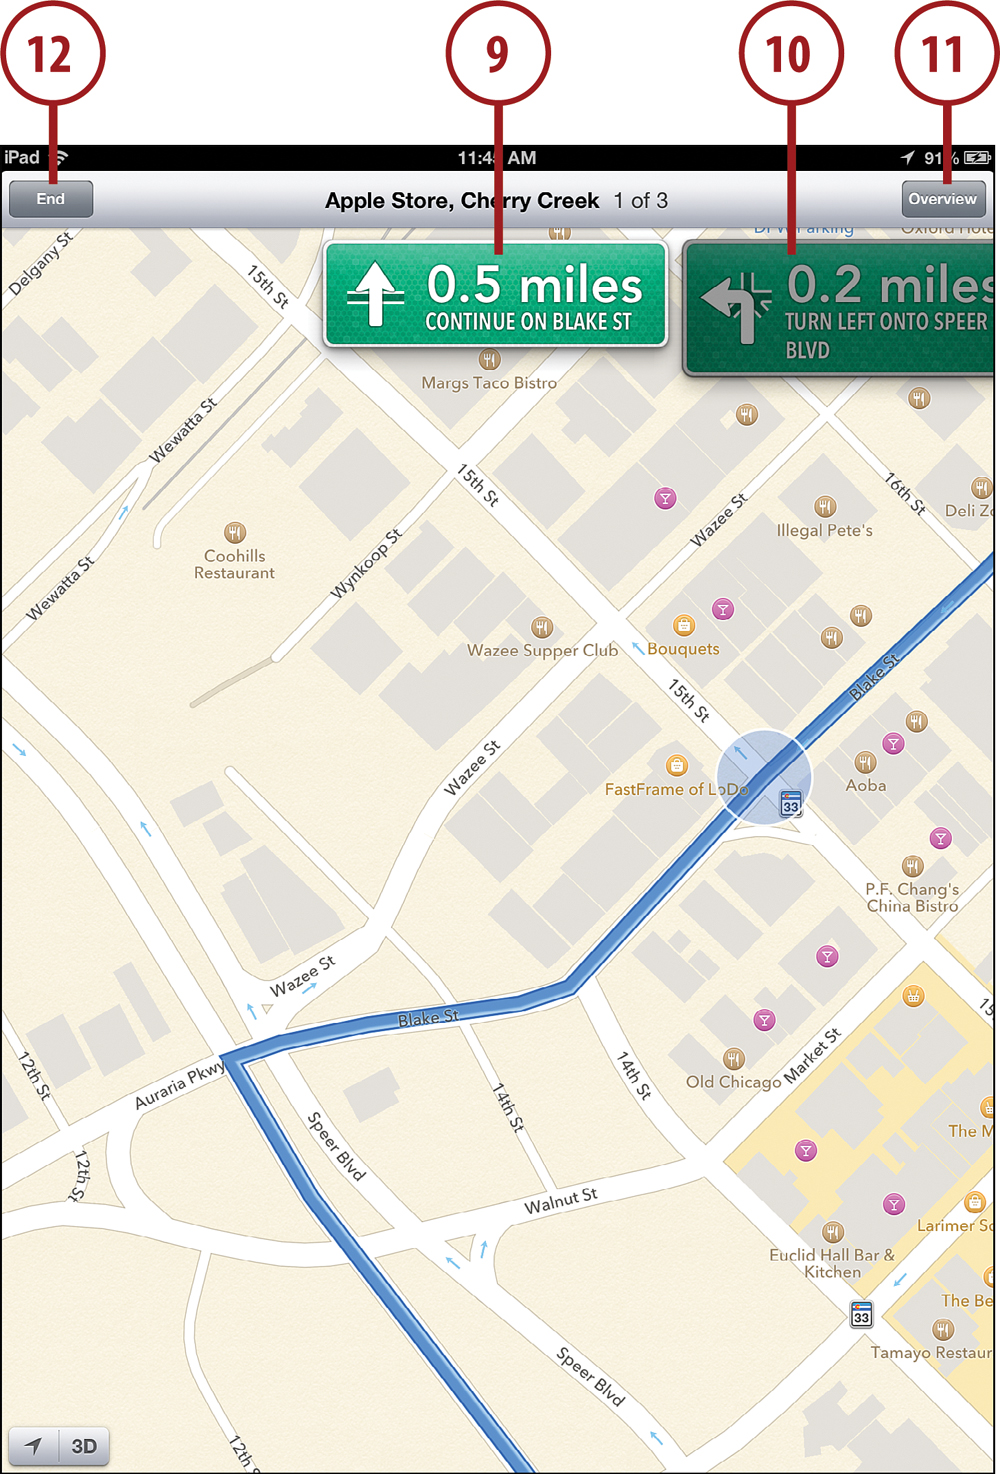
9. The current instruction appears at the top of the screen.
10. Tap on the next instruction to jump to it, or it will automatically shift over to the left as you accomplish the previous instruction. You can also swipe left to right to view future instructions.
11. Tap Overview to temporarily go to the map view that shows the entire route.
12. When you are done using the directions feature, tap End to exit back into normal map mode.
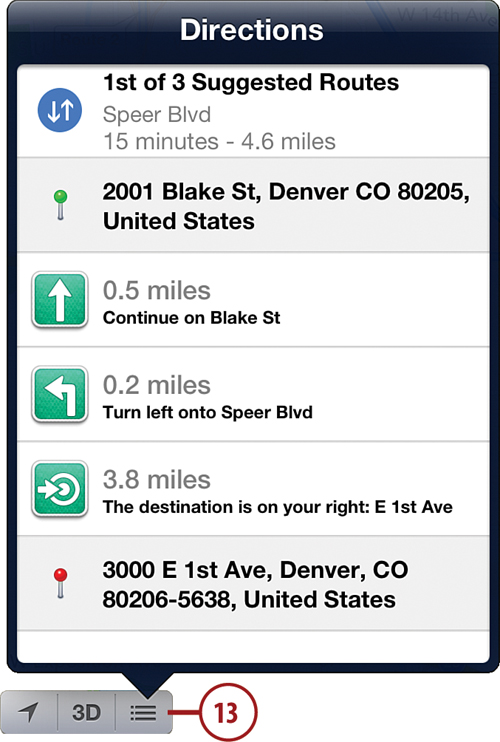
13. Tap the list button to view the directions as a simpler text list.
Sadly, the Maps app won’t let you have more than two waypoints for a route. And you can’t tap in the middle of a route. An alternative is to use Google maps in the Safari browser at http://maps.google.com.
Spoken Turn-By-Turn Directions
For those who have a wireless mobile connection on their iPad, directions become much more useful. You can use your mobile connection as you drive and the Maps app will follow along, updating the steps in your route as you make progress. You even get spoken directions as you approach each turn, so you don’t need to take your eyes off the road.
The easiest way to get the Maps app to show you directions is to ask Siri. With or without the Maps app open, try phrases like:
“How do I get to Denver International Airport?”
“Take me to the nearest coffee shop.”
“Plot a course to Colfax Avenue and Colorado Boulevard.”
“Take me home.”
Setting Bookmarks
If you find yourself requesting directions to or from the same location often, you might want to set a bookmark for that spot.
1. In Maps, search for a location.
2. Tap the i button to bring up the info box on that location.
3. Tap Add to Bookmarks.
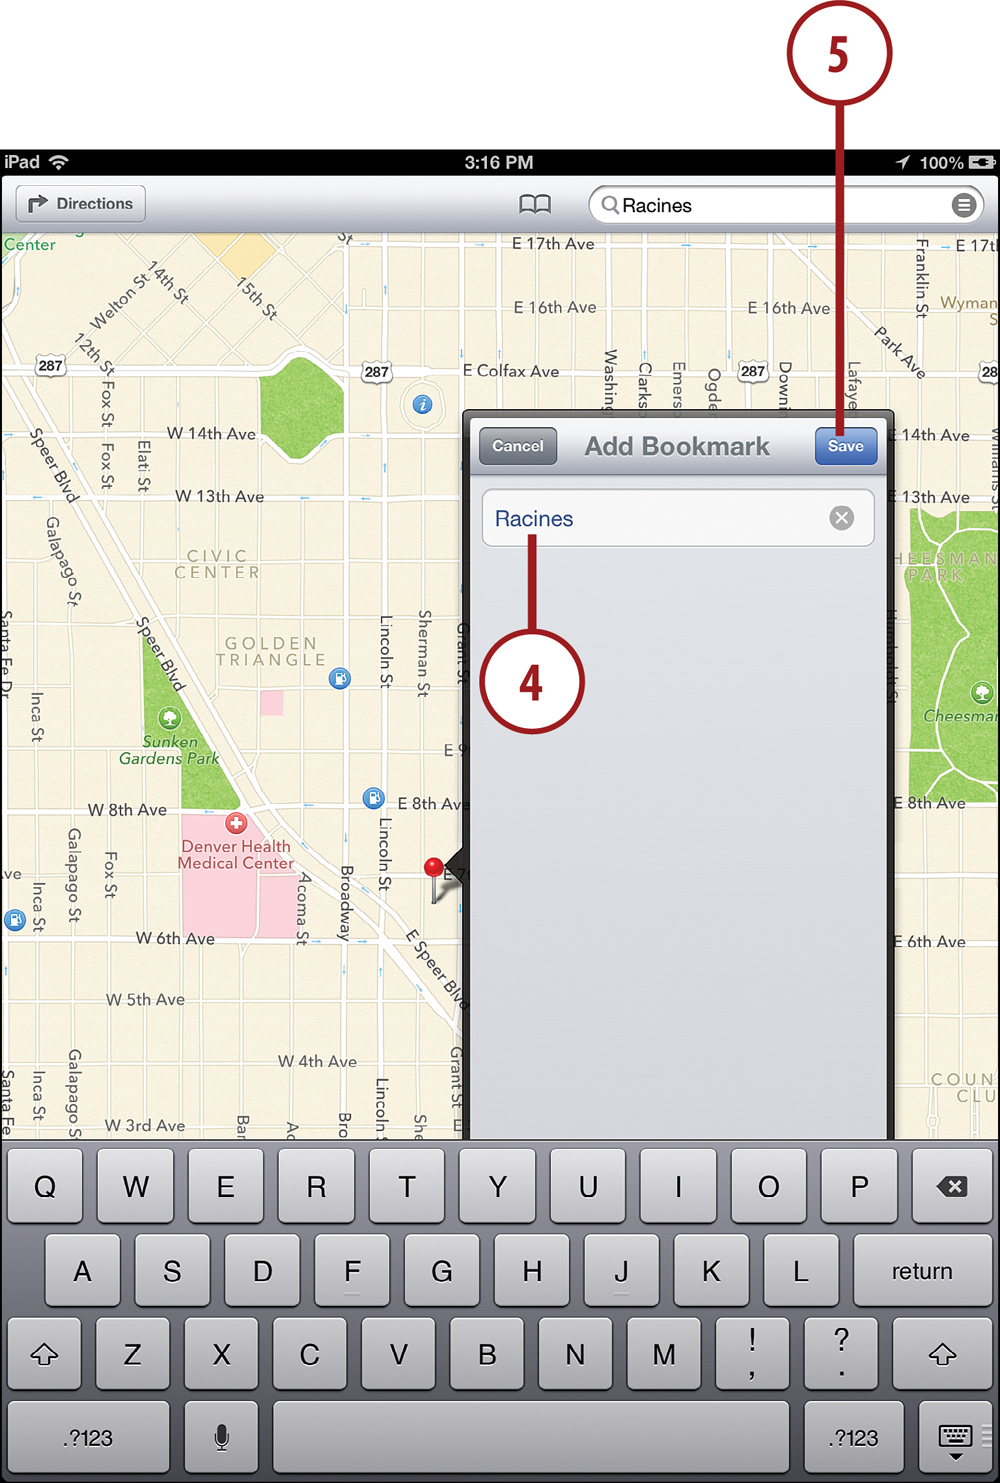
4. Edit the name for the location if you want.
5. Tap Save.
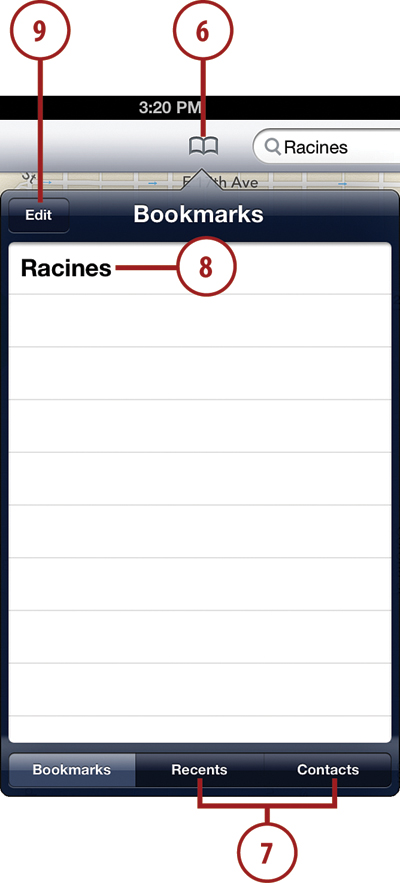
6. Tap the Bookmarks button at the top of the screen to view your bookmarks.
7. At the bottom of the Bookmarks menu, tap Recents or Contacts to see a list of recently visited locations or pull up the address stored for a contact.
8. Tap the name of a bookmark to go to that location on the map.
9. You can also tap Edit to remove bookmarks.
You can also create a bookmark by manually dropping a pin on the map. Tap and hold any location on the map, and a purple pin appears there. You can then drag the pin to another location if it isn’t placed exactly where you want it. These pins have addresses and an i button just like any searched-for location. So, you can use the Add to Bookmarks button after tapping the i to add it as a bookmark. This comes in handy when the app doesn’t quite get the address right.
Using Views
One of the coolest things about online maps are the satellite and street views. Both are fun and helpful and a lot more interesting than a traditional map.
Using Satellite View
Satellite view is like the standard Map view in that you can search for places and get directions. But you can also get a better sense of what is at a location.
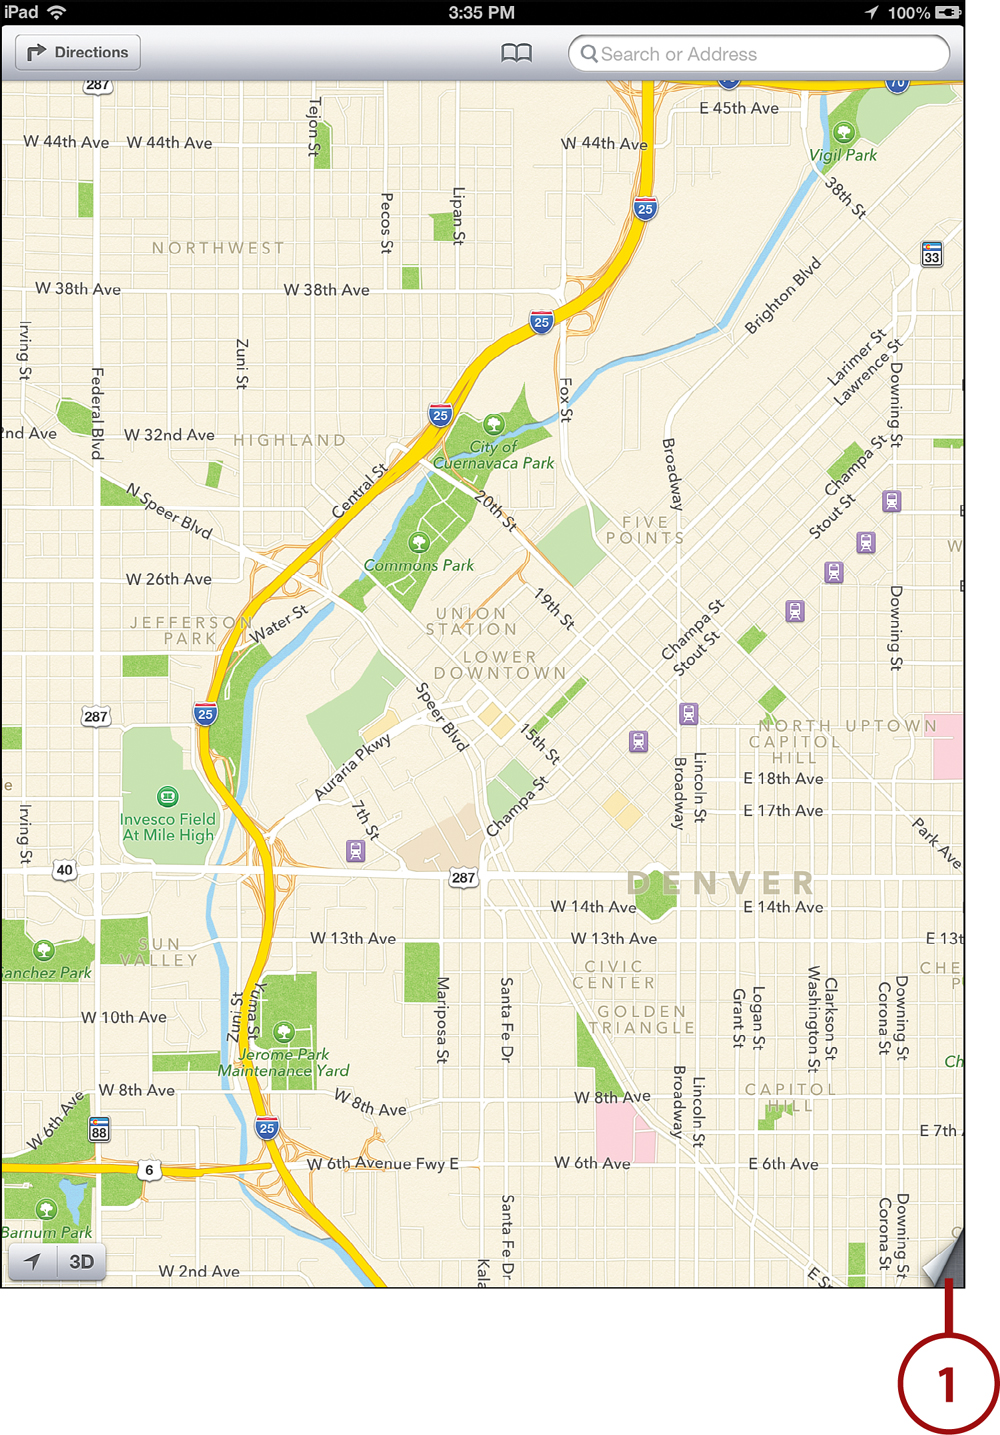
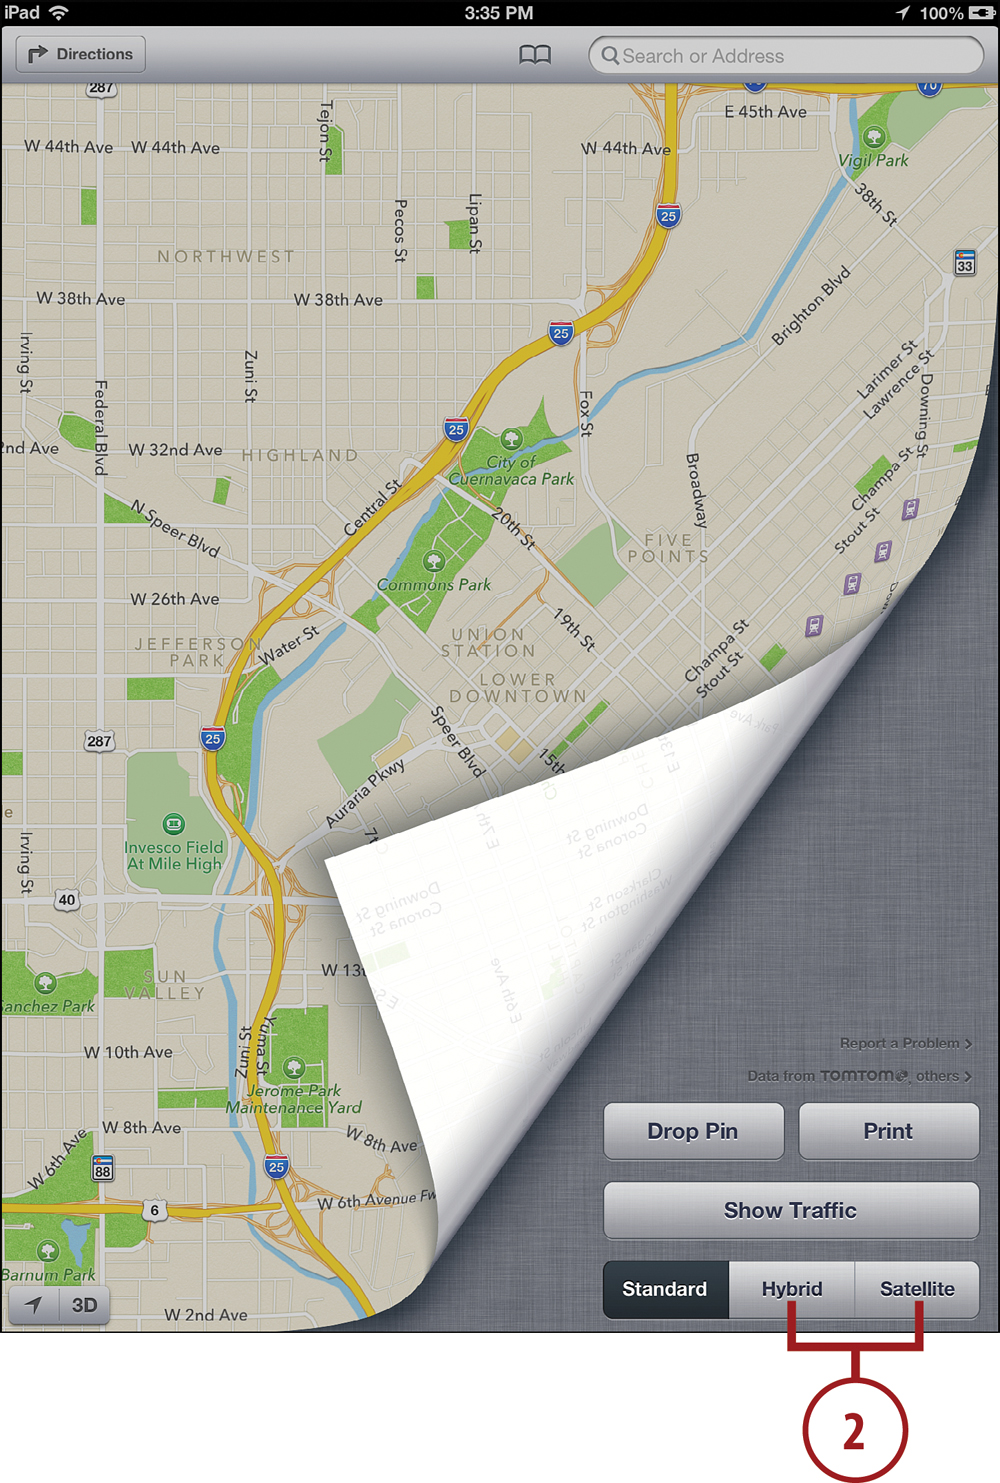
1. In Maps, tap the bottom-right corner, where the map page is curled a bit.
2. Tap Satellite to see a satellite view of your location. If that view isn’t quite what you need, select Hybrid to see a satellite view that also gives you map references to identify items on the map.
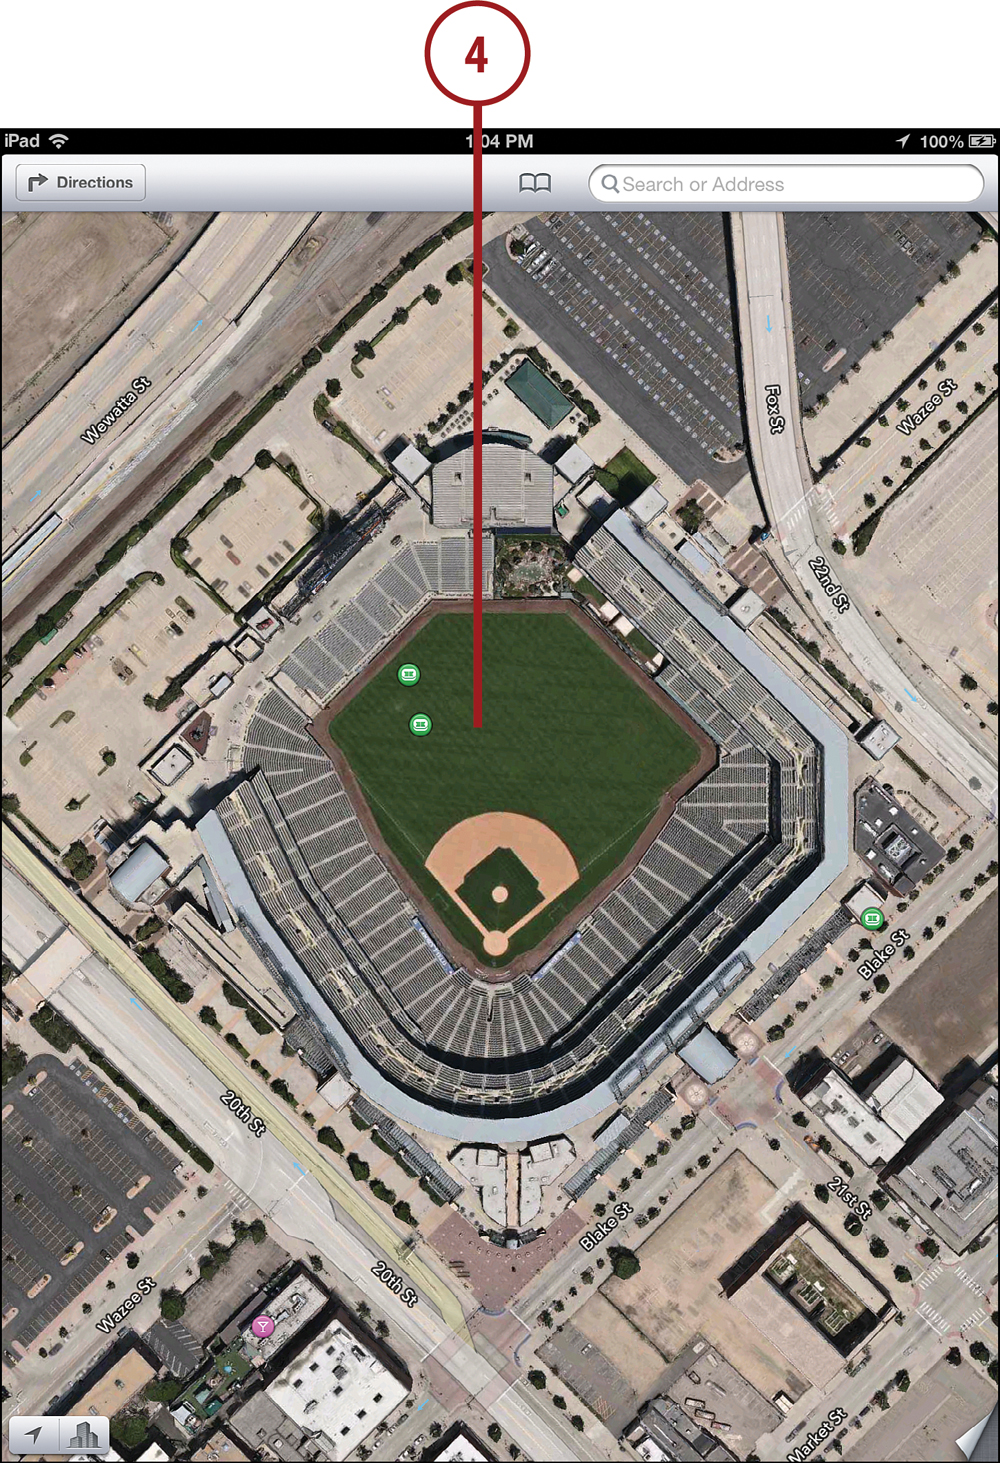
3. Unpinch in the center of the map to zoom in.
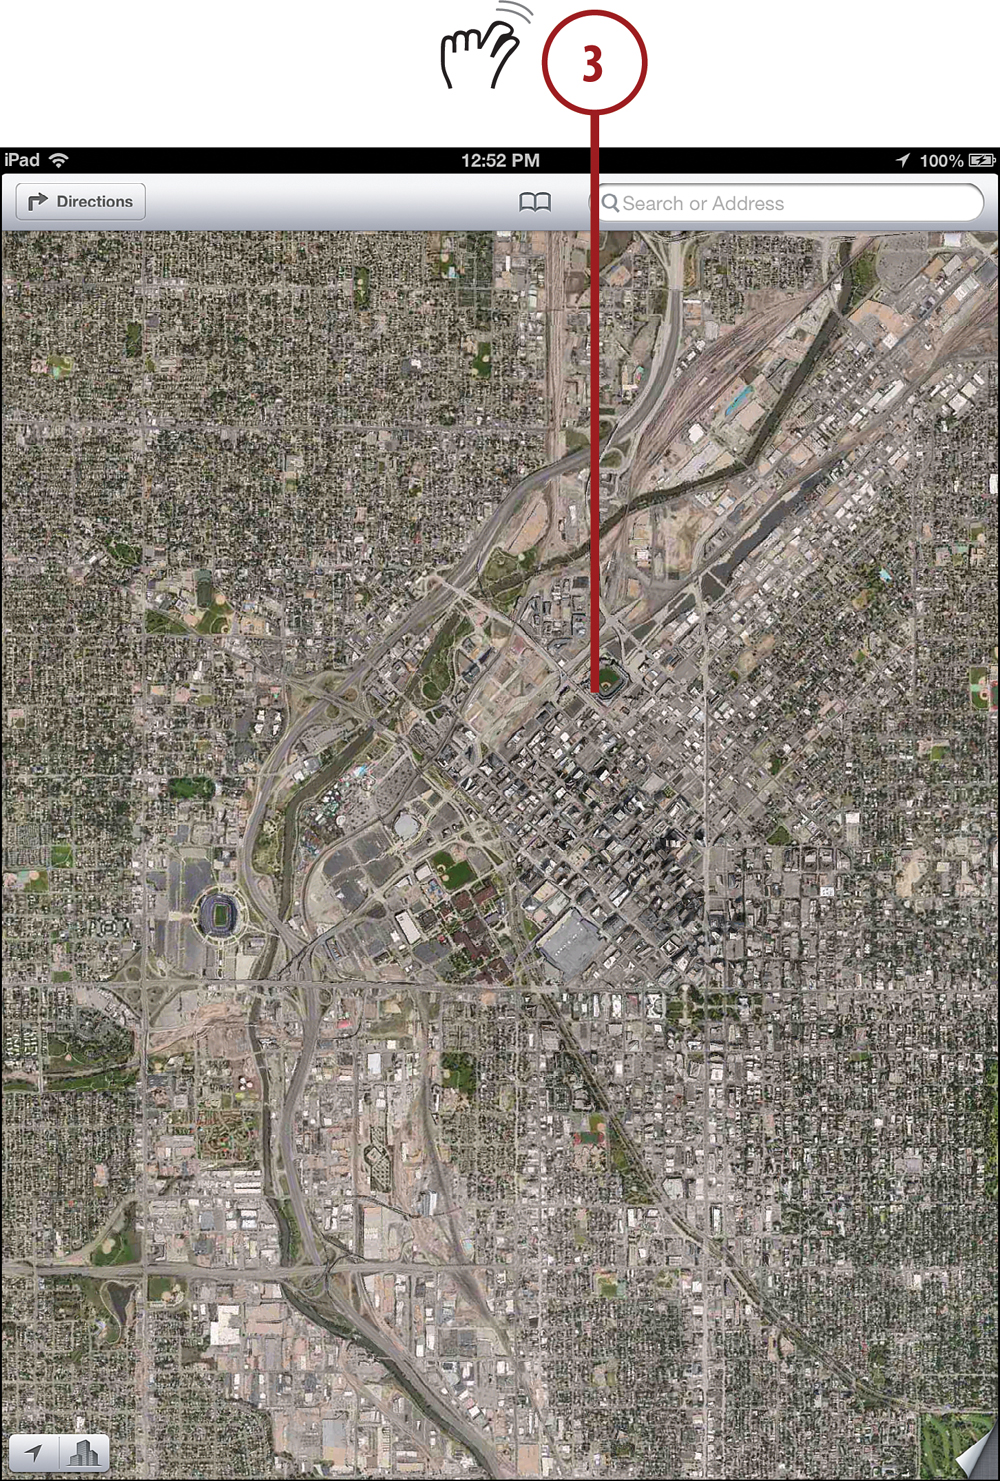
4. The closer view helps show you what the streets actually look like.
Using 3D View
The old Google Maps had street view, a way to view images taken at street level. However, the new Apple Maps app replaces that with 3D aerial views—images taken from airplanes that include all sides of buildings in major downtown areas.
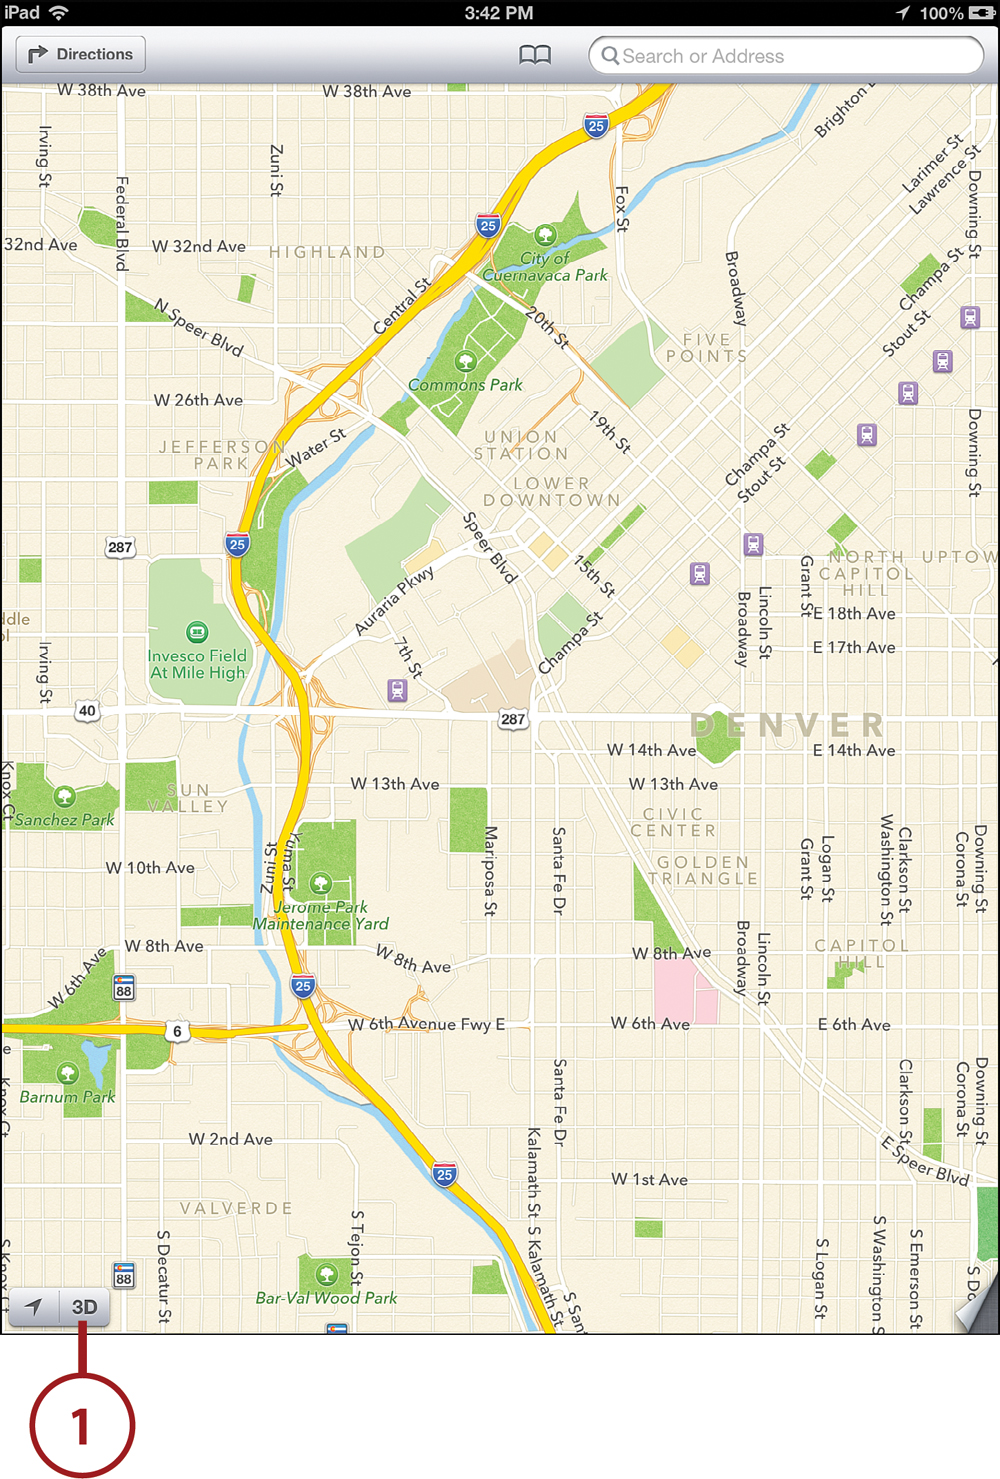
1. Start by looking in Maps using the standard view. Tap the 3D button.
2. The flat top-down view is replaced by a perspective view. Pinch to zoom in closer.
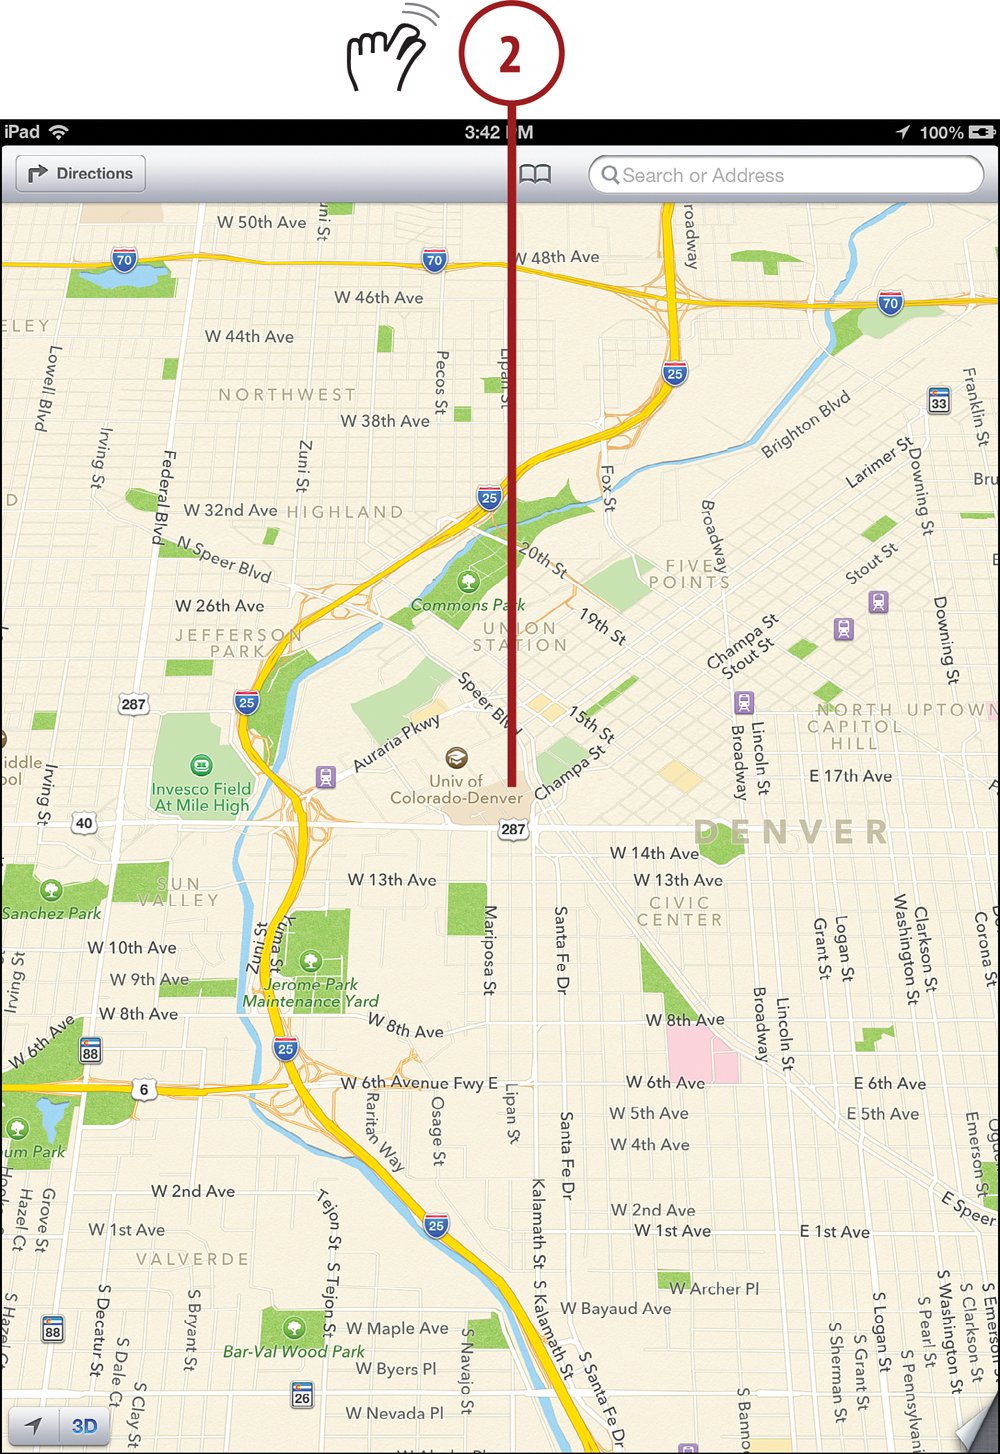
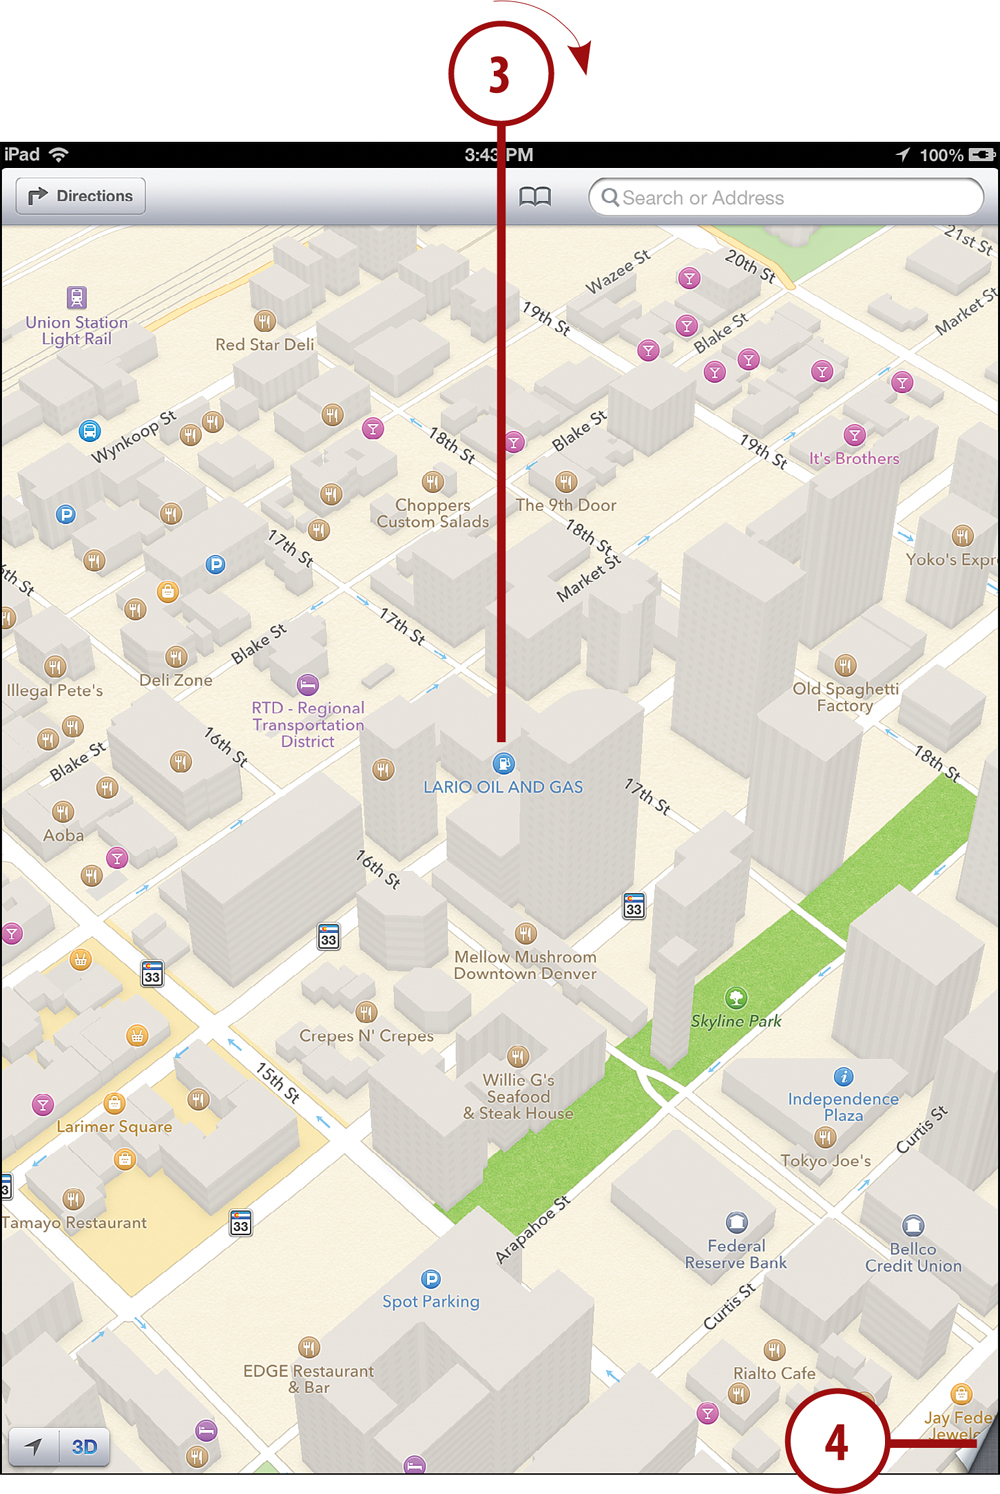
3. Larger buildings in downtown areas are now 3D objects. Use two fingers to rotate the image, and you can see the buildings from all angles.
4. Tap the bottom-right corner and then select Satellite view. You can still zoom and rotate in satellite view, even getting so close to the ground that you can virtually move between buildings.
5. Tap to turn off 3D mode and return to standard top-down flat mode.
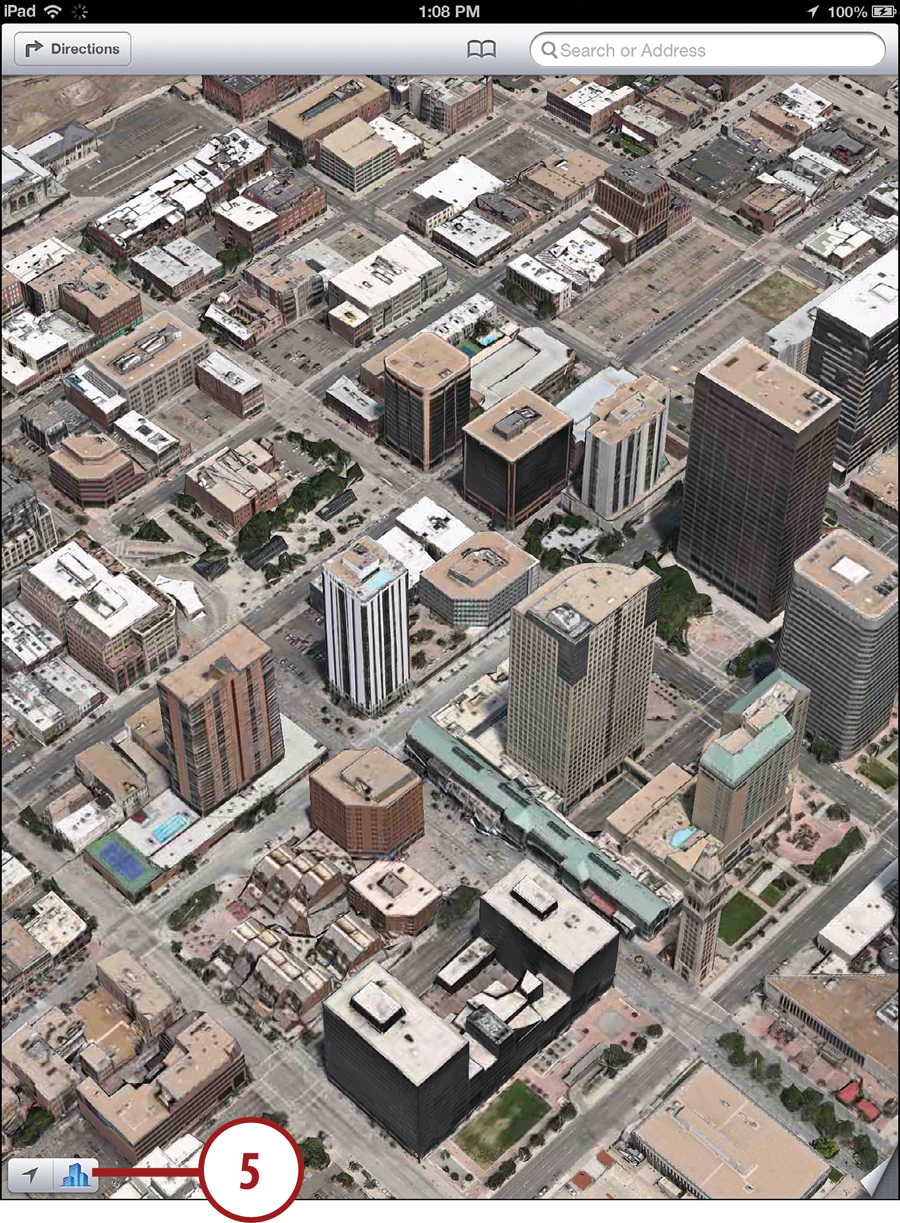
Although 3D view is great for those of us who live in big cities, it isn’t available for every location. For there to be 3D models and textures, an Apple-hired airplane has to take pictures of your city. They have gotten a lot of the world’s major cities, but not everywhere yet.
Getting Traffic Reports
The Maps app includes a way for you to see up-to-date traffic flow and information.
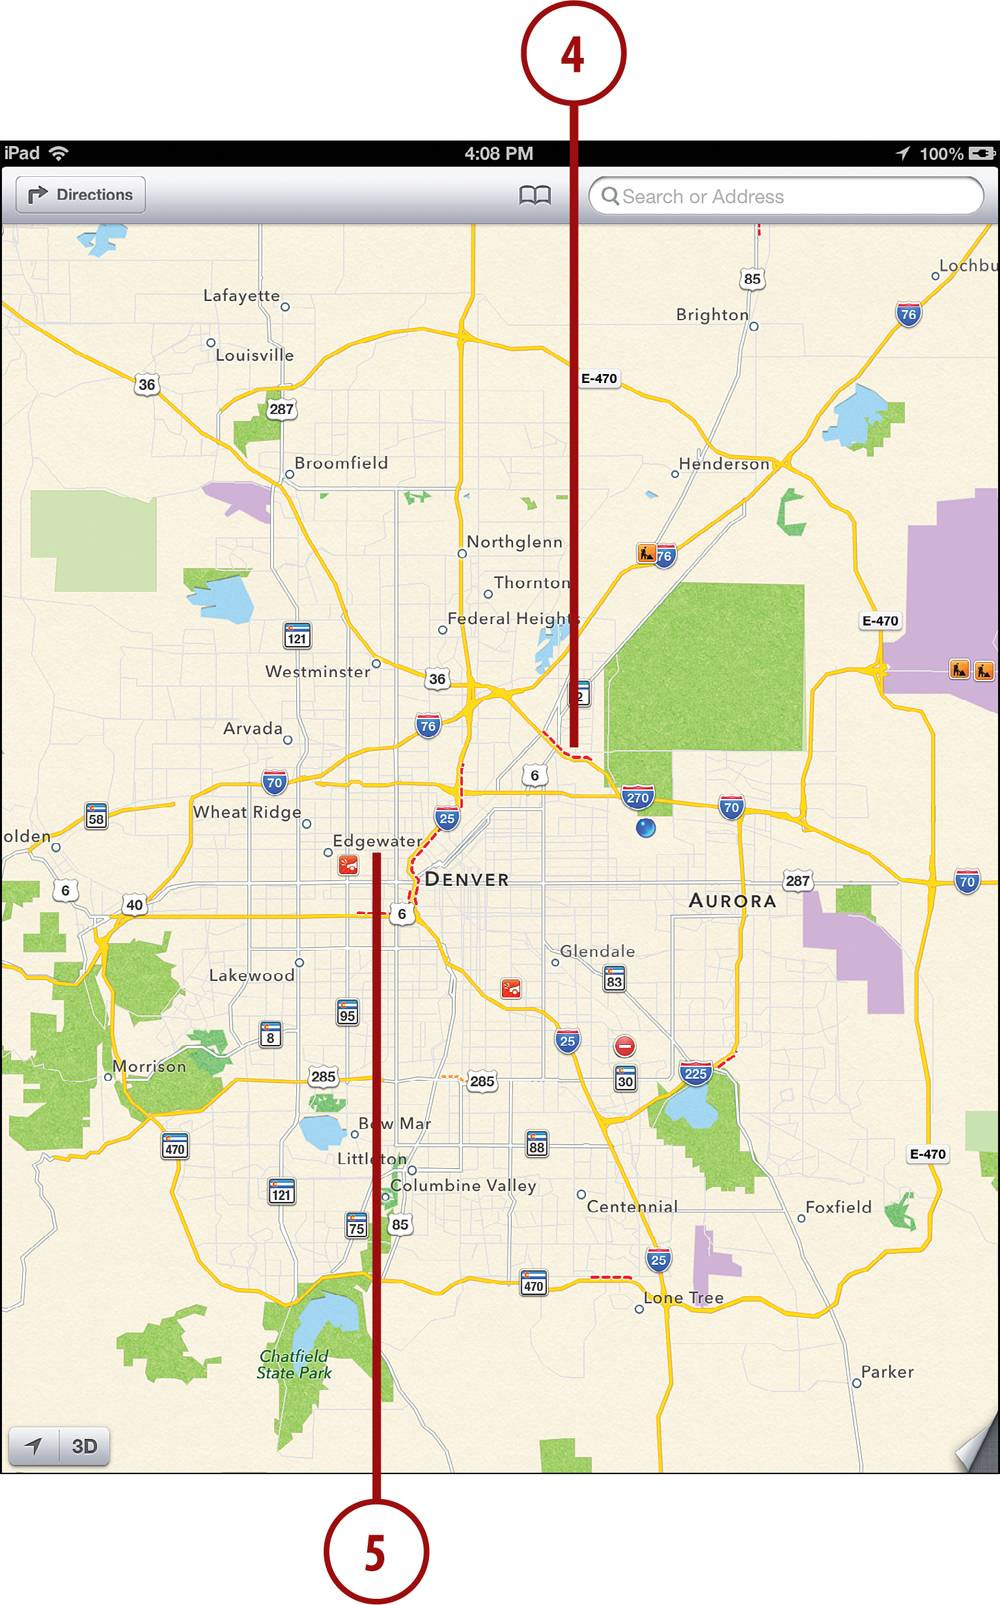
1. Bring up a Map view that shows some highways and major boulevards.
2. Tap the page corner.
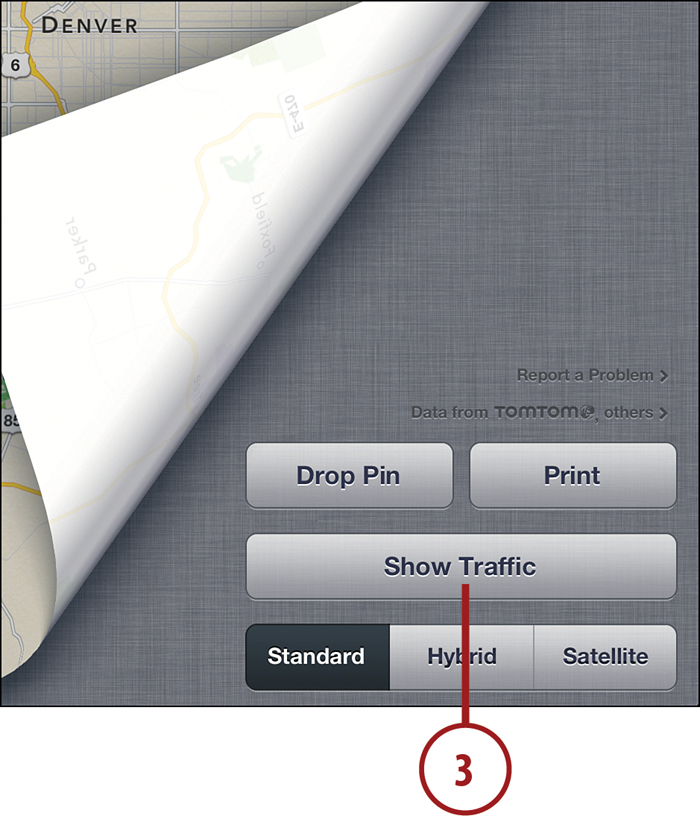
4. The map shows red and yellow dashed lines where traffic is slow.
5. There are also icons for accidents, road closures, and construction. Tap any of these for details.