
Chapter Two. Shooting Flowers Like a Pro
There’s More to It Than You’d Think
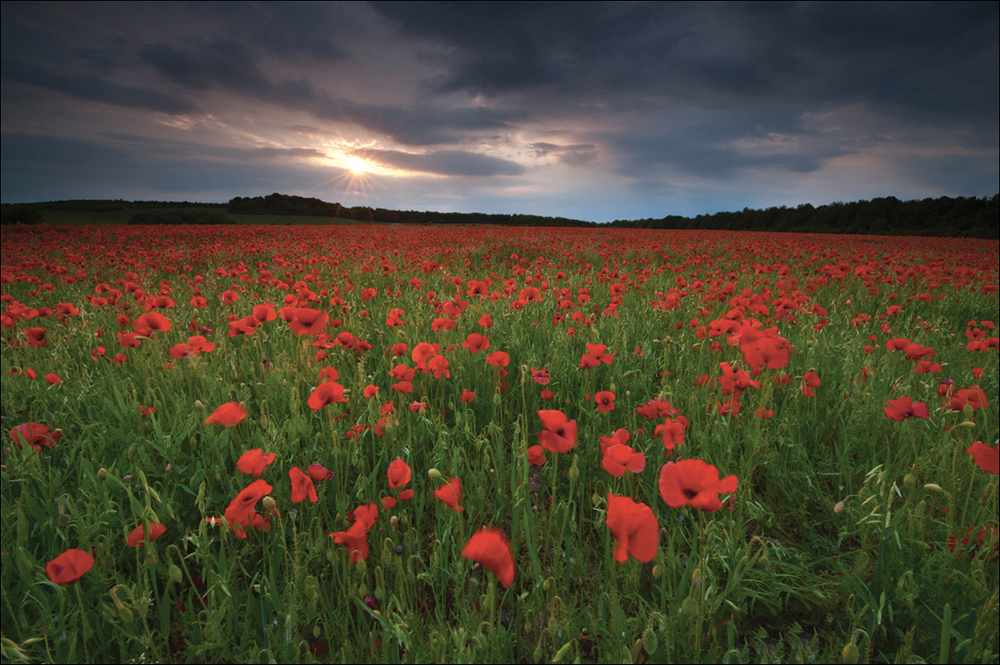
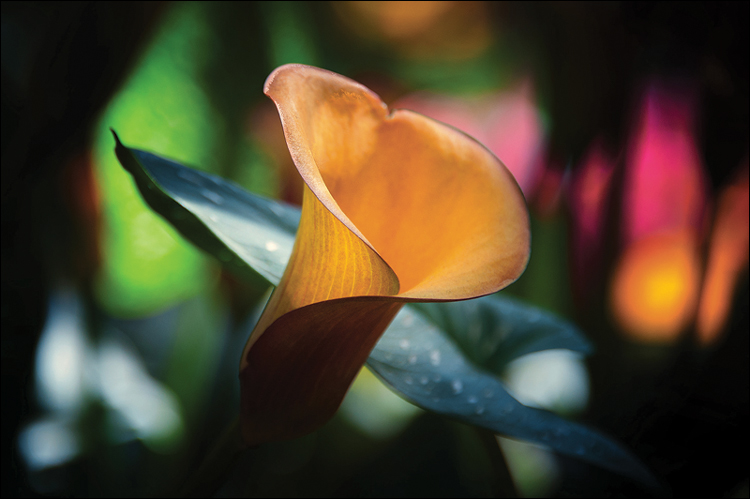
SHUTTER SPEED: 1/60 SEC F-STOP: F/5.6 ISO: 800 FOCAL LENGTH: 70MM | PHOTOGRAPHER: SCOTT KELBY

You’re probably surprised to see a chapter in here about shooting flowers because flowers seem like they’d be easy to shoot, right? I mean, they’re just sitting there—not moving. They’re colorful. They’re already interesting, and people love looking at them. It should be a total no-brainer to get a good flower shot. But, ya know what? It’s not. It’s a brainer. It’s a total brainer. Ya know why? It’s because of pollination. That’s right, it’s the pollination that naturally occurs in nature that puts a thin reflective film over flowers that can’t normally be seen with the naked eye, but today’s sensitive CMOS and CCD digital camera sensors capture this reflectance and it appears as a gray tint over our images. Not only does it turn the photos somewhat gray (which causes flowers to lose much of their vibrant color), you also lose sharpness as well. Now, there is a special photographic filter (called the Flora 61B from PhotoDynamics) that can help reduce the effects of this pollination and both bring back the sharpness and reduce the graying effect, but because of U.S. trade sanctions imposed by the Federal Trade Commission, we can no longer buy this filter direct. Especially because I totally made this whole thing up. I can’t believe you fell for this two chapters in a row. Seriously, how are you going to get good flower photos if you’re falling for the old Flora 61B trick? Okay, I’m just teasing you, but seriously, getting good flower shots is an art, and if you follow the tips I’m laying out in this chapter, the very next flower shots you take will be that much better (especially if you don’t mind the graying and loss of sharpness caused by pollination). See, there I go again. It’s a sickness.
Don’t Shoot Down on Flowers
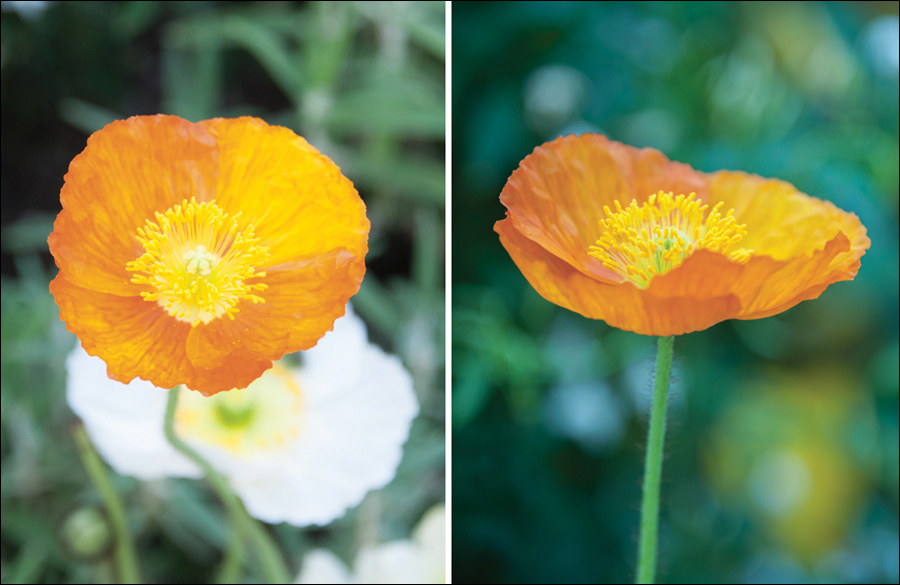
On an average day, if you were to walk by some wildflowers in a field, or along a path in a garden, you’d be looking down at these flowers growing out of the ground, right? That’s why, if you shoot flowers from a standing position, looking down at them like we always do, your flower shots will look very, well...average. If you want to create flower shots with some serious visual interest, you have to shoot them from an angle we don’t see every day. That usually means not shooting down on them, and instead getting down low and shooting them from their level. This is another one of those things the pros routinely do and most amateurs miss. Hey, if you’re going to shoot some great flower shots, you’re going to have to get your hands dirty (well, at least your knees anyway). The shots above show the difference: on the left, the typical “shooting down on flowers” shot; on the right, the same flower in the same light using the same focal length lens shot 30 seconds later, but I shot it from the side (down on one knee) instead of shooting down on it. You can see the difference shooting a non-typical angle makes. So, to get great flower shots, start by not shooting down on them. By the way, while you’re down there, try getting really low (down below the flowers) and shoot up at them for a fascinating angle you rarely see!
Shooting Flowers with a Zoom Lens
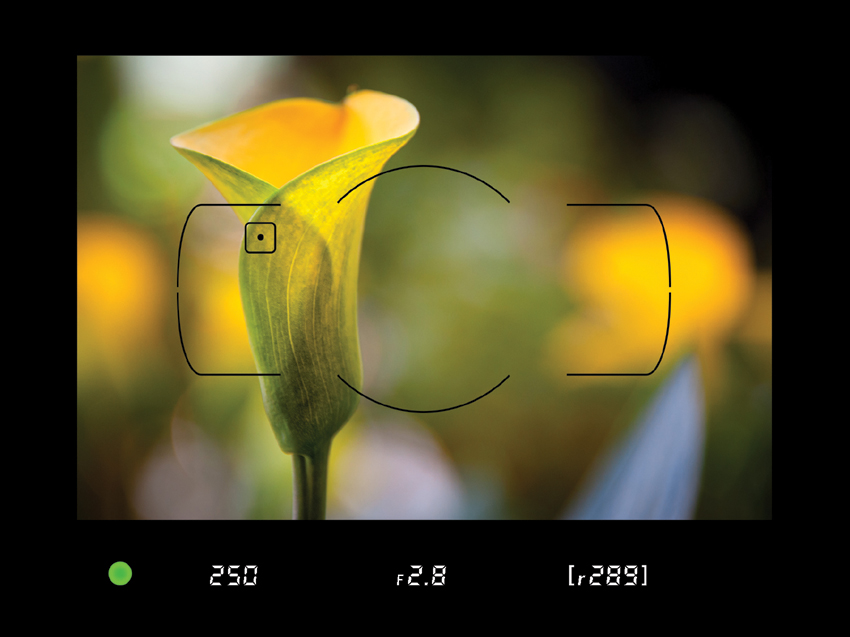
You don’t have to have a macro (close-up) lens to take great flower shots—zoom lenses work just great for shooting flowers for two reasons: (1) you can often zoom in tight enough to have the flower nearly fill the frame, and (2) it’s easy to put the background out of focus with a zoom lens, so the focus is just on the flower. Start by shooting in aperture priority mode (set your mode dial to A or Av), then use the smallest aperture number your lens will allow (in other words, if you have an f/5.6 lens, use f/5.6). Then try to isolate one flower, or a small group of flowers that are close together, and focus on just that flower. When you do this, it puts the background out of focus, which keeps the background from distracting the eye and makes a stronger visual composition.
Use a Macro Lens to Get Really Close
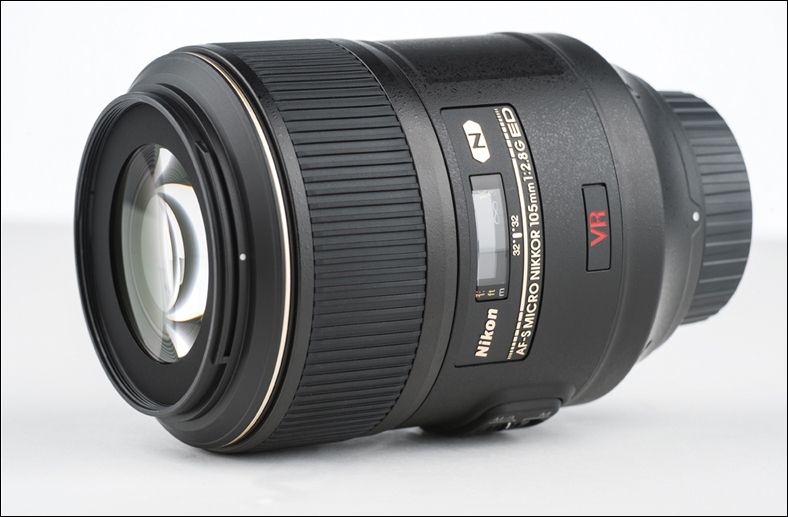
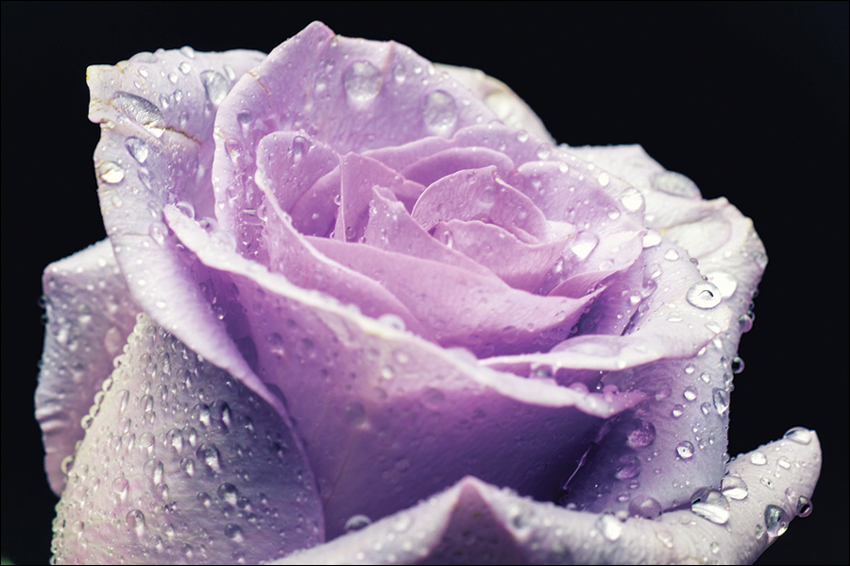
If you’ve ever wondered how the pros get those incredibly close-up shots (usually only seen by bees during their pollination duties), it’s with a macro lens. A macro lens (just called “macro” for short) lets you get a 1:1 view of your subject and reveal flowers in a way that only macros can. A macro lens has a very shallow depth of field—so much so that when photographing a rose, the petals in the front can be in focus and the petals at the back of the rose can be out of focus. I’m not talking about an arrangement of roses in a vase—I’m talking about one single rose. By the way, you must (see how that’s set off in italics?), must, must shoot macro on a tripod. When you’re really in tight on a flower, any tiny bit of movement will ruin your photo, so use every sharpening technique in Chapter 1 to capture this amazing new world of macro flower photography.
Can’t Afford a Macro? How ’bout a Close-Up?

I learned about this from my buddy (and famous wildlife and nature photographer) Moose Peterson, and what it lets you do is turn your telephoto zoom lens into a macro lens for 1/4 of the price, and 1/10 the weight and size. It looks just like a thick filter (it’s about 1" thick), and it screws onto both Canon and Nikon lenses just like a traditional filter, but it turns your zoom lens into a macro zoom. What’s great about this little close-up lens is that:
(1) it takes up so little room in your camera bag;
(2) it weighs just a few ounces;
(3) and best of all—it’s pretty inexpensive (well, compared to buying a decent macro lens, which would run you at least $500).
It’s called the Canon Close-Up Lens (even though it’s from Canon, you can get a version that screws onto a Nikon lens. It’s the only thing I know of from Canon that’s designed for Nikon cameras. I use the Canon Close-Up Lens 500D to attach to my 70–200mm Nikon VR lens [it’s 77mm], and it works wonders). So, how much is this little wizard? Depending on the size of the lens you’re going to attach it to, they run anywhere from about $75 to $145. That ain’t bad!
There are three ideal times to shoot flowers:
(1) On cloudy, overcast days. The shadows are soft as the sun is hidden behind the clouds, and the rich colors of the flowers aren’t washed out by the harsh direct rays of the sun. That’s why overcast days are a flower photographer’s best friend. In fact, there’s probably only one other time that’s better than shooting on an overcast day, and that is...
(2) Just after a rain. This is a magical time to shoot flowers. Shoot while the sky is still overcast and the raindrops are still on the petals (but of course, to protect your digital camera [and yourself], don’t actually shoot in the rain). If you’ve got a macro lens, this is an amazing time to use it. While you’re shooting macro, don’t forget to shoot the raindrops on leaves and stems as well, while they’re reflecting the colors of the flowers (of course, don’t forget to shoot on a tripod if you’re shooting macro).
(3) If you shoot on sunny days, try to shoot in the morning and late afternoon. To make the most of this light, shoot with a long zoom lens and position yourself so the flowers are backlit, and you’ll get some spectacular (but controlled) back lighting.
Don’t Wait for Rain—Fake it!
This one may sound cheesy at first, but you’ll be shocked at how well this works. Instead of waiting for a rainy day to shoot, take a little spray bottle with you, fill it with water, and spray the flowers with water yourself. I found a nice little spray bottle in Walgreens’ beauty section (I know what you’re thinking, “Walgreens has a beauty section?” Believe it or not, they do) for a couple of bucks, and it works wonders. Just a couple of quick spritzes with the spray bottle and you’ve got some lovely drops of water on your petals, and no one will ever know you didn’t wait patiently for Mother Nature to intervene. Get a small enough bottle and you can carry it in your camera bag (empty, of course). By the way, I’ve used this spray bottle technique to shoot some yellow roses I bought for my wife, and by using a macro lens you’d swear I was shooting on the White House lawn after a spring shower. Try this once—you’ll become a believer.
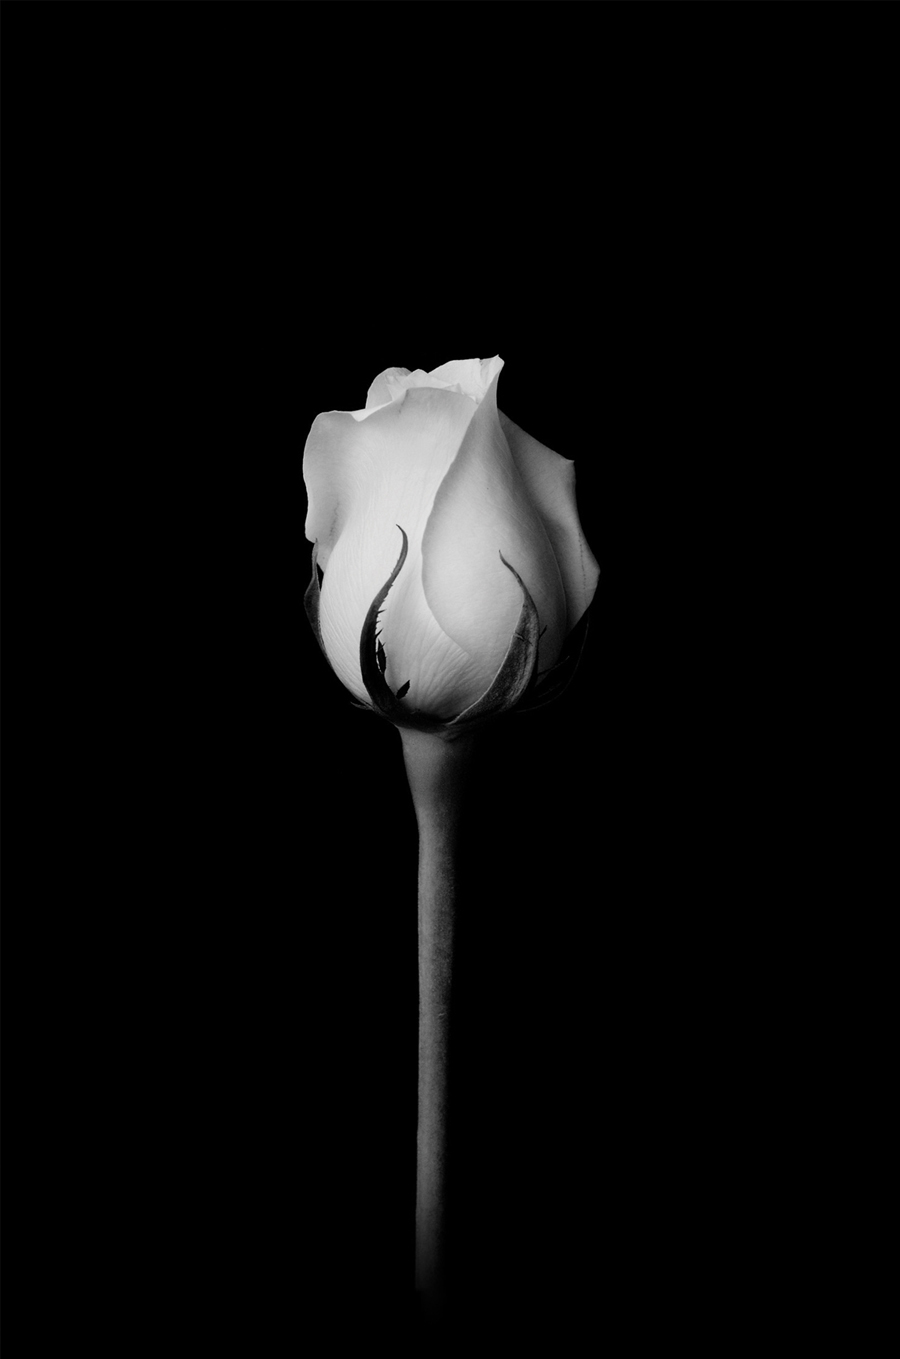
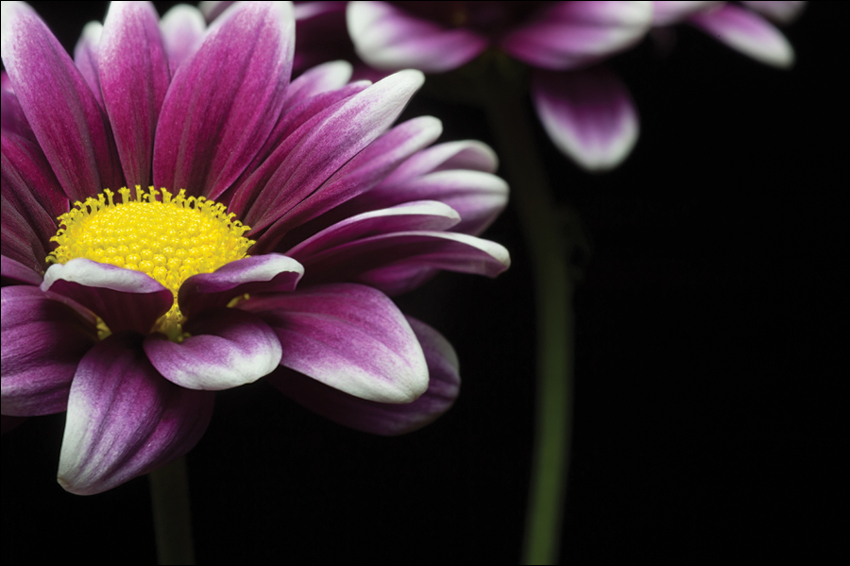
Flowers on a Black Background
One of the most dramatic compositions for shooting flowers is to position a single flower on a black background. You can add a black background in Photoshop, but in most cases that is just way too much work. Instead, do what the pros do—put a black background behind your flower when you shoot it. My buddy Vincent Versace, one of the leading nature photographers (and instructors) in the business, told me his trick—he wears a black jacket while out shooting flowers, and if he sees a flower he wants on a black background, he has his assistant (or a friend, or his wife, or a passerby, etc.) hold the back of his jacket behind the flower. I know, it sounds crazy—until you try it yourself. If you’re shooting flowers indoors (I shoot nearly every arrangement I buy for my wife, or that we receive from friends), buy a yard of either black velvet or black velour (velvet runs around $10–15 per yard; velour runs around $5–10 per yard) and literally put it behind your flowers. You can prop it up on just about anything (I hate to admit it, but I’ve even propped up my velour background by draping it over a box of my son’s Cookie Crisp cereal). Leave a few feet between your flowers and the black background (so the light falls off and the black looks really black) and then shoot away. Now, what kind of light works best? Keep reading to find out.
Flowers on a White Background
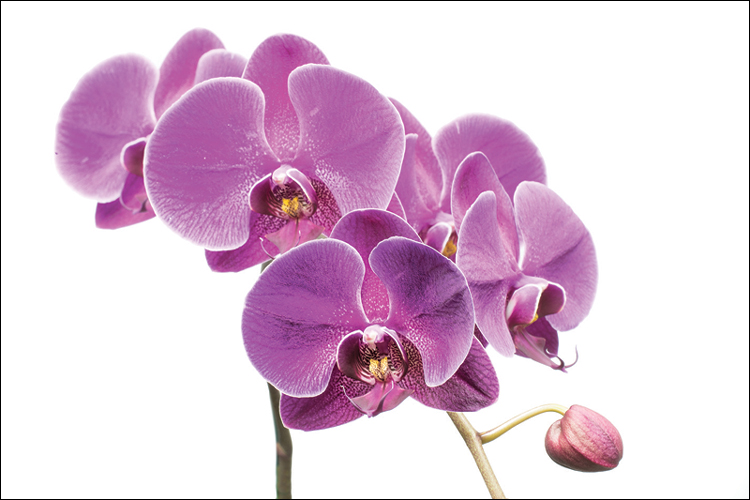
Another popular look for a flower photographer is to shoot on a white background. You could buy a seamless roll of paper from your local camera store (it’s pretty cheap), but it’s usually much wider than you need. Plus, unless you’re shooting flowers for a florist, you’re usually not going to want to see the vase. That’s why I go to Office Depot and buy two or three 20x30" sheets of white mounting board (it looks like poster board, but it’s much thicker and stiffer). I usually position one behind the flowers (in a vase), and then use the other to reflect natural light (from a window with indirect sunlight) back onto the white background so it doesn’t look gray. Again, put about 3 feet between your flowers and the background, and use that natural light to capture your flowers on what appears to be a solid white background you added in Photoshop, but it was even easier because you did it in the camera.
The Perfect Light for Indoor Flower Shots
If you’re shooting flowers indoors, you don’t have to buy an expensive lighting rig (finally, something you don’t have to spend a bunch of money on), because flowers love diffused natural light. By diffused, I mean that it’s not getting direct sunlight, so any soft light coming in from a window works just great. If your window is really, really dirty, that’s even better because it makes the light even more diffuse. So look for a window in your house, studio, office, etc., that has non-direct sunlight coming in. Then set your flowers near that window, and position them so you’re getting side lighting (if the natural light hits the flowers head on, they’ll look kind of flat—you need that extra dimension that side lighting brings). Set up your tripod so you’re shooting the flowers at eye level (remember, don’t shoot down on flowers). Now you’re ready to shoot in some beautiful, soft light, and you didn’t spend a dime (at least on lighting, anyway).
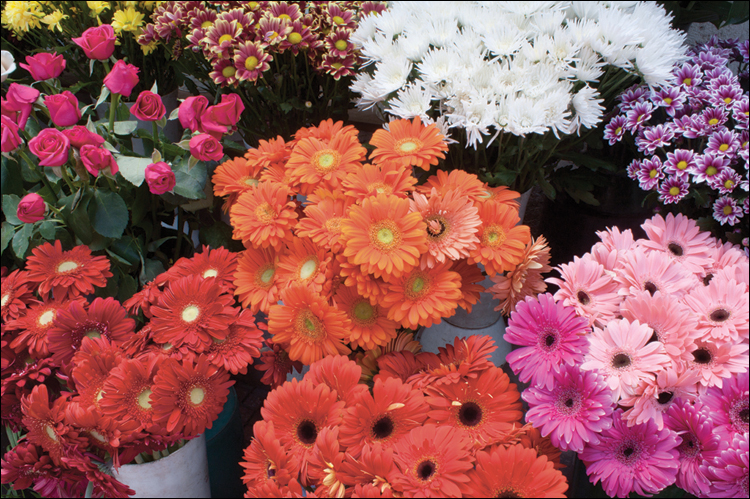
This may sound like the “Duh” tip of the book, but I can’t tell you how many times I’ve told a photographer about this and they say, “Gee, I never thought of that.” To get some really great flowers to shoot, just go to a local florist and buy them (see, there’s that “duh” part). You can pick exactly which individual flowers you want (I like shooting roses, calla lilies, and daisies myself), and chances are the flowers you’re getting are in great shape (they’re fresh). You can reject any flower they pull out that has brown spots or is misshapen (I love that word, “misshapen”), and you don’t have to pay to have them arranged. You can often walk out for less than 10 bucks with some amazing-looking subjects to shoot at the height of their freshness (though sometimes you have to wait a day or so until your roses are in full bloom).
Stopping the Wind
If you’re shooting flowers outdoors, you’re bound to run into the natural enemy of flower photography—wind. There’s nothing more frustrating than standing there, tripod set, camera aimed and focused, and you’re waiting for the wind to die down enough to get the shot. This is especially bad if you’re shooting macro, where the slightest movement spells disaster (well, not disaster, but a really blurry photo). You can try the old use-your-body-to-block-the-wind trick (which rarely works, by the way), but you’re actually better off letting the camera fix the problem. Switch to shutter priority mode (where you control the shutter speed and your camera takes care of adjusting the rest to give you a proper exposure), then increase the shutter speed to at least 1/250 of a second or higher. This will generally freeze the motion caused by wind (unless it’s hurricane season). If the higher shutter speed doesn’t do the trick, then you have to go to Plan B, which is making the wind the subject. That’s right, if you can’t beat ‘em, join ‘em—use a very slow shutter speed so you see the movement of the flowers (you’ll actually see trails as the flower moves while your shutter is open), and in effect you’ll “see” the wind, creating an entirely different look. Give this seeing-the-wind trick a try, and you might be surprised how many times you’ll be hoping the wind picks up after you’ve got your regular close-ups already done.
Consider Just Showing One Part
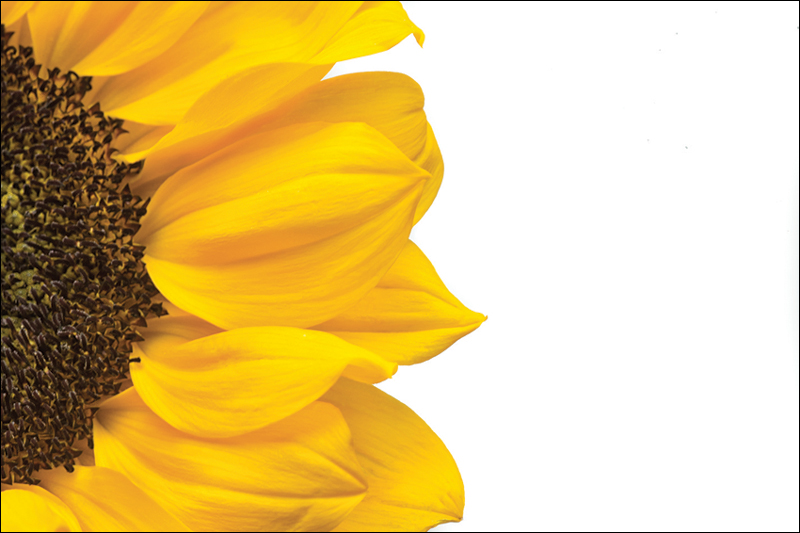
Although most of the time we’ll be capturing one or more flowers in our frame, you can create flower images with a lot of impact by zooming in really tight and just showing part of a flower. One single petal (if it’s a larger flower) or 1/3 or 1/2 of the flower can really create a dynamic-looking image. One of the reasons why these images are so interesting is because this close-up view of flowers is one we normally don’t see. This doesn’t take any special technique—you just have to zoom in really close (and if you have a macro lens, it’s even easier getting in really tight on just part of the flower).