2.3.5. Configure Launcher Icon Step
When your app is installed on a device, its icon and name appear with all other installed apps in the launcher, which you can access via the ![]() icon on your device’s home screen. Android runs on a wide variety of devices that have different screen sizes and resolutions. To ensure that your images look good on all devices, you should provide several versions of each image your app uses. Android can automatically choose the correct image based on various specifications, such as the screen’s resolution (width and height in pixels) or DPI (dots per inch). We discuss these mechanisms starting in Chapter 3. You can find more information about designing for varying screen sizes and resolutions at
icon on your device’s home screen. Android runs on a wide variety of devices that have different screen sizes and resolutions. To ensure that your images look good on all devices, you should provide several versions of each image your app uses. Android can automatically choose the correct image based on various specifications, such as the screen’s resolution (width and height in pixels) or DPI (dots per inch). We discuss these mechanisms starting in Chapter 3. You can find more information about designing for varying screen sizes and resolutions at
and about icons in general at
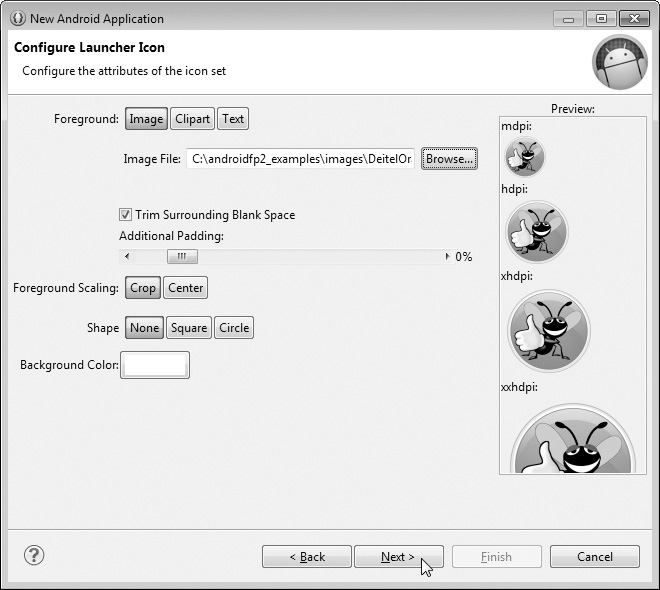
The Configure Launcher Icon step (Fig. 2.5) enables you to configure the app’s icon from an existing image, a piece of clip art or text. It takes what you specify and creates versions scaled to 48-by-48, 72-by-72, 96-by-96 and 144-by-144 to support various screen resolutions. We used an image named DeitelOrange.png. To use it, click Browse... to the right of the Image File: field, navigate to the images folder in the book’s examples folder, select DeitelOrange.png and click Open. Previews of the scaled images are shown in the dialog’s Preview area. These images will be placed into appropriate folders in the app’s project. Images do not always scale well. For apps that you intend to place in the Google Play store, you might want to have an artist design icons for the appropriate resolutions. In Chapter 9, we discuss submitting apps to the Google Play store and list several companies that offer free and fee-based icon design services. Click Next > to continue to the Create Activity step.