
5. Cut the Clutter: Scan Everything
In This Chapter
![]() What Is a Scanner?
What Is a Scanner?
![]() The App Scanner
The App Scanner
![]() The Portable Scanner
The Portable Scanner
![]() The Desktop Scanner
The Desktop Scanner
Of all the things you can do, perhaps nothing does more to turn your mild-mannered iPad into the Ultimate iPad than converting anything and everything you can into a compatible digital file. Many files are already in a compatible format, and just require available storage—music and video files come to mind. But for most folks, clutter typically comes in the form of paper—letters, personal documents, recipes, old photos, magazines, permission forms, bills, and so much more. These are all items that can and should be converted to digital files to reduce physical clutter.
Of course, many items are best kept in their physical form—car titles, marriage licenses, stock certificates, and wills—but having a digital backup is still always a good idea. However, for everything else, you need to ask yourself if something can be converted to a digital file and then the original tossed in the garbage or shredded. If you’ve set up a storage solution that can be easily accessed with your iPad, then by converting documents to digital you’re ensuring that just about everything you’ll ever need is just a tap away on your iPad. (And you’ll see shortly just how easy it is to locate everything using keyword/tag searches.)
For me personally, my office is 98% paper free. I do have a few folders or boxes that contain paper items that I either must keep (for legal reasons) or want to keep (for personal reasons). These include business documents that I’m forced to keep a copy of for tax purposes and sentimental items such as a number of my children’s sketches, paintings, and report cards.
But everything else? Digital. PDF, JPEG, DOC, and a dozen more formats are all available using an app or two. How did I get all of my paper clutter into these digital formats, and how will you do it? The answer is simple—you’re going to scan them with a scanner.
What Is a Scanner?
In its simplest form, a scanner converts a single document or a photo from its physical form into a digital file. That file can be one of many formats—PDF, JPEG, PNG, and even Word or Excel files with the proper software.
Scanners come in many sizes—from large, refrigerator-sized machines that are typically used in commercial settings where large quantities of documents and high speed are required, to scanners that exist only as apps that run on your iPhone or iPad. In between are devices that are often referred to as “personal scanners.” These scanners typically fall between the size of a shoebox and an office laser printer. Some are portable in the sense that you can unplug them from a computer and take them with you, whereas others are just large enough that you’ll want to plug them into a computer and leave them be.
Not only do scanners come in a variety of sizes and shapes, they also rely on varying methods for converting photos and documents to digital files. Some act like a camera, taking a photo of the entire document at once. Others use a more expensive image sensor, capable of detecting colors, grayscale, and the difference between black and white.
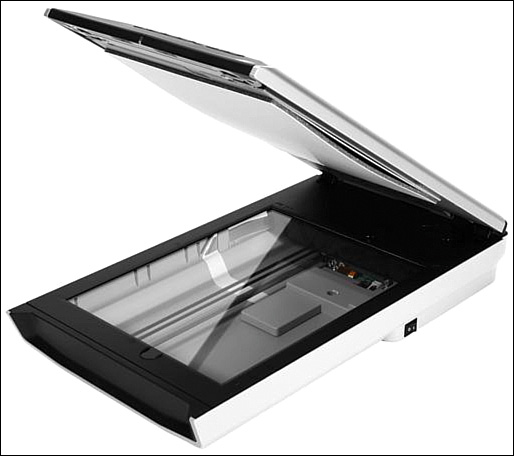
Some scanners can only handle a single document or photo at a time, whereas more advanced scanners often come with a tray that allows a user to insert 10, 20, or even 100 pages at once. The scanner uses a feeding system to pull in a page, scan it, and then pull in another page. Older scanners like the flat-bed scanners shown in Figure 5.1 require you to open a lid, place a document, close the lid, and then scan—a very slow process.
Although flatbed scanners will work just fine for short scanning jobs, they’ve really been replaced by the more modern scanner. Today’s modern scanners, even the ones that only handle a single item at a time, often skip the lid and let you simply feed the document into the top of the scanner. And there are even more features available with today’s modern scanners, such as the following:
![]() Higher resolution scanning—Many inexpensive flatbed scanners just couldn’t offer the resolution required to scan photos, for example. If you enlarged a scanned photo on your computer screen, the image would appear grainy and with blemishes.
Higher resolution scanning—Many inexpensive flatbed scanners just couldn’t offer the resolution required to scan photos, for example. If you enlarged a scanned photo on your computer screen, the image would appear grainy and with blemishes.
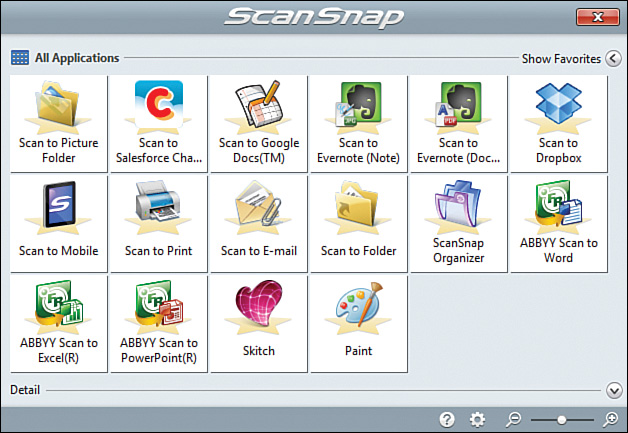
![]() Multiple file types supported—Older scanners could scan to JPG and possibly PDF or PNG, but today’s scanners can save scans as Word documents, Excel spreadsheets, and much more. (You’ll see an example of just how many different types are available to one scanner model later in the chapter.)
Multiple file types supported—Older scanners could scan to JPG and possibly PDF or PNG, but today’s scanners can save scans as Word documents, Excel spreadsheets, and much more. (You’ll see an example of just how many different types are available to one scanner model later in the chapter.)
![]() Flexible speeds—Older scanners had one speed—slow. Today’s scanners offer much higher scan speeds, even at high resolution. If you’re willing to sacrifice some scan resolution (for black-and-white documents, for example), you can even increase the scan speed by dropping the scan resolution from 600DPI to 300DPI (dots per inch). You’ll gain even more speed if you elect to scan color documents and photos to grayscale files.
Flexible speeds—Older scanners had one speed—slow. Today’s scanners offer much higher scan speeds, even at high resolution. If you’re willing to sacrifice some scan resolution (for black-and-white documents, for example), you can even increase the scan speed by dropping the scan resolution from 600DPI to 300DPI (dots per inch). You’ll gain even more speed if you elect to scan color documents and photos to grayscale files.
![]() Smaller footprint—The old flatbed scanners were huge, taking up a large chunk of a desktop. Modern scanners free up desktop space by growing up, not out. This means they have a slot at the top to feed in documents, and the scanned item comes out the bottom.
Smaller footprint—The old flatbed scanners were huge, taking up a large chunk of a desktop. Modern scanners free up desktop space by growing up, not out. This means they have a slot at the top to feed in documents, and the scanned item comes out the bottom.
![]() Portable means portable—Some new scanners are so small they’ll fit in a purse or briefcase with plenty of room to spare. These mini-scanners are mostly single-page scanners, but they often come with rechargeable batteries and internal memory, meaning you can scan something wherever you are and have the scan saved in the device until you have time to plug it into a computer and download the scans.
Portable means portable—Some new scanners are so small they’ll fit in a purse or briefcase with plenty of room to spare. These mini-scanners are mostly single-page scanners, but they often come with rechargeable batteries and internal memory, meaning you can scan something wherever you are and have the scan saved in the device until you have time to plug it into a computer and download the scans.
Less desk space, lower price, and faster scans means that today’s scanners are all about efficiency and ease of use. And that’s exactly what you need if you decide you want to move toward a paperless home or office (or both). And it’s also absolutely required for anyone choosing to turn an iPad into an Ultimate iPad—if you wish to access anything and everything from your iPad, some sort of scanner is going to be necessary.
In the next few sections, you’ll see some of the options available when it comes to personal scanners. This chapter is going to avoid the large, expensive scanners you might find in an office setting and instead offer you three different scanner formats to consider, each with pros and cons, but all helpful in getting you moving toward your own Ultimate iPad.
The App Scanner
If you own an iPad 2 or higher with a built-in camera, you’re halfway to owning the simplest and least expensive type of scanner possible. With nothing more than a free or inexpensive app, you can turn your iPad into a portable scanner that uses the built-in camera to take photos of documents. This type of app isn’t great for scanning photos (you’re basically taking a photo of a photo, and the results are never great), but when it comes to text on a page, the right app not only can provide you with a PDF of the scanned document but even convert the scanned text into an editable document that you can open in a text editor or even Word. Let’s take a look at a few options.
Note
In a sense, taking a photo with your iPad’s camera app is performing a kind of scan. You can take photos of receipts, tax documentation, and other important items that you wish to keep a digital record of but don’t want to keep the paper original. The photo exists as a JPG and doesn’t take up much space, so there’s nothing wrong with snapping a photo of a piece of mail and then shredding the original if you don’t need it. Just keep in mind that a photo may lose some of its details if enlarged, depending on the quality of your iPad’s camera.
A simple search of Apple’s App Store using “PDF scanner” provides over 300 results. A favorite free PDF scanner for your iPhone and iPad is called Genius Scan (also available for Android and Windows phones). After installing the app and opening it, you tap the orange button (with a camera icon on it) and point it at a document, as shown in Figure 5.2.
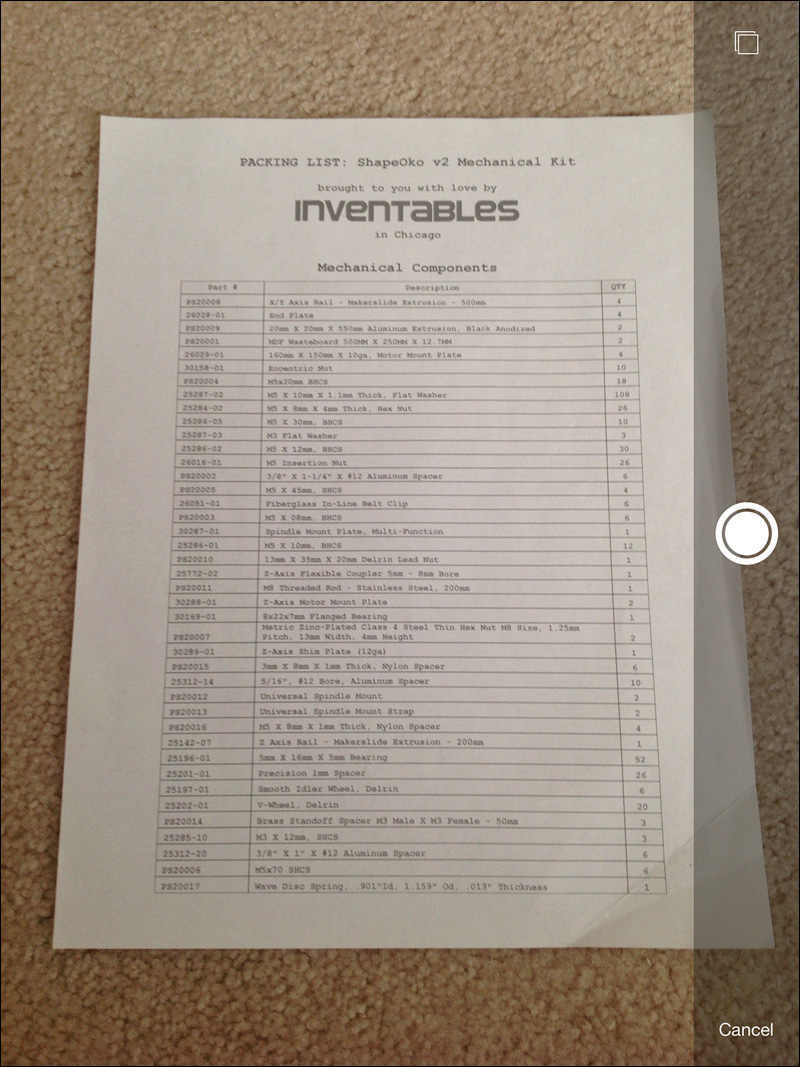
Press the shutter button to take a photo and then Genius Scan will attempt to find the borders of a scanned document, such as a receipt sitting on a desk, as shown in Figure 5.3. You can use your finger to redraw the border if it cuts off any part of the document you wish to have included.
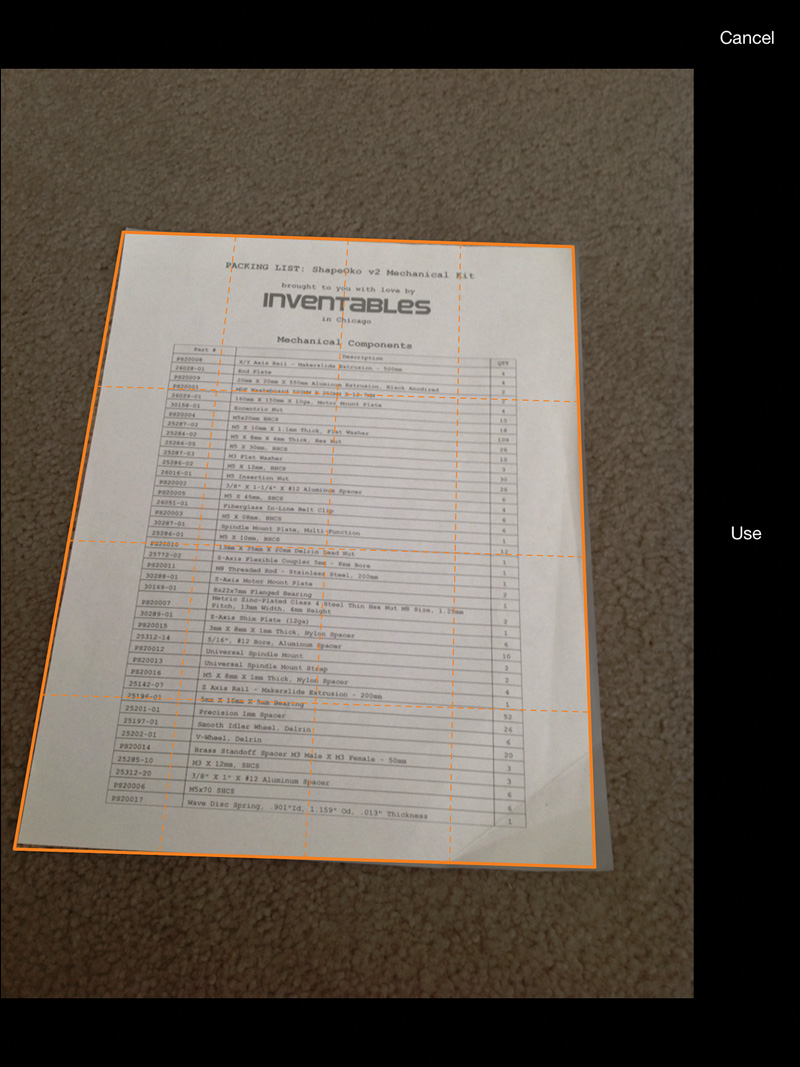
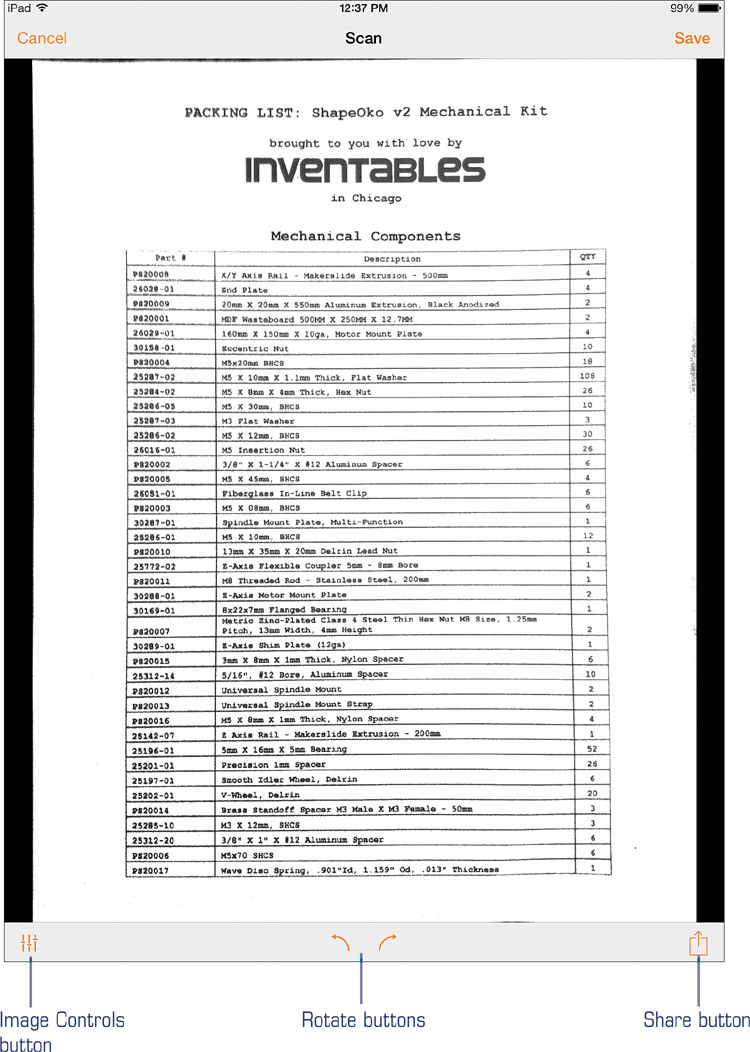
You can tap the Use button to accept the image or the Cancel button to go back and reshoot. If you choose to use the image, you’ll find a few controls at the bottom of the screen, as shown in Figure 5.4. The Image Controls button (lower-left corner) allows you to convert a color photo to black and white (and back again), rotate the image, and turn off the image enhancement made by the app. The Share button (lower-right corner) lets you email the photo, save it to the iPhone’s Camera Roll, or post it to Facebook.
Genius Scan also comes in a paid version for $6.99 that offers you the ability to save your scans to a cloud service such as Dropbox, Twitter, box.com, Google Drive, SkyDrive, Evernote, and a few more. These options are shown as gray icons (versus orange icons for available options) in the free version when you tap the Share button. Tapping on a gray icon will open a new screen that offers the upgrade.
Although Genius Scan is a great free app that does a good job of converting images to PDF files, there’s one more app for your consideration. If you’ll remember back to the discussion of Evernote in Chapter 4, “Evernote: Your New Best Friend,” you’ll recall that Evernote offers both free and paid accounts, with the paid account offering a few upgrades to the service, such as a higher monthly upload quota.
One interesting feature that Evernote also offers paid users is a PDF scanning service—when you upload a PDF as a note to a paid account, that PDF is scanned so that it becomes a searchable document by keyword. Why is this important?
If you scan a receipt of a recent purchase with Genius Scan, the app can convert the document to a PDF, but that PDF is not keyword searchable. Let’s say you took a photo of a receipt for your new Sony LCD television that clearly states the brand, model name, and price paid, and you’ve uploaded the newly created PDF file to Evernote. If you have hundreds of PDFs stored in a free Evernote account and wish to find one that has the word “Sony” on it, unless you renamed the PDF with a filename that easily identifies that receipt, you may find yourself having to open up a lot of PDFs as you search for that one receipt scan.
If you have a paid Evernote account, this is done for you when you upload your PDF files as notes. Go into Evernote, type Sony in the search box, and every document stored in your Evernote notes and notebooks will be searched for any occurrences of that keyword.
But what if you’re using a free Evernote account? How can you make certain your PDF files are also searchable with keywords? To do this will require a slightly different scanning app, one that can scan a file, save it as a PDF, but also scan the original item and convert words to text. This is called OCR, or Optical Character Recognition, and not only do more advanced scanners offer this ability, as you’ll soon see, but there are even iPhone/iPad apps that offer this feature. One of them is PDFpen Scan+.
PDFpen Scan+ costs $4.99 (and you can install on both an iPhone and iPad for the single purchase), but if you’re using a free Evernote account, this is one inexpensive way to have your PDF notes made searchable.
After purchasing, installing, and opening PDFpen Scan+ on your iPad, you’ll see a screen similar to the one in Figure 5.5.
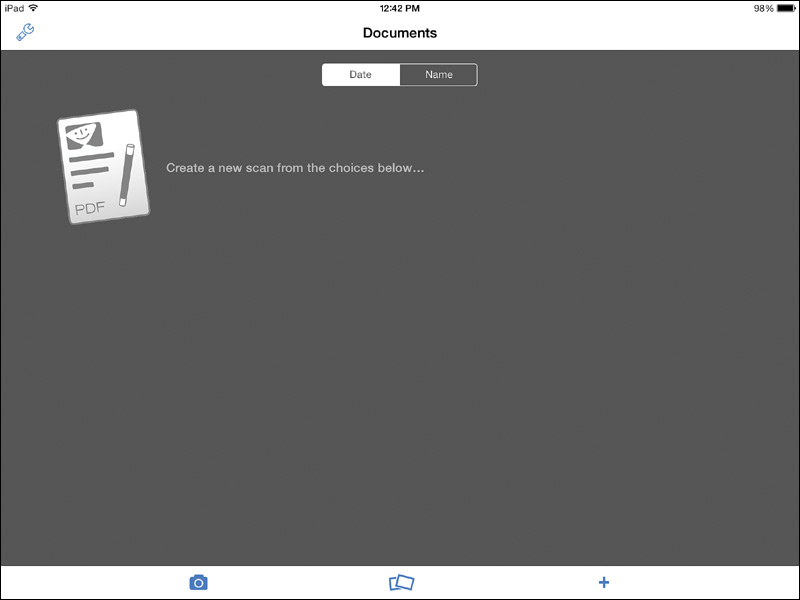
To create a new scan, tap the camera icon in the lower-left corner and line up your document as shown in Figure 5.6.
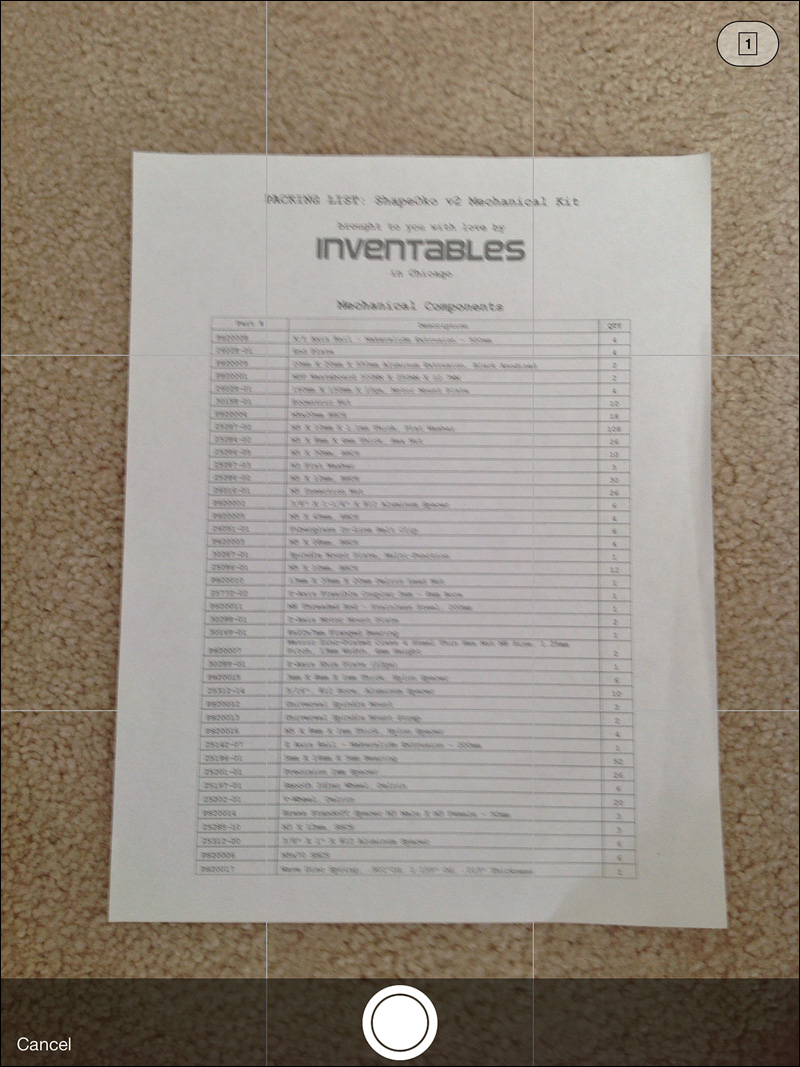
After taking the photo, tap the Accept button to keep the photo or the Retake button to reshoot. If you choose to accept the scan, you’ll next be asked to help the app determine the edges of the document, as shown in Figure 5.7.
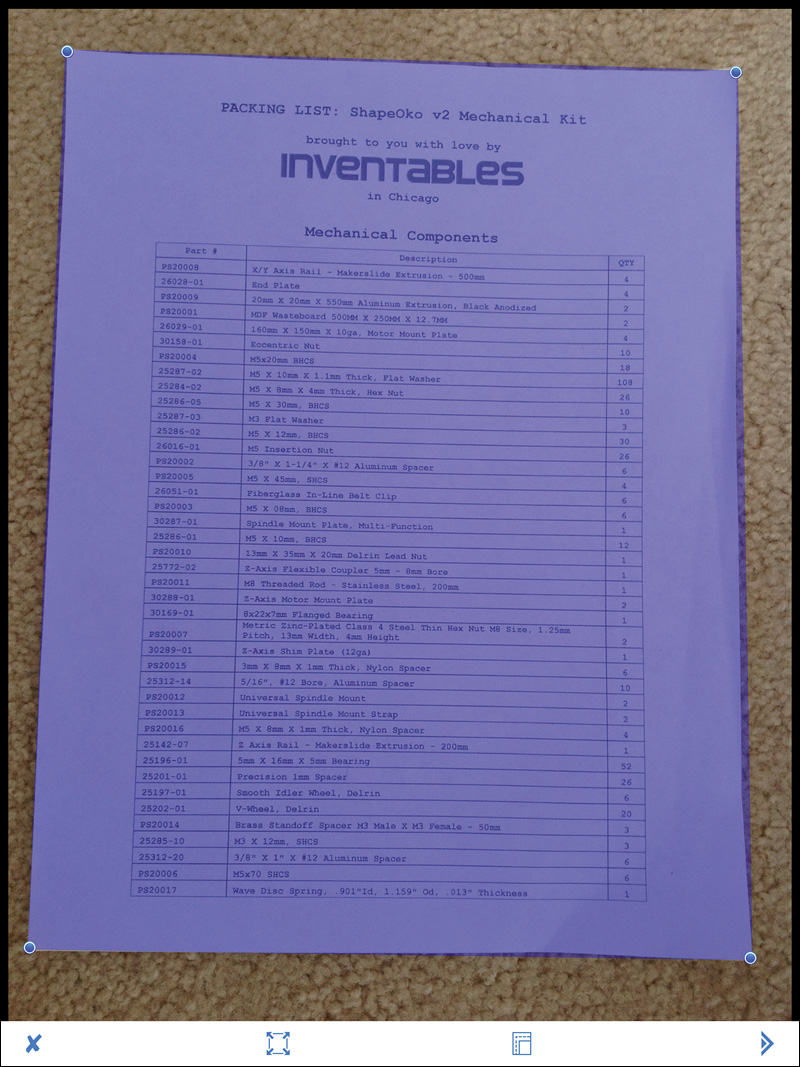
You’ll need to drag the dots to the corners of the document if they aren’t already there. It doesn’t have to be perfect, and the purple shading really only needs to cover the text you wish to convert. Tap the small arrow (lower-right corner) to have your document cropped. You can remove the carpet surrounding the document you see in Figure 5.7, as you can see in Figure 5.8.
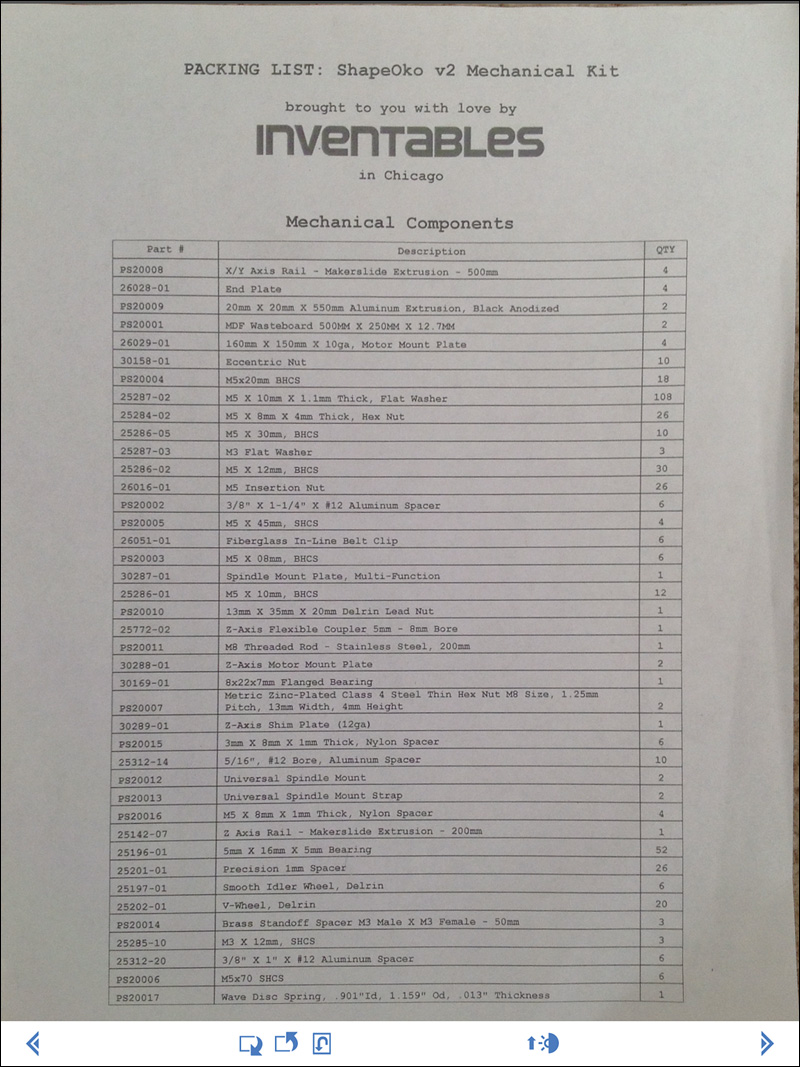
You can tap the arrow in the lower-left corner to go back if you’re unhappy with the cropping process. If you are satisfied, once again tap the arrow in the lower-right corner to finalize the scan. As you can see in Figure 5.9, you can choose to change a color scan to a black and white or grayscale scan with the touch of a button.
If you’re unhappy with a grayscale conversion, you can always tap back on the Color button to return the scan to its original color version. Tap the Save button when you’re done and the document will appear on the app’s desktop, as shown in Figure 5.10.
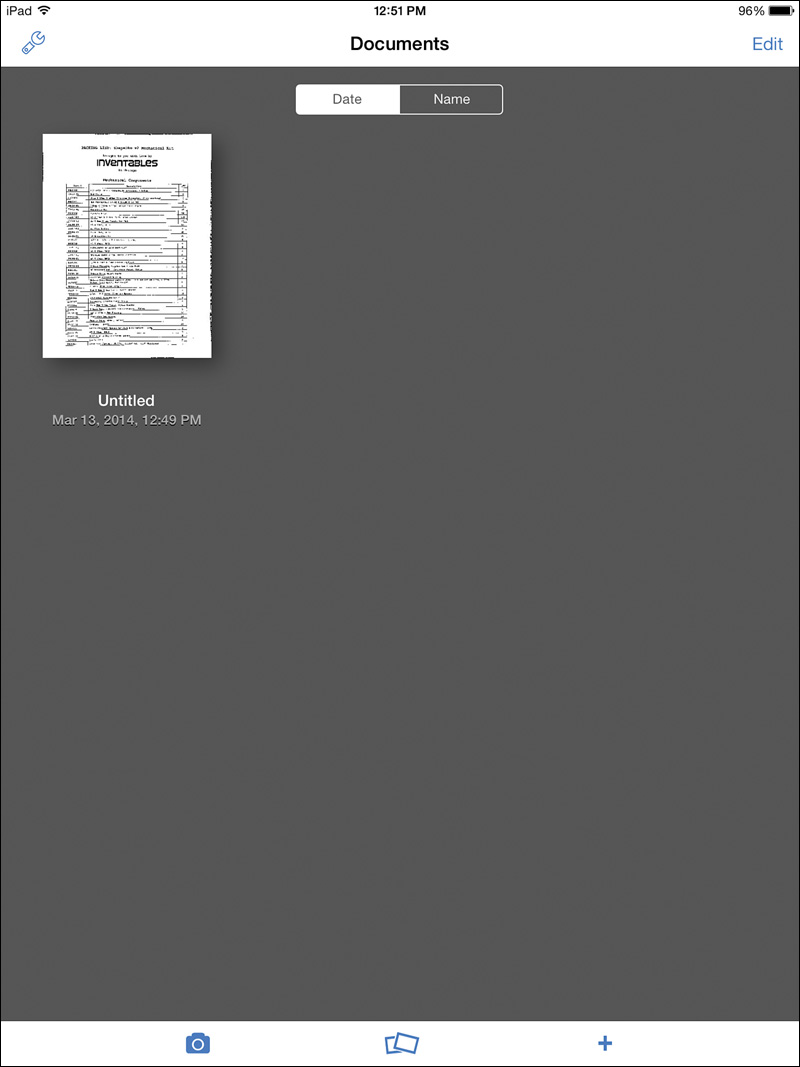
If you tap and hold a moment on the name of the file (Untitled is the default), you can rename the document and give it a more descriptive title.
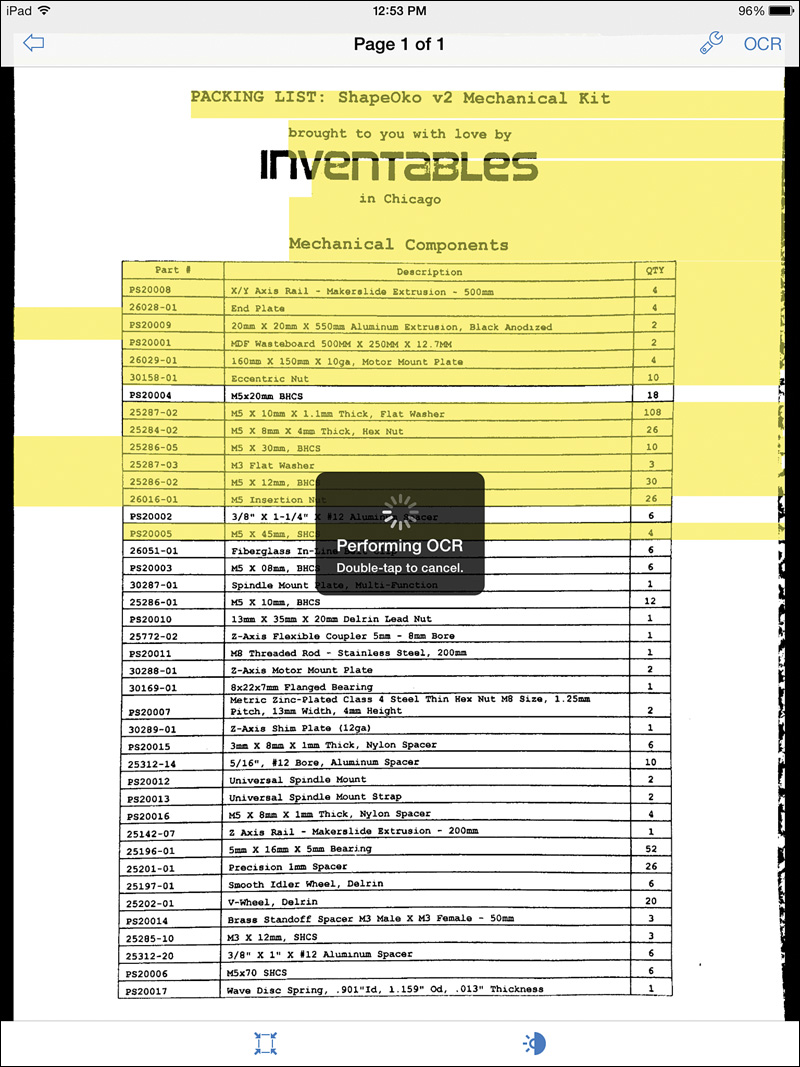
Although the scan is complete, the PDF hasn’t yet been converted to a searchable document. You still need to run the file through the OCR process, so tap the document to select it and you’ll notice an OCR button in the upper-right corner of the screen, as shown in Figure 5.11. Select OCR Document from the pop-up menu. (The other option is OCR Document Text, which will remove graphics such as letterhead logos and signatures, leaving only plain text.)

Once the OCR conversion process begins, you’ll see the screen start to turn yellow as the text is scanned. Figure 5.12 shows the OCR process almost complete.
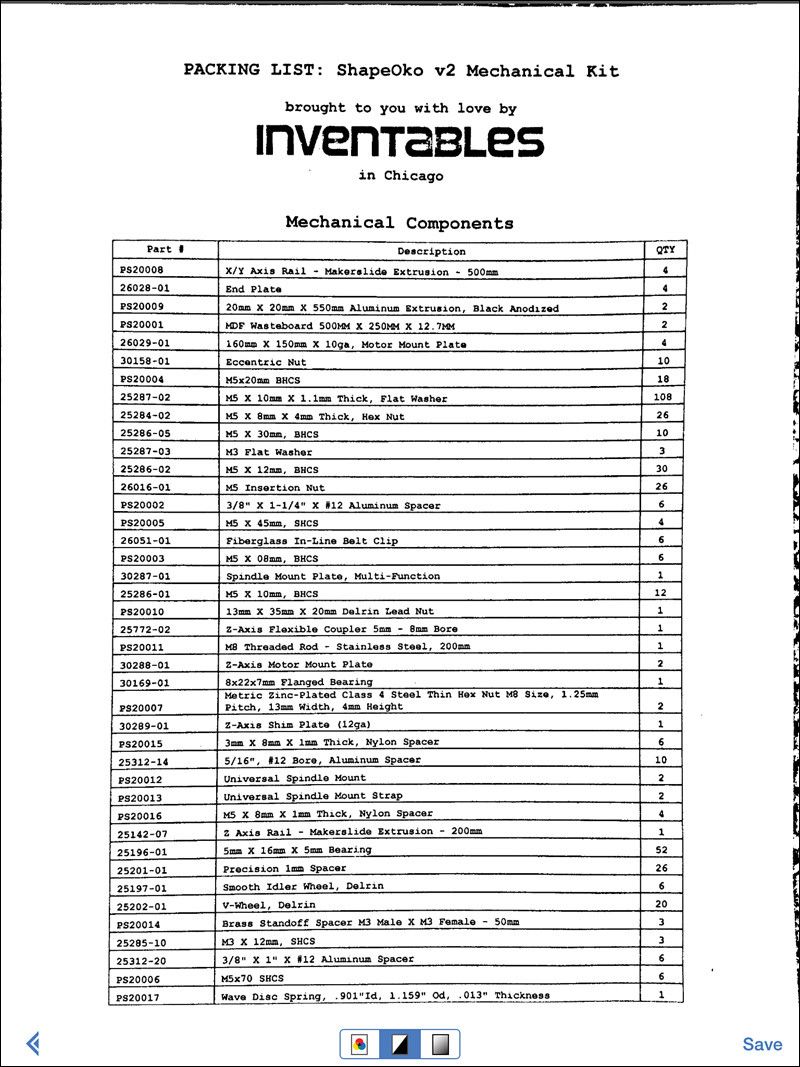
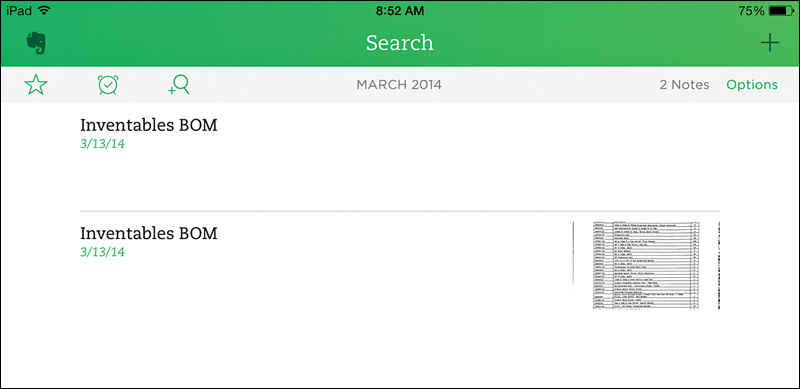
After the document is converted to a searchable PDF, I can tap the Tools button (it’s the wrench icon shown in the upper-right corner in Figure 5.11) and select Share to Evernote. The PDF is pushed to my Evernote account (and I’m asked to select the notebook where I wish it to be stored). As you can see in Figure 5.13, if I search for the term “Universal Spindle,” the PDF I just converted in Evernote is found. A single tap on the document opens it so I can examine it in more detail.
All this power and functionality is available to you from a simple app or two. If you are a paid Evernote user, you could go with the free Genius Scan app and let Evernote handle the PDF scanning operation. And if you use a free Evernote account, the PDFpen Scan+ app may require a few extra steps on your part to make the final PDF searchable, but it’s well worth the small price of the app and the time to run OCR on important documents.
The Portable Scanner
One of the benefits to going with a non–app-based scanner is often found in the software that comes bundled with the scanner. This special software often contains features that allow you to save scans in different formats other than PDF or JPG. Other features will let you scan special items such as business cards and have all the details automatically filled in to a contact database. Some scanners even have software that lets you edit scans on the fly, letting you fix a word or letter in a document, for example, or even combine two scans into a single page (such as when scanning a two-page article from a magazine).
The software is often shared by various models of scanner from a manufacturer, so if you’ve identified a scanner manufacturer you’re interested in, often your only real choice is to decide on the particular model you wish to purchase. Not all manufacturers offer a range of scanning models, but those that do will often have what are called “portable scanners.” Portable scanners typically can only scan a single item at a time—you feed the photo or document in on one side and out it comes on the other. Portable scanners are small, light, and often run on a rechargeable battery, making them easy to tote around.
As I mentioned in Chapter 1, “The Ultimate iPad,” one of my favorite portable scanners is the $199 Doxie Go shown in Figure 5.14.
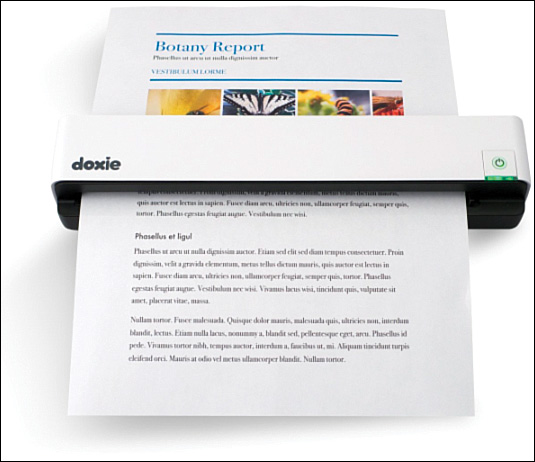
The Doxie Go scans in a single item at a time—insert it into the front and it comes out the back. Its particular size does mean it has a limitation on the size of items you can scan—8.5"×15" is the maximum size sheet that can be inserted.
It can handle resolutions up to 600DPI (and can be dropped down for faster speeds and smaller file size), and its built-in memory means you can scan and scan (up to around 100 scans on one charge) without the need to have it connected to a computer. The specs say it can hold about 450 single-sided pages or 1,800 scanned photos.
I have one in my kitchen where my wife and I can scan in important documents that we get in the mail. (I also have a shredder in the kitchen, meaning after we scan a document, it goes into the shredder and reduces clutter). After a month or so of scanning, I simply connect the Doxie Go to my home computer with a USB cable and upload all the scans, placing them either in Dropbox or Evernote, depending on the content.
But connecting the Doxie Go to a computer isn’t even necessary now. For an extra $30, the Doxie Go + Wi-Fi version will allow for scans to be uploaded to your computer over a Wi-Fi network or even directly to your iPad. That’s right—an app you install on your iPad allows you to scan directly from the Doxie Go + Wi-Fi device to your iPad and straight into a cloud service such as Dropbox or Evernote. Oh, and the software that comes with the Doxie Go (and the Doxie Go + Wi-Fi) model offers OCR for your scans, just like PDFpen Scan+, so scan comfortably knowing your scans will be keyword searchable from your Ultimate iPad.
A portable scanner like the Doxie Go is a great way to get rid of your clutter, allowing you to take your piles of documents to a coffee shop, the living room, or even the outdoor deck (provided it’s not gusting!) to get comfortable and start scanning. If you have an initial manageable amount of documents to scan and a small amount of weekly or monthly items (financial documents, for example) that are coming in, the portable scanner is likely all you’ll ever need.
But even the portable scanner has some limitations. If you have boxes and boxes of documents to scan, oversized photos you wish to convert, and maybe some documents that need to be scanned into files other than PDF or JPG file types, you may find that your scanning needs can only be satisfied with a desktop scanner.
The Desktop Scanner
Desktop scanners are the slightly larger brother to the portable scanners. They’re not really meant to be ported from place to place, but instead are linked to a computer (usually with a USB cable) that has special software installed allowing users to preview, edit, and save scans in a variety of ways. (Some desktop scanners, as you’ll soon see, also support Wi-Fi scanning, requiring no connection to a computer.)
Note
You may be familiar with the All-in-One type devices that include a scanner, printer, and fax machine. These are certainly an option, but often the built-in scanner does not offer as many options as a dedicated scanner, such as saving as a PDF (most of these scanners only scan as JPEG images). There are also dedicated photo scanners that offer super-high resolution scanning of photos if that’s the main source of your scanning needs.
There are simply too many scanners and too many variations of software to review, but most of them have a few things in common. Most desktop scanners, for example, can hold 10 or more pages at a time, so you don’t have to feed single sheets, one at a time, as you do with the portable versions. (If you’ve got books and magazines that you want to scan, be sure to check out the specialty scanner I cover in Chapter 7, “Convert Your Collections: Reducing Book and Magazine Clutter,” that will keep you from having to cut up your books and magazines to scan them in.)
Desktop scanners typically allow for larger original documents and photos, and they usually scan at a much faster rate than the smaller scanners. That said, there are always exceptions to the rule.
In this chapter, I’m going to introduce you to my go-to scanner for almost all of my scanning needs. Why have I chosen a desktop version over the portable version? Mainly because every week I have a small pile of documents to scan—contracts, financial paperwork, kids’ artwork and spelling tests, and so much more. I also frequently find myself needing to combine two pages together into either a single PDF file or one single graphic that would normally span two pages. Either way, I’ve found over the last few years that a desktop scanner works best for me, and the one I’m looking at right now that has served me well is the Fujitsu ScanSnap iX500, shown in Figure 5.15.
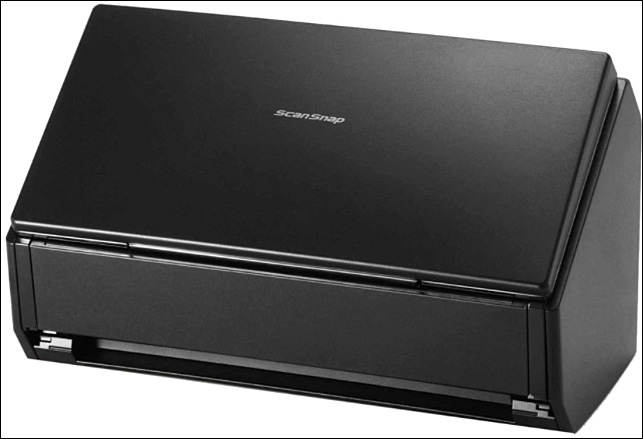
The scanner in Figure 5.15 is in what I call Sleep Mode—it has its top and bottom panels closed up to save desk space. When everything is opened up, the iX500 looks like the one in Figure 5.16.
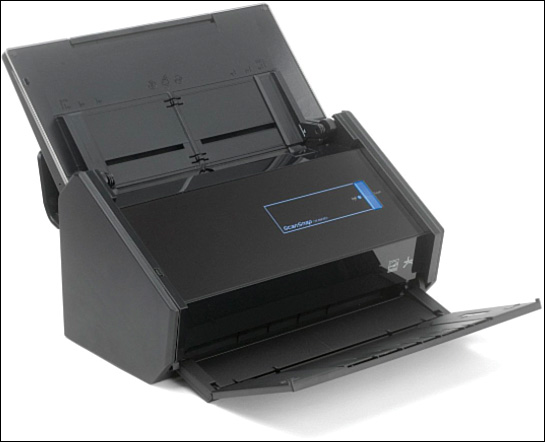
The iX500 has a single button on the front labeled Scan. In normal operation it’s lit up blue and all that’s required of me is to insert anywhere from one to 50 pages in the rear of the scanner. The iX500 is also a double-sided scanner—it can scan the front and back of a page at the same time if required. (I’ll show you a bit more about this in a moment.)
When I press the Scan button, the first sheet is pulled down into the scanner and comes out the front. Onscreen, the software will automatically open and I’m greeted with what you see in Figure 5.17.
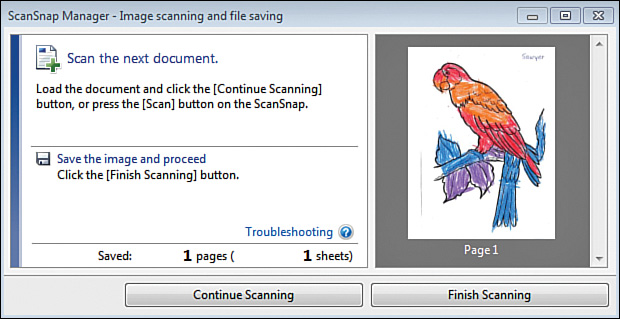
I’m scanning in some of my young son’s artwork, and I’d like to store them all in a single PDF. To do that, I can place another piece of paper in the tray and click the Continue Scanning button. When I’m done scanning, I click the Finish Scanning button.
After finishing a scanning operation, the ScanSnap software puts up a window like the one in Figure 5.18 that lets me choose how I wish to save the scan.
Tip
Windows and Mac versions of the software are available. They look a little different, but the functionality is the same. Some of the nontraditional file types do require optional software to be installed as well.
As you can see in Figure 5.18, I can save the scan as a photo, send it to the printer, save it to Evernote or Dropbox, and even send it directly to an email message as an attachment. The software offers up the ability to scan a text document and have it saved as a Word file that can be edited, and there’s even an option for scanning a spreadsheet and saving it to Excel.
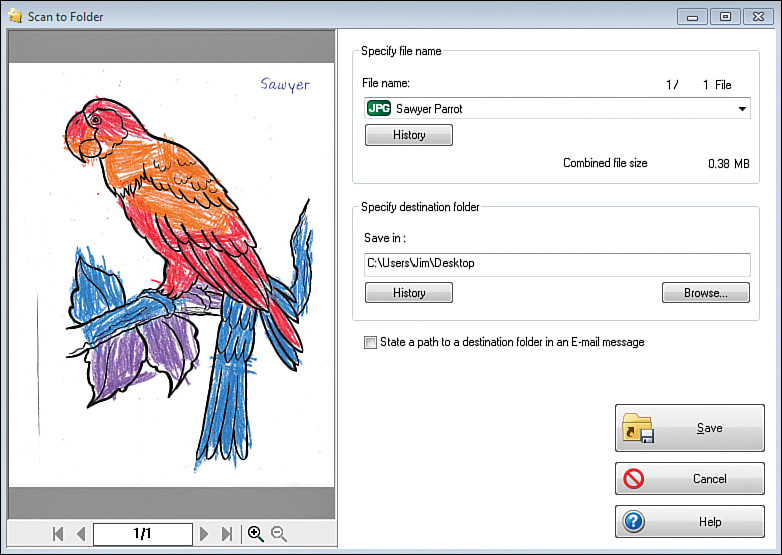
If you wish to save the scan to your desktop, simply choose the Scan to Folder option, type in a name for the file, and select the folder where the file is to be placed, as shown in Figure 5.19. (For me, I usually scan directly into Dropbox or Evernote, depending on the item scanned.)
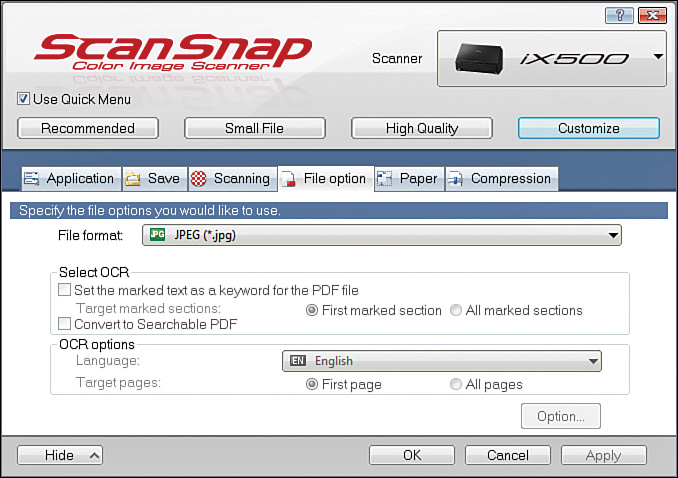
By default, a scan is initially saved either as a JPG or a PDF, and you select which option you prefer using the ScanSnap control panel, shown in Figure 5.20.
The control panel offers you a single place to make scanning configuration settings that include the following:
![]() Default save location—You can specify the default folder as well as a name format using the Save tab.
Default save location—You can specify the default folder as well as a name format using the Save tab.
![]() Color versus B/W or grayscale—Use the Scanning tab to choose whether you want color to be the default scanning option. (Choosing B/W or grayscale will speed up scans.)
Color versus B/W or grayscale—Use the Scanning tab to choose whether you want color to be the default scanning option. (Choosing B/W or grayscale will speed up scans.)
![]() Single or dual-side scans—The Scanning tab also allows you to set whether the iX500 always scans both sides or a single side. (You can manually override this default setting at any time.)
Single or dual-side scans—The Scanning tab also allows you to set whether the iX500 always scans both sides or a single side. (You can manually override this default setting at any time.)
![]() PDF or JPG—The File Option tab lets you choose between PDF or JPG as the default file type.
PDF or JPG—The File Option tab lets you choose between PDF or JPG as the default file type.
Other tabs allow you to configure paper size, compression (to save on storage space), and a few other options.
If you’ll recall, the PDFpen Scan+ app for the iPad allows you to scan a document and run it through OCR conversion. Just as you can choose to not run a file through OCR if you don’t need it keyword searchable, the ScanSnap software also allows you to turn on or off the OCR feature by default.
Figure 5.21 shows the File Option tab from the control panel. Notice that the first check box and the Convert to Searchable PDF check box are both checked.
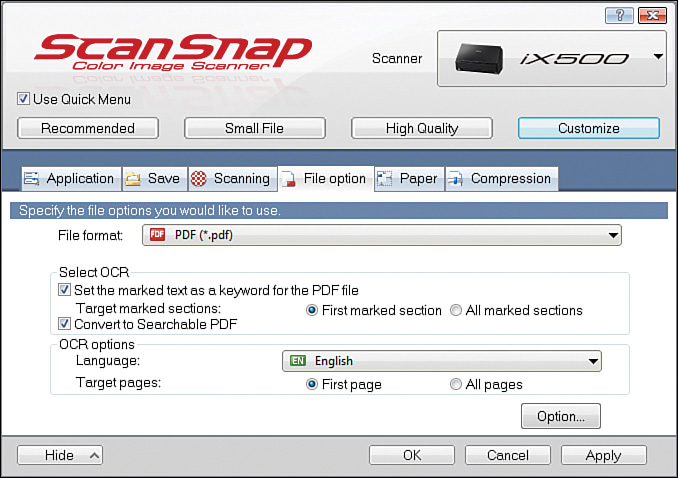
The OCR process does slow the scanning process just a little a bit (one to two seconds extra per page), so keep in mind you can always go in and disable it temporarily if you’re going to be scanning photos and other non-text items or documents that you don’t necessarily need to be keyword searchable. (Notice also that the First Page option is selected versus the All Pages option—sometimes all you need to do is make the first page of a document searchable for keywords to be helpful.)
Most desktop scanners and their respective software work in a similar manner to the iX500. You scan an item, save it as a PDF or JPG, and then export it or save it to a location you specify. Some scanners will hold more sheets in the tray; some will hold fewer.
Before I close out this chapter, I’d like to show you one final feature that works so well with my iPad. As mentioned earlier, the iX500 can communicate via Wi-Fi, so with the special app from ScanSnap, I can send scans directly to my iPad’s screen instead of to my computer. Figure 5.22 shows the app running on my iPad.
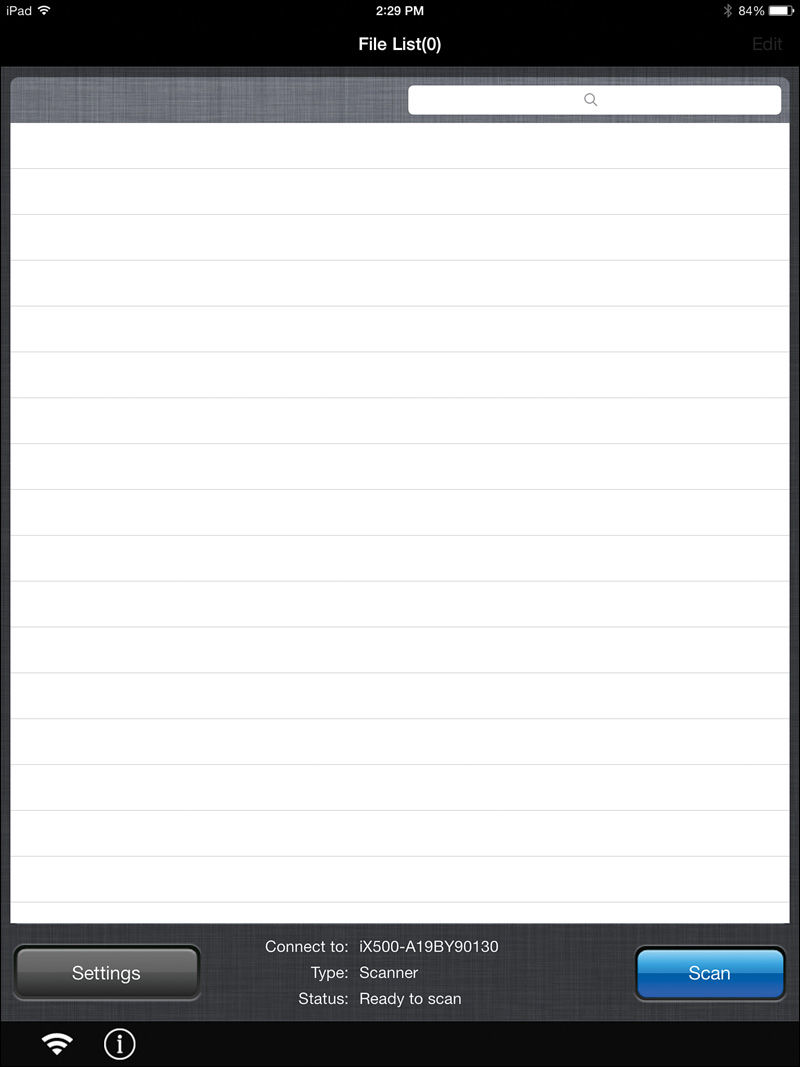
After loading a document (or documents) into the tray, instead of tapping the Scan button on the iX500, I tap the Scan button on my iPad and the scanned document appears in the list, as shown in Figure 5.23. (A message also appears on the computer screen telling me the iX500 has switched over to mobile scanning.)
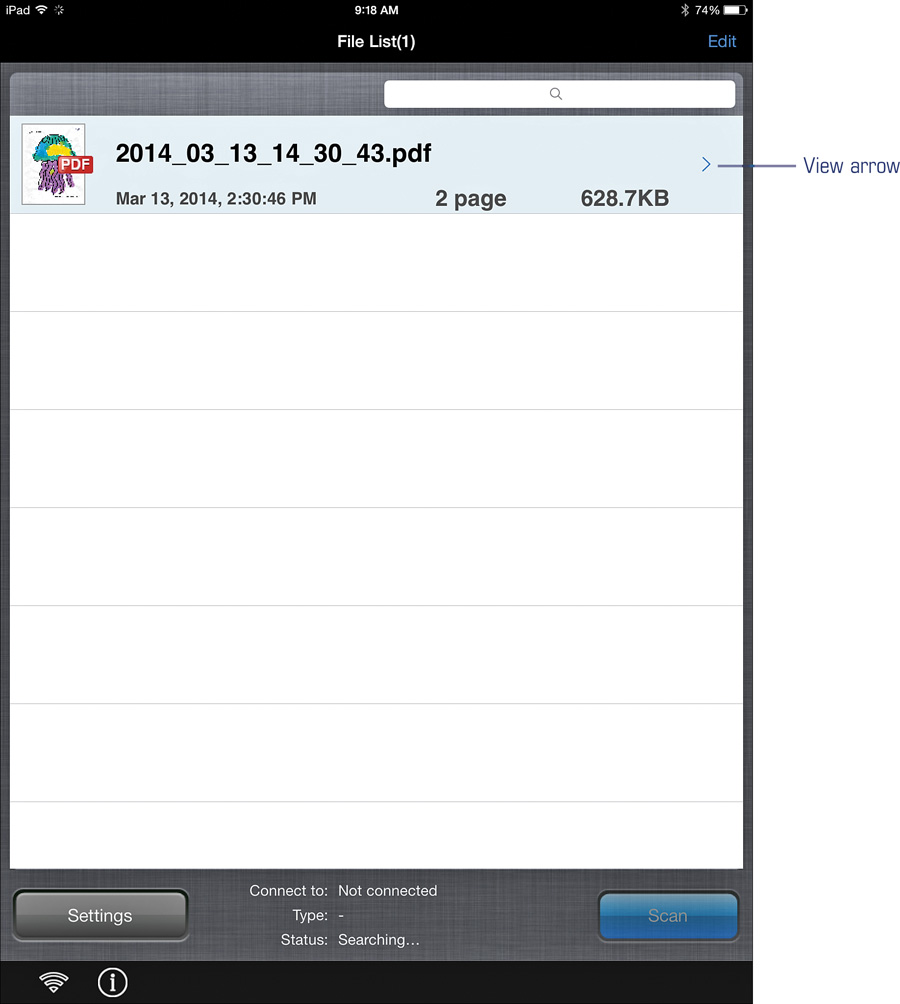
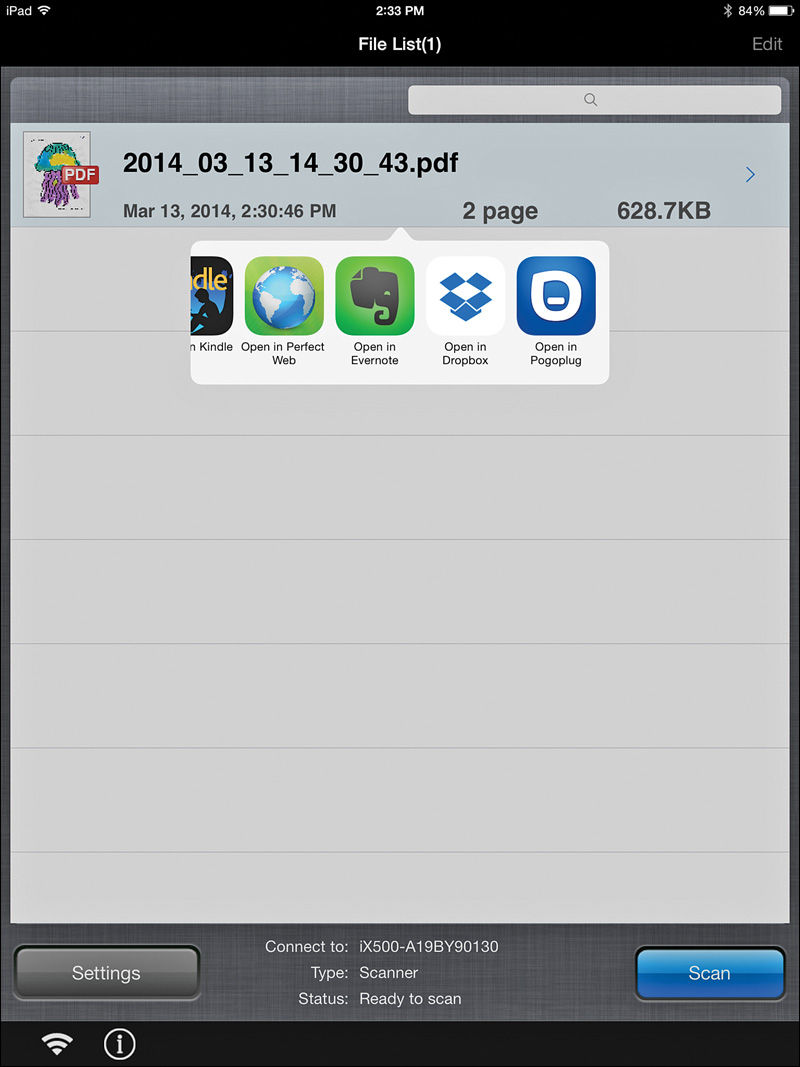
By tapping the View arrow on the right, I can view my scanned item on my iPad. But tapping anywhere else on the file opens a small menu like the one in Figure 5.24, allowing me to select where I wish to send the scan—Evernote, Dropbox, Pogoplug, or somewhere else.
As you can see, the iX500 desktop scanner does offer me quite a few more capabilities than an app scanner or a portable scanner. When I’m done, I close up the iX500 panels and it sits patiently for our next scanning session, typically when my Scan box gets about halfway filled or I receive a document that’s important enough to justify an immediate scan.
Summary
When shopping for a scanner, take what you have learned in this chapter and identify what’s important to you when it comes to scanning. Do you need speed because you have lots of weekly or monthly scanning to do? If so, the desktop scanner will likely serve you well. Can you be satisfied with a simple photo taken of receipts and other documents? If that’s the case, save some money and use either your iPad’s Camera app or find a free or inexpensive scanner app. Or maybe all you need is a portable scanner that you can take with you to the coffee shop or to a client’s office where you expect you might want to capture some documents as digital files for viewing on your iPad. Whatever your need, there’s probably a scanner technology that matches your lifestyle.
Ultimately, one of the steps toward turning your ordinary iPad into an Ultimate iPad is to find a way to turn as many paper documents into digital ones and then storing them in Dropbox or Evernote or on Pogoplug-connected hard drive, where you’ll be able to find them with a few keyword searches. By doing this, you’ve made your iPad into a single source for finding anything you need, when you need it. And having access to all your documents from the iPad means you’re more than halfway home to owning an Ultimate iPad.