
5
Motion techniques
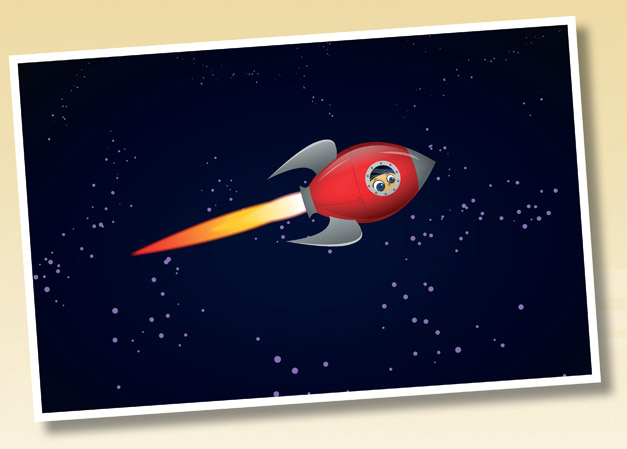
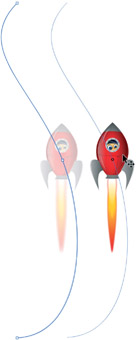
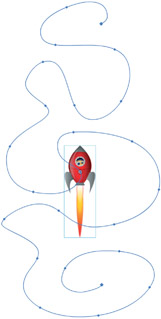
■ Animating movement often requires tricking the viewer’s eye into thinking the motion is there when it is merely implied. The rocket isn’t actually moving forward but your eye thinks it is because the background is animated in the opposite direction the rocket is pointing.
LET’S FACE IT, FLASH IS ABOUT MOTION. IN SOME CASES, the more motion, the better. Motion can emphasize the intensity of an action sequence and can add a measure of realism to your animations. Whether it’s making text fly around a website or animating a character in an action sequence, providing convincing motion effects can be critical to their visual success.
In this chapter, we’ll examine the differences between the Motion tween and the Classic tween methods as well as look at a few of what I consider the most valuable motion effects that you can use in your everyday life as a Flash designer and animator.
Motion and Classic tweens
SO MUCH HAS CHANGED with Flash over the years, yet so much has remained the same. One of the fundamental features of Flash animation is the Motion Tween and as of Flash CS4 we have 2 different tween models. What are the differences between these 2 tween models? What tween model should you use and when?
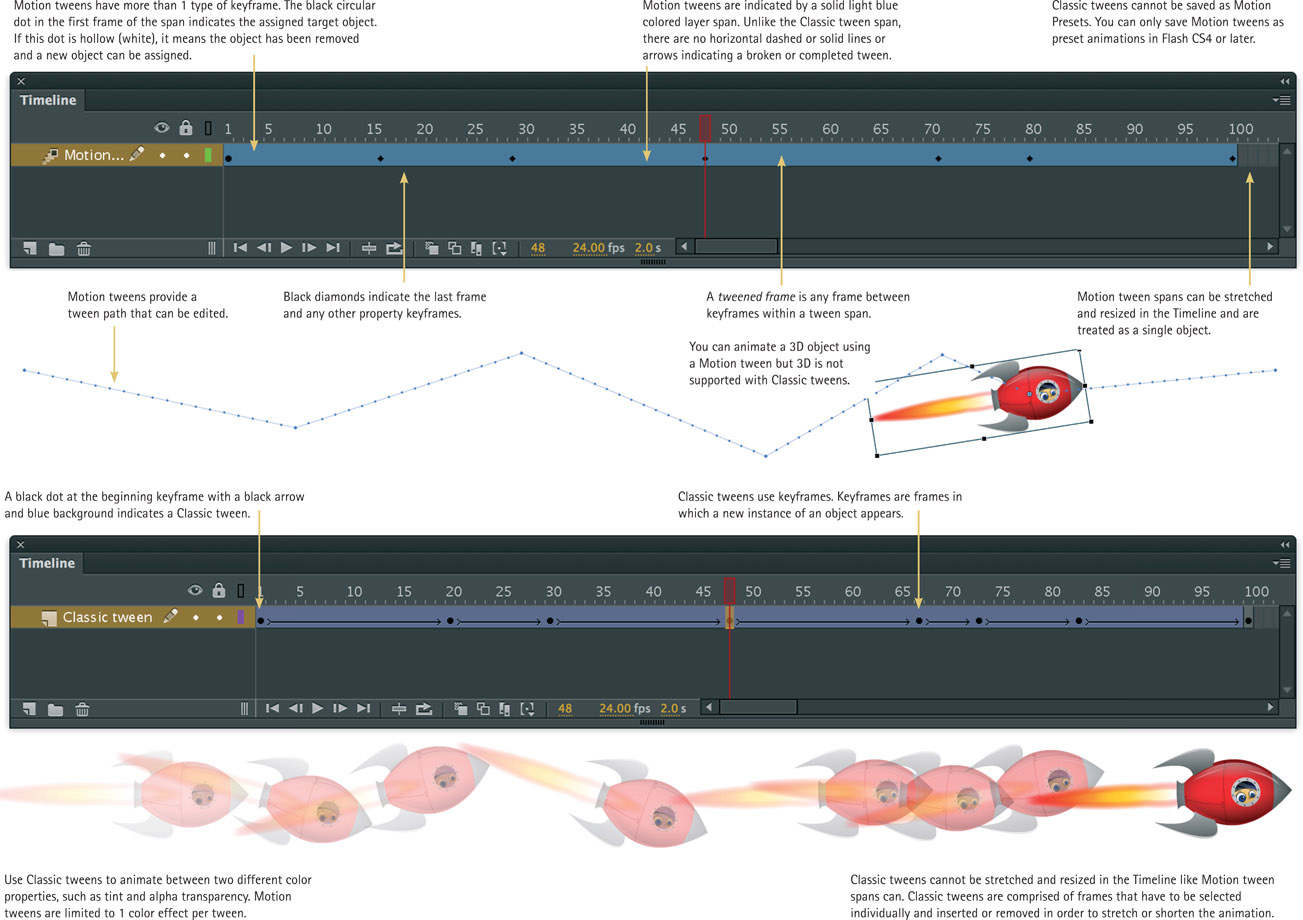
If you remember one thing about the two tween methods in Flash CC, the Classic tween is frame-based while the new Motion tween is objectbased. There are advantages and disadvantages to using either, and the difference depends on what kind of object you are animating and what that object needs to do. This example compares both tweening methods to show how they can both be used depending on your animation needs.

Creating Motion tweens
THINK OF THE MOTION tween as a Classic tween on steroids, allowing you to animate each property individually across an entire motion span which was difficult if not impossible with previous versions of Flash and Classic tweens. One of the most popular timeline-related enhancement requests is now a reality: the ability to lengthen and shorten the Motion tween and have all keyframes interpolated automatically. With Classic tweens this can only be done manually and the more layers, frames and keyframes, the more of a nightmare this process can be. Let’s take a look at more differences between these two tweening methods.
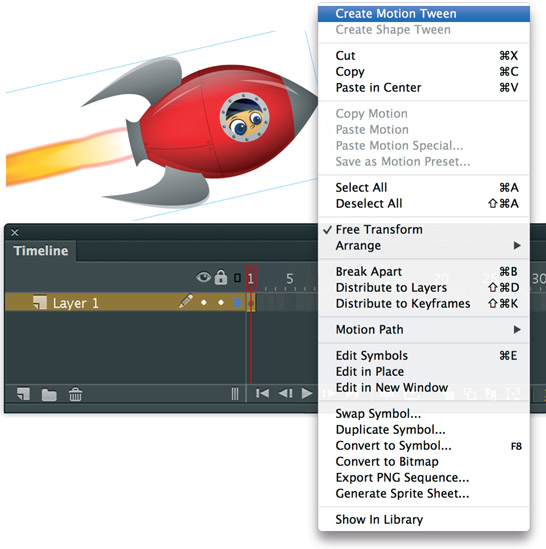
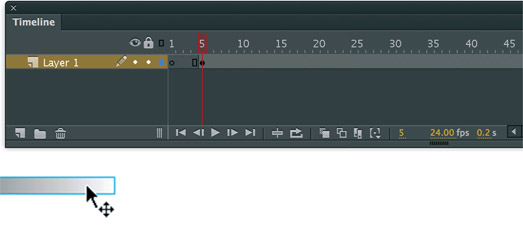
1 Motion tweens can be applied to symbols and text fields. A tween span in a layer can contain only one object or one text field. However, you can have multiple objects nested inside a single object being Motion tweened. To apply a Motion tween, right click over the object on the stage and select Create Motion Tween from the context menu.
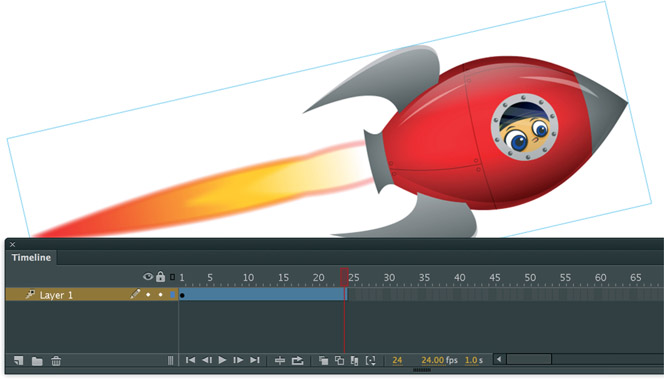
2 Flash automatically lengthens the tween span to accommodate a full second’s worth of frames based on the document’s frame rate. If your frame rate is set to 24 frames per second, then your span becomes 24 frames long. The playhead marker is automatically positioned at the end of the tween span.
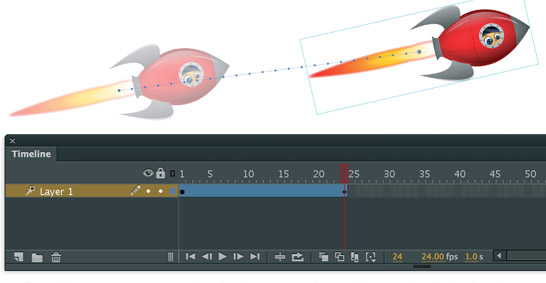
3 The quickest way to create an animation is to simply move the object to a new position on the stage. Flash will automatically create a motion path that can be edited using the Selection ![]() and Subselection
and Subselection ![]() tools.
tools.
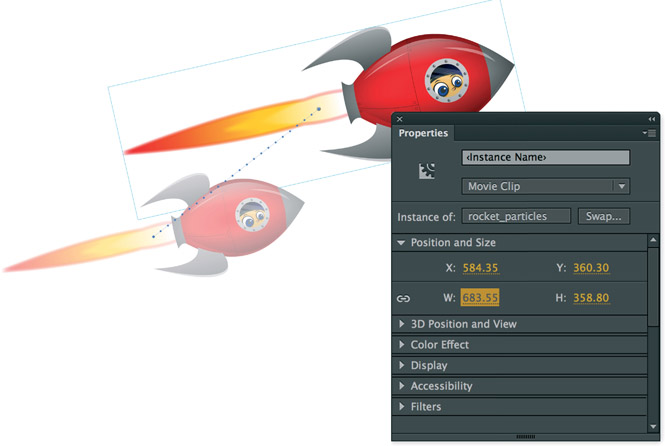
4 Use the Position and Size features in the Properties panel to control the exact position and size of the object. These are hot text sliders that allow you to drag across them to change their values as well as select and type in the value manually.
Hot Tip

The terms “keyframe” and “property keyframe” have 2 different meanings in Flash CC. The term keyframe refers to a frame in the Timeline in which a symbol instance appears on the Stage for the first time. The separate term property keyframe refers to a value defined for a property at a specific time or frame in a Motion tween.
Working with Motion spans
SO HOW DOES THIS NEW MOTION tween model work anyway? Not only has Adobe changed how tweens are created and applied but how we work with frames, keyframes and the tween span itself. The new Motion tween is very different from its predecessor visually, sans any dashed or solid horizontal arrows, or vertical lines indicating the “sync” feature being turned off. The Motion tween span is simple and straightforward, uncluttered and unadulterated, yet provides the ability to create sophisticated animations that go beyond the capabilities of the Classic tween method.
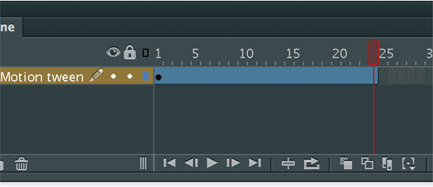
1 It’s ironic that the Motion tween span since Flash CS5 looks so plain and simple, yet offers so much power and flexibility. You will not find horizontal lines with arrow heads between keyframes. You will not see dashed lines signifying broken tweens or vertical lines representing non-synced keyframes. This is a brave new world for Flash tweeners and to steal a line from Flash animation legend Laith Bahrani, “All of your tweens have finally come true.”
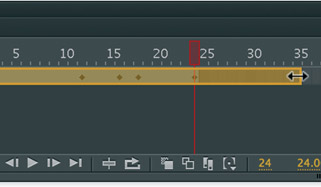
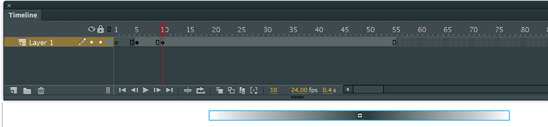
2 To lengthen the duration of your animation, drag either the left or right edge of the span to the desired frame. Flash will automatically interpolate all the keyframes in the span according to its new length. To add frames to a span without interpolating the existing keyframes, hold down ![]() while dragging the edge of the span.
while dragging the edge of the span.
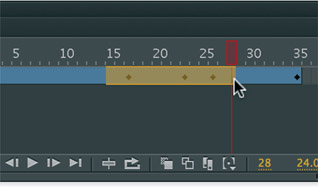
3 You can select a range of frames in a Motion span by dragging across the desired frames.
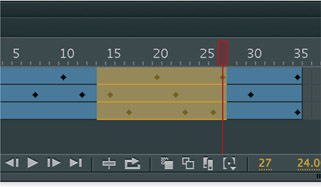
4 To move a span in the Timeline, select it by double-clicking on it and then click and drag it to a new location in the layer.
5 To select a single frame or keyframe in a Motion span, click the frame or keyframe. Once it’s selected you can drag the keyframe to a new frame, or ![]() click to duplicate it while dragging it to a new frame.
click to duplicate it while dragging it to a new frame.
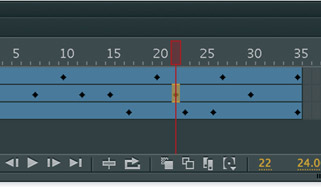
6 To select a range of frames in a Motion span, drag across the range of frames and layers you want to select.
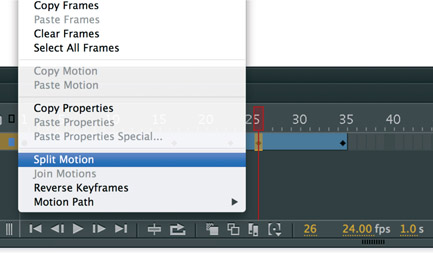
7 To split a tween span into two separate spans, ![]() -click or
-click or ![]() -click a single frame in the span and then choose Split Motion from the span context menu.
-click a single frame in the span and then choose Split Motion from the span context menu.
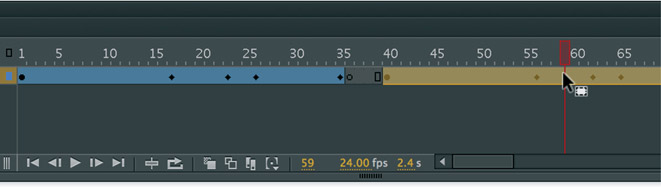
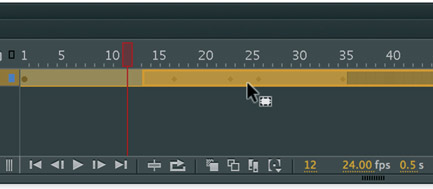
8 You can duplicate a Motion span by selecting it and then holding down the ![]() key while dragging it to a new location. This is super easy way to duplicate an animation across layers and other Motion spans.
key while dragging it to a new location. This is super easy way to duplicate an animation across layers and other Motion spans.
If you drag a Motion span and overlap it with an existing span, the frames shared by both spans will be “consumed” by the span being moved into this position.
Hot Tip
When working with Motion spans, keep in mind that controlling nested animations inside a Graphic symbol (see “Lip Syncing, nesting method”), is very limited. Any settings for Graphic symbols (Loop, Play Once and single frame) are applied once to the entire span. They cannot be applied to individual property keyframes in the span. Therefore your ability to control nested animations is lost, which is the main reason why Adobe retained the Classic tween method.
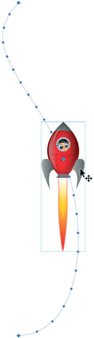
Editing Motion paths
IF YOU’RE ALREADY FAMILIAR with Flash and the Classic tween method, then you may have, at one time or another, experienced some frustrations trying to work with a frame-based tween model. Throw in the need to animate your object along a path and your workload just increased even more. Previously, if we needed to animate an object along a path, a guide layer was first created, then linked to the object layer, and then the object was manually snapped to both ends of the path with the aid of the Snap tool. The Motion tween method eliminates the need for all of these extra steps.
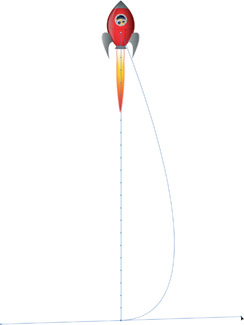
1 Right-click over the object and select Create Motion Tween. Flash automatically creates a Motion span in the Timeline. With the playhead over the last frame of the span, drag the object to a new location to expose the Motion path on the stage.
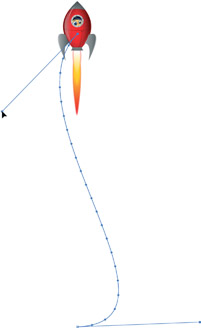
2 Use the Selection ![]() tool and click anywhere on the stage away from the Motion path to ensure it is deselected. Reshape the path by simply dragging it anywhere along the segment.
tool and click anywhere on the stage away from the Motion path to ensure it is deselected. Reshape the path by simply dragging it anywhere along the segment.
3 With the Subselection tool, you can expose the control points and Bezier handles on the path that correspond to each position property keyframe. You can use these handles to reshape the path around the property keyframe points.
4 Position the play head on a frame where the object resides midpoint along the path. Drag the object to reshape the path automatically.
5 You can reposition the entire Motion path and the animation by selecting it with the Selection ![]() tool and then dragging it to a new location.
tool and then dragging it to a new location.
6 Use the Free Transform ![]() tool to scale, rotate and skew the Motion path as you would an object.
tool to scale, rotate and skew the Motion path as you would an object.
7 In some cases it may be easier to create a complex path by drawing it on a new layer with the Pencil ![]() or Pen
or Pen ![]() tool.
tool.
8 Select the stroke and then copy it ![]() . Select the Motion span in the Timeline or the object on the stage and paste your stroke
. Select the Motion span in the Timeline or the object on the stage and paste your stroke ![]()
![]() .
.
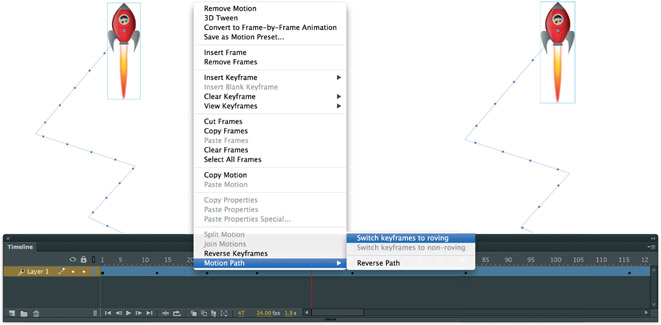
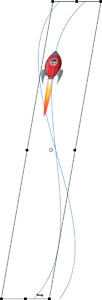
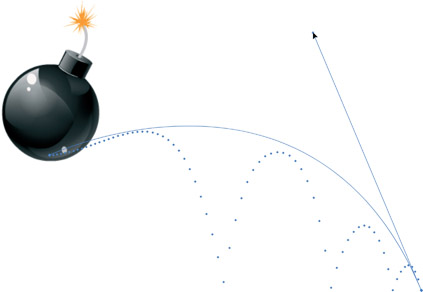
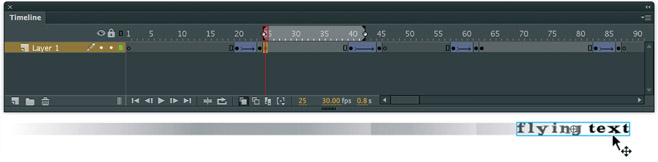
9 If you dig a little deeper into Flash CC’s context menu, you may discover yet another new feature called “switch keyframes to roving.” The dictionary defines roving as: “not assigned or restricted to any particular location, area, topic, etc.” In keeping with that definition, Flash describes a roving keyframe as: “…keyframe that is not linked to a specific frame in the Timeline.” What a roving keyframe means in Flash terms: say you create an animation like the one pictured above, where an object is following a path with several unequal segments. Each segment spans a different number of frames causing the object to travel at different speeds along each segment. If you want the object’s movement to be fixed, then right click over the span and go to Motion Path and select Switch keyframes to roving.
Hot Tip

With the Subselection tool selected, hold down the ![]() key to temporarily perform free transforms to the Motion path.
key to temporarily perform free transforms to the Motion path.
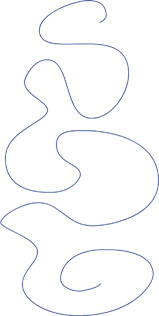
Motion Presets
MOTION PRESETS ARE pre-built Motion tweens that can be applied to an object on the stage. With the object already selected, choose the desired preset from the default list in the Motion Presets panel and click the Apply button. The preset animation has been applied to your new object. The default presets provide a great starting point, but you’ll likely want to make your own. Flash CC provides the ability to save your custom animations as presets that can be reused over and over. You can build up libraries of animations that are not only easily applied to any object on the stage but can also be shared across the entire Flash design community.
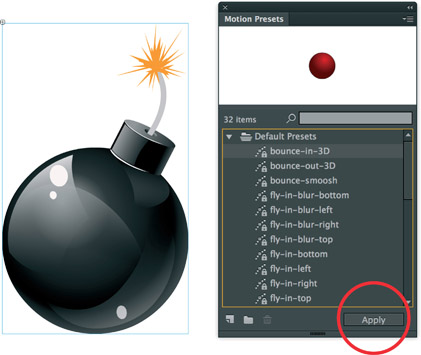
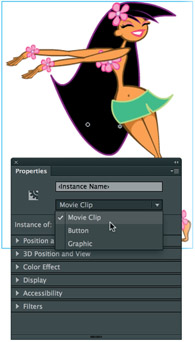
1 Go to Window > Motion Presets to open the Motion Presets panel. This panel looks a lot like the Library panel with its preview window on top and list of folders and preset objects below. Select a preset to preview it and then select a Movie Clip symbol on the stage. Click the Apply button to assign the motion to the object.
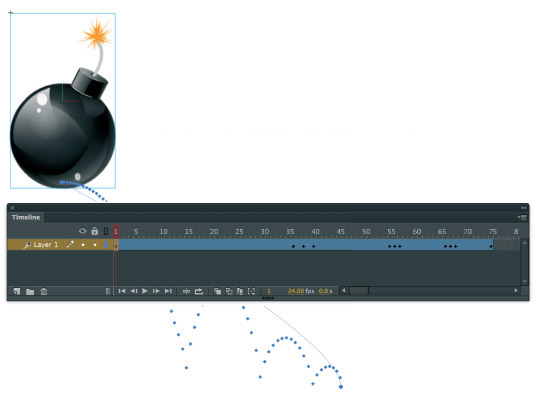
2 Once the preset is added, Flash applies a Motion tween to the selected object. You can leave the animation as is or use it as a starting point by editing the Motion span in the timeline as well as the spline path that the object now follows.
3 The Motion path can be edited using the Selection ![]() and Subselection
and Subselection ![]() tools. Here the Selection tool is used to edit the curve of the path by dragging between its end points. Make sure you click on the stage away from the path to make sure the path is deselected first. Use the Subselection
tools. Here the Selection tool is used to edit the curve of the path by dragging between its end points. Make sure you click on the stage away from the path to make sure the path is deselected first. Use the Subselection ![]() tool to edit the control points using the Bezier handles that appear when selecting an end point or a property keyframe along the path. You can use these handles to reshape the path around the property keyframe points.
tool to edit the control points using the Bezier handles that appear when selecting an end point or a property keyframe along the path. You can use these handles to reshape the path around the property keyframe points.
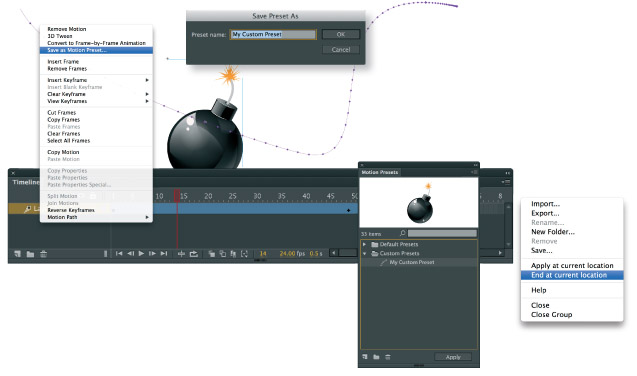
4 You can save your custom animation by right-clicking over the tween span in the timeline or over the object on the stage and selecting Save as Motion Preset from the popup menu. Provide a descriptive name and click OK to add it to the Custom Preset folder in the Motion Preset panel. Your new custom preset can now be applied to other objects the same way we just applied a default preset.
Hot Tip

To apply the preset so that its motion ends at the current position of the object on the stage, select “End at current location” from the Motion Preset’s drop-down menu located in its upper right corner.
Motion tweens and 3D
FLASH HAS ALWAYS BEEN A 2-dimensional design and animation program. Making a 2-dimensional object appear to spin in a 3-dimensional space has been a popular effect but very difficult due to the lack of that 3rd dimension. Since CS4, Flash offers 3D capabilities in the form of 3D Rotation and Transformation tools.
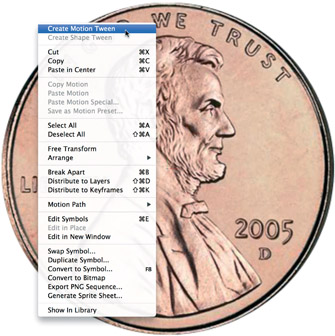
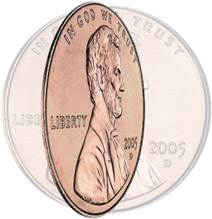
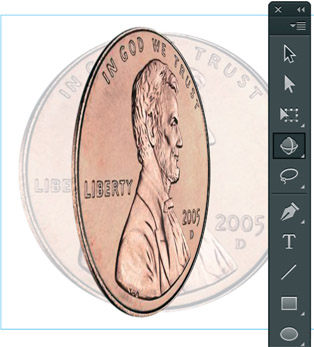
1 Let’s start with the image we want to spin. It can be anything you want, but I have chosen a coin because it seems this is the exact object many people want to use to animate spinning anyway. I’m using a bitmap of a 1 cent US penny, but you can use a coin of any currency either as an imported bitmap or drawn with Flash’s drawing tools. Either way, make sure to convert the artwork to a Movie Clip symbol and then right click over it and select Create Motion Tween.
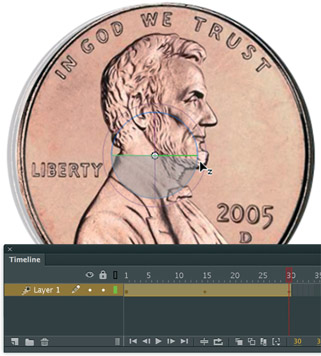
2 Select the 3D Rotation tool ![]() and with the playhead on a frame other than frame 1, drag the object along its Y axis (horizontally).
and with the playhead on a frame other than frame 1, drag the object along its Y axis (horizontally).
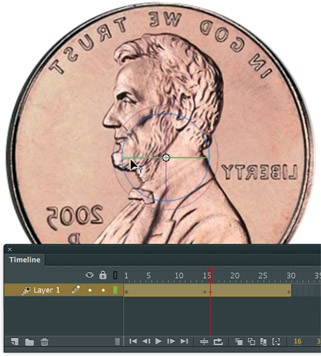
3 Do not try to rotate the coin 360 degrees and expect Flash to know what you want it to do. You will need to divide the animation in half by stopping the coin rotation just short of the half way point.
4 Next, position the playhead marker on the last frame and rotate the object the rest of the way so that it is facing us as it was in frame 1. Playback your animation to see the coin spin in 3D space.
5 But wait! Something’s not right. Flash spins the coin to the right during the first half of the animation but then reverses direction during the second half. This reversal is easily corrected by placing the play head on the frame just after the second keyframe and rotating the object slightly more.
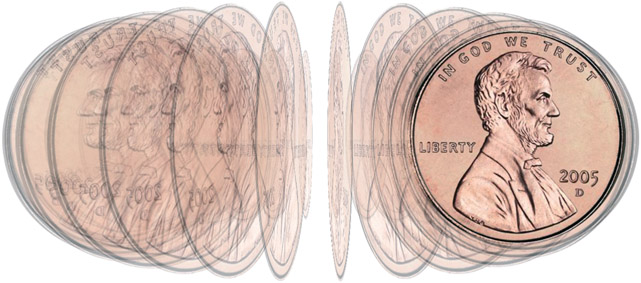
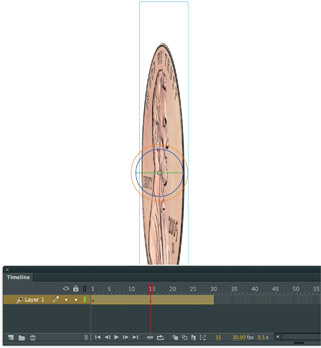
6 With the 3D rotation complete, try experimenting by editing the object’s position relative to its center point. Edit the instance of the object by double-clicking on it. Move the object away from the center point (represented by the “+” cross hairs). The further you move the object from its center point, the more dramatic the effect of the 3D rotation. Here I turned on the Onionskin feature so you can see each frame of the effect when the symbol has been moved horizontally from its own center point.
Hot Tip

Experiment further by adjusting the Perspective angle and Vanishing point in the “3D Position and View” section of the Properties panel. You can get some very interesting 3D perspectives by applying more depth to your object.
3D Position and View

ONE OF THE MOST REQUESTED features from animators over the years has been the addition of a camera in Flash. Having the ability to build scenes involving a background, midground and foreground has always been a part of the production process. With a camera comes the ability to zoom and pan easily through a scene, requiring the movement of only 1 single object (the camera) instead of simulating a camera by moving all the contents around the stage.
Cameras only work in 3D environments and Flash, up until now, has never supported 3D except for ActionScript-generated 3D engines. But if you are like me, that level of ActionScript prowess is beyond reach.
Flash CC still doesn’t support an actual camera, but we do have the next best thing: 3D Position and View, specifically a Z axis that we can now utilize to simulate a virtual 3D stage more effectively than with previous versions of Flash.
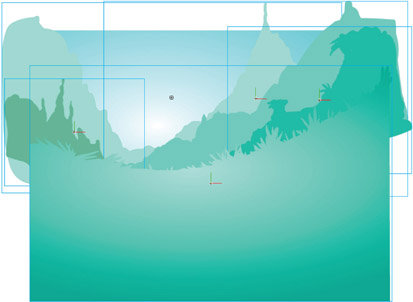
1 Setting up your stage is the most time consuming part of the process. The more elements in your scene, the more convincing the 3D effect will be. Here I have built a landscape consisting of background and midground elements, all converted to Movie Clip symbols and each residing on its own layer.
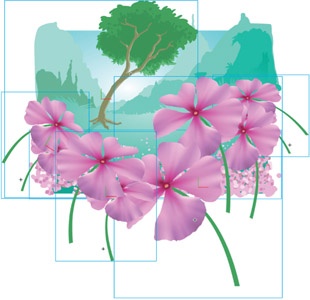
2 To suggest an even more convincing sense of depth I have included several foreground objects by adding several instances of a Movie Clip containing the flower graphic from Chapter 2.
3 Determine what frame you want the “camera” zoom to begin and insert keyframes for all of the layers containing the objects that will eventually be moved along the Z axis. Apply Motion tweens to each of the Movie Clips.
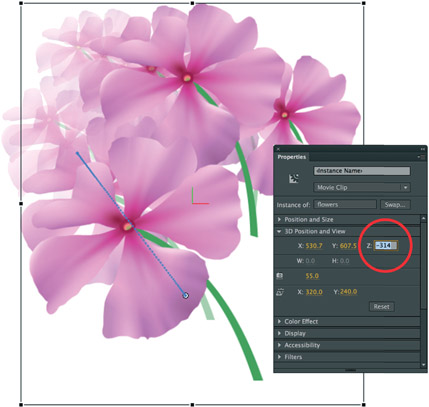
4 With the playhead in the last frame of the Motion span and the Properties panel open, select each Movie Clip individually and use the Z axis hot text slider to scale and position each object outside the stage. You will likely need to edit the X and Y axes to position the object precisely where you want it.

5 For this shot we are simulating a camera zoom, meaning the shot will move us into the scene. Since Flash doesn’t have a true Camera, we simulate a zoom by scaling each object from its original size to a larger size. The direction of the zoom is dictated by the final position of each Movie Clip. The key to the success of this effect is how much the objects move in relation to each other. Foreground objects move faster and scale larger than the objects furthest away from us in the background. The sky and largest mountain range do not move at all while the flowers closest to us move and scale the most. These differences in movement give the viewer a sense of true depth in the scene.
Hot Tip

Locate this source file that was part of the downloadable package from the official website of this book. Scrub the timeline with various layers turned on and off to see just how each object is animated relative to other objects on other layers. The parallax motion is a sophisticated effect viewable when all objects are seen together in motion.
Basic shadow
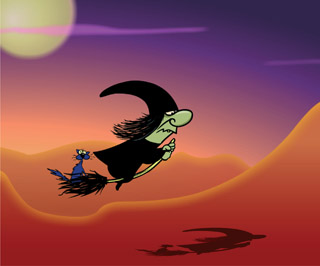
SHADOWS CAN ADD depth to your project. This example is the most basic technique for adding a simple shadow to an animated character. Its simplicity does have its limitations, however. In this chapter you will learn more advanced shadow techniques with greater flexibility, but some may not be supported in older versions of the Flash player. Depending on your target audience and your client’s technical requirements, you may need a technique that will allow you to publish to older player versions. This effect demonstrates one such technique.
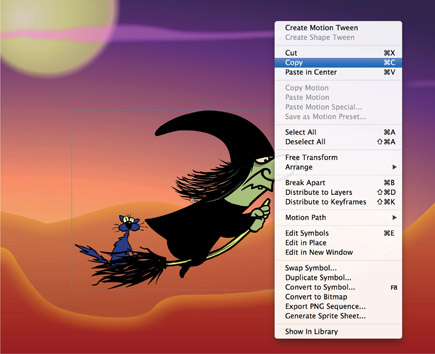
1 For the best result, place your character animation inside a symbol which is commonly referred to as “nesting”. The next step is to simply copy the symbol of your character using ![]() . Create a new layer and move it below the character layer. Paste the copy of the symbol using
. Create a new layer and move it below the character layer. Paste the copy of the symbol using ![]() into this new layer.
into this new layer.

2 Next, apply a tint to the symbol instance you just pasted. The tint needs to have a strength of 100% to completely hide the character’s details. The color of the tint should also be a darker color value than the background.
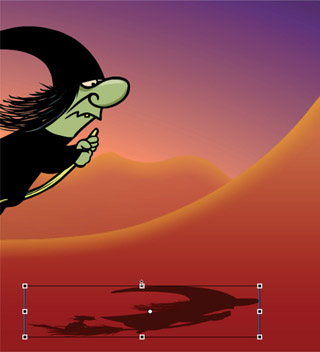
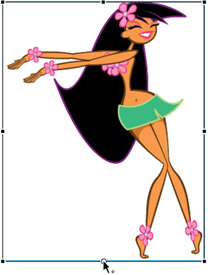
3 Position the shadow instance and with the Free Transform tool ![]() , scale it vertically to suggest some perspective of it being cast against the ground.
, scale it vertically to suggest some perspective of it being cast against the ground.
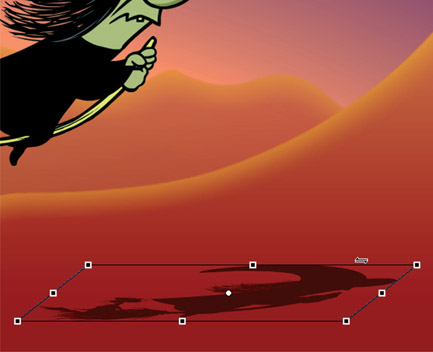
4 With the Free Transform tool ![]() still selected, click and drag horizontally outside the bounding box in between the handles to skew the shadow.
still selected, click and drag horizontally outside the bounding box in between the handles to skew the shadow.
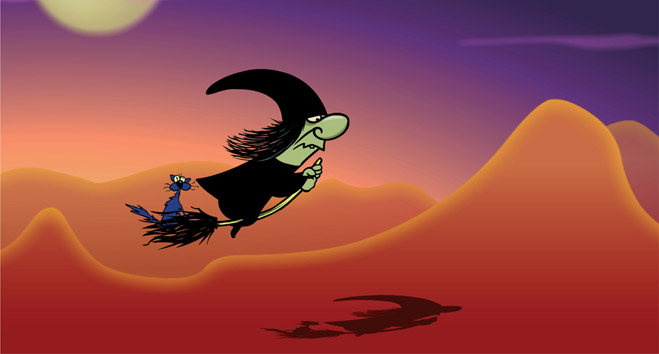
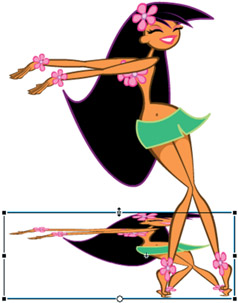
5 You may want to scale your shadow slightly smaller to suggest more depth. Play around with its position relative to the original character for the best results. Because the shadow symbol is a duplicate of the original animated character symbol, it will also animate in sync with the character. This synchronization will result in a convincing shadow effect. Since you have not used any special filters, this shadow effect is supported by all versions of the Flash Player.
Hot Tip

This technique works great when your entire character animation resides in a symbol. Using a duplicate of this symbol for the shadow serves a dual purpose: since you are reusing a symbol, your movie will be efficient in terms of file size. Another advantage to using a duplicate symbol is evident when you revise or add more animation to the original symbol. Since both instances reference the same symbol in the Library, the shadow instance will be updated as well.
Drop shadow
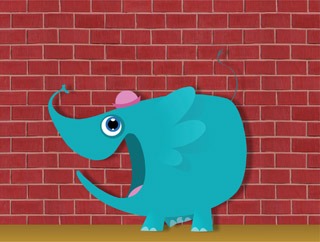
BILBO THE ELEPHANT CHARACTER ®CHRIS GEORGENE
SEPARATION BETWEEN character and background can be critical to the overall impact of your animations. There are several ways to approach adding shadows for characters, but with animation the approach can seem a bit daunting at first. Flash CC makes adding shadows as easy as possible with the use of Filters.
For this example we’ll take a look at the Drop Shadow filter in its purest form. The perspective shadow technique that follows this one will provide a cool way to use the same filter that adds more depth and perspective.
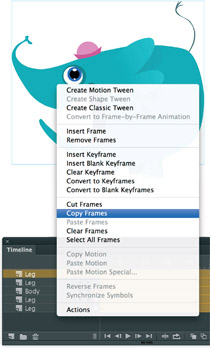
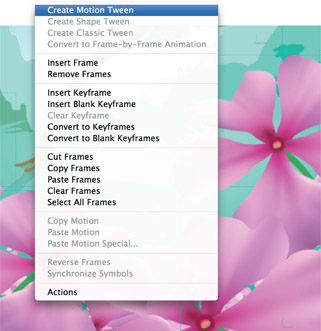
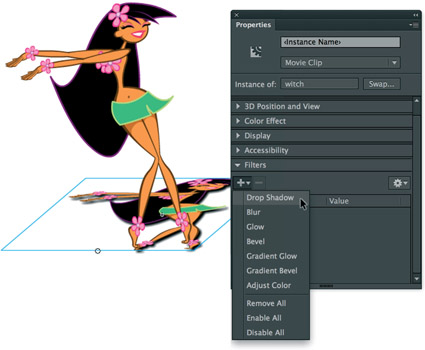
1 Filters can only be applied to Movie Clips. If your animation is not in a Movie Clip, you’ll need to remedy this by selecting the entire range of frames and layers and then Copy Frames from the right-click context menu.
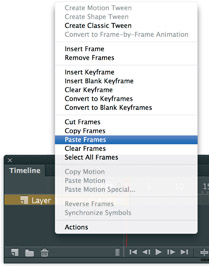
2 Create a new Movie Clip symbol from the Library panel. Select the first frame of this symbol, and from the right-click context menu, select Paste Frames.

3 Drag an instance of this Movie Clip to a new layer on the main Timeline. Delete all the original frames and layers as they are no longer needed. Select your new Movie Clip instance and from the Properties panel select the Drop Shadow filter from the Filters section.
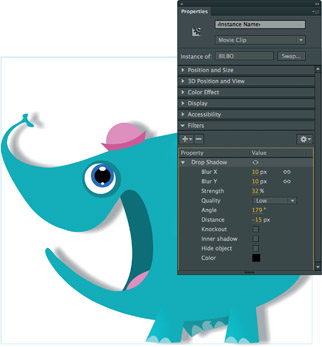
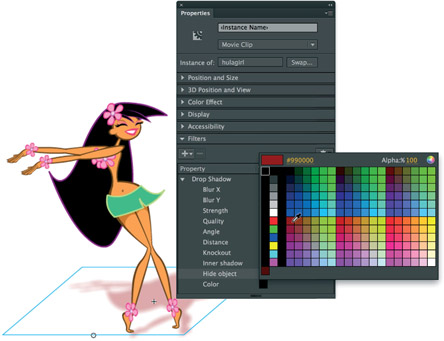
4 Adjust the amount of blur, opacity, angle and distance to achieve your desired results. You can also select the color of the shadow by clicking on the swatch color.
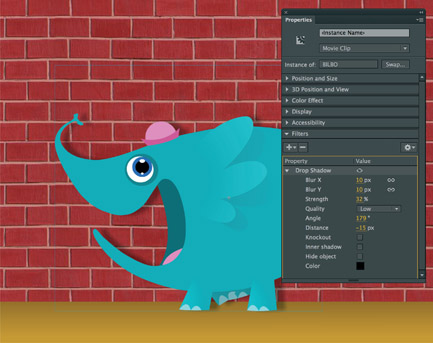
5 If you have a complex background, set the opacity to around 30–40%. This will allow the background values to show through the shadow itself for a realistic effect. I usually spend most of my time adjusting the angle and distance of the shadow relative to my light source. Test your movie to see the Movie Clip and shadow animation.
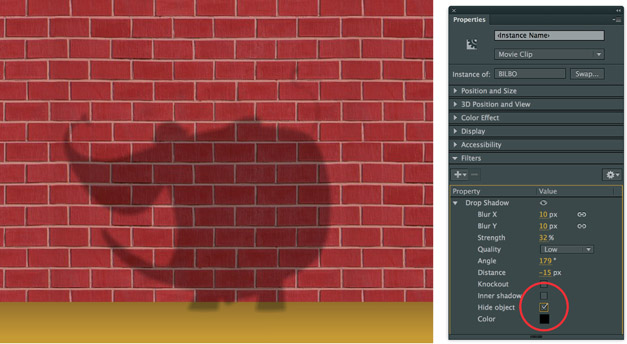
6 Select the Hide object feature to hide the Movie Clip. The drop shadow will remain on stage. Test your movie to see just the shadow animation. Experiment with some of the other options, such as Knockout and Inner shadow. You can also click the little lock icon next to blur to remove the X and Y constraint. Apply more blur to X or Y for even more interesting results.
Hot Tip

Adjust the strength of the shadow to suggest more or less contrast between our character and wall. Less strength (less opacity) will suggest a softer light, such as an overcast day. Higher strength (more opacity) will suggest a stronger light, such as a very sunny day.
Perspective shadow
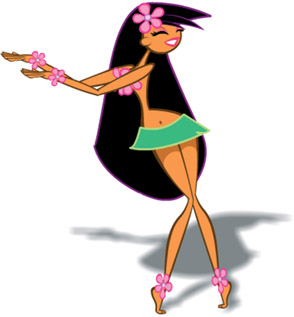
MUDBUBBLE HULA GIRL CHARACTER
SO FAR WE’VE LOOKED at how to add a Drop Shadow filter to an animated character using a Movie Clip and the Filters feature. But the Drop Shadow can be a little limiting in some situations. To place a character in an environment that has more depth and perspective, the Drop Shadow will not work very well since it tends to flatten the perspective. You may need a shadow that provides the illusion of perspective and depth.
1 Select your Movie Clip instance and copy it using ![]() . Create a new layer below it and paste it in place using
. Create a new layer below it and paste it in place using![]()
![]() .
.
2 Lock the top layer to avoid editing it. Select the instance in the layer below it, and using the Free Transform tool ![]() , edit its center point so that it is positioned on the bottom edge.
, edit its center point so that it is positioned on the bottom edge.
3 Scale the symbol downward by dragging the handle in the top center. Notice that the center point positioned on the bottom edge limits that edge from scaling.

4 Next, skew the symbol by dragging in between the handles outside the top edge.
5 With the symbol still selected, apply a Drop Shadow filter to it.
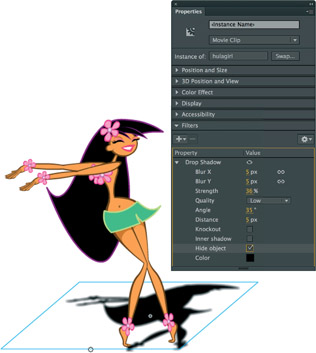
6 The “cheat” to this technique is to select the Hide object feature. Now all you’ll see is the Shadow filter itself.
7 Play around with the options provided. You can adjust the amount of blur, opacity, quality, angle and distance. You can even change the overall color of the filter itself.
Hot Tip

Filters were introduced in Flash 8. Therefore the oldest player version to support filters is Flash Player version 8. You cannot publish to Flash Player version 7 or older and expect any filter effects to be included. Flash will warn you if your publish settings are set to a player that does not support filters. Plan ahead as much as you can. If your client requires an older player, then avoid filters.
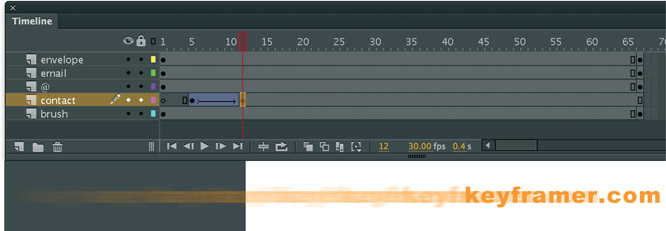
Flying text
REMEMBER THE FIRST time you learned to use a mouse? Or tie your shoes? These tasks seem so simple now, but some things are just plain easier after someone shows you how. It’s the “not knowing where to start” that can be frustrating.
Well, consider this your start. I’m going to show you how simple it is to achieve some basic, cool motion effects in Flash CC — effects that look really difficult to build, but are not so hard to create once you know how. Specifically, you’ll make objects appear to move very fast using an animation effect known as Motion blur. This blur is not the same filter effect as shown in the previous example, but rather a simple use of a linear gradient.
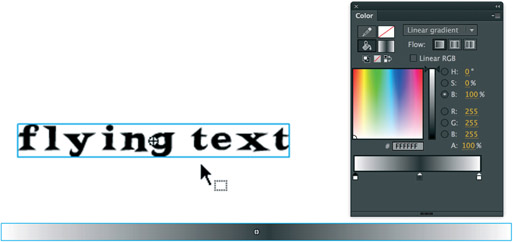
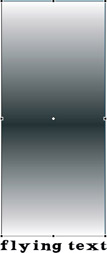
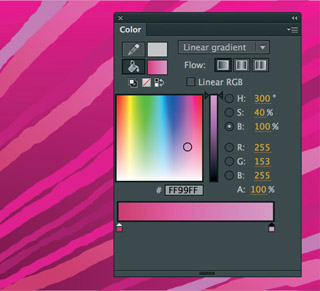
1 First, you need to create the two objects used for this effect: text and a linear gradient. The linear gradient should have at least three colors; the middle color should be a value similar to the main color of the object and the left and right colors should be the same color as your background. If you have a complex background, mix these two colors with 0% alpha so that the blur blends into the background.
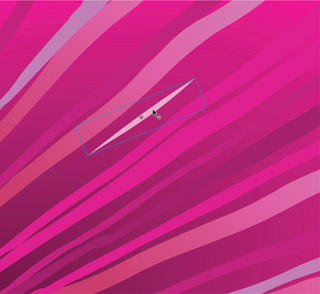
2 To create the animation for this effect, convert the linear gradient to a symbol and place it about halfway off one side of your stage. You might want to start the animation on a frame other than frame 1 to provide a moment for the viewer to anticipate the action.
3 About three to five frames down your Timeline, add a new keyframe (F6). Holding down the Shift key, use the right arrow key to move the gradient across the stage. Position it wherever you like; just make sure it remains on the stage entirely (do not position it off the stage).
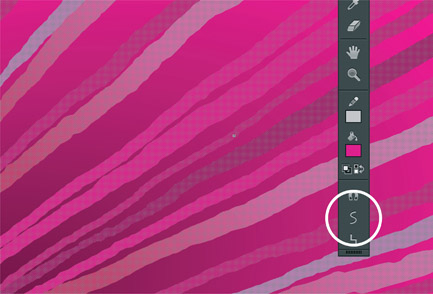
4 Apply a Motion tween to make the gradient symbol move across the stage. Next, create a blank keyframe in the frame after your second keyframe and drag your text symbol to the stage from the Library panel ![]() .
.
Turn on the Onionskin tool, so you can see the previous frame and where the linear gradient is positioned. Align your text to the right of the gradient. Play back your animation.
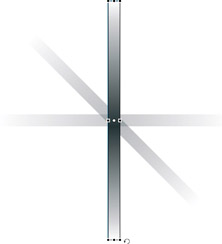
5 This effect is not limited to a horizontal format. Rotate the gradient 90 degrees.
6 Align the text below (or above) the gradient using the Onionskin tool to help guide you.
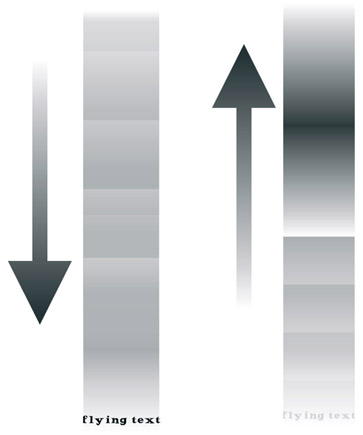
7 Repeat the same procedure as you did for the horizontal effect. Motion tween the gradient vertically from outside the viewable stage area. Then, in the frame after the tween, add a blank keyframe and position and align the text below the gradient. Reverse the procedure to make the text fly out and off the stage. I’m sure you will have a lot of fun with this effect as it is one of the easiest to master, yet it looks so good!
Hot Tip

This technique works quite well with objects other than text. Balls, bullets, superheroes, cars, just about any object in action that requires a high rate of speed will work with this effect. You will likely want to play around with a combination of frame rate and the length of your Motion tweens depending on your project. The advantage with this effect is you do not need a very fast frame rate (although it does help). You can achieve the same results with a lower frame rate as long as the number of frames in the Motion tweens are fewer than compared to a higher frame rate.
Combining effects
THERE ARE SOME ANIMATED EFFECTS that look so advanced it’s difficult to determine how they were actually made. It is often assumed the skill level necessary to create such advanced motion graphics is well out of reach for the average Flash user.
Not true in most cases. When we watch animated motion graphics, if the frame rate is fast enough, the human eye may not be able to see everything that is happening. As a result, our mind fills in what may not even be there. The good news is, we can use this natural shortcoming of the human eye to our own advantage when creating “advanced” motion effects. In my experience I have discovered that the most visually appealing animations are a combination of multiple techniques happening at the same time.

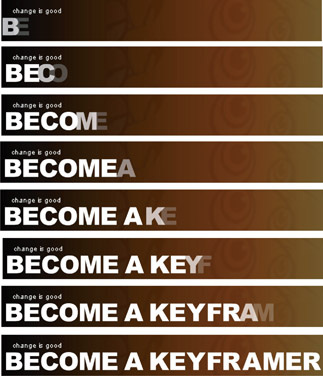
1 Type out your text using the Text tool ![]() . This particular font is pretty complex and already suggests movement. Your text, however, can be hand-drawn graphics depending on the style of project you might have.
. This particular font is pretty complex and already suggests movement. Your text, however, can be hand-drawn graphics depending on the style of project you might have.

2 With the text field still selected, break it apart using ![]() once. Applying one break will split the text field into individual text fields per letter. One break retains the properties of the font, and you have the ability to edit each letter as such. If you wish, you can break it apart one more time to convert the font into raw vector shapes.
once. Applying one break will split the text field into individual text fields per letter. One break retains the properties of the font, and you have the ability to edit each letter as such. If you wish, you can break it apart one more time to convert the font into raw vector shapes.
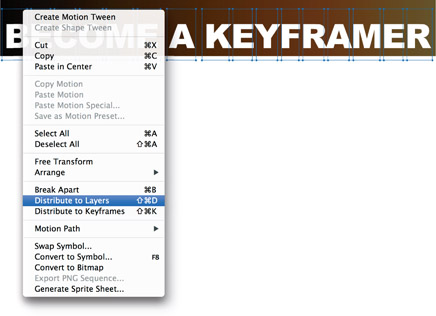
3 With every letter still selected, right-click over one of them and select Distribute to Layers which will create a new layer for every letter, and each letter will be placed into its own layer for you. A true time saver if ever there was one. Now is a good time to convert each letter to a Graphic symbol.
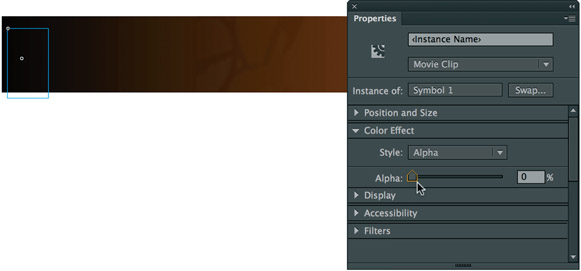
4 On each layer, add a keyframe about three to four frames down the Timeline. Now go back to the first keyframe containing your letter, select the letter symbol on the stage and apply some alpha via the Properties panel. Drag the alpha slider all the way down to 0%. Repeat this procedure for every letter. Apply a classic Motion tween for every letter so that they all fade in when you play back your Timeline. You can choose to use the new Motion tween for this effect if you prefer.
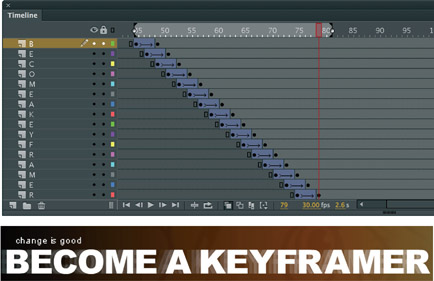
5 Next, to create the effect of each letter fading in one after the other, you will stagger each Motion tween to overlap the one below it. Starting with your second letter, select the range of frames in the Motion tween, then drag them down the Timeline a few frames. You can also select a frame before the tween and press F5 (Insert Frames) to push each Motion tween down the Timeline.

6 The final step is to select the first frame of each animation and use Shift while pressing the left arrow key to position each letter with 0% alpha to the left and on playback will create the motion of each letter flying into position while fading in at the same time. Once again, there is nothing particularly difficult about this effect. All you have done is use Motion tweens with some alpha fades. This is still a very basic Flash animation technique. The only difference is the timing of each letter relative to each other. Throw in a slight amount of movement, and suddenly you have what looks like an advanced animated text effect.
Hot Tip

Once something is an actual command, you can then create a custom key shortcut for it. Shortcuts will save you about two clicks every time you need to apply a tween. That can add up quickly over a period of days, weeks and months. Every minute saved is a minute earned in this industry.
Blur filter (text)

SOMETIMES YOU MAY NEED a blur effect that is more realistic than the linear gradient method. The Blur filter is perfect for creating realistic blurs, even animated ones. Filters were introduced in Flash 8, and to create the same blur effect in older versions we had to export the object from Flash as a PNG file, open it in Photoshop (or any graphics editor of choice) and apply the Motion blur. Then we would have to export from Photoshop as a PNG file and import back into Flash. Thankfully, those days are long gone with the ability to not only apply filters, but to animate them as well.
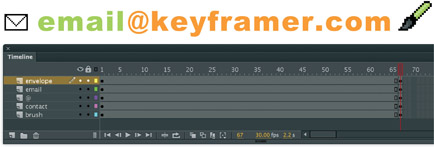
1 It is usually a good idea when creating animated effects to work backwards. Start with the final frame, insert frames to extend your entire Timeline and then add keyframes to the last frame.

2 Go back to frame 1 and begin the animation process by positioning the objects that will animate into view off the stage. Hold down the ![]() key while pressing the arrow keys to maintain alignment and move the object incrementally ten frames.
key while pressing the arrow keys to maintain alignment and move the object incrementally ten frames.
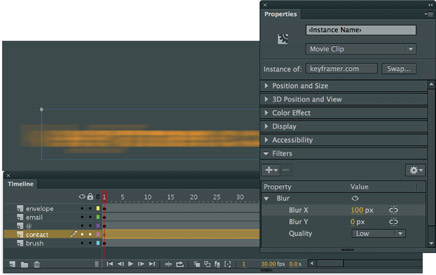
3 In frame 1, select a Movie Clip symbol on the stage and apply a Blur filter from the Filters panel. Click on the small black chain icon to unlock the blur constraint. Use the slider to adjust the amount of blur for the X axis only.
4 Drag the keyframe in your last frame closer to the first keyframe and apply a Motion tween. The symbol will animate from outside the stage into its original position. The Blur filter will also be motion tweened from the amount of blur in the first frame to no blur in the last frame.
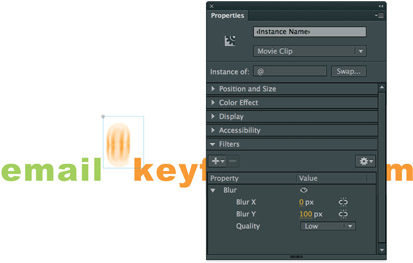
5 For objects that fly in vertically, limit the amount of blur to the Y axis. Remember to use your Shift and arrow keys to maintain alignment between keyframes, unless of course you want to have your object travel at an angle.
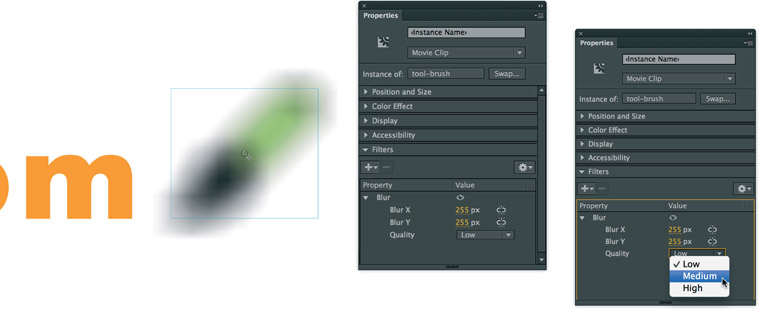
6 Objects that appear as if being focused from thin air use an equal amount of blurring for both the X and Y axis. Did you know you can set a blur amount beyond what the slider allows? The slider taps out at a value of 100, but you can type in your own value up to 255.
Hot Tip

Be careful about the number of filters you apply to objects. The playback performance of the Adobe Flash Player may be affected if too many calculations are needed to render each of the filtered effects. Each filter has a quality setting: Low, Medium and High. If you are unsure about the processor speed of your target audience, use the Low setting to ensure maximum playback performance.
Selective blurring
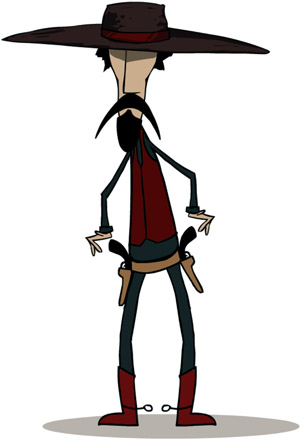
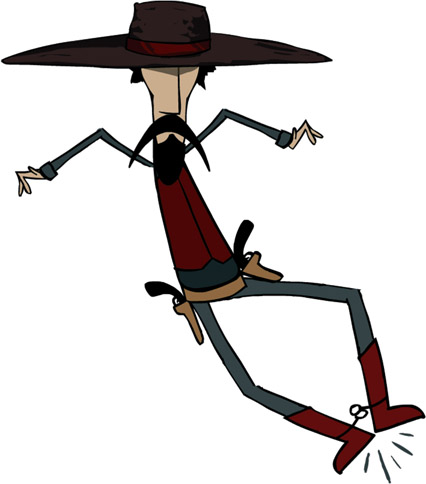
HERE’S ANOTHER COOL TRICK TO suggest movement between two keyframes. Open the “cowboy.fla” and play back the animation. The technique being used is basically a mixture of frame-by-frame animation with a variation of blurring and stretching. Look closely at the movement of his arm when he reaches for the gun. There’s only two frames where this effect is used, and at 24fps it’s almost impossible to see. Yet the technique is still visually effective as it really smooths out the motion of his arm through the gesture of reaching and drawing his weapon.
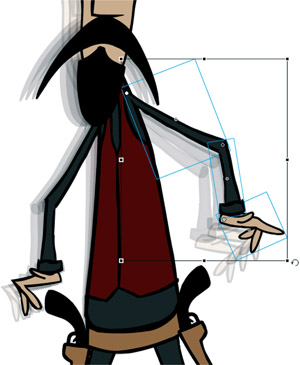
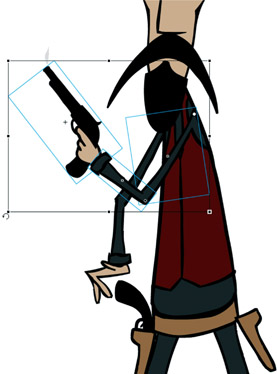
1 The first step is to add a little anticipation. Rotate the arm into a position that suggests he is about to grab something. I also added some “itchy-finger” animation to build up the anticipation and focus the attention on his hand.
2 Replace the arm with some very simple shapes drawn freehand style with the Brush tool. The fill for the arm is a mixture of black and about 30% transparency. The fill that represents the hand is the flesh tone mixed with some transparency as well.
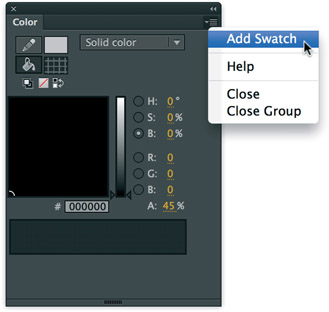
3 You can mix in a little alpha by typing in a percentage manually or using the handy slider bar. Add this new color to your Swatch panel using the upper right corner drop-down menu.
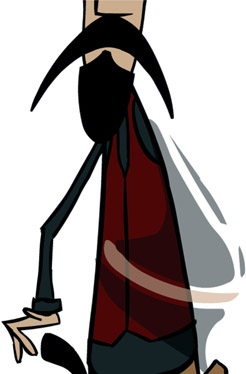
4 The next frame is similar to the previous frame. I used the Brush tool again to draw new shapes using the same colors. Turn on the Onionskin tool to see the previous frame as a reference.
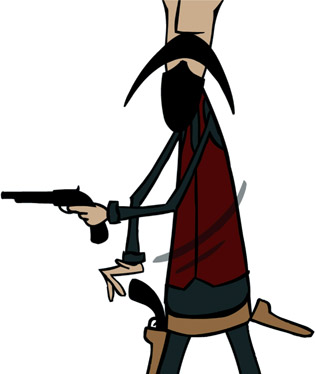
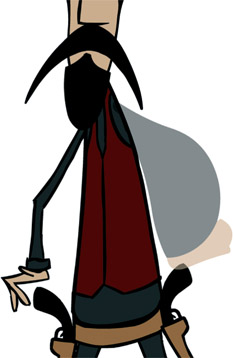
5 After two frames of blurring, it is time to bring the original arm back to the animation and in a new position. You will notice I also added some brush strokes behind the arm to suggest the arm is still moving but decelerating.
6 When a gun is fired, the resulting action is referred to as “recoil.” We have Sir Isaac Newton to thank for showing us that every action has an equal and opposite reaction. This law of physics is critical for us to understand and, when necessary, incorporate into our work.
Hot Tip

The selective blurring technique works best when it is barely seen. If it stays on stage long enough for the viewer to notice it as an object, it has performed a disservice to your animation effect. In essence, this technique should enhance the motion as a whole, not introduce an additional component. It should be subtle and used sparingly for a greater overall effect.
Background blurring
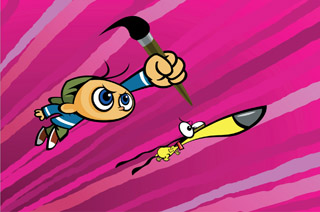
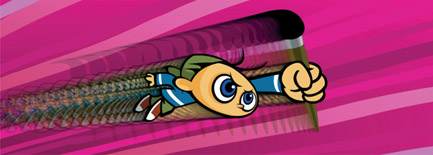
IF YOU WATCH ANIMATED shows on television, then I’m sure you’ve seen the Motion blur technique, where the characters remain relatively still while the background is being blurred. These streaks provide the illusion that the characters are flying through the air at an incredible speed. Visually it’s a very dramatic effect and can be used in a myriad of ways during an action sequence.
The illusion here is that the background is actually moving through the shot, but in fact it doesn’t have to be. In this example the shapes that represent the motion simply wiggle slightly in a very short loop. What makes this effect convincing is a combination of color, line work and of course the character itself.
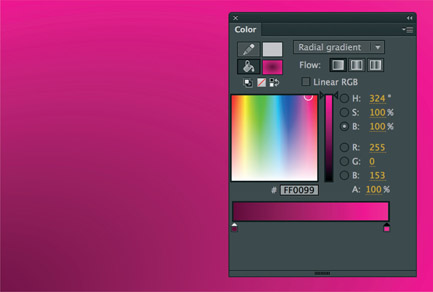
1 Start with a radial gradient as the undertone of your shot. Use the Gradient Transform tool ![]() to position the gradient in the lower left corner. It is where the character will fly in from and helps provide some needed depth to the scene.
to position the gradient in the lower left corner. It is where the character will fly in from and helps provide some needed depth to the scene.

2 Create a new layer and use the Line tool ![]() with a stroke color high in contrast to your gradient colors. Draw some lines to use as directional guides.
with a stroke color high in contrast to your gradient colors. Draw some lines to use as directional guides.
3 Create a new layer above your guidelines and using the Brush tool ![]() and a large brush size, hand draw some thick lines that taper slightly towards the lower left corner.
and a large brush size, hand draw some thick lines that taper slightly towards the lower left corner.
4 Select all lines and convert them to a Graphic symbol. Edit this symbol by adding several keyframes on the same layer. Each new keyframe will duplicate the lines for each added keyframe. Select all lines in each keyframe and click the “Smooth” tool (Brush subselection tool) a few times. Make sure the amount of smoothing is different for each keyframe. The idea is to create an oscillation between frames.
5 On the main Timeline I added some random shapes flying through the shot in the same direction as the background lines. These shapes help emphasize the speed and direction the character is moving.

6 The final touch is to add your character. This effect works best when your character is drawn in a way that reflects the speed and wind resistance they would encounter.

7 You can emphasize the dramatic effect by motion tweening the character from off the stage into its final position. Combine this effect with some of the Motion blur effects previously learned in this chapter, and you’ll have a killer action sequence.
Hot Tip

With the background as a nested looping animation, you can easily reuse it for other similar shots that need to imply very fast motion. As a symbol, it can be transformed by scaling, skewing and even tinting it based on the design of your shot.
How did I get here?
I SPEAK AT MANY CONFERENCES, SCHOOLS AND USER GROUPS THROUGHOUT the country. It’s fun because I can not only share tips and tricks, but also connect with other designers and animators on a personal level. Traveling to events around the world has given me the ability to tap into the pulse of the culture that surrounds Flash. I hear firsthand the thoughts, opinions, gripes and questions users have about this industry.
There’s always one particular question I am asked by students, teachers and fellow users: “How did you get to where you are now?” Now, I’ve been known to drag out even the shortest of stories. Plus, the answer to this question is lengthy to begin with. Here’s the abridged version.
The road that led me to where I am now was, to say the least, full of twists, turns and even dead ends. But somehow, I still managed to make some correct turns along the way, even when I didn’t know where each one would eventually take me. Ten years ago, if you told me I was going to be a successful freelance animator, I would have laughed.

I first started using Flash in 1999 and had never seen anything like it. At that time I was a Creative Director for a small animation studio in the Boston area, and we turned to Flash as our main animation program. Shockwave contracted us to create an animated series for their popular site www.shockwave.com. I was already a fan of Shockwave, which this project particularly exciting. It became a crash course on how to use Flash to create animation optimized for the Web. As a company we had no experience developing for the Web. As an individual, this was a brave new frontier as well. make it even more interesting, I had strict deadlines to meet, which all but eliminated the research and development portion of the process. All eyes were on me to figure out the artistic and technical issues involved with delivering engaging and interactive content. I was very new to vector-based animation, and my skill level with actionScript was not too much beyond a gotoAndPlay command. Was I underqualified? Totally. But I had the confidence to deliver the project complete and on time. I knew I just needed to roll up my sleeves a little further.
The series was a success, but it wouldn’t have been possible without the help of the Flash community. I frequented the Macromedia Flash forums and various online resources like moock.org, were-here.com and ultrashock.com, where I found a large community of users willing to provide a helping hand. My community involvement became a daily ritual, and over time, I found myself providing more answers than questions. Not only did I advance quickly, I made many friends and networked myself into a few high-profile freelance gigs. I started to specialize in animation and motion graphics for the Web. I was hooked.
It was an exciting time to be a Flash user, as the Internet was bursting with dynamic and engaging content. It was the beginning of the “dotcom” boom, and little did I know just how much of an effect it would have on my career. A couple of years later, Macromedia announced the creation of the Team Macromedia program, and soon after a Macromedia employee suggested that I personally submit my application. To my surprise, I was accepted. I was now officially recognized as a member of the Flash community by the company that makes Flash. So cool! Since the Adobe/Macromedia acquisition, this program continues under the name Adobe Certified Professionals, which I guess makes me not only a “team” member but also an “expert.” But as far as I’m concerned, I am just a typical Adobe user, still working in the trenches just like everybody else, exactly where I want to be.
Aside from populating the online Flash forum with technical answers, I found myself delivering live Flash technical presentations via Adobe Connect and what is commonly referred to as “Tech Wednesdays.” One such presentation has been overwhelmingly popular (http://my.adobe.acrobat.com/p46515568/). This demo was my very first recorded Breeze presentation, and it has been one of the most popular resources for Flash character design and animation on the Web. Funny thing is, I was merely filling for the original presenter who had to cancel last minute. With no time to prepare anything, I simply demonstrated what I do on a daily basis for clients and sometimes for self-amusement. Due to its popularity I was asked to host more online presentations, all of which were recorded and featured on Adobe’s website. These are my most rewarding community experiences due to the number of users who continue to benefit from these recordings.
Ask me how I ended up here, and I will tell you it was the result of hard work, a little luck and the generosity of the Flash community. Ask me why I volunteer so much of my time to the Flash community, and I will tell you it’s because I remember how precious the help was from them when I needed it most. Flash is just a tool, but it’s the community that surrounds this tool that transforms it into a culture.
http://www.adobe.com/devnet/author_bios/chris_georgenes.html
http://www.adobe.com/devnet/flash/articles/design_character_pt1.html
http://www.adobe.com/devnet/flash/articles/design_character_pt2.html