CONVERTING WEBSITES INTO NATIVE APPS USING PHONEGAP
Up to this point you have built sophisticated websites using HTML, CSS, and JavaScript. Mobile website development is only one of two distinct reasons customers have smart phones. The other reason is apps.
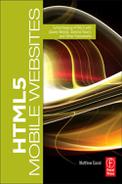
Apps are all the games, utilities, and programs you download onto your phone. Today there are over 300,000 different apps for Android and iOS. Other devices, such as BlackBerry, are building large libraries of applications. In other words, the app market is white hot, as shown in Figure 5.1.
So how do you get in?
This is the brilliant bit. You can use the CSS, HTML5, and JavaScript you have already been using. A company called Nitobi has developed a tool called PhoneGap that allows you to build apps using web technologies. There is no need to know complex programming languages such as Objective-C or Java.
In this section you will convert mobile websites into real-world applications for Android and iOS devices using PhoneGap.
Working with PhoneGap
To build an application for the iPhone, BlackBerry, or Android device requires you to work in a development environment that uses a specialized Software Developers Kit (SDK). For the iPhone, Apple has Xcode, a complete development environment; for Android, Google has an SDK that snaps into the open source Eclipse development environment.
Notobi’s PhoneGap is a set of custom templates that work within these development environments. PhoneGap templates provide a set of default settings that do most of the work for you, as shown in Figure 5.2.
The advantage this gives you is that you are building directly in the development environment for the mobile operating system you are targeting, giving you access to all the testing and debugging tools that any developer will be using. In addition, Nitobi has gone to great lengths to make it easy for you to work through the tools.
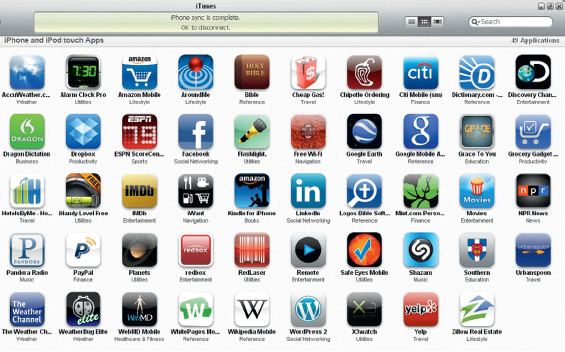
Figure 5.1 A wall of apps.
Figure 5.2 Notobi’s PhoneGap deploys apps to all popular smart phone environments.
The negative is that you do need an understanding for how to build an application in the development environment. The term “build” is commonly used to describe the process of converting your code into a native application.
Each development platform has a different approach to building an application. PhoneGap’s approach to building templates that install into the native development tools gives you a head start. Fundamentally, PhoneGap will be ready for you to use in your development tools in two steps:
1. Download and install the development environment.
2. Download and install PhoneGap templates.
Let’s take Google’s Android as an example. To run
PhoneGap on Android, first you need to get to Google’s developers website (developer.android.com). Select and download the development environment for Android for the operating system you are working on (you have a choice of Windows, Mac, or Linux).
Go to http://eclipse.org/ and select the Download Eclipse button. The file will download. After the files have downloaded, run the installation to install Eclipse. After Eclipse has installed, you can add the PhoneGap files.
Go to PhoneGap.com and select the Download button. You will be downloading a ZIP file containing the PhoneGap templates, as shown in Figure 5.3.
Figure 5.3 PhoneGap can be downloaded in one file.
Expanding the ZIP file will reveal a set of subfolders:
• WebOS
• BlackBerry
• Android
• Bada
• iOS
• Symbian
Each folder is tied directly to a mobile operating system. An additional folder named Documentation provides detailed explanation for all the supported features within PhoneGap, as shown in Figure 5.4.
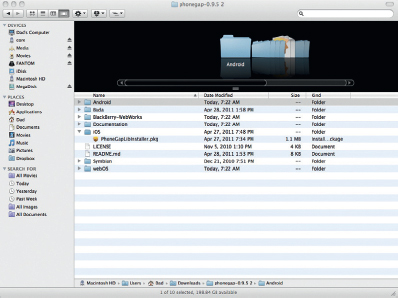
Figure 5.4 There are six different mobile operating systems supported by PhoneGap.
Open the Android folder. You will see a folder named Sample. The Sample folder is a blank project that you can open and use as a template for future projects. Within Sample, look for the subfolder named Assets and then www.
The www folder is where you can place your HTML, CSS, and JavaScript. You can install any HTML5 that is supported by the browser on the Android Phone. This includes advanced technologies such as geolocation, web storage, and CSS3.
Once you have copied over your files, you can use the build tools that are built into Android. In this chapter we will not delve too deeply into the Android build process. You can find a lot of information converting the details of application build for Android at Google’s Android YouTube Channel, at www.youtube.com/user/androiddevelopers (Figure 5.5).
Arguably one of the most complex environments is Apple’s iOS development process; it is also the platform where you will get a significant number of downloads. For this reason, we are going to step through in detail the process of building an application using Apple’s Xcode.
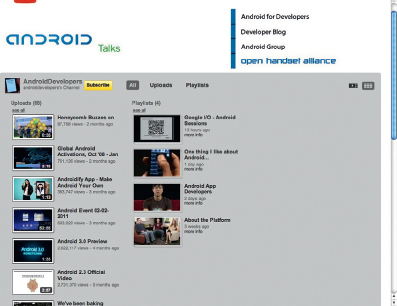
Figure 5.5 Google’s Android Developer Channel on YouTube.
Setting Up a PhoneGap Project for iOS Devices
Apple’s development process is complex. There are benefits and negatives to this. On one hand you have process that is thorough and can accurately trace back all applications to the original developer. The negative is that building an application for the iPhone can be a time-consuming process.
The development environment for iOS is Xcode. Before you even download and install Xcode you will need to complete the following steps to become a certified developer and have your apps registered with Apple.
Becoming an Apple Developer
To create an iPhone app you need to complete several activities before your apps will run:
1. Become a certified Apple developer.
2. Create a development and a Developer P12 certificate.
3. Register your development iPhone with Apple.
The hardest part of developing apps for the iPhone is not the code you will develop, but ensuring you have all of your is and ts dotted and crossed per Apple’s rigorous registration process.
Becoming an Apple Certified Developer
To be able to develop applications for the iPhone you need to become a certified Apple developer. The cost is only $99 a year and this gives you the ability to load applications to the iTunes App Store. Yes, you heard me correctly—it costs only $99 a year to load as many apps as you can develop into the iTunes App Store. This is an amazing deal.
Follow these steps:
1. On a Mac go to http://developer.apple.com/ios as shown in Figure 5.6.
2. Select the Register button. Either use the iTunes Account information you already have or create a new account.
3. When you have completed the registration you will be sent an e-mail containing a link to your developer and distribution certificates.
4. Go to https://developer.apple.com/devcenter/ios/index.action to download and install an Apple iPhone Developer Certificate.
5. View the certificate by opening Keychain on your Mac. You will need to reference the two certificates as you develop your iPhone Apps.
6. Right-click the Developer Certificate. Select Export Certificate.
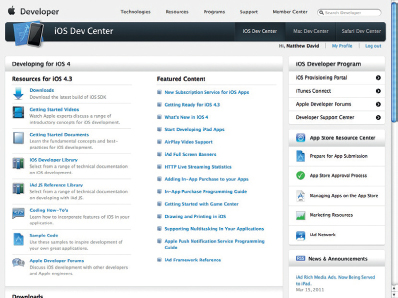
Figure 5.6 Apple’s iOS Dev Center.
7. Select a place where you want to save the certificate. Use the P12 Personal Information Exchange format.
8. Select the Save button. You will be prompted to give your app a password. Give it a secure password and remember it—you will need it later.
9. Export the Distribution certificate in P12 format, too.
After you have your P12 certificates you will need to register your test iPhone with Apple. You can register up to 100 devices per year.
1. Connect your test iPhone/iPod Touch to your computer.
2. Open iTunes and select your device from the list to view the Summary tab data.
3. Click the serial number next to your device. The number will change to an identifier (UDID) number.
4. Copy the number.
5. Go to http://developer.apple.com/ios/manage/devices/index. action as shown in Figure 5.7.
6. Select Add Devices.
7. On the Add Devices screen paste in the UDID number and give your device a name. You may want to choose something like “iPhone Development” or “iPod Touch Gen 3 Development.”
The developer account ID, registered device, and P12 certificates are needed for all apps your want to sell in the iTunes App Store.
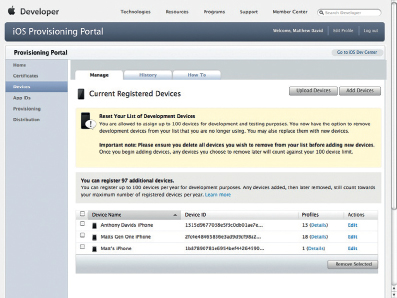
Figure 5.7 iOS Device management.
Each iPhone app you develop requires several specific tools for it to work. They include:
• App ID
• Provisioning profile
• Icons
With these three tasks complete you will able to create iPhone apps.
Creating App IDs
The App ID is a unique identifier Apple uses to identify your app from the tens of thousands of apps in the iTunes App Store.
1. Go to the App ID page in the iOS developer center (http://developer.apple.com/ios/manage/bundles/index.action) as shown in Figure 5.8.
2. Select New App ID.
3. Give your new app ID a name you can find easily, such as ShakespeareQuotes. The name has to be all one word.
4. Finally, you need to add a bundle seed ID. The convention is to reverse your website address and add the app’s name at the end. For instance, com.focalpress.ShakespeareQuotes.
5. Select OK and your new App ID is ready for you.
With your App ID created you can create a provisioning profile for your app.
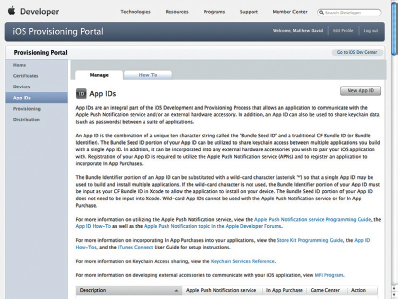
Figure 5.8 App ID management.
Creating a Developer’s Provisioning Profile
A provisioning profile is a document that you associate with your app for either development or for iTunes app distribution. There are three types of provisioning profiles: Developer, Distribution to Ad Hoc, and Distribution to iTunes App Store. We will cover how to use the Distribution Profiles later in the chapter. For now, you will focus on creating the Developer Profile.
1. Go to the Profile page in the iPhone developer center (http://developer.apple.com/ios/manage/provisioningprofiles/index.action) as shown in Figure 5.9.
2. Select the Development tag.
3. Select New profile.
4. Give your profile a meaningful name. A convention that is gaining popularity is to use the prefix “dev” followed by the App ID; for instance, DevMyFirstApp.
5. From the Certificates list check your name.
6. Find your App ID from the drop-down list.
7. Select your test device from the devices listed and then select the Submit button.
8. Your certificate will take about 30 seconds to generate. When it has, you will see a Download button. Select the Download button and save the Developer Profile to your desktop. The file should have the extension mobileprovision.
9. Connect your test iPhone to iTunes.
10. Drag the downloaded Developer Profile onto iTunes and then sync your iPhone. This adds the Developer Profile to your testing device.
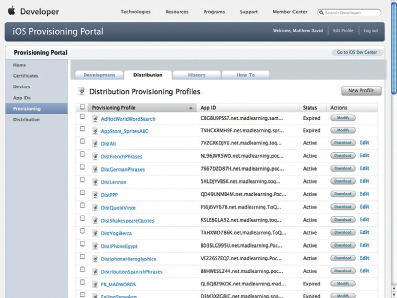
Figure 5.9 Apple’s provisioning site.
Developing Icons for Your iPhone Apps
In preparation for your iPhone app you need four PNG images:
• 29.png—a file that is 29 × 29 pixels
• 57.png—a file that is 57 × 57 pixels
• 512.png—a file that is 512 × 512 pixels
• Default.png—a placeholder file that is used while your app is loading. The file must start with a capital D.
You can create all of these files using tools such as Adobe Fireworks.
Building Your App with Xcode
Now you have all documents you need for an application, but you also need the development environment. Apple’s development environment is Xcode.
As a licensed member of the Apple iOS Developer program you can download Xcode for free from developer.apple.com/ios. Xcode is a very large file, so it will take a while to download.
Installing Xcode is the same as any software package on OS X. Before you start Xcode, you need to install the PhoneGap Xcode templates. From the PhoneGap.zip you downloaded earlier, locate the subfolder named iOS. Open the folder and locate the file named PhoneGapLibInstaller.pkg, as shown in Figure 5.10.
Double-click on PhoneGapLibInstaller.pkg to install the template file. Locate the profile you created for your app site and drag the profile onto the Xcode icon. This adds the profile to Xcode and will allow you to associate it with your app later.
When the PhoneGap files have been installed, open Xcode. On the Xcode splash screen, select the New Project button to choose a new project.
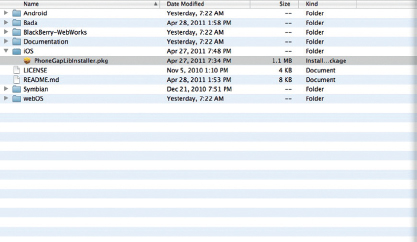
Figure 5.10 The iOS version of PhoneGap.
The New Project screen opens. Along the left-hand side you will see PhoneGap under the User Templates category, as shown in Figure 5.11.
Choose the default PhoneGap-based application.
Xcode now generates the files needed for the project. This only takes a moment. To make your project tied to your app, you will need to make a couple of settings changes.
From the Project menu select Edit Project Settings. The settings screen has four main sections: General, Build, Configurations, and Comments, as shown in Figure 5.12.
Select the Build section. You need to associate the profile for your app with this project. This is done in the section named Code Signing with the property Code Signing Identity.
To the right of the Code Signing Identity property is a drop-down menu you can select that allows you to choose from the profiles you have associated with Xcode. Select the appropriate profile.
At this time you can close the Settings screen. Associating the profiles is a process you only have to complete once per year.
The next configuration step is to modify the Plist configuration document for your project. The application Plist is located in the main project under the Resources subfolder. You will see two Plist files, one named PhoneGap.plist and the second named after your app. Do not modify the PhoneGap.plist document. Select the Plist for your app. You will see that the Plist is a set of properties with values, as shown in Figure 5.13.
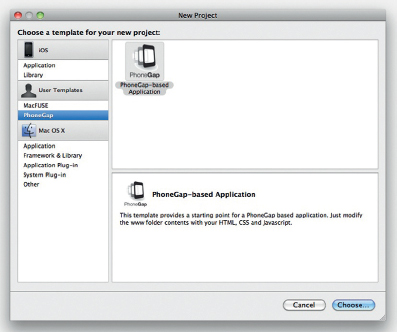
Figure 5.11 Choosing PhoneGap in Xcode.
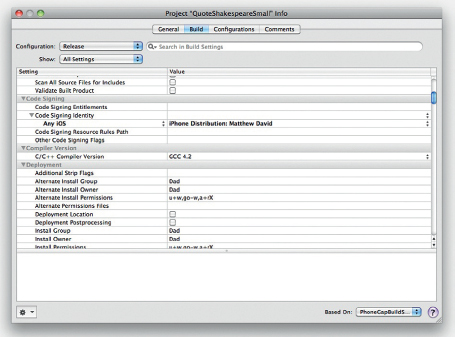
Figure 5.12 Xcode project settings.
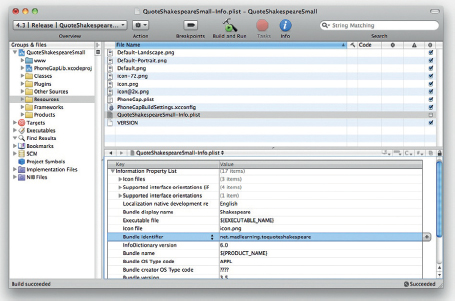
Figure 5.13 Your apps Plist settings.
Locate the property named Bundle identifier; the bundle identifier is the full conical name of your app. You already set this when you created your app ID on Apple’s developer website. You will need to write the full name here. For instance, using the example App ID from before would be com.focalpress.ShakespeareQuotes.
At this point, you have completed all the default settings for your app. Here is the good news: you do not need to go through these steps again. How about that?
Now onto the fun stuff: creating apps with HTML.
In your Xcode project you will see a subfolder named www. By default the folder contains the the file Index.html.
At this time you can build your app. Go to the Build menu option and choose Build and Run. The default setting in Xcode is to install your app in the iPhone Simulator that comes with Xcode. You now have an app. OK, it doesn’t show anything, but it is a real app. Close the Simulator to kill the test. Go back to Xcode and select the folder named www. Right-click on the folder and choose Reveal in Finder. The OS X Finder opens showing you the folder for the HTML files.
Now you can add your own website files including images, video, HTML5, JavaScript, and CSS. There is no need to learn any Objective-C to build your application.
After you have added your files you can go back and test your app in Xcode in the Simulator. Voilà! One real-world iOS app built with HTML.
Extending PhoneGap with Plug-ins
The PhoneGap architecture has matured to the point where it now supports plug-ins. Essentially, a plug-in is a specialized piece of code that you can add to your project. Once it has been added you can connect to the plug-in with some JavaScript in your page.
Using plug-ins for PhoneGap can be a great way to extend the functionality of your app. But there are some caveats when working with plug-ins:
• Plug-ins are not created the same way for each Mobile OS platform. Each is custom-code tailored to the target device.
• All of the plug-ins are created as Open Source solutions.
• Each PhoneGap plug-in has different degrees of support.
Bottom line: plug-ins can be great but you will need to work through the idiosyncrasies of each plug-in yourself.
The best location to find plug-ins is GitHub at https://github.com/phonegap/phonegap-plugins/ (see Figure 5.14).
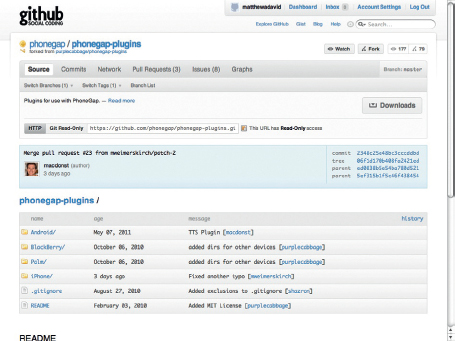
Figure 5.14 Plug-ins for PhoneGap.
There are currently four main categories of plug-ins:
• Android
• BlackBerry
• Palm (WebOS)
• iPhone
Each category has plug-ins customized to the operating system. Adding the plug-ins to your projects is similar. Within each PhoneGap project folder is a subfolder named Plugins. Here you will add the plug-ins for most of your projects. In your index.html file you will add JavaScript that allows you to link to Plugin.
The following is an example of using the MapKit plug-in for iOS development, as shown in Figure 5.15: https://github.com/phonegap/phonegap-plugins/blob/master/iPhone/MapKitPlug.
To add the plug-in, you will need to download the following Objective-C files (https://github.com/phonegap/phonegap-plugins/tree/master/iPhone):
• AsyncImageView.h
• AsyncImageView.m
• MapKit.h
• MapKit.m
• PGAnnotation.h
• PGAnnotation.m
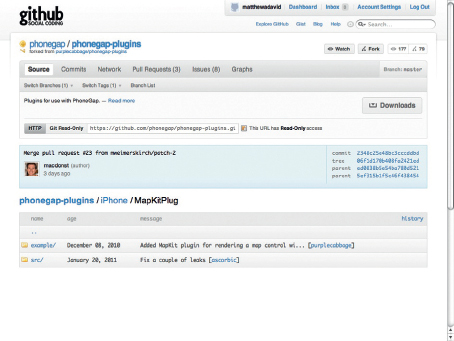
Figure 5.15 The MapKit plug-in.
These files should be added to the Plugins folder in your Xcode.
An additional JavaScript file called MapKitPlug.js needs to be added to the www folder that links the Objective-C to the HTML files.
At this point you have all the files you need to add a map to your web page. The map is tied directly back to Apple’s native MapKit built into the iPhone.
The following HTML will add a MapKit map to your page:
<!DOCTYPE HTML PUBLIC “-//W3C//DTD HTML 4.01//EN” “http://www.w3.org/TR/html4/strict.dtd”>
<html>
<head>
Change this if you want to allow scaling:
<meta name=“viewport” content=“width=default-width; user-scalable=no” />
<meta http-equiv=“Content-type” content=“text/html; charset=utf-8”>
<title>MapTest</title>
iPad/iPhone specific css below, add after your main:
<link rel=“stylesheet” media=“only screen and (max-device-width: 1024px)” href=“ipad.css” type=“text/css” />
<link rel=“stylesheet” media=“only screen and (max-device-width: 480px)” href=“iphone.css” type=“text/css” />
The following adds links to both the PhoneGap and MapKit-Plugin JavaScript files:
<script type=“text/javascript” charset=“utf-8” src=“phonegap.js”></script>
<script type=“text/javascript” charset=“utf-8” src=“MapKitPlug.js”></script>
<script type=“text/javascript” charset=“utf-8”>
function onBodyLoad()
{
document.addEventListener(“deviceready”, onDeviceReady, false);
}
function cbMapCallback()
{
alert(arguments[0]);
}
When this function is called, PhoneGap has been initialized and is ready to roll:
function onDeviceReady()
{
}
function showMap()
{
var pin = { lat:49.281468,
lon:-123.104446,
title:“Nitobi HQ”,
pinColor:“purple”,
index:0,
selected:true};
This runs the calls to MapKit:
var _options = {
buttonCallback: “cbMapCallback”,
height:360,
diameter:1000,
atBottom:true,
lat:pin.lat,
lon:pin.lon
};
window.plugins.mapKit.showMap();
window.plugins.mapKit.setMapData([pin],_options);
}
function hideMap()
{
window.plugins.mapKit.hideMap();
}
function resizeMap()
{
lon:-123.104446,
title:“Nitobi HQ”,
pinColor:“purple”,
index:0,
selected:true};
// do your thing!
var _options = {
buttonCallback: “cbMapCallback”,
height:260,
diameter:1000,
atBottom:true,
lat:pin.lat,
lon:pin.lon
};
window.plugins.mapKit.showMap();
window.plugins.mapKit.setMapData([pin],_options);
}
</script>
</head>
The following command in the BODY element loads MapKit into your HTML:
<body onload=“onBodyLoad()”>
<button style=“top:400px;position:absolute;” onclick=“showMap()”>Show Map</button>
<button style=“left:100px;top:400px;position: absolute;” onclick=“hideMap()”>Hide Map</button>
<button style=“left:200px;top:400px;position: absolute;” onclick=“resizeMap()”>Resize Map</button>
</body>
</html>
You can save and test your file. Without having to learn Objective-C and leveraging the JavaScript knowledge you already have you can load a native MapKit map into your app.
Extending PhoneGap with Custom Code
There will be times when you want to enhance the PhoneGap project you are working on using your own custom code. This can be done with PhoneGap—after all, you are building the solution in a native development environment. You have full access to the native code in that environment.
The following example will add Apple’s iAd advertising feature to your app.
The first step is to add the iAd framework to your project. In your project folder you will see a category named Frameworks. Right-click on the folder and select Add → Add Existing Framework. From the pop-up window choose the framework named iAd.
Now you have to modify two Class files in your project. Go to your project and select the folder named Classes.
You will see two Class files that are labeled after your project name with the extension of either AppDelegate.h or AppDelegate.m. Select AppDelegate.h and modify the code to the following:
#import <UIKit/UIKit.h>
#import “PhoneGapDelegate.h”
#import <iAd/iAD.h>
@interface appNameDelegate : PhoneGapDelegate <ADBannerViewDelegate> {
BOOL bannerIsVisible;
}
@end
The important element is the inclusion of line three where you are importing the iAd framework.
The fourth and fifth line will bind the Objective-C code you will need to add to the delegate file. The file that ends in .m is where you will add your Objective-C to control the appearance of the iAd feature:
- (id) init
{
return [super init];
}
This is the main kick-off after the app inits; the views and settings are set up here.
- (void)applicationDidFinishLaunching:(UIApplication *)
application
{
[ super applicationDidFinishLaunching:application ];
}
-(id) getCommandInstance:(NSString*)className
{
You can catch your own commands here, if you wanted to extend the app protocol, or add your own app specific protocol to it.
return [super getCommandInstance:className];
}
Called when the webview finishes loading, this stops the activity view and closes the image view:
- (void)webViewDidFinishLoad:(UIWebView *)theWebView
{
bannerIsVisible = YES;
ADBannerView *adView = [[ADBannerView alloc] initWithFrame:CGRectZero];
adView.frame = CGRectMake(0, 430, 320, 50);
If you want the banner to be on top of the screen, remove these lines:
adView.delegate = self;
adView.currentContentSizeIdentifier = ADBannerContent SizeIdentifier320×50;
[theWebView addSubview:adView];
return [ super webViewDidFinishLoad:theWebView ];}
- (void)webViewDidStartLoad:(UIWebView *)theWebView
{
return [ super webViewDidStartLoad:theWebView ];
}
- (void)webView:(UIWebView *)theWebView didFailLoadWithError:(NSError *)error
{
return [ super webView:theWebView didFailLoadWithError:error ];
}
- (BOOL)webView:(UIWebView *)theWebView shouldStartLoadWit hRequest:(NSURLRequest *)request navigationType:(UIWebViewNav igationType)navigationType
{
return [ super webView:theWebView shouldStartLoadWithRequest:request navigationType:navigationType ];
}
- (BOOL) execute:(InvokedUrlCommand*)command
{
return [ super execute:command];
}
This is where the AdBanner is called:
- (void)bannerView:(ADBannerView *)banner didFailToReceive AdWithError:(NSError *)error
{
if (bannerIsVisible)
{
[UIView beginAnimations:@“animateAdBannerOff” context:NULL];
The preceding code assumes the banner view is at the bottom of the screen.
banner.frame = CGRectOffset(banner.frame, 0, 50); [UIView commitAnimations];
bannerIsVisible = NO;
}
}
- (void)bannerViewDidLoadAd:(ADBannerView *)banner
{
if (!bannerIsVisible)
{
[UIView beginAnimations:@“animateAdBannerOn” context:NULL];
This assumes the banner view is offset −50 pixels so that it is not visible.
banner.frame = CGRectOffset(banner.frame, 0, -50);
[UIView commitAnimations];
bannerIsVisible = YES;
}
}
- (BOOL)bannerViewActionShouldBegin:(ADBannerView *)banner willLeaveApplication:(BOOL)willLeave
{
NSLog(@“Banner view is beginning an ad action”);
BOOL shouldExecuteAction = YES;
Your app implements this method if you want it not fixed:
if (!willLeave && shouldExecuteAction)
{
Here you can insert code to suspend any services that might conflict with the advertisement.
}
return shouldExecuteAction;
}
- (void)dealloc
{
[ super dealloc ];
}
@end
At this point you can save your files and test your app in the iPhone simulator. You will see that a sample ad runs. You cannot get real ads until you publish your app to the iTunes App Store.
Now you have an opportunity to monetize your applications.
Packaging Your App for the iTunes App Store
Apple’s iTunes Store is an amazing success story: 300,000 apps and 7 billion downloads is nothing to sneeze at. There are many success stories of groups making millions from Apple. But, before you can get any money, you need to have your app ready for deployment.
At this time your app is ready for deployment to the iTunes App Store. There are some simple changes to your Xcode environment you need to make in order to publish your application.
With Xcode open to the project you are working on, you should make the following changes:
• The build must be targeted to a device.
• The Active Configuration in the build must be Release.
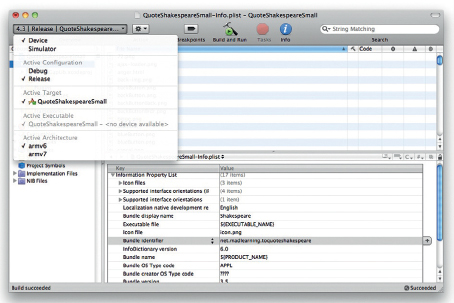
Figure 5.16 Packaging your app for distribution.
When you have these two settings applied, you can then go to Build → Build And Archive. This step will create a special version of your app that can be submitted directly to iTunes App Store, as shown in Figure 5.16.
Now your website is converted into an app and ready for submission. You will see that it is now being managed in the Organizer, as shown in Figure 5.17.
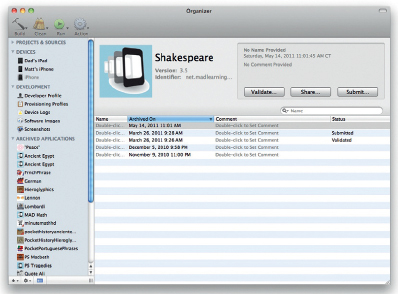
Figure 5.17 The Xcode App Organizer.
The final step is to go into Apple’s iTunes Connect to configure the settings that will allow your app to appear in the App Store.
Using iTunes Connect to Publish Your App
You are now very close to having an app available on the iTunes store. Can you feel the rush? You could be selling thousands of apps in a matter of a few days. The gap between you and riches is Apple’s iTunes Connect publishing tool. You will be using a new website to upload your final iPhone Apps. The site is called iTunes Connect (https://itunesconnect.apple.com/), as shown in Figure 5.18.
In every sense, iTunes Connect is your business relationship with Apple. The site allows you to set up your contracts, tax records, and banking information; review sales trends; download financial reports; and manage your In App Purchases. In App Purchases is a method for buying something within an app for iOS devices. You will need to complete these sections in order to sell your app in iTunes. This section is going to focus on the important part of iTunes Connect: managing your applications.
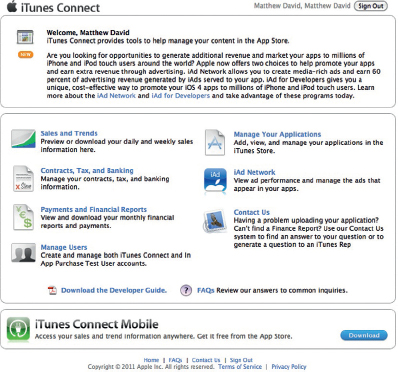
Figure 5.18 Apple’s iTunes Connect is your business relationship with Apple.
There are some tasks you can complete before you upload your app:
1. You will need at least one screen shot of your app as it appears in your iPhone. Fortunately there is a very easy way to do that. At any time when your app is playing on your iPhone, press the Home and Sleep buttons at the same time. The screen will flash and a screen shot will be taken of your app. The image is stored in your Camera Roll and is exactly the same size Apple needs.
2. When you have completed this task, go to https://itunesconnect.apple.com. Use your Apple Developer ID and Password to log into the site.
3. Select Manage Your App from iTunes Connect. You will be taken to a screen where you can add a new app and review apps you are selling.
4. Select the Add New App button to start the process of creating a new iTunes App.
5. There are several screens you need to complete to upload your app to iTunes. The first is the Export Compliance screen asking if the app contains encrypted data. You will want to keep your first app deployed to the App Store simple and not use encryption. Later, when you are familiar with the idiosyncrasies of the App Store submission process, you can experiment with different settings. Your first app should not have any encryption, so choose No at this time.
6. The next page is the Overview page. For the most part, the content you enter on this screen can be edited after your app has been submitted. There are two sections that cannot change: Application Name and Keywords. Ensure that you select a name that accurately describes what you selling. You are allowed up 100 characters of keywords. Use your Search Engine Optimization experience to add keywords that categorize your app. These two sections are very important.
7. The remaining fields allow you to add a description; submit the app to main categories; add copyright, version number (start with 1.0), SKU number, and application/support URL; and support e-mail. Select the Continue button when you have completed the page.
8. The next page allows you to add a Rating for your app. A rating is determined by answering 10 questions. Click the Continue button when you have answered the questions to take you to the Upload page.
9. Upload the 512.jpg for the large icon.
10. Upload a 480 × 320 jpg image for the primary screenshot.
11. Add one to four 480 × 320 jpg images for the additional screenshots. You will get a green check mark for each successfully loaded image.
12. Select Continue to go to the Pricing and Availability screen.
13. You do not get to select a specific price for your app. Instead, Apple lists a number of Tiers you can choose. At first glance this may seem frustrating but what Apple has done is to remove the pain of selling with different currencies. A Tier 2 app will be $0.99 in the United States, 59 pence in England, and AU$1.29 in Australia. There are over 70 different currencies that Apple manages for you. You can also choose to have screens that show the app going on sale in different countries.
14. The availability option allows your app to go on sale at a specific time in the future.
15. At this point you get to review all of your content and press the Submit button.
16. When the meta-content has been saved you can go back to your Xcode Organizer and find the app you have been working on. Select the latest build version and choose the Submit button.
17. A window will open asking you to match your app with a profile on iTunes Connect. Select the correct profile and submit your app.
Apple has done a lot to improve the review process for new apps. Today it only takes five to seven days for an app to be approved by Apple and appear in iTunes.
Using Dreamweaver CS5.5 to Build Your PhoneGap Projects
Adobe has gone full onboard for its support of both HTML5 and Mobile development. To this end, starting with the release of Dreamweaver CS5.5 you can now natively support iOS and Android PhoneGap.
Creating a PhoneGap app in Dreamweaver is as simple as extending site settings. Adobe has a number of videos on its website (http://tv.adobe.com/) that step you through the process of converting Dreamweaver from a web development tool into an app machine.
Using PhoneGap Build to Create BlackBerry and Windows Phone Apps
A third place you can build your PhoneGap app is with the newly released PhoneGap Build. Located at build.phonegap.com the new service allows you to upload your files directly to the Cloud and have PhoneGap’s build servers convert your HTML into native apps, as shown in Figure 5.19.
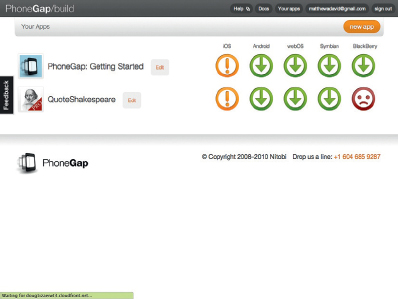
Figure 5.19 PhoneGap Build.
Using Build allows you to target multiple OS environments without having to have a deep knowledge of each OS SDK and tools.
Summary
The world has gone app crazy. There is a very good reason: Apps make money. In this section you have seen how you can take your knowledge of HTML5 for mobile devices and convert your optimized websites into native applications that run on Android, iPhones, BlackBerrys, and more.
PhoneGap integrates tightly into the development environment you are working in. The benefit this bring is that you can extend the core codebase in your apps with plug-ins and extensions. This gives you the opportunity to leverage features such as such as maps, advertising, and more.
The popularity of PhoneGap has reached the ears of many companies. In particular, Adobe is now including PhoneGap support starting with Dreamweaver CS5.5. If you do not have Dreamweaver you can use a web service called PhoneGap Build that will convert your HTML files into native apps. There simply is no excuse when it comes to creating apps: If you know HTML, then you can build a native application.