
PROJECT: BUILDING A NATIVE iOS APP WITH PHONEGAP
Throughout the book we have been talking about building websites for mobile devices. This is great, but there is one next step you need to take: building native applications.
PhoneGap is emerging as a leading tool for converting applications from HTML into native applications. In this project you will convert a mobile website into a native application for Android, iOS, and BlackBerry phones.
What You Will Need
To get started with this project you will need to download the files from www.visualizetheweb.com. The files for this project are contained in a ZIP file that you can extract on your desktop.
The project files you need to build this project include the following:
• Icons
• Web app with iUI framework
Setting Up Your Web Files for the Project
The first step in converting a website into a PhoneGap native application is to create your web content. For this example you will use a mobile website that is a collection of quotes from Buddha, as shown in Figure P5.1.
While stepping through the code for the Buddha web app you will see that a new code base is being used: iUI. iUI is an lesser known alternative to jQuery Mobile. The framework can be downloaded at http://code.google.com/p/iui/downloads/list.
The framework is a great alternative to jQTouch. You can download the files at http://www.iui-js.org/.
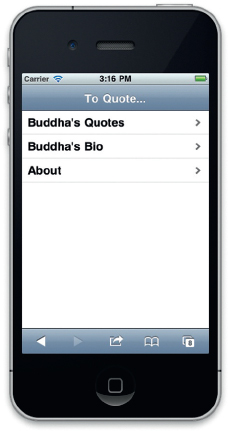
Figure P5.1 iUI is used as the mobile framework.
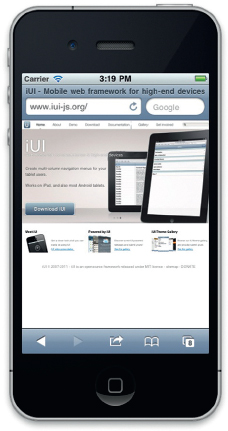
Figure P5.2 The iUI website.
You will want to edit the folder labeled www. Expand the folder to see the files contained within. The key elements are:
• PhoneGap.js
• CSS folder (containing the theme)
• iUI folder (containing iUI assets)
• SpryAssets (dataset files)
• index.html
• quote.html
Let’s look at the index.html page. The HTML in the HEADER element consists of the following:
<html>
<head>
<title>To Quote Buddha</title>
The opening HTML declares that the document is using HTML5. The TITLE element will be ignored when you publish these pages as a native app (I added it through habit).
The following line declares the size of the page as it relates to a viewport. The viewport is a specific Meta attribute Apple introduced with iOS.
<meta name=“viewport” content=“width=device-width; initial-scale=1.0; maximum-scale=1.0; user-scalable=0;”/>
The following META element is another specific Apple iOS attribute that allows the web page to run as a web app.
<meta name=“apple-mobile-web-app-capable” content=“yes” />
The following SCRIPT element links to an Adobe JavaScript framework called Spry. The Spry framework allows the application to load external data into the web pages. This is very useful for managing your content.
<script src=“SpryAssets/SpryData.js” type=“text/javascript”></script>
<script src=“SpryAssets/SpryHTMLDataSet.js” type=“text/javascript”></script>
<link href=“SpryAssets/SpryMasterDetail.css” rel=“stylesheet” type=“text/css” />
<script type=“text/javascript”>
var ds1 = new Spry.Data.htmlDataSet(“quote.html”, “quotes”, {sortOnLoad: “LeadIn”, sortOrderOnLoad: “ascending”});
ds1.setColumnType(“Quote”, “html”);
</script>
The following points to the iUI CSS and JavaScript frameworks:
<link rel=“stylesheet” href=“iui/iui.css” type=“text/css” />
<link rel=“stylesheet” title=“Default” href=“iui/t/default/default-theme.css” type=“text/css”/>
<link rel=“stylesheet” href=“css/iui-panel-list.css” type=“text/css” />
<script type=“application/x-javascript” src=“iui/iui.js”></script>
</head>
<body>
These frameworks point to the libraries, CSS, and data sources you will use in your application. The following sets the web pages themselves. As with jQTouch and jQuery Mobile, you will see that the DIV element is used to manage how content is presented on the screen. The following is the toolbar across the top of the screen:
<div class=“toolbar”>
<h1 id=“pageTitle”></h1>
<a id=“backButton” class=“button” href=“#”></a> </div>
<ul id=“home” title=“To Quote…” selected=“true”>
<li><a href=“#quotes”>Buddha’s Quotes</a></li>
<li><a href=“#bio”>Buddha’s Bio</a></li>
<li><a href=“#about”>About</a></li>
</ul><br /><br /><br />
</div>
You will see that a standard HTML list is used to separate content with links to the different screens. The same metaphor is used with other mobile frameworks.
The following DIV elements manage the dynamic data pulled into the application. For this project we will not go into too much detailed regarding how this is managed with the Spry framework.
<div id=“quotes” class=“panel”>
<h2>Buddha’s Quotes</h2>
<span spry:region=“ds1” class=“listClass”>
<ul id=“quotes” selected=“true” >
<li spry:repeat=“ds1” spry:setrow=“ds1” ><a href=“#quote”>{LeadIn}</a></li>
</ul><br /><br /><br />
</span>
</div>
Each quote can be viewed in its own screen. The following is the HTML to create this screen:
<div id=“quote” class=“panel”>
<div spry:detailregion=“ds1” class=“DetailContainer”>
<h2>{LeadIn}</h2>
<p class=“DetailColumn”>{Quote}</p>
<br>
<p class=“DetailColumn”>Author: {Author}</p><br /><br /> <br />
</div>
</div>
The next two screens are the standard “about the app” screens you find in many applications:
<div id=“bio” class=“panel”>
<h2>The History Of Buddha</h2>
<p class=“DetailColumn”>
<p>Siddhartha Gautama was a spiritual teacher from ancient India who founded Buddhism. In most Buddhist traditions, he is regarded as the Supreme Buddha (P. sammambuddha, S. samyaksabuddha) of our age, “Buddha” meaning “awakened one” or “the enlightened one.” The time of his birth and death are uncertain: most early 20th-century historians dated his lifetime as c. 563 BCE to 483 BCE, but more recent opinion may be dating his death to between 411 and 400 BCE.
</P>
<p>Gautama, also known as Sakyamuni (“Sage of the Sakyas”), is the primary figure in Buddhism, and accounts of his life, discourses, and monastic rules are believed by Buddhists to have been summarized after his death and memorized by his followers. Various collections of teachings attributed to him were passed down by oral tradition, and first committed to writing about 400 years later.
</p>
<p class=“DetailColumn”>Source: Wikipedia.org</p><br /> <br /><br />
</div>
<div id=“about” class=“panel”>
<h2>About</h2>
<p class=“DetailColumn”>“To Quote Buddha” is a MAD Learning education app designed for parents by parents</p>
<p align=“center”><a href=“mailto:info@madlearning. net”>[email protected]</a></p>
<p align=“center”><a href=“http://www.madlearning.net” target=“_blank”>www.madlearning.net</a></p>
</body>
</html>
At this point you have the entire HTML you need to run this page. You can test the HTML by loading the page into Safari or a similar web browser.
Using PhoneGap Build
Creating the HTML is the first part of converting your files into a native app. The next step is to use your code to create the native application. This can be done a number of ways. Arguably the easiest way is to use a service such as PhoneGap’s Build service, as shown in Figure P5.3.
You can access the Build service at https://build.phonegap.com/. At this time, PhoneGap’s Build service allows you to create native applications for the following:
• iOS (iPhone/iPad)
• Android
• WebOS
• BlackBerry
• Symbian
• Windows Phone 7
• MeeGo
• Bada
The last three mobile operating systems were not available at the time of writing this book, but a sneak peak lets me know that they will be supported by the time you read this book.
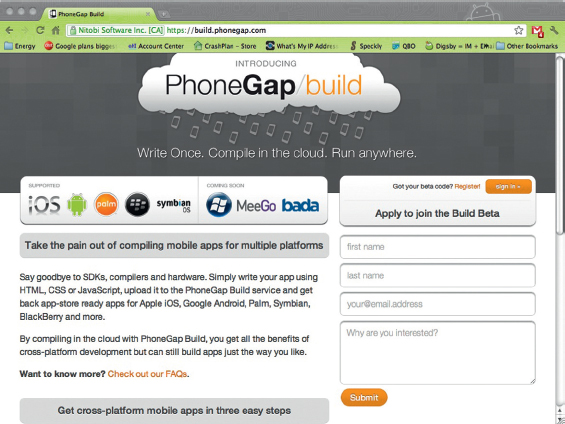
Figure P5.3 PhoneGap Build.
You will need to register with PhoneGap’s Build site to create an account. Following the creation of a new account you will also need to create digital certificates for iOS, BlackBerry, and Android applications. This is one-time-only process. There is a lot of help information on PhoneGap’s site for this process. Give yourself a full day to make sure you complete the certificate process correctly. Again, once you have done this you will not need to do it again. Phew!
Building Your Application
Nitobi has made the process for building your applications very easy. There are three ways to convert a collection of web pages into an app:
• Create a new GIT repository
• Pull from an existing git/svn project (you will need to provide the exact URL)
• Package a collection of web pages into a ZIP file and upload to the cloud service
I prefer to use the third method. All you have to do is select the main folder for your files and convert it into a ZIP file. For Mac users this means right-clicking and selecting the Archive option. For PC users, it means right-clicking the top folder and selecting Send → ZIP.
When you have your ZIP file you can upload it to the PhoneGap Build site.
The Build servers will kick into high gear immediately and start converting your application. This process takes about five minutes depending on the size of the files you are uploading.
A very useful dashboard shows you where you are in the build process. A happy face icon lets you know that your HTML has been converted into an app. A sad face means something went wrong, as shown in Figure P5.4.
Nitobi is adding more functionality to the PhoneGap Build service that includes additional operating systems, and the ability to add custom icons and replace code.

Figure P5.4 The PhoneGap Build health chart.
When the build process is done you will have links to all the apps in their native format. Here is the list:
• iOS apps are APP files
• Android apps are APK
• WebOS is IPD
• Symbian is WGZ
• BlackBerry is OTA
You will need the apps in their native format to submit to the many app stores.
Submitting to the App Stores
At one time it was easy to submit to an app store. There was only one: Apple’s iTunes App Store. Then came Google’s Android Market. And now there are over a dozen, from Intel’s AppUp store to Amazon’s Android App Store. Every Mobile OS has one or more app stores.
So which one do you target? The reality is that you need to target all of them.
The app marketplace is very much at the beginning of its lifecycle. There are currently approximately 600 million phones that are classified as smart phones being used globally. IDC has projected that this number will come close to 1.8 billion by the end of 2015. To put this into a frame of reference, the potential app market is 50% larger than the current PC/Mac market. By 2020 the smart phone market is estimated to reach 4 billion: Every two out of three people on the planet will have a smart phone.
This is a huge market!
Each market has its own requirements. You will also find that each market has a different process for reviewing apps. Google’s Android Market will publish your app in less than two hours. The Amazon Android App Store will take as much as six weeks. You will need to work within the restrictions of each store. Try not to get too frustrated since all the stores are greatly improved over Apple’s original delayed release schedule when the iTunes App Store first opened. My first app took two months to be published!
Making Money!
There are several reasons why you want to build an app: It may be to simply show your friends that you have built an app—this was my motivation when I got started—nothing like one-upping your smug, UNIX friends (wink).
Another reason may be more practical: You want to make money.
Mobile operating systems are providing more effective methods for making money with your applications. The three main techniques today are:
• Charge for the app
• In-app purchase
• Advertising
Charging for your app is a method of generating revenue. What I have found, however, is that you can increase the number of downloads you have for your app by running special sales. There are a large number of websites that track app sales. Start by selling your app at an introductory price; later, raise the price for two weeks and then drop it back down. You will see your sales jump.
The next method for increasing sales is through purchasing features from within your application.
A final, consistent tool for generating revenue is through advertising. Mobile advertising from companies such as Apple, Google, and Greystripe has matured dramatically. Today, it is widely believed that mobile ads are more effective than any other format of online advertising.
After you have defined which method you are going to use to monetize your app, your next step will be to market it. This includes asking for app reviews, starting a Twitter feed, and a hundred other activities. In many ways, you will put as much effort into marketing your app as you did publishing it.
Summary
In this project you have used a new mobile web framework, iUI. The framework is similar to jQuery Mobile and jQTouch. When you have finished with your HTML you can post the files to a website, or you can create a native application for sale in an app store.
The second part of the chapter placed a focus on converting your HTML into a native application for publication using Nitobi’s PhoneGap Build cloud service. Through a few steps, you can convert a website into a native application.
The final step, once you have your application files, is to load the files to the different app stores and make some money.
In the next project, you will see how you can create solutions for tablets.