
Ajax isn’t a technology. It’s really several technologies, each flourishing in its own right, coming together in powerful new ways | ||
| --Jesse J. Garrett, who coined the term | ||
Ajax is an acronym that stands for Asynchronous JavaScript and XML. It encompasses techniques that allow us to liven up web pages with behaviors that happen outside the normal HTTP request life cycle (without a page refresh).
Some example use-cases for Ajax techniques are
Sending form data asynchronously
Seamless navigation of web-presented maps, as in Google Maps
Dynamically updated lists and tables, as in Gmail and other web-based email services
Web-based spreadsheets
Forms that allow in-place editing
Live preview of formatted writing alongside a text input
Ajax is made possible by the XMLHttpRequestObject (or XHR for short), an API that is available in all modern browsers. It allows JavaScript code on the browser to exchange data with the server and use it to change the user interface of your application on the fly, without needing a page refresh. Working directly with XHR in a cross-browser-compatible way is difficult, to say the least, which is why the open-source ecosystem flourishes with Ajax JavaScript libraries.
Incidentally, Ajax, especially in Rails, has very little to do with XML, despite its presence there at the end of the acronym. The payload of those asynchronous requests going back and forth to the server can be anything. Often it’s just a matter of form parameters posted to the server, and receiving snippets of HTML back, for dynamic insertion into the page’s DOM. Many times it even makes sense for the server to send back data encoded in a simple kind of JavaScript called JavaScript Object Notation (JSON).
It’s outside the scope of this book to teach you the fundamentals of JavaScript and/or Ajax. It’s also outside of our scope to dive into the design considerations of adding Ajax to your application, elements of which are lengthy and occasionally controversial. Proper coverage of those subjects would require a whole book and there are many such books to choose from in the marketplace. Therefore, the rest of the chapter simply assumes that you understand what Ajax is and why you would use it in your applications.
Ruby on Rails makes adding Ajax to your application very simple, because of its smart integration with Prototype and Scriptaculous. We begin this chapter by examining the philosophy and implementation of those two important JavaScript libraries, and follow with a comprehensive reference section covering the relevant ActionPack helpers that enable Ajax on Rails. We also cover Rails’ RJS feature, which allows you to invoke JavaScript with Ruby code based on the server.
To get the most benefit of this chapter, you should have at least a basic understanding of JavaScript programming.
The Prototype library (located at http://prototype.conio.net) was written and is actively maintained by Sam Stephenson, a member of the Rails core team. Prototype is described by its creator as a “unique, easy-to-use toolkit for class-driven development and the nicest Ajax library around.”
Prototype is distributed with Ruby on Rails and is copied into new Rails projects as public/javascripts/prototype.js by the Rails script. Its roughly 2000 lines of JavaScript are a powerful foundation for building all sorts of Ajax interaction with the server and visual effects on the client. In fact, despite its close connection to Ruby on Rails, Prototype is extremely successful in its own right as an Ajax library.
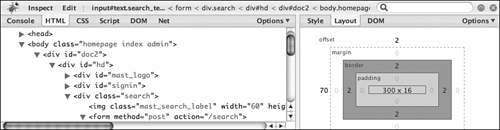
FireBug,[1] an extremely powerful extension for Firefox, is a must-have tool for doing Ajax work. It lets you inspect Ajax requests and probe the DOM of the page extensively, even letting you change elements and CSS styles on the fly and see the results on your browser screen. It also has a very powerful JavaScript debugger that you can use to set watch expressions and breakpoints. See Figure 12.1.
FireBug’s DOM browser can be used to explore the Prototype library as it exists at runtime in your browser page. FireBug also has an interactive console, which allows you to experiment with JavaScript in the browser just as you would use irb in Ruby. In some cases, the code samples in this chapter are copied from the FireBug console, which has a >>> prompt.
For example, inspecting Prototype with the console yields the following output:
>>> Prototype
Object Version=1.5.0_rc2 BrowserFeatures=Object
As I’ve jokingly told many of my Ruby on Rails students when covering Ajax on Rails: “Even if you don’t listen to anything else I say, use FireBug! The productivity gains you experience will make up for my fee very quickly.”
Having an understanding of the Prototype API and how it works is not strictly necessary to doing Ajax on Rails, but it will help tremendously when you want to move beyond the simple example cases and write your own JavaScript routines.
Much of prototype.js is code defining advanced object-oriented language constructs on top of what is already provided by JavaScript. For example, the extend function creates a way to do inheritance. Much of Prototype will be startlingly familiar to Ruby programmers, such as the inspect method on Object and the gsub method on String. Since JavaScript functions act as closures, just like Ruby blocks, Prototype follows the example of Ruby when it comes to array use and manipulation with iterators, and many other aspects of its API.
The overall flavor of Prototype code is very Rubyish, making it a comfortable and productive fit for Ruby and Rails hackers. You might even develop a liking for JavaScript (if you didn’t have one already), which despite its humble origins and bad reputation, is actually an extremely powerful and expressive programming language. Never mind the function keyword everywhere in your code—it blends into the background eventually.
The following functions are defined in the top-level context of Prototype:
The $ function is a shortcut and extension of one of the most commonly used functions in all JavaScript browser programming: document.getElementByID. The name is so short because it is used so often, according to one of the main principles of effective API design.
You may pass $() one or more strings, to which it will return either one matching element or an array of them, assuming the supplied ID strings match elements present on the page. For convenience, $ will not blow up if you pass it an element instance rather than a string in its parameters. It will simply pass the element back to you or add it to its results list.
ID parameters without matching elements will result in undefined return values, just like with the underlying document.getElementByID function. Trying to retrieve more than one element with the same ID will probably not work, and is dependent on the browser implementation. It’s better to stick to well-formed markup and not have duplicate identifiers.
The $$ function takes one or more CSS selector strings and returns an array of matching elements from the DOM. The ability to find elements by CSS selector is one of the most powerful features of Prototype.
The $A function is an alias for Array.from. It converts its parameter into an Array object, including the functions of Enumerable. (See the section “Enumerable” in this chapter.)
Inside Prototype, $A is mostly used for converting lists of arguments and DOM nodes into arrays. Note that the latest versions of Prototype mix enumerable functions right into JavaScript’s native Array object, which makes this function of very little use.
The $F function is an alias for Form.Element.getValue. It returns the value of any form field on a page, by ID. It is a useful convenience method because it works regardless of whether you pass it a text input, a select input, or a text area.
The $H function extends a plain JavaScript object with the functions of Enumerable and Hash making it resemble a hash in Ruby. (See the section “Hash” in this chapter.)
The $R function is a shortcut for the ObjectRange constructor. (See the section “ObjectRange” in this chapter.)
This is not exactly a top-level function, but it made the most sense to me to include it in this section, since these is the only function of the Try object.
When doing cross-browser-compatible operations, it’s quite common to need to try a couple of different ways of doing something until one of them works. The Try object defines a these function, to which you pass a list of functions that should be attempted until one doesn’t throw an exception.
A classic example, taken right from the Prototype codebase, is the way that you grab a reference to the XMLHttpRequest object, which varies significantly between Firefox and Internet Explorer:
var Ajax = {
  getTransport: function() {
    return Try.these(
      function() {return new XMLHttpRequest()},
      function() {return new ActiveXObject('Msxml2.XMLHTTP')},
      function() {return new ActiveXObject('Microsoft.XMLHTTP')}
    ) || false;
  },

  activeRequestCount: 0
}The Class object defines a create function, used to declare new instances of Ruby-like classes in the rest of the framework. Those classes can then declare an initialize function to serve as an constructor when new is invoked to create a new instance,
Here is the implementation of ObjectRange as an example:
ObjectRange = Class.create();
Object.extend(ObjectRange.prototype, Enumerable);
Object.extend(ObjectRange.prototype, {
  initialize: function(start, end, exclusive) {
    this.start = start;
    this.end = end;
    this.exclusive = exclusive;
  },

  ...
});

var $R = function(start, end, exclusive) {
  return new ObjectRange(start, end, exclusive);
}
First, a class is created for ObjectRange (which would look like class ObjectRange in Ruby). Next, the prototype object of ObjectRange is extended in order to establish instance methods. The functions of Enumerable are mixed in, followed by the anonymous JavaScript object defined by the curly braces, inside of which is the initialize function plus whatever other instance methods are needed.
One reason that Prototype code can be so clean and concise is that it mixes functions right into JavaScript’s base classes, such as Object.
Returns a copy of the object supplied as a parameter, by using it to extend a new Object instance:
clone: function(object) {
  return Object.extend({}, object);
}The extend static function literally loops through every property of the supplied source object and copies them over to the destination object, including functions, thereby serving as an inheritance and cloning mechanism. (JavaScript doesn’t have built-in support for inheritance.)
The source code is instructional and simple enough to include here:
Object.extend = function(destination, source) {
  for (var property in source) {
    destination[property] = source[property];
  }
  return destination;
}Objects in JavaScript behave almost exactly like associative arrays (or hashes) in other languages, and they’re used extensively in that fashion in JavaScript code. The keys static function returns a list of the properties defined on an object. The values static function returns a list of property values.
If the parameter is undefined (which is different than null in JavaScript), the static inspect function returns the string 'undefined'. If the parameter is null, it returns 'null'. If an inspect() function is defined on the parameter, it is invoked; otherwise, toString() is called as a final resort.
The following methods are available on arrays in addition to those defined in Enumerable.
Removes all elements from the array and returns it. Interestingly enough, the implementation of this method simply sets the length of the array to zero:
clear: function() {
  this.length = 0;
  return this;
}Removes all null and undefined elements from the array and returns it. Notice the use of select in the implementation:
compact: function() {
  return this.select(function(value) {
    return value != undefined || value != null;
  });
}Takes the array and recursively flattens its contents into a new array, which is returned. In other words, this function iterates over the elements of the source array, and for each element that is an array, it extracts its elements into the new array to be returned. Notice the use of inject in the implementation:
flatten: function() {
  return this.inject([], function(array, value) {
    return array.concat(value && value.constructor == Array ?
      value.flatten() : [value]);
  });
}Returns the index of a particular element belonging to an array or returns -1 if the element is not found.
indexOf: function(object) {
  for (var i = 0; i < this.length; i++)
    if (this[i] == object) return i;
  return -1;
  });
}Overrides the default inspect and prints out the elements of the array delimited by commas.
indexOf: function() {
  return '[' + this.map(Object.inspect).join(', ') + ']';
}Reverses the order of the array. The inline argument, which defaults to true, specifies whether to modify the receiving array or leave it in its original state.
Removes the first element of the array and returns it, causing the size of the array to shrink by 1.
Removes (or subtracts) the elements specified as arguments from the receiver. Takes either an array or list of elements to be removed, which is easily accomplished by wrapping arguments in a call to $A. Notice the use of select in the implementation:
without: function() {
  var values = $A(arguments);
  return this.select(function(value) {
    return !values.include(value);
  });
}The document.getElementsByClassName(className [, parentElement]) method returns a lists of elements from the DOM that have the supplied CSS className. The optional parentElement parameter lets you limit the search to a particular branch of the DOM instead of searching the entire document, starting from the body element (default).
The following list of constants is added to the Event class, for convenience.
Object.extend(Event, {
  KEY_BACKSPACE: 8,
  KEY_TAB:       9,
  KEY_RETURN:   13,
  KEY_ESC:      27,
  KEY_LEFT:     37,
  KEY_UP:       38,
  KEY_RIGHT:    39,
  KEY_DOWN:     40,
  KEY_DELETE:   46
});
The constants make it easy to define event handlers for keyboard events. In the following code example, we make use of a use of a switch statement inside of a simple onKeyPress event handler to detect when the user presses Escape.
onKeyPress: function(event) {
  switch(event.keyCode) {
    case Event.KEY_ESC:
      alert('Canceled'),
      Event.stop(event);
  }
}Traverses the DOM tree upward, starting from the element that originated the event. Returns the first element it finds that matches the tagName parameter (case-insensitive). If no matching parent element is found, this function returns the element that originated the event by default instead of erroring out, which can cause some confusion.
The observe function wraps the browser’s own addEventListener function, which is part of the DOM Level 2 specification. It establishes an observer relationship between the specified element and an observer function. The element parameter may refer to a string ID or the element itself, quite often document in the case of mouse and keyboard events.
The stopObserving function is essentially the same except that it disconnects the event handler, and wraps the removeEventListener method of the DOM.
The name parameter refers to a valid event name (as a string), as defined in the DOM specification for browsers (blur, click, and so on).[2]
The observer parameter should be a function reference, meaning the name of a function without parentheses (often a source of confusion!). In almost all cases, you will want to use the bindAsEventListener function in conjunction with observe, so that the event-handler function executes in the correct context. (See “Extensions to JavaScript’s Function Class” in the next section.)
The useCapture option can be used to specify that the handler should be called in the capture phase instead of the bubbling phase, and defaults to false.
Here’s an example of Event.observe taken from Scriptaculous’ AutoCompleter object:
addObservers: function(element) {
  Event.observe(element, "mouseover",
this.onHover.bindAsEventListener(this));
  Event.observe(element, "click",
this.onClick.bindAsEventListener(this));
}Returns x and y coordinates of the mouse pointer on the page when the event occurred.
The following two functions are mixed into the native Function class.
Used to bind a function into the context of the object passed as a parameter. That parameter is almost always inevitably the value this, the current object context, because the main use for bind is to take a function that was defined elsewhere and make sure that it will execute with the exact context where you want it to be executed.
For example, see the way that the registerCallback function of PeriodicalExecuter is implemented:
registerCallback: function() {
  setInterval(this.onTimerEvent.bind(this), this.frequency * 1000);
}
It is necessary to bind the onTimerEvent function to execute in the context of whatever object the callback is being registered on, rather than the prototype object of the PeriodicalExecuter object itself.
Use of bind is admittedly a difficult concept to grasp, unless you are an experienced JavaScript programmer or have an affinity for functional programming, so don’t fret if you don’t understand it immediately.
Used to attach a function as a DOM event handler in such a way that the event object will get passed to the function as its parameter. Used in similar fashion to bind where you want to make sure that some method gets executed in the context of a particular instance, rather than the prototype class where it is defined. This method is not used by the Prototype library itself, but it is used extensively in Scriptaculous and in custom application JavaScript, whenever you want to create observer-style classes to contain event handlers bound to elements on a page.
The following code example is a custom class designed to alert you to changes in an input field with a customizable message:
var InputObserver = Class.create();
InputObserver.prototype = {
  initialize: function(input, message) {
    this.input = $(input);
    this.message = message;
    this.input.onchange = this.alertMessage.bindAsEventListener(this);
  },

  alertMessage: function(e) {
    alert(this.message + ' (' + e.type + ')'),
  }
};

var o = new InputObserver('id_of_some_input_field', 'Input field'),The following three functions are mixed into the native Number class.
Returns the hexadecimal representation of an integer RGB value.
toColorPart: function() {
  var digits = this.toString(16);
  if (this < 16) return '0' + digits;
  return digits;
},
Remember that numbers in JavaScript are not automatically auto-boxed, so to speak. You have to assign the number to a variable, wrap the value in a Number instance yourself, or simply put it in plain parentheses in order to be able to invoke functions on it. Not convinced? You can figure it out interactively using the FireBug console:
>>> 12.toColorPart();
missing ; before statement 12.toColorPart();
>>> n = new Number(12)
12
>>> n.toColorPart();
"0c"
>>> n = 12
12
>>> n.toColorPart();
"0c"
>>> (12).toColorPart();
"0c"
>>> 12.toColorPart
missing ; before statement 12.toColorPart
>>> (12).toColorPart
function()
Just like the times method available on numerics in Ruby, number.times() takes a block of code and invokes it a number of times (according to the value of the number it is called on). Notice the use of $R to easily create a range, and each to invoke the supplied iterator function.
times: function(iterator) {
   $R(0, this, true).each(iterator);
   return this;
 }
Here’s a simple example that will pop up an alert box five times. Remember that you can’t invoke a JavaScript function directly on a raw number because it will confuse the parser, hence the extra parentheses are needed:
>>> (5).times(new Function("alert('yeah')"))
5The following methods are mixed into the native String class.
Turns dash-separated strings into lowerCamelCase.
>>> "about-to-be-camelized".camelize()
"aboutToBeCamelized"
Turns underscore-separated strings into dash-separated-strings.
>>> "about_to_be_dasherized".dasherize()
"about-to-be-dasherized"
The escapeHTML instance function escapes all HTML and XML markup in the receiving string, by turning the angle brackets of tags into entities.
>>> '<script src="http://evil.org/bad.js"/>'.escapeHTML() "<script src="http://evil.org/bad.js"/>"
The unescapeHTML function reverses the operation.
The evalScripts instance function executes any <script> tags found in the receiving string.
The extractScripts instance function returns an array of strings containing the text of all <script> tags found in the receiving string. Note that the opening and closing <script> tags themselves are omitted; only JavaScript code is extracted.
The gsub instance function returns a copy of the receiving string, with all occurrences of pattern replaced with the value supplied in replacement. The receiving string is not modified. Pattern should be a literal JavaScript regular expression, delimited with “/” characters.
The sub function is similar to gsub, but only makes as many replacements as specified in the count parameter, which defaults to 1.
The scan instance function is very similar to gsub, except that it takes an iterator function instead of a replacement value.
The strip instance function removes leading and trailing whitespace. Notice the chained calls to replace in the implementation:
strip: function() {
  return this.replace(/^s+/, '').replace(/s+$/, ''),
}The stripScripts instance function removes <script> tags (including their content) from the receiving string. The stripTags instance function removes all HTML and XML tags from the receiving string.
Both functions turn a query string (URL request format) into a JavaScript object.
>>> "?foo=bar&da=da+do+la".toQueryParams()
Object foo=bar da=da+do+la
Works just like the truncate method that Rails mixes into strings. If the receiving string is longer than length, it will be truncated and the last three characters will be the truncationString (defaults to an ellipse, “...”).
>>> "Mary had a little lamb".truncate(14)
"Mary had a ..."
The Ajax object has useful behavior and also serves as the root namespace for other Ajax-related objects in Prototype.
Holds the number of Ajax requests executing at any given moment, and there may be more than one since they fire asynchronously. Primarily used when implementing activity indicators (a.k.a. “spinners”), those little animated icons let the user know when communication with the server is happening:
Ajax.Responders.register({
  onCreate: function() {
    if($('busy') && Ajax.activeRequestCount > 0)
      Effect.Appear('busy', { duration:0.5, queue:'end' });
  },

  onComplete: function() {
    if($('busy') && Ajax.activeRequestCount == 0)
      Effect.Fade('busy', {duration:0.5, queue:'end' });
  }
});The Responders object manages the list of event handlers interested in notification about Ajax-related events. The preceding code example shows Ajax.Responders used to register a pair of custom callback functions, onCreate and onComplete, which take care of showing and hiding a spinner graphic that indicates Ajax activity.
In addition to the static functions described in the following sections, Ajax.Responders extends Enumerable.
Adds responder objects to the list of registered responders interested in receiving Ajax-related events. Responders are invoked in the order in which they were registered, and they should implement at least one of the following Ajax callbacks: onCreate, onComplete, or onException.
The Enumerable object is used just as you would use the Enumerable module as a mixin in Ruby. It depends on the receiver having an _each function defined. Prototype mixes Enumerable into quite a number of other objects, including Array, Hash, ObjectRange, Ajax.Responders, and Element.ClassNames.
Just as in Ruby, you can mix Enumerable into your own custom JavaScript classes. Just provide an implementation of _each for Enumerable’s functions to use.
// Provide your custom class with an _each function
var MyCustomClass = Class.create();
MyCustomClass.prototype = {
  _each: function(iterator) {
    for (var i = 0, length = this.length; i < length; i++) {
      iterator(this[i]);
    }
  }
}

// Mix in Enumerable's iterator functions
Object.extend(MyCustomClass.prototype, Enumerable);
JavaScript doesn’t support private or protected functions; therefore, functions not intended for public use are prefixed with an underscore in Prototype.
The design of Enumerable varies from Ruby in that it provides you with a public each function, which uses _each under the covers. Apart from that, most of the iterator functions provided by Enumerable are very similar to their counterparts in Ruby.
The each function takes a function reference as its iterator parameter and invokes that function for each of its elements. The individual element is passed as the parameter to the iterator function.
Let’s look at a simple example, which will alert three times:
function alerter(msg) {
  alert(msg);
}

["foo", "bar", "baz"].each(alerter)
The way to pass a function by reference in JavaScript is to simply refer to it by name, leaving off the parentheses.
Here are the rest of the enumerable functions. Most iterator are invoked with two parameters: value and index.
The all function passes each element of the Enumerable object to the iterator, and returns true if the iterator function never returns false. If the iterator parameter is omitted, each element itself is considered in a Boolean context. You can think of the all function as a big Boolean AND operation.
The any function passes each element of the Enumerable object to the iterator, and returns true if the iterator function ever returns true. If the iterator parameter is omitted, each element itself is considered in a Boolean context. You can think of the any function as a big Boolean OR operation.
The collect function (aliased as map) returns the results of running the iterator function for each of the elements in an Enumerable object.
>>> $R(1,4).collect(Prototype.K) // K returns whatever you pass it
[1, 2, 3, 4]
>>> $R(1,4).collect(function(){return "cat"})
["cat", "cat", "cat", "cat"]The detect function (aliased as find) is used to find the first element of an enumerable that matches criteria defined in the iterator function.
>>> $R(1,100).detect(function(i){ return i % 5 == 0 && i % 6 == 0 })
30The eachSlice function splits the elements of the array into a number of slices as specified by the number parameter. Then it returns the results of calling collect with the optional iterator function, on the list of resulting slices, which effectively flattens the result back down into a single-dimension array.
>>> $R(1,10).eachSlice(5)
[[1, 2], [3, 4], [5, 6], [7, 8], [9, 10]]

>>> $R(1,10).eachSlice(2, function(slice) { return slice.first() })
[1, 3, 5, 7, 9]The findAll function (aliased as select) is used to find all of the elements of an enumerable that match the criteria defined in the iterator function.
>>> $R(1,100).findAll(function(i){ return i % 5 == 0 && i % 6 == 0 })
[30, 60, 90]The grep function returns all elements of an enumerable for which the regular expression passed as the pattern parameter matches with a non-null result.
The optional iterator function is invoked for any values that matched.
>>> quote = "The truth does not change according to our ability to
stomach it"
"The truth does not change according to our ability to stomach it"

>>> quote.split(' ').grep(/w{5}/)
["truth", "change", "according", "ability", "stomach"]

>>> quote.split(' ').grep(/w{5}/, function(val, i){ return i + ":" +
val })
["1:truth", "4:change", "5:according", "8:ability", "10:stomach"]The include function (aliased as member) returns true if any member of the enumerable equals the obj parameter. The comparison is made using the == function.
>>> ['a','b','c'].include('a')
true
>>> ['a','b','c'].include('x')
falseThe inGroupsOf function is kind of like eachSlice, but does not take an iterator. It always returns a two-dimensional array containing equal-sized groups, composed of the enumerable’s elements. The optional filler parameter allows you to specify a value that should be used to fill out the remaining slots, if any, on the last group, and defaults to null.
>>> $R(1,10).inGroupsOf(3)
 [[1, 2, 3], [4, 5, 6], [7, 8, 9], [10, null, null]]
>>> $R(1,10).inGroupsOf(3, 0) // pad with zeros
[[1, 2, 3], [4, 5, 6], [7, 8, 9], [10, 0, 0]]
The inject function combines the elements of the enumerable, applying the iterator function to the accumulator and each element, in turn. At each iteration, the value of accumulator is set to the value returned by the iterator function. Unlike the Ruby version, Prototype’s inject requires an initial value for accumulator.
>>> $R(1,5).inject(0, function(acc, e) { return acc + e })
15The invoke function invokes the function named by functionName to each element of the enumerable and collects the results. The optional parameters will be passed as parameters to the invoked function.
>>> $R(1,5).inject(0, function(acc, e) { return acc + e })
15The max and min functions are very similar to each other, and return the elements of the enumerable of the highest and least values, respectively. An optional iterator function can be supplied to transform the value of the element that is used for comparison.
>>> $R(1,5).min()
1
>>> ["1","2","3"].max(function(val) { return Number(val) })
3The partition function returns a two-item array. The first is an array containing the enumerable’s elements for which the optional iterator function returned true, and the second contains those elements for which it returned false. If an iterator is not supplied, the Boolean value of the element itself will be used.
>>> ["1",null,"2",null,null].partition()
[["1", "2"], [null, null, null]]
The pluck function conveniently plucks a list of property values from an enumerable. This is essentially a convenience method similar to collect.
>>> $$('script').pluck('src')
["http://localhost:3000/javascripts/prototype.js?1165877878",
 "http://localhost:3000/javascripts/effects.js?1161572695",
"http://localhost:3000/javascripts/dragdrop.js?1161572695",
"http://localhost:3000/javascripts/controls.js?1161572695",
"http://localhost:3000/javascripts/application.js?1161572695", ""]The reject function returns elements of the enumerable for which the required iterator function returns false.
The sortBy function returns the elements of Enumerable sorted according to the criteria returned by the required iterator function.
Incidentally, when I was coming up with an example for this function, I realized that because I’m used to coding Ruby, I quite often forget to say return in the body of the iterator function. Unfortunately, that won’t usually cause the script to fail, and can be very confusing. Don’t forget that JavaScript functions need an explicit return statement!
>>> linusQuote = "Software is like sex: It's better when it's free."
"Software is like sex: It's better when it's free."
>>> linusQuote.split(' ').sortBy(function(s,index) { return s.length })
["is", "it's", "sex:", "It's", "like", "when", "free.", "better",
"Software"]The toArray function (aliased as entries) returns the elements of the enumerable as an array.
The interesting zip function is modeled after the Ruby iterator of the same name. It has nothing to do with compression; rather, think of the behavior of a zipper on your clothing. The zip function merges the elements of each enumerable supplied as a parameter, such that the returned list has the same number of elements as the receiving enumerable does.
If the last (optional) parameter is a function, it is used as an iterator and invoked on each array element that will be returned. The easiest way to explain is probably to illustrate with an example, similar to the one presented in the “Pickaxe” book (Programming Ruby):
>>> a = [4, 5, 6]
[4, 5, 6]
>>> b = [7, 8, 9]
[7, 8, 9]
>>> [1, 2, 3].zip(a, b)
[[1, 4, 7], [2, 5, 8], [3, 6, 9]]
The Object class in JavaScript, which can be created on the fly with curly-brace literals, is very close to an associative array (a.k.a. hash) already. Without modification, it supports square-bracket notation for assignment and lookup.
Prototype gives us a Hash class that extends Enumerable and adds familiar functions similar to those available in Ruby hashes.
The keys and values functions return lists of keys and values, accordingly.
The merge function merges values passed in from another hash into the receiver. If any keys exist in both the receiver and passed-in hash, the value of the receiver’s entry will be overwritten.
>>> $H({foo:'foo', bar:'bar'}).merge({foo:'F00', baz:'baz'})
Object foo=F00 bar=bar baz=bazThe toQueryString function formats the key/value pairs of a hash as a query string appropriate for appending to a URL. It comes in very handy, compared to trying to construct query strings yourself:
>>> $H(Prototype).toQueryString()
"Version=1.5.0_rc2&BrowserFeatures=%5Bobject%20Object%5D&ScriptFragment
=(%3F%3A%3Cscript.*%3F%3E)((%0A%7C%0D%7C.)*%3F)(%3F%3A%3C%2Fscript%3E)"
ObjectRange provides an easy way to create JavaScript ranges. ObjectRange does provide a constructor but the more common way is to use $R. Prototype uses the succ method to figure out what the next value is in the range and Prototype provides such a method on Number and String. Prototype also mixes in Enumerable, making ranges much more usable.
>>> $A($R(1, 5)).join(', ')
'1, 2, 3, 4, 5'
>>> $R(1, 3).zip(['Option A', 'Option B', 'Option C'], function(tuple) {
  return tuple.join(' = '),
})
['1 = Option A', '2 = Option B', '3 = Option C']
Special care needs to be taken when using strings in ranges as ObjectRange does not use alphabetical boundaries but instead goes through the entire character table. This can create a huge array if not considered.
>>> $A($R('a', 'c'))
['a', 'b', 'c']
>>> $A($R('aa', 'ab'))
[..., 'ax', 'ay', 'az', 'a{', 'a|', 'a}', ...]  // A very large array
The Prototype object holds the version number of the library as the Version property, a regular expression snippet to match a script tag in HTML markup as ScriptFragment, and two very simple functions.
The emptyFunction is just that: empty. The K function has nothing to do with hyperfactorial or complex numbers; it simply returns the value that was passed into it as an argument and is used internally by Prototype.
When we covered helper modules in Chapter 11, we purposely left out PrototypeHelper and its companion, Scriptaculous helper. They provide an easy way to use the Prototype and Scriptaculous Javascript libraries (respectively) to add Ajax functionality to your application.
Now that we’ve discussed the JavaScript functionality in Prototype, “All About Helpers,” we can make a basic Ajax call. Rails minimizes the amount of JavaScript you need to write by hand. One of the most common helper methods is link_to_remote, which we’ll use to fetch a random number from the controller in Listing 12.1. The controller follows RESTful principles and leverages the respond_to method to respond to callers that expect a JavaScript response.
We’ll create only an index view since the new method only renders text. In the index view we’ll use the link_to_remote helper to generate an Ajax link to our new method. The result of the request will be placed inside the div tag with the id of result. We define what to link to using the url parameter. It accepts the same values as the standard link_to method.
<html>
  <head>
    <%= javascript_include_tag :defaults %>
  </head>
  <body>
    <%= link_to_remote 'Random Number Please', :url =>
new_random_path,
:update => 'result' %>
    <br/><br/>
    <div id="result"></div>
  </body>
</html>
The rendered page will look like this:
<html>
  <head>
    <script src="/javascripts/prototype.js?1184547490"
            type="text/javascript"></script>
    <script src="/javascripts/effects.js?1184547490"
            type="text/javascript"></script>
    <script src="/javascripts/dragdrop.js?1184547490"
            type="text/javascript"></script>
    <script src="/javascripts/controls.js?1184547490"
            type="text/javascript"></script>
    <script src="/javascripts/application.js?1184547490"
            type="text/javascript"></script>
  </head>
  <body>
    <a href="#" onclick="new Ajax.Updater('result',
 'http://localhost:3000/randoms/new', {asynchronous:true,
 evalScripts:true}); return false;">Random Number Please</a>
    <br/>
    <br/>
    <div id="result"></div>
  </body>
</html>
The call to javascript_include_tag :defaults added the needed script tags. Rails appends a unique number to the URL to help prevent problems caused by the browser caching old versions of your JavaScript files.
The link_to_remote helper is highly customizable, which means that we can use it to retain all the random numbers we’ve received. We need to change the view to use an unordered list first and to not replace the contents of the ul tag each time we click on the Ajax link. Instead the result should be appended below the unordered list.
<html>
  <head>
    <%= javascript_include_tag :defaults %>
  </head>
  <body>
    <%= link_to_remote 'Random Number Please', :url =>
new_random_path,
:update => 'result', :position => :bottom %>
<br/><br/>
    <ul id="result"></ul>
  </body>
</html>
Next we change the controller to render a list item tag.
Class RandomsController < ApplicationController
  ...

  def new
    respond_to do |wants|
      wants.js { render :text => "<li>#{rand(1_000_000)}</li>" }
    end
  end
end
Now each time we click the link, the result will be placed below the last one. The position parameter takes for different options: :before, :after, :top, and :bottom. The :before and :after values refer to the element, whereas the :top and :bottom values refer to the children of the element. If we wanted the newest random number to appear first in the list, we just need to replace :bottom with :top. If we replaced it with :before, though, we would insert our list items outside the unordered list like this:
...
    <br/><br/>
    <li>15416</li>
    <li>9871</li>
    <ul id="result"></ul>
...
What if a problem occurs during our Ajax request? The link_to_remote has a callback to handle these situations. To use it you just need to set the :failure parameter.
...
<%= link_to_remote 'Random Number Please', :url => new_random_path,
 :update => 'result', :position => :bottom, :failure => "alert('HTTP
Error ' + request.status + '!')" %>
...
The :failure parameter takes a JavaScript function or fragment as a value. The callback has access to the underlying XMLHttpRequest object. In this case, the status code is displayed but we could also display the complete response by calling request.responseText. There are a number of other callbacks described in Table 12.1.
Table 12.1. Callback Options for link_to_remote
Parameter | Description |
|---|---|
| Called before request is initiated. |
| Called immediately after request was initiated and before |
| Called when the remote document is being loaded with data by the browser. |
| Called when the browser has finished loading the remote document. |
| Called when the user can interact with the remote document, even though it has not finished loading. |
| Called when the |
| Called when the |
| Called when the |
If you need more control, you can set callbacks for specific status codes. The following example sets a callback for a 404 status code. Note that the status code is not a symbol but rather an integer.
...
<%= link_to_remote 'Random Number Please', :url => new_random_path,
 :update => 'result', :position => :bottom, :failure => "alert('HTTP
 Error ' + request.status + '!')", 404 => "alert('Not Found')" %>
...
The link_to_remote method has a number of parameters to customize the browser-side behavior. While Ajax is typically asynchronous, you can change this behavior to be synchronous by setting :type => :synchronous. This will cause the browser to block until the request is finished processing. You can also add a confirmation dialog by setting :confirm => true. If you need to perform your Ajax request conditionally, you can set the :condition parameter to a JavaScript expression of browser-side conditions.
Just as link_to has link_to_remote, form_for has remote_form_for. It takes the same options and callbacks as link_to_remote but returns a form tag that submits the form elements using an XMLHttpRequest in the background. Just like the form_for method, remote_form_for will present its values in the standard params object. We can illustrate this by creating an Ajax form, which will create a new Addition model, add the attributes together, and return the result. The controller would look like this:
Class AdditionsController < ApplicationController
  def new
    @addition = Addition.new
  end

  def create
    @addition = Addition.new(params[:addition])
    respond_to do |wants|
      wants.js { render :text => @addition.sum_x_and_y}
    end
  end
end
In the new view we would have:
<html>
  <head>
    <%= javascript_include_tag :defaults %>
  </head>
  <body>
    <% remote_form_for :addition, @addition,
         :url => additions_path,
         :update => 'result' do |f| %>
       X: <%= f.text_field :x %>
       Y: <%= f.text_field :y %>
       <%= submit_tag 'Create' %>
     <% end %>
    <div id="result"></div>
  </body>
</html>
The preceding view is rendered as follows:
<html>
  <head>
    ...
  </head>
  <body>
    <form action="/additions/non_ajax_create" method="post"
          onsubmit="new Ajax.Updater('result', '/additions',
          {asynchronous:true,
 evalScripts:true, parameters:Form.serialize(this)}); return false;">
X: <input id="addition_x" name="addition[x]" size="30" type="text" />
Y: <input id="addition_y" name="addition[y]" size="30" type="text" />
<input name="commit" type="submit" value="Create" />
    </form>
    <div id="result"></div>
  </body>
</html>
The remote_form_for can also take a “fall-through” target for browsers that don’t support JavaScript. By default this is the same action as the one specified in the url parameter. To set it to something else, set the :action parameter in the html options, like this:
...
<% remote_form_for :addition, @addition, :url => additions_path,
 :update => 'result', :html => { :action => url_for(:controller =>
 'additions', :action => 'non_ajax_create') } do |f| %>
...
Another option for submitting a form via Ajax is to use a regular form_for and a submit_to_remote instead of a standard submit. The submit_to_remote takes all the same options as remote_form_for.
A common Rails Ajax method is periodically_call_remote, which will call a URL every n number of seconds. It takes the same options and has the same callbacks as link_to_remote. It defaults to calling the URL every 10 seconds, though you can change that by setting the :frequency parameter. We can change the random number generator view in the previous example to fetch a new number every five seconds. We don’t need to change the controller, just the view to it:
<html>
  <head>
    <%= javascript_include_tag :defaults %>
  </head>
  <body>
    <%= periodically_call_remote :url => new_random_path, :update =>
 'result', :frequency => 5 %>
<br/><br/>
    <div id="result"></div>
  </body>
</html>Whereas periodically_call_remote happens every n seconds, observe_field happens on every change in a particular form field. We can use this to display a list of possible area codes as a user enters one into a text field. To do this, we’ll use the following index view.
<html>
  <head>
    <%= javascript_include_tag :defaults %>
  </head>
  <body>
    Area Code: <%= text_field_tag 'number' %>
    <br/>d
    <span id="area_code_results"></span>
    <%= observe_field 'number', :url => { :controller => 'area_codes',
 :action => 'show'}, :frequency => 0.25, :update => '
area_code_results', :with => 'number' %>
</body>
</html>
In our numbers controller we’ll modify our show method.
Class AreaCodesController < ApplicationController
  def show
    respond_to do |wants|
      wants.js {
        @area_codes = AreaCode.find_like(params[:number])
`if @area_codes.empty? || params[:number].blank?
          render :text => ' '
        else
          render :text => @area_codes.map(&:to_s).join('<br/>')
        end
      }
    end
  end
end
The observe_field method checks the DOM element identified by number every 0.25 seconds for any changes. If the field has changed, that is, more data has been entered into or removed from the field, an XMLHttpRequest is made. The request is sent to the action identified by the url parameter; in this case, show on the area codes controller. That method looks for all area codes that start with the numbers entered so far.
We can use the standard params object in the controller because we specified the with parameter in the observe_field method. If we hadn’t used the with parameter, we would have to look at the actual request body using something like request.body.read. We could also send additional parameters by setting the with parameter to something like: 'number='+ escape($(''number'').value) + '&other_value=-1'. We could then access number and other_value from the params object once again.
By default the observe_field method will trigger on changed events for text fields and text areas, and on clicks for radio buttons and check boxes. If you want to use a different event, simply set the on parameter to the appropriate handler like blur of focus. In the preceding example we make a request to a URL, but we could also have called a JavaScript function instead. To do this we would set the function parameter to the appropriate function like: :function => 'update_results'. Additionally, observe_field takes all the options that link_to_remote does.
If you need to observe an entire form, observe_form may be a better choice than observe_field. The observe_form takes the DOM ID of a form and watches all elements of the form. It takes all the same options and behaves the same as observe_field except the default value of the with parameter is the serialized value of the form (the request string).
Rails includes a feature called RJS, which arguably stands for Ruby JavaScript. The RJS API generates blocks of JavaScript code based on Ruby code, thus allowing you to manipulate a view or parts of a view from the server side.
In the area codes example of the preceding section, we rendered the result of an area code search using render :text like this:
render :text => @area_codes.map(&:to_s).join('<br/>')What if we also wanted to prefix the results with the number found? We might just add that to the string we return, like this:
render :text => "Found #{area_codes.size} Results<br/>
                  #{@area_codes.map(&:to_s).join('<br/>')}"
That works, but what if we needed to show the results count somewhere else in the view—somewhere that a simple string concatenation like the one used in the preceding example wouldn’t work.
We could start using RJS by structuring the view template like this:
<html>
  <head>
    <%= javascript_include_tag :defaults %>
  </head>
  <body>
    Area Code: <%= text_field_tag 'number' %>
    <span id="area_code_results_message"></span>
    <br/>
    <hr/>
    <span id="area_code_results"></span>
    <%= observe_field 'number', :url => { :controller => 'area_codes',
  :action => 'show'}, :frequency => 0.25, :with => 'number' %>
</body>
</html>
Now using RJS, the respond_to block in our controller might look like this:
wants.js {
  @area_codes = AreaCode.find_like(params[:number])
if @area_codes.empty?
    render :update do |page|
      page.replace_html 'area_code_results_message',
                        'No Results Found'
      page.replace_html 'area_code_results', ''
    end
  else
    render :update do |page|
      page.replace_html 'area_code_results_message',
                        "Found #{@area_codes.size} Results"
      page.replace_html 'area_code_results',
                        @area_codes.map(&:to_s).join('<br/>')
end
  end
}
Since we’re using RJS, we no longer need to use the update parameter in the observe_field method. This is because observe_field and all the methods we’ve talked about so far will execute any JavaScript received.
In the controller we no longer render text. Instead, the call to render :update tells ActionController to render a block of JavaScript. Rails provides a number of helper methods that help us create JavaScript for rendering.
The preceding code uses one of those: replace_html, which replaces the inner HTML of the element identified in the first argument with the value of the second argument.
We can use FireBug to see the JavaScript sent back to the browser in the response body.
Element.update("area_code_results_message", "Found 41 Results");
Element.update("area_code_results", "301 - MD, W Maryland: Silver
Spring, Frederick, Camp Springs, Prince George's County (see
240)�74br/�76302 - DE, Delaware�74br/�76303 - CO, Central
Colorado:Denver (see 970, also 720 overlay)�74br/�76...We haven’t been following sane best practices, because we’re combining controller and view logic in one place. We can fix things up by geting RJS code out of our controller and into template files.
First we create a view called show.js.rjs that contains the following lines:
if @area_codes.empty? || params[:number].blank?
  page.replace_html 'area_code_results_message',
                    'No Results Found'
  page.replace_html 'area_code_results', ''
else
  page.replace_html 'area_code_results_message',
                    "Found #{@area_codes.size} Results"
page.replace_html 'area_code_results',
                    @area_codes.map(&:to_s).join('<br/>')
end
Now we can clean up our controller:
class AreaCodesController < ApplicationController
  def show
    @area_codes = AreaCode.find(:all,
      :conditions => ['number like ?', "#{params[:number]}%"])
  end
end
The respond_to construct is gone, and we instead rely on Rails’ default behavior of picking a view that matches the request. In other words, Rails will choose to serve a JavaScript view if the request was from an XMLHttpRequest. RJS can also be used in helpers too.
Rails comes with a number of RJS methods, which are described in the following sections.
This method will write raw JavaScript to the page. This is useful if we have a custom method in application.js that we want to call. For example:
// application.js
function my_method() {
  alert('my_method called'),
}

// my_controllers.rb
class MyControllers < Application
  def show
    ...
     render :update do |page|
       page << 'my_method();'
     end
    ...
  end
endThis returns a reference of the element identified by id in the DOM. Further calls can then be made on this element reference like hide, show, and so on. This behaves just like the $(id) construct in Prototype.
render :update do |page|
  page['my_div'].hide # same thing as $('my_div').hide
endThis will display a JavaScript alert with the given message:
render :update do |page|
  page.alert('Something is not right here')
endCalls the JavaScript function with the given arguments if any. If a block is given, a new JavaScript generator will be created and all generated JavaScript will be wrapped in a function() { ... } and passed as the class final argument.
// application.js
function my_method() {
  alert('my_method called'),
}

// my_controllers.rb
class MyControllers < Application
  def show
    ...
     render :update do |page|
       page.call('my_method)
     end
    ...
  end
endThis will execute the given block after the given number of seconds have passed.
render :update do |page|
  page.delay(5) {
    page.visual_effect :highlight, 'results_div', :duration => 1.5
  }
endThis creates a draggable element (draggable elements are discussed in the section “Drag and Drop.”
This creates a drop receiving element, which is discussed in the section “Drag and Drop.”
Hides the elements identified by the given DOM ids.
render :update do |page|
  page.hide('options_div')
  page.hide('options_form', 'options_message')
endInserts HTML at the given position relative to the given element identified by the DOM id. Position can be any one of the values shown in Table 12.2.
The options_for_render can be either a string of HTML to insert or options passed to render.
render :update do |page|
  page.insert_html :after, 'my_div', '<br/><p>My Text</p>'
  page.insert_html :before, 'my_other_div', :partial => 'list_items'
end
This is used to pass a literal JavaScript expression as an argument to another JavaScript generator method. The returned object will have a to_json method that will evaluate to code.
Causes the browser to redirect to the given location.
render :update do |page|
  page.redirect_to 'http://www.berlin.de'
end
Replaces the entire element (not just its internal HTML) identified by the DOM id with either a string or render options set in options_for_render.
render :update do |page|
  page.replace 'my_div', '<div>Message</div>'
  page.replace 'my_div', :partial => 'entry'
end
Replaces the internal HTML identified by the DOM id with either a string or render options set in options_for_render.
Obtains a collection of element references by finding it through a CSS pattern. You can use standard prototype enumerations with the returned collection.
render :update do |page|
  page.select('div.header p').first
  page.select('div.body ul li).each do |value|
     value.hide
  end
endCreates a sortable element that is discussed in the section “Sortable.”
Toggles the visibility of the elements identified by the ids. In other words, visible elements will become hidden and hidden elements will become visible.
This will start the named effect on the element identified by the DOM id. From RJS you can call appear, fade, slidedown, slideup, blinddown, and blindup. Each of these effects results in an element showing or hiding on the page. You can also call toggle_appear, toggle_slide, and toggle_blind to toggle the effect. For a complete list of visual effects, not just the displaying of elements, and options they take, consult the Scriptaculous documentation. To fade an element, we would do the following:
render :update do |page|
  page.visual_effect :fade, 'my_div'
end
JavaScript Object Notation (JSON) is a simple way to encode JavaScript objects. Rails provides a to_json on every object. We can use JSON instead of RJS to accomplish similar results. The main difference is where the logic lives to handle the result. Using RJS, the logic lives in Rails. Using JSON, the logic lives in JavaScript.
To illustrate, let’s change our recurring example controller to return JSON.
class AreaCodesController < ApplicationController
  def show
    respond_to do |wants|
      wants.json {
        @area_codes=
          AreaCode.find_all_by_number(params[:area_code][:number])
        render :json => @area_codes.to_json
       }
    end
  end
end
This will return the following:
[{attributes: {updated_at: "2007-07-22 20:47:18", number: "340", id:
"81", description: "US Virgin Islands (see also 809)", created_at:
"2007-07-22 20:47:18", state: "VI"}}, {attributes: {updated_at: "2007-
07-22 20:47:18", number: "341", id: "82", description: "(overlay on
510; SUSPENDED)", created_at: "2007-07-22 20:47:18", state: "CA"}},
{attributes: {updated_at: "2007-07-22 20:47:18", number: "345", id:
"83", description: "Cayman Islands", created_at: "2007-07-22
20:47:18", state: "—"}}, {attributes: {updated_at: "2007-07-22
20:47:18", number: "347", id: "84", description: "New York (overlay
for 718: NYC area, except Manhattan)", created_at: "2007-07-22
20:47:18", state: "NY"}}]
We now need to change our view to handle this returned JSON content.
<html>
  <head>
    <%= javascript_include_tag :defaults %>
  </head>
  <body>
    Area Code: <%= text_field_tag 'number' %>
    <span id="area_code_results_message"></span>
    <br/>
    <hr/>
    <span id="area_code_results"></span>
    <%= observe_field 'number',
          :url => { :controller => 'area_codes',:action => 'show'},
          :frequency => 0.25,
          :with => 'number',
          :complete => "process_area_codes(request)" %>
  </body>
</html>
The only change is the addition of a callback to the process_area_codes JavaScript function which we’ll define in application.js.
function process_area_codes(request) {
  area_codes = request.responseText.evalJSON();
  $('area_code_results').innerHTML = ' '
  area_codes.each(function(area_code, index) {
    new Insertion.Bottom("area_code_results", "<li>" +
      area_code.attributes.number + " - " +
      area_code.attributes.state + ", " +
      area_code.attributes.description + "</li>");
  });
}Scriptaculous makes doing drag and drop less painful, and Rails provides a few helper methods to make it even more painless. We can illustrate this by making the returned list of area codes draggable to a drop area where it can be selected. First we need to change our view.
<html>
  <head>
    <%= javascript_include_tag :defaults %>
  </head>
  <body>
    Area Code: <%= text_field_tag 'number' %>
    <span id="area_code_results_message"></span>
    <hr/>
    Selected: <span id="selected" style="padding: 0 100px; width:
 200px; height: 200px; background-color: lightblue;"></span>
<%= drop_receiving_element 'selected', :onDrop =>
 "function(element) { $('selected').innerHTML = element.innerHTML; }",
 :accept=>'area_code' %>
    <hr/>
    <span id="area_code_results"></span>
    <%= observe_field 'number', :url => { :controller => 'area_codes',
 :action => 'show'}, :frequency => 0.25, :with => 'number' %>
  </body>
</html>
We’ve used a JavaScript helper called drop_receiving_element to make the element identified by the DOM ID 'selected' receive draggable elements of the class 'area_code'. We’ve further customized it by setting the onDrop parameter to a JavaScript function to copy the dragged element’s HTML. With the drop element defined, we need to change our show.js.rjs view to make each returned area code a draggable element.
if @area_codes.empty? || params[:number].blank?
  page.replace_html 'area_code_results_message',
                    'No Results Found'
  page.replace_html 'area_code_results', ''
else
  page.replace_html 'area_code_results_message',
                    "Found #{@area_codes.size} Results"
page.replace_html 'area_code_results', ''

  @area_codes.each do |area_code|
    id = area_code.number.to_s
    page.insert_html :bottom,
                     'area_code_results',
                     content_tag(:div,
                                 area_code,
                                 :id => id, :class => 'area_code')
page.draggable id, :revert => true
  end
end
Here we iterated over the collection of area codes and made each one a draggable div element. We set the id of the element to the area code number and set the class to 'area_code'. The class is important as the drop element we created in the preceding example will only accept elements whose class is 'area_code'.
We can now refresh the page and drag an area code to the colored selected box. This is nice, but what would be more useful is to send back to the server the area code that was selected. We can accomplish this by changing the drop element:
<%= drop_receiving_element 'selected',
         :onDrop => "function(element) {$('selected').innerHTML =
                                           element.innerHTML; }",
         :accept => 'area_code',
         :url => { :controller => 'area_codes',
                   :action => 'area_code_selected' } %>
Now when an element is dropped, an XMLHttpRequest will be made to the area_code_selected method. By default, the dragged element’s id is sent to the server, which is the area code number in this case. In our controller we can log the selected area code.
Class AreaCodesController < ApplicationController
  def area_code_selected
    area_code = AreaCode.find_by_number(params[:id])
    # do something with area_code
    render :nothing => true
  end
endScriptaculous and Rails builds on top of the Drag and Drop to create sortable lists. We can use this to sort the area codes returned. First we need to change our view to use an unordered list since the sortable JavaScript expects this.
<html>
   ...
   <ul id="area_code_results"></ul>
   ...
</html>
In the show.js.rjs view we also know to change over to list items and make the list sortable. We also remove the draggable declaration since we get that behavior automatically when the list is declared as sortable.
if @area_codes.empty? || params[:number].blank?
  ...
else
  ...
  @area_codes.each do |area_code|
    id = area_code.number.to_s
    page.insert_html :bottom, 'area_code_results', content_tag(:li,
 area_code, :id => id, :class => 'area_code')
end
  page.sortable 'area_code_results', :url => { :controller =>
 'area_codes', :action => 'sorted_area_codes' }
end
With this we can now sort the returned area code result by dragging and dropping within the list. Each time we drop an area code element an XMLHttpRequest is made to the sorted_area_codes method. We access the list order via params[:area_code_results], which contains an array of area codes in sorted order using the DOM ID of the area codes. If an underscore is present in the DOM ID, only the last part of it will be serialized and sent to the server. For example, a sorted element with a DOM ID of 'string_1' will be sent as '1'.
While this functionality is slated for a plugin in Rails 2.0, it’s still quite useful. Autocompleters are often used to suggest values as you enter characters into a text field.
To return to our recurring example, we can use an autocompleter to display possible matching area codes as you type. In other words, if I enter 6, an autocompleter will show me all area codes that start with 6. We’ll start with a special text field:
<html>
  <head>
    <%= javascript_include_tag :defaults %>
  </head>
  <body>
    Area Code: <%= text_field_with_auto_complete :area_code, :number
%>
  </body>
</html>
This will create a text field and associate it with an Ajax.Autocompleter that will make an XMLHttpRequest on each keystroke to a method called auto_complete_for_area_code_number. By default, text_field_with_auto_complete looks for a method named auto_complete_for_#{object_name}_#{field}. This method in our controller looks like this:
class AreaCodesController < ApplicationController
  ...
  def auto_complete_for_area_code_number
    @area_codes = AreaCode.find_by_number(params[:area_code][:number])
render :inline => "<%=auto_complete_result(@area_codes, :number)%>"
  end
  ...
end
We render it as an inline because auto_complete_result is an ActionView helper and not directly available in the controller.
We can also use Rails and Scriptaculous to create in-place XMLHttpRequest editors. Again, this functionality will be removed from Rails core and become part of a plugin in Rails 2.0. If we wanted to edit the descriptive text of an area code in this fashion, our view would look like this:
<html>
  <head>
    <%= javascript_include_tag :defaults %>
  </head>
  <body>
    Number: <%= in_place_editor_field :area_code, :number %><br/>
    State: <%= in_place_editor_field :area_code, :state%><br/>
    Description: <%= in_place_editor_field :area_code, :description %>
  </body>
</html>
The in-place editor fields will by default look for a method name set_#{object_name}_#{field}. In the case of number, this method would be set_area_code_number, which looks like this:
Class AreaCodesController < ApplicationController
  ...
  def set_area_code_number
   @area_code = AreaCode.find(params[:id])
   render :text => @area_code.number
  end
  ...
end
The success of Rails is often correlated to the rise of Web 2.0, and one of the factors linking Rails into that phenomenon is its baked-in support for Ajax. There are a ton of books about Ajax programming, including some that are specific to using Ajax and Rails together. It’s a big subject, but it’s a big enough part of Rails that we felt the need to include it as part of The Rails Way.
In this chapter, you were encouraged to use the FireBug plugin for Firefox if you aren’t doing so already. Then we provided a comple reference guide to the Prototype JavaScript library, essential for doing Ajax programming, along with a review of the functionality provided by the Rails PrototypeHelper module.
In the sections dealing with RJS, you learned how you can write JavaScript in Ruby, which may come in very handy sometimes.
Finally, you learned the built-in Rails helpers for Scriptaculous effects and controls.
| 1. | The first step to getting the FireBug plugin for Firefox is to visit http://www.getfirebug.com/. |
| 2. | See http://www.quirksmode.org/dom/w3c_events.html for a comprehensive explanation of DOM events and how to use them. |