
The very powerful and the very stupid have one thing in common. Instead of altering their views to fit the facts, they alter the facts to fit their views...which can be very uncomfortable if you happen to be one of the facts that needs altering. | ||
| --Doctor Who | ||
Controllers are the skeleton and musculature of your Rails application. In which case, models form the heart and mind, and your view templates (based on ActionView, the third major component of Rails) are your application’s skin—the part that is visible to the outside world.
ActionView is the Rails API for putting together the visual component of your application, namely the HTML and associated content that will be rendered in a web browser whenever someone uses your Rails application. Actually, in this brave new world of REST resources, ActionView is involved in generating any sort of output you want to pour out of your app.
ActionView contains a full-featured templating system based on a Ruby library named ERb. It takes data prepared by the controller layer and interleaves it with view code to create a presentation layer for the end user.
In this chapter, we cover the fundamentals of the ActionView framework, from the basics of templating, to effective use of partials, to the significant performance boosts possible via caching.
Inside standard Rails view template files, you’re writing code in a kind of Ruby dialect, namely Embedded Ruby, or ERb, which is not unique to Rails. ERb is a standard library of the Ruby distribution.
An ERb document typically contains static HTML together with Ruby code that will be executed dynamically when the template is rendered. As I’m sure you know if you’ve done any Rails programming at all, to insert Ruby code into an ERb document, you place the code inside a pair of delimiters.
There are two different types of template delimiters available, which serve different purposes, and work identically to their counterparts in JSP and ASP technologies, which you might be familiar with already:
<% %> and <%= %>
The code between the delimiters will be executed in either case. The difference is that the return value of the first expression is discarded, while that of the second is inserted into the template’s output.
A very common bug during everyday Rails coding is to accidentally use the non-outputting delimiter where you actually needed one that produces output. You’ll tear your hair out trying to figure out why a certain value is not showing up on your screen, and yet no errors are being generated.
You can get a feel for ERb outside of Rails since the ERb interpreter is a standard part of Ruby, and you can write and process ERb templates for practice using that interpreter. You simply use the command-line command erb.
For example, put the following template code in a file (demo.erb, perhaps):
Let's list all the methods of a Ruby string.

First we need a string.

<% str = "I am a string!" %>

We've got one: here it is:

  <%= str %>

Now, let's see its methods:

<% str.methods.sort[0...10].each_with_index do |m,i| %>
  <%= i+1 %>. <%= m %>
<% end %>
Now, run the file through erb:
$ erb demo.erb
You’ll see the following output:
Let's list all the methods of a Ruby string.

First we need a string.


We've got one: here it is:

  I am a string!

Now, let's see its methods -- or maybe just a few, so they don't
scroll off the screen:


  1. %

  2. *

  3. +

  4. <

  5. <<

  6. <=

  7. <=>

  8. ==

  9. ===

  10. =~
As you can see, all of the Ruby code inside the delimiters has been executed, including the assignment to str and the iteration with each. Only the code inside the equal-sign delimiters, however, has contributed to the output from the execution of the template.
You may also notice a lot of blank lines in the output. The presence of delimited code in the template has no special effect, one way or the other, on the line count. A line is a line, so the following line comes through as a blank line:
<% end %>
Rails gives you a way to remove at least some of the extra blank lines, by using modified delimiters:
<%- str.methods.sort[0...10].each_with_index do |m,i| -%>
  <%= i+1 %>. <%= m %>
<%- end -%>
Note the minus signs in the delimiters; they will suppress leading whitespace and extra newlines in the output of the template. Used judiciously, they can pretty up your template output significantly. It isn’t something that the end user cares about, but it might help you out whenever you’re examining the HTML source code of your application.
Ruby’s commenting symbol # will work to cancel an ERb delimiter. Just insert it right after the percent sign of the opening delimiter tag.
<%#= str %>
The contents of the commented ERb tag will be ignored. You don’t want to leave commented-out code littering your template, but it’s useful for temporarily disabling something.
One of the most common idioms you’ll use when coding Rails views is to conditionally output content to the view. The most elementary way to control conditional output is to use if/else statements in conjunction with <% %> as follows:
<% if @show_subtitle %>
  <h2><%= @subtitle %></h2>
<% end %>
A lot of times you can use inline if conditions and shorten your code, since the <%= tag doesn’t care if you feed it a nil value. Just add a postfix if condition to the statement:
<h2><%= @subtitle if @show_subtitle %></h2>
Of course, there’s a potential problem with the preceding example. The first, more verbose, conditional output will eliminate the <h2> tags entirely, but the second example does not.
There are a couple of ways to deal with the problem and keep it a one-liner.
First, there’s the butt-ugly solution that I’ve occasionally seen in some Rails applications, which is the only reason why I’m mentioning it here!
<%= "<h2>#{@subtitle}</h2>" if @show_subtitle %>Aaargh! Ugly! The more elegant solution involves Rails’ content_tag helper method.
<%= content_tag('h2', @subtitle) if @show_subtitle %>Helper methods, both the ones included in Rails and the ones that you’ll write on your own, are your main tool for building elegant view templates. Helpers are covered extensively in Chapter 11, “All About Helpers.”
As of Rails 2.0 the standard naming practice is to suffix ERb template files with .erb, but in earlier versions of Rails, we used .rhtml.
There are two other standard formats and suffixes for templates:
.builder(formerly.rxml) signals Rails to execute the template with Jim Weirich’sBuilder::XmlMarkuplibrary, used to easily create XML-based output. Use of Builder is covered in Chapter 15, “XML andActiveResource.”.rjs(unchanged) triggers Rails’ built-in JavaScript generation facilities, covered in Chapter 12, “Ajax on Rails.”
Note that at the end of this chapter, we do a quick survey of third-party templating languages available that integrate nicely with Rails, and why you might want to try them. For now, let’s continue with a review of layout and template usage.
Rails has easy conventions for template usage, related to the location of templates with the Rails project directories.
The app/views directory, shown in Figure 10.1, contains subdirectories matching the name of each controller in the application. Within each controller’s view subdirectory, you place a template named to match its corresponding action.
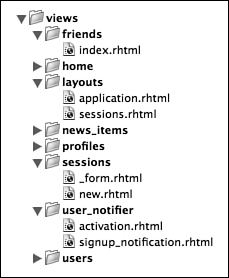
The special app/views/layout directory holds layout templates, intended to be reusable containers for your views. Again, naming conventions are used to determine which templates to render, except this time it is the name of the controller that is used for matching.
In the case of layouts, the inheritance hierarchy of controllers comes into play. Most Rails applications have an application.rhtml file in their layout directory. It shares its name with the ApplicationController, which is typically extended by all the other controllers in an application; therefore it is picked up as the default layout for all views.
It is picked up, unless of course, a more specific layout template is in place, but most of the time it makes sense to use just one application-wide template, such as the simple one shown in Listing 10.1.
Example 10.1. A Simple, General-Purpose application.rhtml Layout Template
<!DOCTYPE HTML PUBLIC "-//W3C//DTD HTML 4.01//EN"
"http://www.w3.org/TR/html4/strict.dtd">

<html>
 <head>
  <meta http-equiv="Content-Type" content="text/html; charset=UTF-8">
  <title>My Rails Application</title>
  <%= stylesheet_link_tag 'scaffold', :media => "all" %>
  <%= javascript_include_tag :defaults %>
 </head>
 <body>
  <%= yield :layout %>
 </body>
</html>
The stylesheet_link_tag and javascript_include_tag methods are helpers that automatically insert standard LINK and SCRIPT tags into your document, for CSS and JavaScript files, respectively. The only other interesting part of that template is the call to yield :layout, which we discuss next.
The Ruby language’s built-in yield keyword is put to good use in making layout and action templates collaborate. Notice the use of yield in the middle of the layout template:
<body>
  <%= yield :layout %>
</body>
In this case, the :layout symbol is a special message to the rendering system. It marks where to insert the output of the action’s rendered output, which is usually the template corresponding to that action.
You can add extra places in your layout where you want to be able to yield content, by including additional yield invocations—just make sure to use a unique identifier. A good example is a layout that has left and right sidebar content (simplified, of course):
<body>
  <div class="left sidebar">
    <%= yield :left %>
  </div>
  <div id="main_content">
    <%= yield :layout %>
  </div>
  <div class="right sidebar">
    <%= yield :right %>
  </div>
</body>
The center DIV element receives the main template content generated. But how do you give Rails content for the left and right sidebars? Easy—just use the content_for method in your template code in the following way:
<% content_for(:left) do %>
<h2>Navigation</h2>
<ul>
  <li>...
</ul>
<% end %>

<% content_for(:right) do %>
<h2>Help</h2>
<p>Lorem ipsum dolor sit amet, consectetur adipisicing elit,
   sed do eiusmod tempor incididunt ut labore et dolore magna
   aliqua. Ut enim ad minim veniam, quis nostrud ...
<% end %>

<h1>Page Heading</h1>
<p>The normal template content that will get yielded
  to :layout</p>
  ...
Besides sidebars and other types of visible content blocks, I suggest you yield for additional content to be added to the HEAD element of your page, as shown in Listing 10.2. It’s a super-useful technique, because Internet Explorer can occasionally get very ill-tempered about SCRIPT tags appearing outside of the HEAD element.
Example 10.2. Yielding Additional Head Content
<!DOCTYPE HTML PUBLIC "-//W3C//DTD HTML 4.01//EN"
"http://www.w3.org/TR/html4/strict.dtd">

<html>
 <head>
  <meta http-equiv="Content-Type" content="text/html; charset=UTF-8">
  <title>My Rails Application</title>
  <%= stylesheet_link_tag 'scaffold', :media => "all" %>
  <%= javascript_include_tag :defaults %>
  <%= yield :head %>
 </head>
 <body>
  <%= yield :layout %>
 </body>
</html>
We’ve seen how layouts and yielding content blocks work, but other than that, how does data get from the controller layer to the view? During preparation of the template, instance variables set during execution of the controller action will be copied over as instance variables of the template context.
Copying of instance variables is the main form of communication from controller to view, and frankly, that behavior is one of the most basic facts about Rails and I’m sure that you know it:
class HelloWorldController < ActionController::Base
  def index
    @msg = "Hello, world!"
  end
end

# template file /app/views/hello_world/index.html.erb
<%= @msg %>
What you might not be aware of is that a lot more than just instance variables from the controller are copied over to the template. It’s not a good idea to depend on some of the following objects directly, and especially not to use them to do data operations. Remember that MVC standard practice is to let the controller layer prepare data for rendering, not the view!
Want to see everything that comes across the controller-view boundary? Throw <%= debug(assigns) %> into your template and take a look at the output. The assigns attribute is essentially internal to Rails and you should not use it directly in your production code.
Local filesystem path pointing to the base directory of your application where templates are kept.
The current controller instance is made available via controller, before it goes out of scope at the end of request processing. You can take advantage of the controller’s knowledge of its name (via the controller_name attribute) and the action that was just performed (via the action_name attribute), in order to structure your CSS more effectively, as shown in Listing 10.3.
That would result in a BODY tag looking something like this, depending on the action executed:
<body class="timesheets index">
Hopefully you already know that the C in CSS stands for cascading, which refers to the fact that class names cascade down the tree of elements in your markup code and are available for creation of rules. Our trick in Listing 10.3 is to automatically include the controller and action name as classnames of your BODY element, so that you can use them to customize look and feel of the page very flexibly later on in the development cycle.
Here’s an example of how the technique would be used to vary the background of header elements depending on the controller path:
body.timesheets .header {
  background: url(../images/timesheet-bg.png) no-repeat left top
}

body.expense_reports .header {
  background: url(../images/expense-reports-bg.png) no-repeat left top
}The flash is a view variable that you’ll definitely use on a regular basis. It has popped up in larger code samples throughout the book so far, whenever you want to send the user a message from the controller layer, but only for the duration of the next request.
A common Rails practice is to use flash[:notice] to hold benign notice messages, and flash[:error] for communication of a more serious nature. Personally, I like to conditionally output both of them in DIV elements, right at the top of my layout, and use CSS to position them, as shown in Listing 10.4.
Example 10.4. Standardized Flash Notice and Error Placement in application.html.erb
<html>
  ...
  <body>
    <%= content_tag 'div', h(flash[:notice]),
         :class => 'notice', :id => 'notice' if flash[:notice] %>
    <%= content_tag 'div', h(flash[:error]),
         :class => 'notice error', :id => 'error' if flash[:error] %>

    <%= yield :layout %>
  </body>
</html>
Using the content_tag helper facilitates making the entire output conditional. Otherwise, I’d need an if block around the HTML markup and the scheme would get pretty messy.
The headers variable holds the values of HTTP headers that accompanied the request being processed. Not much you can do with headers in your view, other than occasionally view them for debugging reasons. Put <%= debug(headers) %> somewhere in your layout and you’ll see output similar to the following in your browser, after refreshing the page of course:
--
Status: 200 OK
cookie:
- - adf69ed8dd86204d1685b6635adae0d9ea8740a0
Cache-Control: no-cache
Have something to record for posterity in the logs while you’re rendering the view? Use the logger method to get the view’s Logger instance, RAILS_DEFAULT_LOGGER unless you’ve changed it.
This is the same params hash that is available in your controller, containing the key/value pairs of your request. I’ll occasionally use a value from the params hash directly in the view, particularly when I’m dealing with pages that are subject to filtering or row sorting.
<p>Filter by month:
  <%= select_tag(:month_filter,
        options_for_select(@month_options, params[:month_filter])) %>
It’s very dangerous from a security perspective to put unfiltered parameter data into the output stream of your template. The following section, “Protecting the Integrity of Your View from User-Submitted Content,” covers that topic in depth.
The HTTP request and response objects are exposed to the view, but other than for debugging purposes, I can’t think of any reason why you would want to use them directly from your template.
The session variable is the user’s session hash. There might be situations where it’d be okay to pull values out to affect rendering, but I shudder to think that you might try to set values in the session from the view layer. Use with care, and primarily for debugging, just like request and response.
If any data in your application is user-submitted, or in any way originates from a source that you don’t trust completely, then you need to keep in mind the need to escape and sanitize template content. Otherwise, you leave yourself wide open to a variety of malicious hacker attacks.
For example, consider the following template snippet, which copies the value of params[:page_number] into its output quite innocently:
<h1>Search Results</h1>
<h2>Page <%= params[:page_number] %></h2>
Easy way to include the page number, right? Sure. But consider what happens if someone submits a request to that page that embeds a SCRIPT tag and some malicious code as the value of the page_number request parameter? Bingo! The malicious code goes right into your template!
Fortunately, there is a very simple way to prevent this form of attack and the Rails core developers expect you to use it very often, so they named the method with one character: h.
<h1>Search Results</h1>
<h2>Page <%=h(params[:page_number]) %></h2>
The h method escapes HTML content—instead of passing it through as markup, it will convert the less-than and greater-than characters into their respective character entities, and in so doing, cripple malicious injection attacks. Of course, it doesn’t do anything to content that doesn’t have markup.
But what if you are trying to display user-submitted HTML, as is often the case with web applications that feature blog-style commenting facilities? In those cases, you can try using the sanitize method of ActionView::Helpers::TextHelper. It’ll strip out the tags most commonly used in attacks: FORM and SCRIPT, but leave others intact. The sanitize method is covered in depth in Chapter 11.
A partial is a fragment of template code. The Rails way is to use partials to factor view code into modular chunks that can be assembled in layouts with as little repetition as possible. The syntax for including a partial within a template starts with render :partial => "name". Partial template names must begin with an underscore, which serves to set them apart visually within a given view template directory. However, you leave the underscore out when you refer to them.
The simplest partial use case is simply to extract a portion of template code. Some developers divide their templates into logical parts by using partial extraction. Sometimes it is easier to understand the structure of a screen if the significant parts are factored out of it. For instance, Listing 10.5 is a simple user registration screen that has its parts factored out into partials.
Example 10.5. Simple User Registration Form with Partials
<h1>User Registration</h1>
<%= error_messages_for :user %>
<% form_for :user, :url => users_path do -%>
  <table class="registration">
   <tr>
    <td class="details demographics">
     <%= render :partial => 'details' %>
     <%= render :partial => 'demographics' %>
    </td>
    <td class="location">
     <%= render :partial => 'location' %>
    </td>
   </tr>
   <tr>
    <td colspan="2"><%= render :partial => 'opt_in' %></td>
   </tr>
   <tr>
    <td colspan="2"><%= render :partial => 'terms' %></td>
   </tr>
  </table>
  <p><%= submit_tag 'Register' %></p>
<% end -%>
While we’re at it, let me pop open one of those partials. To conserve space, we’ll take a look at one of the smaller ones, the partial containing the opt-in check boxes of this particular app. The source is in Listing 10.6; notice that its name begins with an underscore.
Personally, I like partials to be entirely contained inside a semantically significant markup container. In the case of the opt-in partial in Listing 10.6, both check box controls are contained inside a single <fieldset> element, which I’ve given an id attribute. Following that rule, more as a loose guideline than anything else, helps me to mentally identify how the contents of this partial are going to fit inside the parent template. If we were dealing with other markup, perhaps outside of a form, I might choose to wrap the partial markup inside a well-identified <div> container, instead of a <fieldset>.
Why not include the <td> markup inside the partial templates? It’s a matter of style—I like to be able to see the complete markup skeleton in one piece. In this case, the skeleton is the table structure that you see in Listing 10.5. If portions of that table were inside the partial templates, it would obfuscate the layout of the page. I do admit that this is one of those areas where personal style and preference should take precedence and I can only advise you as to what has worked for me, personally.
Since the registration form is neatly factored out into its component parts, it is easy to create a simple edit form using some of its partials, as in Listing 10.7.
Example 10.7. Simple User Edit Form Reusing Some of the Same Partials
<h1>Edit User</h1>
<%= error_messages_for :user %>
<% form_for :user, :url => user_path(@user),
                   :html => { :method => :put } do -%>
  <table class="settings">
   <tr>
    <td class="details">
     <%= render :partial => 'details' %>
    </td>
    <td class="demographics">
     <%= render :partial => 'demographics' %>
    </td>
   </tr>
   <tr>
    <td colspan="2" class="opt_in">
      <%= render :partial => 'opt_in' %>
    </td>
   </tr>
  </table>
  <p><%= submit_tag 'Save Settings' %></p>
<% end -%>
If you compare Listings 10.5 and 10.7, you’ll notice that the structure of the table changed a little bit in the Edit form, and it has less content than the registration form. Perhaps the location is handled in greater detail on another screen, and certainly you don’t want to require agreement of terms every time the user changes her settings.
Until now we’ve been considering the use of partials that reside in the same directory as their parent template. However, you can easily refer to partials that are in other directories, just by prefixing the directory name. You still leave off the underscore, which might feel a little weird.
Let’s add a captcha partial to the bottom of the registration form from Listing 10.5, to help prevent spammers from invading our web application:
  ...
  <tr>
    <td colspan="2"><%= render :partial => 'terms' %></td>
   </tr>
   <tr>
    <td colspan="2"><%= render :partial => 'shared/captcha' %></td>
   </tr>
  </table>
  <p><%= submit_tag 'Register' %></p>
<% end -%>
Since the captcha partial is used in various different parts of the application, it makes sense to let it reside in a shared folder rather than any particular view folder. However, you do have to be a little bit careful when you move existing template code into a shared partial. It’s quite possible to inadvertently craft a partial that depends implicitly on where it’s rendered.
For example, take the case of the Rails-talk mailing list member with a troublesome partial defined in login/_login.rhtml:
<% form_tag do %>
 <label>Username:</label>
 <%= text_field_tag :username, params[:username] %>
 <br />
 <label>Password:</label>
 <%= password_field_tag :password, params[:password] %>
 <br />
 <%= submit_tag "Login" %>
<% end %>
The login form submission worked when he rendered this partial as part of the login controller’s login action (“the login page”), but not when it was included as part of the view for any other section of his website. The problem is that form_tag (covered in the next chapter) normally takes an optional action parameter telling it where to post its information. If you leave out the action, the form will post back to its current URL, which will vary for shared partials, depending on where they’re being used from.
Partials inherit the instance variables available to their parent templates. That’s why the form helpers used in the partials of Listings 10.5 and 10.7 work: They rely implicitly on an @user variable to be in scope. I feel it’s fine to use this implicit variable sharing in some cases, particularly when the partials are tightly bound to their parent templates. It would be especially true in cases where the only reason you broke out partials in the first place was to reduce the size and complexity of a particularly large template.
However, once you get into the practice of breaking out partial templates for application-wide reuse, depending on implicitly passed variables gets a lot more dicey. That’s why Rails supports the passing of locally scoped variables to partial templates, as a hash parameter named :locals, as in the following snippet:
render :partial => 'shared/address', :locals => { :form => form }The names and values of the :locals hash are converted into locally scoped variables (no @ sign) in the partial. Listing 10.8 is a variation on the registration template. This time we’re using the version of form_for that yields a block parameter representing the form to its form helper methods. We’ll pass that form parameter on, too.
Example 10.8. Simple User Registration Template Passing Form as Local Variable
<h1>User Registration</h1>
<%= error_messages_for :user %>
<% form_for :user, :url => users_path do |form| -%>
  <table class="registration">
   <tr>
    <td class="details address demographics">
     <%= render :partial => 'details',
                :locals => {:form => form } %>
     <%= render :partial => 'shared/address',
                :locals => {:form => form } %>
    </td>
   </tr>
  </table>
  <p><%= submit_tag 'Register' %></p>
<% end -%>
And finally, in Listing 10.9 we have the shared address form.
Example 10.9. A Simple Shared Address Partial Using Local Variable
<fieldset class="address">
  <legend>Address</legend>
  <p><label>Street</label><br/>
    <%= form.text_area :street, :rows => 2, :cols => 40 %></p>
  <p><label>City</label><br/>
    <%= form.text_field :city %></p>
  <p><label>State</label><br/>
    <%= form.text_field :state, :size => 2 %></p>
  <p><label>Zip</label><br/>
      <%= form.text_field :zip, :size => 15 %></p>
</fieldset>
The form helper methods, which we’ll cover in Chapter 11, have a variation in which they are called on the form variable yielded by the form_for method. That is exactly what we passed on to these partials via the :locals hash.
If you need to check for the presence of a certain local variable, you need to do it by checking the local_assigns hash that is part of every template. Using defined? variable won’t work due to limitations of the rendering system.
<% if local_assigns.has_key? :special %>
<%= special %>
<% end %>
One of the best uses of partials is to render collections. Once you get into the habit of rendering collections with partials, you won’t want to go back to the relative ugliness of cluttering your templates with for loops and each.
render :partial => 'entry', :collection => @entries
Simple and precise, and dependent on a naming convention. The most important is how the object being rendered is exposed to the partial template. It is set as a local variable named the same as the partial template itself. The partial corresponding to the last code snippet would reference a local variable named entry.
<%= div_for(entry) do %>
  <%= h(entry.description) %>
  <%= distance_of_time_in_words_to_now entry.created_at %> ago
<% end %>
There’s another variable set for collection-rendered partials that doesn’t get much attention. It’s a 0-indexed counter variable that tracks the number of times the partial has gotten rendered. It’s useful for rendering numbered lists of things.
The name of the variable is the name of the partial, plus _counter.
<%= div_for(entry) do %>
  <%= entry_counter %>:
  <%= h(entry.description) %>
  <%= distance_of_time_in_words_to_now entry.created_at %> ago
<% end %>If you wanted to use the same partial that you use with a collection, execpt with a single entry object, you’d have to pass it that single instance via the :locals hash described in the preceding section, like this:
render :partial => 'entry', :locals => {:entry => @entry }I’ve also seen the following hack done as a way to avoid needing that locals parameter:
<% entry = @entry if @entry %>
<% div_for(entry) do %>
  <%= h(entry.description) %>
  <%= distance_of_time_in_words_to_now entry.created_at %> ago
<% end %>
That works, but it’s nasty, repetitive, and introduces an implicit optional dependency on @entry. Don’t do stuff like that. Use the :locals parameter, as intended.
If you take a look at your development log, you’ll notice that it shows which partials have been rendered and how long they took.
Rendering template within layouts/application
Rendering listings/index
Rendered listings/_listing (0.00663)
Rendered listings/_listing (0.00296)
Rendered listings/_listing (0.00173)
Rendered listings/_listing (0.00159)
Rendered listings/_listing (0.00154)
Rendered layouts/_login (0.02415)
Rendered layouts/_header (0.03263)
Rendered layouts/_footer (0.00114)
The Rails caching mechanism can make your production-deployed application very responsive. Caching lets you specify that anything from entire pages down to fragments of the page should be captured to disk as HTML files and sent along by your web server on future requests with minimal involvement from Rails itself.
There are three types of caching in Rails:
Page caching. The output of an entire controller action is cached to disk, with no further involvement by the Rails dispatcher.Action caching. The output of an entire controller action is cached to disk, but the Rails dispatcher is still involved in subsequent requests, and controller filters are executed.Fragment caching. Arbitrary bits and pieces of your page’s output can be cached to disk to save the time of having to render them in the future.
I wanted to mention up front that caching is disabled in development mode. If you want to play with caching, you’ll need to edit the following setting in the config/environments/development.rb file:
config.action_controller.perform_caching = false
Of course, remember to change it back before checking it back into your project repository, or you might face some very confusing errors down the road.[1]
The simplest form of caching is page caching, triggered by use of the caches_page macro-style method in a controller. It tells Rails to capture the entire output of the request to disk so that it is served up directly by the web server on subsequent requests without the involvement of the dispatcher. Nothing will be logged to the Rails log, nor will controller filters be triggered—absolutely nothing to do with Rails will happen, just like the static HTML files in your project’s public directory.
By definition, if there’s anything that has to change on every request or specific to an end user’s view of that page, page caching is not an option. On the other hand, if all we need to do is run some filters that check conditions before displaying the page requested, the caches_action method will work. It’s almost like page caching, except that controller filters are executed prior to serving the cached HTML file. That gives you the option to do some extra processing or even redirect if necessary.
Action caching is implemented with fragment caching (covered later in this chapter) and an around filter (covered in Chapter 2, “Working with Controllers”). The cached action content is keyed based on the current host and the path, which means that it will still work even with Rails applications serving multiple subdomains using a DNS wildcard. Also, different representations of the same resource, such as HTML and XML, are treated like separate requests and cached separately.
We’ll use our lil_journal[2] sample application as the basis for our code snippets in this section. The application should have public versus private entries, so for default requests, we should run a filter that figures out whether the visitor is logged in and redirects them to the public action if necessary. Listing 10.10 has the EntriesController code.
Example 10.10. The EntriesController of lil_journal
class EntriesController < ApplicationController

  before_filter :check_logged_in, :only => [:index]

  caches_page :public
  caches_action :index

  def public
    @entries = Entry.find(:all,
                          :limit => 10,
                          :conditions => {:private => false})

    render :action => 'index'
  end

  def index
    @entries = Entry.find(:all, :limit => 10)
  end

  private

    def check_logged_in
      redirect_to :action => 'public' unless logged_in?
    end

end
The public action displays only the public entries and is visible to anyone, which makes it a candidate for page caching. However, since it doesn’t require its own template, we just call render :action => 'index' explicitly at the end of the public action.
Knowing that your application will eventually require caching should influence your design decisions. Projects with optional authentication often have controller actions that are impossible to page or action-cache, because they handle both login states internally. That would have been the case in Listing 10.10 if we had written the index action to handle both public and private display:
def index
  opts = {}
  opts[:limit] = 10
  opts[:conditions] = {:private => false } unless logged_in?
  @posts = Entry.find(:all, opts)
end
Most of the time, you won’t have too many pages with completely static content that can be cached using cache_page or cache_action, and that’s where fragment caching comes into play.
Users are accustomed to all sorts of dynamic content on the page, and your application layout will be filled with things like welcome messages and notification counts. Fragment caching allows us to capture parts of the rendered page on disk and serve them up on subsequent requests without needing to render their content again. The performance improvement is not as dramatic as with page or action caching, since the Rails dispatcher is still involved. However, you can still give your application a blazing speed boost by using fragment caching.
Fragment caching is by nature something you specify in your view template rather than at the controller level. You do so using the cache method of ActionView. It takes a block, which lets you wrap content that should be cached.
Once we log in to our Lil’ Journal sample application, the header section should really display information about the logged-in user, so action-caching the index page is out of the question. We’ll remove the action_cache directive from the EntriesController, but leave cache_page in place for the public action. Then we’ll go into the entries/index.html.erb template and add fragment caching, as shown in Listing 10.11.
Easy as that—the HTML output of rendering the collection of entries is stored in the fragment cache associated with the entries/index page. That’s fine if we’re only caching one fragment of the page, but most of the time we’ll need to give the fragment some extra identification.
The cache method takes an optional name parameter.
<% cache "my_fragment" do %>
If you leave it blank, as we have in Listing 10.11, it caches its content keyed to the URL of its parent page. That’s an acceptable solution as long as there is only one fragment on the page.
If we’re caching more than one fragment on the page, we need to add an extra identifier, so that we don’t suffer name collisions. Listing 10.12 is an enhanced version of the entries page, where we’ve added the display of recent comments in the sidebar.
Example 10.12. The Entries Page with Two Fragment Cache Directives
<%= content_tag :h1, "#{@user.name}'s Journal" %>

<% cache(:fragment => 'entries') do %>
  <%= render :partial => 'entry', :collection => @entries %>
<% end %>

<%- content_for :sidebar -%>

  <% cache(:fragment => 'recent_comments') do %>
    <%= render :partial => 'comment', :collection => @recent_comments
%>
  <% end %>

<% end %>
After the code in Listing 10.12 is rendered, there will be two fragments stored in the cache, keyed as follows:
/entries/index?fragment=entries/entries/index?fragment=recent_comments
The fact that Rails uses the page’s URL scheme to key fragments in the cache is an elegant solution to a somewhat difficult problem. Consider for instance, what would happen if you added pagination to the Lil’ Journal application and pulled up the second page of entries. Without further work, a pair of additional fragments would be correctly cached for future use:
/entries/index?page=2&fragment=entries/entries/index?page=2&fragment=recent_comments
Sometimes, you’ll want to fragment-cache content that is not specific to a single URL of your application. To add globally keyed fragments to the cache, we’ll again use the name parameter of the cache helper method, but this time we’ll give it a string identifier instead of a hash.
To demonstrate, let’s add a requirement that our Lil’ Journal application should display user statistics on every page. In Listing 10.13, we cache the stats partial for every user, using their name and a "_stats" suffix as the key.
Example 10.13. The Entries Page with Global User Stats
<%= content_tag :h1, "#{@user.name}'s Journal" %>

<% cache(:fragment => 'entries') do %>
  <%= render :partial => 'entry', :collection => @entries %>
<% end %>

<%- content_for :sidebar -%>

  <% cache(@user.name + "_stats") do %>
    <%= render :partial => 'stats' %>
  <% end %>

  <% cache(:fragment => 'recent_comments') do %>
    <%= render :partial => 'comment', :collection => @recent_comments %>
  <% end %>

<% end %>
There’s one part we’ve left out of our caching discussion so far, and that is the subject of expiring cached content once it is stale—once the data it is reflecting has become out of date.
Once you have fragments of your view cached, it no longer makes sense to do the database queries that supply those fragments with their data. After all, the results of those database queries will never be used until the cached fragments are expired. The read_fragment method lets you check for the existence of cached content, and takes the same parameters that you used with the associated cache method.
Here’s how we would modify the index action accordingly:
def index
  unless read_fragment(:fragment => 'entries')
    @entries = Entry.find(:all, :limit => 10)
  end
end
Now the finder method will only get executed if the cache needs to be refreshed.
Whenever you use caching, you need to consider any and all situations that will cause the cache to become stale, out of date. Then you need to write code that sweeps away the old content, so to speak, making room for new content to be cached in its place.
The expire_page and expire_action methods let you explicitly delete content from the cache, so that it is regenerated on the next request. You identify the content to expire using the url_for conventions used elsewhere in Rails. Listing 10.14 shows how we’ve added expiration to the create method of the entries controller.
Notice how line 4 of Listing 10.14 explicitly expires the page associated with the public action. If you think about it, though, it’s not only the create action that invalidates the cache. The update and destroy actions would invalidate it too.
In your applications, particularly if you’re doing REST-style resources, remember that different representations of the same resource are treated like separate requests and cached separately. If you’ve cached the XML response of an action, you’ll have to expire it by appending :format => :xml to the action specification.
Whoops! I almost forgot (seriously) that we also have cached fragments to clear out, using the expire_fragment method. Now the create action looks like this:
def create
  @entry = @user.entries.build(params[:entry])
  if @entry.save
    expire_page :action => 'public'
    expire_fragment(:fragment => 'entries')
    expire_fragment(:fragment => (@user.name + "_stats"))
    redirect_to entries_path(@entry)
  else
    render :action => 'new'
  end
endThere’s actually still (!) a serious problem with the expiration routine that we put in the create action. Remember we said that the fragment caching of entries would work with pagination, and that we’d have cached fragments keyed like this: '/entries/index?page=2&fragment=entries'
As a result, just doing expire_fragment(:fragment => 'entries') will only clear the first page from the cache. For that reason, the expire_fragment method understands regular expressions, and we’ll need to use them in our code:
expire_fragment(r%{entries/.*})There has to be a better way to handle invalidation than remembering to stick a bunch of complicated expiration statements in all your action methods. Besides, caching is a unique concern, which seems to indicate that it should be applied in a more aspect-oriented fashion.
A Sweeper class is kind of like an ActiveRecord Observer object, except that it’s specialized for use in expiring cached content. When you write a sweeper, you tell it which of your models to observe for changes, just as you would with callback classes and observers.
Listing 10.15 is a sweeper to keep the caching of Lil’ Journal’s entries in order.
Example 10.15. An Entries Sweeper for Lil’ Journal
class EntrySweeper < ActionController::Caching::Sweeper
  observe Entry

  def expire_cached_content(entry)
    expire_page :controller => 'entries', :action => 'public'
    expire_fragment(r%{entries/.*})
    expire_fragment(:fragment => (entry.user.name + "_stats"))
  end

  alias_method :after_save, :expire_cached_content
  alias_method :after_destroy, :expire_cached_content

end
Once you have a Sweeper class (put it in your app/models directory), you need to tell your controller to use that sweeper in conjunction with its actions. Here’s the top of the revised entries controller for Lil’ Journal:
class EntriesController < ApplicationController

  before_filter :check_logged_in, :only => [:index]
  caches_page :public
  cache_sweeper :entry_sweeper, :only => [:create, :update, :destroy]

  ...
Like many other controller macros, the cache_sweeper method takes :only and :except options. There’s no need to bother the sweeper for actions that can’t modify the state of the application, so we do indeed include the :only option in our example.
Like the related observers, sweepers are not limited to observing just one model. The main thing to remember if we go down that route is that our callback methods will need to know how to handle all of them. Ruby’s case statement may come in handy, as shown in Listing 10.16, a full revision of the EntrySweeper, which may now observe Comment as well as Entry objects.
Example 10.16. The EntrySweeper Revised to Observe and Handle Both Entries and Comments
class EntrySweeper < ActionController::Caching::Sweeper
  observe Entry, Comment

  def expire_cached_content(record)
    expire_page :controller => 'entries', :action => 'public'
    expire_fragment(r%{entries/.*})

    user = case entry
      when Entry then record.user
      when Comment then record.entry.user
    end

    expire_fragment(:fragment => (user.name + "_stats"))
  end

  alias_method :after_save, :expire_cached_content
  alias_method :after_destroy, :expire_cached_content

endIf you’ve turned on caching during development, you can actually monitor the Rails log for messages about caching and expiration.
Processing Entries#index (for 127.0.0.1 at 2007-07-20 23:07:09) [GET]
 ...
Cached page: /entries.html (0.03949)


Processing Entries#create (for 127.0.0.1 at 2007-07-20 23:10:50)
[POST]
 ...
Expired page: /entries.html (0.00085)
It’s a good way to see whether your caching is actually working as expected.
The Action Cache plugin by Tom Fakes and Scott Laird is a recommended drop-in replacement for the built-in Rails caching facilities. It doesn’t change the Caching API at all, only the underlying implementation.
script/plugin install http://craz8.com/svn/trunk/plugins/action_cache
These are the major features of the Action Cache plugin:
Stores cached entries as YAML streams (instead of just HTML) so that the
Responseheaders from the original response can be returned along with cached content.Adds a
last-modifiedheader to the response so that clients use aget-if-modifiedHTTP request. If the client already has cached content, sends a304 Not Modifiedresponse.Ensures that only requests with a
200 OKstatus are cached. Otherwise, error pages and empty content can get stuck in the cache (and cause difficult-to-diagnose problems.)Allows developers to override Rails with their own implementation of cache key generation.
Allows an action to specify an optional Time To Live value for a response, before cached content associated with the response will be automatically expired.
Allows control over whether caching occurs for an action at runtime based on request parameters. (For instance, never cache content for site administrators.)
A new method,
expire_all_actions, clears out the entire action cache contents.Changes the
expire_actionimplementation to actually use theRegexpfragment expiry call, causing all matching cache items to be cleared. For those of you using REST, and providing HTML, JS, and XML for the same action, all three will be expired when you expire one of them with code like this:expire_action :controller => 'foo', :action => 'bar'
Unlike session data, fragment-cached data can grow to be quite large. Rails gives you four different options for cache storage:
FileStore. Keeps the fragments on disk in thecache_path, which works well for all types of environments and shares the fragments for all the web server processes running off the same application directory.MemoryStore. Keeps the fragments in the memory, and can potentially consume an unacceptable amount of memory per process.DRbStore. Keeps the fragments in the memory of a separate, shared DRb process. This option only keeps one cache around for all processes, but requires that you run and manage a separate DRb process as part of your deployment process.MemCacheStore. Works like DRbStore, but uses a proven cache server namedmemcached. I informally surveyed a bunch of Rails professionals about cache storage, and all of them suggested thatmemcacheis the best option.[3]
The :memory_store option is enabled by default.
ActionController::Base.fragment_cache_store = :memory_store

ActionController::Base.fragment_cache_store = :file_store,
"/path/to/cache/directory"
ActionController::Base.fragment_cache_store = :drb_store,
"druby://localhost:9192"
ActionController::Base.fragment_cache_store = :mem_cache_store,
"localhost"
As long as you’re hosting your Rails application on a single server, setting up caching is fairly straightforward and easy to implement (of course, coding it is a different story).
If you think about the implications of running a cached application on a cluster of distinct physical servers, you might realize that cache invalidation is going to be painful. Unless you set up the file storage to point at a shared filesystem such as NFS or GFS, it won’t work.
If you do choose file-based storage, you probably want to give yourself a way to manually clear your application’s cached content. It’s not difficult to do using Rake. Just add a file to the lib/tasks folder named cache.rake. You’ll be creating a task similar to the one shown in Listing 10.17.
I used entries in the example task, but remember that you may have to add one or more of your own FileUtils.rm_rf statements corresponding to the pages that your application is caching.
As a final note, keep in mind, that it’s common to use the FileUtils.rm_rf brute-force approach in sweepers instead of the expire_* methods, mostly because a lot of times it’s just easier to blow away entire cached directories and let them be rebuilt as needed.
In this chapter, we’ve covered the ActionView framework with a detailed explanation of ERb templating and how the Rails rendering system works. We’ve also covered the use of partials in-depth, since their use is essential for effective Rails programming.
From the relatively simple principles of templating, we jumped into a complicated subject: caching. Knowing how to implement caching will save you the day you work on Rails application that really need to perform. Indeed, developers of high-traffic Rails websites tend to see Rails as a very fancy HTML generation platform, which helps them create content for caching.
Now it’s time to cover the mechanism whereby you can inject a whole bunch of smarts into your view layer without cluttering up your templates: Helpers.
| 1. | In his great screencast on the subject, Geoffrey Grosenback suggests adding another environment mode to your project named |
| 2. | Subversion URL: http://obiefernandez.com/svn/projects/awruby/prorails/lil_journal. |
| 3. | If you go the memcache route, definitely consider using Err the Blog’s CacheFu plugin, available at http://require.errtheblog.com/plugins/browser/cache_fu. |