
It’s not that Rails encourages you to do test-driven development, it’s that it makes it difficult for you to not do test-driven development. | ||
| --Brian Eng, interviewed on the Rails podcast | ||
Automated tests allow us to verify the functionality of our application, prevent regression (introduction of new and previously fixed bugs), and help us to keep our code flexible. Test coverage refers to the quality and number of automated tests that we have in relation to production code. When our test coverage is deficient, there is no proof that the system works as intended. We could change something that breaks the application, and not notice the failure until much time has passed, when it will be much more difficult to diagnose and to fix.
The importance of testing your Ruby code cannot be overstated. Without a compiler, there is no way of knowing that the code you’ve written is even free of syntax errors! You must assume that your code is broken until you put it through its paces. Do you want that to happen on your development machine, under your control, where you can diagnose problems? Or would you rather find out about errors when your deployed application bombs the server and aggravates your bosses, colleagues, and end users? It’s a serious issue.
David and everyone on the Rails core team are all true believers in high-quality automated testing and they lead the community by example: Rails itself has an extraordinary amount of test coverage. Patches, even for small fixes, are not accepted unless they are accompanied by working test cases. From the beginning, testing has been an integral and essential part of the Rails way, which sets Rails apart from the majority of other frameworks out there.
When you make a habit of driving your development with testing, you end up clarifying and elaborating your project requirements up front, instead of after your work has been through the QA department a few times. So the act of developing tests during coding is essentially a kind of specification activity. RSpec is a Ruby library that takes the concept of driving development with specifications literally, and you can use it with Rails instead of testing. Unfortunately, RSpec is not yet a mainstream choice for Rails developers, and since this chapter’s title is “Testing,” we’ll hold off talking about RSpec until Chapter 18, “RSpec on Rails.”
Realistically, the topics included in this chapter could fill a (large) book of their own. It’s been a real challenge to organize the material in such a way that it makes sense for the majority of readers. It’s also been really difficult to decide on the appropriate level of detail to include.
Since The Rails Way is primarily a reference work, I’ve tried to not to go off on too many philosophical tangents related to testing, and limit the discussion to the following topics:
Rails testing terminology
A review of
Test::Unit, Ruby’s unit-testing framework and how it relates to RailsFixtures, for managing testing data and analysis of why everyone hates them
Unit, functional, and integration testing with
Test::UnitRake tasks related to testing
Acceptance testing and Selenium
Before we go any further, I need to clarify something that tends to be very confusing to Rails newcomers who are familiar with unit-testing orthodoxy. The standard directories of your application’s test folder are shown in Figure 17.1.
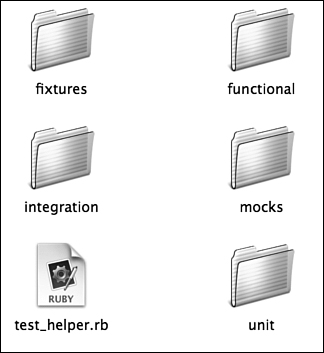
The terms fixtures, functional, integration, mocks, and unit all have their own special meanings in Rails, which are either slightly different or completely divergent from commonly accepted definitions in the greater world of software engineering. The resulting cognitive dissonance makes Rails testing one of my least favorite aspects of the overall framework.
Both unit and functional tests in Rails use the Fixtures API, which interacts with the database. In fact, it takes quite a bit of hacking to make unit tests in Rails not involve the database. Given that normal Rails tests never test isolated units of Ruby code, they can’t possibly be (true) unit tests; they must all be functional tests, by traditional definitions of the term. Wait a minute—if they’re all functional tests, why is there a unit folder? Ah, you see the conflict.
I’m afraid there isn’t a particularly good defense of the chosen nomenclature. Tests that live in the unit folder are in fact functional tests of models that happen to be oriented toward testing of individual methods, in the traditional unit-test way. Tests that live in the functional folder are indeed functional tests of controllers that happen to be oriented toward testing of individual controller actions. We give both types full sections in this chapter.
The mocks folder is treated specially during test runs. Classes in it are loaded last, meaning that they can override behavior of other classes in your system. That ability is particularly useful when you depend on classes that do things that shouldn’t be done during a test run, such as
Interaction with external systems, such as payment gateways, geocoders, or other web services
Execution of forked or long-running processes
Alteration of the state of the system in an unrecoverable way
Using Ruby’s open classes, you can write your own mock versions of methods that you don’t want to actually execute during your test run. For instance, assume that you have code that submits transactions for processing via a PaymentGateway class. Your production code invokes the process method. Unless you mock it out, whenever you run a test, a transaction will be sent to the actual payment gateway, which is probably bad.
However, you can solve that problem if you monkeypatch[1] PaymentGateway with your own implementation of process, which does not actually talk to the real payment gateway. You could add a class like the following to your mocks directory.
class PaymentGateway
  def process(transaction)
    # In ur gateway, mocking ur transactions!
  end
end
The concept is somewhat reminiscent of traditional test mocking, yet has nothing to do with it. (It’s actually a form of stubbing—you are stubbing out the real functionality of the class.) Now, if you were doing a mock payment gateway this way for real, you would probably give it some state, to be able to check later that process was actually called.
class PaymentGateway
  attr :processed_transaction

  def process(transaction)
    # In ur gateway, mocking your transactions!
    @processed_transaction = transaction
  end
end
You see, if you didn’t check to see if process was called, you would never know if your code is working correctly. I’m not going to go any further with this example, or with coverage of Rails mocks in this sense. As far as I’m concerned, you should delete the mocks directory. Nobody uses it. In fact, many of us consider this feature of Rails an abomination that should have never seen the light of day.[2]
The Mocha library[3] should be your choice for adding mocking to your Rails tests. It’s actually included inside Rails as a dependency of Rails’ own test suite. However, Mocha is a RubyGem, and you should get a copy of the latest version for yourself using the usual gem install magic:
sudo gem install mocha
Mocha provides a unified, simple, and readable syntax for both traditional mocking and for mocking with real objects. A traditional mock is an object that you can script with expectations about which of its methods will be called during a test. If those expectations are not met, the mock object causes the test to fail.
Mocha also gives you the ability to do stubbing, which is the act of overriding existing methods to return known values. It even lets you mock and stub methods on real (non-mock) classes and instances. For example, you can stub ActiveRecord instance methods like find or association accessors and reduce dependence on complicated fixture setups.
For example, here’s a real example of using Mocha to mock behavior that we really don’t want to actually trigger during a test run—that of the Google Geocoder service. Not only would it be slow, but we would never be able to run this test successfully unless we were online:
class SearchControllerTest < Test::Unit::TestCase

  def test_should_geolocate_zip_codes_to_return_cities_result
    res = mock('response')
    res.stubs(:lat => 40, :lng => 50)
    GoogleGeocoder.expects(:geocode).with('07601').returns(res)

    place = mock('place')
    Place.expects(:new).with(:lat => 40, :lng => 50).returns(place)

    hackensack = mock('city')
    City.expects(:near).with(place, 10.miles).returns([hackensack])
    post :index, :text => '07601'

    assert_include hackensack, assigns(:places)
  end
end
In case it isn’t obvious, this test checks to make sure that the search controller invokes the geolocation service to help it find cities near a supplied zip code.
The mock method creates a new mock response object. The actual type of the object doesn’t matter, thanks to duck typing. The stubs method tells the mock which methods should simply return specified values if invoked, using a nice hash syntax.
I’ll stop talking about Mocha now, so we don’t get totally derailed from the overall subject of the chapter, which is, of course, testing. However, throughout the chapter I’ve included some examples on how using Mocha makes your Rails testing tasks easier.
Rails integration tests were introduced in Rails 1.1 and are probably closest to the actual meaning of their name in the software engineering world. They engage the entire stack of Rails components and allow you to chain together multiple requests to test large-scale interactions of application code.
class AdvancedTest < ActionController::IntegrationTest
  fixtures :people, :forums

  def test_login_and_create_forum
    login_as :admin
    get '/forums'
    assert_response :success

    post '/forums', :forum => {:name => 'a new forum'}
    assert_response :redirect
    follow_redirect!

    assert_select 'div#topics div.title:last-of-type', 'a new forum'
  end
end
Integration tests are kind of like functional tests on steroids. You won’t need too many of them in your projects, and you won’t want too many of them either because they’re slow. However, they will prove their worth in helping you flush out hard-to-find interaction bugs. There’s a whole section on integration tests later in the chapter (“Rails Integration Tests”).
Is Rails testing nomenclature confusing? Yes, clearly. Is it going to be fixed anytime soon? Nope.[4]
Are there options? Of course! It wouldn’t be Ruby otherwise. However, I warn you that going down these roads means leaving the Rails way, and your mileage may vary.
Here’s a quick rundown of your options as I see them:
My favorite option: scrap Rails testing altogether and use RSpec instead. (Make sure to take a quick look at the section about fixtures and integration tests in this chapter, then skip over to the next chapter.”)
Rename your test directories to
models,controllers,views, and so on. The resulting changes to Rake tasks are left as an exercise to the reader.Prohibit database access from unit tests, using advice from Jay Fields at http://blog.jayfields.com/2006/06/ruby-on-rails-unit-tests.html.
The one option that you should never take is to ditch testing altogether. Delivering Rails applications without automated test coverage is irresponsible and unprofessional.
All standard tests in Rails extend Ruby’s built-in testing framework called Test::Unit, which is considered part of the xUnit family. Similar frameworks exist for all other major programming languages. If you’ve used Java’s JUnit or .NET’s NUnit before, you should be familiar with the major concepts involved. If not, the following review of xUnit concepts may prove valuable.
A test case is made by subclassing the Test::Unit::TestCase and populating it with a collection of test methods that stress some aspect of your application. This is what a test case looks like in Rails:
require File.dirname(__FILE__) + '/../test_helper'

class UserTest < Test::Unit::TestCase

  fixtures :models

  def setup
    # code to be run before all test methods
  end

  def test_some_bit_of_functionality
    # logic and assertions
  end

  def teardown
    # code to be run after all test methods
  end
end
A test is a single public method of a test case, whose name begins with the prefix test_ and whose body contains code that proves the correct operation of some small part of your program. Test method names should be descriptive and describe the intention of the test in an explicit manner. A long name such as test_only_authorized_user_may_be_associated_as_approver is great, but a short name such as test_works is considered bad form. It should be easy to read the test and quickly figure out what the code under test is supposed to do. To that end, keep test methods bodies short and to the point.
An assertion is the comparison of an expected value with the result of an expression. For example, in a test you may set an attribute on a model in a way that should fail validation, and then use an assert statement to ensure that the error message produced is what it should be.
A setup method runs before each and every test method. A teardown runs after each method. Setup methods are very common in Rails tests, while teardown methods are not.
A successful test is one that executes without assertion failures or exceptions raised. Tests have two unsuccessful modes, failure and error. A test failure means that an assertion failed, while a test error means that an exception or runtime error halted execution of the test.
Sometimes we call a successful test run a green bar and a failing test run a red bar. That’s based on the traditional behavior of unit-testing GUIs. When you run tests from the command prompt, you see a series of dots appear, signaling the execution of the individual test methods being run. The characters F and E in the series of dots indicate failure and error status, respectively.
Test suites are collections of test cases, and in other languages they are often defined by the developer. Standard Rails projects do not have the notion of developer-defined test suites. Instead, collections of tests are kept in three subdirectories of the test folder: functional, integration, and unit and are executed with rake tasks.
Because of the way that Test::Unit classes work, simply executing a test file from the command line with the Ruby interpreter will run all of its test methods. It is also possible to run a single test method, by supplying its name with an -n command-line option:
$ ruby test/unit/timesheet_test.rb -n
  test_only_authorized_user_may_be_associated_as_approver

Loaded suite test/unit/timesheet_test
Started
.
Finished in 1.093507 seconds.

1 tests, 2 assertions, 0 failures, 0 errors
Most of the time, we run the entire test suite for our application by simply typing rake test at the command prompt in our project directory. Even just rake will do, since test is the default task. Later on in the chapter we cover all of the test-related Rake tasks.
The ability to get a named reference to a particular chunk of a known object graph is completely killer. | ||
| --Michael Koziarski, Rails core team | ||
In manufacturing, fixtures are used to build and test everything from circuit boards, to electronic devices, to raw materials and finished goods. As specifically applied to software engineering, fixtures are a mechanism for defining the baseline state of a system prior to running tests on it.
Whenever you use Rails code generation, default fixture files for new models are created inside the test/fixtures directory of your project and have contents that look like Listing 17.1.
The file has a .yml extension, indicating that it is a YAML (Yet Another Markup Language) file.[5] YAML is primarily a data serialization language and has no direct relationship to XML. Its indentation-based scoping is reminiscent of Python.
Example 17.1. A Simple YAML Fixture File Example: test/fixtures/users.yml
quentin:
  id: 1
  email: [email protected]
  created_at: <%= 6.months.ago.to_s(:db) %>
newbie:
  id: 2
  email: [email protected]
  crypted_password: <%= Digest::SHA1.hexdigest("password") %>
  created_at: <%= 1.minute.ago.to_s(:db) %>
The indentation of fields in your fixture must be consistent, or the YAML parser will balk. Also, the indentation must not contain any tab characters. According to the YAML spec, the amount of indentation is a presentation detail used exclusively to delineate structure and is otherwise ignored. My advice is to stick with the two-space indentation scheme common to the Ruby world.[6]
Take another look at the fixture in Listing 17.1. The file contains the contents of the users database table, as it should exist in your test database when you run your test. In case it’s not immediately obvious, the mapping from fixture file to database table is based on the name of the file.
Fixtures are essentially two-dimensional serialized hashes. In our sample, the tag quentin: is the key (name) that is used to uniquely identify the hash of properties corresponding to the first record of our test users database table. Make it a goal to name your fixture records in an informative and semantically meaningful way whenever possible. You use the key to be able to quickly get a reference to a fixture object in your test, without having to load it via ActiveRecord.
The second-level keys (:id, :email, :created_at, etc.) must correspond to column names in the user table. As you can see in the example, it is not necessary to add keys for every column of the mapped table; in fact you should make it a practice to add only the minimum amount of data that you need for your testing purposes. The :id field is always needed, and often you’ll run into problems by messing up the sequence of ids in a way that your database will get quite upset about. We’ll cover a technique to avoid that hassle when we talk about dynamic fixture data later on in this section.
Fixtures can also be formatted as comma-separated values (known as CSV). In case you haven’t heard of it, CSV is an old, portable text file format that is best-known nowadays as the best way to get data in and out of Microsoft Excel in a cross-platform-compatible fashion.
Here’s the same (yet much harder to read) fixture as before, but formatted as CSV:
id, email, crypted_password, created_at
1, [email protected], , <%= 6.months.ago.to_s(:db) %>
2, [email protected], <%= Digest::SHA1.hexdigest("password") %>,
<%= 1.minute.ago.to_s(:db) %>
Ugh, that’s ugly. Depending on the nature of your sample data, managing it with a spreadsheet tool like Excel might make sense. However, YAML is by far a more popular choice, because it’s much more readable, and easier to edit by hand.
The fact that records in a YAML fixture file are keyed with meaningful names is another factor that makes YAML a better choice. To access a record from your fixture file, you need to specify use of the fixture in the class context of your test. Then from inside methods you invoke a method with the same name as your fixture file and pass the name of the fixture record as its parameter, for example: users(:quentin) or timesheets(:first). It’s a quick and easy way to access your sample data, and the fact that you can choose the names means that you can give them rich semantic meaning.
fixtures :users

def test_can_access_quentin_fixture
  assert(users(:quentin) != nil)
end
On the other hand, names for records in CSV fixtures are automatically generated, created by deriving the class name of the fixture file and adding an incrementing number to the end. In our example, the first fixture would be called :user_1 and the next would be called :user_2, and so on. There’s no semantic meaning in those names, other than knowing that we’re dealing with a user instance.
Before loading the records of a fixture into the test database, Rails runs its textual content through the ERb template parser. It means you can embed actual Ruby code in your fixture files using <% %> and <%= %> markup, just as you do in your view templates. That dynamic behavior can be leveraged to really streamline the work involved in using fixtures effectively.
The preceding examples have dynamic content. <%= Digest::SHA1.hexdigest ("password") %> saves us from having to actually do the encryption ourselves and manually copy in an unreadable and error-prone string like 00742970dc9e6319f8019fd54864d3ea740f04b1.
Another example is how the date values are populated, by letting Rails take care of formatting the dates the way the database expects them: <%= 5.days.ago.to_s(:db) %>
Use of dynamic content in fixtures is not limited to conversion and formatting of values, though. You can also use looping constructs to create lots of fixture data easily. The example given in the Rails documentation demonstrates the basic technique:
<% for i in 1..1000 %>
fix_<%= i %>:
  id: <%= i %>
  name: guy_<%= 1 %>
<% end %>
Don’t forget that you can put any valid Ruby inside those ERb tags, which includes defining new helper methods and including modules.
One of my biggest annoyances with fixture files used to be having to manually maintain the id numbers in proper sequence. Then I realized I can just add an auto_increment method to the fixture file (I shortened the fixture records themselves for brevity):
<%
  def auto_increment
    @id ||= 0; @id += 1
  end
%>
quentin:
  id: <%= auto_increment %>
  login: quentin
aaron:
  id: <%= auto_increment %>
  login: aaron
If you want to make methods such as auto_increment in the preceding example available to all of your fixture files, define them in a Ruby file called fixture_helpers.rb. Place it in your project’s /lib directory, and make sure they’re available by adding the line require 'fixture_helpers' at the top of test/test_helper.rb.
After spending much time carefully crafting sample data for testing an application, it’s not unusual to want to dump your fixture records into the development database so that you can use that sample data interactively via your browser or console.
The default Rails rake configuration includes a target that does exactly that. Invoke rake db:fixtures:load from the command line to import fixture records into the current environment. That rake target lets you pick a subset of fixtures to load, by adding the variable expression FIXTURE=table1,table2 at the end of the command line.
By the same token, if your application has complicated relationships or you’re just too lazy[7] to manually craft your fixture files, you might be inclined to automatically generate your fixture files from data in the development database. Assuming you have a working application already, you would be able to just point and click your way to sample data. All you need is a way to get data out of the database and into the right YAML format.
For whatever reason, dumping data to fixtures is not a part of core Rails.[8] Considering that Rails gives you a to_yaml method on ActiveRecord models and Hash objects, it wouldn’t be too hard to write your own Rake task. However, it’s not necessary to do so because of a well-proven plugin written by Geoff Grosenbach. It’s called ar_fixtures and you can install it with the following command:
$ script/plugin install http://topfunky.net/svn/plugins/ar_fixtures
Once the plugin is installed, dumping a fixture is a simple matter of invoking a new rake task called rake db:fixtures:dump. Unlike the built-in loading rake task, this one takes a MODEL parameter with the name of the ActiveRecord class that you want to dump data for:
$ rake db:fixtures:dump MODEL=BillingCode
No feedback is provided, so check the fixtures file to verify what happened:
--
billing_code_00001:
  code: TRAVEL
  client_id:
  id: 1
  description: Travel expenses of all sorts
billing_code_00002:
  code: DEVELOPMENT
  client_id:
  id: 2
  description: Coding, etc.
Frankly, I’m not too thrilled about the way that the data is dumped with this plugin, but it’s only because I’m picky about wanting my id column to appear first, and things like that. I also don’t like to have entries for nil columns. Nevertheless, this plugin might be a good starting point for your purposes.
By the way, you don’t need to worry about the -- characters at the top of the file. They just indicate the beginning of a YAML document and can be safely deleted.
The use_transactional_fixtures option, present along with explanatory documentation in the standard test/test_helper.rb file of your project, governs whether Rails will try to accelerate your tests by wrapping each test method in a transaction that’s rolled back on completion. The rollback speeds up execution of the test suite, since the fixture data doesn’t have to be reloaded into the database for each test. The default setting for this option is true.
Using transactional fixtures is important for more than just performance. Rolling back changes after each test method ensures that you don’t write test methods that are coupled to each other by depending on database changes that happened outside of their scope. Interlinked test methods are notoriously difficult to debug and a horrible practice to fall into.
The use_instantiated_fixtures setting, which is set by default to false, is another option present in the standard test_helper.rb file. Turning on this setting will make instance variables available automatically for each fixture record, at the cost of severely degraded performance of your tests. It dates back to the earliest versions of Rails, and as far as I can tell, has really fallen out of favor.
During Railsconf 2006, one of the speakers asked, “Who in the audience likes fixtures?”
I was standing in the back of the room, mind wandering a bit, and I’m the type of person who doesn’t hesitate to raise his hand in public situations. As such, I found myself in the awkward position of being one of the only people to answer affirmatively.
Why do so many experienced Rails people hate fixtures? There are various answers to that question—all of them multifaceted. Here are my interpretations of the most popular reasons to hate fixtures, followed by my own feelings on the Rails way to use fixtures.
This one is true. Fixtures engage the database layer, and will make large test suites bog down in a thick soup of frenzied I/O activity. Leave fixtures out of the equation and it’s not uncommon to have test suites with thousands of test cases that take only a few seconds to execute. This reason is popular with the unit-testing “purist” crowd.
As a general rule, don’t include fixtures that you don’t need in your tests. If you can manage testing using objects created “from scratch” or using only mocks and stubs with a library such as Mocha, then it’s even better.
If you’re the sort of person who stresses the importance of valid data in the database, you probably think fixtures are downright evil. Why? Because there is no validation that takes place when data from fixtures gets shoved into the database. Rails doesn’t care whether you define a single column’s data on a fixture object, or all of them. It will happily populate a row in the database with any data you give it. Pretty much the only requirement is that the column type is compatible with what you’re trying to stick in it. That’s pure evil.
The thing is, if you feel that strongly about not having invalid data in your database, don’t write fixtures with invalid data. Problem solved.
On a related note, if this reason for hating fixtures strikes a chord with you, you might believe in using database foreign-key constraints. Fixtures don’t work well with foreign-key constraints, since it’s difficult to consistently define the order in which they are loaded into the database.
This reason is one of the more globally applicable ones. If you try to keep a lot of data in fixtures, you will eventually start having problems keeping it all properly maintained. It’s just too difficult to manage large datasets in the fixtures format... that’s why we keep data in databases!
It’s also difficult to maintain foreign-key relationships between objects stored in fixtures. Most of our brains are just not very good at remembering relationships based on nothing but small integers.
In all my time doing Rails, I haven’t found any good reasons to keep more than a few representative instances of model objects in fixture files. Go beyond a few at your own peril.
Yet another good reason to hate fixtures is that they are brittle. Brittleness is a term that denotes your code’s resistance to changes (or lack thereof). If any little change in your fixtures breaks a bunch of tests, they are brittle. If you have too many brittle tests, you will stop testing altogether, and when you die you will definitely go to hell. You see, fixtures are evil!
Seriously, there are some good strategies for keeping fixtures unbrittle. I’ll reiterate my advice to keep your set of fixtures down to a manageable size. That will reduce the pain of having to make changes. There are also plugins available that let you define discrete sets of fixtures,[9] representing different testing scenarios, instead of having to cram all possibilities into one global set.
Also, the fixtures_references plugin[10] gives you another interesting solution to the brittleness problem, by allowing you to reference fixtures from within fixtures. Yes, that’s right, you won’t have to cross-reference foreign keys by memory any more if you use this plugin. Just reference the related fixture record using the same syntax you would use in your test:
<% fixtures :employees %>

packaging:
  id: 1
  name: Packaging
  manager_id: <%= employees(:bob)['id'] %>
I’ve proven to myself on my projects that when you use a mocking framework like Mocha, you can cut your usage of fixtures down to where they aren’t nearly as painful as we’ve described in the preceding section.
Sometimes you can get away with using no fixtures at all, and that’s great. Other times, they’re convenient. The key, I believe, is to keep the number of fixtures you have to maintain down to a handful of representative cases, and stub them together as needed.
Incidentally, there are situations where fixtures are downright crucial (unless you want to create a bunch of model objects from scratch and save them to the database inside your test, which I hate doing). The one situation that comes to mind immediately is testing usages of find_by_sql in your model. Since you’re writing SQL, you definitely want to run that against a real database and make sure that it works. There’s no way of unit-testing it purely unless you parse the SQL yourself!
The bottom line: You don’t need to hate fixtures; just try to be smart about how you use them.
Assertion methods are the mechanism with which you actually perform verification in your test methods. Assertion methods always take an optional (last) parameter specifying a failure message. Use failure messages as insurance against confusion when someone (perhaps even you) is trying to figure out a test failure in the future.
The Test::Unit::Assertions module (part of Ruby itself) gives you a variety of basic assertion methods that you can use in all of your Rails tests. To preserve space, the following list combines assertions with not variants under the same heading. I also left out a couple that are not relevant for Rails programming.
If assertions were hand tools, assert and deny would be sledgehammers—blunt, to the point, and not much use in detail-oriented work. Give assert or deny basic Boolean expressions and they’re happy. More than any other assertions, plain-old assert and deny deserve explicit failure messages. Otherwise you get frustrating results like “false should be true.”
assert @user.valid?, "user was not valid"


deny @user.valid?, "user was valid"
If you use assert, by all means make sure you are passing it a Boolean value. Remember that nil is considered false in a Boolean context. If you are purposely checking whether an expression evaluates to nil or not, then use assert_nil or assert_not_nil to communicate your intention.
Check that the final return value of a block of Ruby code is true.
assert_block "Failed because couldn't do the thing" do
  # do some processing required to do_the_thing
  do_the_thing
end
Takes two parameters to check for equality (or not), using the equal? method. The first parameter is the reference value. The second is the expression to check.
assert_equal "passed", @status
Checks that a float value is within a certain tolerance. The Ruby docs say that assert in_epsilon is “like assert_in_delta but better dealing with errors proportional to the sizes of [the parameters].”
assert_in_delta(expected, actual, 0.01, message="exceeded tolerance")
Checks that an object is an instance of a class (not module). The of part of the name should help you remember that the class is the first parameter.
assert_instance_of Time, @timestamp
Checks that an object is a kind_of? class or module. Again, the of part of the name indicates that the class or module to check comes first.
assert_instance_of Enumerable, @my_collection
Checks that a regular expression matches a given value (or not). The regular expression comes first.
assert_match /d{5}(-d{4})?/, "78430-9594"Checks that a reference is nil (or not).
assert_not_nil User.find(:first)
Checks that two references point to the same object (or not).
assert_same "foo".intern, "foo".intern
Checks that exceptions are raised in the block provided (or not). I love the example given in the Ruby docs.
assert_raise RuntimeError, LoadError do
  raise 'Boom!!!'
end
Checks that an object respond_to? a given message. The object comes first, followed by the message.
assert_respond_to @playlist, :shuffle
Fails the test with the supplied message.
flunk "REDO FROM START"
It’s easy to make the mistake of using fail (belonging to the Kernel class, and therefore available everywhere) instead of flunk. The fail method causes a runtime error to be raised, which will stop your test, but with an error condition instead of a failure.
Rails adds a number of assertions that supplement the ones provided by Test::Unit.
assert_differenceandassert_no_differenceassert_generates,assert_recognizes, andassert_routingassert_responseandassert_redirected_toassert_tag(deprecated) andassert_selectassert_templateassert_valid
The only ones in the list that are general purpose are assert_difference and assert_no_difference. All are covered in the following sections, with code examples and as they apply to testing specific parts of Rails.
I’d rather know the first time I run the suite that 10 things are failing, not that 5 are failing and a few others may or may not be failing. | ||
| --Jay Fields | ||
I like to make my tests as elegant and expressive as possible. The idea of limiting each test method to one assertion is usually attributed to TDD guru Dave Astels, and has been popularized in the Rails community by Jay Fields[11] and others.
If you are following the one-assertion guideline, then rather than a single test method that looks like this...
def test_email_address_validation
  u = users(:sam)
  u.email = "sam"
  assert ! u.valid?
  u.email = "[email protected]"
  assert u.valid?
  u.email = "[email protected]"
  assert u.valid?
  u.email = "[email protected]"
  assert u.valid?
  u.email = "sam@@colgate.com"
  assert ! u.valid?
end
you would have instead written at least five test methods, each with a better description of the behavior being tested. For convenience, I would also move the assignment of a short variable for users(:sam) up to a setup method:
def setup
  @sam = users(:sam)
end

def test_email_validation_fails_with_simple_string_name
  @sam.email = "sam"
  assert not @sam.valid?  # prefer not over ! for readability
end

def
test_email_validation_should_succeed_for_valid_email_containing_dot
  @sam.email = "[email protected]"
  assert @sam.valid?
end

... # you get the picture, I hope
The main advantage to following the guideline is to increase maintainability of your tests, but there are also other important benefits, such as
You are forced to spell out the meaning of your tests in the test name, which is output to the test results on failure. Otherwise, the intention of the assertion would be hidden in a comment, or not present in the test at all.
You get a more accurate picture of how broken a test is. When there are multiple (potentially unrelated) assertions in a single test method, all it takes is for the first assertion to break and the rest will not get executed.
Jay also claims that following the one-assertion guideline helps him think more critically about the design of his domain model: “Often the methods of my domain model end up with a single responsibility.”
Let’s talk some more about testing the domain model of your Rails app, its ActiveRecord models.
As we’ve mentioned earlier in the chapter, a Rails unit test is actually a functional test of an ActiveRecord model. It’s not necessary to test the operation of built-in methods such as find, since those are adequately covered by the tests supplied with Rails itself.
For example, the following test might be instructional in some way, but is altogether useless for your Rails project:
def test_find
  @user = User.create(:name => "John Foster")
  assert_equal @user, User.find_by_name("John Foster")
end
Why is it useless? It tests native functionality of Rails, which already has adequate test coverage. Unless you hand-coded a find_by_name method, you haven’t proven anything about your code, only that Rails behaves as expected.
It’s worth mentioning that besides instance methods, our ActiveRecord models are also filled with declarative macro-style code at the top of their files. It’s easy to mess up that code, so make sure to give them some test coverage too.
Whenever you use a generator to create an ActiveRecord model, Rails automatically creates a skeleton unit test in the test/unit directory of your project. It looks something like this:
require File.dirname(__FILE__) + '/../test_helper'

class BillableWeekTest < Test::Unit::TestCase
  fixtures :billable_weeks

  # Replace this with your real tests.
  def test_truth
    assert true
  end
endTraditionally, a unit test limits itself to testing one public method of an object and nothing more.[12] When we’re testing an ActiveRecord model in Rails, we usually include multiple test methods for each public method, to make sure that we verify behavior thoroughly.
Listing 17.2 contains a couple of test methods from the TimesheetTest of our recurring sample application.
Example 17.2. The Timesheet Model Test from the Time & Expenses Sample App
 1 class TimesheetTest < Test::Unit::TestCase
 2
 3   fixtures :users
 4
 5   def test_authorized_user_may_be_associated_as_approver
 6     sheet = Timesheet.create
 7     sheet.approver = users(:approver)
 8     assert sheet.save
 9   end
10
11   def test_non_authorized_user_cannot_be_associated_as_approver
12      sheet = Timesheet.create
13      begin
14        sheet.approver = users(:joe)
15        flunk "approver assignment should have failed"
16      rescue UnauthorizedApproverException
17        # expected
18      end
29    end
20  end
As we covered earlier in the chapter, we can leverage the fixtures system to have objects ready for testing. (Line 3 invokes fixtures :users.) You can use as many fixtures as necessary, and the names are always plural. I didn’t load the timesheet fixtures because I don’t need them. A basic, newly created Timesheet instance suits my needs just fine (lines 6 and 12).
If I wanted to use even more idiomatic Ruby in this test example, I would probably refactor lines 13–18 to use assert_raises.
The implementation that determines whether a user is an authorized approver or not is hidden from view in this test. That may or may not be a bad thing in your case. I’m of the opinion that it’s a good thing. This is after all a timesheet test, not a user or authorization test. All I wanted to verify when I wrote this test case was that one assignment succeeded, and the other didn’t. The logic for authorization is not relevant in this test case.
Whenever you use a generator to create an ActiveRecord controller, Rails automatically creates a functional test for it. Functional tests let you verify that your controllers exhibit the correct behavior in handling requests that come their way. Since the functional test subsystem also invokes the view code for the actions invoked, functional tests can include assertions on the content of the response.
Functional tests follow certain conventions, which most new Rails developers are introduced to when they first open up a scaffolding-generated functional test. Let’s use a functional test from an open-source bulletin board package for Rails named Beast for our main examples.[13]
The top line is similar to a unit test in that it requires the common test_helper file. Next, the controller under test is required:
require File.dirname(__FILE__) + '/../test_helper'
Normally, any errors raised during controller execution are rescued so that the appropriate error page can be displayed to the user. But during testing, you want those errors to rise all the way to the top where the test framework can register that they happened. In a great example of how useful open classes are in Ruby, the solution for our functional tests is simply to override the rescue_action method of ActionController.
require 'forums_controller'
# Re-raise errors caught by the controller.
class ForumsController; def rescue_action raise e end; end
Semicolons, which are optional line delimiters in Ruby, are used to keep the line length of the file minimal.
Next up is the opening of the functional test class itself, which by naming convention, starts with the name of the controller it is testing. If the test uses fixtures, they are usually specified on the following line:
class ForumsControllerTest < Test::Unit::TestCase
  fixtures :forums, :posts, :users
Functional tests always have a setup method like the following one. It sets three required instance variables for the test, and will be run prior to each test method invocation:
def setup
  @controller = ForumsController.new
  @request    = ActionController::TestRequest.new
  @response   = ActionController::TestResponse.new
end
You can use the @request and @response objects, but additional convenience accessors for session, flash, and cookies are also provided. You can access those structures at any time in your test method, whether to set values to them or make assertions about how their state changed due to the controller action execution.
Normally, you should have at least a couple of test methods per controller action, to verify handling of happy path and error conditions. The general workflow of a functional test method is to put any necessary preconditions into place, and then call a method on the test itself (such as GET, POST, PUT, DELETE, or HEAD) corresponding to the HTTP request desired. An xhr method is also provided, which lets you simulate an XMLHttpRequest interaction, as would occur if the browser made an Ajax request.
The first parameter to the request method is a symbol corresponding to the name of the action method to be tested, followed by a hash of parameters.
The following example tests that a GET request to /forums/edit/1 is successful.
def test_should_get_edit_form
  login_as :aaron
  get :edit, :id => 1
  assert_response :success
end
The following sorts of assertions are the most common for functional tests. You may come up with your own, but remember that controllers shouldn’t be doing much more than invoking business logic on your models, and setting up an environment for the view to render properly.
One of the main behaviors of controller actions that render a template is the setting of instance variables to be used in the view. There are a variety of different ways to make assertions of that type, but all revolve around the fact that after invoking the controller action, the assigns method returns a hash of instance variables set for the template.
The scaffolding code has gotten a lot of people in the habit of asserting that assigned variables are not nil. That’s not as safe as actually making assertions about the contents of those assigned variables.
def test_that_users_are_assigned_properly

  # lame assertion
  assert_not_nil assigns(:users)

  # getting better
  assert_equal 3, assigns(:users).size

  # best, check the contents of users but get a sane error on failure
  assert_equal %w(Bobby Sammy Jonathan), assigns(:users).map(&:login)

end
As alluded to in the final comment and assertion, we’ll get a “sane error on failure” by doing a little magic with the map method, in order to check an array of names instead of an array of objects. The thing is, when assert_equal fails, the output will be an inspect dump of the objects that didn’t match, which for a big ActiveRecord model can be a big multiline jumble of code that isn’t very readable.
The assert_response method of functional tests is a convenience method that asserts that the response is one of the following types:
:success. Status code was 200.:redirect. Status code was in the 300–399 range.:missing. Status code was 404.:error. Status code was in the 500–599 range.
def test_should_get_index_successfully
  get :index
  assert_response :success
end
You can also pass an explicit status number like assert_response(501) or its symbolic equivalent[14]assert_response(:not_implemented).
The @response object is packed with information. (Just try adding puts @response.inspect after processing a request if you want a look.) Among the attributes of a response is the headers hash, which can be used to verify things like MIME content type and character encoding.
XML_UTF8 = "application/xml; charset=utf-8"

def test_should_get_index_with_xml
  request.env['Content-Type'] = 'application/xml'
  get :index, :format => 'xml'
  assert_response :success
  assert_equal XML_UTF8, @response.headers['Content-Type']
end
The assert_template method makes it simple to test whether a particular template was rendered by the action under test:
def test_get_index_should_render_index_template
  get :index
  assert_template 'index'
end
By the same token, the assert_redirected_to method makes it easy to verify that the redirection options passed in match those of the redirect called in the latest action. This match can be partial, such that assert_redirected_to(:controller => "weblog") will also match the redirection of redirect_to(:controller => "weblog", :action => "show") and so on.
def test_accessing_protected_content_redirects_to_login
  get :protected
  assert_redirected_to :controller => "session", :action => "new"
end
The follow_redirect method is supposed to allow you to continue making assertions for a second action on the same controller.[15] Trying to follow a redirect to another controller will raise an error. See the section “Rails Integration Tests” later in this chapter to learn more about making more than one request per test method.
The flash convenience method gives you direct access to the flash hash of the user’s session.
def test_accessing_protected_content_redirects_to_login
  post :create ... # bad attributes

  assert_equal "Problem saving. Check form and try again.",
flash[:error]
end
The assert_difference method provides an easy way to check controller actions that cause records to be added to the database.
assert_difference 'Article.count' do
  post :create, :article => {...}
end
Positive or negative differences can be specified. The default is +1, but if we specify -1 then we have an easy way of testing delete operations.
assert_difference 'Article.count', -1 do
  delete :destroy, :id => ...
end
An array of expressions can also be passed in and evaluated.
assert_difference [ Report.count', 'AuditLog.entries.size' ], +2 do
  post :create, :article => {...}
end
By the way, that +2 is legal (albeit somewhat rare) Ruby syntax. While it happens to be unnecessary in this usage, it does convey the idea of this assertion quite eloquently. Make readability of your code an important goal of your day-to-day coding activities, especially in tests.
If you want to make sure that records were not added or removed from the database, you can use the assert_no_difference method:
assert_no_difference 'Article.count' do
  post :create, :article => {...}  # invalid_attributes
endThe assert_valid method ensures that the passed record is valid by ActiveRecord standards and outputs error messages if it fails.
def test_create_should_assign_a_valid_model
  post :create ... # good attributes
  assert_valid assigns(:post)
end
The Rails way of testing view template output is to do so within the scope of controller test methods. Triggering a controller action causes the entire rendering chain to occur, and HTML (or other type) output to be set to response.body. Rails has a powerful API for making assertions on that output: assert_select. If you’re looking through older Rails code, you might find usages of an older view assertion method named assert_tag—it was deprecated in favor of assert_select.
The assert_select method uses CSS selector syntax for asserting contents of HTML or XML markup. It’s extraordinarily flexible and powerful, because CSS selection is very flexible and powerful. If you already understand CSS selector syntax (and as a web application developer, you probably do), then assert_select should definitely be your preferred method of testing the contents of your views.[16]
Here are some examples, inspired by the documentation, showing how you can test that selected element(s) exist, have specific text content, test number, and order of elements, and more:
def test_page_has_right_title
  get :index
  assert_select "title", "Welcome"
end

def test_form_includes_four_input_fields
  get :new
  assert_select "form input", 4
end

def test_show_does_not_have_any_forms_in_it
  get :show, :id => 1
  assert_select "form", false, "Show page must contain no forms"
end

def page_has_one_link_back_to_user_page
  get :show, :id => 1
  assert_select "a[href=?]",
                url_for(:controller=>"user", :id=>user_id),
                :count => 1, :text => "Back to page"
end
The assert_select method comes in two variants, and has one of the most complicated APIs of any other Rails method that I know. It’s unusual in that the first parameter is optional. In both forms, the value, equality, and message, as well as block parameters are optional.
The first (most common) form uses the CSS selector string to select elements from the response in the context of a functional test.
The second form, which I believe is rarely used by most developers, takes an explicit instance of HTML::Node as the element parameter, and selects all matching elements starting from (and including) that element and all its children in depth-first order.
Calling assert_select inside an assert_select block will automatically run the assertion for each element selected by the enclosing assertion, as in the following examples, which have the exact same behavior:
assert_select "ol > li" do |elements|
  elements.each do |element|
    assert_select element, "li"
  end
end

# use the shorter version

assert_select "ol > li" do
  assert_select "li"
endThe assert_select method understands the set of CSS selector formats listed in Table 17.1. Combine them to identify one or elements for assertion.
Table 17.1. CSS Selector Reference
Selector | Behavior |
|---|---|
| An element with the tag name In the subsequent table entries, |
| Element |
| Element Example: Verify the title of a Login page: assert_select "html:root > head > title", "Login" |
| Element Example: Ensure that sponsored content in a list is before unsponsored content: assert_select 'LI.sponsored ~ LI:not(.sponsored)' |
| Element Example: Assert that your content assert_select 'DIV#header + DIV#content' |
| |
| Elements attributed with a CSS class named |
| Elements attributed with an ID equal to |
| Elements with a specified attribute name. |
| Elements with an |
| Elements with an |
| Elements with an |
| Elements with an |
| Elements with an |
| Elements with an |
| An element that is the root element of the document. |
| The first child element of Note: This and other selectors like it will match multiple elements if |
| The last child element of |
| The |
| The |
| The first sibling of type Example: Assert that all drop-down selection boxes in a given document always include a blank option at the top: assert_select('SELECT OPTION:first-of-type','') |
| The last sibling(s) of type |
| The Example: Assert the order and content of the <SELECT id="filter">
<OPTION>None</OPTION>
<OPTION>Businesses</OPTION>
<OPTION>People</OPTION>
</SELECT>
assert_select('SELECT#filter option:nth-of-type(1)',
'None')
assert_select('SELECT#filter option:nth-of-type(2)',
'Businesses')
assert_select('SELECT#filter option:nth-of-type(3)',
'People') |
| Elements that are the only child of its parent matching |
| Elements that are the only sibling of their type matching Example: Ensure that only one external JavaScript file is ever included on the page. (A rule sometimes enforced for performance reasons...) assert_select('HEAD SCRIPT[src]:only-of-type') |
| Elements that have no children (includes text nodes). |
| Elements that do not match the |
Sometimes you want to use a substitution value, instead of matching for the existence or count of the CSS selector string defined. In that case, you can use the ? character as a placeholder. Works with class names (.?, classname), identifier attributes (#?, id), and regular attributes ([attr=?], string, or regexp).
assert_select "form[action=?]", url_for(:action=>"login") do
  assert_select "input[type=text][name=username]"
  assert_select "input[type=password][name=password]"
end
The equality parameter is optional and can be one of the values listed in Table 17.2. The default value is true, which means that at least one element was found matching the CSS selector. If you wish to supply only one criterion for the matched elements, use the singular form. Otherwise, pass the criteria as a hash.
Table 17.2. Options for the equality Parameter of assert_select
Hash Form | Explanation | |
|---|---|---|
true | :minimum => 1 | At least one element matched |
false | :count => 0 | No elements matched. |
"something" | :text => "something" | All elements matched have the text content. |
/^[a-z]{2}$/i | :text => /^[a-z]{2}$/i | All elements matched match the regular expression. |
n | :count => n | Exactly n elements matched. |
:minimum => n | At least n elements matched. | |
:maximum => n | At most n elements matched | |
n..m | :minimum => n, :maximum => m | Number of elements matched falls in the supplied |
Variants of assert_select_rjs are used in functional tests to check RJS-style manipulation of the view by your controllers.
Leaving off the args asserts simply that one or more elements were updated or inserted via RJS. With all variants of assert_select_rjs, nested assert_select statements can be used to verify the HTML payload of the update or insertion:
# Check that RJS inserts or updates a list with four items.
assert_select_rjs 'my_list' do
  assert_select "ol > li", 4
end
Same as assert_select_rjs(*args, &block), but specifies a particular id that is being updated or inserted.
Rounding out the assert_select code are methods for checking e-mail and encoded HTML, as well a the css_select method, which is useful in conjunction with the version of the assert_select that takes an HTML node as its first parameter.
Rails provides a set of assertions for use in functional tests that allow you to check that your routing file is configured as you expect it to be.
Asserts that the provided options can be used to generate the provided path, which is the inverse behavior of assert_recognizes.
assert_generates("/items", :controller => "items",
                 :action => "index")

assert_generates("/items/list", :controller => "items",
                 :action => "list")

assert_generates("/items/list/1", :controller => "items",
:action => "list", :id => "1")Asserts that the routing of the given path was handled correctly and that the parsed options match, which is the inverse behavior of assert_generates.
# check the default action
assert_recognizes({:controller => 'items', :action => 'index'},
'items')

# check a specific action
assert_recognizes({:controller => 'items', :action => 'list'},
'items/list')

# check an action with a parameter
assert_recognizes({:controller => 'items', :action => 'list',
 :id => '1'}, 'items/list/1')
Pass a hash in the second argument to specify the request method. This is useful for routes requiring a specific HTTP method. The hash should contain a :path with the incoming request path and a :method containing the required HTTP verb.
# assert that POSTing to /items will call create on ItemsController
assert_recognizes({:controller => 'items', :action => 'create'},
                  {:path => 'items', :method => :post})
You can also pass in “extras” with a hash containing parameters that would normally be present in the query string. This can be used to assert that URL query parameters are added to the params hash correctly. To test query strings you must use the extras argument; appending the query string on the path the way that you normally do in your application code will not work.
# assert that a path of '/items/list/1?view=print' returns correct
options
assert_recognizes({:controller => 'items', :action => 'list',
                   :id => '1', :view => 'print'},
'items/list/1', { :view => "print" })Asserts that path and options match both ways; in other words, the URL generated from options is the same as path, and also that the options recognized from path are the same as options. This essentially combines assert_recognizes and assert_generates into one step.
Rails 1.1 introduced a built-in integration test API as a “logical progression in the existing series of available tests.”[18]
Integration tests differ from functional tests in that they verify interactions across multiple browser requests, spanning any number of controllers and actions. In addition to validating functionality of the application, well-written integration tests should help flush out whatever bugs may be lurking in your use of routing and user sessions. When used in this way, Rails integration tests might be suitable acceptance tests for your project.
Integration tests are kept as files in the test/integration directory. They are executed via the rake target test:integration, or just like other Rails tests, by invoking the file directly with the Ruby interpreter.
You don’t have to write the skeleton code for an integration test yourself, since a generator is provided. Give the generator an integration test name as its argument in CamelCase or under_score format.
$ script/generate integration_test user_groups
      exists  test/integration/
      create  test/integration/ user_groups_test.rb
The generator will create an integration test template ready for editing, such as the following:
require "#{File.dirname(__FILE__)}/../test_helper"

  class UserGroupsTest < ActionController::IntegrationTest
    # fixtures :your, :models

    # Replace this with your real tests.
    def test_truth
      assert true
    end
  end

end
So far the process is very similar to how we write tests for models and controllers, but in order to proceed, we have to make some decisions on how we want to implement the feature to be tested. In this sense, writing the integration test prior to implementation of a feature serves as a design and specification tool. Before going any further with our example, let’s take a quick look at the API methods available for coding our integration tests.
The get and post methods take a string path as their first argument and request parameters as the second argument, as a hash. To use the familiar controller/action hash for the first parameter instead of a literal URL string, use the url_for method.
The follow_redirect! method instructs your test to follow any redirect initiated by the last request. The status method returns the HTTP status code of the last request. When asserting a redirect, the redirect? method asserts that the status code of the last request is equal to 300.
ActionController::Assertions::ResponseAssertions is a module containing the assertions that we use in our integration tests. Remember that all assertion methods in Rails have an optional message parameter displayed when the assertion fails during a test run.
Asserts that the redirection options passed in match those of the redirect called in the latest action. This match can be partial, such that assert_redirected_to(:controller => "weblog") will also match the redirection of redirect_to(:controller => "weblog", :action => "show"), and so on.
Asserts that the HTTP response status code matches the supplied criteria. The following list of symbols can be used in place of an actual integer value such as assert_response(501).
:success. Status code was 200.:redirect. Status code was in the 300–399 range.:missing. Status code was 404.:error. Status code was in the 500–599 range.
An integration Session instance represents a set of requests and responses performed sequentially by some virtual user. Because you can instantiate multiple sessions and run them side by side, you can also mimic (to some limited extent) multiple simultaneous users interacting with your system.
Typically, you will instantiate a new session using IntegrationTest# open_session, rather than instantiating Integration::Session directly.
The default Rakefile for Rails projects includes 10 tasks related to testing, as shown in Table 17.3.
Table 17.3. Rake Testing Tasks
Target | Description |
|---|---|
| The |
| The |
| Prepares the test database for a test run and loads the current development schema into it. If you are running a test directly after having made schema changes to your database, you have to run this task first or your test will fail. |
| Empties the test database. |
| The |
| Run only the tests in the |
| Run only the tests in the |
| Run only the tests in the |
| Run only tests that have been modified in the last 10 minutes. |
| Run only the tests that are modified according to Subversion. |
A well-written acceptance test suite is an essential ingredient in the success of any complex software project, particularly those run on Agile principles and methodologies such as extreme programming. In fact, one of the best definitions that I’ve run across for acceptance test is from the Extreme Programming official website:
The customer specifies scenarios to test when a user story has been correctly implemented. A story can have one or many acceptance tests, what ever it takes to ensure the functionality works.[19]
Stated simply, acceptance tests let us know that we are done implementing a given feature, or user story, in XP lingo. Traditionally, acceptance tests consist of test scripts—a list of actions taken by a tester (or encoded into a testing tool) to ensure that the application works correctly. Nowadays, relying on manual acceptance testing to verify web applications is considered a worst practice. It is slow, error-prone, and expensive.
An individual acceptance test is useful to the developer who writes it as a design and tasking tool. A whole suite of automated acceptance tests covering the desired functionality of our application is a useful and continuous indicator of the state of your project’s completion.
As a Rails developer working on a given user story or feature, having an automated acceptance test keeping me focused on the task at hand helps keep my productivity at optimal levels. The same principles of test-driven development (TDD) apply, just at a higher conceptual level than unit tests. It’s so easy to do most stuff in Rails that you might find it hard to limit yourself to working on a particular task at a time, and that’s a dangerous habit to get into.
Also, experience has shown that most Rails applications (and Web 2.0 apps in general) are data and UI-heavy. They simply don’t have a lot of business logic driving a critical need for extensive unit tests. However, you can’t just leave parts of your application without test coverage—in an interpreted language like Ruby, that’s a recipe for disaster.
That’s where automated acceptance tests come in: Encode the acceptance criteria for a given user story or feature prior to implementing it. Requirements not clear? Seek clarity. Not sure how your application’s models and controllers need to be designed? Go for it. Make some initial decisions and use those as the basis for your test.
Prior to working on the implementation, your acceptance test will fail near its beginning. As you code the implementation, run the acceptance test over and over again and watch the red bars turn into green bars. Once the whole test is green, you’re done! In the process you’ve created an automated regression suite that yields a multitude of benefits down the road.
Luckily, since so many Rails developers are fans of Agile, there are strong options available that let you quickly and easily create acceptance test suites for your own Rails projects.
This chapter covers the most significant options available, starting with an open-source product called Selenium on Rails, continuing with a look at the acceptance-testing capabilities built into Rails itself, and finishing off with descriptions of other useful acceptance-testing tools for Rails.
Selenium is the name of a family of testing tools featuring tests that run directly in the web browser, exactly replicating the actions of a real user. Selenium was developed by a team of programmers and testers at ThoughtWorks, and is designed specifically for the acceptance testing requirements of Agile teams.
A Selenium script consists of a series of commands that manipulate and verify the state of the web browser. There are three kinds of Selenium commands: actions, accessors, and assertions. In the beginning, you will mostly be using actions and assertions. Most commands take two parameters: target and value.
Some commands wait for a condition to become true, which allows Selenium to test page transitions and Ajax functionality. Such commands will succeed immediately if the condition is already true, but they will fail and halt the test if a timeout value is exceeded before the condition does become true.
Actions are commands that generally manipulate the state of the application. They do things like “open a URL” and “click a specific hyperlink.” When an action fails or errors out, execution of the test stops.
Actions with the “AndWait” suffix, such as click_and_wait, tell Selenium that the action will cause the browser to make a call to the server, and that Selenium should wait for a new page to load or an Ajax call to complete.
Assertions are used to verify that the state of the application conforms to what is expected. Examples include “make sure the page title is X” and “verify that this check box is checked.” All Selenium assertions can be used in three modes: assert, verify, and wait_for. For example, you can assert_text, verify_text, and wait_for_text.
When an assert fails, the test stops execution. When a verify fails, the test will log the failure, but continue executing. Therefore, use asserts to check state that is necessary in order to continue testing, and verifies to check things like form-field values, which don’t necessarily mean you need to halt the test.
You target Selenium actions and assertions at some HTML element on the page under test using element locators. There are various kinds of locator strings with their own conventions in Selenium, but the most common are automatically understood by the engine. Locators starting with document. are treated as a DOM traversal expression in JavaScript. Locators starting with // are treated as a DOM traversal expression in XPath. Any other locator string (unless prefixed) is treated as an identifier (id attribute of an element).
Patterns are used to specify expected values of arbitrary text on the page, form field values, specific nodes in the markup, element attributes, and so on. Selenium supports various types of pattern including regular expressions, but most of the time your pattern will simply be a text string.
A complete Selenium reference is available online.[20] This chapter introduces the use of Selenium commands, but does not provide an exhaustive usage guide for them.
Selenium on Rails[21] is the name of the Selenium product crafted specifically for Rails developers and is distributed as a Rails plugin. It has been designed to work seamlessly with the Rails testing environment and fixtures.
It’s easy to install Selenium on Rails and get started.
Install the core Selenium files needed by the plugin:
gem install seleniumInstall the Selenium on Rails plugin for a given project:
script/plugin installhttp://svn.openqa.org/svn/selenium-on-rails/selenium-on-rails/Generate the test directory and a test script:
script/generate selenium first.rselStart your Rails server in its test environment:
server -e testOpen the Selenium Test Runner in your browser: http://localhost:3000/selenium
If your installation and setup succeeded, you see the Selenium Test Runner in your browser. You should also know that Selenium tests can be run from the command line and integrated into an automated suite of tests, but for demonstration purposes we will use the built-in web interface to execute our tests.
Go ahead and click the All button in the Execute Tests control panel. Selenium will execute the First test script, displayed in the center-top panel of the interface. Unless the title of the page at the base URL of your Rails application reads “Home,” the test will fail.
The first two commands of the test have a light green background color. This indicates that they executed correctly. However, the header cell and the row containing the assertTitle command have light red backgrounds indicating failure. The control panel in the top-right pane of the interface shows the status of the test run.
To make the test pass, open the file test/selenium/first.rsel, and edit the assert_title command so that it checks the actual contents of the title element for your site. In my case, I changed it to check for “Ruby on Rails: Welcome aboard.”
setup
open '/'
assert_title 'Ruby on Rails: Welcome aboard'
I flip back over to the browser and refresh the page so that my changes are picked up. Now when I run the test, it should pass successfully and turn green, the color of progress!
Selenium on Rails scripts are written in Ruby, using an API that the authors have nicknamed RSelenese. It is a direct port of the Selenium command language, except that commands are Ruby-fied—lowercase and underscore-delimited rather than CamelCase. The Selenium on Rails engine looks for RSelenese tests in the test/selenium directory tree in files ending with the .rsel extension.
Selenium on Rails also understands HTML-formatted scripts, and will execute any that it finds in files with an .sel extension. However, in practice you are better off keeping as much of your application written in Ruby as possible, and tests are not necessarily an exception to that rule. Also, since RSelenese is just plain Ruby, you can use normal language constructs such as conditionals and loops for extra expressive power whenever needed.
The example shows use of an iterator in RSelenese to successively open 10 pages:
(1..10).each do |num|

  open :controller => 'user', :action => 'list', :page => num
end
Quite often, there are parts of your acceptance test suite that will appear identically in each test case. To keep things DRY, you can define script partials and include them inside test scripts. If you have some common actions you want to do in several test cases you can put them in a separate partial test case and include them in your other test cases.
A partial test case is just like a normal test case except that its filename starts with an underscore.
#_login.rsel
open '/login'
type 'name', 'john'
type 'password', 'password'
click 'submit'
To include a partial test case in a RSelenese test case, use include_partial:
include_partial 'login'
The ability to pass variables to partials makes them even more useful. For instance, let’s assume that we want to use the _login partial for more than just the john user. Within the partial, put local variable placeholders for the parameters...
#_login.rsel with params
open '/login'
type 'name', name
type 'password', password
click 'submit'
...and then pass values for those parameters in the call to include_partial as a hash.
include_partial 'login', :name => 'jane', :password => 'foo'
This chapter has turned out to be one of the most difficult to write in the whole book, probably because the material in it merits a book of its own. We’ve learned quite a bit about Rails testing, and how in order for it to be hassle-free, we have to be smart about our use of fixtures and use third-party mocking libraries such as Mocha. We also discussed the differences between unit, functional, integration, and acceptance tests in Rails, covering a lot of reference material along the way that will be helpful to you in your day-to-day coding.
It turns out that many Rails developers have opted to drop Rails testing entirely and adopt a slightly different way of thinking about how they verify their projects. The philosophy is called behavior-driven development and the library they use is called RSpec.
| 1. | Snooty Pythonistas hate the term “monkeypatching,” which is used to describe changing implementation of classes that you didn’t write thanks to open classes. Hardcore Rubyists dislike it as well, because they don’t think the practice is unusual enough to merit a special term. Adam Keys suggests the term “duck-punching” is now in vogue. I simply think one word is preferable to the mouthful: “altering the behavior of an existing class or object thanks to Ruby’s open classes.” |
| 2. | I admit that’s hyperbole. When I ran this paragraph by Rick Olson, he implicitly defended the core team by telling me “Mocha wasn’t around then.” |
| 3. | Learn more about Mocha at http://mocha.rubyforge.org/. |
| 4. | I asked David to explain why they are categorized the way they are, and he said, “Unit tests were chosen to imply that these tests were about dealing with individual methods of the models or services while functional tests would deal with compositions of more elements (both controllers and models). In practice, there’s much bleeding going on and today it could just as well have been called models and controller tests. It’s not an area of great importance to us.” |
| 5. | See http://yaml.org for more information about YAML. |
| 6. | It is not uncommon to accidentally mess up the indentation of fixture files. Luckily, the error message that Rails will spit out when you have a bad fixture is usually informative. |
| 7. | Hey, as a programmer it’s actually a compliment, not an insult, to be called lazy. |
| 8. | When I asked in #caboose, Courtenay said: “It’s about whether anyone in core ever wanted to dump their fixtures to a file.” It’s probably as simple as that. |
| 9. | Improve your fixtures experience with http://thatswhatimtalkingabout.org/news/2006/8/31/fixture-sets-for-rails. |
| 10. | Improve your fixtures experience even more with http://www.pluginaweek.org/2007/04/07/14-fix-your-fixtures-with-fewer-foreign-key-ids/. |
| 11. | Jay has one of the best explanations for why you should limit the number of assertions in a single test at http://blog.jayfields.com/2007/06/testing-one-assertion-per-test.html. |
| 12. | If dependencies external to the object under test are required in order to write a unit test, they should be mocked or stubbed so that the correct operation of those external dependencies does not become part of this particular test case. We’ll talk about mocks and stubs later. |
| 13. | Beast is a “small, lightweight forum in Rails with a scary name and a goal of around 500 lines of code.” Visit http://beast.caboo.se/ for more information. |
| 14. | Browse |
| 15. | At the time of this writing, the |
| 16. | Incidentally, |
| 17. | CSS tag selectors are case-insensitive. Throughout this book we generally set off HTML tag names in caps just for clarity’s sake. |
| 18. | Jamis has a good introduction at http://jamis.jamisbuck.org/articles/2006/03/09/integration-testing-in-rails-1-1. |
| 19. | Definition of acceptance testing is at http://www.extremeprogramming.org/rules/functionaltests.html. |
| 20. | Selenium reference is available at http://release.openqa.org/selenium-core/nightly/reference.html. |
| 21. | For the Selenium on Rails plugin see http://openqa.org/selenium-on-rails/. |