To learn more about starting a database file, see Chapter 18.
You can start building a database by entering data into a table. Access stores all data in tables, and you can have multiple tables in a single database. Tables consist of columns and rows that intersect to form cells for holding data. Each row is considered a record in a table. You can use columns to hold fields, which are the individual units of information contained within a record.
Create a New Table
Note
See Chapter 18 to learn how to create a database file.
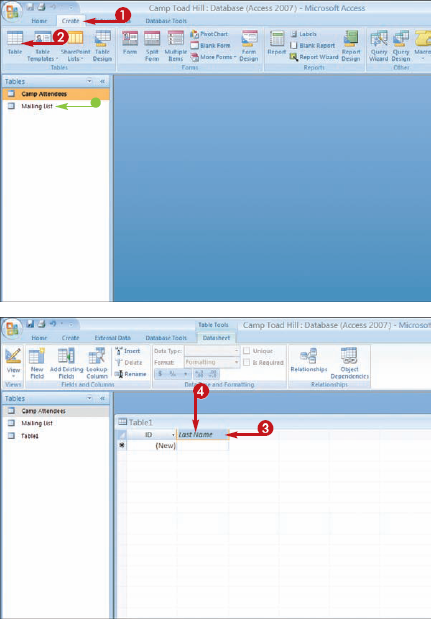
Access opens a new table in Datasheet view.
Note
See the "Change Table Views" task to learn more about Datasheet view.
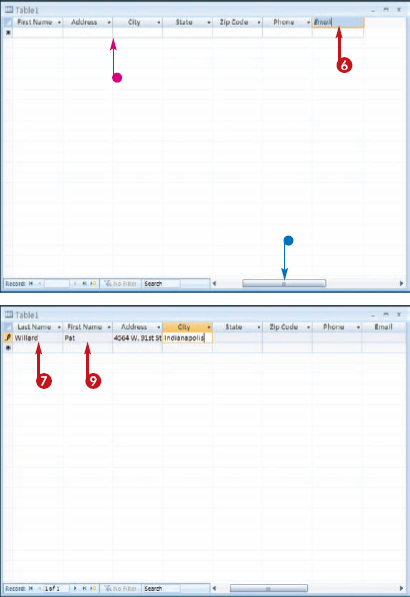
Repeat Steps 8 and 9 to complete the record.
When you reach the last field, you can press
Note
How do I navigate a table?
You can click in a cell to make the cell active, or you can use the keyboard keys to navigate around a table. You can press

How can I repeat an entry for a cell?
You can press

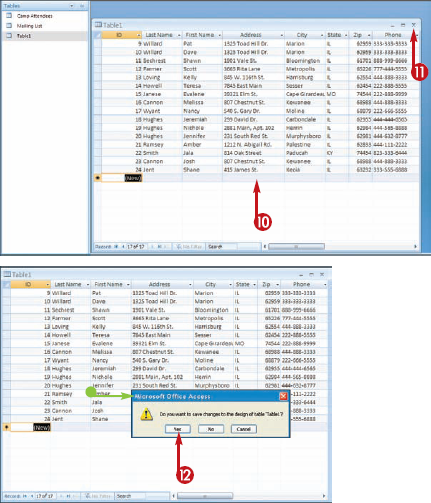
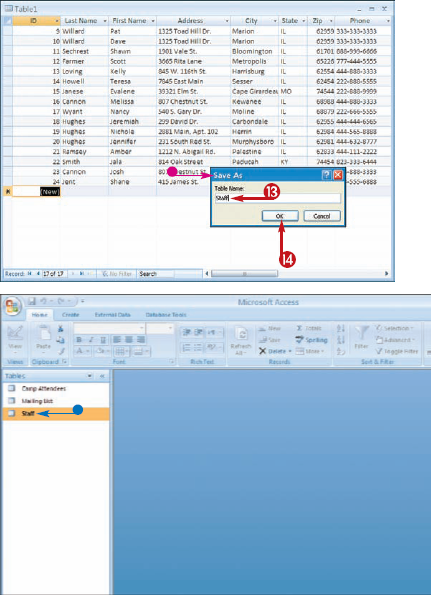
When creating a new table, you can give the table a unique name. After you save the table, you can reopen it to add more data or make changes to the existing data. All table objects that you create appear listed in the Navigation pane.

Note
A primary key uniquely identifies each record in a table. For many tables, the primary key is a numbering field that stores a unique number for each record as it is entered into the database. You can also designate another field as a primary key. To do so, switch the table to Design view, select the field that you want to set as the primary key, and click the Primary key button on the Design tab.

How do I edit a record?
To edit a record, reopen the table in Datasheet view and make changes to the data. When you close the table, Access prompts you to save your changes.
You can use an Access table template to help you create and customize a table for your database. You can choose from a variety of table types. After you create the table, you can insert your own data.
Create a Table with a Table Template
Note
See Chapter 18 to learn how to create a database file.
Access opens a new table in Datasheet view.
Note
See the "Change Table Views" task to learn more about Datasheet view.
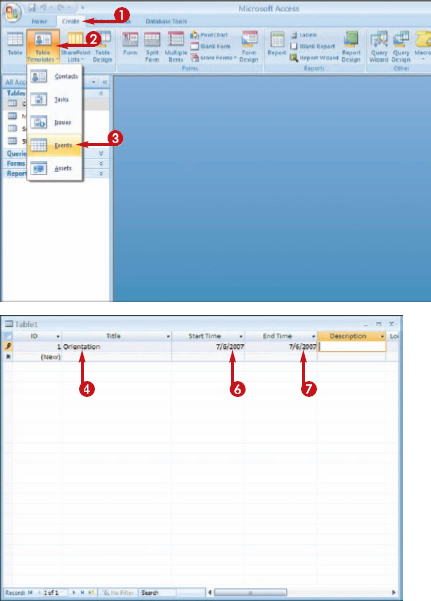
When you reach the last field, you can press
Access prompts you to save the table changes.
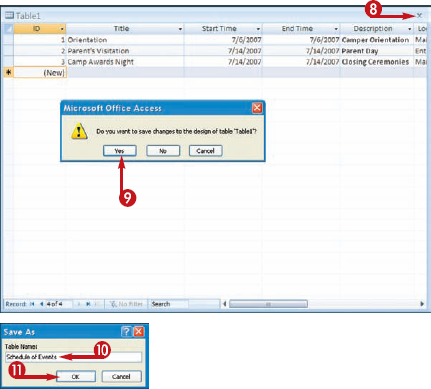
The Save As dialog box appears.
Access saves the table and lists it in the Navigation pane.
Note
Can I rename the table fields?
Yes. You can rename fields in any table by double-clicking the field label and typing a new name. When you finish, press

How do I remove a table that I no longer want?
Before attempting to remove a table, ensure that it does not contain any important data that you need. To delete the table, select it in the Navigation pane and press

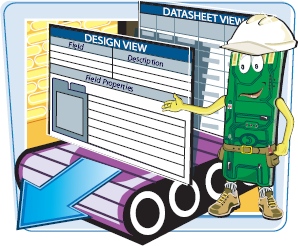
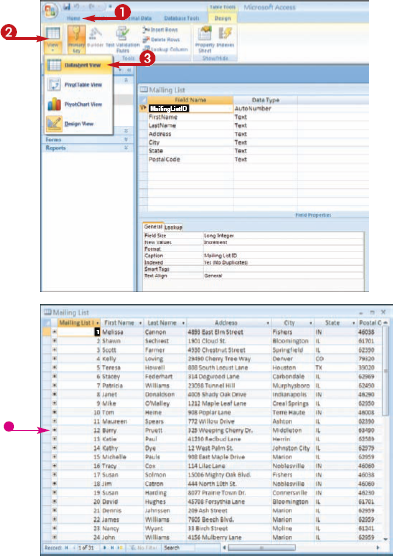
You can view your table data using two different view modes: Datasheet view and Design view. In Datasheet view, the table appears as an ordinary grid of intersecting columns and rows where you can enter data. In Design view, you can view the skeletal structure of your fields and their properties. You can use Design view to modify the design of the table.
Change Table Views
SWITCH TO DESIGN VIEW
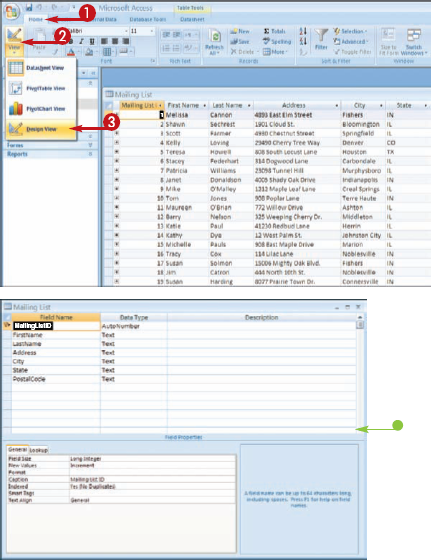
SWITCH TO DATASHEET VIEW
Note
What can I change in Design view?
You can add fields by typing new field names in the Field Name column. You can also change the field names or change the type of data that is allowed within a field, such as text or number data only. The Field Properties sheet at the bottom of Design view allows you to change the design of the field itself, specifying how many characters the field can contain, whether or not fields can be left blank in the record, and other properties.

What do the PivotTable and PivotChart views do?
If you create a PivotTable, you can use PivotTable view to summarize and analyze data by viewing different fields. You can use the PivotChart feature to create a graphical version of a PivotTable, and use the PivotChart view to see various graphical representations of the data. See the Access Help files to learn more about the PivotTable and PivotChart features.

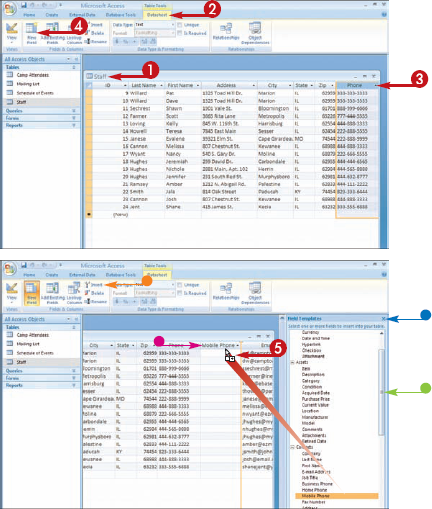
You can add fields to your table to include more information in your records. For example, you may need to add a separate field to a Contacts table for mobile phone numbers.
Add a Field
Note
See the previous task, "Change Table Views," to learn more about the Access views.
Note
Access adds a new field to the right of the existing field you select.
The Field Templates pane opens.

You can delete a field that you no longer need in a table. When you remove a field, Access permanently removes any data contained within the field for every record in the table.
Delete a Field
Note
See the "Change Table Views" task, earlier in this chapter, to learn more about the Access views.
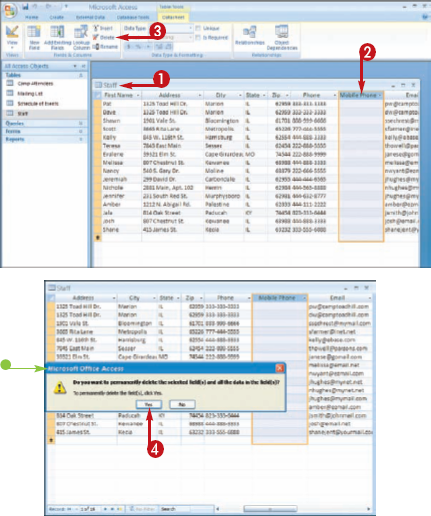
Access removes the field and any record content for the field from the table.
You can hide a field in your table by hiding the entire column of data. You might hide a field to focus on other fields for a printout or to prevent another user on your computer from seeing the field.

Hide a Field

Access selects the entire column.


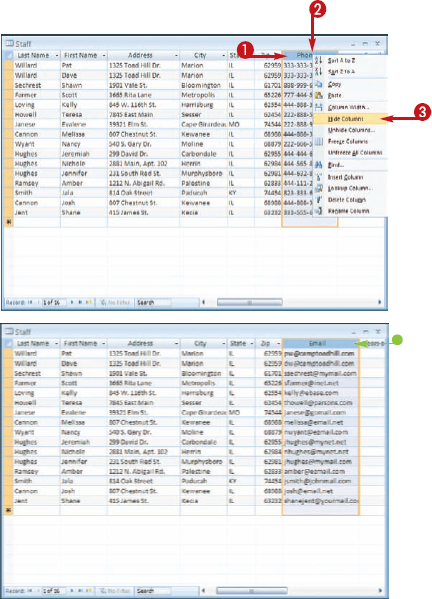
Access hides the column.
Note
Because Access does not mark hidden fields, you need to remember if you have previously hidden fields or activate the Unhide Columns command when in doubt.
You can move a field in your table to rearrange how you view and enter record data. For example, you may want to move a field to appear before another field to suit the way you type your record data.
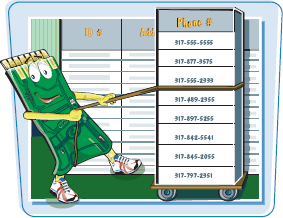
Move a Field
Access selects the entire column.
The
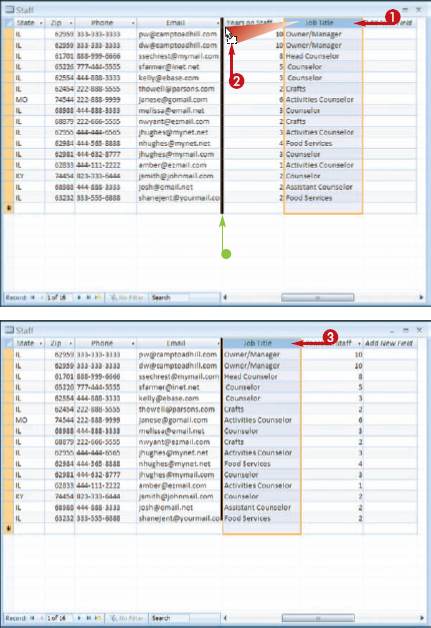
Access moves the field to the new location.

You can add new records to your database table whenever you want. Any new records that you add appear at the end of the table.
Add a Record
You can fill in the record's fields as needed.
Note
See the "Create a Table" task, earlier in this chapter, to learn how to enter record data.
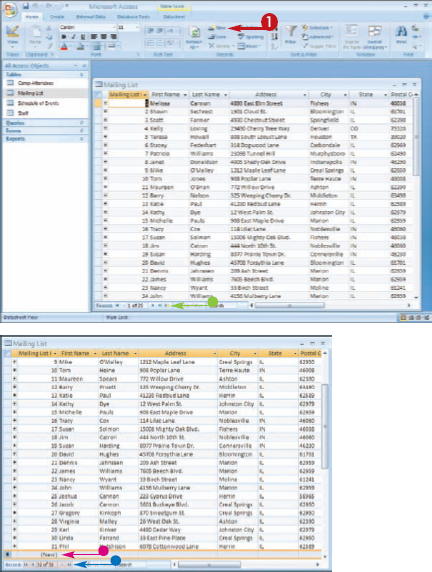
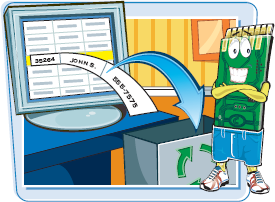
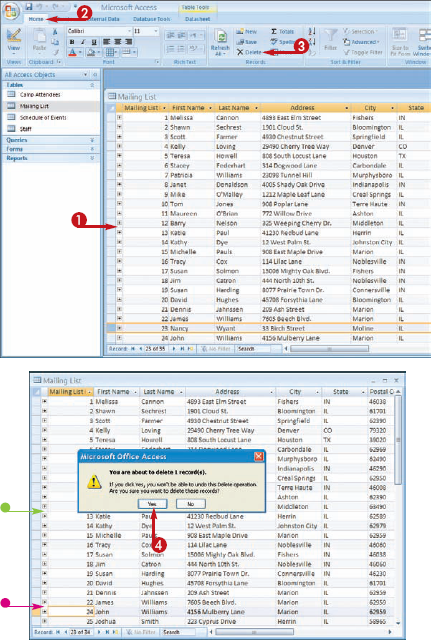
You can remove a record from your database if it holds data that you no longer need. Removing old records can reduce the overall file size of your database and make it easier to manage. When you delete a record, all of the data within its fields is permanently removed.
Add a Record
You can also right-click the record, and then click Delete Record.
Access displays a warning box about the deletion.
