
If you've ever surfed the Web, you've probably used web applications: to do research, to pay your bills, to send e-mail, or to buy from an online store. As a programmer, you may even have written web applications in other languages. If you have, you'll find the experience of doing so in Python comfortingly familiar, and probably easier. If you're just starting out, rest assured that there's no better way to enter this field than with Python.
When the World Wide Web was invented in the early 1990s, the Internet was used mainly by university students, researchers, and employees of technology companies. Within a few years, the Web had brought the Internet into popular use and culture, co-opting proprietary online services or driving them into bankruptcy. Its triumph is so complete that for many people, the Web is synonymous with the Internet, a technology that predates it by more than 20 years.
Our culture became dependent on the Web so quickly that it hardly seems necessary to evangelize the benefits for the user of web applications over traditional client-server or standalone applications. Web applications are accessible from almost anywhere in the world. Installing one piece of software on your computer — a web browser — gives you access to all of them. Web applications present a simple user interface using a limited set of widgets. They are (usually) platform independent, usable from any web browser on any operating system — including ones not yet created when the application was written.
If you haven't yet written your own web applications, however, you might not know about the benefits of developing for the web platform. In many respects, the benefits for the developer are the flip side of the benefits for the user. A web application doesn't need to be distributed; its users come to it. Updates don't have to be distributed either: When you upgrade the copy of the program on your server, all of your users start using the new version. Web applications are by convention easy to pick up and use, and because others can link to a web application from their own web sites, driving traffic there, buzz and word-of-mouth spread much more quickly. As the developer, you also have more freedom to experiment and more control over the environment in which your software runs.
The virtues of the Web are the virtues of Python: its flexibility, its simplicity, and its inclusive spirit. Python applications are written on Internet time; a hobbyist's idea can be explored in an evening and become a Web fad the next day.
Python also comes packaged with simple, useful modules for interacting with web clients and servers: urllib.parse, urllib, urllib.request, urllib.error, cgi, even http.server. Many (some would say too many) open-source frameworks are also available that make it easy to build a complex Python web application. Frameworks such as Django — covered in Chapter 19 — Zope, and others, provide templating, authentication, access control, and more, freeing you up to work on the code that makes your application special.
It's a huge field, perhaps the most active in the Python community, but this chapter gets you started. You learn how to use basic, standard Python modules to make web applications people will find useful. You also learn how to make them even more useful by creating "web service" interfaces that make it possible for your users to use your applications as elements in their own programs. In addition, you learn how to write scripts of your own to consume popular web services and turn the knowledge gained to your advantage.
If you're reading this chapter, you've probably used web applications before and perhaps have written a web page or two, but you probably don't know how the Web is designed or how web applications work behind the scenes. If your experience is greater, feel free to skip ahead, although you may find the next section interesting. If you've been writing web applications, you might not have realized that the Web actually implements a specific architecture, and that keeping the architecture in mind leads to better, simpler applications.
In this chapter you learn:
It might seem strange to think of the Web as having an architecture at all, especially for anyone who started programming as or after the Web became popular. Because it's so tightly integrated into your daily life, the assumptions that drive the Web might seem invisible or have the flavor of defaults. They are out there, though, differing from what came before and arranged into a coherent architecture. The architecture of the Web was formally defined in 2000 by Roy Fielding, one of its founders. He calls the web architecture Representational State Transfer, or REST. This section briefly summarizes the most important concepts behind REST, while connecting them to the workings of HTTP (the protocol that implements REST) and providing examples of architectures that made the same decisions differently.
Much of this chapter is dedicated to writing applications that use the features of the REST architecture to best advantage. As a first step toward learning about those features, here's a brief look at some of the main aspects of REST.
The most fundamental characteristic of an architecture is the purpose it serves. Without this to use as a guideline, there would be no way to distinguish good architectures from bad ones. Therefore, the first characteristic of REST is the problem it solves: the creation of a "distributed hypermedia system," to quote the Fielding dissertation. REST drives the Web: a network of documents that link to one another, dispersed over a large number of geographically scattered computers under varied ownership. All of REST's other characteristics must be evaluated against this one.
The second characteristic of REST is the nature of the actors in a REST architecture. REST defines a client-server relationship between actors, as opposed to, say, the peer-to-peer relationship defined by BitTorrent or other file-sharing programs. A document on the Web is stored on (or generated by) a particular server and delivered upon request to a client who asks for it. A client talks only to servers, and a server only to its clients. In HTTP, the server is a web server, and the client is typically a web browser.
The third characteristic of REST is that no session state is kept on the server. Every request made by a client must contain all of the information necessary to carry out that request. The web server need not know anything about previous requests the client may have made. This requirement is why web browsers pass cookies and authentication credentials to a site with every single request, rather than only once at the beginning of a long session.
An HTTP session lasts only as long as one back-and-forth transaction between client and server: The client requests a document from the server, and the server delivers the response, which either contains the requested document or explains why the server couldn't deliver it. Protocols like FTP and SSH, in which the client and server communicate more than once per session, must keep state on the server side so that each communication can be understood in the context of the previous one. REST puts this burden on the client instead.
Many frameworks and applications build sessions on top of HTTP by using cookies, special URLs, or some other trick. There's nothing wrong with this — it's not illegal or immoral, and it has its benefits — but by doing this, the application forfeits the benefits of the stateless server. A user might find it impossible to come back to a particular document or might get stuck in a bad state and be unable to do anything about it because the problem is on the server.
Because the problem REST solves is that of managing a distributed network of documents, its unit of storage is the document, or in REST terms, the resource. A static web page is a resource according to REST, but so is one that's dynamically generated by a web application. On the Web, anything interesting you can get with your web browser is a resource.
Each resource has at least one unique identifier, a string that names it and no other resource. In the world of HTTP, this is the resource's URL. The resource identifier http://www.python.org/ identifies a well-known resource that talks about Python. http://python.org/ is another identifier for the same resource. http://www.google.com/search?q5Python is an identifier denoting a dynamic resource: one created upon request by a web application. This custom-made resource is an index full of references to other resources; all of which should pertain in some way to Python (the language or the snake). It didn't have to be this way: WAIS, one of the technologies subsumed by the Web, treated searches and search results as first-class objects. In the REST architecture, these things exist only within resources and their identifiers.
A web object that can't be reached by typing an address is not technically a REST resource, because it has no identifier. If you can only get to a web page by submitting a form in your web browser, that page is not a resource; it's a side effect of your form submission. It's generally a good idea to make your web pages real resources. A resource is more useful than a nonresource that contains the same information: It can be bookmarked, passed around to others, accessed automatically, and used as input to scripts that manipulate resources.
When you request a resource with your web browser, what you actually get back is a representation of that resource. In the most common case, a resource has only one representation: The resource is a file on the disk of the web server, and its representation is byte-for-byte the same as that file. However, a single resource may have multiple representations. A news site may make each of its stories available in an HTML file, a stripped-down printer-friendly HTML file, a plaintext file, a PDF file, and so on.
A web client may choose a representation for a resource by choosing between that resource's identifiers (for instance, story.html or story.html?printable), or it may simply tell the server which format it prefers and let the server decide which representation is most appropriate.
We normally think of web pages as things we read, but we act on the Web as well, creating and changing pages through the same tool we use to retrieve them. If you have a weblog, you're familiar with creating new web resources by using your web browser, but it also happens in other contexts. When you send e-mail through a webmail application, an archive page is created that contains the message you sent. When you buy something from an online store, a receipt page is made available, and other pages on the site change to show the outstanding order.
The action of retrieving a resource should be idempotent: The fact that you made the request should not change the contents of the resource. Resource modification is a different operation altogether. In addition to retrieving a resource, REST also enables a client to create, modify, and delete a server's resources (given the proper authorization, of course). A client creates a new resource by specifying, in some format, a representation for the resource, and modifies an existing resource by specifying the desired new representation. It's up to the web application to render to the exact format of the representation it wants.
In HTTP, the four basic operations are implemented by four commands, or verbs, as described in the following table.
HTTP Verb | Purpose |
|---|---|
| Retrieves a resource's representation |
| Modifies a resource to bring it in line with the provided new representation |
| Creates a new resource from the provided representation |
| Deletes an existing resource |
These four commands are often compared to the basic file system operations (read, write, create, and delete) and to the four basic SQL commands (SELECT, UPDATE, INSERT, and DELETE). Unfortunately, as you see in a bit, web browsers support only the first two commands.
Although REST's principles are generally applicable, it's realized primarily in HTTP, the protocol that drives the Web. The best way to understand HTTP is to see it in action. To that end, you're going to write a web server.
No, really. It's easy to write a web server in Python. In fact, the simplest one takes just a few lines of code, because Python is packaged with a web server, and all you have to do is activate it.
Because you're already programming your own web servers, it's not difficult to write one that enables you to see your own sample HTTP request and response. Here's a script called VisibleWebServer.py. It includes a subclass of SimpleHTTPRequestHandler that does everything SimpleHTTPRequestHandler does, but that also captures the text of the HTTP request and response and prints them to standard output. When you make a request, it just prints out a little log message to the server's standard output. When you hit the Visible Web Server, you get everything:
#!/usr/bin/python
import http.server
from http.server import SimpleHTTPRequestHandler
from http.server import HTTPServer

#The port of your local machine on which you want to run this web
#server.  You'll access the web server by visiting,
#e.g. "http://localhost:8000/"

PORT = 8000

class VisibleHTTPRequestHandler(SimpleHTTPRequestHandler):
    """This class acts just like SimpleHTTPRequestHandler, but instead
    of logging only a summary of each hit to standard output, it logs
the full HTTP request and response."""
def log_request(self, code='-', size='-'):
"""Logs a request in great detail. This method is called by
SimpleHTTPRequestHandler.do_GET()."""
print(self._heading("HTTP Request"))
#First, print the resource identifier and desired operation.
print(self.raw_requestline,)
#Second, print the request metadata
for header, value in self.headers.items():
print(header + ":", value)
def do_GET(self, method='GET'):
"""Handles a GET request the same way as
SimpleHTTPRequestHandler, but also prints the full text of the
response to standard output."""
#Replace the file object being used to output response with a
#shim that copies all outgoing data into a place we can see
#later. Then, give the actual work of handling the request to
#SimpleHTTPRequestHandler.
self.wfile = FileWrapper(self.wfile)
SimpleHTTPRequestHandler.do_GET(self)
#By this time, the shim file object we created previously is
#full of the response data, and is ready to be displayed. The
#request has also been displayed, since it was logged by
#log_request() (called by SimpleHTTPRequestHandler's do_GET)
print("")
print(self._heading("HTTP Response"))
print(self.wfile)
def _heading(self, s):
"""This helper method formats a header string so it stands out
from the data beneath it."""
line = '=' * len(s)
return line + '
' + s + '
' + line
class FileWrapper:
"""This class wraps a file object, such that everything written to
the file is also silently appended to a buffer that can be printed
out later."""
def __init__(self, wfile):
"""wfile is the file object to which the response is being
written, and which this class silently replaces."""
self.wfile = wfile
self.contents = []
def __getattr__(self, key):
"""If someone tries and fails to get an attribute of this
object, they're probably trying to use it as the file object
it replaces. Delegate to that object."""
return getattr(self.wfile, key)
def write(self, s):"""Write a string to the 'real' file and also append it to the
list of strings intended for later viewing."""
self.contents.append(s)
self.wfile.write(s)
def __str__(self):
"""Returns the output so far as a string."""
return ''.join(self.contents)
if __name__ == '__main__':
httpd = HTTPServer(('localhost', PORT), VisibleHTTPRequestHandler)
httpd.serve_forever()Note how even though SimpleHTTPRequestHandler wasn't designed for its output to be intercepted, it wasn't terribly difficult to replace its output file with an impostor that does what you need. Python's operator overloading makes it easy for one object to impersonate another. In the following exercise, you actually use this script and consider a sample request and response.
An HTTP request has two parts. The first line of the request is the command; it contains an HTTP verb, a resource identifier, and (optionally) the version of HTTP being used:
GET /hello.html HTTP/1.1
Here the verb is GET and the resource identifier is /hello.html.
The second part of the HTTP request is a series of headers: key-value pairs describing the client and providing additional information about the request:
host: localhost:8000
accept-language: en
accept-encoding: gzip, compress
accept: text/*, */*;q=0.01
In the REST architecture, all information necessary to identify the resource should be kept in the identifier. Because SimpleHTTPServer serves only static files, you'll use /foo.html to uniquely identify one file on disk. Another web server might be able to dynamically generate a representation of /foo.html instead of just looking for a file on disk, but /foo.html would still identify one particular resource.
Though the identifier should completely identify the resource, the key-value pairs can be used to make smaller-scale decisions about which representation of the resource to show — for instance, to send a localized version of a document in response to the Accept-Language header. HTTP headers are also used to regulate caching and to transmit persistent client state (that is, cookies) and authentication information.
Web browsers generally send HTTP headers with capitalized names like "User-Agent," and that's how this chapter refers to particular headers. A quirk of the
SimpleHTTPRequestHandlerclass means that the Visible Web Server prints out header names in lowercase even if that's not how they were received, but it doesn't matter much: HTTP headers are not case-sensitive. "User-Agent" and "user-agent" are the same header.
The HTTP response tells the story of how the web server tried to fulfill the corresponding request. It begins with a status code, which summarizes the response:
HTTP/1.1 200 OK
In this case, the response code was 200 (OK), which means everything went fine and your resource is enclosed. Less desirable status codes you may have seen in your web browsing include the following:
403 (Forbidden), which means the resource might or might not exist but you're not allowed to receive it anyway
404 (File Not Found) The most famous HTTP status code that you'll actually see in your browser, this means the resource is just gone and has left no forwarding address, or was never there
500 (Internal Server Error), which is often caused by a bug in a web application
All forty standard error codes are defined and categorized in RFC 2616, available at
www.w3.org/Protocols/rfc2616/rfc2616-sec10.html. Some of them are obscure, but it pays to know them. For instance, the 204 response code, "No Content," can be used in a web application to take action when the user clicks a link, without making the user's web browser load another page.
Following the status code are a number of headers, in the same key-value format as HTTP request headers:
Server: SimpleHTTP/0.6 Python/3.1.0
Date: Thu, 24 Sep 2009 00:47:25 GMT
Content-type: text/html
Content-Length: 42
Just as request headers contain information potentially useful to the web server, response headers contain information potentially useful to the web browser. By far the most important HTTP response header is "Content-Type." Without this header, the web browser wouldn't know how to display the document being sent. The content type of /foo.html is text/html, which tells the web browser to render the representation it receives as HTML. If the client had requested /foo.jpg instead, the content type would have been image/jpeg, and the browser would have known to render the document as a graphic instead.
A blank line follows the response headers, and the rest of the response consists of the document being delivered (if any). For a successful GET request, the document is the resource that was requested. For a successful POST, PUT, or DELETE request, the result document is often the new version of the resource that was changed, or a status message talking about the success of the operation. An unsuccessful operation often results in an HTTP response containing a document describing the error and possibly offering help.
Web applications are considered more or less "RESTful" depending on how well they employ the features of HTTP. There are no hard-and-fast rules for this, and sometimes convenience wins out over RESTfulness, but HTTP has conventions, and you might as well use them to your advantage instead of reinventing them unnecessarily. Some rules of thumb for designing RESTful interfaces follow:
Keep resource identifiers transparent. A user should be able to figure out what kind of resource is on the other end of a resource identifier just by looking at it. The biggest challenge to achieving this is designing the resource identifier so that it holds all of the information necessary to uniquely identify the resource.
On the other hand, don't put something into the resource identifier if it doesn't help identify a resource. Ask the user to provide that information in an HTTP header instead, or in the data of a
POST,DELETE, orPUTrequest.Don't put something into the data of a
POST,DELETE, orPUTrequest if it makes sense to put it into one of the standard HTTP headers. For instance, authentication information can be submitted through HTTP authentication. If you make a resource available in multiple formats, you can have clients use the HTTP header "Accept" to specify which one they want.Don't return a status code of 200 ("OK") on an error, unless there's really no HTTP error that conveys the problem. 500 (problem on the server end) and 400 (problem on the user end) are good general-purpose errors. One problem with this rule is that browsers such as Internet Explorer may show their own generic error screen if they receive an error code other than 200, blocking a document you might have generated to help the user with her specific problem.
Using different web browsers and resources, experiment with the Visual Web Server until it becomes boring. Unless you find this whole topic boring, this encroaching ennui probably means you're pushing the limits of what's to be learned from examining HTTP requests and responses. Fortunately, it gets much more interesting very quickly: The next phase is the dynamic world of web applications.
REST is easy to implement when you're just serving files off of a hard disk, but that only covers the part of REST whereby you request resources. Representations, the means by which you create, modify, and delete resources, don't come into the picture at all. Although a set of static HTML files is technically a web application, it's not a very interesting one.
You can handle the transfer of representations and the creation of dynamic applications in a number of ways (remember the chapter on Django?), but the venerable standard is the Common Gateway Interface (CGI). CGI was developed in the early 1990s and has remained more or less the same since its creation. The goal of CGI is to enable someone to write a script that can be invoked from an HTTP request, without having to know anything about web server programming. A web server that supports CGI is capable of transforming certain HTTP requests into script invocations.
The CGI standard is hosted at
http://hoohoo.ncsa.uiuc.edu/cgi/. The page hasn't changed since 1996, but neither has CGI.
Because CGI is implemented inside the web server, it must be enabled through web server configuration. The setup of CGI is highly dependent on the brand of web server and on your system administrator's idea of how a system should be administrated. Even different Linux distributions have different out-of-the-box setups for CGI. Rather than give comprehensive instructions for all contingencies, or evade the issue altogether and assume you can get it working, following are a few lines of Python that implement a simple CGI server; save this under the name of EasyCGIServer.py. This server can be used for all of the CGI examples in this chapter. Once again, a built-in Python module makes it easy.
#!/usr/bin/python
import http.server
from http.server import HTTPServer
from http.server import CGIHTTPRequestHandler

def run(server_class=HTTPServer, handler_class=CGIHTTPRequestHandler):
  server_address=('',8001)
  httpd=server_class(server_address, handler_class)
  httpd.serve_forever()
if __name__ == '__main__':
  run()
The code is as simple as that for EasyWebServer; in fact, it's nearly identical. The only new feature EasyCGIServer supports is special treatment of the cgi-bin directory, which is where CGI scripts are kept.
The CGI standard specifies a deal that a CGI-enabled web server makes with any file it chooses to interpret as a CGI script. The web server is responsible for receiving and parsing the HTTP request, for routing the request to the correct script, and for executing that script just as you might execute a Python script from the command line. It's also responsible for modifying the script's runtime environment to include CGI-specific variables, whose values correspond to information about the runtime environment, and information found in the HTTP request. For instance, the User-Agent header becomes the environment variable HTTP_USER_AGENT, and the HTTP verb invoked by the request becomes the environment variable HTTP_METHOD. As with any other environment variables, these special variables can be accessed through the os.environ dictionary, and the script can use them to evaluate the HTTP request.
In return for this service, the CGI script is expected to take over the duties of the web server for the duration of that HTTP session. Anything the script writes to standard output is output as part of the HTTP response. This means that in addition to producing a document of some kind, the script needs to output any necessary HTTP headers as a preface to the document. At the very least, every CGI script must output the Content-Type HTTP header.
Your script might find more than 20 special CGI variables in its environment. The important ones are covered a bit later, but first look at a very simple CGI script that gives you the tools you need to explore the variables yourself. It's called PrintEnvironment.cgi:
#!/usr/bin/python

import os
import cgitb
cgitb.enable()
The cgitb module will give you exception reporting and stack tracebacks in your web browser, similar to what you see when a command-line Python script throws an exception. It'll save you from getting mysterious 500 error codes, and from having to look through web server logs to find the actual error message:
#Following is a list of the environment variables defined by the CGI
#standard. In addition to these 17 predefined variables, each HTTP
#header in the request has a corresponding variable whose name begins
#with "HTTP_". For instance, the value of the "User-Agent" header is
#kept in "HTTP_USER_AGENT".
CGI_ENVIRONMENT_KEYS = [ 'SERVER_SOFTWARE',
                         'SERVER_NAME',
                         'GATEWAY_INTERFACE',
                         'SERVER_PROTOCOL',
                         'SERVER_PORT',
                         'REQUEST_METHOD',
                         'PATH_INFO',
                         'PATH_TRANSLATED',
                         'SCRIPT_NAME',
                         'QUERY_STRING',
                         'REMOTE_HOST',
                         'REMOTE_ADDR',
                         'AUTH_TYPE',
                         'REMOTE_USER',
                         'REMOTE_IDENT',
                         'CONTENT_TYPE',
                         'CONTENT_LENGTH' ]

#First print the response headers. The only one we need is Content-type.
print("Content-type: text/plain
")

#Next, print the environment variables and their values.
print("Here are the headers for the request you just made:")
for key, value in os.environ.items():
if key.find('HTTP_') == 0 or key in CGI_ENVIRONMENT_KEYS:
print(key, "=", value)Put this file in your cgi-bin/ directory, make it executable, and visit http://localhost:8000/cgi-bin/PrintEnvironment.cgi. You should see something like the following:
Here are the headers for the request you just made:
SERVER_SOFTWARE => SimpleHTTP/0.6 Python/3.1.0
REQUEST_METHOD => GET
PATH_INFO =>
SERVER_PROTOCOL => HTTP/1.1
QUERY_STRING =>
CONTENT_LENGTH =>
SERVER_NAME => rubberfish
PATH_TRANSLATED => /home/jamesp/LearningPython/listings
SERVER_PORT => 8001
CONTENT_TYPE => text/plain
HTTP_USER_AGENT =>
HTTP_ACCEPT =>  text/html, text/plain, text/rtf, text/*, */*;q=0.01

GATEWAY_INTERFACE => CGI/1.1
SCRIPT_NAME => /cgi-bin/PrintEnvironment.py
REMOTE_ADDR => 127.0.0.1
REMOTE_HOST => rubberfish
With the PrintEnvironment.py file in place, you're defining a resource with the identifier http://localhost:8000/cgi-bin/PrintEnvironment.cgi. When you run EasyCGIServer, this resource is defined by the output you get when you run the Python code in PrintEnvironment.cgi; and, depending on the content of your request, it can be different every time you hit that URL.
Note
PrintEnvironment.cgi contains an enumeration of the defined CGI environment variables and only prints the values of those variables. The purpose of this is twofold: to put that information where you'll see it and to avoid leaking information that might be contained in other irrelevant environment variables.
Note
EasyCGIServer inherits the environment of the shell you used to run it; this means that if you run EasyCGIServer instead of Apache or another web server, a version of PrintEnvironment.cgi that printed the whole environment would print PATH and all the other environment variables in your shell. This information would swamp the legitimate CGI variables and possibly disclose sensitive information about your user account. Remember that any web servers you set up on your computer can be accessed by anyone else on the same machine, and possibly by the Internet at large. Don't expose information about yourself unnecessarily.
A few of the CGI-specific environment variables deserve further scrutiny here:
REQUEST_METHODis the HTTP verb corresponding to the REST method you used against this resource. Because you were just trying to retrieve a representation of the resource, you used theGETHTTP verb.QUERY_STRINGandPATH_INFOare the two main ways in which a resource identifier makes it into a CGI script. You can experiment with these two variables by accessingPrintEnvironment.cgiin different ways. For instance,GETting the resource identifier/cgi-bin/PrintEnvironment.cgi/pathInfo/?queryStringwill setPATH_INFOtopathInfo/andQUERY_STRINGtoqueryString. The strange-looking, hard-to-understand URLs you often see when using web applications are usually longQUERY_STRINGs.HTTP_USER_AGENTis a string provided by the web browser you used to access the page, which corresponds to the "User-Agent" HTTP header and which is supposed to identify the web browser you're using. It's interesting as an example of an HTTP header being transformed into a CGI environment variable. Another such variable isHTTP_REFERER, derived from the "Referer" HTTP header. The "Referer" header is provided whenever you click a link from one page to another, so that the second page knows how you accessed it.
It's possible to manipulate the output of PrintEnvironment.cgi enough to prove that it serves dynamic resources, but the interface to it isn't that good. To get different text back, you have to use different web browsers, hack the URL (that is, request different resources), or do even weirder things. Most web applications eschew this type of interface in favor of one based on HTML forms. You can make a lot of useful web applications just by writing simple CGIs that print HTML forms and read the QUERY_STRING and PATH_INFO variables.
A brief recap of HTML forms seems appropriate here, because the forms are relevant only to web applications. Even if you already know HTML, it's useful to place HTML forms in the context of the REST architecture.
An HTML form is enclosed within <FORM> tags. The opening <FORM> tag has two main attributes: action, which contains the identifier of the CGI script to call or the resource to be operated upon, and method, which contains the HTTP verb to be used when submitting the form.
The only HTTP verbs supported by HTML forms are GET, for reading a resource, and POST, for writing to a resource. A form action of PUT or DELETE is invalid HTML, and most web browsers will submit a POST request instead. As you'll see, this puts a bit of a kink in the implementation of REST-based web applications, but it's not too bad.
Between the opening <FORM> tag and the closing </FORM> tag, special HTML tags can be used, which a web browser renders as GUI controls. The GUI controls available include text boxes, checkboxes, radio button groups, buttons that activate form submission (all achieved with the INPUT tag), large text entry fields (the TEXTAREA tag), and drop-down selection boxes (the SELECT tag).
If you put that HTML in a file called SimpleHTMLForm.html in the root directory of your EasyCGIServer installation, you can retrieve it via the URL http://localhost:8001/SimpleHTMLForm.html. Because it's not a CGI script, EasyCGIServer will serve it as a static file, just as EasyWebServer would. If you then click the Submit button, the form data will be encoded by the web browser into a GET request, and submitted to a resource with a long identifier beginning with /cgi-bin/PrintFormSubmission.cgi. Unfortunately, there's nothing on disk — no file and no script — corresponding to that resource identifier, so instead of doing anything useful, the web server is going to return a "page not found" error document (status code: the famous 404). With Python's cgi module, though, it's easy to put a script in place that will take the form submission and do something with it.
When you click one of the Submit buttons on SimpleHTMLForm.html, notice that you're not exactly GETting the resource /cgi-bin/PrintFormSubmission.cgi, the resource specified in the action attribute of the <FORM> tag. You're GETting a slightly different resource, something with the long, unwieldy identifier of /cgi-bin/PrintFormSubmission.cgi?textField=Some+text&radioButton=2&button=Submit.
This is how a GET form submission works: The web browser gathers the values of the fields in the form you submitted and encodes them so they don't contain any characters not valid in a URL (for instance, spaces are replaced by plus signs). It then appends the field values to the form destination, to get the actual resource to be retrieved. Assuming there's a CGI at the other end to intercept the request, the CGI will see that encoded form information in its QUERY_STRING environment variable. A similar encoding happens when you submit a form using the POST verb, but in that case the form data is sent as part of the data, not as part of the resource identifier. Instead of being made available to the script in environment variables, POSTed data is made available on standard input.
The cgi module knows how to decode the form data present in HTTP requests, whether the request uses GET or POST. The cgi module can obtain the data from environment variables (GET) or standard input (POST), and use it to create a reconstruction of the original HTML form in a class called FieldStorage.
FieldStorage can be accessed just like a dictionary, but the safest way to use it is to call its getfirst() method, passing in the name of the field whose value you want.
Why is form.getfirst('fieldName') safer than form['fieldName']? The root of the problem is that sometimes a single form submission can legitimately provide two or more values for the same field (for instance, this happens when a user selects more than one value of a selection box that allows multiple selections). If this happens, form['fieldName'] will return a list of values (for example, all the selected values in the multiple-selection box) instead of a single value. This is fine as long as your script is expecting it to happen, but because users have complete control of the data they submit to your CGI script, a malicious user could easily submit multiple values for a field in which you were only expecting one.
If someone pulls that trick on you and your script is using form['fieldName'], you'll get a list where you were expecting a single object. If you treat a list as though it were a single object your script will surely crash. That's why it's safer to use getfirst: It is always guaranteed to return only the first submitted value, even if a user is trying to crash your script with bad data.
In older versions of Python prior to 2.2, the getfirst method is not available. Instead, to be safe you need to simulate getfirst with code like the following:
fieldVal = form.getValue("field")
if isinstance(fieldVal, list): #More than one "field" was submitted.
   fieldVal = fieldVal[0]
When you're actually expecting multiple values for a single CGI variable, use the _getlist_ method instead of getfirst to get all the set values.
Now that you know about the FieldStorage object, it's easy to write the other half of SimpleHTMLForm.html: PrintFormSubmission.cgi, a CGI script that prints the values it finds in the form's fields:
#!/usr/bin/python
import cgi
import cgitb
cgitb.enable()
form = cgi.FieldStorage()
textField = form.getfirst("textField")
radioButton = form.getfirst("radioButton")
submitButton = form.getfirst("button")
print('Content-type: text/html
')
print('<html>')
print('<body>')
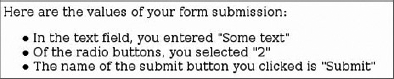
print('<p>Here are the values of your form submission:</p>')
print('<ul>')
print('<li>In the text field, you entered "%s".</li>' % textField)
print('<li>Of the radio buttons, you selected "%s".' % radioButton)
print('<li>The name of the submit button you clicked is "%s".' % submitButton)
print('</ul>')
print('</body>')
print('</html>')Now, when you click the submit button on SimpleHTMLForm.html, instead of getting a 404 Not Found error, you'll see something similar to what is shown in Figure 20-1.
So far so good. You can go a little further, though, and create a script capable of printing out any form submission at all. That way, you can experiment with HTML forms of different types. To get started, have the new script print out a fairly complex HTML form when you hit it without submitting a form to it. The script that follows deserves to be called PrintAnyFormSubmission.cgi:
#!/usr/bin/python
import cgi
import cgitb
import os
cgitb.enable()
form = cgi.FieldStorage()
print('Content-type: text/html
')
print('<html>')
print('<body>')
if form.keys():
verb = os.environ['REQUEST_METHOD']
print('<p>Here are the values of your %s form submission:' % verb)
print('<ul>')
for field in form.keys():
valueObject = form[field]
if isinstance(valueObject, list):
#More than one value was submitted. We therefore have a
#whole list of ValueObjects. getlist() would have given us
#the string values directly.
values = [v.value for v in valueObject]
if len(values) == 2:
connector = '" and "' #'"Foo" and "bar"'
else:
connector = '", and "' #'"Foo", "bar", and "baz"'
value = '", "'.join(values[:−1]) + connector + values[−1]
else:
#Only one value was submitted. We therefore have only one
#ValueObject. getfirst() would have given us the string
#value directly.
value = valueObject.value
print('<li>For <var>%s</var>, I got "%s"</li>' % (field, value))
else:
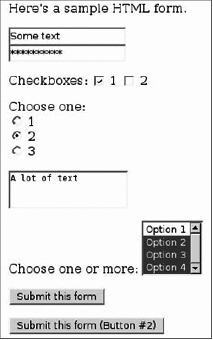
print('''<form method="GET" action="%s">
<p>Here's a sample HTML form.</p>
<p><input type="text" name="textField" value="Some text" /><br />
<input type="password" name="passwordField" value="A password" />
<input type="hidden" name="hiddenField" value="A hidden field" /></p>
<p>Checkboxes:
<input type="checkbox" name="checkboxField1" checked="checked" /> 1
<input type="checkbox" name="checkboxField2" selected="selected" /> 2
</p>
<p>Choose one:<br />
<input type="radio" name="radioButton" value="1" /> 1<br /><input type="radio" name="radioButtons" value="2" checked="checked" /> 2<br />
<input type="radio" name="radioButtons" value="3" /> 3<br /></p>
<textarea name="largeTextEntry">A lot of text</textarea>
<p>Choose one or more: <select name="selection" size="4" multiple="multiple">
<option value="Option 1">Option 1</option>
<option value="Option 2" selected="selected">Option 2</option>
<option value="Option 3" selected="selected">Option 3</option>
<option value="Option 4" selected="selected">Option 4</option>
</select></p>
<p><input type="Submit" name="button" value="Submit this form" />
<p><input type="Submit" name="button" value="Submit this form (Button #2)" />
</form>''' % os.environ['SCRIPT_NAME'])
print('</body>')
print('</html>')Try It Out: Printing Any HTML Form Submission
Put PrintAnyFormSubmission.cgi in your cgi-bin/ directory and start up EasyCGIServer. Visit http://localhost:8001/cgi-bin/PrintAnyFormSubmission.cgi. You'll be given an HTML form that looks something like what is shown in Figure 20-2.
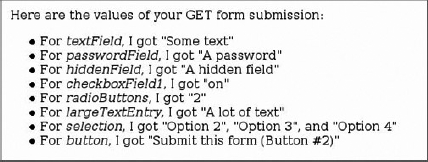
Change any of the form data you want and click one of the Submit buttons. You'll be taken to a screen that looks like the one shown in Figure 20-3.
How It Works
When you first request the resource identified by /cgi-bin/PrintAnyFormSubmission.cgi, the script uses the cgi module to look for a form submission. Because there are no form variables, it assumes you didn't submit a form at all and presents the default resource: a fairly complex HTML form for you to play with.
When you click one of the Submit buttons, you request a very different resource: something like /cgi-bin/PrintAnyFormSubmission.cgi?textField=Some+text&passwordField=A+password&hiddenField=A+hidden+field&checkboxField1=on&radioButtons=2&largeTextEntry=A+lot+of+text&selection=Option+2&selection=Option+3&selection=Option+4&button=Submit+this+form+%28Button+%232%29. This time, the cgi module picks up a lot of form variables and outputs a dynamically generated resource that iterates over the submitted form variables to describe the form you submitted. If you submit the form again with different values, you're requesting a slightly different resource and the HTML output by the script will be different in corresponding ways.
If you're new to web programming, note especially that even though there was a
checkboxField2field in the form submitted, there's no mention of it in the description of the form submission. Web browsers don't encode unchecked checkboxes into the form submission, so they don't show up at all in theFieldStorageobject. This can be a little annoying.
You can use SimpleHTMLForm.html against this script as well as against PrintFormSubmission.cgi. In fact, you can use any form at all against this script, including forms designed for other web applications, as long as you change the form's action attribute to point to /cgi-bin/PrintFormSubmission.cgi. However, if you don't provide any inputs at all (that is, you GET the base resource /cgi-bin/PrintFormSubmission.cgi), you'll be given the default HTML form. This pattern — a CGI script that, when invoked with no arguments, prints its own form — is a powerful tool for building self-contained applications. Note also how the script uses the special CGI-provided environment variable SCRIPT_NAME to refer to itself. Even if you name this script something else or put it in another directory, the form it generates will still refer to itself.
Like the EasyHTTPServer, PrintAnyFormSubmission.cgi is a good way to experiment with a new concept, but it gets boring quickly. It's time to move on to something more interesting: a real web application.
With a basic knowledge of REST, the architecture of the Web; and CGI, the main way of hooking up programs to that architecture, you're ready to design and build a basic application. The next few pages detail the construction of a simple content management system called a wiki.
The wiki was invented in 1995 by Ward Cunningham and is best known today as the base for Wikipedia (www.wikipedia.org), a free online encyclopedia (see Figure 20-4). Cunningham's original wiki (http://c2.com/cgi/wiki/) is still popular among programmers, containing information on and discussion of technical and professional best practices. Of course, there's also the REST wiki mentioned earlier.

The most distinctive features of wikis are as follows:
Open, web-based editing — Some content management systems require special software or a user account to use, but wiki pages are editable through any web browser. On most wikis, every page is open to editing by anyone at all. Because of problems with spam and vandalism, some wikis have begun to require user accounts. Even with wikis that distinguish between members and nonmembers, though, the norm is that any member can edit any page. This gives wikis an informal feel, and the near lack of barriers to entry encourages people to contribute.
A flat namespace of pages — Each page in a wiki has a unique name. Page names are often WikiWords, strings formed by capitalizing several words (the title of the page) and pushing them together. That is, WikiPageNames OftenLookLikeThis. There is no directory structure in a wiki; all pages are served from the top level. Pages are organized through the creation of additional pages to serve as indexes and portals.
Linking through citing — One wiki page can link to another simply by mentioning its WikiWord name in its own body. When a page is rendered, all WikiWords cited therein are linked to the corresponding pages. A page may reference a WikiWord for which no page yet exists: At rendering time, such a reference is linked to a form for creating the nonexistent page. Wikis that don't name their pages with WikiWords must define some other convention for linking to another page in the same wiki.
Simple, text-based markup — Rather than require the user to input HTML, wikis employ a few simple rules for transforming ASCII text into the HTML displayed when a page is rendered. Sample rules include the use of a blank line to signify a new paragraph, and the use of *asterisks* to bold a selection. Unfortunately, these conventions are only informal, and there are no hard-and-fast rules. So, the specific rules differ widely across the various wiki implementations.
Sample applications often lack important features necessary to make the application fit for actual use. An online store application presented within the context of this chapter would be too complex to be easily understood, yet not complete enough to actually use to run an online store. Because the defining features of a wiki are so few and simple, it's possible to design, build, and explain a fully fledged wiki in just a few pages. BittyWiki, the application designed and built in this chapter according to the principles just described, weighs in at under 10 kilobytes, but it's not the shortest wiki written in Python.
See
http://infomesh.net/2003/wypy/wypy.txtfor a wiki written in only 814 characters and 11 lines of Python. It's acutely painful to behold.
Before writing any code, you need to make a couple of design decisions about the nature of the wiki you want to create. In the following examples, the design decisions made are the ones that lead to the simplest wiki back end: after all, for the purposes of this discussion, the important part of BittyWiki is the interface it presents to the Web, not the back end.
Wiki implementations store their pages in a variety of ways. Some keep their files on disk, some in a database, and some in a version-controlled repository so that users can easily repel vandalism. For simplicity's sake, a BittyWiki installation will keep a page on a disk file named after that page. All of a given wiki's pages will be kept in the same directory. Because the wiki namespace is flat, no subdirectories are needed.
Each wiki implementation that uses WikiWords must decide which strings are valid names of wiki pages, so that it can automatically link citations of those pages. BittyWiki uses one of the simplest WikiWord definitions: It treats as a WikiWord any string of letters and numbers that begins with a capital letter and contains at least two capitals. "WikiWord" is itself a WikiWord, as are "WikiWord2," "WikiworD," "WWW," and "AI."
Any wiki page can be retrieved by name, but you also need a default page for when no name is specified. The default page will be the one called "HomePage."
On the basis of those design decisions, it's now possible to write the core of BittyWiki: the code that reads from and writes to the back end, and that processes the WikiWord links. Put this code into BittyWiki.py, in your cgi-bin/ directory or somewhere in your PYTHON_PATH:
"""This module implements the BittyWiki core code: that which is not
bound to any particular interface."""

import re
import os

class Wiki:
    "A class representing a wiki as a whole."
    HOME_PAGE_NAME = "HomePage"

    def __init__(self, base):
        "Initializes a wiki that uses the provided base directory."
        self.base = base

        if not os.path.exists(self.base):
            os.makedirs(self.base)
        elif not os.path.isdir(self.base):
            raise IOError('Wiki base "%s" is not a directory!' % self.base)

    def getPage(self, name=None):
        """Retrieves the given page for this wiki, which may or may not
        currently exist."""
        if not name:
            name = self.HOME_PAGE_NAME
        return Page(self, name)

class Page:
    """A class representing one page of a wiki, containing all the
    logic necessary to manipulate that page and to determine which other
    pages it references."""

    #We consider a WikiWord any word beginning with a capital letter,
    #containing at least one other capital letter, and containing only
    #alphanumerics.
    WIKI_WORD_MATCH = "(([A-Z][a-z0-9]*){2,})"
WIKI_WORD = re.compile(WIKI_WORD_MATCH)
WIKI_WORD_ALONE = re.compile('^%s$' % WIKI_WORD_MATCH)
def __init__(self, wiki, name):
"""Initializes the page for the given wiki with the given
name, making sure the name is valid. The page may or may not
actually exist right now in the wiki."""
#WIKI_WORD matches a WikiWord anywhere in the string. We want to make
#sure the page is a WikiWord and nothing else.
if not self.WIKI_WORD_ALONE.match(name):
raise(NotWikiWord, name)
self.wiki = wiki
self.name = name
self.path = os.path.join(self.wiki.base, name)
def exists(self):
"Returns true if there's a page for the wiki with this name."
return os.path.isfile(self.path)
def load(self):
"Loads this page from disk, if it exists."
if not hasattr(self, 'text'):
self.text = ''
if self.exists():
self.text = open(self.path, 'r').read()
def save(self):
"Saves this page. If it didn't exist before, it does now."
if not hasattr(self, 'text'):
self.text = ''
out = open(self.path, 'w')
out.write(self.text)
out.close()
def delete(self):
"Deletes this page, assuming it currently exists."
if self.exists():
os.remove(self.path)
def getText(self):
"Returns the raw text of this page."
self.load()
return self.text
class NotWikiWord(Exception):
"""Exception thrown when someone tries to pass off a non-WikiWord
as a WikiWord."""
PassHomePage references other pages in the wiki, but none of them exist yet:
>>> page2 = wiki.getPage("PageTwo")
>>> page2.exists()
False
Of course, you can create one of those pages:
>>> page2.text = "Here's page 2.

It links back to HomePage."
>>> page2.save()
>>> page2.exists()
True
Finally, a look at the NotWikiWord exception:
>>> wiki.getPage("Wiki")
Traceback (most recent call last):
  File "<stdin>", line 1, in ?
  File "BittyWiki.py", line 25, in getPage
    return Page(self, name)
  File "BittyWiki.py", line 47, in __init__
    raise NotWikiWord, name
BittyWiki.NotWikiWord: Wiki
The BittyWiki library provides a way to manipulate the wiki, but it has no user interface. You can write standalone scripts to manipulate the repository, or create pages from an interactive prompt, but wikis were intended to be used over the Web. Another set of design decisions awaits, related to how BittyWiki should expose the wiki pages and operations as REST resources.
Because REST is based on resources, the first thing to consider when designing a web application is the nature of the resources to provide. A wiki provides only one type of resource: pages out of a flat namespace. Information in the URL path is easier to read than keeping it in the string, so a wiki page should be retrieved by sending a GET request to the CGI, appending the page name to the CGI path. The resulting resource identifier looks like /bittywiki.cgi/PageName. To modify a page, a POST request should be sent to its resource identifier.
The allowable operations on a wiki page are as follows: creating one, reading one, updating one, and deleting one. These four operations are so common to different types of resources that they have their own acronym (CRUD), used to describe the many applications designed for performing those operations. A wiki is a web-based CRUD application for named pages of text kept in a flat namespace.
Most wikis either implement page delete as a special administrator command, or don't implement it at all; this is because a page delete command makes vandalism very easy. BittyWiki's naïveté with respect to the delete command is perhaps its least realistic feature.
Not by coincidence, the CRUD operations correspond to the four main HTTP verbs: Recall that the same four operations show up repeatedly, whether the subject is databases, file system access, or web resources. Ideally, one CRUD operation would map to one HTTP verb.
When users request a page for reading, the only information they must provide is the page name. Therefore, for the read operation, no additional information must be tacked on to the resource identifier defined in the previous section. A simple GET to the resource identifier will suffice.
When modifying a page, it's necessary to send not only the name of the page but its desired new contents. POSTing the data to the resource identifier should suffice to do that.
Now you run into a problem: You have two more operations (create and delete), but only one HTTP method (POST) is both suitable for those operations and also supported by the HTML forms that will make up your interface. These operations must be consolidated somehow.
It makes no sense to "create" a page that already exists or to "edit" a nonexistent page, so those two operations could be combined into a single write operation. There are still two actions (write and delete) to go through POST, so the problem remains.
The solution is to have users put a marker in their POST data to indicate which operation they want to perform, rather than just post the data they want to use in the operation. The key for this marker is operation, and the allowable values are write and delete.
So far, the design assumes that the write and delete actions are triggered in response to HTML form submissions. Where are those HTML forms going to come from? Because the forms need to be dynamically generated based on the name of the page they're modifying, they must be generated by the wiki program. This makes them a new type of resource. Contrary to what was stated earlier, BittyWiki actually serves two types of resources. Its primary job is to serve pages, but it must also serve HTML forms for manipulating those pages.
Unlike pages, forms can't be created, updated, or deleted by the user: they can only be read. (After they're read, however, they can be used to create, update, or delete pages.) The forms should therefore be accessible through GET URLs.
Because the user will be requesting a form to write or delete a particular page, it makes sense to base the resource identifier for the form on that of the page. You have two ways of doing this. The first is to continue to append to the PATH_INFO of the identifier, so that the form to delete the page at /bittywiki.cgi/MyPage is located at /wiki.cgi/MyPage/delete. The other way is to use the QUERY_STRING, so that that form is located at /wiki.cgi/MyPage?operation=delete.
There's no right or wrong solution. However, because the operation keyword is already in use for the POST form submissions, and because the pages (not the forms) are the real point of a wiki, BittyWiki implements the second strategy. The possible values are the same as for the POST commands: write and delete.
To summarize: Each wiki page in BittyWiki boasts three associated resources. Each resource might behave differently in response to a GET and a POST, as shown in the following table.
Resource | What GET does | What POST does |
|---|---|---|
| Displays the page if it exists; displays create form if not | Nothing |
| Displays edit form | Writes page, provides status |
| Displays delete form | Deletes page, provides status |
If no page name is specified (that is, someone GETs the bare resource /bittywiki.cgi/), the CGI will ask the core wiki code to retrieve the default page.
There are tradeoffs to consider when you're designing your resource identifiers and weighing PATH_INFO against QUERY_STRING. Both "/foo.cgi/clients/MegaCorp" and "/foo.cgi?client=MegaCorp" are legitimate REST identifiers for the same resource. The advantage of the first one is that it looks a lot nicer, more like a "real" resource. If you want to give the appearance of hierarchy in your data structure, nothing does it as well as a PATH_INFO-based identifier scheme.
The problem is that you can't use that scheme in conjunction with an HTML form that lets you, for example, select MegaCorp from a list of clients. The destination of an HTML form needs to be defined at the time the form is printed, so the best you can do ahead of time would be /foo.cgi/, letting the web browser tack on "?client=MegaCorp" when the user submits the form. If your application has this problem, you might consider defining two resource identifiers for each of your resources: an identifier that uses PATH_INFO, and one that uses QUERY_STRING.
The final question is to consider how to transform the plaintext typed by writers into the HTML displayed to readers. Some wikis are extravagant and let writers do things like draw tables and upload images. BittyWiki supports only a few very basic types of text-to-HTML markup:
To ensure valid HTML, all pages are placed within paragraph (
<p>) tags.Two consecutive newlines are treated as a paragraph break.
Any HTML manually typed into a wiki page is escaped, so that it's displayed to the viewer instead of being interpreted by the web browser.
Because there are so few markup rules, BittyWiki pages will look a little bland, but prohibiting raw HTML will limit the capabilities of any vandals that happen along.
With these design decisions made, it's now possible to create the CGI web interface to BittyWiki. This code should go into bittywiki.cgi, in the same cgi-bin/ directory where you put BittyWiki.py:
#!/usr/bin/python
import cgi
import cgitb
import os
import re
from BittyWiki import Wiki, Page, NotWikiWord
cgitb.enable()

#First, some HTML templates.
MAIN_TEMPLATE = '''<html>
<head><title>%(title)s</title>
<body>%(body)s<hr />%(navLinks)s</body>
</html>'''

VIEW_TEMPLATE = '''%(banner)s
<h1>%(name)s</h1>
%(processedText)s'''

WRITE_TEMPLATE = '''%(banner)s
<h1>%(title)s</h1>
<form method="POST" action="%(pageURL)s">
 <input type="hidden" name="operation" value="write">
 <textarea rows="15" cols="80" name="data">%(text)s</textarea><br />
 <input type="submit" value="Save">
</form>'''

DELETE_TEMPLATE = '''<h1>%(title)s</h1>
<p>Are you sure %(name)s is the page you want to delete?</p>

<form method="POST" action="%(pageURL)s">
 <input type="hidden" name="operation" value="delete">
<input type="submit" value="Delete %(name)s!">
</form>'''

ERROR_TEMPLATE = '<h1>Error: %(error)s</h1>'
BANNER_TEMPLATE = '<p style="color:red;">%s</p><hr />'

#A snippet for linking a WikiWord to the corresponding wiki page.
VIEW_LINK = '<a href="%s">%%(wikiword)s</a>'

#A snippet for linking a WikiWord with not corresponding page to a
#form for creating that page.
ADD_LINK = '%%(wikiword)s<a href="%s">?</a>'
Rather than print out HTML pages from inside the CGI script, it's often useful to define HTML templates as strings ahead of time and use Python's string interpolation to fill them with dynamic values. This helps to separate presentation and content, making it much easier to customize the HTML. Separating the HTML out from the Python code makes it possible to hand the templates over to a web designer who doesn't know Python.
One feature of Python that deserves wider recognition is its capability to do string interpolation with a map instead of a tuple. If you have a string "A %(foo)s string", and a map containing an item keyed to foo, interpolating the string with the map will replace "%(foo)s" with the string value of the item keyed to foo:
class WikiCGI:

    #The possible operations on a wiki page.
    VIEW = ''
    WRITE = 'write'
    DELETE = "delete'

    def __init__(self, wikiRoot):
        self.wiki = Wiki(wikiRoot)

    def run(self):
        toDisplay = None
        try:
            #Retrieve the wiki page the user wants.
            page = os.environ.get('PATH_INFO', '')
            if page:
                page = page[1:]
            page = self.wiki.getPage(page)
        except NotWikiWord, badName:
            page = None
            error = '"%s" is not a valid wiki page name.' % badName
            toDisplay = self.makeError(error)

        if page:
            #Determine what the user wants to do with the page they
            #requested.
makeChange = os.environ['REQUEST_METHOD'] == 'POST'
if makeChange:
defaultOperation = self.WRITE
else:
defaultOperation = ''
form = cgi.FieldStorage()
operation = form.getfirst('operation', defaultOperation)
#We now know which resource the user was trying to access
#("page" in conjunction with "operation"), and "form"
#contains any representation they were submitting. Now we
#delegate to the appropriate method to handle the operation
#they requested.
operationMethod = self.OPERATION_METHODS.get(operation)
if not operationMethod:
error = '"%s" is not a valid operation.' % operation
toDisplay = self.makeError(error)
if not page.exists() and operation and not
(makeChange and operation == self.WRITE):
#It's okay to request a resource based on a page that
#doesn't exist, but only if you're asking for the form to
#create it, or actually trying to create it.
toDisplay = self.makeError('No such page: "%s"' % page.name)
if operationMethod:
toDisplay = operationMethod(self, page, makeChange, form)
#All the operation methods, as well as makeError, are expected
#to return a set of values that can be used to render the HTML
#response: the title of the page, the body template to use, a
#map of variables to interpolate into the body template, and a
#set of navigation links to put at the bottom of the page.
title, bodyTemplate, bodyArgs, navLinks = toDisplay
if page and page.name != Wiki.HOME_PAGE_NAME:
backLink = '<a href="%s">Back to wiki homepage</a>'
navLinks.append(backLink % self.makeURL())
print("Content-type: text/html
")
print(MAIN_TEMPLATE % {'title' : title,
'body' : bodyTemplate % bodyArgs,
'navLinks' : ' | '.join(navLinks)})When the WikiCGI class is instantiated, it finds out which resource is being requested, and what the user wants to do with that resource. It delegates to one of a number of methods (yet to be defined) that handle the various possible operations.
Each of these methods is expected to return the skeleton of a web page: the title, a template string (one of the templates defined earlier: VIEW_TEMPLATE, WRITE_TEMPLATE, and so on), a map of variables to use when interpolating that template, and a set of links to help the user navigate the wiki.
The last act of WikiCGI instantiation is to fill out this skeleton: to interpolate the provided variable map into the page-specific template string and then to interpolate that into the overarching main template. The result, a complete HTML page, is simply printed to standard output.
The next part of the CGI defines the three operation-specific methods, which take a page and (possibly) a resource representation stored in form data; make any appropriate changes; and return the raw materials for a document:
def viewOperation(self, page, makeChange, form=None, banner=None):
    """Renders a page as HTML, either as the result of a request
    for it as a resource, or as a side effect of some other
    operation."""
    if banner:
        banner = BANNER_TEMPLATE % banner
    else:
        banner = ''
    if not page.exists():
        title = 'Creating %s' % page.name
        toDisplay = (title, WRITE_TEMPLATE,
                     {'title' : title,
                      'banner' : banner,
                      'pageURL' : self.makeURL(page),
                      'text' : ''},
                     [])
    else:
        writeLink = '<a href="%s">Edit this page</a>'
                    % self.makeURL(page, self.WRITE)
        deleteLink = '<a href="%s">Delete this page</a>'
                    % self.makeURL(page, self.DELETE)
        toDisplay = (page.name, VIEW_TEMPLATE,
                     {'name' : page.name,
                      'banner' : banner,
                      'processedText' : self.renderPage(page)},
                     [writeLink, deleteLink])
       return toDisplay

   def writeOperation(self, page, makeChange, form):
"Saves a page, or displays its create or edit form."
       if makeChange:
           data = form.getfirst('data')
           page.text = data
           page.save()
           #The operation is done, but we still need a document to
           #return to the user. Display the new version of this page,
           #with a banner.
           toDisplay = self.viewOperation(page, 0, banner='Page saved.')
       else:
           navLinks = []
           pageURL = self.makeURL(page)
           if page.exists():
               title = 'Editing ' + page.name
               navLinks.append('<a href="%s">Back to %s</a>' % (pageURL,
                                                                      page.name))
           else:
               title = 'Creating ' + page.name
toDisplay = (title, WRITE_TEMPLATE, {'title' : title,
'banner' : '',
'pageURL' : pageURL,
'text' : page.getText()},
navLinks)
return toDisplay
def deleteOperation(self, page, makeChange, form=None):
"Deletes a page, or displays its delete form."
if makeChange:
page.delete()
banner = 'Page "%s" deleted.' % page.name
#The page is deleted, but we still need a document to
#return to the user. Display the wiki homepage, with a banner.
toDisplay = self.viewOperation(self.wiki.getPage(), 0,
banner=banner)
else:
if page.exists():
title = 'Deleting ' + page.name
pageURL = self.makeURL(page)
backLink = '<a href="%s">Back to %s</a>'
toDisplay = (title, DELETE_TEMPLATE, {'title' : title,
'name' : page.name,
'pageURL' : pageURL},
[backLink % (pageURL, page.name)])
else:
error = "You can't delete a page that doesn't exist."
toDisplay = self.makeError(error)
return toDisplay
#A registry mapping 'operation' keys to methods that perform the operations.
OPERATION_METHODS = { VIEW : viewOperation,
WRITE: writeOperation,
DELETE: deleteOperation }
def makeError(self, errorMessage):
"Creates a set of return values indicating an error."
return (ERROR_TEMPLATE, "Error", {'error' : errorMessage,
'mainURL' : self.makeURL("")}, [])
def makeURL(self, page="", operation=None):
"Creates a URL to the resource defined by the given page and resource."
if hasattr(page, 'name'):
#A Page object was passed in, instead of a page name.
page = page.name
url = os.environ['SCRIPT_NAME'] + '/' + page
if operation:
url += '?operation=' + operation
return urlThe last main section of this CGI is the code that transforms the raw wiki text into HTML, linking WikiWords to BittyWiki resources and creating paragraph breaks:
#A regular expression for use in turning multiple newlines
#into paragraph breaks.
MULTIPLE_NEWLINES = re.compile("(
?
){2,}")
def renderPage(self, page):
"""Returns the text of the given page, with transforms applied
to turn BittyWiki markup into HTML: WikiWords linked to the
appropriate page or add form, and double newlines turned into
paragraph breaks."""
#First, escape any HTML present in the bare text so that it is
#shown instead of interpreted.
text = page.getText()
for find, replace in (('<', '<'), ('>', '>'), ('&', '&')):
text = text.replace(find, replace)
#Link all WikiWords in the text to their view or add resources.
html = '<p>' + page.WIKI_WORD.sub(self._linkWikiWord, text)
+ '</p>'
#Turn multiple newlines into paragraph breaks.
html = self.MULTIPLE_NEWLINES.sub('</p>
<p>', html)
return html
def _linkWikiWord(self, match):
"""A helper method used to replace a WikiWord with a link to view
the corresponding page (if it exists), or a link to create the
corresponding page (if it doesn't)."""
linkedPage = self.wiki.getPage(match.group(0))
link = ADD_LINK
if linkedPage.exists():
link = VIEW_LINK
link = link % self.makeURL("%(wikiword)s")
#The link now looks something like:
# <a href="/cgi-bin/bittywiki.cgi/%(wikiword)s">%(wikiword)s</a>
#We'll interpolate 'wikiword' to fill in the actual page name.
return link % {'wikiword' : linkedPage.name}Finally, here is the code that invokes WikiCGI against a particular wiki when this file is run as a script:
if __name__ == '__main__':
    WikiCGI("wiki/").run()
Once you're underway, you'll be able to start editing pages of your own.
Make this code executable and try it out in conjunction with EasyCGIServer or with your web host's CGI setup. Hitting http://localhost:8001/cgi-bin/bittywiki.cgi (or the equivalent on your web host) sends you to the form for creating the wiki's homepage. You can write a homepage, making references to other pages that don't exist yet, and then click the question marks near their names to create them. You can build your wiki starting from there; this is how real wikis grow. A wiki is an excellent tool for managing collaboration with other members of a development team, or just for keeping track of your own notes. They're also easy and fun to build, which is why so many implementations exist.
BittyWiki is a simple but fully functional wiki with a simple but flexible design. The presentation HTML is separated from the logic, and the job of identifying the resource is done by a method that then dispatches to one of several handler methods. The handler methods identify the provided representation (if any), take appropriate action, and return the resource representation or other document to be rendered. The resources and operations were designed by considering the problem according to the principles of REST. This type of design and architecture are a very useful way of building standalone web applications.
So far, the web applications developed in this chapter share one unstated underlying assumption: their intended audience is human. The same is true of most applications available on the Web. The resource representations served by the typical web application (the wiki you just wrote being no exception) are a conglomeration of data, response messages, layout code, and navigation, all bundled together in an HTML file intended to be rendered by a web browser in a form pleasing to humans. When interaction is needed, applications present GUI forms for you to fill out through a human-computer interface; and when you submit the forms, you get more pretty HTML pages. In short, web applications are generally written by humans for humans.
Yet web applications, even the most human centric, have always had nonhuman users: software clients not directly under the direction of a human — to give them a catchy name, robots. From search engine spiders to automatic auction bidding scripts to real-time weather display clients, all sorts of scripted clients consume web applications, often without the knowledge of the people who originally wrote those applications. If a web application proves useful, someone will eventually write a robot that uses it.
In the old days, robots had no choice but to impersonate web browsers with humans driving them. They would make HTTP requests just like a web browser would, and parse the resulting HTML to find the interesting parts. Though this is still a common technique, more and more web applications are exposing special interfaces solely for the benefit of robots. Doing so makes it easier to write robots, and frees the server from using its bandwidth to send data that won't be used. These interfaces are called web services. Big-name companies like Google, Yahoo!, Amazon, and eBay have exposed web service APIs to their web applications, as have many lesser-known players.
Many fancy standards have been created around web services, some of which are covered later in this chapter, but the basic fact is that web services are just web applications for robots. A web service usually corresponds to a web application, and makes some of the functionality of that application available in robot-friendly form. The only reason these fancy standards exist is to make it easier to write robots or to expose your application to robots.
Robots have different needs than humans. Humans can glance at an HTML rendering of a page and separate the important page-specific data from the navigation, logos, and clutter. A robot has no such ability: It must be programmed to parse out the data it needs. If a redesign changes the HTML a site produces, any robot that reads and parses that HTML must be reprogrammed. A human can recall or make up the input when a web application requires it; a robot must be programmed ahead of time to provide the right input. Because of this, it's no surprise that web services tend to have better usage documentation than their corresponding web applications, nor that they serve more structured resource representations.
Web services and the scripts that use them can exist in symbiotic relationships. If you provide web services that people want to use, you form a community around your product and get favorable publicity from what they create. You can give your users the freedom to base new applications on yours, instead of having to implement their feature requests yourself. Remember that if your application is truly useful, people are going to write robots that use it no matter what you do. You might as well bless this use, monitor it, and track it.
The benefits of consuming others' web services are more obvious: You gain access to data sets and algorithms you'd otherwise have to implement yourself. You don't need to get permission to use these data sets, because web services are prepackaged permission.
Even if you control both the producers and the consumers of data, advantages exist to bridging the gap with web services. Web services enable you to share code across machines and programming languages, just as web applications can be accessed from any browser or operating system.
Python is well suited to using and providing web services. Its loose typing is a good match for the various web service standards, which provide limited or nonexistent typing. Because Python lets you overload a class's method call operator, it's possible to make a web service call look exactly like an ordinary method call. Finally, Python's standard library provides good basic web support. If a high-level protocol won't meet your needs or its library has a bug, you can drop to the next lowest level and still get the job done.
Web services are just web applications for robots, so it's natural that they should operate just like normal web applications: You send an HTTP request and you get some structured data back in the response. A web service is supposed to be used by a script, though, so the request that goes in and the response that comes out need to be more formally defined. Whereas a web application usually returns a full-page image that is rendered by a browser and parsed by the human brain, a web service returns just the "important" data in some easily parseable format, usually XML. There's also usually a human-readable or machine-parseable description of the methods being exposed by the web service, to make it easier for users to write a script that does what they want.
Three main standards for web services exist: REST, XML-RPC, and SOAP. For each standard, this chapter shows you how to use an existing public web service to do something useful, how to expose the BittyWiki API as a web service, and how to make a robot manipulate the wiki through that web service.
If REST is so great for the Web that humans use, why shouldn't it also work for robots? The answer is that it works just fine. The hypertext links and HTML forms you designed for your human users are access points into a REST API that can just as easily be used by a properly programmed robot. All you need to add is a way to provide robot-friendly representations of your resources, and a way for robots to get at those representations.
If you're designing a web application from scratch, keep in mind the needs of both humans and robots. You should end up able to expose similar APIs to your HTML forms and to external scripts. It's unlikely you'll expose the exact same features to humans and to robots, but you'll be able to reuse a lot of architecture and code.
In some situations you might want to create a new, simpler API and expose that as your web service instead. This might happen if you're working on an application with an ugly API that was never meant to be seen by outsiders, if your web application is very complex, or if the people writing robots only want to use part of the full API.
Amazon.com, the popular online store, makes much of its data available through a REST web service called Amazon Web Services. Perhaps the most interesting feature of this web service is the capability it offers to search for books or other items and then retrieve metadata, pictures, and reviews for an item. Amazon effectively gives you programmatic access to its product database, something that would be difficult to duplicate or obtain by other means.
The Amazon Web Services homepage is at
http://aws.amazon.com/.
To use Amazon Web Services you need a subscription ID. This is a 13-character string that identifies your account. You can get one for free by signing up at www.amazon.com/gp/aws/registration/registration-form.html/. After you have an API key, you can use it to query Amazon Web Services. Because the AWS interface is RESTful, you invoke it by sending a GET request to a particular resource: The results are returned within an XML document. It's the web service equivalent of Amazon's search engine web application. Instead of a user interface based on HTML forms, AWS has rules for constructing resources. Instead of a pretty HTML document containing your search results, it gives you a structured XML representation of them.
Note
The Amazon Web Services are actually something of a REST heretic. Though most of AWS's design is RESTful, it defines a few operations that make changes on the server side when you GET them. For instance, the AWS CartModify operation enables you to add or remove items from your Amazon shopping cart just by making a GET request. Recall that GET requests shouldn't change any resources on the server side; you should use POST, PUT, or DELETE for such operations. Presumably, the AWS designers chose consistency (using GET for everything) over RESTfulness.
Note
Because the AWS API isn't purely RESTful, it's not necessarily safe to pass around the resource identifiers AWS gives you. Someone else might end up adding books to your shopping cart by mistake! This is exactly the sort of thing to avoid when designing your own REST API.
Amazon lets individuals and booksellers advertise their used copies of books on its site, and Amazon presents the lowest used price for a book alongside its own price for a new book. If you look back at that XML search result for James Joyce, you'll see that A Portrait of the Artist as a Young Man is available new from Amazon for $8.10 ("OurPrice"), but people are also selling used copies for as low as $1.95 ("UsedPrice"). That's a pretty good price, even when you factor in shipping. Many of the books listed on Amazon are available used for as little as one cent. Amazon will show you the lowest used price for any individual book, but it's not so easy to scan a whole list looking for bargains.
Amazon users can keep "wish lists" of things they'd like to own. If you keep one yourself, you've selected out of the millions of items on Amazon a few that you'd be especially interested in buying for a bargain. Amazon Web Services provides a wish list search, so it's possible to write a script that uses AWS to go through a wish list and identify the bargains. If you don't mind buying used, this could save you a lot of money.
Here's a class, BargainFinder, that accepts a list obtained from an AWS query and scans it for second-hand bargains. Bargains can be defined as costing less than a certain amount (say, $3), or as costing a certain amount less than the corresponding items new from Amazon (say, 75% less). It, and the code fragments that follow it, are part of a file I call WishListBargainFinder.py:
import copy
import re
import amazon

class BargainFinder:
    """A class that, given a list of Amazon items, finds out which
    items in the list are available used at a bargain price."""

    def __init__(self, bargainCoefficient=.25, bargainCutoff=3.00):
        """The bargainCoefficient is how little an item must cost
        used, versus its new price, to be considered a bargain. The
        default bargain coefficient is .25, meaning that an item
        available used for less than 25% of its Amazon price is
        considered a bargain.

        The bargainCutoff is for finding bargains among items that are
        cheap to begin with. The default bargainCutoff is 5, meaning
        that any item available used for less than $3.00 is considered
        a bargain, even if it's available new for only a little more
        than $3.00."""
        if bargainCoefficient >= 1:
            raise Exception, 'It makes no sense to look for "bargains" that '
            + 'cost more used than new!'
        self.coefficient = bargainCoefficient
        self.cutoff = bargainCutoff

    def printBargains(self, items):
        """Find the bargains in the given list and present them in a
        textual list."""
        bargains = self.getBargains(items)
        printedHeader = 0
        if bargains:
            print ('Here are items available used for less than $%.2f, ' +
                   'or for less than %.2d%% of their Amazon price:')
                  % (self.cutoff, self.coefficient*100))
            prices = bargains.keys()
            prices.sort()
            for usedPrice in prices:
                for bargain, amazonPrice in bargains[usedPrice]:
                    savings = ''
                    if amazonPrice:
                        percentageSavings = (1-(usedPrice/amazonPrice)) * 100
                        savings = '(Save %.2d%% off $%.2f) '
                                  % (percentageSavings, amazonPrice)
                    Print(' $%.2f %s%s' % (usedPrice, savings,
                                          bargain.ProductName))
        else:
            print("Sorry, I couldn't find any bargains in that list.")

    def getBargains(self, items):
        "Scan the given list, looking for bargains."
        bargains = {}
        for item in items:
bargain = False
amazonPrice = self.getPrice(item, "OurPrice")
usedPrice = self.getPrice(item, "UsedPrice")
if usedPrice:
if usedPrice < self.cutoff:
bargain = True
if amazonPrice:
if (amazonPrice * self.coefficient) > usedPrice:
bargain = True
if bargain:
#We sort the bargains by the used price, so the
#cheapest items are displayed first.
bargainsForPrice = bargains.get(usedPrice, None)
if not bargainsForPrice:
bargainsForPrice = []
bargains[usedPrice] = bargainsForPrice
bargainsForPrice.append((item, amazonPrice))
return bargains
def getPrice(self, item, priceField):
"""Retrieves the named price field (eg. "OurPrice",
"UsedPrice", and attempts to parse its currency string into a
number."""
price = getattr(item, priceField, None)
if price:
price = self._parseCurrency(price)
return price
def _parseCurrency(self, currency):
"""A cheap attempt to parse an amount of currency into a
floating-point number: Strip out everything but numbers,
decimal point, and negative sign."""
return float(self.IRRELEVANT_CURRENCY_CHARACTERS.sub('', currency))
IRRELEVANT_CURRENCY_CHARACTERS = re.compile("[^0-9.-]")This class won't quite work as is, because it assumes that a list of query results obtained from PyAmazon (the items argument to getBargains) works just like a Python list. Actually, AWS query results are delivered in pages of 10. Making a single AWS query returns only the single page you request, and you'll need extra logic to iterate from the last item on the first page to the first item of the second.
That's why OnDemandAmazonList was invented. This class, available from the same website as PyAmazon itself, hides the complexity of retrieving successive AWS result pages behind an interface that looks just like a Python list. You iterate over an OnDemandAmazonList as you would any other list, and behind the scenes it makes the necessary web service calls to get the data you want. This is another example of why Python excels at web services: It makes it easy to hide this kind of inconvenient detail.
With OnDemandAmazonList, it's a simple matter to put an interface on the BargainFinder class with code that retrieves a wish list as an OnDemandAmazonList, and runs it through the BargainFinder to find the items on the wish list that are available used for a bargain price. You could just as easily use the BargainFinder to find bargains in the result set of any other AWS query, so long as you made sure to wrap the query in an OnDemandAmazonList:
from OnDemandAmazonList import OnDemandAmazonList
def getWishList(subscriptionID, wishListID):
    "Returns an iterable version of the given wish list."
    kwds = {'license_key' : subscriptionID,
 'wishlistID' : wishListID,
            'type' : 'lite'}
    return OnDemandAmazonList(amazon.searchByWishlist, kwds)

if __name__ == '__main__':
    import sys
    if len(sys.argv) != 3:
        print 'Usage: %s [AWS subscription ID] [wish list id]' % sys.argv[0]
        sys.exit(1)
    subscriptionID, wishListID = sys.argv[1:]
    wishList = getWishList(subscriptionID, wishListID)
    BargainFinder().printBargains(wishList)
Here's the WishListBargainFinder running against my mother's wish list:
# python WishListBargainFinder.py [My subscription ID] 1KT0ATF9MM4FT
Here are items available used for less than $3.00, or for less than 25% of
their Amazon price:
 $0.29 (Save 94% off $4.99) Clockwork : Or All Wound Up
 $1.99 (Save 68% off $6.29) The Fifth Elephant: A Novel of Discworld
 $2.95 (Save 57% off $6.99) Interesting Times (Discworld Novels (Paperback))
 $2.96 (Save 52% off $6.29) Jingo: A Novel of Discworld
A quick word about Amazon wish list IDs: The
WishListBargainFindertakes a wish list ID as command-line input, but wish list IDs are a little bit hidden in the Amazon web application. To find a person's wish list ID, you need to go to his or her wish list and then look at theidfield of the URL. The wish list ID is a twelve-character series of letters and numbers that looks likeBUWBWH9K2H77.
You can programmatically search for a user's wish list by making an AWS call (using the
ListSearchoperation), but because that method is not yet supported byPyAmazon, you'll have to construct the URL and parse the XML yourself. For guidance, look at the examples on Amazon's site:http://aws.amazon.com/resources/.
Let's revisit BittyWiki, the simple wiki application you created in the previous section as a sample web application. By design, BittyWiki already exposes a very simple REST API. Recall that in addition to the name of the page, which is always part of the resource identifier, there are only two variables to consider: operation and data. operation tells BittyWiki what you want to do to the page you named, and data contains the data you want to shove into the page. Now consider this API from a robot's point of view.
The first thing to consider is how to even determine whether a given request comes from a human (more accurately, a web browser) or a robot. You might think this is easy; after all, the User-Agent HTTP header you saw earlier is supposed to identify the software that's making the request. The problem is that there's no definitive list of web browsers. New browsers and robots are being created all the time, and some use the same underlying libraries (a web browser and a robot written in Python might both claim to be urllib). The User-Agent string isn't reliable enough to be used as a basis for this decision.
Most web services solve this problem by creating a second set of resource identifiers that mirror the resource identifiers used by the web application but serve up robot-friendly resource representations. The "robot's entrance" for your application might be an entirely separate script (app-api.cgi instead of app.cgi) or a standard string prepended to the PATH_INFO of a resource identifier (app.cgi/api/foo instead of app.cgi/foo). The PATH_INFO solution yields nicer-looking resource identifiers, but BittyWiki's REST web service will be implemented as a separate CGI, just because it's easier to present.
One final note with respect to PUT and DELETE. Web services are free from dependence on HTML forms. Though the PUT and DELETE HTTP verbs aren't supported by web browsers, they are supported by many (but not all) programmable clients. You could simplify the preexisting BittyWiki interface a little by bringing in PUT and DELETE. Doing this would let you get rid of the operation argument, which is only used to distinguish a PUT- or POST-style POST request from a DELETE-style POST request. However, for the sake of correspondence with the web application, and because not all programmable clients support PUT and DELETE, the BittyWiki REST web service won't take this route.
The second thing to consider is which features of the web application it makes sense to expose through an external API. Why would someone want programmatic access to the contents of a wiki? A wiki's users might create two types of robot:
A robot that modifies or creates wiki pages — for instance, an automated test system that posts a daily status report to a particular wiki page
A robot that retrieves wiki pages — to archive or mirror a wiki or to render wiki pages to an end user in some format besides HTML
The first type of robot might need to create, edit, and delete a wiki page. That functionality can remain more or less intact, but unlike in a web application, there's no need to present a nice-looking document after taking a requested action. All the robot needs to know is whether or not its request was carried out. The document returned for a POST operation need only contain a status message.
Both types of robots need to retrieve pages from the wiki. What they actually need, though, is not the HTML rendering of the page (the thing you get when you GET /bittywiki.cgi/PageName), but the raw page data (the thing that shows up in the edit box when you GET /bittywiki.cgi/PageName?operation=write). The first type of robot needs the data in this format because it's going to do its own rendering, and it's easier to render from the raw data than from HTML. The second type of robot needs it in this format for a similar reason; it's because that's what shows up in the edit box because that's how it's stored on the back end.
BittyWiki's REST API for robots is therefore basically similar to the REST API for web browsers. The only difference is the format of the responses: Instead of human-readable HTML documents, the REST web service outputs plaintext documents. A more complicated REST web service, like Amazon's, would probably output documents formatted in XML or sparse HTML, expecting the client to parse them. Here's the plaintext result of GETting http://localhost:8001/cgi-bin/bittywiki-rest.cgi; compare it to the HTML output when you GET http://localhost:8001/cgi-bin/bittiwiki.cgi:
This is the home page for my BittyWiki installation.

Here you can learn about the philosophy and technologies that drive web
applications: REST, CGI, and the PythonLanguage.
The structure of bittywiki-rest.cgi is also similar to bittywiki.cgi:
#!/usr/bin/python
import cgi
import cgitb
cgitb.enable()
import os
import re
from BittyWiki import Wiki, Page, NotWikiWord

class WikiRestApiCGI:

    #The possible operations on a wiki page.
    VIEW = ''
    WRITE = 'write'
    DELETE = 'delete'

    #The possible response codes this application might return.
    RESPONSE_codeS = { 200 : 'OK',
                       400 : 'Bad Request',
                       404 : 'Not Found'}

    def __init__(self, wikiBase):
       "Initialize with the given wiki."
        self.wiki = Wiki(wikiBase)

    def run(self):
        """Determine the command, dispatch to the appropriate handler,
        and print the results as an XML document."""
        toDisplay = None
        try:
            page = os.environ.get('PATH_INFO', '')
            if page:
                page = page[1:]
            page = self.wiki.getPage(page)
        except NotWikiWord, badName:
            toDisplay = 400, '"%s" is not a valid wiki page name.' % badName

        if not toDisplay:
            form = cgi.FieldStorage()
            operation = form.getfirst('operation', self.VIEW)
            operationMethod = self.OPERATION_METHODS.get(operation)
            if operationMethod:
                if not page.exists() and operation != self.WRITE:
                    toDisplay = 404, 'No such page: "%s"' % page.name
                else:
                    toDisplay = operationMethod(self, page, form)
            else:
                toDisplay = 400, '"%s" is not a valid operation.' % operation
#Print the response.
responseCode, payload = toDisplay
print('Status: %s %s' % (responseCode,
self.RESPONSE_codeS.get(responseCode)))
print('Content-type: text/plain
')
print(payload)The main code figures out the resource and the desired operation and hands this off (along with any provided representation) to a handler method. The result is then rendered — but this time as plaintext:
def viewOperation(self, page, form=None):
    "Returns the raw text of the given wiki page."
    return 200, page.getText()

def writeOperation(self, page, form):
    "Writes the specified page."
    page.text = form.getfirst('data')
    page.save()
    return 200, "Page saved."

def deleteOperation(self, page, format, form=None):
    "Deletes the specified page."
    if not page.exists():
        toDisplay = 404, "You can't delete a page that doesn't exist."
    else:
        page.delete()
        toDisplay = 200, "Page deleted."
    return toDisplay

#A registry mapping 'operation' keys to methods that perform the
operations.
OPERATION_METHODS = { VIEW : viewOperation,
                      WRITE: writeOperation,
                      DELETE: deleteOperation }
The three operation handler methods are also similar to their counterparts in bittywiki.cgi, though simpler because they produce less data.
What good is this web service for BittyWiki? Well, here's an only slightly contrived example: Suppose that you get someone to host a BittyWiki installation for an open-source project you're working on, called Foo. You create a lot of wiki pages that mention the name of the project in their text ("Foo is a triphasic degausser for semantic defribulation") and in the titles of the pages (BenefitsOfFoo, FooDesign, and so on). All is going well until one day when you decide to change the name of your project to Bar. It would take a long time to manually change those wiki pages (including renaming many of them), and you don't have access to the server on which the wiki is actually hosted, so you can't write a script to crawl the file system. What do you do?
Here's a Python script, WikiSpiderREST.py, which acts as a wiki search-and-replace spider. Starting at the HomePage of the wiki (which is a WikiWord), it crawls the wiki by following WikiWord links, and replaces all of the instances of one string (for example, "Foo") with another string (for example, "Bar").
A page whose name contains the old string (for example, "FooDesign") is deleted and re-created under a different name (for example, "BarDesign"). WikiSpiderREST.py keeps track of the pages it has processed so as not to waste time or get stuck in a loop:
#!/usr/bin/python
import re
import urllib

class WikiReplaceSpider:
    "A class for running search-and-replace against a web of wiki pages."

    WIKI_WORD = re.compile('(([A-Z][a-z0-9]*){2,})')

    def __init__(self, restURL):
       "Accepts a URL to a BittyWiki REST API."
        self.api = BittyWikiRestAPI(restURL)

    def replace(self, find, replace):
        """Spider wiki pages starting at the front page, accessing them
        and changing them via the provided API."""

        processed = {} #Keep track of the pages already processed.
        todo = ['HomePage'] #Start at the front page of the wiki.
        while todo:
            for pageName in todo:
                print('Checking "%s"; % pageName)
                try:
                    pageText = self.api.getPage(pageName)
                except RemoteApplicationException, message:
                    if str(message).find("No such page") == 0:
                        #Some page mentioned a WikiWord that doesn't exist
                        #yet; not a big deal.
                        pass
                    else:
                        #Some other problem; pass it on up.
                        raise RemoteApplicationException, message
                else:
                    #This page actually exists; process it.
                    #First, find any WikiWords in this page: they may
                    #reference other existing pages.
                    for wikiWord in self.WIKI_WORD.findall(pageText):
                        linkPage = wikiWord[0]
                        if not processed.get(linkPage) and linkPage not in todo:
                            #We haven't processed this page yet: put it on
                            #the to-do list.
                           todo.append(linkPage)

                    #Run the search-and-replace on the page text to get the
                    #new text of the page.
                    newText = pageText.replace(find, replace)

                    #Check to see if this page name matches
                    #search and replace. If it does, delete it and
                    #recreate it with the new text; otherwise, just
#save the new text.
newPageName = pageName.replace(find, replace)
if newPageName != pageName:
print(' Deleting "%s", will recreate as "%s"'
% (pageName, newPageName))
self.api.delete(pageName)
if newPageName != pageName or newText != pageText:
print(' Saving "%s"' % newPageName
self.api.save(newPageName, newText))
#Mark the new page as processed so we don't go through
#it a second time.
if newPageName != pageName:
processed[newPageName] = True
processed[pageName] = True
todo.remove(pageName)So far, there's been nothing REST-specific except the reference to a BittyWikiRestAPI class. That's about to change as you go ahead and define that class, as well as others that implement a general Python interface to the BittyWiki REST API:
class BittyWikiRestAPI:

    "A Python interface to the BittyWiki REST API."

    def __init__(self, restURL):
       "Do all the work starting from the base URL of the REST interface."
        self.base = restURL

    def getPage(self, pageName):
       "Returns the raw markup of the named wiki page."
        return self._doGet(pageName)

    def save(self, pageName, data):
       "Saves the given data to the named wiki page."
        return self._doPost(pageName, { 'operation' : 'write',
                                        'data' : data })

    def delete(self, pageName):
       "Deletes the named wiki page."
        return self._doPost(pageName, { 'operation' : 'delete' })

    def _doGet(self, pageName):
       """"Does a generic HTTP GET. Returns the response body, or
        throws an exception if the response code indicates an error."""
        url = self._makeURL(pageName)
        return self.Response(urllib.urlopen(url)).body

    def _doPost(self, pageName, data):
       """Does a generic HTTP POST. Returns the response body, or
        throws an exception if the response code indicates an error."""
        url = self._makeURL(pageName)
        return self.Response(urllib.urlopen(url, urllib.urlencode(data))).body
def _makeURL(self, pageName):
"Returns the URL to the named wiki page."
url = self.base
if url[−1] != '/':
url += '/'
return url + pageName
class Response:
"""This class handles the HTTP response returned by the REST
web service."""
def __init__(self, inHandle):
self.body = None
statusCode = None
info = inHandle.info()
#The status has automatically been read into an object
#that also contains all the HTTP headers. The status
#string looks like '200 OK'
statusHeader = info['status']
statusCode = int(statusHeader.split(' ')[0])
#The remaining data is the plain-text response. In a more
#complex application, this might be structured text or
#XML, and at this point it would need to be parsed.
self.body = inHandle.read()
#The response codes in the 2xx range are the only good
#ones. Getting any other response code should result in
#an exception.
if statusCode / 100 != 2:
raise RemoteApplicationException, self.body
class RemoteApplicationException(Exception):
"""A simple exception class for use when the REST API returns an
error condition."""
passThe BittyWikiRestAPI class uses the urllib library to GET and POST things to BittyWiki's REST interface CGI. It interprets the response as a status message, an exception message, or the text of a requested page. This class could be distributed in a standalone module to encourage developers to write BittyWiki add-ons in Python.
Note that the Response class is defined within the BittyWikiRestAPI class: No one else is going to use it, and putting it here makes it invisible outside the class. This is completely optional, but it makes the top-level view neater.
Finally, some code that implements a command-line interface to the spider:
if __name__ == '__main__':
    import sys
    if len(sys.argv) == 4:
        restURL, find, replace = sys.argv[1:]
    else:
        print('Usage: %s [URL to BittyWiki REST API] [find] [replace]'
              % sys.argv[0])
        sys.exit(1)
WikiReplaceSpider(restURL).replace(find, replace)XML-RPC is a protocol that does the same job as REST: It makes it easy to write a robot that accesses and/or modifies some remote application just by making HTTP requests. Some important differences exist, though. Whereas a REST call looks like manipulation of a document repository, an XML-RPC looks like a function call (in fact, in Python implementations, the call to the web service is disguised as a function call). Instead of sending a GET or POST to the resource you want to retrieve or modify, as with REST, XML-RPC traditionally has you do all your calls by POSTing to one special "server" resource. The data you POST contains an XML representation of a function you'd like to call, and any arguments to that function. As with REST, the response to your call is a document containing any information you requested, any status messages, and so on.
BittyWiki is simple enough that everything you pass in or get out is a mere string. We're fortunate in this regard because strings are the only data type supported by REST. If you need to pass an integer into a REST application, you need to encode it as a string and trust that the resource handler will know to turn it back into an integer. If you need to pass in an ordered list, you need to learn the server's preferred way of representing an ordered list as a string. One REST application might represent lists as "item1,item2,item3"; another might represent them as "item1|item2|item3|"; a third might represent them as a custom-defined XML data structure. The major shortcoming of REST is that there's no standard way of marshalling different data types into strings, or of unmarshalling a string into typed data. You need to relearn the request and response format for every REST web service you use.
Here's the canonical sample XML-RPC client application. The public XML-RPC server betty.userland.com provides some example methods, including one that returns the name of a U.S. state, given an index, into an alphabetical list:
>>> import xmlrpc.client
>>> from xmlrpc.client import ServerProxy
>>> server=xmlrpc.client.ServerProxy("http://bettey.userland.com")
>>> server.examples.getStateName(41)
'South Dakota'
If this were a REST web service, the forty-first state in the list would be accessible as a distinct resource, perhaps http://betty.userland.com/StateNames/41. You'd get the name of a state by GETting the appropriate resource. You might have access to a Python library that handles the request and response details (the way the PyAmazon library handles the details of Amazon Web Services), but such libraries need to be written anew for each REST web service, because there's no REST standard for data structure representation.
XML-RPC's main advantage over REST is that it provides a standard way of encoding simple data structures into request and response data. XML-RPC specifies different XML strings for encoding the integer 4, the floating-point value 4.0, the string "4", and a list containing only the string "4". What you get back from an XML-RPC call is not a document that you have to parse, but a description of a data structure that can be automatically created for you by xmlrpc.client, the XML-RPC library that comes with Python. It's possible to make any kind of XML-RPC call using just one library (xmlrpc.client).
By now, you'll have noticed that Python is not very fastidious about types, and it will work with you on transforming one type to another. That said, its built-in types cover just about everything for which XML-RPC defines a representation: Booleans, integers, floating-point numbers, strings, arrays, and dictionaries. For binary data and dates, xmlrpc.client provides wrapper classes.
The XML-RPC spec, at
www.xml-rpc.com/spec/, is short and sweet.
The XML-RPC request body is the body of an HTTP POST request. It's an XML document containing a methodCall element. The methodCall element contains two elements of its own: methodName, which designates the method to be called; and params, which contains a list of the parameters to be passed as arguments into the method.
Here's a sample XML-RPC request for a hypothetical method that sorts a list of numbers in either ascending or descending order:
<?xml version="1.1"?>
<methodCall>
 <methodName>searchsort.sortList</methodName>
 <params>
  <param>
   <value>
    <array>
     <data>
      <value><i4>10</i4></value>
      <value><i4>2</i4></value>
     </data>
    </array>
   </param>
   <param><value><boolean>1</boolean></param>
   </params>
</methodCall>
This is the XML-RPC equivalent of invoking a hypothetical local method with the following code:
import searchsort
 searchsort.sortList([10, 2], True)
Given what you know about xmlrpc.client, it's no surprise that this method request would be generated and POSTed when you ran code like this:
import xmlrpc.client
xmlrpc.client.ServerProxy("http://sortserver/RPC").searchsort.sortList([10,
2], True)The XML-RPC methodName can be any string, but XML-RPC methods are traditionally grouped into named packages, such as searchsort in the preceding example. In a Python implementation, this makes it look like a module called searchsort that contains the functions to expose, like sortList.
XML-RPC parameters can be any of the following types:
Data Type | Sample XML-RPC Representation |
|---|---|
Boolean True or False |
|
A string |
|
An integer |
|
A floating-point number |
|
An array (items can be of any type, or a mixed type) |
<array> <data> <value><i4>10</i4></value> <value><i4>2</i4></value> </data> </array> |
A dictionary (keys must be strings; values can be any type) |
<struct>

   <member>
      <name>search</name>

<value><string>James Joyce</string></
value>

   </member>

 <member>
   <name>channels</name>

   <value><boolean>1</boolean></
value>

   </member>

</struct> |
A date and time |
<dateTime.iso8601>20090914T19:11:20 </dateTime.iso8601> (Use |
Binary data |
<base64>AVRoaXMgaXMgYmluYXJ5IGRhdGEu</base64> |
Strongly typed languages can have problems with some of these: mixed-type arrays, for example. Dynamic languages like Python handle these in stride.
The body of the XML-RPC response is an XML document describing the return value of the function invoked by the request.
Assuming the hypothetical searchsort.sortList method does what it says, when invoked with the sample body given earlier it'll return a response that looks like this:
<?xml version="1.1"?>
<methodResponse>
 <params>
  <param>
   <value>
    <array>
     <data>
      <value><i4>2</i4></value>
      <value><i4>10</i4></value>
     </data>
    </array>
   </value>
  </param>
 </params>
</methodResponse>
The response has the same basic structure as the request, but it's sparser. It's missing a methodName element because it's assumed you know which method you just called. It has a params element, just like the request; but whereas the request's params element could contain any number of param children (the arguments to the method), the response list is only allowed to contain a single param child: the return value.
A REST web service is expected to flag error conditions using HTTP status codes, in conjunction with error documents that describe the problem. As you might expect, XML-RPC does a similar thing in a more structured way.
If an XML-RPC server can't complete a request for any reason, it returns a response containing a fault, instead of one containing a return value in params. A sample fault response is as follows:
<?xml version="1.1"?>
<methodResponse>
 <fault>
  <value>
   <struct>
    <member>
     <name>faultCode</name>
     <value><int>4</int></value>
    </member>
    <member>
     <name>faultString</name>
<value><string>No such method: "searchSort.sortList".</string></value>
</member>
</struct>
</value>
</fault>
</methodResponse>The fault element describes an XML-RPC struct (that is, a Python dictionary) with two members: faultString, which contains a human-readable description of what went wrong, and faultCode, the equivalent to the HTTP status code used to signify failure in REST contexts (even an XML-RPC call that results in a fault response will have an HTTP status code of 200). The advantage of faultCodes is that you can define them as you please for whatever problems are specific to your application. The disadvantage is that, unlike with HTTP status codes, there's no consensus as to what faultCodes mean. You'll need to reach an understanding with your users about the meanings of your service's faultCodes.
Within Python, a response with a fault corresponds to an xmlrpc.client.Fault object, a subclass of Error. If you're using Python's XML-RPC libraries, you can just raise and catch exceptions normally, instead of having to worry about creating or parsing XML-RPC faults.
If you doubt that Python programmers are spoiled, consider this: Not only does the language come bundled with a library that makes it easy to write XML-RPC clients; it also comes bundled with an XML-RPC server. As with the other server classes, xmlrpc.server runs as a standalone web server on its own port. However, the XML-RPC functionality is also available as a CGI program that accepts HTTP POSTs in XML-RPC format. This is implemented in another class, CGIXMLRPCRequestHandler, the name of which probably has more consecutive capital letters than any other class name in the Python standard library.
Here's a script, bittywiki-xmlrpc.cgi, that exposes the BittyWiki API either through an XML-RPC CGI (if you invoke it without command-line arguments, the way a CGI-enabled web server would) or through a standalone XML-RPC server (if you pass it through the port to use on the command line):
If you're using the
EasyCGIServerpresented earlier, or another server based on Python'sCGIHTTPServer, using this script as a CGI may not work for you. If you run into problems with the CGI, try using another web server, such as Apache, or running a standalone XML-RPC server instead of going through a CGI.
import sys
import xmlrpc.server
from BittyWiki import Wiki

class BittyWikiAPI:
    """A simple wrapper around the basic BittyWiki functionality we
    want to expose to the API."""

    def __init__(self, wikiBase):
       "Initialize a wiki located in the given directory."
self.wiki = Wiki(wikiBase)
def getPage(self, pageName):
"Returns the text of the given page."
page = self.wiki.getPage(pageName)
if not page.exists():
raise NoSuchPage, page.name
return page.getText()
def save(self, pageName, newText):
"Saves a page of the wiki."
page = self.wiki.getPage(pageName)
page.text = newText
page.save()
return "Page saved."
def delete(self, pageName):
"Deletes a page of the wiki."
page = self.wiki.getPage(pageName)
if not page.exists():
raise NoSuchPage, pageName
page.delete()
return "Page deleted."
class NoSuchPage(Exception):
passSo far, nothing XML-RPC specific — just a nicely packaged interface to the three basic functions of the BittyWiki API. Next, you write a function that exposes those three functions to XML-RPC. You have two ways of doing this: You can register functions one at a time or register an object instance, which registers all that object's methods at once. This example provides code for both ways of registering the methods, but the instance registration is commented out, because in earlier versions of Python it exposed a security vulnerability:
def handlerSetup(handler, api):
    """This function registers the methods of the BittyWiki API
    as functions of an XML-RPC handler."""

    #Register the standard functions used by XML-RPC to advertise which methods
    #are available on a given server.
    handler.register_introspection_functions()

    #Register the BittyWiki API methods as XML-RPC functions in the
    #'bittywiki' namespace.
    handler.register_function(api.getPage, 'bittywiki.getPage')
    handler.register_function(api.save, 'bittywiki.save')
    handler.register_function(api.delete, 'bittywiki.delete')
Finally, the script portion, which starts up either a standalone XML-RPC server that can serve any number of requests, or a CGI-based XML-RPC script, which serves only the current request:
if __name__ == '__main__':
    WIKI_BASE = 'wiki/'
    api = BittyWikiAPI(WIKI_BASE)
    standalonePort = None
    if len(sys.argv) > 1:
        #The user provided a port number; that means they want to
        #run a standalone server.
        standalonePort = sys.argv[1]
        try:
            standalonePort = int(standalonePort)
        except ValueError:
            #Oops, that wasn't a port number. Chide the user and exit.
            scriptName = sys.argv[0]
            print('Usage:')
            print(' "%s [port number]" to start a standalone server.'
                  % scriptName)
            print(' "%s" to invoke as a CGI.' % scriptName)
            sys.exit(1)
        isStandalone = 1
        print("Starting up standalone XML-RPC server on port %s."
              % standalonePort)
        handler = xmlrpc.server.SimpleXMLRPCServer
                  (('localhost', standalonePort))
    else:
        #No port number specified; this is a CGI invocation.
        handler = xmlrpc.server.CGIXMLRPCRequestHandler()

    handlerSetup(handler, api)

    if standalonePort:
        handler.serve_forever()
    else:
handler.handle_request()Remember WikiSpiderREST.py, the script that crawled BittyWiki pages using its REST API to perform search-and-replace operations? You had to write a custom class (BittyWikiRESTAPI) to construct the right URLs to use against the REST interface, and a custom XML parser to process the response documents you got in return. Of course, once you have written that stuff, it can be reused in any application that uses BittyWiki's REST API, but the main selling point of XML-RPC is that such classes aren't necessary: xmlrpc.client handles everything. Put that to the test by rewriting WikiSpiderREST.py as WikiSpiderXMLRPC.py:
#!/usr/bin/python
import re
import xmlrpc.client

class WikiReplaceSpider:
    "A class for running search-and-replace against a web of wiki pages."

    WIKI_WORD = re.compile('(([A-Z][a-z0-9]*){2,})')

    def __init__(self, rpcURL):
       "Accepts a URL to a BittyWiki XML-RPC API."
        server = xmlrpc.client.ServerProxy(rpcURL)
        self.api = server.bittywiki

    def replace(self, find, replace):
        """Spider wiki pages starting at the front page, accessing them
        and changing them via the XML-RPC API."""

        processed = {} #Keep track of the pages already processed.
        todo = ['HomePage'] #Start at the front page of the wiki.
        while todo:
for pageName in todo:
print('Checking "%s"' % pageName)
try:
pageText = self.api.getPage(pageName)
except xmlrpc.client.Fault, fault:
if fault.faultString.find("No such page") == 0:
#We tried to access a page that doesn't exist;
#not a big deal.
pass
else:
#Some other problem; pass it on up.
raise xmlrpc.client.Fault, fault
else:
#This page actually exists; process it.
#First, find any WikiWords in this page: they may
#reference other pages.
for wikiWord in self.WIKI_WORD.findall(pageText):
linkPage = wikiWord[0]
if not processed.get(linkPage) and linkPage not in todo:
#We haven't processed this page yet: put it on
#the to-do list.
todo.append(linkPage)
#Run the search-and-replace on the page text to get the
#new text of the page.
newText = pageText.replace(find, replace)
#Check to see if this page name matches the search
#string. If it does, delete it and recreate it
#with the new text; otherwise, just save the new
#text in the existing page.
newPageName = pageName.replace(find, replace)
if newPageName != pageName:
print(' Deleting "%s", will recreate as "%s"'
% (pageName, newPageName))
self.api.delete(pageName)
if newPageName != pageName or newText != pageText:
print(' Saving "%s"' % newPageName)
saveResponse = self.api.save(newPageName, newText)
#Mark the new page as processed so we don't go through
#it a second time.
if newPageName != pageName:
processed[newPageName] = True
processed[pageName] = True
todo.remove(pageName)The WikiReplaceSpider class looks almost exactly the same as before. The only big difference is that, whereas before a method call like api.getPage moved into custom REST code you had to write, it now moves into preexisting xmlrpclib code. Without those API-specific classes to implement, the WikiReplaceSpider class is pretty much all the code:
if __name__ == '__main__':
    import sys
    if len(sys.argv) == 4:
        rpcURL, find, replace = sys.argv[1:]
    else:
        print('Usage: %s [URL to BittyWiki XML-RPC API] [find] [replace]'
              % sys.argv[0])
        sys.exit(1)
    WikiReplaceSpider(rpcURL).replace(find, replace)
That's it. This spider works just like the REST version, but it takes less code because there's no one-off code to deal with the specifics of the REST API. This script is run just like the REST version, but the URL passed in is the URL to the XML-RPC interface, instead of the URL to the REST interface:
$ python WikiSpiderXMLRPC.py http://localhost:8000/cgi-bin/bittywiki-xmlrpc.cgi Foo Bar
Checking "HomePage"
 Saving "HomePage"
Checking "FooCaseStudies"
...
XML-RPC solves REST's main problem by defining a standard way to represent data types such as integers, dates, and lists. However, while XML-RPC was being defined, the W3C's XML working group was working on its own representation of those data types and many others. After XML-RPC became popular, the W3C turned its attention to it, and started redesigning it to use WC3's preexisting standards. Along the way, ambition broadened the scope of the project to include any kind of message exchange, not just procedure calls and their return values. The result was SOAP. The acronym originally stood for Simple Object Access Protocol, but because the standard's scope has been expanded so far beyond simple remote procedure calls, the acronym itself is no longer applicable.
SOAP may still be simple compared to COM or CORBA, but it's a lot more complicated than XML-RPC. Fortunately, you don't need all of SOAP just to expose a web application as a web service. The part you do need looks basically like XML-RPC with a more general XML encoding scheme. SOAP gives you access to a broader range of data types than XML-RPC, and even lets you define your own.
Unfortunately, at the time of this writing, Python 3.1 does not widely support SOAP and useful third-party modules such as SOAPpy have not yet been updated to work with the current version (or even Python version 2.6 for that matter). Because there is every reason to anticipate that this will be corrected in the (hopefully) near future, this section demonstrates how to use SOAP (and specifically the SOAPpy module) in Python version 2.4. If you want to try out the examples, I recommend downloading and installing Python 2.4 on your computer. Otherwise, just follow along; the examples closely mirror those of the previous XML-RPC examples, so it should not be too difficult.
Note that writing any of the following code in Python 2.6 and above will not work.
Just as with REST and XML-RPC, a SOAP message is typically sent as the data portion of an HTTP POST request. Just as with those other protocols, then, it's technically possible to use a SOAP web service without any SOAP-specific tools: Just construct the message by hand, send it off with urllib, and parse the response with the xml.sax module. Realistically, though, you need a SOAP library to use SOAP with Python. A SOAP library will deal with transforming Python data structures to SOAP's XML representations and back, just as xmlrpc.client does for XML-RPC.
Unfortunately, there's no "soaplib" bundled with Python, but you can download one. There are two SOAP libraries for Python. The one library used in this chapter is SOAPpy, which provides an xmlrpc.client-like version of a SOAP client and a SOAP server.
If you're running Debian GNU/Linux, you can just install the "soappy" package; if not, you can download the distribution from
http://pywebsvcs.sourceforge.net/. ZSI, the other Python SOAP package, is also available from that site. Be warned thatSOAPpyrequires two other packages:fpconst, a floating-point library, andPyXML, a set of XML utilities. More information and links to the packages are available in theSOAPpy READMEfile.
Here's a transcript of a hypothetical SOAP RPC call that tries to sort a list in ascending order; compare it to the XML-RPC transcript earlier that called an XML-RPC version of the same method:
<?xml version="1.1" encoding="UTF-8"?>
<SOAP-ENV:Envelope SOAP-ENV:encodingStyle="http://schemas.xmlsoap.org/soap/
encoding/"
 xmlns:SOAP-ENV="http://schemas.xmlsoap.org/soap/envelope/"
 xmlns:SOAP-ENC="http://schemas.xmlsoap.org/soap/encoding/"
 xmlns:xsi="http://www.w3.org/1999/XMLSchema-instance"
 xmlns:xsd="http://www.w3.org/1999/XMLSchema">
<SOAP-ENV:Body>
 <ns1:sortList xmlns:ns1="urn:SearchSort" SOAP-ENC:root="1">
  <v1 SOAP-ENC:arrayType="xsd:int[2]" xsi:type="SOAP-ENC:Array">
   <item>10</item>
   <item>2</item>
  </v1>
  <v2 xsi:type="xsd:boolean">True</v2>
 </ns1:sortList>
</SOAP-ENV:Envelope>
The first thing to notice is all those xmlns declarations. SOAP is very particular about XML namespaces, whereas XML-RPC is much more informal and serves standalone XML documents. SOAP uses XML namespaces to define the format of the SOAP message itself (SOAP-ENV), the data types (such as xsd:boolean and the SOAP-specific SOAP-ENC:Array), and the very concept of a data type (xsi:type). This gives SOAP a lot more flexibility in how its data is encoded, but between XML Schema (xsd) and the SOAP data encoding schema (SOAP-ENC), most of the basic data types are already defined for you. Only in more complicated cases will you need to define custom data types.
The other namespace mentioned in this message is urn:SearchSort. That's the namespace of the method you're trying to call. As mentioned before, this is like the way the XML-RPC version of this request named its method searchsort.sortList, instead of just sortList. SOAP has formalized the XML-RPC convention, and uses XML namespaces to distinguish between different methods with the same name. Your SOAP call must be executed in a particular XML namespace. If you use a Python SOAP library to make SOAP calls, this is probably the only namespace you'll actually have to worry about.
If you ignore the namespaces, this message looks a lot like the XML-RPC message you saw earlier. There's a method call tag that contains a list of tags for the arguments to be passed into the method. Instead of the method call tag containing a child tag with the method name, here the tag is simply named after the method to be called. In XML-RPC, the arguments were listed inside a separate params tag. Here, they're direct children of the method call tag. The SOAP message is a little more concise, but (again, disregarding the namespace declarations) just as easy to read.
Compare the XML-RPC representation of the array to be sorted, which you saw earlier, to the SOAP representation of the same array:
<array>
 <data>
  <value><i4>2</i4></value>
  <value><i4>10</i4></value>
</data>
</array>
<v1 SOAP-ENC:arrayType="xsd:int[2]" xsi:type="SOAP-ENC:Array">
  <item>10</item>
  <item>2</item>
</v1>
This difference between the two protocols is typical. There's more up-front definition in SOAP and more references to external documents that formally define the data types. The upside of that is that once the definition is done, it takes fewer bytes to actually define a data structure. It doesn't make much difference with a small array like this, but consider an array with thousands or millions of elements. SOAP is more efficient than XML-RPC at representing large data structures.
Here's a possible response you might get from a SOAP server after sending it the sortList request:
<?xml version="1.1" encoding="UTF-8"?>
<SOAP-ENV:Envelope SOAP-ENV:encodingStyle="http://schemas.xmlsoap.org/soap/encoding/"
xmlsn:SOAP-ENV="http://schemas.xmlsoap.org/soap/envelope/"
 xmlns:SOAP-ENC="http://schemas.xmlsoap.org/soap/encoding/"
 xmlns:xsi="http://www.w3.org/1999/XMLSchema-instance"
 xmlns:xsd="http://www.w3.org/1999/XMLSchema">
<SOAP-ENV:Body>
 <ns1:sortList xmlns:ns1="urn:SearchSort" SOAP-ENC:root="1">
  <return SOAP-ENC:arrayType="xsd:int[2]" xsi:type="SOAP-ENC:Array">
   <item>2</item>
   <item>10</item>
  </return>
 </ns1:sortList>
</SOAP-ENV:Envelope>
Just as with XML-RPC, a SOAP response has the same basic structure as a SOAP request. Where the SOAP request had a list of arguments, the SOAP response has a single return value. This, too, is similar to XML-RPC: Recall that an XML-RPC response contained a params list, which was only allowed to contain one param — the return value. SOAP makes this convention more natural by eliminating the params tag and just returning the return value.
If you make a SOAP request that makes the server code throw an exception, the Body of the response you get back will contain a Fault element. It might look something like this:
</SOAP-ENV:Body>
 <SOAP-ENV:Fault SOAP-ENC:root="1">
  <faultcode>SOAP-ENV:Client</faultcode>
  <faultstring>No method urn:SearchSort:sortList found</faultstring>
  <detail xsi:type="xsd:string">
   There's no method "sortList" in the urn:SearchSort namespace.
  </detail>
 </SOAP-ENV:Fault>
</SOAP-ENV:Body>
The faultstring and detail sub-elements of Fault are for human-readable descriptions, and the faultcode element describes the type of error. Whereas XML-RPC says nothing about the fault code except that it must be an integer, SOAP defines four standard strings to serve as fault codes. Two of them (mustUnderstand and VersionMismatch) you probably won't encounter in basic SOAP use. The other two fault codes serve, appropriately enough, to identify who caused the fault. If you're writing a SOAP client and you get a faultcode of Client, that means you caused the error (for instance, in the preceding, by calling a method that doesn't exist in the namespace you specified). If the faultcode is Server, that means there's nothing wrong with your request but the server can't fulfill it at the moment — perhaps the server code can't access a database or some other necessary resource.
Within a Python interface, the details of a response with a Fault are hidden from you, pretty much as in XML-RPC. If a Python method you've exposed through SOAP throws an exception, the SOAP server automatically transforms the exception into a SOAP response with a Fault element. If you're using SOAPpy and you call a remote method that responds with a Fault, it is transformed into a subclass of Error: SOAPpy.Types.faultType.
In principle, there's no reason why you shouldn't be able to run a SOAP server from a CGI script: Remember that despite all the additional complexity and mystique of SOAP, it's just like REST and XML-RPC in that it's just a document being POSTed to a URL and another document being sent in return. Unfortunately, SOAPpy doesn't provide a CGI script that serves SOAP requests, only a standalone server, SOAPServer.
ZSI, the other SOAP implementation for Python, does offer a CGI-based server.
The following sample script, BittyWiki-SOAPServer.py, exposes the BittyWiki interface to SOAP using a standalone server. This file should go into the same directory as the file BittyWiki.py, so that you can use the core BittyWiki engine. Alternatively, you can put BittyWiki.py into one of the directories in your PYTHON_PATH so you can use it from anywhere:
#!/usr/bin/python
import sys
import SOAPpy
from BittyWiki import Wiki

class BittyWikiAPI:
    """A simple wrapper around the basic BittyWiki functionality we
    want to expose to the API."""

    def __init__(self, wikiBase):
       "Initialize a wiki located in the given directory."
        self.wiki = Wiki(wikiBase)

    def getPage(self, pageName):
       "Returns the text of the given page."
        page = self.wiki.getPage(pageName)
        if not page.exists():
            raise NoSuchPage, page.name
        return page.getText()

    def save(self, pageName, newText):
       "Saves a page of the wiki."
        page = self.wiki.getPage(pageName)
        page.text = newText
        page.save()
        return "Page saved."

    def delete(self, pageName):
       "Deletes a page of the wiki."
        page = self.wiki.getPage(pageName)
        if not page.exists():
            raise NoSuchPage, page.name
        page.delete()
        return "Page deleted."

class NoSuchPage(Exception):
    """An exception thrown when a caller tries to access a page that
    doesn't exist."""
    pass
The actual API code is exactly the same as for the XML-RPC server; it could even be moved into a common library. The only difference is that now you register it with a SOAPServer instead of a SimpleXMLRPCServer:
DEFAULT_PORT = 8002
NAMESPACE = 'urn:BittyWiki'
WIKI_BASE = 'wiki/'
if __name__ == '__main__':
    api = BittyWikiAPI(WIKI_BASE)
    port = DEFAULT_PORT
    if len(sys.argv) > 1:
port = sys.argv[1]
try:
port = int(port)
except ValueError:
#Oops, that wasn't a port number. Chide the user and exit.
print 'Usage: "%s [optional port number]"' % sys.argv[0]
sys.exit(1)
print "Starting up standalone SOAP server on port %s." % port
handler = SOAPpy.SOAPServer(('localhost', port))
handler.registerObject(api, NAMESPACE)
handler.serve_forever()Here's WikiSpiderSOAP.py, another wiki search-and-replace client similar to the ones described earlier for BittyWiki's REST and XML-RPC interfaces. By now, this code should be familiar. The pattern is always the same: Set up some reference to the basic BittyWiki API and run the basic search-and-replace spider algorithm using it. The only major difference between this version and the XML-RPC version is the exception handling: xmlrpclib and SOAPpy act differently when something goes wrong on the server side, so the exception handling code must be different. Other than that, the SOAP-based search-and-replace spider looks more or less the same as the XML-RPC one:
#!/usr/bin/python
import re
import SOAPpy

class WikiReplaceSpider:
    "A class for running search-and-replace against a web of wiki pages."

    WIKI_WORD = re.compile('(([A-Z][a-z0-9]*){2,})')

    def __init__(self, rpcURL):
       "Accepts a URL to a BittyWiki SOAP API."
        self.api = SOAPpy.SOAPProxy(rpcURL, "urn:BittyWiki")
        self.api.config.dumpSOAPIn=1

    def replace(self, find, replace):
        """Spider wiki pages starting at the front page, accessing them
        and changing them via the XML-RPC API."""

        processed = {} #Keep track of the pages already processed.
        todo = ['HomePage'] #Start at the front page of the wiki.
        while todo:
            for pageName in todo:
                print 'Checking "%s"' % pageName
                try:
                    pageText = self.api.getPage(pageName)
                except SOAPpy.Types.faultType, fault:
                    if fault.detail.find("NoSuchPage") != −1:

                        #Some page mentioned a WikiWord that doesn't exist
                        #yet; not a big deal.
                        pass
                    else:
                        #Some other problem; pass it on up.
                        raise SOAPpy.Types.faultType, fault
                else:
                    #This page actually exists; process it.
                    #First, find any WikiWords in this page: they may
                    #reference other existing pages.
                    for wikiWord in self.WIKI_WORD.findall(pageText):
                        linkPage = wikiWord[0]
                        if not processed.get(linkPage) and linkPage not in todo:
                            #We haven't processed this page yet: put it on
                            #the to-do list.
                            todo.append(linkPage)

                    #Run the search-and-replace on the page text to get the
                    #new text of the page.
                    newText = pageText.replace(find, replace)

                    #Check to see if this page name matches the search
                    #string. If it does, delete it and recreate it
                    #with the new text; otherwise, just save the new
                    #text in the existing page.
newPageName = pageName.replace(find, replace)
if newPageName != pageName:
print ' Deleting "%s", will recreate as "%s"'
% (pageName, newPageName)
self.api.delete(pageName)
if newPageName != pageName or newText != pageText:
print ' Saving "%s"' % newPageName
self.api.save(newPageName, newText)
#Mark the new page as processed so we don't go through
#it a second time.
if newPageName != pageName:
processed[newPageName] = True
processed[pageName] = True
todo.remove(pageName)
if __name__ == '__main__':
import sys
if len(sys.argv) == 4:
rpcURL, find, replace = sys.argv[1:]
else:
print 'Usage: %s [URL to BittyWiki SOAP API] [find] [replace]'
% sys.argv[0]
sys.exit(1)
WikiReplaceSpider(rpcURL).replace(find, replace)This spider works just like the REST and the XML-RPC versions described earlier in this chapter:
$ python WikiSpiderSOAP.py http://localhost:8002/ Foo Bar
Checking "HomePage"
 Saving "HomePage"
Checking "FooCaseStudies"
...
Note that because BittyWiki-SOAPServer.py runs its own web server, there's no need to point to a script somewhere on the web server that handles the SOAP interface. The entire web server is the SOAP interface.
That concludes the use of Python version 2.4 for now; we return to it in the section on WSDL later on.
Exposing a web service API won't do any good unless the people who want to write robots can figure out how to use it. If you were to distribute a Python module with inadequate documentation (shame on you), a determined user could try to figure out the API by looking at the source code and, if necessary, making experimental changes, learning through trial and error. That isn't possible when you expose a web service, so it's especially important that you have a real way of getting the API information to your users.
In my opinion, no matter which web service protocol you're using, nothing beats an up-to-date human-readable description of an API. This can be written manually or generated through introspection and the use of Python docstrings. Up next are three sample documents that describe the three web service APIs for the BittyWiki application created in this chapter. They're all extremely short, but they contain all the information a user needs to write an application using any of them.
To get the raw wiki markup for the page "WikiPage", GET the URL http://localhost:8000/cgi-bin/bittywiki-rest.cgi/WikiPage. You'll get an XML data structure in which the <data> tag contains the wiki markup of the WikiPage page. If the WikiPage page doesn't exist, you'll get an error.
To modify the contents of the page "WikiPage", POST to the URL http://localhost:8000/cgi-bin/bittywiki-rest.cgi/WikiPage. Set data equal to the wiki markup you want to write to the page, and operation to the string write. You'll receive an XML data structure in which the <message> tag contains a status message. If the WikiPage page doesn't exist, it will be automatically created.
To delete the page "WikiPage", POST to the URL http://localhost:8000/cgi-bin/bittywiki-rest.cgi/WikiPage. Set "operation" to the string delete. You'll receive an XML data structure in which the <message> tag contains a status message. If the WikiPage page doesn't exist, you'll get an error.
The BittyWiki API server is located at http://localhost:8001/. It exposes three methods:
bittywiki.getPage(string pageName) — Returns the text of the named page. Passing an empty string designates the wiki homepage. This throws a fault if you request a page that doesn't exist.
bittywiki.save(string pageName, string text) — Sets the text of the named page. If the page doesn't already exist, it is automatically created.
bittywiki.delete(string pageName) — Deletes the named page. This throws a fault if you try to delete a page that doesn't exist.
The BittyWiki SOAP server is located at http://localhost:8002/. It exposes three methods in the namespace "urn:BittyWiki":
getPage(string pageName) — Returns the text of the named page. Passing an empty string designates the wiki homepage. This throws a fault if you request a page that doesn't exist.
save(string pageName, string text) — Sets the text of the named page. If the page doesn't already exist, it is automatically created.
delete(string pageName) — Deletes the named page. This throws a fault if you try to delete a page that doesn't exist.
An unofficial addendum to the XML-RPC specification defines three special functions in the "system" namespace, as a convenience to users who might not know which functions an XML-RPC server supports, or what those functions might do. These special functions are the web service equivalent of Python's ever-useful dir and help commands. Both xmlrpc.server and CGIXMLRPCRequestHandler support two of the three introspection functions, assuming you call the register_introspection_functions method on the server or handler object after instantiating it:
handler=xmlrpc.server.SimpleXMLRPCServer((host,port))
handler.register_introspection_functions()
Method Name | What It Does |
|---|---|
| Returns the names of all the functions the server makes available. |
| Returns a string with documentation for the named function. Implemented in Python by returning the function's Python docstring. |
| Returns the signature and return type of the named function. Not automatically supported by the Python implementation because Python function definitions don't include type information. |
Many SOAP-based web services define their interface in a WSDL file. WSDL is basically a machine-parseable version of the human-readable API document shown earlier in this section.
Recall that XML-RPC defines a set of rules for transforming a few basic data structures into XML documents and back into data structures. WSDL allows such rules to be constructed on the fly. It's more or less a programming language-agnostic schema for describing functions: their names, the data types of their arguments, and the data types of their return values. Although WSDL is associated with SOAP, it's possible to use SOAP without using WSDL (in fact, you did just that throughout this chapter's section on SOAP).
A WSDL file is an XML document (of course!), which defines the following aspects of your web service inside its definitions element:
Any custom data types defined by your web service. These go into
complexTypeelements of atypeslist.The formats of the messages sent and received by your web service; that is, the signatures and return values of the functions your web service defines. These are defined in a series of
messageelements, and may make reference to any custom data types you defined earlier.The names of the functions your web service provides, along with the input and output messages expected by each. This is in the
portTypeelement, which contains anoperationelement for each of the web service's functions.A binding of your web service's functions to a specific protocol — that is, HTTP. For simple SOAP applications, this section is an exercise in redundancy: You end up just listing all of your functions again. It exists because SOAP is protocol-independent; you need to explicitly state that you're exposing your methods over HTTP. This goes in the
bindingelement.Finally, the URL to your web service. This is defined in the
serviceelement.
Note that because you are once again working with SOAP, and the SOAP libraries have not been updated (at the time of this writing) to work with Python version 2.6 or 3.0, you will once more rely on Python version 2.4 for the following examples. Here's BittyWiki.wsdl, a WSDL file for the SOAP API exposed by BittyWiki:
<?xml version="1.1"?>
<definitions name="BittyWiki"
             targetNamespace="urn:BittyWiki"
            xmlns:xsd="http://www.w3.org/2001/XMLSchema"
            xmlns:soap="http://schemas.xmlsoap.org/wsdl/soap/"
      xmlns="http://schemas.xmlsoap.org/wsdl/">
<!- -Descriptions of the functions exposed by the BittyWiki API.  The
definitions of the functions reference message elements which will be
defined afterwards.- ->
<portType name="BittyWikiPortType">
  <operation name="getPage">
      <input message="sendPageName"/>
      <output message="getPageText"/>
  </operation>

  <operation name="save">
<input message="sendPageNameAndText"/>
<output message="getStatusMessage"/>
</operation>
<operation name="delete">
<input message="sendPageName"/>
<output message="getStatusMessage"/>
</operation>
</portType>The WSDL parser now knows which functions are exposed by BittyWiki, but nothing about the signatures or return types of those functions. Those come next:
<!- -Descriptions of the method signatures used by the BittyWiki API.
For instance, this first one is for a method where you send in a page name.
This method signature is common to getPage() and delete().- ->
<message name="sendPageName">
   <part name="pageName" type="xsd:string"/>
</message>

<message name="sendPageNameAndText">
   <part name="pageName" type="xsd:string"/>
   <part name="pageText" type="xsd:string"/>
</message>

<!- -Descriptions of the possible return values obtained from the
BittyWiki API. The first one is for a return value that contains
a wiki page's markup: that is, the return value of getPage().- ->
<message name="getPageText">
   <part name="pageText" type="xsd:string"/>
</message>

<message name="getStatusMessage">
   <part name="message" type="xsd:string"/>
</message>
A rather redundant section follows, as the four SOAP functions are bound to SOAP-over-HTTP:
<!- -A binding of the BittyWiki API functions (previously defined only
in the abstract) to the specific "SOAP-over-HTTP" protocol.- ->
<binding type="BittyWikiPortType" name="BittyWikiSOAPBinding">
<soap:binding style="rpc" transport="http://schemas.xmlsoap.org/soap/http" />
  <operation name="getPage">
   <input><soap:body use="literal" namespace="urn:BittyWiki" /></input>
   <output><soap:body use="literal" namespace="urn:BittyWiki" /></output>
  </operation>

  <operation name="save">
   <input><soap:body use="literal" namespace="urn:BittyWiki" /></input>
   <output><soap:body use="literal" namespace="urn:BittyWiki" /></output>
  </operation>

  <operation name="delete">
   <input><soap:body use="literal" namespace="urn:BittyWiki" /></input>
   <output><soap:body use="literal" namespace="urn:BittyWiki" /></output>
</operation>
</binding>
Finally, the code to let WSDL know where to find the BittyWiki web service:
<!- -A link to the BittyWiki web service on the web. It uses the
BittyWiki API defined in BittyWikiPortType, as realized by its
SOAP-over-HTTP binding, BittyWikiSOAPBinding.- ->
<service name="BittyWiki">
 <port name="BittyWikiPort" binding="BittyWikiSOAPBinding">
  <soap:address location="http://localhost:8002/"/>
 </port>
</service>
</definitions>
The BittyWiki API doesn't define any custom data
types, so there's notypeselement in its WSDL file. If you want to see atypeselement that has somecomplexTypes, look at the WSDL file for the Google Web APIs.
WSDL is pretty complicated: That WSDL file is bigger than the Python script implementing the web service it describes. WSDL files are usually generated from the corresponding web service source code, so that humans don't have to specify them. It's not possible to do this from Python code because a big part of WSDL is defining the data types, and Python functions don't have predefined data types. Both the SOAPpy and ZSI libraries can parse WSDL (in fact, they share a WSDL library: wstools), but there's not much in the way of Python-specific resources for generating WSDL.
This chapter described three standards for web services, each with a different philosophy, each with advantages and drawbacks. REST aims to get the most out of the facilities provided by HTTP, but it lacks a standard encoding for even simple data types. XML-RPC provides that encoding, but it's verbose and only deals with simple data types and compositions of simple data types. SOAP offers the structured data types of XML-RPC with the flexibility of REST, but its added complexity makes hard cases more difficult to understand than if they'd just been implemented with REST.
Industry trends favor REST and SOAP over XML-RPC. SOAP has the backing of large software companies such as IBM and Microsoft; REST has the backing of independent web service users and developers. That's because APIs based around REST and XML-RPC are generally easier to learn and use. Whenever web services expose the same API through different protocols, the simplest one generally wins. For instance, Amazon exposes a SOAP API in addition to the REST API covered in this chapter, but about 80 percent of its users choose REST over SOAP.
Which should you choose? Well, if you were a big fan of large software companies like IBM and Microsoft, you probably wouldn't be using Python in the first place. You would be using Java or .NET: two strongly typed languages with good SOAP tool support. In most cases, the extra functionality of SOAP isn't needed, and Python's support for SOAP isn't consummate with the added complexity, so why choose it unnecessarily?
You should start off by planning to expose a well-designed REST or XML-RPC API. If, during the design or implementation stage, you start running into problems with your choice, look into using SOAP (once the libraries have been updated). Unless you're doing heavy-duty automatic business process software, or interfacing with a statically typed language like Java or .NET, you'll probably be able to see the REST or XML-RPC API through to the end. Your users will thank you for the simpler interface.
My ideal web service would have a RESTful interface in which each resource could accept POST data in the format defined by XML-RPC (or some simple subset of SOAP). The web service could then be designed along REST principles, but some variant of xmlrpc.client or SOAPpy could be used to marshal and unmarshal the data without requiring the creation of custom parsers.
Whatever you choose, please try to keep web services in mind from the moment you begin the design: A web service is just a web application for robots. If you want your application to inspire creativity and not just meet a predefined need, you must give up some of the control to your users.
A web service may have users who skirt the rules, or administrators who feel the users are ungrateful for the service they're being provided. In the interests of harmony, here are a few basic pieces of advice for managing the social aspect of web services.
If you write a robot to consume someone else's web services, it's important to play by the rules. In particular, don't try to evade any limitations such as license keys or daily limits on your access to the API. Access to a web service is a privilege, not a right. It's better to run out of API calls and have to complete a task later than you planned than to have your access taken away altogether.
If you're planning to expose your web application through a web service, you need to consider the flip side of these issues. If your audience is already scripting your application, you've got a leg up because you don't have to guess what people might do with it. Before you design your web services, poll your robot-writing users to see what parts of your application they're using. Make your web services available on terms that allow users to move over to the new system, or they'll have no incentive to switch.
As producer of a public web service, you might feel like the burden of etiquette falls completely on your users. After all, you're providing a service to them and not expecting anything in return. Nonetheless, it's important to make your terms of use palatable because the people writing the robots have the final advantage: So long as you provide a web application with the same functionality as the web service, determined users can always write a robot to use the web application however they want. There's no foolproof way you can distinguish between a robot that uses your site and the web browser a human might use to use your site. They're both pieces of software running on someone's computer, making an HTTP request. All the HTTP headers, including the User-Agent and the authentication headers, can be forged by a robot.
That said, if a particular robot is causing you trouble, you can solve the problem with the same tools you'd use against a troublesome human user.
It's possible to write scripts that consume web applications as though they were web services. After all, that's how the idea of web services got started in the first place. Some sites still haven't gotten the web services religion, or might have web services that don't expose the functionality you need. To write the robot you have in mind, you'd have to go through the application.
This chapter doesn't cover how to write such scripts, but the general principles are similar to web services; and if this topic interests you, you'll eventually find yourself doing it. When you do, don't do anything that violates the site's terms of service. In addition, don't access the site more than a human user would. If you can, run your script in off hours so you don't add to the load on the system. Finally, ask the site administrators for a web service interface so you can work against a more stable interface that uses less bandwidth.
Web applications are powerful and popular; with Python, they're also easy to write. The REST architecture made the Web usable and successful: Employing it when designing your application gives you a head start. Web applications are designed for humans; a web service is just a web application designed for use by software scripts instead. Expose REST and XML-RPC web services for simplicity and easy adoption; SOAP for heavy-duty tasks or when interfacing with Java or .NET applications. Make use of the web services provided by others: They're opening up their data sets and algorithms for your benefit.
What's a RESTful way to change BittyWiki so that it supports hosting more than one Wiki?
Write a web application interface to
WishListBargainFinder.py. (That is, a web application that delegates to the Amazon Web Services.)The wiki search-and-replace spider looks up every new WikiWord it encounters to see whether it corresponds to a page of the wiki. If it finds a page by that name, that page is processed. Otherwise, nothing happens and the spider has wasted a web service request. How could the web service API be changed so that the spider could avoid those extra web service requests for nonexistent pages?
Suppose that, to prevent vandalism, you change BittyWiki so that pages can't be deleted. Unfortunately, this breaks the wiki search-and-replace spider, which sometimes deletes a page before re-creating it with a new name. What's a solution that meets both your needs and the needs of the spider's users?