
Laying the code foundation
Working with the <head> section
Developing the <body> section
Exploring Code view
Working with Live View and Live Code view
Using related and dynamically related files
Accessing the Code Navigator
Consolidating code with the JavaScript Extractor
Dreamweaver Technique: Collapsing and Moving Code
Adding special characters
As far as most designers are concerned, in a perfect world, you could lay out a complex Web site with a visual authoring tool and never have to see the HTML and other code, much less modify it. Dreamweaver takes you a long way toward this goal — in fact, you can create many types of Web pages using only Dreamweaver's Design and Live views. As your pages become more complex, however, you may need to tweak your code in one way or another.
Programmers, on the other hand, are happiest working directly with the code. To accomplish their goals efficiently, coders need a responsive, flexible editor capable of handling a wide range of computer languages. Just how much assistance is required is a matter of personal taste: Some code writers want all the help they can get, with features such as syntax coloring, code completion, and Code Hints, among others. Other programmers just want the editor to stay out of their way.
Dreamweaver tries to give coders the best of both worlds by providing a full-featured editor with numerous options. In addition to the features mentioned in the preceding paragraph, Dreamweaver includes full tag libraries in numerous languages: HTML, CFML, ASP.NET, JSP, and PHP to name a few. Both hand-coders and visual designers can enjoy the benefits of Dreamweaver tools such as the Snippets panel, for adding chunks of code via drag-and-drop, and the Tag inspector, for displaying all the attributes of a chosen tag — and making them editable as well. This chapter covers all these features and more.
Although the Internet is made up of a plethora of technologies, HTML is still at the heart of a Web page. This chapter gives you a basic understanding of how HTML works and provides you with the specific building blocks to begin creating Web pages. This chapter also gives you your first look at a Dreamweaver innovation: Code view, for altering the code side by side with the visual environment. The other Dreamweaver-specific material in this chapter — which primarily describes how Dreamweaver sets and modifies page properties — is suitable for even the most accomplished Web designers. Armed with these fundamentals, you are ready to begin your exploration of Web-page creation.
To understand what HTML is, you simply need to know what it stands for: Hypertext Markup Language. Hypertext refers to one of the World Wide Web's main properties — the capability to jump from one page to another, no matter where the pages are located on the Web. Markup Language means that a Web page is actually a heavily annotated text file. The basic building blocks of HTML, such as <strong> and <p>, are known as markup elements, or tags. The terms element and tag are used interchangeably.
An HTML page, then, is a set of instructions (the tags) suggesting to your browser how to display the enclosed text and images. The browser knows what kind of page it is handling based on the tag that opens the page, <html>, and the tag that closes the page, </html>. The great majority of HTML tags come in such pairs, in which the closing tag always has a forward slash before the keyword. Two examples of tag pairs are <p>...</p> and <title>...</title>. A few important tags are represented by a single element: the image tag <img>, for example.
The HTML page is divided into two primary sections: the <head> and the <body>. Information relating to the entire document goes in the <head> section: the title, description, keywords, and any language subroutines called from within the <body>. The content of the Web page is found in the <body> section. All the text, graphics, embedded animations, Java applets, and other elements of the page are found between the opening <body> and the closing </body> tags.
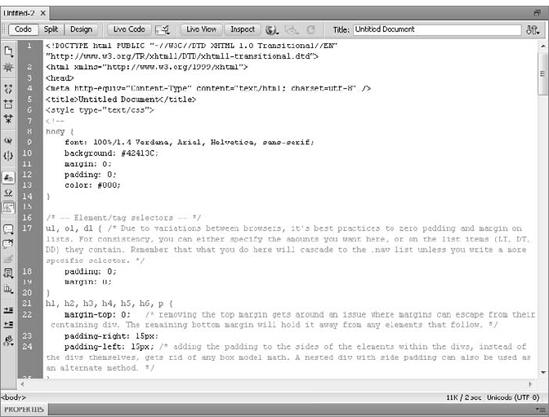
When you start a new document in Dreamweaver, the basic format is already laid out for you. Listing 5-1 shows the code from a Dreamweaver blank Web page.
Example 5-1. The HTML for a new Dreamweaver page
<!DOCTYPE HTML PUBLIC "-//W3C//DTD HTML 4.01 Transitional//EN">
<html>
<head>
<title>Untitled Document</title>
<meta http-equiv="Content-Type" content="text/html; charset=iso-8859-1">
</head>

<body>

</body>
</html>
I cover the opening <!DOCTYPE> tag in the section "doctype and doctype Switching" a little later in the chapter. First, you should notice how the <head>...</head> pair is separate from the <body>...</body> pair and that both are contained within the <html>...</html> tags.
Notice also that the <meta> tag has two additional elements:
http-equiv="Content-Type"
and
content="text/html; charset=iso-8859-1"
These types of elements are known as attributes. Attributes modify the basic tag and can either be equal to a value or stand-alone. I cover the specifics of the <meta> tag later in this chapter; for now, you should focus on just the syntax. Attributes are made up of name/value pairs where the attribute is set to be equal to some value, typically in quotes. Not all tags have attributes, but when they do, the attributes are specific.
One last note about an HTML page: You are free to use carriage returns, spaces, and tabs as needed to make your code more readable. The interpreting browser ignores all but the included tags and text to create your page. I point to some minor, browser-specific differences in interpretation of these elements throughout the book, but generally, you can indent or space your code as you wish.
Note
The style in which Dreamweaver inserts code is completely customizable. See Chapter 3 for details on changing your code preferences and Chapter 32 to see how you can adjust your tags more specifically with the Tag Library Editor.
The latest version of HTML is known as XHTML, short for Extensible HTML. XHTML is based on XML and, as such, has a more rigid syntax than HTML. For example, tags that do not enclose content — the so-called empty tags — are written differently. In HTML, a line-break tag is:
<br>
whereas in XHTML, the line-break tag is:
<br/>
Notice the additional space and the closing slash. Other differences include an opening XML declaration, as well as a specific doctype tag placed before the opening <html> tag. All tags must be in lowercase, and all attribute values must appear in quotes (but not necessarily lowercase) as follows:
<table align="RIGHT">
Dreamweaver makes it easy to code in XHTML and even to convert existing pages from HTML to XHTML. To work in XHTML from the ground up, set the Document Type Definition (DTD) option to one of the XHTML options available on the New Document category of Preferences (available when you choose Edit
To change an HTML page into an XHTML one, choose File
Because Dreamweaver has taken the pain out of using XHTML, the question is: Should you code in XHTML or HTML? As in most situations, it depends. Many larger companies that work extensively in XML require well-formed XHTML pages. Because it is the latest version of the Web's core language — and recommended by the W3C — you'll be perfectly poised for the future. One aspect of the future is the proliferation of Internet devices other than the computer: PDAs, cell phones, and set-top boxes, among others. For these types of devices, XHTML is far more portable than HTML.
However, you should be aware that not all browsers render XHTML pages exactly the same as they do HTML pages. The problems stem largely from older browsers (version 4 and earlier for both Internet Explorer and Netscape). If the audience for your site is heavily dependent on older browsers, you should probably stick with HTML for the time being; on the other hand, if the site's audience is fairly up-to-date and forward-looking, code in XHTML.
The very first element of an HTML page — even before the <html> tag — is, increasingly, a doctype declaration. As the name implies, a doctype declaration specifies the language or, more specifically, the DTD (Document Type Definition) in use for the file that follows. To validate their page, many authors include doctype statements like the following:
<!DOCTYPE HTML PUBLIC "-//W3C//DTD HTML 4.01 Transitional//EN">
This doctype is inserted by default when Dreamweaver creates a new static HTML page.
Note
As of this writing, the latest version of HTML to complete the recommendation process by the W3C is 4.01. After this version, the W3C recommended the switch to XHTML. Another revision of HTML is in the works, however: known as HTML5, this version allows you to use either HTML or XHTML coding.
Some browser versions inspect the doctype element in order to determine how the page should be rendered. Engaging in a practice known as doctype switching, these browsers (Internet Explorer 5.x and Safari 1.x or higher on a Mac, Internet Explorer 6 on Windows, and Netscape 6 or higher) work in two modes: strict and regular. When a browser is in strict mode, a page must be well-formed and validate without error to be rendered properly. Strict rendering is more consistent across browsers. The regular mode is far looser and more forgiving in how the page is coded; however, the page is more likely to be rendered differently in the varying browser versions.
You can ensure that your pages are rendered in the regular mode in a number of ways:
Do not include a
doctypedeclaration at all.Use a
doctypedeclaration that specifies an HTML version earlier than 4.0.Use a
doctypedeclaration that declares a transitional DTD of HTML 4.01, but does not include a URL to the DTD.
To trigger a browser's strict rendering mode:
Use a
doctypedeclaration for XML or XHTML.Use a
doctypedeclaration that declares a strict DTD of HTML 4.01.Use a
doctypedeclaration that declares a transitional DTD of HTML 4.01 that includes a URL to the DTD.
When including a URL to the DTD, the doctype looks as follows:
<!DOCTYPE HTML PUBLIC "-//W3C//DTD HTML 4.01 Transitional//EN"
"http://www.w3.org/TR/html4/loose.dtd">
You have several alternatives in Dreamweaver for including whichever doctype you choose. Hand-coding is a sure but tedious method; the doctype statement is somewhat cumbersome and certainly not easy to remember precisely. You could also alter the standard HTML page by changing the Default.html file found in your Dreamweaver CS5ConfigurationDocumentTypesNewDocuments folder.
Note
For more details on altering the default page template, see Chapter 28.
Another approach is to create a custom snippet that enables you to drag the desired code right onto the page on a case-by-case basis. Use of the Snippets panel is covered later in this chapter in the section "Adding Code Through the Snippets Panel."
Which approach you take — strict or regular — depends, as with HTML and XHTML, on your audience. If a significant number of your site's audience use older browsers, stay with a regular doctype. If the statistics for your site indicate that a high percentage of visitors are using more current browsers, go with a strict doctype. Of course, some clients or managers may mandate that their designers use a specific doctype.
Information pertaining to the Web page overall is contained in the <head> section of an HTML page. Browsers read the <head> to determine how to render the page — for example, is the page to be displayed using the Western, the Chinese, or some other character set? Search engine spiders also read this section to quickly glean a summary of the page.
When you begin inserting JavaScript (or code from another scripting language such as VBScript) into your Web page, all the subroutines and document-wide declarations go into the <head> area. Dreamweaver uses this format by default when you insert a JavaScript behavior.
Dreamweaver enables you to insert, view, and modify <head> content without opening an HTML editor. Dreamweaver's View Head Content capability enables you to work with <meta> tags and other <head> HTML code as you do with the regular content in the visual editor.
When you first open a page in Dreamweaver, your default Web page is untitled, with no background image and only a plain, white background. You can change any of these properties and more through Dreamweaver's Page Properties dialog box.
As usual, Dreamweaver gives you more than one method for accessing the Page Properties dialog box. You can choose Modify
Tip
Here's another way to open the Page Properties dialog box: Click the Page Properties button of the Text Property inspector.
The Page Properties dialog box, shown in Figure 5-1, gives you easy control over the overall look and feel of the HTML page.
Note
If you set options in the Appearance (HTML) category, the values you assign through the Page Properties dialog box are applied to the <body> tag. However, because values assigned in Appearance (CSS), the preferred way of working, result in CSS rules embedded in the document's <head> area, this topic is covered here.
The main categories of the Page Properties dialog box are Appearance (CSS), Appearance (HTML), Links (CSS), Headings (CSS), Title/Encoding, and Tracing Image. The Appearance (HTML) category should be used only on legacy pages that have not been converted to CSS styling.
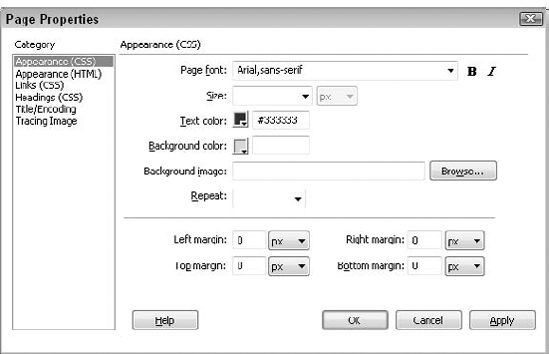
The Appearance (CSS) category controls the overall look and feel of the current document as CSS rules. The Appearance (CSS) options, shown in Figure 5-1, include:
Page Font: Set the font family from the drop-down list or select Edit Font List to make more options available. Fonts can optionally be set to bold and/or italic.
Size: Choose a default size from the list or enter a specific value. Both absolute (9, 10, 12, and so on) and relative (xx-small, medium, larger, and so on) are available. If an absolute value is used, any of the standard measurement systems such as pixels, points, or ems can be chosen.
Text Color: Click this color swatch to control the color of default text.
Background Color: Click this color swatch to change the background color of the Web page. Select one of the browser-safe colors from the drop-down list, or enter its name or hexadecimal representation (for example, "#FFFFFF") directly into the text field.
Background Image: Select the graphic displayed in the page background. The path to the source file can either be entered in the field directly or chosen by clicking the Browse button. If the image is smaller than your content requires, the browser tiles the image to fill out the page; specifying a background image overrides any selection in the Background Color field.
Repeat: Define whether the background image is repeated along the X or Y axis, both, or not at all. If no Repeat option is specified, the background image repeats horizontally and vertically to fill the page.
Margins: Enter values here to change the page margin settings. As with the text size, the various measurement systems are available.
Tip
To gain greater control over your background image, set the parameters through the CSS Rule Definition dialog when defining a CSS rule for the <body> tag. Through CSS, you can control the background image placement as well as the attachment options (fixed or scroll).
Note
If you set the Preferences to use HTML tags rather than CSS, you enter the margin settings into the <body> tag.
The Appearance (HTML) category defines the background and margin properties like the equivalent settings in the Appearance (CSS) category, but writes the code as attributes in the <body> tag. This category includes:
Background Color: Click this color swatch to change the background color of the Web page. Select one of the browser-safe colors from the drop-down list, or enter its name or hexadecimal representation (for example, "#FFFFFF") directly into the text field.
Background Image: Select the graphic displayed in the page background. The path and source filename can either be entered in the field directly or chosen by clicking the Browse button. If the image is smaller than your content requires, the browser tiles the image to fill out the page; specifying a background image overrides any selection in the Background Color field.
Margins: Enter values here to change the page margin settings. As with the text size, the various measurement systems are available.
Note
If you set the Preferences to use HTML tags rather than CSS, you enter the margin settings into the <body> tag.
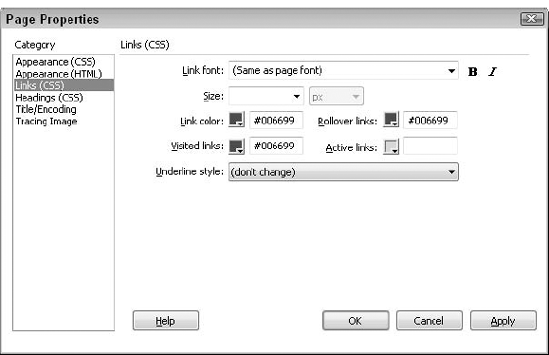
Hyperlinks are a critical aspect of any Web page, and the Links (CSS) category of the Page Properties dialog box sets their initial and interactive appearance. This category has the following options (see Figure 5-2):
Link Font: Set the typeface for links. The default choice is to use the same font as the rest of the page, an option set in the Appearance (CSS) category. You can also opt to bold or italicize a link.
Size: Set the font size for the link. If you do not enter a value, links are displayed in the same size as the standard font.
Link Color: Click this color swatch to modify the color of any text designated as a link or the border around an image link.
Visited Links: Click this color swatch to select the color that linked text changes to after a visitor to your Web page has selected that link and then returned to your page.
Rollover Links: Select the color you want to appear when the user's mouse moves over the link.
Active Links: Click this color swatch to choose the color to which linked text changes briefly when a user selects the link. The active link flashes very briefly during a normal operation and many designers don't bother specifying this parameter.
Underline Style: Determine how the link uses underlines. Designers have the choice of always underlining the link, never underlining it, displaying the underline only on rollover, or hiding it during rollover.
Dreamweaver enables you to control the headings on a page separately from the paragraph text, if you so desire. By default, all headings (tags <h1> through <h6>) share the same font as set for the page, but you can choose a new font from the Heading Font list. Any font chosen here applies to all headings, but sizes and colors for each heading may be set independently, as shown in Figure 5-3.

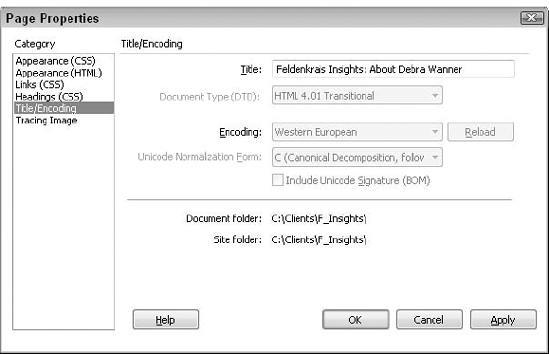
Fundamental aspects of the Web page are set in the Title/Encoding category. Use the Title field to enter the Web page title; what you enter here appears in the browser's title bar when your page is viewed. Search engine spiders also read the title as one of the important indexing cues.
Tip
You can also change the document title in Dreamweaver's Document toolbar. Just enter the information in the Title field and press Enter (Return) to confirm the modification. You see the new title appear in the program's title bar and whenever you preview the page in a browser.
The Encoding options determine the character set in which you want your Web page to be displayed. The default option for the English version of Dreamweaver is Western European. Developers of multilanguage sites may find it better to choose Unicode (UTF-8) as the encoding option.
If Unicode is selected, both the Unicode Normalization Form list and the Include Unicode Signature (BOM) option become available, as shown in Figure 5-4. The Unicode Normalization Form list chooses how the Unicode characters are converted to binary format. The Unicode Signature option determines whether a byte order mark (BOM) is attached to the file.
The Page Properties dialog box also displays the document folder if the page has been saved and the current site root folder if one has been selected.
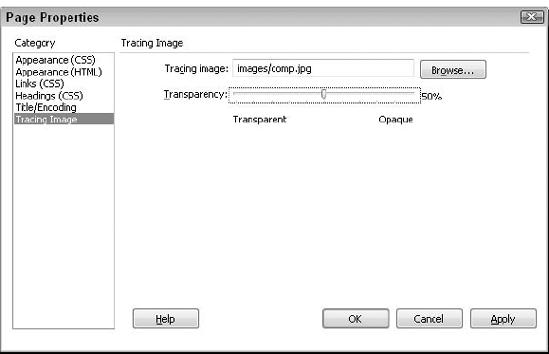
The Tracing Image category enables you to pick a graphic that can be used as a layout guide; the tracing image is displayed only in Dreamweaver. Select the file by clicking the Browse button and locating a GIF, JPG, PNG, or PSD file; if you choose a Photoshop (PSD) document, Dreamweaver converts it to a Web-ready format. After you've selected your file, you can set the degree of opaqueness by changing the Transparency slider, shown in Figure 5-5.
Note
The Tracing Image option is a powerful feature for quickly building a Web page based on design comps. For details about this feature and how to use it with Dreamweaver AP elements, see Chapter 10.
Choosing Colors from an Onscreen Image
One of the features found throughout Dreamweaver, the Eyedropper tool, is especially useful in the Page Properties options. The Eyedropper tool appears whenever you open any of Dreamweaver's color swatches, such as those attached to the Background, Text, and Links colors. You can not only pick a color from the Web-safe palette that appears, but you can also use the Eyedropper to select any color on any page — including system colors such as those found in dialog boxes and menu strips.
To use the Eyedropper tool to choose a color for the background (or any of the other options) from an onscreen image, follow these steps:
Insert your image on the page and, using the vertical scroll bar, position the Document window so that the image and the Page Properties dialog box can be viewed simultaneously.
If your image is too big to fit both it and the Page Properties dialog box on the same screen, temporarily resize your image by dragging its sizing handles. You can restore the original image size when you have finished by clicking the Refresh button on the Image Property inspector.
Open the Page Properties dialog box by choosing Modify

Drag the Page Properties dialog box to a place where the image can be seen.
Select the Background color swatch (or whichever one you want to change). The Dreamweaver color picker opens, and the pointer becomes an eyedropper.
Move the Eyedropper tool over the image until you find the correct color. (In Windows, you must hold down the mouse button as you drag the Eyedropper off the Dreamweaver dialog box to the image.) As you move the Eyedropper over an image, its colors are reflected in the color well, and its hex value is shown on the color picker. Click once when you've found the appropriate color. The color picker closes.
Repeat Steps 4 and 5 to grab other colors from the screen for other color swatches. Click OK when you've finished modifying the page properties.
You don't have to keep the image on your page to get its color. Just insert it temporarily and then delete it after you've used the Eyedropper to grab the shade you want.
Summary information about the content of a page — and a lot more — is conveyed through <meta> tags used within the <head> section. The <meta> tag can be read by the server to create a header file, which makes it easier for indexing software used by search engines to catalog sites. Numerous different types of <meta> tags exist, and you can insert them in your document just like other objects.
One <meta> tag is included by default in every Dreamweaver page. The Document Encoding option of the Page Properties dialog box determines the character set used by the current Web page and is displayed in the <head> section as follows:
<meta http-equiv="Content-Type" content="text/html; charset=iso-8859-1">
The preceding <meta> tag tells the browser that this page is, in fact, an HTML page and that the page should be rendered using the specified character set (the charset attribute). The key attribute here is http-equiv, which is responsible for generating a server response header.
Note
After you've determined your <meta> tags for a Web site, the same basic <meta> information can go on every Web page. Dreamweaver provides a way to avoid having to insert the same lines repeatedly: templates. After you've set up the <head> elements the way you like them, choose File
In Dreamweaver, you can insert a <meta> tag or any other tag using the <head> tag objects, which you access via the Head menu in the Insert panel's Common category (see Figure 5-6) or the Insert

Figure 5-6. Quick access to hidden code is available through the Head menu of the Insert panel's Common category.
Table 5-1. Head Tag Objects
Description | |
|---|---|
Meta | Inserts information that describes or affects the entire document. |
Keywords | Includes a series of words used by some search engines to index the current Web page and/or site. |
Description | Includes a text description of the current Web page and/or site. |
Refresh | Reloads the current document or loads a new URL within a specified number of seconds. |
Base | Establishes a reference for all other URLs in the current Web page. |
Link | Inserts a link to an external document, such as a style sheet. |
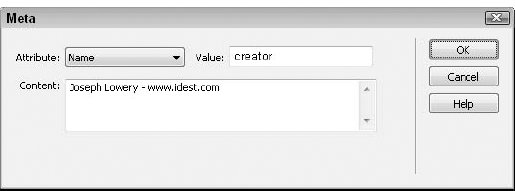
The Meta object is used to insert tags that provide information for the Web server through the HTTP-equiv attribute, and to include other overall data that you want in your Web page but not made visible to the casual browser. Some Web pages, for example, have built-in expiration dates after which the content is to be considered outmoded. In Dreamweaver, you can use the Meta object to insert a wide range of descriptive data.
You can access the Meta object in the Head menu in the Common category of the Insert panel or via the Insert menu by choosing Insert
You can add as many Meta objects as you want by repeating Steps 1 through 4. To edit an existing Meta object, you must first choose View
Take a closer look at the tags that convey indexing and descriptive information to some search engine spiders. Those chores are handled by the Keywords and Description objects. As noted in the sidebar, "Built-in Meta Commands," the Keywords and Description objects output specialized <meta> tags.
Both objects are straightforward to use. Choose Insert
Warning
Although you can enter paragraph returns in your Keywords and Description objects, you have no reason to. Browsers ignore all such formatting when processing your code.
What you place in the Keywords and Description objects can have a big impact on the accessibility of your Web page. If, for example, you want to categorize your Web page as an homage to the music of the early seventies, you could enter the following in the Content area of the Keywords object:
music, 70s, 70's, eagles, ronstadt, bee gees, pop, rock
In the preceding case, the content list is composed of words or phrases, separated by commas. Use sentences in the Description object, as follows:
The definitive look back to the power pop rock stylings of early
1970s music, with special sections devoted to the Eagles, Linda
Ronstadt, and the Bee Gees.
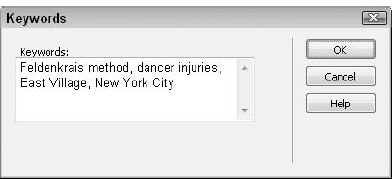
Figure 5-8. Entering information through the Keywords object helps search engines correctly index your Web page.
Keep in mind that the content in the Description should complement and extend both the Keywords and the Web page title. You have more room in both the Description and Keywords objects — actually, an unlimited amount — than in the page title, which should be on the short side in order to fit into the browser's title bar.
Warning
When using <meta> tags with the Keywords or Description objects, don't stuff the <meta> tags repeatedly with the same word. The search engines are engineered to reject too many instances of the same words, and your description will not get the attention it deserves.
The Refresh object forces a browser to reload the current page or to load a new page after a designer-set interval. The Web page visitor usually controls refreshing a page; if, for some reason, the display has become garbled, the user can choose Reload or Refresh from the menu to redraw the screen. Impatient Web surfer that I am, I often stop a page from loading to see what text links are available and then — if I don't see what I need — I hit Reload to bring in the full page. The code inserted by the Refresh object tells the server, not the browser, to reload the page. This can be a powerful tool, but it can lead to trouble if used improperly.
To insert a Refresh object, follow these steps:
Choose Insert
Enter the number of seconds you want to wait before the Refresh command takes effect in the Delay text box. The Delay value is calculated from the time the page finishes loading.
Select the desired Action:
Go To URL
Refresh This Document
If you selected Go To URL, enter a path to another page in the text box or click the Browse button to select a file.
Click OK when you have finished.
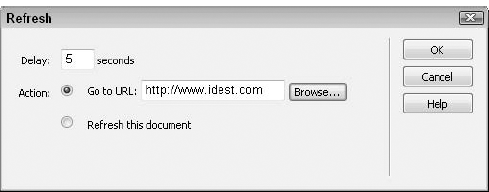
The Refresh object is most often used to redirect a visitor to another Web page. The Web is a fluid place, and sites often move from one address to another. Typically, a page at the old address contains the Refresh code that automatically takes the user to the new address. It's good practice to include a link to your new URL on the change-of-address page because not all browsers support the Refresh option. One other tip: Keep the number of seconds to a minimum — there's no point in waiting for something to happen automatically when you could click a link.
Warning
If you elect to choose the Refresh This Document option, use extreme caution, for several reasons. First, you can easily set up an endless loop for your visitors in which the same page is constantly being refreshed. If you are working with a page that updates often, enter a longer Refresh value, such as 300 or 500. You should be sure to include a link to another page to enable users to exit from the continually refreshed page. You should also be aware that many search engines will not index pages using the <meta> refresh tag because of widespread abuse by certain industries on the Web.
Through the Base object, the <head> section enables you to exert fundamental control over the basic HTML element: the link. The code inserted by this object specifies the base URL for the current page. If you use relative addressing (covered in Chapter 9), you can switch all your links to another directory — even to another Web site — with one command. The Base object takes two attributes: href, which redirects all the other relative links on your page, and target, which specifies where the links are rendered.
To insert a Base object in your page, follow these steps:
Choose Insert
Input the path that you want all other relative links to be based on in the Href text box or click the Browse button to pick the path.
If you want, enter a default target for all links without a specific target to be rendered in the Target text box.
Click OK when you've finished.
How does a <base> tag affect your page? Suppose you define one link as follows:
images/backgnd.gif
Normally, the browser looks in the same folder as the current page for a subfolder named images. A different sequence occurs, however, if you set the <base> tag to another URL in the following way:
<base href="http://www.testsite.com/client-demo01/">
With this <base> tag, when the same images/backgnd.gif link is activated, the browser looks for its file in the following location:
http://www.testsite.com/client-demo01/images/backgnd.gif
Warning
Because of the all-or-nothing capability of <base> tags, many Webmasters use them cautiously, if at all.
The Link object indicates a relationship between the current page and another page or file. Although many other intended uses exist, the <link> tag is most commonly used to apply an external Cascading Style Sheet (CSS) to the current page. This code is entered automatically in Dreamweaver when you create a new linked style sheet (as described in Chapter 6), or you can add the attributes yourself with the Link object. The <link> tag is also used to include TrueDoc dynamic fonts.
Tip
One other popular use of the <link> tag is to create favicons. A favicon is a small icon that appears in the Favorites menu of Internet Explorer browsers when you mark a site as a Favorite or bookmarked. To have a favicon appear when a page is bookmarked, create a favicon using one of the tools listed at www.favicon.com and upload that image file to your site. Then put a tag like this on your page:
<link rel="SHORTCUT ICON" href="/images/fav.ico">
where fav.ico is the name of the icon file, here stored in the images folder at the root of the site.
To insert a Link object, first choose Insert
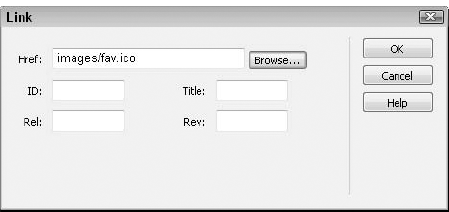
Next, enter the necessary attributes, as shown in Table 5-2.
Note
Aside from the style sheet use, little browser support exists for the other link functions. However, the World Wide Web Consortium (W3C) supports an initiative to use the <link> tag to address other media, such as speech synthesis and Braille devices, and it's entirely possible that the Link object will be used for this purpose in the future.
Table 5-2. Attributes for the Link Object
Description | |
|---|---|
| Path to the file being linked. Use the Browse button to open the Select File dialog box. |
| Used by scripts to identify this particular object and affect it if need be. |
| Displayed as a tooltip by Internet Explorer browsers. |
| Keyword that describes the relationship of the linked document to the current page. For example, an external style sheet uses the keyword |
| Like |
The content of a Web page — the text, images, links, and plugins — is all contained in the <body> section of an HTML document. The great majority of <body> tags can be inserted through Dreamweaver's visual layout interface.
To use the <body> tags efficiently, you need to understand the distinction between logical styles and physical styles used in HTML. An underlying philosophy of HTML is to keep the Web as universally accessible as possible. Web content is intended to be platform- and resolution-independent, but the content itself can be styled by its intent as well. This philosophy is supported by the existence of logical <body> tags (such as <code> and <cite>), with which a block of text can be rendered according to its meaning, and physical style tags for directly italicizing or underlining text. HTML enables you to choose between logical styles, which are relative to the text, or physical styles, which can be regarded as absolute.
Logical styles are contextual, rather than explicit. Choose a logical style when you want to ensure that the meaning, rather than a specific look, is conveyed. Table 5-3 shows a listing of logical style tags and their most common usage. Tags not supported through Dreamweaver's visual interface are noted.
Logical styles are becoming increasingly important now that more browsers accept Cascading Style Sheets. Style sheets make it possible to combine the best elements of both logical and physical styles. With CSS, you can easily make the text within your <code> tags blue, and the variables, denoted with the <var> tag, green.
Table 5-3. HTML Logical Style Tags
Usage | |
|---|---|
| Increases the size of the selected text relative to the surrounding text. Not currently supported by Dreamweaver. |
| Citations, titles, and references; usually shown in italic. |
| For showing programming code, usually displayed in a monospaced font. |
| Defining instance; used to mark the introduction of a new term. |
| Emphasis; usually depicted as underlined or italicized text. |
| Keyboard; used to render text to be entered exactly. |
| Strikethrough text; used for showing text that has been deleted. |
| Sample; a sequence of literal characters. |
| Decreases the size of the selected text relative to the surrounding text; not currently supported by Dreamweaver. |
| Strong emphasis; usually rendered as bold text. |
| Subscript; the text is shown slightly lowered beneath the baseline. |
| Superscript; the text is shown slightly raised above the baseline. |
| Teletype; displayed with a monospaced font such as Courier. |
| Variable; used to distinguish variables from other programming code. |
Tip
By default, Dreamweaver is now set to use the logical styles <strong> and <em> whenever you click the Bold and Italic buttons on the Property inspector, respectively. Choose Edit
HTML picked up the use of physical styles from modern typography and word processing programs. Use a physical style when you want something to be absolutely bold, italic, or underlined (or, as we say in HTML, <b>, <i>, and <u>, respectively). You can apply the bold and the italic tags to selected text through the Property inspector or by choosing Text
Although Dreamweaver offers many options for using the visual interface of the Document window, sometimes you just have to tweak the code by hand. Dreamweaver's acceptance by professional coders is due in large part to the easy access to the underlying code. Dreamweaver includes several methods for directly viewing, inputting, and modifying code for your Web page. For large-scale additions and changes, you might consider using an external HTML editor such as BBEdit or Homesite, but for many situations, the built-in Code view and Code inspector are perfectly suited and much faster to use.
Code view is one of the coolest tools in Dreamweaver's code-savvy toolbox. You can either view your code full-screen in the Document window, split-screen with Design view, or in a separate panel, the Code inspector. The underlying engine for all Code views is the same.
You can use either of the following methods to display the full-screen Code view:
Choose View
Click the Show Code View button on the toolbar. Code view displays, as shown in Figure 5-11.
You can access the split-screen Code and Design view with either of the following methods:
Choose View
Click the Show Code and Design Views (Split) button on the Document toolbar.
To change the relative size of the Code and Design views, drag the splitter bar up or down. In the split-screen Code and Design view, Code view is shown on top of the Design view. You can reverse that order by choosing View
In recent years, monitors have gotten wider and Dreamweaver's previously default horizontal Split view seemed to be wasting space. Now, Dreamweaver in Split view defaults to placing the code in a vertical window, so you see Code and Design view side-by-side rather than one on top of the other. Dreamweaver even offers a quick menu alternative if you'd prefer to switch your Design view position, View
Another coding option is the Code inspector. You have two ways to open the Code inspector. You can either choose Window

Figure 5-12. To update Design view while still working in the Code view, click the handy Refresh button — either on the Document toolbar or the Property inspector — or press F5.
In all Code views, Dreamweaver does not update the Design view of the document immediately — whereas changes in Design view are instantly reflected in any open Code view. This delay is enforced to enable the code to be completed before being applied. To apply modifications made in the code, switch to Design view; if Design view is open, click anywhere in it to give it focus. Should Dreamweaver detect any invalid HTML, such as an improperly closed tag, the offending code is flagged with a yellow highlight in both Design and Code views. Select the marked tag to see an explanation and suggestions for correcting the problem in the Property inspector.
You can also apply code changes to Design view by saving the document or by clicking the Refresh button on the toolbar or the Property inspector. The Refresh button becomes active only when modifications are made in any Code view. You also have a keyboard and menu alternative: Pressing F5 has the same effect as choosing View
Generally, the Code view and Code inspector act like a regular text editor. Simply click anywhere in the inspector to add or modify code. Double-click a word to select it. Select an entire line by moving your pointer to the left edge of the code — where the pointer becomes a right-pointing arrow — and clicking once. Multiple lines can be selected in this same fashion by dragging the right-pointing arrow. After a section of code is selected, you can drag and drop it into a new location; pressing the Ctrl (Option) key while dragging makes a copy of the selection. You can move from word to word by pressing Ctrl (Command) in combination with any of the arrow keys.
You can also easily change the indentation — in or out — for selected blocks of code. To further indent a block of code, select it and press Tab. To decrease the level of indentation for a selected code block, press Shift+Tab. Alternatively, you can choose Edit
Tip
Although the keyboard shortcuts for indenting and outdenting code may seem arbitrary at first, they're actually easy to remember. The period and comma used in those shortcuts are on the same key as the left angle bracket (>) and right angle bracket (<), respectively — which indicates the direction of the code shift.
As a further aid to help you find your way through a maze of code, Dreamweaver includes the Balance Braces command. JavaScript is notorious for using parentheses, brackets, and curly braces to structure its code — and it's easy to lose sight of where one enclosing brace begins and its closing mate ends. Dreamweaver highlights the content found within the closest pair of braces to the cursor when you choose Edit
Although most Web designers who use the code editor in Dreamweaver prefer to manually enter their code, the power of the Insert panel is still at your disposal for rapid code development. Any element available from the Insert panel can be inserted directly into Code view or the inspector. To use the Insert panel, you must first position your cursor where you would like the code for the object to appear. Then select the element or drag and drop the element from the Insert panel to Code view or the inspector.
Note
Keep in mind that Dreamweaver's code editor is highly customizable. You can change the way the lines wrap by using indents for certain tag pairs; you can even control the amount of indentation. All the preferences are outlined for you in Chapter 3.
The great majority of what appear to be single Web pages are really a collection of multiple files (CSS, JavaScript, XML, and PHP or other server-side coding) interwoven into a master HTML source file. From the designer's and the browser's perspective, all of these files are not separate documents, but parts of the whole: the completed Web page. Managing and editing these multiple but connected documents are difficult tasks for the modern Web designer.
To answer the challenge of editing and managing all of these elements, Dreamweaver CS5 introduces a new way of working with three inter-related features: Live View, Related Files, and Code Navigator. The first of these features, Live View, accurately displays the complex requirements for CSS in the modern browser — because it is a modern browser! Based on Webkit, the open source engine used by Apple's Safari and Google's Chrome browsers, Live View gives you a fully rendered page right in Dreamweaver, complete with JavaScript interactivity. Unlike Design view, the visual representation in Live View is not editable. However, Code view remains completely available and active. Moreover, you not only can edit the HTML source in Code view while reviewing real-world results in Live View, you can also modify any of the associated document through the second associated feature, Related Files. Just choose the link to any external code from the Related Files bar to open it in Code view, ready for editing.
Code Navigator completes the circuit begun with the Live View and Related Files features. While clicking a link in the Related Files bar displays that page for editing, Code Navigator goes from your source HTML (in Code or Design view) directly to the targeted code block.
The following sections offer detailed explanations of these three inter-related features to help you more effectively design and re-design your multi-part Web pages.
Up to a point, Live View lets you view and interact with your Web page within Dreamweaver as if it were on a live Web server. You'll still need to test your Web site and pages fully in a range of browsers before they can be pushed live, but Live View does give you the capability to review your page in Dreamweaver while making changes to the code. Any modifications to the code can be immediately displayed by refreshing the page by pressing F5, clicking Refresh in the Document toolbar, or clicking into the Live View display.
With Live View, you can:
Click named anchor links contained within the same page.
Review rollover effects where one image source is replaced by another.
See
onLoadevents, such as a portion of a page fading into view.Trigger Ajax-based partial page updates, like those developed with Spry data sets.
Display CSS-based interactions, including menu hover states.
Show both inline and CSS-based JavaScript events such as tooltips.
Display server-side code output as HTML output, with a proper testing server set up.
What you can't do with Live View:
Follow links from one page to another.
Pop open browser windows.
Submit and process forms.
Preview the page in a specific browser.
To work in Live View, follow these steps:
Enter into Live View by doing one of the following:
Clicking Live View in the Document toolbar
Choosing View
Pressing Alt+F11 (Option+F11)
Interact with your page by moving your mouse over linked text, images, or CSS-based interactive elements.
To make a change to the page, enter Split view by clicking Split in the Document toolbar or choosing View
Modify your code.
Refresh the rendered page by doing one of the following:
Clicking Refresh Design View in the Document toolbar
Clicking Refresh in the Property inspector
Clicking anywhere in Live View
Choosing View
Pressing F5
To leave Live View, do one of the following:
Clicking Live View in the Document toolbar
Choosing View
Pressing Alt+F11 (Option+F11)

Tip
Not only is Code view available for modifications when you're in Live View, but so are a number of Dreamweaver panels. You can, for example, make a change to a property in the CSS Styles panel and it will be applied to Live View when the page is refreshed. Additionally, both the Tag inspector and Behaviors panel remain active while in Live View. If you click into Code view, all panels become available.
Browsers, of course, base their rendered display of Web pages on their reading of the source code. Source code can change dynamically during a visitor's session. JavaScript functions can rewrite entire blocks of code to swap CSS classes or images, XML data can be swapped in and out, and server-side coding can completely update the page. Dreamweaver includes a companion feature to Live View to give you an under-the-hood perspective: Live Code.
Live Code displays the actual code used by the browser to render the current display in Live View (see Figure 5-14). As with Live View, the Live Code display is not editable. To distinguish it from standard Code view, Live Code is shown with a yellow highlight. Once displayed, you can use Live Code to debug your page. For instance, JavaScript variables are revealed as their runtime values, without the need for using JavaScript alerts.
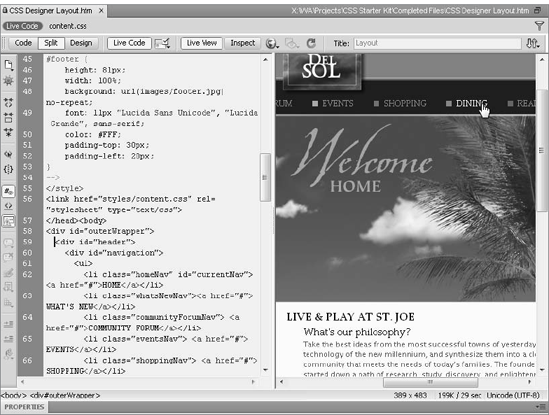
Figure 5-14. Use Live Code in conjunction with Live View to debug portions of your page that dynamically update, including JavaScript, XML, CSS, or server-side changes.
You must be in Live View to access the Live Code mode. Working with Live Code is very straightforward:
Once you're in Live View, do one of the following:
Click Live Code in the Document toolbar.
Choose View
Interact with the page to review any code changes.
To exit Live Code, either click Live Code in the Document toolbar or choose View
Dreamweaver includes a number of options to enhance Live View functionality. One of the most useful options is the ability to freeze the JavaScript in its current state so you can review the code more closely. This feature makes it possible to modify the effects of JavaScript rollovers and other interactions. A simple press of the keyboard shortcut, F6, while in Live View, freezes the JavaScript. You can then modify any code and once you refresh the page, review your rendered changes. Press F6 again to unfreeze JavaScript.
To access the Live View options, choose the Live View menu button, shown in Figure 5-15, or select View
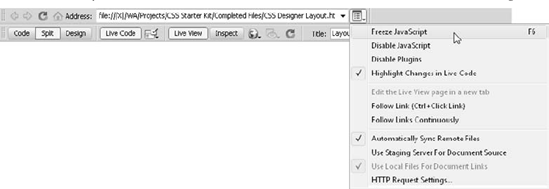
Figure 5-15. The Live View options are available from the Live View menu button on the Browser Navigation toolbar.
The available Live View options include:
Freeze JavaScript: Pauses JavaScript interaction and displays elements in their current state. Can be invoked with the keyboard shortcut F6.
Disable JavaScript: Turns off JavaScript and re-renders the page with JavaScript enabled.
Disable Plugins: Turns off plug-ins and re-renders the page without the plug-ins enabled.
Highlight Changes in Live Code: Changes the background color for code that is dynamically written, such as changing classes or IDs.
Edit the Live View Page in a New Tab: If you've followed a link to a page, when this option is selected, it will open for editing in a new document tab.
Follow Link (Ctrl/Cmd+Click Link): Manually follow any link when Ctrl+clicked (Cmd+clicked).
Follow Links Continuously: Automatically follow links when clicked.
Automatically Sync Remote Files: Allows remote files to be displayed if a link to that file is clicked.
Use Staging Server for Document Source: Relies on the current page as stored on the staging server to render in Live View. This option is enabled by default for dynamic sites using PHP, ColdFusion, or ASP.
Use Local Files for Document Links: Sets Live View to use files stored in your Local Site Root as the related files. This option is enabled by default for standard, non-dynamic sites; if not checked, Dreamweaver uses files found on the Testing server.
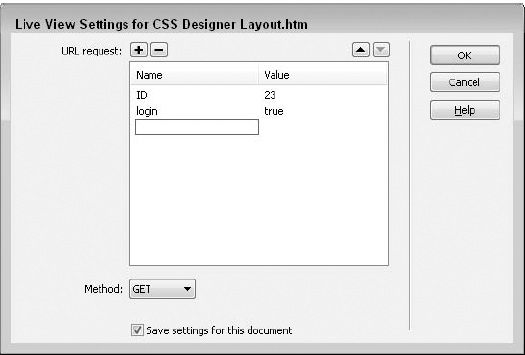
HTTP Request Settings: Opens a dialog box (see Figure 5-16) for setting the method (Get or Post) and defining URL parameter variables and values, such as those displayed after a question mark in the URL, that is,
http://www.your_blue_sky.com?ID=23. The settings can optionally be stored with the document for rapid development and testing.
As noted earlier, the modern Web page is often, essentially, a compound document with external files of various types, like CSS and JavaScript, integrated in the main HTML source code. The Related Files feature makes it possible to quickly navigate to any of these external files and make any changes in Code view while reviewing the rendered page in Dreamweaver's Design or Live view.
All included files — as well as a link to the HTML source code — are displayed in the Related Files bar, located below the filename tab and the Document toolbar, as shown in Figure 5-17. Dreamweaver recognizes four different type of related files: external CSS style sheets, JavaScript and other client-side scripting files, Spry data set sources in either HTML or XML format, and server-side includes. Related Files support for external CSS style sheets is so good, it even recognizes nested style sheets, where one is imported in another.
Figure 5-17. Click any external file in the Related Files toolbar to quickly make edits; refresh the page to re-render it in Design or Live view.
Note
The power of Related Files has been increased dramatically in Dreamweaver CS5. Now you can discover deeply nested related files that are dynamically included. The Dynamically Related Files feature makes it possible to work with popular content management systems (CMS) — such as WordPress, Drupal, and Joomla — from within Dreamweaver. Dreamweaver is now capable of working with so many related files, in fact, that an additional capability to set a filter for only those desired files has also been added to the program. With the filter "wide-open," it's possible for Dreamweaver to discover well over 100 files related to a single Web page. The Dynamically Related Files feature works only with PHP pages.
The recommended method for getting the most out of the Related Files feature is to enable Live View and enter into Split view to display both the code and rendered page simultaneously. Dreamweaver will enter Split view automatically if you're in Live View and click any of the related files, including Source Code.
Tip
If you'd prefer to open your external files as a separate document, you have two options. To do so on a case-by-case basis, right-click (Control+click) the related file link and choose Open as Separate File. To turn off the Related Files feature, clear the Enable Related Files checkbox in the General category of Preferences.
If you're working with a PHP page, Dreamweaver will display a message in the Info bar at the top of the Document Window that notifies you that there may be dynamically related files that can only be revealed by server-side processing. Clicking the Discover link in the Info bar submits the page to a staging or live server, which allows Dreamweaver to identify additional related files that fit into these categories:
Nested server-side includes: Server-side includes referenced in another server-side include.
Dynamically-generated includes: Files linked via paths created through a combination of variables and server-side language processing. For example, a path to a configuration file might be constructed by combining the
conf_path()variable with the filenamesettings.php.Included External Files: CSS and JavaScript files referenced in a dynamically generated server-side include.
By default, Dreamweaver will only discover dynamically related files manually — that is, if you click the Discover link. You can, however, set Dreamweaver to discover dynamically related files automatically through the General category of Preferences.
Note
For more in-depth information on how to get the most out of the Dynamically Related Files feature, see Chapter 23.
If the Related Files bar is the Ferrari that gets you to your external file quickly, the Code Navigator is the Ducati motorcycle that zips directly to your code block. With the Code Navigator, you can quickly see what code is affecting the current selection and reveal that precise code chunk for immediate editing.
When activated, the Code Navigator displays as a pop-up window with a series of clickable links, as shown in Figure 5-18. Pertinent to the current selection, the Code Navigator displays related CSS rules (internal and external), external JavaScript files, server-side includes, template parents, library files, and iframe source files. Best of all, access to the Code Navigator is pretty much ubiquitous in Dreamweaver: you can invoke the Code Navigator in Design, Code, Split, Live, and Live Code views. Click the icon that resembles a ship's steering wheel, which appears over the current selection to open the Code Navigator. Alternatively, you can Alt+click (Command+Option+click) to display the Code Navigator.
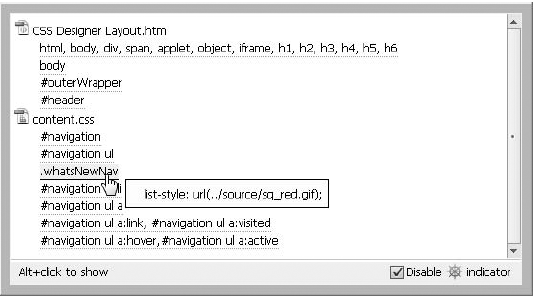
Figure 5-18. In the Code Navigator, the CSS rules affecting the current selection are presented in the cascade order so you can determine the most relevant.
To use the Code Navigator, follow these steps:
Place your cursor in the code you want to inspect and click the Code Navigator indicator (the steering wheel icon) that appears.
Another approach is to Alt+click (Command+Option+click) the code you want to investigate.
When the Code Navigator window opens, move your mouse over any of the CSS selectors to see a pop-up window with the rule's properties and values.
Click any link to open the containing file and go to the associated code block.
After you've modified the code, click Refresh in the Document toolbar, pressing F5 or clicking in Design or Live view to see the updated page.
If you find that the Code Navigator indicator is getting in your way, you can hide it by choosing the Disable Indicator option in the Code Navigator window.
Tip
When a link to a CSS rule, JavaScript file, or server-side include is clicked in the Code Navigator, the code appears as a related file in Split view. Files that cannot be displayed as a related file — including templates, library items, and iframe source files — are opened as a separate document.
Much of the special tools and functionality aimed at helping the coder are concentrated in the Coding toolbar. The Coding toolbar, enabled by default, is attached to the left side of Code view. In all, there are 15 different buttons and menu buttons that greatly enhance the coding experience in Dreamweaver.
The Coding toolbar's functions are a combination of old and new; some of the features have been placed on the Coding toolbar for ease of use, whereas others cannot be found anywhere else in Dreamweaver. The top button, Open Documents, falls into the latter category and brings some much needed access when working with multiple files. Select Open Documents to see a listing of all files currently open. Unlike the tabs or the list in the Windows menu, the Open Documents list shows the full path of each entry, as shown in Figure 5-19; this is an essential distinction for designers who want pages from multiple directories, and even multiple sites, open at the same time.
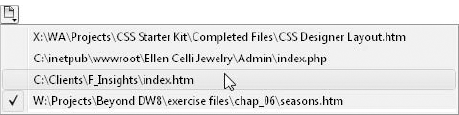
Figure 5-19. The Coding toolbar's Open Documents feature displays the full path for all currently available files.
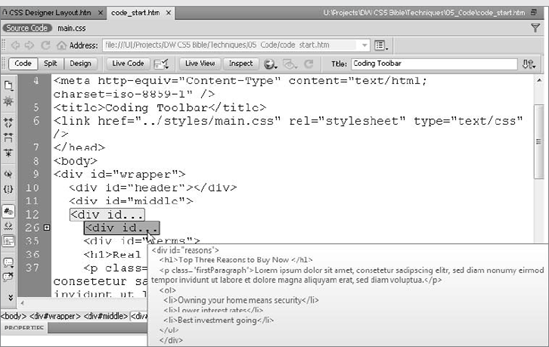
Code collapse is the focus of the next group of buttons in the Coding toolbar. Code collapse allows you to hone in on your work by temporarily condensing specific sections of the code into a single line or, alternatively, condensing all but the selection. Hover your cursor over the collapsed element to see the first ten lines of code in a tooltip (see Figure 5-20).
The three buttons in this group work in concert with your cursor position and selection in Code view:

Figure 5-20. Code collapse lets you concentrate on just the code you're working on, while keeping the hidden code accessible via tooltips.
Any code marked as collapsed retains that state after it has been saved, closed, and re-opened. If you press Alt (Option) while clicking either Collapse Full Tag or Collapse Selection, Dreamweaver inverses the normal collapse operation. For example, if your cursor is placed in a <div> tag and you press Alt (Option) while clicking Collapse Full Tag, all the code outside of the current <div> tag is collapsed.
You can also expand and collapse code outside of the Coding toolbar. Whenever you select any portion of the code, handles appear at the top and bottom of your selection to the left of the code. Click either of the handles to collapse the code; click the single collapsed handle again to expand it. As noted earlier, you can hover over the collapsed code to see the first ten lines in a tooltip.
Collapsing and Moving Code
In this Technique, you use various features of the Coding toolbar including Dreamweaver's code collapse feature to make it easy to move code from one place on the page to another.
In the Techniques site, expand the 05_Code folder and open the
code_start.htmfile.While in Design view, place your cursor in the first heading, Relative Realty Benefits.
Switch to Code view.
From the Coding toolbar, click Select Parent Tag once to select the
<h1>tag and then again to select its parent,<div id="benefits">.Click Collapse Full Tag from the Coding toolbar.
Hover your cursor over the collapsed code to see the hidden code in the tooltip.
Place your cursor in the code for the next div,
<div id="reasons">.Choose Collapse Full Tag again.
Select the code line containing the just-collapsed tag and drag it in front of the first collapsed code.
From the Coding toolbar, click Expand All.
The two different sections of the page have now been switched. One last operation will clean up the look of the code.
From the bottom of the Coding toolbar, choose Format Source Code
Switch to Design view and save your page.
Familiarity with the functions of the Coding toolbar will greatly help your coding productivity.
Coders will appreciate the capability to quickly select and identify different groups of code with the next series of buttons on the Coding toolbar:
Select Parent Tag: Expands the selection from the current cursor position to enclose the surrounding tag.
Balance Braces: Selects code within the matching set of parentheses, braces, or square brackets; if the code is nested, click again to select the parentheses, braces, or square brackets.
Line Numbers: Toggles the line numbers on the left of Code view.
Highlight Invalid Code: Marks broken code with a yellow highlight.
The last two options, Line Numbers and Highlight Invalid Code, are also found in the View Options menu option of the Document toolbar.
The next two buttons of the Coding toolbar focus on comments. Because Dreamweaver is a Web page editor, you'll find a variety of different types of comments available under the first menu button, Apply Comments:
<!--HTML Comments-->//CSS or JavaScript single line style comments/*CSS or JavaScript block style comments*/'Visual Basic single line style commentsASP-, ASP.NET-, JSP-, PHP-, or ColdFusion-style comments, depending on the application server used
Each of the comments options wrap a selection in the chosen comment style; in the case of single-line style comments, the comments are placed at the start of each selected line. If no code is highlighted, an empty comment of the desired type is inserted.
The Remove Comment button follows Apply Comment. The Remove Comment feature uncomments any selected code and will remove multiple comments unless they are nested. In the case of nested comments, only the outer comments are deleted.
CSS has become an integral element of the Web designer's tool chest and its code is frequently entwined with the page's HTML. This, however, is not always a desirable situation and the Coding toolbar provides two tools to help separate CSS from the code: Convert Inline CSS to Rule and Move CSS.
In the highly pressured work environment that often typifies the creation of a full-featured site, Web designers don't always follow best practices. It's not uncommon for designers to temporarily apply an inline style to a tag to try out a particular look. However, by the time the page is pushed live on the Web, it's almost always best to move your inline styles to standard rules. The Convert Inline CSS to Rule command is the perfect clean-up tool for just this type of situation.
Your cursor will need to be within a tag that includes an inline style for the Move or Convert CSS
<div id="logoLayer" style="position:absolute; width:232px;
height:39; z-index:2; left: 5px; top: 0px; visibility: visible">
Once the command is invoked, the Convert Inline CSS dialog box appears (see Figure 5-21). With it, you can choose to store the inline CSS in a new class, the current tag, or a new CSS selector. You'll also have options for creating the new rule in an existing style sheet or the <head> tag of the document.
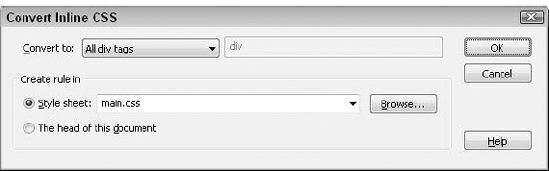
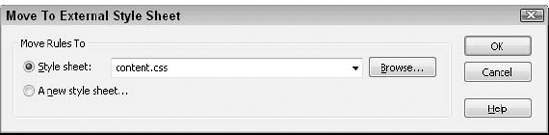
The Move CSS command handles another common pre-launch task: moving embedded styles to an external style sheet. Many designers use embedded styles during the design phase for quicker debugging; for maximum effectiveness, the final styles are removed from the <head> of the document and placed in an external style sheet. The Move CSS command — as the name implies — exports CSS rules from the current location to the external style sheet of your choosing.
To access the Move or Convert CSS
Need a quick way to add a parent tag to a selection? Choose Wrap Tag and you can easily enter the desired outer element, along with any desired attributes and values. Press Enter (Return) to confirm your choices and the parent tag code is inserted.
Note
Although the Wrap Tag function resembles the Quick Tag Editor, you cannot use it to toggle between the three different modes as you can in the Quick Tag Editor.
You can wrap content with much more than a single tag through the Recent Snippets button. A snippet is a block of code that has been stored by Dreamweaver and can be inserted at any point. The Recent Snippets feature lists the ten most recently used snippets, which can be either wrap or block type. For more information about Snippets, see the section "Adding Code Through the Snippets Panel" later in the chapter.
The final buttons on the Coding toolbar are used for styling your code. The Indent Code and Outdent Code buttons move selected code blocks in or out according to the options set in the Code Format category of Preferences. The final button, Format Source Code, allows you to style either the entire document or a selection of your code according to the Code Format Settings — which, along with another code style option, Tag Libraries — is also available under this menu.
One of the reasons why the Web grew so quickly is that the basic tool for creating Web pages was ubiquitous: Any text editor would do. That's still true, but just as you can cut down any tree with a hand saw, that doesn't make it the right tool — the most efficient tool — for the job. Dreamweaver includes numerous features and options that make it a world-class code editor and not just for HTML. The Tag Library feature makes Dreamweaver a terrific code-editing environment for almost any Web language, including XHTML, XML, ColdFusion, ASP, ASP.NET, JSP, and PHP. Moreover, the database structure underlying the tag libraries means that the libraries can be expanded or modified at any time. New tags, attributes, and even entire languages can be added by hand or imported in a number of methods, including from a DTD schema.
Dreamweaver's tag libraries offer numerous benefits that greatly enhance the coding experience. Chief among these benefits are Code Hints and Tag Completion.
Writing code is an exact art. If you enter <blickquote> instead of <blockquote>, neither Dreamweaver nor the browser renders the tag properly. Perhaps an even bigger problem than misspelling tags and attributes is remembering them all. As more and more developers of static Web pages go dynamic, many are finding that the sheer amount of information they need is quite daunting. Don't worry hand-coders, Dreamweaver's Code Hints feature helps you avoid those misspellings and prompts your memory — making you more efficient in the process.
The Code Hints tool is a valuable aid to all Web designers, even beginners. It's a quick way to develop a tag as you type it by displaying a pop-up list of tags (as shown in Figure 5-23), attributes and, in some cases, even values for each tag. Best of all, Code Hints work the way you want to work. If you're a touch-typist, your hands never have to leave the keyboard to accept a particular tag or attribute. If you prefer to use the mouse, you can easily double-click to select your entry. If you like, Dreamweaver even completes your code with an ending tag.
The Code Hints that appear are stored in Dreamweaver's Tag Library database and can be modified by choosing Edit
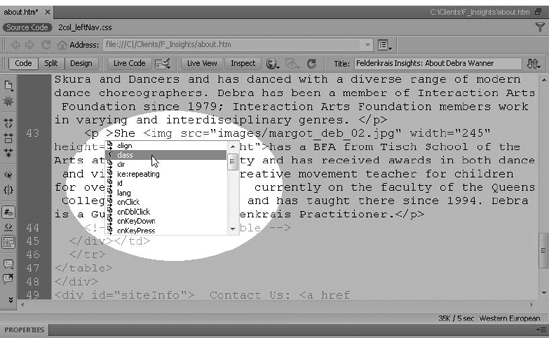
Figure 5-23. Master the use of the Code Hints feature to give your code writing a major productivity boost.
Note
Code Hints are enabled by default. To disable them or to control the speed with which the pop-up list appears, choose Edit
When Code Hints is turned on, follow these steps to use this helpful feature:
In Code view, enter the opening tag bracket,
<. The Code Hint pop-up list instantly shows all the tags for the document type of the current page.To move down the list, type the first letter of the tag. With each letter that you type, Dreamweaver homes in on the indicated tag.
When the proper tag is highlighted, press Enter (Return) and the code is inserted. Alternatively, you can scroll down the list and double-click the desired tag to insert it.
To add attributes to the tag, enter a space. The attribute list for the current tag is displayed.
As with the tag, type until the desired attribute is highlighted in the list and then press Enter (Return). Attributes are, for the most part, followed by an equal sign and a pair of quotes for the value. The cursor is positioned in between the quotes.
Enter the desired value for the attribute.
If the attribute can accept only a certain range of values, such as the
alignattribute, the accepted values also appear in the Code Hints pop-up list. If you choose one of the specified values, the cursor moves to the end of the name-value pair after the closing quote.Enter a space to continue adding attributes or enter the closing tag bracket,
>.Insert any content to follow the opening tag.
When you're ready to add the closing tag, just type the first two characters
</and Dreamweaver adds the rest of the tag.
Dreamweaver's Tag Completion feature is really quite intelligent and can easily handle any number of nested tags. For example, let's say you start with an opening <div> tag and then begin to enter your headings and <p> tags. As you enter the closing characters </ after each tag, Dreamweaver completes the proper tag. If, after all other tags are closed you type in the closing characters, Dreamweaver will finish the final </div> tag automatically.
Note
There are actually a couple of different styles of Code Completion and you can choose which one you'd prefer — or none at all — from the Code Hints category of Preferences. All the various options are covered in the section "Customizing Your Code" in Chapter 3.
In addition to straight text, Dreamweaver offers several types of attribute values, each with its own special type of drop-down list:
Color: When a color-related attribute is entered, Dreamweaver displays a color palette and eyedropper cursor for sampling the color. When a color is picked, its corresponding hexadecimal value is entered into the code.
Font: For attributes requiring the name of a font, such as the
<font>tag'sfaceattribute, Dreamweaver displays the current font list of font families (such as Arial, Helvetica, sans serif), as well as an option to edit that list.Style: Enter the class attribute in almost any tag, and you see a complete list of available CSS styles defined for the current page. Other CSS controls, such as Edit Style Sheet and Attach Style Sheet, are also available.
File: Should an attribute require a filename, Dreamweaver opens the standard Select File dialog box to enable you to easily locate a file or choose a data source.
Code Hints aren't just for entering new tags; you can take advantage of their prompting when modifying existing code as well. To add an attribute, place your cursor just before the closing bracket and press the spacebar to trigger the Code Hints pop-up menu. To change an entered value, delete both the value and the surrounding quotes; the pop-up options appear after the opening quote is entered.
When it comes to coding, mindless repetition is one big time-killer. Quite often, you repeat the same function — such as converting all the tags to lowercase — for a section of your code. These types of procedures quickly become tedious, and performing them one at a time is grossly inefficient. For commonly performed operations, Dreamweaver has a far better way.
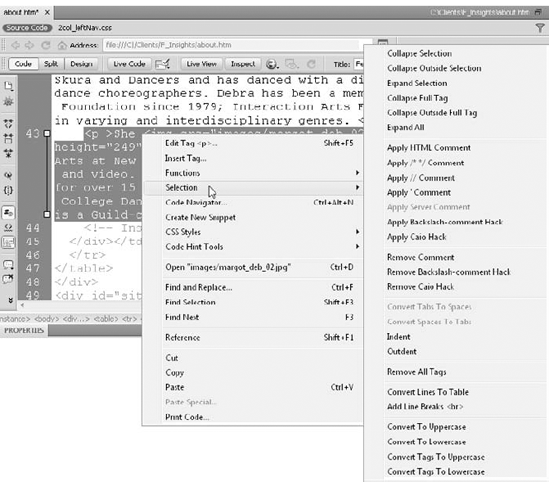
The Selection menu is activated in Dreamweaver's shortcut menu whenever a section of code is highlighted. Twenty-seven varied, but extremely useful, functions are available, as shown in Figure 5-24. All the procedures take effect immediately and require no further dialog box or interaction. Just select the code, choose the operation, and you're done. The Selection functions are especially helpful when cleaning imported code or when converting code to text or vice versa.
The Selection menu includes the following:
Collapse Selection: Collapses the selected code.
Collapse Outside Selection: Collapses all but the selected code.
Expand Selection: Expands any collapsed code inside the selection.
Collapse Full Tag: Collapses the nearest parent tag.
Collapse Outside Full Tag: Collapses all but the nearest parent tag.
Expand All: Expands all collapsed code in the document.
Apply HTML Comment: Inserts an HTML comment:
<!-- -->.Apply /* */ Comment: Inserts a multi-line JavaScript/CSS comment:
/* */.Apply // Comment: Inserts a single-line JavaScript/CSS comment at the start of a code line:
//.Apply ' Comment: Inserts a single-line ASP comment at the start of a code line:'.
Apply Server Comment: Inserts a comment applicable to the current server model.
Apply Backslash-Comment Hack: Adds a CSS hack to hide styles from Internet Explorer for the Mac 4.x.
Apply Caio Hack: Adds a CSS hack to hide styles from Netscape 4.x.
Remove Comment: Removes any kind of comment in the current selection.
Remove Backslash-Comment Hack: Removes a previously applied Backslash-comment hack.
Convert Tabs To Spaces: Changes every tab used for indenting to four spaces.
Convert Spaces To Tabs: Substitutes a tab for every four spaces.
Indent: Indents the code block one tab stop.
Outdent: Outdents the selected code one tab stop.
Remove All Tags: Strips all tags from a code block, leaving the content.
Convert Lines To Table: Places each individual line, separated by a carriage return, into a table row and the entire code selection in a table.
Add Linebreaks <br>: Inserts a
<br>tag at the end of every line; if the page is XHTML-compliant, the<br />tag is used instead.Convert To Uppercase: Changes the selected code block — both tags and content — to uppercase.
Convert To Lowercase: Lowercases the selection of code, including all the tags and content.
Convert Tags To Uppercase: Uppercases only the tags in the current selection; all code within the tag, including attributes and values, are uppercased.
Convert Tags To Lowercase: Changes all the code within tags (again, including attributes and values) to lowercase.
If the results of your Selection operation are not to your liking, press Ctrl+Z (Command+Z) to undo the command.
If you'd rather point and click than type, Dreamweaver has you covered.
With the Dreamweaver Tag Chooser, you have access to all the standard tags in HTML/XHTML, CFML, ASP.NET, JSP, JRun Custom Library, ASP, PHP, and WML, and the Adobe-specific tags for Dreamweaver templates and Sitespring Project Sites. Open the Tag Chooser in one of several ways:
Choose Insert
Right-click (Control+click) in Code view and choose Insert Tag from the context menu.
Press the keyboard shortcut Ctrl+E (Command+E).
Position your cursor where you'd like the tag to appear — in either Code or Design view — and select Tag Chooser from the Insert panel's Common category.
Drag the Tag Chooser button from the Insert panel's Common category to the appropriate place in either Code or Design view.
The tags are grouped under their respective languages. Select any of the languages from the list on the left and all the available tags display on the right. Most of the languages have a plus sign which, when selected, expands the chosen language and displays various functional groupings of tags, such as Page Composition, Lists, and Tables, as shown in the background of Figure 5-25. Under HTML Tags, you can expand the tag groupings further to see, in some cases, tags separated into additional categories such as General, Browser-Specific, and Deprecated.
If you're confused about what a specific tag is for or how it's used, click the Tag Info button. The bottom half of the dialog box converts to a context-sensitive reference panel. Exactly what information is available depends on the tag itself. For most HTML tags, you find a description, examples, and a list of browsers in which the tag is recognized. Much of the information available is also available in the Reference panel (covered later in this chapter); however, not all tags are covered.
When you've chosen a tag and either double-clicked it or selected Insert, the Tag Editor opens. Each tag has its own user interface with full accessibility and CSS options. As shown in Figure 5-25, selecting a category from the list on the left displays the available options on the right.

Figure 5-25. When you select your page element from the Tag Chooser (background), you have a wealth of options in the Tag Editor (foreground).
After entering all the desired parameters in the Tag Editor, clicking OK inserts the code into the page with the cursor in between the opening and closing tags (or after the tag if it is empty). The Tag Chooser uses a nonmodal window and remains open until Close is selected.
Warning
Because the Tag Chooser is nonmodal, you may not realize that you have already inserted the desired tag, causing you to select Insert again. Dreamweaver does not prevent you from entering multiple versions of the same tag.
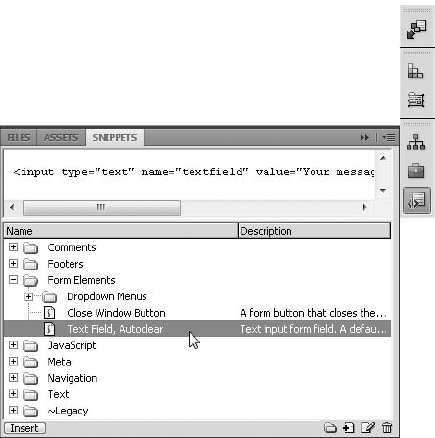
Using the valuable Snippets feature, you can save portions of HTML code for easy recall in other files. It's a lot easier than copying and pasting blocks of code from various files. Tag snippets range from a single tag, such as an HTML comment, to a full navigation layout. Commonly used JavaScript and other language functions and methods are also good candidates to be turned into snippets for later use.
Dreamweaver provides a notable assortment of snippets, but the most important aspect of this feature is that it's extensible. Coders and noncoders alike can easily add any commonly used section of code for later reuse. Snippets work in one of two different ways: A snippet either inserts a solid code block at the cursor point or wraps a selection with before and after code.
Note
Code snippets that include deprecated tags (such as <font>) or outdated JavaScript routines have been relocated to the ~Legacy folder in the Snippets panel.
By default, the Snippets panel is found under the Code panel group; to open it directly, choose Window
To insert a snippet, follow these steps:
Display the Snippets panel if it's not already open by choosing Window
Find the desired snippet by expanding the folder and, if necessary, subfolders.
To insert a snippet as a block of code:
Position the cursor where you'd like the code to appear.
Double-click the snippet (or Snippet icon) or select the snippet and click Insert.
Alternatively, you can drag the snippet into position in either Code view or Design view.
To wrap a snippet around some existing code or page elements:
Select the code or elements.
Double-click the snippet or select the snippet and click Insert.
Again, you can drag the snippet onto the selected code.
Tip
You can quickly hide a section of a page by selecting it and then choosing the Comment, Multiline snippet from the Comments category of the Snippets panel.
Although Dreamweaver's standard code snippets are handy, you don't realize the real value of the Snippets panel until you begin adding your own snippets. To help you manage your snippets, Dreamweaver enables you to create new folders, rename existing ones, or delete ones no longer needed. All this functionality is available through the options menu on the Snippets panel, as well as through the context menu. Snippets, as well as folders, can be renamed, deleted, edited, and, of course, created.
Tip
Before you begin to create your own code snippet, select it first. The Snippets dialog box is modal, and you cannot access other Dreamweaver windows while it is open. The selected code is copied to the Insert Before text field.
To save code as a snippet, follow these steps:
Click the New Snippet button on the bottom of the Snippets panel.
Enter a name to be displayed in the Snippets panel in the Name field.
If you like, you can enter a brief description of the snippet in the Description field.
Choose the type of snippet you're creating: Wrap Selection or Insert Block. The dialog box changes depending on your choice.
If you chose Wrap Selection, enter the code to appear prior to the selection in the Insert Before field, and the code to appear after in the Insert After field.
If you chose Insert Block, enter the code in the Insert Code field. If you switch from Wrap Selection to Insert Block, Dreamweaver appends the Insert Before field with the contents of the Insert After field.
Choose how you would like the snippet to be displayed in the preview area of the Snippets panel, rendered in Design view or as code.
Warning
If you choose the Design preview option for code that does not display in a browser, such as a JavaScript function, it won't be as readable. You still see the code in the preview area, but it does not appear in a monospace font, and all whitespace formatting (such as tabs) appears to be lost.
Click OK when you're finished.
You'll remember that when hand-coding, the last ten used snippets are available directly from the Coding toolbar's Recent Snippets command.
Pop quiz: What value of a form tag's enctype attribute should you use if the user is submitting a file?
application/x-www-form-urlencodedmultipart/form-datamultipart/data-form
Unless you've recently had to include such a form in a Web page, you probably had to pull down that well-worn HTML reference book you keep handy and look up the answer. All code for the Web — including HTML, JavaScript, and Cascading Style Sheets (CSS) — must be precisely written or it is, at best, ignored; at worst, an error is generated whenever the user views the page. Even the savviest of Web designers can't remember the syntax of every tag, attribute, and value in HTML, every function in JavaScript, or every style rule in CSS. A good reference is a necessity in Web design. (By the way, the answer to the pop quiz is B.)
Adobe has lightened the load on your bookshelf considerably with the addition of the Reference panel, shown in Figure 5-27. With the Reference panel, you can quickly look up any HTML tag and its attributes, as well as JavaScript objects and CSS style rules. Dynamic site builders can rely on references for CFML, ASP, PHP, JSP, XML, and XSLT. In addition, the panel contains a complete reference on Web-related accessibility issues from UsableNet. Not only does the Reference panel offer the proper syntax for any code in question, it also displays the level of browser support available in most situations. Moreover, you don't have to dig through the tag lists to find the information you need — just highlight the tag or object in question and press the keyboard shortcut Shift+F1.
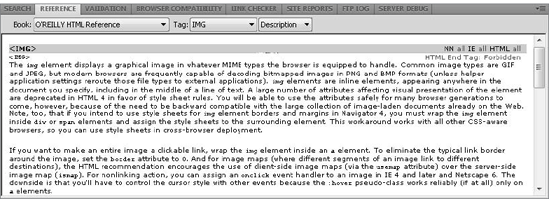
Figure 5-27. To quickly look up a tag, select it in the Tag Selector or in Code view and then press Shift+F1 to open the Reference panel.
You have three different ways to open the Reference panel:
Choose Window
Click the Reference button on the toolbar.
Use the Shift+F1 keyboard shortcut.
Tip
To find reference details for the attributes of an HTML tag, a JavaScript object, or a CSS style rule included on a Web page, open Code view and select the code in question prior to choosing Shift+F1 or clicking the Reference button on the toolbar.
To look for information about code not included in the page, follow these steps:
Display the Reference panel by choosing Window
Select the required guide from the Book drop-down list. The standard options are as follows:
Adobe ColdFusion Function Reference
Adobe CFML Reference
O'Reilly ASP.NET Reference
O'Reilly ASP Reference
O'Reilly CSS Reference
O'Reilly HTML Reference
O'Reilly JavaScript Reference
O'Reilly JSP Reference
O'Reilly PHP Pocket Reference
O'Reilly SQL Language Reference
O'Reilly XML in a Nutshell
O'Reilly XSLT Reference
UsableNet Accessibility Reference
Choose the primary topic from the Style/Tag/Object drop-down list. The list heading changes depending on which book is selected.
Tip
You can move quickly to a topic by selecting the drop-down list and then pressing the key for the first letter of the term being sought. Then you can use the down arrow to move through items that start with that letter. For example, if you were looking for information about the JavaScript regular expressions object, you could press r and then the down arrow to reach RegExp.
If desired, you can select a secondary topic from the second drop-down list. The second list is context-sensitive. For example, if you've chosen an HTML tag, the secondary list displays all the available attributes for that tag. If you've chosen a JavaScript object, the secondary list shows the available properties for that object. The information shown depends, naturally, on the book, topic, and subtopic chosen.
The Reference panel's context menu enables you to switch between three different font sizes: small, medium, and large. This capability is especially useful when working at resolutions higher than 800 × 600. You also have an option to connect directly to O'Reilly Books Online.
Tip
Any code in the Reference panel can be copied by right-clicking (Control-clicking) and choosing Copy. Dreamweaver automatically selects the entire code block with a single click, ready to be copied.
Since Dreamweaver's beginning, one of my favorite features has been the Property inspector. I really appreciate how it adapts for a selected tag. However, the Property inspector is not without its drawbacks. The feature's main deficiency is key to its design — the Property inspector has only a limited amount of room. To encompass the full range of possible attributes for all the possible tags, Dreamweaver needs a more wide-open solution. Enter the Tag inspector.
The Tag inspector (Window
Value fields are not just simple text fields, although you can enter the attribute by hand if you want. The value fields change according to the type of attribute. Attributes that can use a predefined value display a pop-up list with all the possible values; for example, click an <a> tag and the pop-up value list for the lang attribute contains entries for all the possible languages, including en for English (as shown in Figure 5-28). Such pop-up lists are also editable — which means you can enter a value not in the list. Color-type attributes, such as bgcolor, offer the Adobe standard color picker, whereas attributes requiring a filename display both Browse to File (the folder) and Point to File (the crosshairs) icons. All value fields include a lightning bolt icon for inserting dynamic data, such as a field, from a recordset.
You can view the attributes in one of two ways: by category or alphabetically. Two buttons at the top of the panel control the view; click the one on the left to see a breakdown of attributes by categories (General, Browser Specific, CSS/Accessibility, Language, and Uncategorized). The A-to-Z button on the right lists the attributes alphabetically.
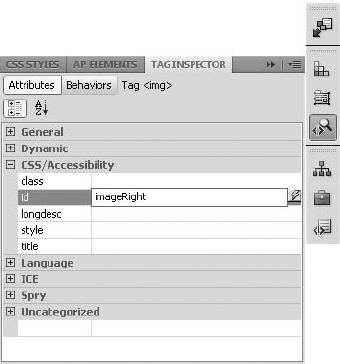
Tip
Attributes that Dreamweaver is unaware of can be added by entering them into the last row of the Tag inspector. To remove an existing attribute, select it and press Backspace (Delete).
I tend to build Web pages in two phases. Generally, I first lay out my text and images to create the overall design, and then I add details and make alterations to get the page just right. The second phase of Web page design often requires that I make a small adjustment to the HTML code, typically through the Property inspector, but occasionally I need to go right to the source — the code.
Dreamweaver offers a feature for making minor, but essential, alterations to the code: the Quick Tag Editor. The Quick Tag Editor is a small pop-up window that appears in the Document window and enables you to edit an existing tag, add a new tag, or wrap the current selection in a tag. One other feature makes the Quick Tag Editor even quicker to use: A handy list of tags or attributes cuts down on typing.
To call up the Quick Tag Editor, use any of the following methods:
Choose Modify
Press the keyboard shortcut Ctrl+T (Command+T).
Click the Quick Tag Editor icon on the Property inspector.
The Quick Tag Editor has three modes: Insert HTML, Wrap Tag, and Edit HTML. Although you can get to all three modes from any situation, which mode appears initially depends on the current selection. The Quick Tag Editor's window (see Figure 5-29) appears above the current selection when you use either the menu or keyboard method of opening it or next to the Property inspector when you click the icon. In either case, you can move the Quick Tag Editor window to a new location onscreen by dragging its title bar.
Tip
Regardless of which mode the Quick Tag Editor opens in, you can toggle to the other modes by pressing the keyboard shortcut Ctrl+T (Command+T).
The Quick Tag Editor offers built-in code hinting, just like that found in Code view. See the sidebar "Working with the Hint List" later in this chapter for details about this feature.
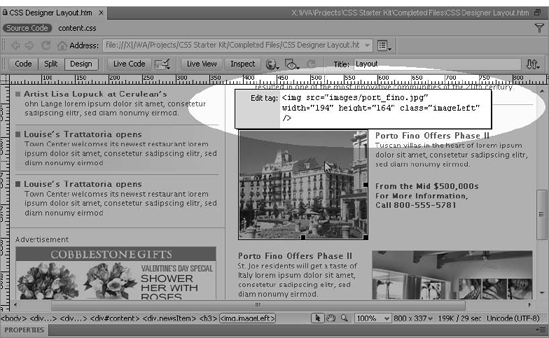
The Insert HTML mode of the Quick Tag Editor is used for adding new tags and code at the current cursor position; it is the initial mode when nothing is selected. The Insert HTML mode starts with a pair of angle brackets enclosing a blinking cursor. You can enter any tag — whether standard HTML or custom XML — and any attribute or content within the new tag. When you're finished, just press Enter (Return) to confirm your addition.
To add new tags to your page using the Quick Tag Editor Insert HTML mode, follow these steps:
Position your cursor where you would like the new code to be inserted.
Choose Modify
Enter your HTML or XML code.
If you pause while typing, the hint list appears, selecting the first tag that matches what you've typed so far. Use the arrow keys to select another tag in the list and press Enter (Return) to select a tag.
Press Enter (Return) when you're finished.
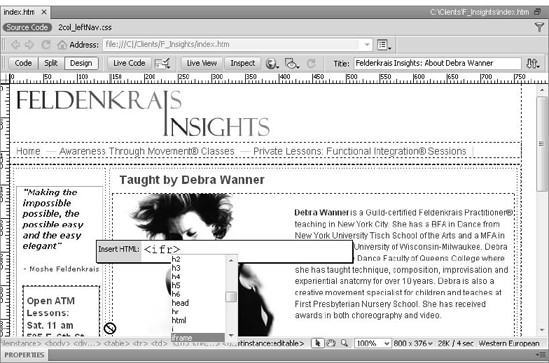
The Quick Tag Editor is fairly intelligent and tries to help you write valid HTML. If, for example, you leave off a closing tag, such as </strong>, the Quick Tag Editor automatically adds it for you.
Part of the power and flexibility of HTML is the capability to wrap one tag around other tags and content. To make a phrase appear bold and italic — or as the best Web practices have it, strong and emphasized — the code is written as follows:
<strong><em>On Sale Now!</em></strong>
Note how the inner <em>...</em> tag pair is enclosed by the <strong>...</strong> pair. The Wrap Tag mode of the Quick Tag Editor surrounds any selection with your entered tag in one easy operation.
The Wrap Tag mode appears initially when you have selected just text (with no surrounding tags) or an incomplete tag (the opening tag and contents, but no closing tag). The Wrap Tag mode is visually similar to the Insert HTML mode, as you can see in Figure 5-31.
However, rather than just include exactly what you've entered into the Quick Tag Editor, Wrap Tag mode also inserts a closing tag that corresponds to your entry. For example, you want to apply a tag not available as an object: the subscript, or <sub>, tag. After highlighting the text that you want to mark up as subscript (the 2 in the formula H20, for example), you open the Quick Tag Editor and enter sub. The resulting code looks like the following:
H<sub>2</sub>0
Warning
You can enter only one tag in Wrap Tag mode; if more than one tag is entered, Dreamweaver displays an alert informing you that the tag you've entered appears to be invalid HTML. The Quick Tag Editor is then closed, and the selection is cleared.
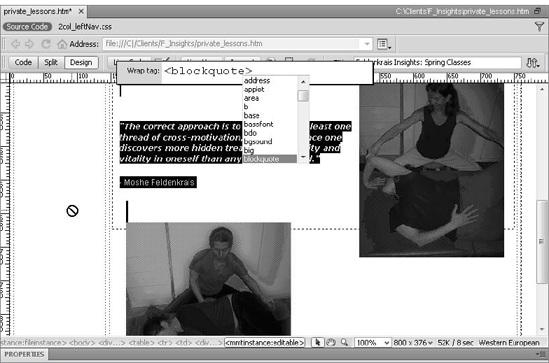
To wrap a tag with the Quick Tag Editor, follow these steps:
Select the text or tags you want to enclose in another tag.
Choose Modify
If you select a complete tag, the Quick Tag Editor opens in Edit Tag mode; press the keyboard shortcut Ctrl+T (Command+T) to toggle to Wrap Tag mode.
Enter the tag you want.
If you pause while typing, the hint list appears. It selects the first tag that matches what you've typed so far. Use the arrow keys to select another tag in the list and press Enter (Return) to select a tag from the hint list.
Press Enter (Return) to confirm your tag.
The Quick Tag Editor closes, and Dreamweaver places the tag before your selection and a corresponding closing tag after it.
If a complete tag — either a single tag, such as <img>, or a tag pair, such as <h1>...</h1> — is selected, the Quick Tag Editor opens in Edit Tag mode. Unlike the other two modes (in which you are presented with just open and closing angle brackets and a flashing cursor), the Edit Tag mode displays the entire selected tag with all its attributes, if any. You can always invoke the Edit Tag mode when you start the Quick Tag Editor by clicking its icon in the Property inspector.
The Edit Tag mode has many uses. It's excellent for adding a parameter not found on Dreamweaver's Property inspector. For example, when you are building a form, some text fields have pre-existing text in them — which you want to clear when the user clicks into the field. To achieve this effect you add a minor bit of JavaScript, a perfect use for the Edit Tag mode. Therefore, you can just select the <i> tag from the Tag Selector and then click the Quick Tag Editor icon to open the Quick Tag Editor. The <imgnput> tag appears with your current parameters, as shown in Figure 5-32. After you have opened it, tab to the end of the tag and enter this code:
onFocus="if(this.value=='Email Required')this.value='';"
In this example, Email Required is the visible text in the field — the value, which automatically clears when the field is selected.
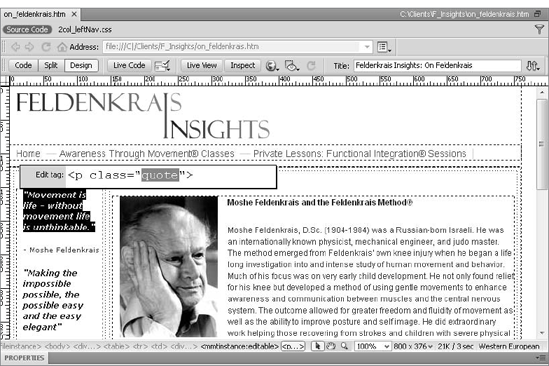
Figure 5-32. In Edit Tag mode, the Quick Tag Editor shows the entire tag, with attributes and their values.
To use the Quick Tag Editor in Insert HTML mode, follow these steps:
Select an entire tag by clicking its name in the Tag Selector.
Choose Modify
To change an existing attribute, tab to the current value and enter a new one.
To add a new attribute, tab and/or use the arrow keys to position the cursor after an existing attribute or after the tag, and enter the new parameter and value.
Tip
If you don't close the quotation marks for a parameter's value, Dreamweaver does it for you.
If you pause briefly while entering a new attribute, the hint list appears with attributes appropriate for the current tag. If you select an attribute from the hint list, press Enter (Return) to accept the parameter.
When you've finished editing the tag, press Enter (Return).
In addition to this capability to edit complete tags, Dreamweaver has a couple of navigational commands to help select just the right tag. The Select Parent Tag command — keyboard shortcut Ctrl+[ (Command+[) — highlights the tag immediately surrounding the present tag. Going in the other direction, the Select Child Tag — keyboard shortcut Ctrl+] (Command+]) — selects the next tag, if any, contained within the current tag. Both commands are available under the Edit menu. Exercising these commands is equivalent to selecting the next tag in the Tag Selector to the left (parent) or right (child).
Java is a platform-independent programming language developed by Sun Microsystems. Although Java can also be used to write entire applications, its most frequent role is on the Web in the form of an applet. An applet is a self-contained program that can be run within a Web page.
Java is a compiled programming language similar to C++. After a Java applet is compiled, it is saved as a class file. Web browsers call Java applets through, aptly enough, the <applet> tag. When you insert an applet, you refer to the primary class file much as you call a graphic file for an image tag.
Each Java applet has its own unique set of parameters — and Dreamweaver enables you to enter as many as necessary in the same manner as plugins and ActiveX controls. In fact, the Applet object works almost identically to the Plugin and ActiveX objects.
Warning
Keep two caveats in mind if you're planning to include Java applets in your Web site. First, most (but not all) browsers support some version of Java — the newest release has the most features, but the least support. Second, all the browsers that support Java offer the user the option of disabling it because of security issues. Be sure to use the Alt property to designate an alternative image or some text for display by browsers that do not support Java.
A Java applet can be inserted in a Web page with a bare minimum of parameters: the code source and the dimensions of the object. Java applets derive much of their power from their configurability, and most of these little programs have numerous custom parameters. As with plugins and ActiveX controls, Dreamweaver enables you to specify the basic attributes through the Property inspector and the custom ones via the Parameters dialog box.
To include a Java applet in your Web page, follow these steps:
Position the cursor where you want the applet to originate and choose Insert
From the Select File dialog box, enter the path to your class file in the File Name text box or click the Browse button to locate the file. An Applet object placeholder appears in the Document window. In the Applet Property inspector (see Figure 5-33), the selected source file appears in the Code text box, and the folder appears in the Base text box.

Figure 5-33. Use the Insert Applet button to insert a Java Applet object and display the Applet Property inspector.
Note
The path to your Java class files cannot be expressed absolutely; it must be given as an address relative to the Web page that is calling it.
Enter the height and width of the Applet object in the H and W text boxes, respectively. You can also resize the Applet object by clicking and dragging any of its three sizing handles.
You can enter any of the usual basic attributes, such as a name for the object, as well as values for Align, V, and/or H Space in the appropriate text boxes in the Property inspector.
If you want, enter the online directory where the applet code can be found in the Base text box. If none is specified, the document's URL is assumed to be this attribute, known as the codebase.
To display an alternative image if the Java applet is unable to run (typically, because the user's browser does not support Java or the user has disabled Java), enter the path to the image in the Alt field. You can use the folder icon to locate the image as well. Text may also serve as the alternative content if you don't want to use an image. Any text entered into the Alt field is displayed in the browser as a tooltip.
To enter any custom attributes, click the Parameters button to open the Parameters dialog box.
Click the Add (+) button and enter the first parameter. Press Tab to move to the Value column.
Enter the value for the parameter, if any. Press Tab.
Continue entering parameters in the left column, with their values in the right. Click OK when you've finished.
Tip
Because of the importance of displaying alternative content for users not running Java, Dreamweaver provides a method for displaying something for everyone. To display an image, enter the URL to a graphics file in the Alt text box. To display text as well as an image, you have to do a little hand-coding. First select a graphics file to insert in the Alt text box and then open Code view. In the <img> tag found between the <applet> tags, add an alt="your_message" attribute by hand (where the text you want to display is the value for the alt attribute). Now your Java applet displays an image for browsers that are graphics-enabled but not Java-enabled, and text for text-only browsers such as Lynx. In this sample code, I've bolded the additional alt attribute.
<applet code="animate.class" width="100" height="100"><param name="img1"
    value="/images/1.jpg"><param name="img2" value="/images/2.jpg"><img
    src="animation.gif" alt="Animate for Life!" width="100" height="100"></applet>
Some Java class files have additional graphics files. In most cases, you store both the class files and the graphics files in the same folder.
When initially developed by Netscape, JavaScript was called LiveScript. This browser-oriented language did not gain importance until Sun Microsystems joined the development team and the product was renamed JavaScript. Although the rechristening was a stroke of marketing genius, it has caused endless confusion among beginning programmers — JavaScript and Java have almost nothing in common outside of their capability to be incorporated in a Web page. JavaScript is used primarily to add functionality on the client-side of the browser (for tasks such as verifying form data and adding interactivity to interface elements) or to script Netscape's servers on the server-side. Java, on the other hand, is an application-development language that can be used for a wide variety of tasks.
Conversely, VBScript is a full-featured Microsoft product. Both VBScript and JavaScript are scripting languages, which means that you can write the code in any text editor and compile it at runtime. JavaScript enjoys more support than VBScript. JavaScript can be rendered by all modern browsers (as well as other browsers such as WebTV, Opera, and Sun's HotJava), whereas VBScript is read only by Internet Explorer on Windows systems and is rarely used today. In Dreamweaver, both types of code are inserted in the Web page in the same manner.
If only mastering JavaScript or VBScript were as easy as inserting the code in Dreamweaver! Simply go to the Script menu on the Common category of the Insert panel and click the Script button, or choose Insert
Of course, JavaScript or VBScript instruction is beyond the scope of this book, but every working Web designer must have an understanding of what these languages can do. Both languages refer to and, to varying degrees, manipulate the information on a Web page. Over time, you can expect significant growth in the capabilities of the JavaScript and VBScript disciplines.
Note
Dreamweaver behaviors have been instrumental in making JavaScript useful for nonprogrammers. To learn more about behaviors, see Chapter 11.
Use the Script Property inspector (see Figure 5-34) to select an external file for your JavaScript or VBScript code. You can also set the language type by opening the Language drop-down list from the Script window and choosing either JavaScript or VBScript. Because different features are available in the various releases of JavaScript, you can also specify JavaScript 1.1 or JavaScript 1.2. Choose a specific version of JavaScript when you initially insert the script — you cannot change the setting from the Script Property inspector. Naturally, you can also make the adjustment in Code view.
When you choose JavaScript or VBScript as your Language type, Dreamweaver writes the code accordingly. Both languages use the <script> tag pair, and each is specified in the language attribute, as follows:
<script language="JavaScript">alert("Look Out!")</script>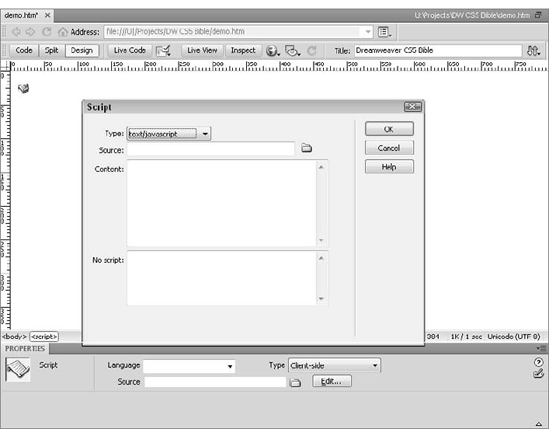
Figure 5-34. The generous Script dialog box provides plenty of room for modifying your JavaScript or VBScript.
With Dreamweaver, you are not restricted to inserting code in just the <body> section of your Web page. Many JavaScript and VBScript functions must be located in the <head> section. To insert this type of script, first choose View
You can also indicate whether your script is based on the client-side or server-side by choosing the Type option from the Property inspector. If you choose server-side, your script is enclosed in <server>...</server> tags and is interpreted by the Web server hosting the page.
Dreamweaver provides a large editing window for modifying your script code. To open this Script Properties window, select the placeholder icon for the script you want to modify and then click the Edit button on the Script Property inspector. You have the same functionality in the Script Properties window as in the Script Property inspector; namely, you can choose your language or link to an external script file (see Figure 5-35).
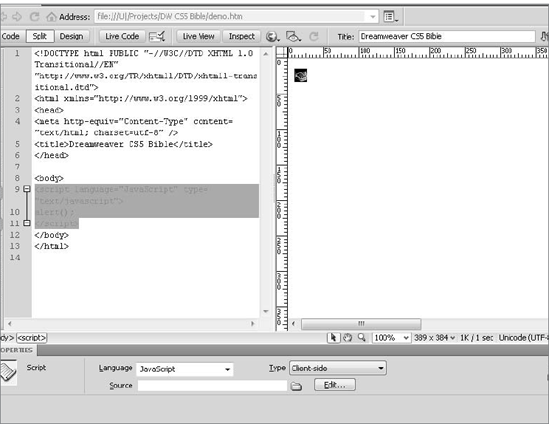
Tip
Some older browsers break when loading a JavaScript Web page and display the code written between the <script>...</script> tag pair. Although Dreamweaver doesn't prevent this problem by default, you can use a trick to prevent this anomaly. In Code view or the Code inspector, insert the opening comment tag (<!--) right after the opening <script> tag. Then insert the closing comment tag (-->), preceded by two forward slashes, right before the closing </script>. An example follows:
<script language="Javascript"><!--[JavaScript code goes here]//--></script>
The comment tags effectively tell the older browser to ignore the enclosed content. The two forward slashes in front of the closing comment tag are JavaScript's comment indicator, which tells it to ignore the rest of the line.
Many of today's Web designers have noted the benefits brought by working with external CSS style sheets — including clarity of code and easier maintenance — and looked for a way to apply the same techniques to JavaScript. By moving all the JavaScript functions into an external file, the core HTML source code loads faster and is easier to review, and the same external page can govern the interactivity of multiple pages. Dreamweaver has long created a barrier to this ideal because all of its JavaScript behaviors are embedded in the page containing the interactivity.
To bridge the gap between the standard Dreamweaver approach to client-side scripting and the more modern method, Dreamweaver CS5 offers a new command: Externalize JavaScript. When the Externalize JavaScript command is run, you're given two options. You can either move just the JavaScript functions from the <head> to an external file or move the functions and also remove the triggers, like onClick or onMouseOver. The implementation of this latter technique is referred to as unobtrusive JavaScript and uses a combination of CSS ID selectors and JavaScript DOM (Document Object Model) manipulation. Happily, the Dreamweaver team has made this very powerful and sophisticated command extremely easy to use.
To extract JavaScript from your page, follow these steps:
Choose Commands
Choose the desired option:
Only Externalize JavaScript: This option exports all JavaScript functions in the
<head>of the document to an external document and links to that document. Script tags in the<body>, with the exception of Spry widgets, are not removed.Externalize JavaScript And Attach Unobtrusively: In addition to the preceding functionality, triggers (also known as event handlers) are deleted from
<a>tags and replaced with a JavaScript file with DOM functions and CSS IDs.
If you chose to externalize JavaScript only, Dreamweaver lists a single option, Remove JavaScript From Head. Leave the option selected and click OK.
If you chose to externalize JavaScript and attach unobtrusively, Dreamweaver displays all the attributes that act as triggers and suggested IDs, as shown in Figure 5-36. To remove all of the triggers, leave all options selected; modify any desired ID, and click OK.
Dreamweaver reports the results of the operation, including the names of new files that have been created and will need to be published with the current page; click OK.
Be aware of some tradeoffs when externalizing your JavaScript, especially when you select the unobtrusive option. After Dreamweaver makes this conversion, client-side behaviors can no longer be re-opened and modified from the Behaviors panel. To make any further modifications, you'd need to open one of the newly created files (current_file.js where current_file is the name of the file from which the JavaScript was extracted) in either Code or Split view and edit the final series of functions by hand.
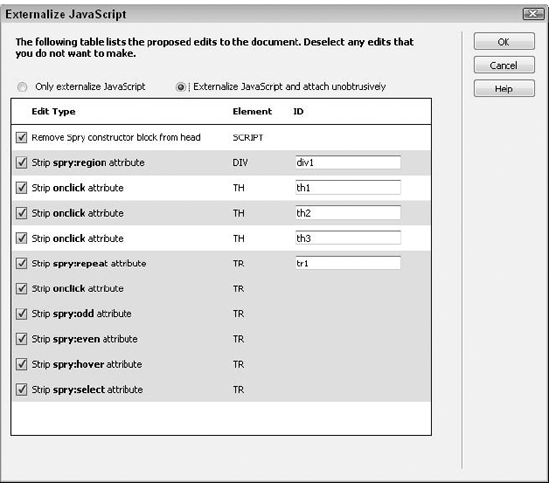
Figure 5-36. Dreamweaver can extract all the JavaScript and replace any selected trigger attribute so that the client-side scripting is not apparent in the code.
The other drawback to extracting JavaScript is applicable to either path you decide to take, externalize JavaScript only or externalize and unobtrusively connect. Once the conversion is complete, it can only be undone after the page is closed. You can, however, reverse your decision by choosing Edit
Syntax — the rules governing the formation of statements in a programming language — is important regardless of which language your pages employ. Earlier browsers tended to be more relaxed about following the syntactical rules of HTML, but as standardization becomes increasingly important, browsers — and businesses — are following suit. Certain languages, such as XML, require the code to be precisely written or it just won't work. To ensure that a page is correctly written, the page should be validated.
Tip
To make sure your HTML pages are valid, you'll need to use any of the Web's numerous validation services. Perhaps the most notable one run by the W3C at http://validator.w3.org.
With Dreamweaver's Validation feature, you can check a single XML page. After it is checked, the resulting errors and warnings, if any, can be stored in an XML file for future output. Any error can be double-clicked to go right to the offending element for immediate correction.
Note
XML files are frequently used to hold data, on the Web and off. To learn more about XML, see Chapter 32, "Integrating with XML and XSLT".
As with other Dreamweaver-style reports, the Validation feature resides in the Results panel, as shown in Figure 5-37. To display the Validation panel, choose Window
Clicking the Validate button — the green triangle in the left margin of the Validation tab shown in Figure 5-37 — unveils two options:
Validate Current Document: Checks the onscreen document against the validation preferences
Settings: Displays the Validation category in Preferences

Figure 5-37. You can easily validate your XML pages from within Dreamweaver using the Validation feature.
Note
To get a full overview of all your options, see Chapter 3.
To validate a page, follow these steps:
Make sure the Validation options you want are set in Preferences. If not, click the Validate button and choose Settings.
Select Validate and then Validate Current Document. Dreamweaver's validation engine goes through the entire page and displays any errors, warnings, and other messages in the Validation panel.
To correct an error, double-click the entry. Dreamweaver highlights the offending tag in Code view, where you can make any modifications necessary.
Select More Info to see additional details, if available, about the current error.
To store the results of the validation as an XML file, select Save Report and enter the name for the file. Dreamweaver, by default, supplies the filename
ResultsReport.xml.To view a listing of the results in your primary browser, choose Browse Report.
Tip
Use Browse Report and then print the file from your browser as a quick way to get a hard copy of the validation results.
When working with Dreamweaver, you're usually entering text directly from your keyboard, one keystroke at a time, with each keystroke representing a letter, number, or other keyboard character. Some situations, however, require special letters that have diacritics or common symbols, such as the copyright symbol, which are outside of the regular, standard character set represented on your keyboard. HTML enables you to insert a full range of such character entities through two systems. The more familiar special characters have been assigned a mnemonic code name to make them easy to remember; these are called named characters. Less typical characters must be inserted by entering a numeric code; these are known as decimal characters. For the sake of completeness, named characters also have a corresponding decimal character code.
Both named and decimal character codes begin with an ampersand (&) symbol and end with a semicolon (;). For example, the HTML code for an ampersand symbol is:
&
Its decimal character equivalent is:
&
Warning
If, during the browser-testing phase of creating your Web page, you suddenly see an HTML code onscreen rather than a symbol, double-check your HTML. The code could be just a typo; you may have left off the closing semicolon, for instance. If the code is correct and you're using a named character, however, switch to its decimal equivalent. Some of the earlier browser versions are not perfect in rendering named characters.
HTML coding conventions require that certain characters, including the angle brackets that surround tags, be entered as character entities. Table 5-4 lists the most common named characters.
Table 5-4. Common Named Characters
Named Entity | Symbol | Description |
|---|---|---|
| < | A left angle bracket or the less-than symbol |
| > | A right angle bracket or the greater-than symbol |
| & | An ampersand |
| " | A double quotation mark |
| ˚ | A nonbreaking space |
| © | A copyright symbol |
| ® | A registered mark |
| ™ | A trademark symbol, which cannot be previewed in Dreamweaver but is supported in Internet Explorer |
Tip
Those characters that you can type directly into Dreamweaver's Document window, including the brackets and the ampersand, are automatically translated into the correct named characters in HTML. Try this when in split-screen Code and Design view. You can also enter a nonbreaking space in Dreamweaver by pressing Ctrl+Shift+spacebar (Command+Shift+Spacebar) or by choosing the Nonbreaking Space object.
To enter almost any character that has a diacritic — such as á, ñ, or â — in Dreamweaver, you must explicitly enter the corresponding decimal character into your HTML page. As mentioned in the preceding section, decimal characters take the form of &#number;, where the number can range from 00 to 255. Not all numbers have matching symbols; the sequence from 14 through 31 is currently unused. The upper range (127 through 159), only partially supported by modern browsers such as Firefox, Safari and Chrome, is now deemed invalid by the W3C. In addition, not all fonts have characters for every entity.
Dreamweaver uses UTF-8 encoding for characters higher than 127. UTF-8 is an ASCII-compatible version of the Unicode character set. Unicode provides a unique number for every character in every language; however, the raw Unicode number is rendered in 15-bit words, unreadable by browsers — a problem solved by UTF-8.
UTF-8 also uses numbers, but does away with the upper limit of 255. For example, the UTF-8 encoding for the trademark symbol is ™, whereas the no-longer–used number entity is ™. Fortunately, you don't have to remember complex codes — all you have to do is use the Character objects.
Not only is it difficult to remember the various name or number codes for the specific character entities; it's also time-consuming to enter the code by hand. The Dreamweaver engineers recognized this problem and created a series of Character objects, which are found under the Characters menu of the Insert panel's Text category or the Insert
Ease of use is the guiding principle for the new Character objects. Eleven of the most commonly used symbols, such as © and ®, are instantly available as separate objects. Inserting the single Character objects is a straightforward point-and-click affair. Either drag the desired symbol to a place in the Document window or position your cursor and select the object. The individual Character objects are described in Table 5-5.
Table 5-5. Character Objects
Icon | Name | HTML Code Inserted |
|---|---|---|
Line Break |
| |
NonBreaking Space |
| |
Left Quote |
| |
Right Quote |
| |
Em-Dash |
| |
Pound |
| |
Euro |
| |
Yen |
| |
Copyright |
| |
Registered |
| |
Trademark |
|
Note
You may notice that the Character objects insert a mix of named and number character entities. Not all browsers recognize the easier-to-identify named entities, so for the widest compatibility, Dreamweaver uses the number codes for a few objects.
The final object in the Characters menu is used for inserting these or any other character entity. The Insert Other Character object displays a large table with symbols for 99 different characters, as shown in Figure 5-38. Simply select the desired symbol, and Dreamweaver inserts the appropriate HTML code at the current cursor position. By the way, the very first character — which appears to be blank — actually inserts the code for a nonbreaking space, also accessible via the keyboard shortcut Ctrl+Shift+spacebar (Command+Shift+spacebar). The nonbreaking space is also available in the Characters menu in the Common category of the Insert panel.
Note
Keep in mind that the user's browser must support the character entity for it to be visible to the user; again, testing is essential. In the case of the Euro symbol, for example, that support is still not widespread. In some instances, where the appearance of a particular character is critical, a graphic may be a better option than a UTF-8 entity.
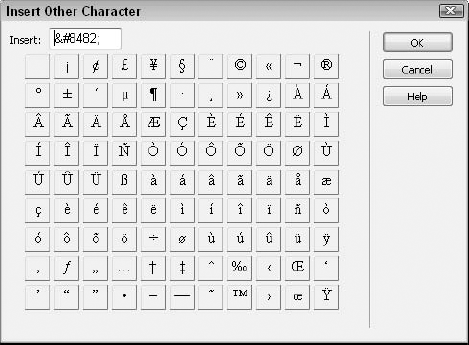
Creating Web pages with Dreamweaver is a special blend of using visual layout tools and HTML coding. Regardless, you need to understand the basics of HTML so that you have the knowledge and the tools to modify your code when necessary. This chapter covered the following key areas:
An HTML page is divided into two main sections: the
<head>and the<body>. Information pertaining to the entire page is kept in the<head>section; all the actual content of the Web page goes in the<body>section.You can change the color and background of your entire page, as well as set its title, through the CSS categories in the Page Properties dialog box.
Use
<meta>tags to summarize your Web page so that search engines can properly catalog it. In Dreamweaver, you can use the View Head Contents feature to easily alter these and other<head>tags.The Live View, Related Files, and Code Navigator features all work together to provide an enhanced workflow with real-world browser rendering and quick access to code in external files.
Java applets can be inserted as Applet objects in a Dreamweaver Web page. Java source files, called classes, can be linked to the Applet object through the Property inspector.
Dreamweaver offers a simple method for including both JavaScript and VBScript code in the
<body>section of your HTML page. Script functions that you want to insert in the<head>section can now be added by choosing ViewTo separate content from presentation, consider extracting your JavaScript with the Externalize JavaScript command. Remember, however, that if you choose to replace the trigger attributes with unobtrusive JavaScript, your Dreamweaver behaviors no longer are editable in the Behaviors panel.
Special extended characters such as symbols and accented letters require the use of HTML character entities, which can either be named (as in
") or in decimal format (as in").
In the next chapter, you learn how to work with Cascading Style Sheets — also known as CSS — to style and lay out your Web pages in Dreamweaver.