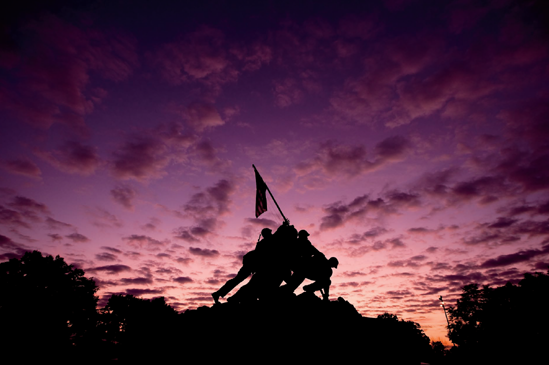
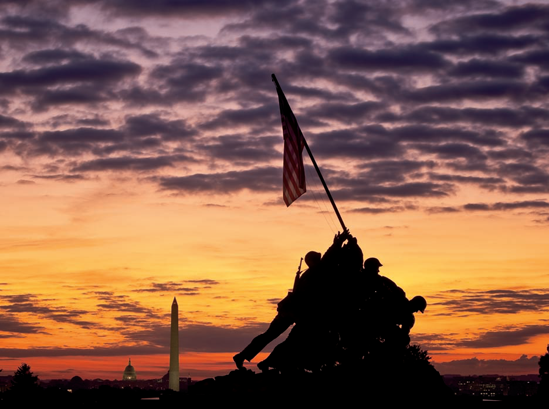
The United States Marine Corps War Memorial on an early summer morning. Taken at ISO 400, f/4, 1/50 second with a 16mm lens.
The United States Marine Corps War Memorial, often referred to by the scene it depicts from the Battle of Iwo Jima during World War II, honors fallen Marines. Its base is inscribed with the many battles in which Marines have fought.
The bronze statue depicts the Pulitzer-prize winning photograph Raising the Flag on Iwo Jima by the late Associated Press photographer Joe Rosenthal. The 33-year-old Rosenthal shot the photo using the press camera of the period, a large format Speed Graphic (1/400 second at f/11), on February 23, 1945.
An image of the U.S. Marine Corps War Memorial is another one of the most recognizable photographs of sights around the D.C. area.
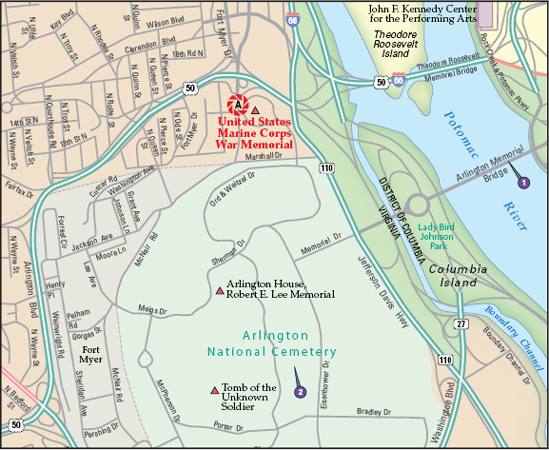
Figure 24.1. The best location from which to photograph the United States Marine Corps War Memorial: (A) west of the memorial. Nearby photo ops: (1) Arlington Memorial Bridge and (2) Arlington National Cemetery.
The iconic shot of the U.S. Marine Corps War Memorial can be taken just west of the memorial. Two locations here work well and are just feet from each other. First, you can shoot from within the trees that form the west border with U.S. Marine Memorial Circle. Here you get a little more elevation on the statue, and you can line up the U.S. Capitol, Washington Monument and, especially in the winter (when the trees are bare), the Lincoln Memorial behind the statue (see Figure 24.1).
Second, if you walk down the small hill here, you can pick a variety of spots to shoot from as well (see Figure 24.2). From the west side, you are also viewing the statue as Joe Rosenthal viewed the actual soldiers when he made his photograph during the Battle of Iwo Jima.
The 7.5 acres that surround the memorial are a pleasant place to photograph and give you an opportunity to walk around the statue to see it from all angles.
The gear requirements here are quite straightforward and don't require much out of the norm.
To emulate Figure 24.1 where you have the Capitol, Washington Monument, and other areas of Washington, D.C. in the shot, you need a lens of between 100 and 150mm. If you shoot horizontally, you can use the wider lens, whereas a vertical photo allows you to use a longer lens. When closer to the memorial, you can use a variety of wider lenses, from 16–24mm.
Because the sun will be either in front or behind you for many of these images, polarizing filters will have less effect (they work best at 90-degree angles to the sun). A graduated neutral density filter could be used to good effect depending on how bright the sky is.
A tripod is very helpful for any low-light shots, especially the first shot amongst the trees using a longer lens in lower light. Because this is an area that doesn't have much pedestrian traffic other than photographers usually, tripods are okay here. However, the closer you get to the memorial and the more crowded it is, the more likely it is that a tripod may be a safety issue for other visitors.
Most cameras set to an automatic exposure mode tend to overexpose low-light scenes, so you'll have to adjust your camera to render these correctly. This is why many cameras have a night setting, so the camera knows to adjust its exposure for a predominantly dark scene. Another way to expose a dark scene correctly is to use your camera's exposure compensation feature and reduce the exposure if your camera is rendering it too brightly.
Determining how you shoot this will be based on whether you are handholding your camera or using a tripod, and time of day. If handholding in low light, try using Shutter Priority and set a shutter speed of 1/60 second (this is a speed at which most people can hand hold their camera and not get any camera-shake blur). Be sure to focus on the memorial carefully because your camera will likely set a low aperture value, which means that the margin of error for focusing is much lower.
If your sky is looking too washed out, try using exposure compensation and reducing the exposure by one stop to start. Another option is to note what the settings are when using Shutter Priority mode, and switch to Manual and dial in these settings. By switching to Manual mode, you can start at the exposure the camera set, but then you can adjust your shutter speed to a higher value to reduce exposure, or increase your aperture value to do the same.
Tip
Some photographers can hand hold a shot down to 1/15 of a second or even slower, but getting a sharp image at such slow shutter speeds can be very difficult because of camera-shake induced blurring.
If you are using a tripod, then you can use Aperture Priority mode and let the camera set whatever shutter speed it wants. In this case, using a higher aperture value causes the camera to let in less light and sets a longer shutter speed. Using longer shutter speeds can make great effects with passing clouds and if the flag of the memorial is fluttering in the wind, getting a little motion in the Stars and Stripes.
Finally, setting a white balance other than auto can help your sunsets come out with their true colors. If you are shooting early or late in the day, try using the Sun setting, which will let the colors be warmer and give a truer feel of a sunset or sunrise photo.
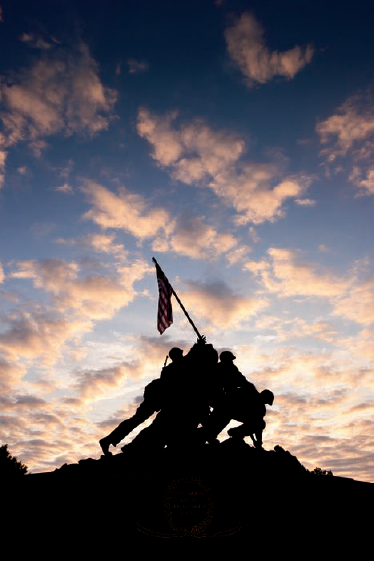
You can take good shots here at most times of the day, but the most provocative time is early morning and late evening.
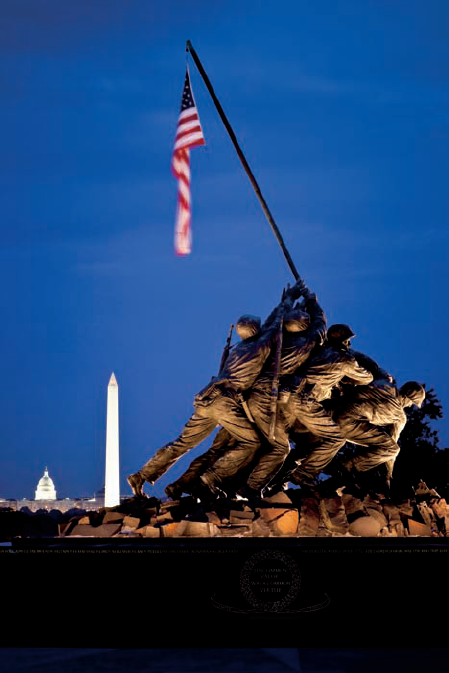
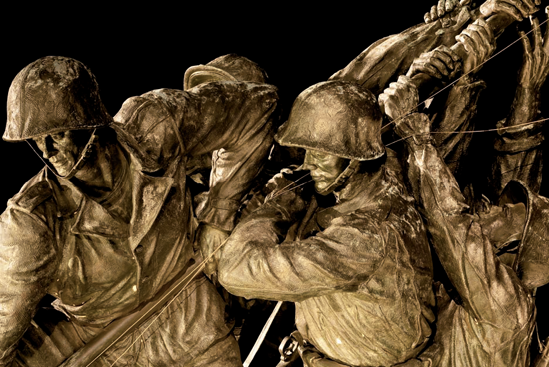
Figure 24.4. A view of the U.S. Marine Corps War Memorial on a cloudy evening (see A on the map). Taken at ISO 320, f/18, 30 seconds with a 150mm lens mounted on a tripod.
Early morning is definitely a great time to shoot here. If you arrive before the sun comes up, you have time to compose a shot and then watch as the colors and clouds interact to change the picture every second. During the day though, the same photos can be taken, just with less dramatic light. (If you are at the memorial during midday, you may try using the sun to silhouette the statue.)
In the evening and at dusk, the statue will most likely be lit with bright flood lights. Try to balance the exposure of the statue with the ambient light (see Figure 24.3). If the sky goes too dark, it will quickly turn black when the memorial is exposed correctly.
Stark photos of the memorial can be made during heavy snows, fog, and even possibly rain. You won't find many areas here to shield yourself from the weather unless you drove, so be prepared if it does begin to rain. Finally, keep an eye on the wind. A little wind fluttering can really help the photo by giving the flag some form.
At night, you can shoot interesting images of the memorial, with the landmarks behind when facing east, as well as detail shots of the statue (see Figure 24.4). Also, more options are available at night facing west, since the buildings that surround the statue are less noticeable.
Besides the iconic shots looking east, some other vantage points can make for good views of the memorial, especially in the winter when the trees have lost their leaves. Next, try rotating your camera with detail shots to compose the photograph in a way that is compelling, rather than always keeping your camera either exactly horizontal or vertical. Finally, shooting other variants of the above photos can make for some great images, too.