
Chapter 27
Using Script.aculo.us
What You’ll Learn in This Chapter:
![]() Downloading the Library
Downloading the Library
![]() Including the Files
Including the Files
![]() Using Effects
Using Effects
![]() Building the Script
Building the Script
We have already seen in previous chapters how powerful the prototype.js library is, and we have used the Rico library, built on prototype.js, to create some visual effects with very little code.
In this chapter you will learn the basics of using Script.aculo.us, a powerful Ajax and user interface development framework, also based on prototype.js.
To see how simple it is to use, you will now create an example script that includes the Script.aculo.us library and use event handlers to demonstrate several of the available effects.
![]()
This example was created using version 1.5.1 of the Script.aculo.us library. It should work with later versions, but the library might have changed since this was written. If you have trouble, you might need to use this specific version.
Downloading the Library
To use the library, you will need to obtain it and copy the files you need to the same folder where you will store your script.
You will find a copy of Script.aculo.us on the CD accompanying this book. Alternatively, you can download the latest version of the library from the Script.aculo.us website at http://script.aculo.us/downloads.
The download is available as a Zip file. Inside the Zip file you will find a folder called scriptaculous-js-x.x.x. You will need the following files from the folders under this folder:
![]()
prototype.js (the Prototype library) from the lib folder
![]()
effects.js (the effects functions) from the src folder
Copy both of these files to a folder on your computer, and be sure to create your demonstration script in the same folder.
![]()
The Script.aculo.us download includes many other files, and you can include the entire library if you intend to use all of its features. For this example, you only need the two files described here.
Including the Files
To add the library to your HTML document, simply use <script> tags to include the two JavaScript files you copied from the download:
<script type=”text/javascript” src=”prototype.js”> </script>
<script type=”text/javascript” src=”effects.js”> </script>
If you include these statements as the first things in the <head> section of your document, the library functions will be available to other scripts or event handlers anywhere in the page.
Using Effects
After you have included the library, you simply need to include a bit of JavaScript to trigger the effects. We will use a section of the page wrapped in a <div> tag with the id value test to demonstrate the effects. Each effect is triggered by a simple event handler on a button. For example, this code defines the Fade Out button:
<input type=”button” value=”Fade Out”
    onClick=”new Effect.Fade($(‘test’))”>
This uses the $ function built into Prototype to obtain the object for the element with the id value test, and then passes it to the Effect.Fade function built into Script.aculo.us.
![]()
This example will demonstrate six effects: Fade, Appear, SlideUp, SlideDown, Highlight, and Shake. There are more than 16 effects in the library, plus methods for supporting Drag and Drop and other features. See http://script.aculo.us for details.
Building the Script
After you have included the libraries, you can combine them with event handlers and some example text to create a complete demonstration of Script.aculo.us effects. The complete HTML document for this example is shown in Listing 27.1.
Listing 27.1 The Complete Library Effects Example
<html>
<head>
<title>Testing script.aculo.us effects</title>
<script type=”text/javascript” src=”prototype.js”> </script>
<script type=”text/javascript” src=”effects.js”> </script>
</head>
<body”>
<h1>Testing script.aculo.us Effects</h1>
<form name=”form1”>
<input type=”button” value=”Fade Out”
onClick=”new Effect.Fade($(‘test’))”>
<input type=”button” value=”Fade In”
onClick=”new Effect.Appear($(‘test’))”>
<input type=”button” value=”Slide Up”
onClick=”new Effect.SlideUp($(‘test’))”>
<input type=”button” value=”Slide Down”
onClick=”new Effect.SlideDown($(‘test’))”>
<input type=”button” value=”Highlight”
onClick=”new Effect.Highlight($(‘test’))”>
<input type=”button” value=”Shake”
onClick=”new Effect.Shake($(‘test’))”>
</form>
<div id=”test”
style=”background-color:#CCC; margin:20px; padding:10px;”>
<h2>Testing Effects</h2>
<hr>
<p>This section of the document is within a <div> element
with the <b>id</b> value <b>test</b>. The event handlers on the
buttons above send this object to the
<a href=”http://script.aculo.us/”>script.aculo.us</a> library
to perform effects. Click the buttons to see the effects.
</p>
</div>
</body>
</html>
This document starts with two <script> tags to include the library’s files. The effects are triggered by the event handlers defined for each of the six buttons. The <div> section at the end defines the test element that will be used to demonstrate the effects.
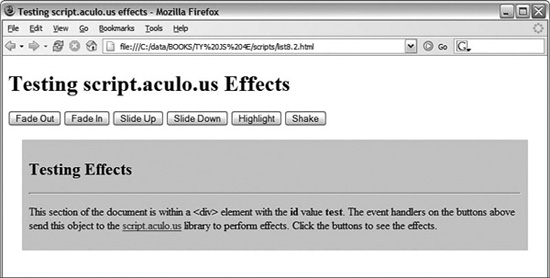
To try this example, make sure the prototype.js and effects.js files from Script.aculo.us are stored in the same folder as your script, and then load it into a browser. The display should look like Figure 27.1, and you can use the six buttons at the top of the page to trigger effects.
Figure 27.1 The library effects example as displayed by Firefox.
Summary
Script.aculo.us is another powerful and easy-to-use toolkit based on the prototype.js library. With just a few lines of code, you can add impressive effects to your page elements.
This chapter has barely scratched the surface of what Script.aculo.us can achieve. Read the package documentation and experiment with the library to see how you can build powerful and impressive interactive pages with minimal additional programming.