
12
WORKING WITH AZURE

With organizations pushing more and more services to the cloud, it’s important that automators understand how to work there. Luckily, thanks to PowerShell’s modules, and its ability to work with just about any API, working in the cloud is a breeze. In this and the next chapter, I’ll show you how to use PowerShell to automate tasks; in this chapter, you’ll work with Microsoft Azure, and in the next, with Amazon Web Services.
Prerequisites
If you’ll be running the code in this chapter, I make a few assumptions about your environment. The first is that you have a Microsoft Azure subscription set up. You’ll be working with real cloud resources in this chapter, so you will receive charges to your account, but the fees should be reasonable. As long as you don’t leave any of the virtual machines you’re creating up for too long, the fees should be less than $10.
Once you have an Azure subscription set up, you’ll need the Az PowerShell module bundle. This bundle of modules provided by Microsoft has hundreds of commands to perform tasks on nearly every Azure service available. You can download it by running Install-Module Az in your console (make sure to run as the administrator). I should note that I am using version 2.4.0 of the Az module. If you’re using a later version, I can’t guarantee that all of these commands will work exactly the same way.
Azure Authentication
Azure gives us a few ways to authenticate to its service. In this chapter, you’ll use a service principal. A service principal is an Azure application’s identity. It is the object that represents an application that can then be assigned various permissions.
Why are you creating a service principal? You want to authenticate to Azure by using an automated script that requires no user interaction. To do this, Azure requires you to use either a service principal or an organizational account. I want everyone to be able to follow along regardless of the type of account they have, so you’ll use a service principal to authenticate to Azure.
Creating a Service Principal
Counterintuitively, the first thing you have to do to create a service principal is authenticate the old-fashioned way. To do this, use Connect-AzAccount, which produces a window like Figure 12-1.
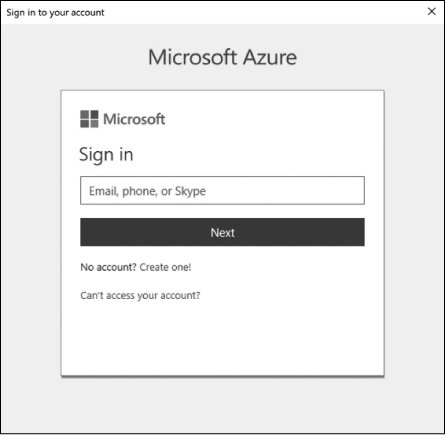
Figure 12-1: The Connect-AzAccount credential prompt
Provide your Azure username and password, and the window should close, giving an output similar to Listing 12-1.
PS> Connect-AzAccount

Environment           : AzureCloud
Account               : email
TenantId              : tenant id
SubscriptionId        : subscription id
SubscriptionName      : subscription name
CurrentStorageAccount :
Listing 12-1: Output from Connect-AzAccount
Be sure to record the subscription ID and tenant ID. You’ll need those in your script a little later. If, for some reason, you don’t catch them while authenticating with Connect-AzAccount here, you can always get them by using the Get-AzSubscription command later.
Now that you’re (interactively) authenticated, you can start creating a service principal. It’s a three-step process: first, you create a new Azure AD application; then, you create the service principal itself; and last, you create a role assignment for that service principal.
You can create the Azure AD application by using whatever name and URI you like (Listing 12-2). What URI you use doesn’t matter for our purposes, but a URI is required to create the AD application. To ensure that you have adequate rights to create an AD application, refer to https://docs.microsoft.com/en-us/azure/active-directory/develop/app-objects-and-service-principals.
PS> ❶$secPassword = ConvertTo-SecureString -AsPlainText -Force -String 'password'
PS> ❷$myApp = New-AzADApplication -DisplayName AppForServicePrincipal -IdentifierUris
'http://Some URL here' -Password $secPassword
Listing 12-2: Creating an Azure AD application
You can see that you’re first creating a secure string by using a password ❶. After you have the password in the correct format, you create a new Azure AD application ❷. A service principal requires an Azure AD application to be created.
Next, you use the New-AzADServicePrincipal command to create the service principal, as in Listing 12-3. You reference the application created in Listing 12-2.
PS> $sp = New-AzADServicePrincipal -ApplicationId $myApp.ApplicationId
PS> $sp

ServicePrincipalNames : {application id, http://appforserviceprincipal}
ApplicationId         : application id
DisplayName           : AppForServicePrincipal
Id                    : service principal id
Type                  : ServicePrincipal
Listing 12-3: Creating an Azure service principal with PowerShell
Last, you need to assign a role to the service principal. Listing 12-4 assigns a Contributor role to ensure that the service principal has the access it needs to perform all of the tasks in this chapter.
PS> New-AzRoleAssignment -RoleDefinitionName Contributor -ServicePrincipalName
$sp.ServicePrincipalNames[0]

RoleAssignmentId   : /subscriptions/subscription id/providers/Microsoft.Authorization/
                     roleAssignments/assignment id
Scope              : /subscriptions/subscription id
DisplayName        : AppForServicePrincipal
SignInName         :
RoleDefinitionName : Contributor
RoleDefinitionId   : id
ObjectId           : id
ObjectType         : ServicePrincipal
CanDelegate        : False
Listing 12-4: Creating a role assignment for a service principal
With that, the service principal has been created and assigned a role.
The only thing left to do is save the encrypted password represented as a secure string for the application you just created somewhere on the disk. You can do that by using the ConvertFrom-SecureString command. The ConvertFrom-SecureString command (the complement of ConvertTo-SecureString) converts encrypted text represented as a PowerShell secure string to a general string, allowing you to save and reference it later:
PS> $secPassword | ConvertFrom-SecureString | Out-File -FilePath C:AzureAppPassword.txt
Once you have the password saved to disk, you’re ready to set up noninteractive authentication for Azure.
Noninteractively Authenticating with Connect-AzAccount
The Connect-AzAccount command prompts you to manually input a username and password. In your scripts, you want to be as noninteractive as possible, because the last thing you want to do is depend on someone sitting in front of a computer to type in your password! Luckily, you can also pass a PSCredential object to Connect-AzAccount.
You’ll write a small script to handle noninteractive authentication. First, let’s create a PSCredential object that contains the Azure app ID and password:
$azureAppId = 'application id'
$azureAppIdPasswordFilePath = 'C:AzureAppPassword.txt'
$pwd = (Get-Content -Path $azureAppIdPasswordFilePath | ConvertTo-SecureString)
$azureAppCred = (New-Object System.Management.Automation.PSCredential $azureAppId,$pwd)
Remember the subscription ID and tenant ID you wrote down earlier? You need to pass those into Connect-AzAccount as well:
$subscriptionId = 'subscription id'
$tenantId = 'tenant id'
Connect-AzAccount -ServicePrincipal -SubscriptionId $subscriptionId -TenantId $tenantId
-Credential $azureAppCred
You’re all set up for noninteractive authentication! Now that you have this set up, it will be saved so you don’t have to authenticate like this again.
If you want the condensed code, download the AzureAuthentication.ps1 script from the book’s resources for this chapter.
Creating an Azure Virtual Machine and All Dependencies
It’s time to set up an Azure virtual machine. Azure virtual machines are one of the most popular Azure services, and having the skills to build Azure VMs will be a big advantage for anyone working in an Azure environment.
Now, way back in the day, when I first created my Azure subscription and wanted to play around with a virtual machine, I thought there’d be a single command to set it up—like all I’d have to do was run New-AzureVm, and voila! There’d be a brand-new virtual machine for me to play with. Boy, was I wrong.
Little did I realize the number of dependencies that had to be in place before a virtual machine would actually work. Did you notice how short the prerequisite section of this chapter is? I left it that way for a reason: to get more experience working with PowerShell, you’ll install all the dependencies you need to create a virtual machine with Azure. You’ll install a resource group, a virtual network, a storage account, a public IP address, a network interface, and an operating system image. In other words, you’ll build this VM from the ground up. Let’s get started!
Creating a Resource Group
In Azure, everything is a resource, and everything must live inside a resource group. Your first task is to create a resource group. To do that, you’ll use the New-AzResourceGroup command. This command requires a resource group name and the geographic region that it will be created in. For this example, you’ll create a resource group named PowerShellForSysAdmins-RG, and you’ll place it in the East US region (as shown in Listing 12-5). You can find all available regions by running the Get-AzLocation command.
PS> New-AzResourceGroup -Name 'PowerShellForSysAdmins-RG' -Location 'East US'
Listing 12-5: Creating an Azure resource group
Once the resource group is created, it’s time to build out the network stack your VM will use.
Creating the Network Stack
For your VM to connect to the outside world and other Azure resources, it needs a network stack: the subnet, virtual network, public IP address (optional), and virtual network adapter (vNIC) that the VM uses.
The Subnet
Your first step is to create a subnet. A subnet is a logical network of IP addresses that can communicate with one another without the use of a router. The subnet will be what goes “into” the virtual network. Subnets segment a virtual network into smaller networks.
To create a subnet config, use the New-AzVirtualNetworkSubnetConfig command (Listing 12-6). This command requires a name and the IP address prefix or network identity.
PS> $newSubnetParams = @{
    'Name' = 'PowerShellForSysAdmins-Subnet'
    'AddressPrefix' = '10.0.1.0/24'
}
PS> $subnet = New-AzVirtualNetworkSubnetConfig @newSubnetParams
Listing 12-6: Creating a virtual network subnet config
You assign the subnet a name of PowerShellForSysAdmins-Subnet and use the prefix of 10.0.1.0/24.
The Virtual Network
Now that you’ve created a subnet config, you can use it to create the virtual network. The virtual network is an Azure resource that allows you to segment various resources such as virtual machines from all other resources. A virtual network can be thought of in the same context as a logical network that you may implement on premises in a network router.
To create a virtual network, use the New-AzVirtualNetwork command, as shown in Listing 12-7.
PS> $newVNetParams = @{
 ❶ 'Name' = 'PowerShellForSysAdmins-vNet'
 ❷ 'ResourceGroupName' = 'PowerShellForSysAdmins-RG'
 ❸ 'Location' = 'East US'
 ❹ 'AddressPrefix' = '10.0.0.0/16'
}
PS> $vNet = New-AzVirtualNetwork @newVNetParams -Subnet $subnet
Listing 12-7: Creating a virtual network
Notice that to create a virtual network, you have to specify the name of the network ❶, the resource group ❷, the region (location) ❸, and the overarching private network that your subnet will be a part of ❹.
The Public IP Address
Now that you’ve set up a virtual network, you need a public IP address so you can connect your VM to the internet and have clients connect to your VM. Note that this step isn’t technically necessary if you plan to make your virtual machine available only to other Azure resources. But since you have bigger plans for your VM, you’ll go ahead and do it.
Again, you can create a public IP address by using a single command: New-AzPublicIpAddress. You’ve seen most of the parameters for this function before, but notice that there’s a new one named AllocationMethod. This parameter tells Azure whether to create a dynamic or static IP address resource. As shown in Listing 12-8, specify that you want a dynamic IP address. You assign your virtual machines dynamic IP addresses because it’s one less task to worry about. Because you don’t require an IP address to always be the same, using dynamic IP addresses frees you from another task.
PS> $newPublicIpParams = @{
    'Name' = 'PowerShellForSysAdmins-PubIp'
    'ResourceGroupName' = 'PowerShellForSysAdmins-RG'
    'AllocationMethod' = 'Dynamic' ## Dynamic or Static
    'Location' = 'East US'
}
PS> $publicIp = New-AzPublicIpAddress @newPublicIpParams
Listing 12-8: Creating a public IP address
Although this public IP address exists, it’s useless because it’s not associated with anything yet. You need to bind it to a vNIC.
The Virtual Network Adapter
To build the vNIC, you need to execute another single-line command, New-AzNetworkInterface, and you can use a lot of the same parameters you’ve been using. You also need the ID of the subnet and the ID of the public IP address you created earlier. Both the subnet and the public IP address were stored as objects with an ID property; you simply need to access that property, as shown in Listing 12-9.
PS> $newVNicParams = @{
    'Name' = 'PowerShellForSysAdmins-vNIC'
    'ResourceGroupName' = 'PowerShellForSysAdmins-RG'
    'Location' = 'East US'
    'SubnetId' = $vNet.Subnets[0].Id
    'PublicIpAddressId' = $publicIp.Id
}
PS> $vNic = New-AzNetworkInterface @newVNicParams
Listing 12-9: Creating an Azure vNIC
Your network stack is complete! The next step is creating the storage account.
Creating a Storage Account
You need to store the virtual machine somewhere. That somewhere is called a storage account. Creating a basic storage account is as easy as using the New-AzStorageAccount command. As with the past few commands you’ve seen, you need a name, resource group, and location; but here you have the new Type parameter, which specifies the level of redundancy your storage account will contain. Use the least expensive type of storage account (locally redundant), specified by the Standard_LRS argument, as you can see in Listing 12-10.
PS> $newStorageAcctParams = @{
    'Name' = 'powershellforsysadmins'
    'ResourceGroupName' = 'PowerShellForSysAdmins-RG'
    'Type' = 'Standard_LRS'
    'Location' = 'East US'
}
PS> $storageAccount = New-AzStorageAccount @newStorageAcctParams
Listing 12-10: Creating an Azure storage account
Now that you have somewhere for the VM to live, it’s time to set up the operating system image.
Creating the Operating System Image
The operating system image is the base to the virtual disk your virtual machine will be using. Instead of installing Windows on your virtual machine, you’ll use a preexisting operating system image to get you to the point to where you can just turn it on.
You create an operating system image in two steps: defining some OS configuration settings, and then defining the offer or OS image to use. Azure uses the term offer to reference the VM image.
To set up all the configuration settings, you build a VM configuration object. This object defines the name and size of the VM you’re creating. You do this by using the New-AzVMConfig command. In Listing 12-11, you create a Standard_A3 VM. (You can find a list of all sizes available by running Get-AzVMSize and specifying the region.).
PS> $newConfigParams = @{
    'VMName' = 'PowerShellForSysAdmins-VM'
    'VMSize' = 'Standard_A3'
}
PS> $vmConfig = New-AzVMConfig @newConfigParams
Listing 12-11: Creating a VM configuration
Once the configuration is created, you can pass the object as the VM parameter for the Set-AzVMOperatingSystem command. This command allows you to both define operating-system-specific attributes, such as the hostname of the VM, and enable Windows Update and other attributes. We’ll keep it simple here, but if you’d like to see everything possible, check out Set-AzVMOperatingSystem information by using Get-Help.
Listing 12-12 creates a Windows operating system object that will have the hostname of Automate-VM (note: the hostname must be fewer than 16 characters). You use the username and password returned by the Get-Credential command to create a new administrative user with the provided password, and you use the EnableAutoUpdate parameter to automatically apply any new Windows updates.
PS> $newVmOsParams = @{
    'Windows' = $true
    'ComputerName' = 'Automate-VM'
    'Credential' = (Get-Credential -Message 'Type the name and password of the
    local administrator account.')
    'EnableAutoUpdate' = $true
    'VM' = $vmConfig
}
PS> $vm = Set-AzVMOperatingSystem @newVmOsParams
Listing 12-12: Creating an operating system image
Now you need to create a VM offer. An offer is how Azure allows you to choose what kind of operating system will be installed on the VM’s OS disk. This example uses a Windows Server 2012 R2 Datacenter image. This image is one provided by Microsoft, so no need to create your own.
Once you’ve created the offer object, you can create a source image by using the Set-AzVMSourceImage command, as shown in Listing 12-13.
PS> $offer = Get-AzVMImageOffer -Location 'East US'❶ –PublisherName
'MicrosoftWindowsServer'❷ | Where-Object { $_.Offer -eq 'WindowsServer' }❸
PS> $newSourceImageParams = @{
    'PublisherName' = 'MicrosoftWindowsServer'
    'Version' = 'latest'
    'Skus' = '2012-R2-Datacenter'
    'VM' = $vm
    'Offer' = $offer.Offer
}
PS> $vm = Set-AzVMSourceImage @newSourceImageParams
Listing 12-13: Finding and creating a VM source image
Here, you’re querying all offers in the East US region ❶ with a publisher name of MicrosoftWindowsServer ❷. You may use Get-AzVMImagePublisher to find a list of publishers. You then limit the offers to a name of WindowsServer ❸. With the source image allocated, you can now assign the image to the VM object. This completes the setup of the VM’s virtual disk.
To assign the image to the VM object, you need a URI for the OS disk you just created, and you need to pass that URI along with the VM object to the Set-AzVMOSDisk command (Listing 12-14).
PS> $osDiskName = 'PowerShellForSysAdmins-Disk'
PS> $osDiskUri = '{0}vhds/PowerShellForSysAdmins-VM{1}.vhd' -f $storageAccount
                 .PrimaryEndpoints.Blob.ToString(), $osDiskName
PS> $vm = Set-AzVMOSDisk -Name OSDisk -CreateOption 'fromImage' -VM $vm -VhdUri $osDiskUri
Listing 12-14: Assigning the operating system disk to the VM
At this point, you have an OS disk, and it’s assigned to a VM object. Time to finish this up!
Wrapping Up
You’re almost done. All that’s left is to attach the vNIC you created earlier and, well, create the actual VM.
To attach the vNIC to the VM, you use the Add-AzVmNetworkInterface command and pass the VM object you created along with the ID of the vNIC you created earlier—all of which you can see in Listing 12-15.
PS> $vm = Add-AzVMNetworkInterface -VM $vm -Id $vNic.Id
Listing 12-15: Attaching the vNIC to the VM
And now, at last, you can create the VM, as shown in Listing 12-16. By calling the New-AzVm command with the VM object, the resource group, and region, you finally have your VM! Note that this will start the VM, and at this point, you’ll begin incurring charges.
PS> New-AzVM -VM $vm -ResourceGroupName 'PowerShellForSysAdmins-RG' -Location 'East US'

RequestId IsSuccessStatusCode StatusCode ReasonPhrase
--------- ------------------- ---------- ------------
                         True         OK OK
Listing 12-16: Creating the Azure virtual machine
You should have a brand-new VM in Azure called Automate-VM. To confirm, you can run Get-AzVm to ensure that the VM exists. Check out the output in Listing 12-17.
PS> Get-AzVm -ResourceGroupName 'PowerShellForSysAdmins-RG' -Name PowerShellForSysAdmins-VM


ResourceGroupName  : PowerShellForSysAdmins-RG
Id                 : /subscriptions/XXXXXXXXXXXXX/resourceGroups/PowerShellForSysAdmins-RG/
                     providers/Microsoft.Compute/virtualMachines/PowerShellForSysAdmins-VM
VmId               : e459fb9e-e3b2-4371-9bdd-42ecc209bc01
Name               : PowerShellForSysAdmins-VM
Type               : Microsoft.Compute/virtualMachines
Location           : eastus
Tags               : {}
DiagnosticsProfile : {BootDiagnostics}
Extensions         : {BGInfo}
HardwareProfile    : {VmSize}
NetworkProfile     : {NetworkInterfaces}
OSProfile          : {ComputerName, AdminUsername, WindowsConfiguration, Secrets}
ProvisioningState  : Succeeded
StorageProfile     : {ImageReference, OsDisk, DataDisks}
Listing 12-17: Discovering your Azure VM
If you see similar output, you’ve successfully created an Azure virtual machine!
Automating the VM Creation
Whew! That was a lot of work getting a single virtual machine running and building all of the dependencies; I would hate to have to go through it again when I want to build my next VM. Why don’t we create a single function that’ll handle all this for us? With a function, we can incorporate all the code we just went through into a single, executable chunk of code that we can reuse over and over again.
If you’re feeling adventurous, I created a custom PowerShell function called New-CustomAzVm, available in this chapter’s resources. It provides an excellent example of how to incorporate all the tasks accomplished in this section into a single, cohesive function with a minimal amount of input.
Deploying an Azure Web App
If you’re working with Azure, you’ll want to know how to deploy an Azure web app. Azure web apps allow you to quickly provision websites and various other web services running on servers such as IIS, Apache, and more without worrying about building the web server itself. Once you learn how to deploy an Azure web app with PowerShell, you’ll be able to work the process into larger workflows including development build pipelines, test environment provisioning, lab provisioning, and more.
Deploying an Azure web app is a two-step process: you create an app service plan and then create the web app itself. Azure web apps are a part of Azure App Services, and any resource under this umbrella must have an associated app service plan. App service plans tell the web app which kind of underlying compute resources to build the program on.
Creating an App Service Plan and Web App
Creating an Azure service plan is simple enough. As before, you need only a single command. This command requires you to provide the name of the app service plan, the region or location where it will exist, the resource group, and an optional tier that defines the kind of performance provided by the server running underneath the web app.
Just as you did in the previous section, you create a resource group to keep all of your resources together; let’s use this command: New-AzResourceGroup -Name 'PowerShellForSysAdmins-App' -Location 'East US'. Once the resource group is created, you create the app service plan and place it inside that resource group.
Your web app, called Automate, will be in the East US region and in the Free tier of apps. You can see all the code to accomplish those tasks in Listing 12-18.
PS> New-AzAppServicePlan -Name 'Automate' -Location 'East US'
-ResourceGroupName 'PowerShellForSysAdmins-App' -Tier 'Free'
Listing 12-18: Creating an Azure app service plan
Once this command is executed, you’ll have the app service plan created and can move on to creating the web app itself.
You may not be surprised to hear that creating an Azure web app with PowerShell is also a single-command process. Just run New-AzWebApp, and supply it with the now-common parameters of resource group name, name, and location, along with the app service plan this web app will sit on top of.
Listing 12-19 uses the New-AzWebApp command to create a web app with the name MyApp inside the PowerShellForSysAdmins-App resource group using the app service plan Automate (the one that you created earlier). Note that this starts the app, which may incur billing.
PS> New-AzWebApp -ResourceGroupName 'PowerShellForSysAdmins-App' -Name
'AutomateApp' -Location 'East US' -AppServicePlan 'Automate'
Listing 12-19: Creating an Azure web app
When you run this command, you should see a lot of properties in your output; these are the web app’s various settings.
Deploying an Azure SQL Database
Another common Azure task is deploying an Azure SQL database. To deploy an Azure SQL database, you need to do three things: create the Azure SQL server that the database will run on, create the database itself, and then create a SQL Server firewall rule to connect to the database.
As in previous sections, you create a resource group to house all your new resources. Run New-AzResourceGroup -Name 'PowerShellForSysAdmins-SQL' -Location 'East US' to do so. Then you’ll create the SQL server that the database will run on.
Creating an Azure SQL Server
Creating an Azure SQL server takes yet another single-line command: New-AzSqlServer. And yet again, you need to provide the name of the resource, the name of the server itself, and the region—but here, you also need the username and password of the SQL administrator user on the server. This requires a little more work. Because you need to create a credential to pass to New-AzSqlServer, let’s go ahead and do that first. I covered how to create a PSCredential object in the “Creating a Service Principal” on page 158, so we won’t go over that here.
PS> $userName = 'sqladmin'
PS> $plainTextPassword = 's3cretp@SSw0rd!'
PS> $secPassword = ConvertTo-SecureString -String $plainTextPassword -AsPlainText -Force
PS> $credential = New-Object -TypeName System.Management.Automation.PSCredential -ArgumentList
$userName,$secPassword
Once you have a credential, the rest is as easy as putting all the parameters into a hashtable, and passing it into the New-AzSqlServer function, as shown in Listing 12-20.
PS> $parameters = @{
    ResourceGroupName = 'PowerShellForSysAdmins-SQL'
    ServerName = 'PowerShellForSysAdmins-SQLSrv'
    Location =  'East US'
    SqlAdministratorCredentials = $credential
}
PS> New-AzSqlServer @parameters

ResourceGroupName        : PowerShellForSysAdmins-SQL
ServerName               : powershellsysadmins-sqlsrv
Location                 : eastus
SqlAdministratorLogin    : sqladmin
SqlAdministratorPassword :
ServerVersion            : 12.0
Tags                     :
Identity                 :
FullyQualifiedDomainName : powershellsysadmins-sqlsrv.database.windows.net
ResourceId               : /subscriptions/XXXXXXXXXXXXX/resourceGroups
                           /PowerShellForSysAdmins-SQL/providers/Microsoft.Sql
                           /servers/powershellsysadmins-sqlsrv
Listing 12-20: Creating the Azure SQL server
Now that the SQL server has been created, you have the bedrock for your database.
Creating the Azure SQL Database
To create the SQL database, use the New-AzSqlDatabase command, as shown in Listing 12-21. Along with the common parameter of ResourceGroupName, pass in the name of the server that you just created and the name of the database you want to create (in this example, AutomateSQLDb).
PS> New-AzSqlDatabase -ResourceGroupName 'PowerShellForSysAdmins-SQL'
-ServerName 'PowerShellSysAdmins-SQLSrv' -DatabaseName 'AutomateSQLDb'

ResourceGroupName             : PowerShellForSysAdmins-SQL
ServerName                    : PowerShellSysAdmins-SQLSrv
DatabaseName                  : AutomateSQLDb
Location                      : eastus
DatabaseId                    : 79f3b331-7200-499f-9fba-b09e8c424354
Edition                       : Standard
CollationName                 : SQL_Latin1_General_CP1_CI_AS
CatalogCollation              :
MaxSizeBytes                  : 268435456000
Status                        : Online
CreationDate                  : 9/15/2019 6:48:32 PM
CurrentServiceObjectiveId     : 00000000-0000-0000-0000-000000000000
CurrentServiceObjectiveName   : S0
RequestedServiceObjectiveName : S0
RequestedServiceObjectiveId   :
ElasticPoolName               :
EarliestRestoreDate           : 9/15/2019 7:18:32 PM
Tags                          :
ResourceId                    : /subscriptions/XXXXXXX/resourceGroups
                                /PowerShellForSysAdmins-SQL/providers
                                /Microsoft.Sql/servers/powershellsysadmin-sqlsrv
                                /databases/AutomateSQLDb
CreateMode                    :
ReadScale                     : Disabled
ZoneRedundant                 : False
Capacity                      : 10
Family                        :
SkuName                       : Standard
LicenseType                   :
Listing 12-21: Creating an Azure SQL database
At this point, you have a running SQL database in Azure. But when you try to connect to it, it won’t work. By default, when a new Azure SQL database is created, it’s locked down from any outside connections. You need to create a firewall rule so you can allow connections to your database.
Creating the SQL Server Firewall Rule
The command to create a firewall rule is New-AzSqlServerFirewallRule. The command takes in the resource group name, the name of the server you created earlier, the name for the firewall rule, and start and end IP addresses. The start and end IP addresses allow you to specify a single IP address or a range of IPs to allow into your database. Since you’ll be working on only one local computer to manage Azure, let’s limit the connections to your SQL server to be from only your current computer. To do that, you first need to figure out your public IP address. You can easily do this via a PowerShell one-liner: Invoke-RestMethod http://ipinfo.io/json | Select -ExpandProperty ip. You can then use the public IP address for both the StartIPAddress and EndIPAddress parameters. However, note that if your public IP address changes, you’ll need to do all this again.
Also, be aware that the server name in Listing 12-22 must be made up of all lowercase letters, hyphens, and/or numbers. Otherwise, you’ll get an error when you attempt to create the firewall rule.
PS> $parameters = @{
    ResourceGroupName = 'PowerShellForSysAdmins-SQL'
    FirewallRuleName = 'PowerShellForSysAdmins-FwRule'
    ServerName = 'powershellsysadmin-sqlsrv'
    StartIpAddress = 'Your Public IP Address'
    EndIpAddress = 'Your Public IP Address'
}
PS> New-AzSqlServerFirewallRule @parameters

ResourceGroupName : PowerShellForSysAdmins-SQL
ServerName        : powershellsys-sqlsrv
StartIpAddress    : 0.0.0.0
EndIpAddress      : 0.0.0.0
FirewallRuleName  : PowerShellForSysAdmins-FwRule
Listing 12-22: Creating an Azure SQL server firewall rule
That’s it! Your database should be up and running.
Testing Your SQL Database
To test your database, let’s make a small function that uses the System.Data.SqlClient.SqlConnection object’s Open() method to attempt a simple connection; see Listing 12-23.
function Test-SqlConnection {
    param(
        [Parameter(Mandatory)]
     ❶ [string]$ServerName,

        [Parameter(Mandatory)]
        [string]$DatabaseName,

        [Parameter(Mandatory)]
     ❷ [pscredential]$Credential
    )

    try {
        $userName = $Credential.UserName
     ❸ $password = $Credential.GetNetworkCredential().Password
     ❹ $connectionString = 'Data Source={0};database={1};User
        ID={2};Password={3}' -f $ServerName,$DatabaseName,$userName,$password
        $sqlConnection = New-Object System.Data.SqlClient.SqlConnection
        $ConnectionString
     ❺ $sqlConnection.Open()
        $true
    } catch {
       if ($_.Exception.Message -match 'cannot open server') {
           $false
       } else {
           throw $_
       }
    } finally {
     ❻ $sqlConnection.Close()
    }
}
Listing 12-23: Testing a SQL connection to the Azure SQL database
You use the SQL server’s fully qualified domain name created earlier as the ServerName parameter for this function ❶ along with the SQL administrator username and password inside a PSCredential object ❷.
Then you break apart the PSCredential object into a plaintext username and password ❸, create the connection string to make the database connection ❹, invoke the Open() method on the SqlConnection object to attempt to connect to the database ❺, and then finally close the database connection ❻.
You can execute this function by running Test-SqlConnection -ServerName 'powershellsysadmins-sqlsrv.database.windows.net' -DatabaseName 'AutomateSQLDb' -Credential (Get-Credential). If you can connect to the database, the function will return True; otherwise, it will return False (and further investigation will be needed).
You can clean everything up by removing the resource group with the command Remove-AzResourceGroup -ResourceGroupName 'PowerShellForSysAdmins-SQL'.
Summary
In this chapter, you dove headfirst into automating Microsoft Azure with PowerShell. You set up noninteractive authentication, and deployed a virtual machine, web app, and SQL database. And you did it all from PowerShell, sparing you any visits to the Azure portal.
You couldn’t have done this without the Az PowerShell module and the hard work of the people who created it. Like other PowerShell cloud modules, all these commands rely on various APIs that are being called under the hood. Thanks to the module, you didn’t have to worry about learning how to call REST methods or use endpoint URLs.
In the next chapter, you’ll take a look at using PowerShell to automate Amazon Web Services.